
A square table topper worked from the center outward with layered borders and three-dimensional poinsettia appliques. You will use double crochet mesh, shell stitches, and picot edging. The finished piece measures 20 inches square and sits on point like a diamond.
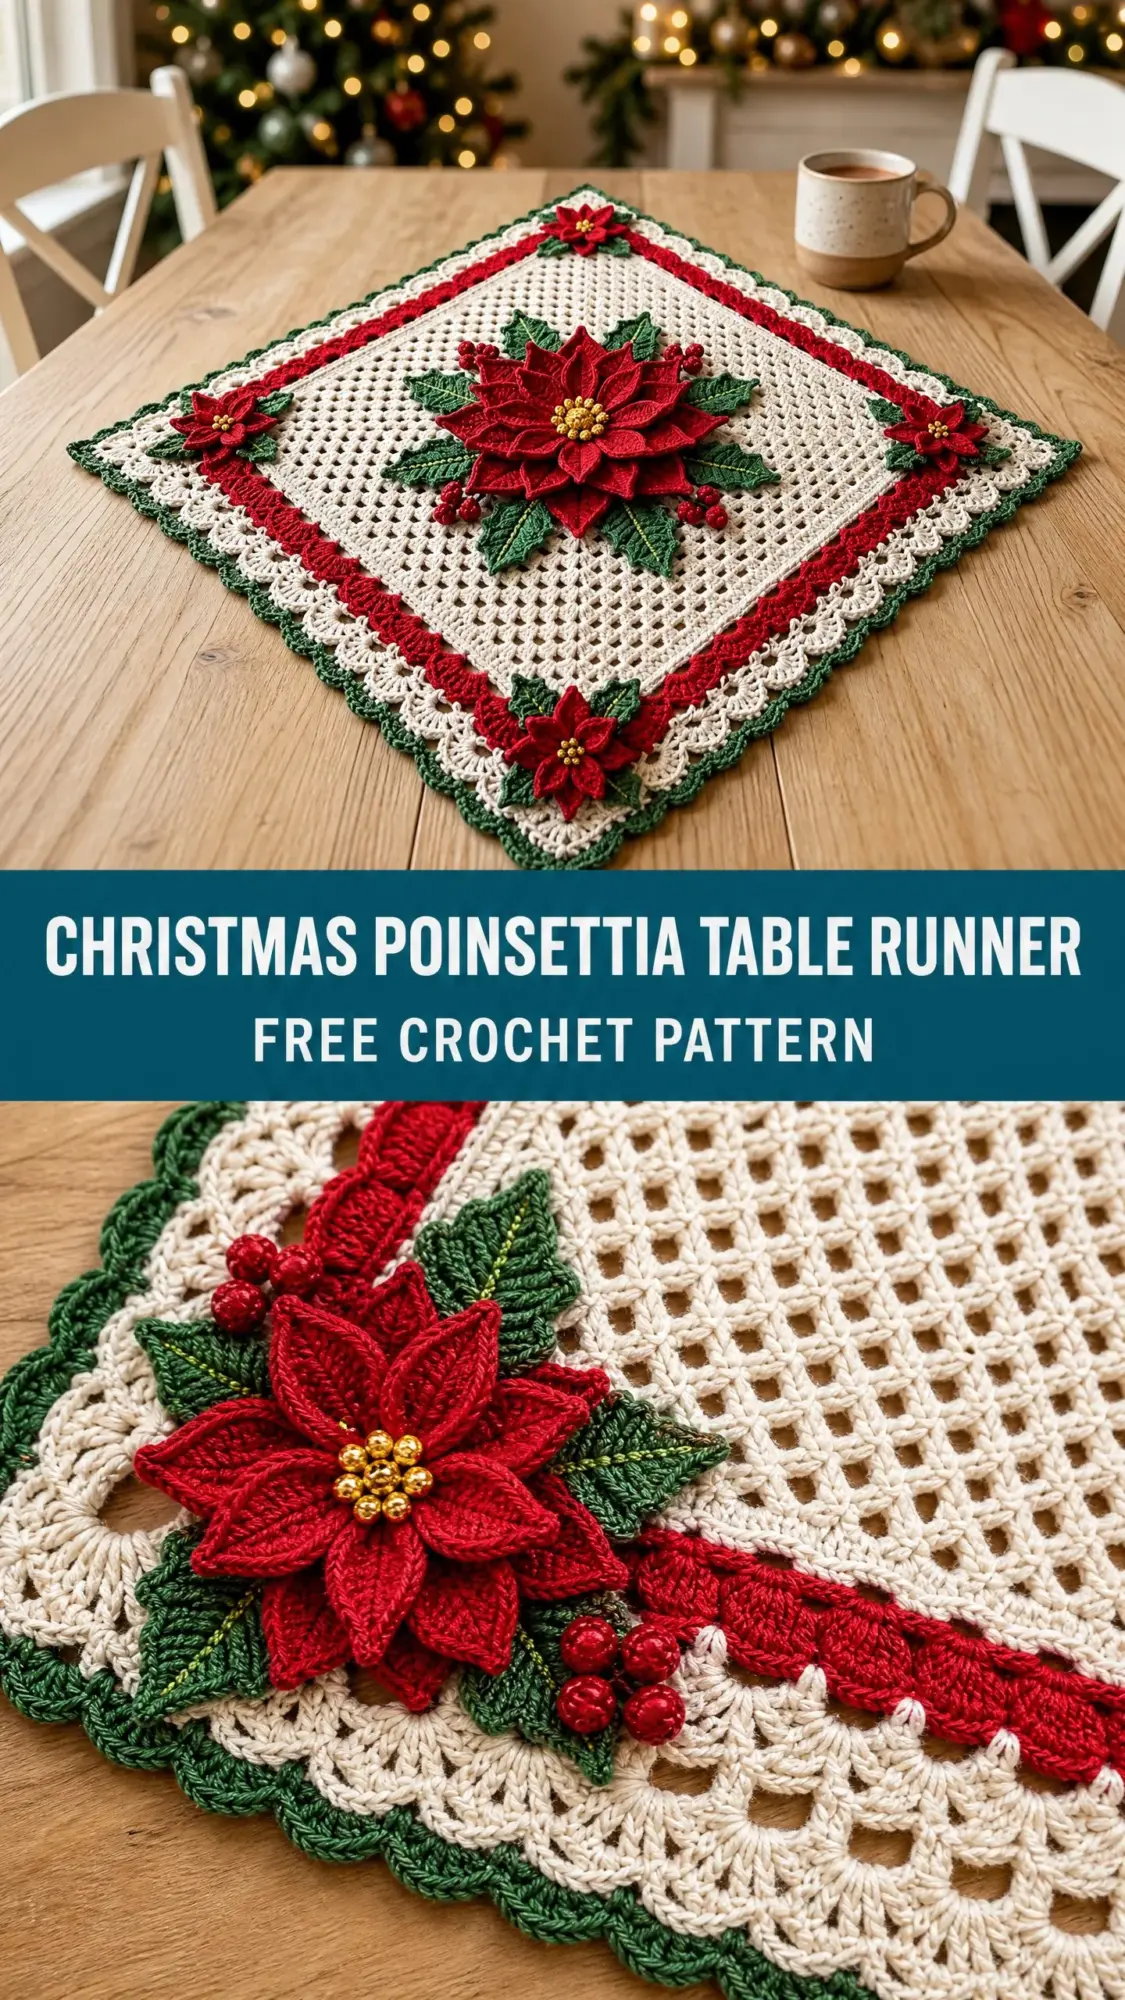
This pattern combines simple techniques into something truly stunning. The mesh center uses basic double crochet and chain spaces. The borders add color and texture through shells and scallops. The poinsettias are worked separately and sewn on at the end.
If you can double crochet and follow a rhythm, you can absolutely make this. Let me walk you through every single step.
Why This Christmas Table Topper Works So Well
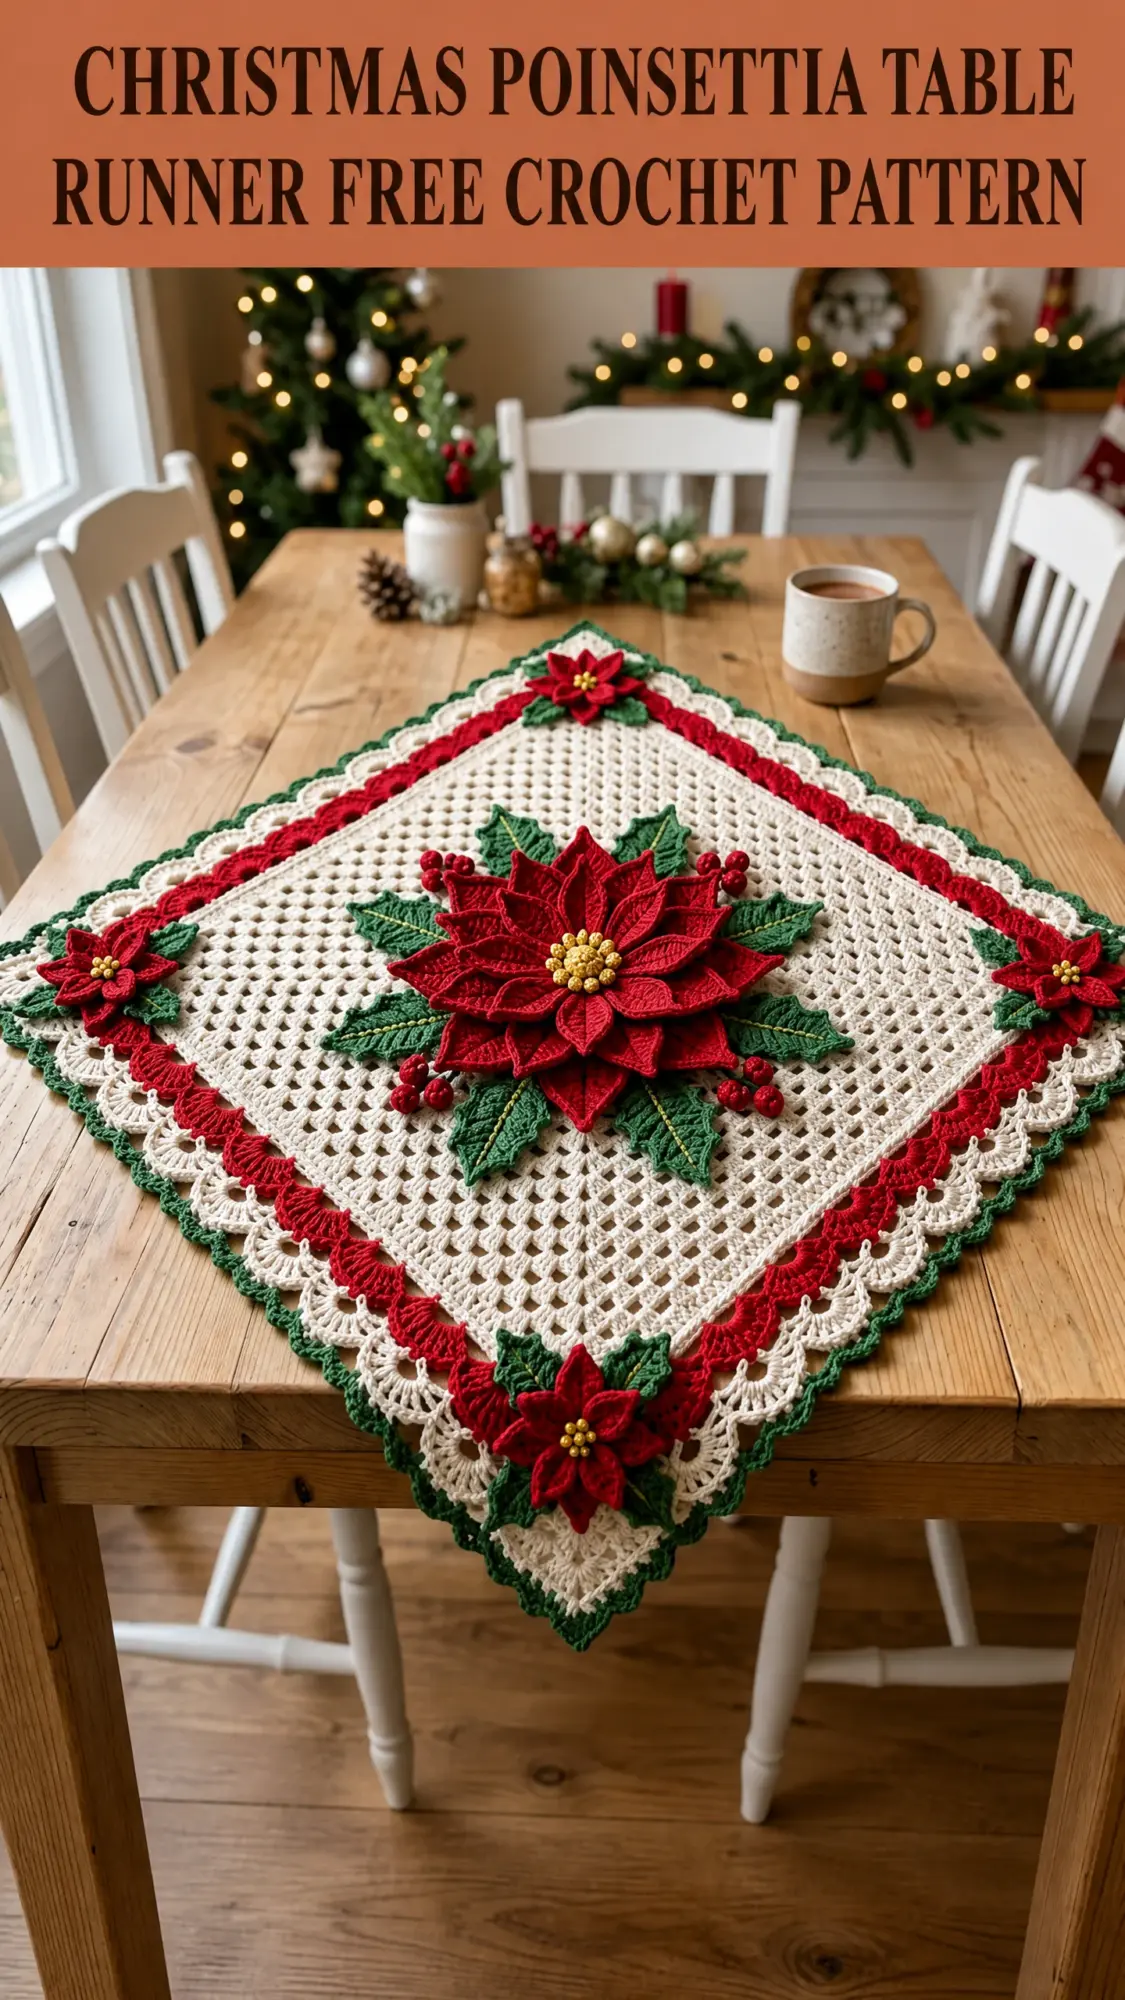
When you place this piece on your dining table rotated 45 degrees, one corner points toward you. The large poinsettia commands attention at the center. Two medium blooms sit at the left and right corners. Two smaller blooms anchor the front and back corners. Holly leaves and berry clusters complete each flower grouping.
The construction is straightforward once you understand the rhythm. You start with a magic ring and work outward in joined rounds. The mesh grows evenly on all four sides through corner increases. Then you add a bold red stripe, a green picot frame, and a cream scalloped lace edge.
The three-dimensional poinsettias look impressive but they are just individual petals sewn together. Each petal is a simple chain foundation with increases and decreases to create the pointed shape. Layer them, add a beaded center, and you have a flower that pops right off the table.
Materials You Will Need
Yarn:
Hooks:
Notions:
Yarn Suggestions
Lion Brand Vanna’s Choice works beautifully here. The smooth finish highlights the open mesh stitches and holds color through blocking. Machine washable too, which matters for a table piece.
Cascade 220 Superwash gives a slightly fuzzy halo that softens the lace edge. It blocks flatter and drapier than acrylic. Hand wash cold and lay flat to dry.
Avoid textured or thick-and-thin yarns. They obscure the mesh pattern. Also check that your red and green are colorfast before wet blocking. Bleeding onto cream is heartbreaking.
Gauge
With Color A and G-6 hook: 16 double crochet (dc) and 8 rows equals 4 inches in standard double crochet fabric.
In the mesh pattern: one mesh unit (1 dc, chain 1, 1 dc over 3 stitches) measures approximately 0.75 inches wide. Four mesh rows measure approximately 2 inches tall.
Gauge matters for achieving the finished size. Swatch and adjust your hook if needed.
Abbreviations and Stitch Definitions
Before we dive in, here are all the abbreviations you will encounter:
Special Stitches
Shell Stitch (shell)
Work 5 dc all into the same stitch or space. This group of five double crochets forms one shell.
Picot
Chain 3, then slip stitch into the first chain made (the chain closest to the hook). This creates a small looped bump at the edge.
V-Stitch (V-st)
Work (1 dc, ch 2, 1 dc) all into the same stitch or space.
Pattern Notes Before You Begin
1. The base is worked from the center outward in joined rounds. You do not turn. Join each round with a slip stitch. The right side faces you throughout.
2. Corner increases happen by working (dc, ch 2, dc) groups into each corner chain-2 space every round. This keeps the square growing evenly.
3. When changing colors at the end of a round, draw the new color through the final slip stitch join.
4. The ch 3 at the start of a dc row counts as 1 dc throughout. The ch 1 at the start of sc rows does not count as a stitch.
5. All poinsettias, leaves, and berry clusters are made separately and sewn on after blocking.
Crochet Pattern Instructions
Section 1: Mesh Center (Color A)
Round 1:
With Color A and G-6 hook, make a magic ring. Ch 4 (counts as 1 dc + ch 1). Work 2 dc into ring, ch 2. (Work 2 dc into ring, ch 1, 2 dc into ring, ch 2) 3 times. Work 1 dc into ring, sl st to join to 3rd chain of starting ch-4. Pull magic ring closed. (12 dc, 4 ch-2 corner spaces, 4 ch-1 side spaces)
Round 2:
Sl st into the first ch-1 sp. Ch 4 (counts as dc + ch 1). Dc in same ch-1 sp. Ch 1. In the corner ch-2 sp: work (2 dc, ch 2, 2 dc). Ch 1. (Dc, ch 1, dc) in next ch-1 sp. Ch 1. Work corner (2 dc, ch 2, 2 dc) in next corner ch-2 sp. Ch 1. Rep from ( to ) 2 more times, ending with a corner group, ch 1. Sl st to join. (4 V-sts on sides, 4 corner groups; 24 dc total)
Round 3:
Sl st to ch-1 sp. Ch 4 (dc + ch 1). Dc in same sp. Ch 1. Dc in next ch-1 sp. Ch 1. Corner (2 dc, ch 2, 2 dc) in corner ch-2 sp. Ch 1. (Dc in next ch-1 sp, ch 1) across each side until you reach each corner, working corner group in each corner ch-2 sp. Sl st to join. (32 dc total after Round 3)
Rounds 4 through 22:
Continue in the established mesh pattern: work (dc, ch 1) in each ch-1 sp along each side, and (2 dc, ch 2, 2 dc) in each corner ch-2 sp, with ch 1 separating each group. Sl st to join each round.
Checkpoint after Round 22: The center square should measure approximately 13.5 to 14 inches from edge to edge. Each side has 22 dc-ch units plus 4 corner groups, approximately 96 dc total around the perimeter.
Fasten off Color A. Weave in ends.
Section 2: Inner Border (Color B, Red)
Join Color B with a sl st to any corner ch-2 sp.
Round 23:
Ch 3 (counts as dc). Work 1 dc in same corner sp. Ch 1. Work 1 dc in each dc and 1 dc in each ch-1 sp along the side (this fills in the mesh to create a solid stripe). At each corner ch-2 sp, work (2 dc, ch 2, 2 dc). Continue across all four sides. Sl st to top of beg ch-3 to join. (47 dc per side, approximately 204 dc total)
Round 24 (Color B):
Ch 3. 1 dc in each dc across each side. Corner (2 dc, ch 2, 2 dc) in each corner ch-2 sp. Sl st to join. (204 dc)
Round 25 (Color B):
Repeat Round 24. (204 dc)
After Round 25, you have a 3-row solid red stripe border.
Fasten off Color B.
Section 3: Inner Green Frame (Color C)
Join Color C to any corner ch-2 sp.
Round 26 (Color C):
Ch 1 (does not count as st). Work 1 sc in same corner sp, ch 3 (first picot made by: ch 3, sl st to first ch of this ch-3 just made), then sc in same corner sp. Continue: sc in each dc across side. At each corner ch-2 sp, work (sc, picot, sc). Sl st to first sc to join. (196 sc plus 4 picots)
Fasten off Color C.
Round 27 (Color C):
Join Color C to the sc immediately after any corner picot. Ch 1. Sc across the entire round, placing 1 sc in each sc, 3 sc into each picot loop, and (sc, ch 2, sc) at each corner. Sl st to first sc to join. (204 sc plus 4 corner ch-2 sps)
Fasten off Color C.
Section 4: Outer Lace Edging (Color A, Cream)
Join Color A to any corner ch-2 sp.
Round 28 (Color A):
Ch 3 (counts as dc). Work 4 more dc in same corner sp (shell made). Ch 2. Sk 3 sc. (Shell of 5 dc in next sc, ch 2, sk 3 sc) repeat across each side. At each corner ch-2 sp, work (shell, ch 3, shell). Continue all the way around. Sl st to top of beg ch-3 to join. (Approximately 52 shells total)
Round 29 (Color A):
Sl st to center dc of first shell. Ch 1. Sc in same st. Ch 5. (Sc in center dc of next shell, ch 5) repeat across all shells, working (sc, ch 5, sc) at the ch-3 corner space between corner shells. Sl st to first sc to join.
Round 30 (Color A, final edging):
Sl st into first ch-5 arch. Ch 1. In each ch-5 arch work: (3 sc, picot, 3 sc). At each corner arch work (3 sc, picot, 3 sc, picot, 3 sc). Sl st to first sc to join.
Fasten off Color A. Weave in all ends.
The piece should now measure approximately 19.5 to 20.5 inches from straight edge to straight edge.
Poinsettia Appliques
Large Petal (make 8 for large poinsettia)
Step 1: Chain 12.
Step 2: Starting in the 4th chain from the hook, work 1 dc in each of the next 3 chains. (4 dc)
Step 3: Work 2 dc in each of the next 2 chains. (4 dc)
Step 4: Work 1 hdc in the next chain, 1 sc in the next chain, 1 sl st in the last chain. You are now at the tip.
Step 5: Rotate work and continue along the opposite side of the foundation chain.
Step 6: Work 1 sc in first foundation ch bump, 1 hdc in next, 2 dc in each of the next 2 bumps, 1 dc in each of the next 3 bumps, sl st to the base chain. Fasten off leaving a tail for sewing.
Medium Petal (make 5 for large poinsettia top layer, 6 for each medium poinsettia)
Step 1: Chain 10.
Step 2: Starting in the 4th chain from the hook, work 1 dc in each of next 2 chains, 2 dc in each of next 2 chains, 1 hdc in next chain, 1 sc in next chain, sl st in last chain.
Step 3: Rotate and work back: 1 sc, 1 hdc, 2 dc in each of next 2 bumps, 1 dc in each of next 2 bumps, sl st to base. Fasten off.
Small Petal (make 5 for each medium poinsettia top layer, 5 for each small poinsettia)
Step 1: Chain 8.
Step 2: Starting in the 4th chain from the hook, work 1 dc in next chain, 2 dc in next 2 chains, 1 hdc in next, sl st in last chain.
Step 3: Rotate and work back: 1 hdc, 2 dc in each of next 2 bumps, 1 dc in next bump, sl st to base. Fasten off.
Center Disc for Large Poinsettia
With Color D, make a magic ring. Ch 1, work 10 sc into ring, sl st to first sc to join. Pull ring closed. (10 sc)
Ch 1, work 2 sc in each sc around, sl st to join. (20 sc)
Sl st in each sc around. Fasten off. Sew 10 to 12 gold seed beads to the top surface.
Assembling the Large Poinsettia
Arrange 8 large petals in a circle with bases meeting at center. Sew bases together using whip stitch, fanning into an even star. Place 5 medium petals on top, centering one between every other pair of large petals. Sew the gold disc center on top.
Medium Poinsettia (make 2)
Make 6 medium petals and 5 small petals. For the center disc, work only Round 1 (10 sc). Attach 6 to 8 beads. Layer and sew as above.
Small Poinsettia (make 2)
Make 5 small petals. No second layer. For center, make a magic ring, work 8 sc into ring, sl st to join. Attach 4 to 6 beads. Arrange petals into a star and attach center.
Holly Leaves and Berry Clusters
Holly Leaf (make 12 total in Color C)
Step 1: With Color C, make a magic ring.
Step 2: Ch 1, work 2 sc into ring, pull ring closed. (2 sc)
Step 3: Ch 13, starting in the 4th chain from hook work: 1 dc, 1 tr, 1 dc, (ch 1, sl st) into next ch to form a point, 1 dc, 1 tr, 1 dc, 1 hdc, 1 sc, sl st into remaining ch sts to reach the base ring, sl st into ring to anchor.
Step 4: Turn and work the second ridge along the other side of the chain: sl st, 1 sc, 1 hdc, 1 dc, 1 tr, 1 dc, (ch 1, sl st) for point, 1 dc, 1 tr, 1 dc, sl st back to ring.
Step 5: Fasten off leaving a long tail.
Berry Cluster (make 5 in Color B)
For each berry: With Color B, make a magic ring, ch 1, work 6 sc into ring, sl st to join and pull ring closed, sl st through all stitches on top to puff up. Make 3 berries per cluster. Sew the 3 berries together at their bases.
Assembly and Placement
Block the base first. Pin it flat, measuring all four sides. Use spray starch for acrylic or wet block for wool. Allow to dry completely before sewing appliques.
Orient the square on point so a corner faces you. Mark the four inner border corners and the center with stitch markers.
Position the large poinsettia at the exact center. Tuck 2 holly leaves under the left and right petal edges. Place a berry cluster beside the flower. Pin everything.
Position one medium poinsettia at the left inner border corner and one at the right inner border corner. Add 2 holly leaves and a berry cluster to each.
Position one small poinsettia at the front corner (nearest you) and one at the back corner. Add leaves and berries.
Sew each applique using a tapestry needle and matching yarn. Stitch through petal bases into the fabric below with small, even stitches that do not show on the right side.
Care Instructions
For acrylic: Machine wash gentle cycle, cold water. Tumble dry low or lay flat. Do not iron directly on flowers.
For superwash wool: Hand wash cool, press in towel, lay flat to dry. Do not hang.
Store flat or rolled around a cardboard tube. Do not fold on the poinsettias.
Time Estimate and Skill Level
Plan for 18 to 24 hours total. About 10 to 12 hours for the base and borders. Another 6 to 8 hours for five poinsettias plus leaves and berries. And 2 hours for assembly and finishing.
This is an advanced intermediate project. The mesh center uses simple stitches but requires consistent tension over many rounds. The borders involve color changes and shell stitches. The poinsettias need shaping through increases and decreases. If you have made granny squares and simple appliques before, you are ready for this.
Final Thoughts on This Christmas Table Topper Crochet Pattern
I love how this piece brings together so many satisfying techniques. The rhythm of the mesh rounds is meditative. The bold red and green borders feel festive without being overwhelming. And those poinsettias really steal the show.
This makes a gorgeous centerpiece for your own holiday table. It also works beautifully as a gift for someone who loves handmade touches. The dimensional flowers always get compliments.
Take your time with the applique placement. Step back and look at the arrangement before you sew. Trust the pattern, trust your hands, and enjoy the process.
Thank you so much for choosing this pattern. I hope it brings warmth and beauty to your holiday table this season. If you make this Christmas poinsettia table topper, I would absolutely love to see it. Tag me on Instagram or share a photo in my Facebook group.
Save this crochet pattern to your Pinterest boards so you can find it when the holiday crafting mood strikes. And please drop a comment below if you make one. I love hearing how projects turn out in your hands.