
I call this one the Sunshine Dress, and she has been living in my design notebook for nearly three years now. The original sketch came to me during a particularly dreary February when I was dreaming of garden parties and warm breezes. I wanted to create something that would make the wearer feel like summer personified. Bright yellow yarn, cascading ruffles, delicate flowers at the neckline. The whole thing felt like bottled sunshine to me.
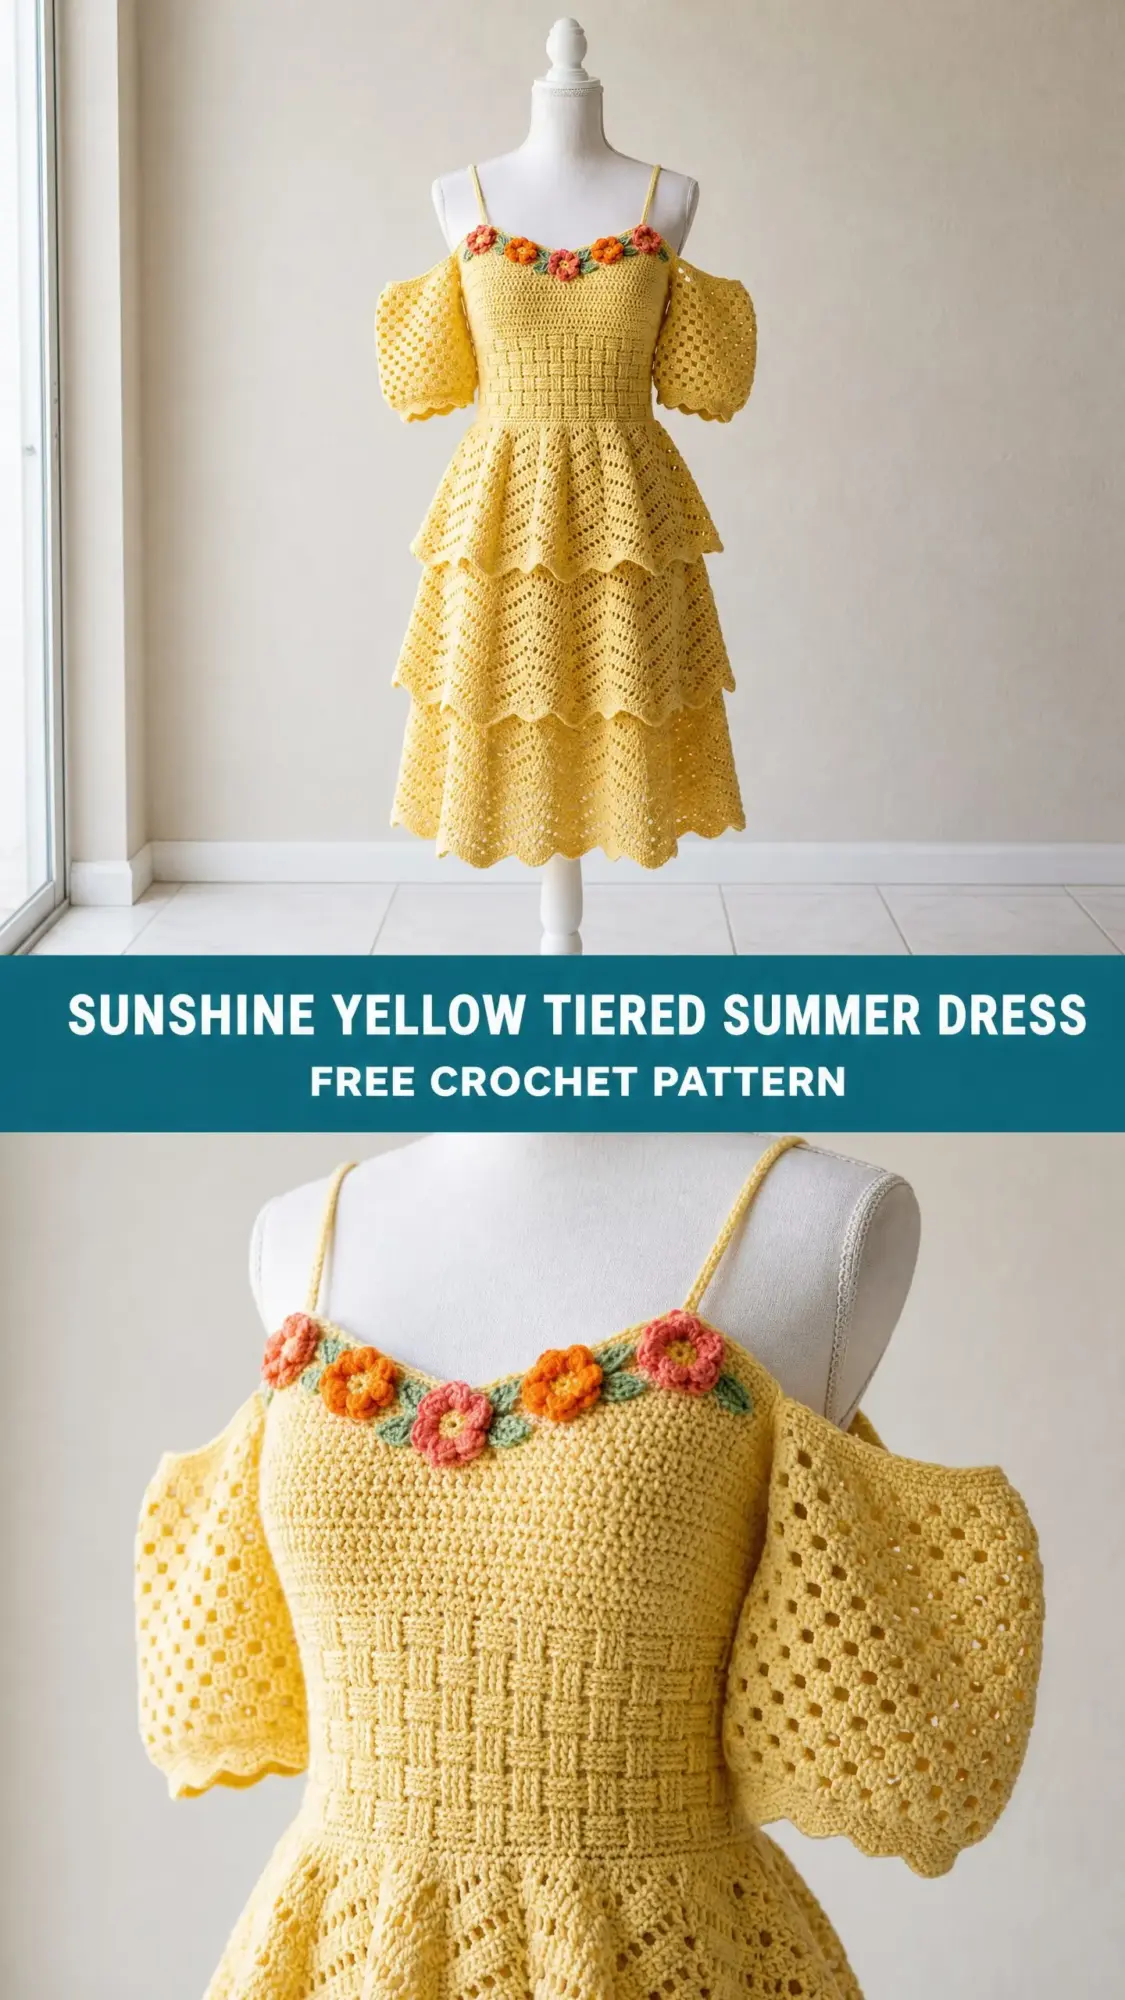
When I finally sat down to bring this crochet pattern to life, I knew it needed that romantic tiered silhouette I had been envisioning all along. The kind of dress that moves when you walk and catches the light just right. I also wanted interesting texture in the bodice to balance out the airy chevron lace of the skirt.
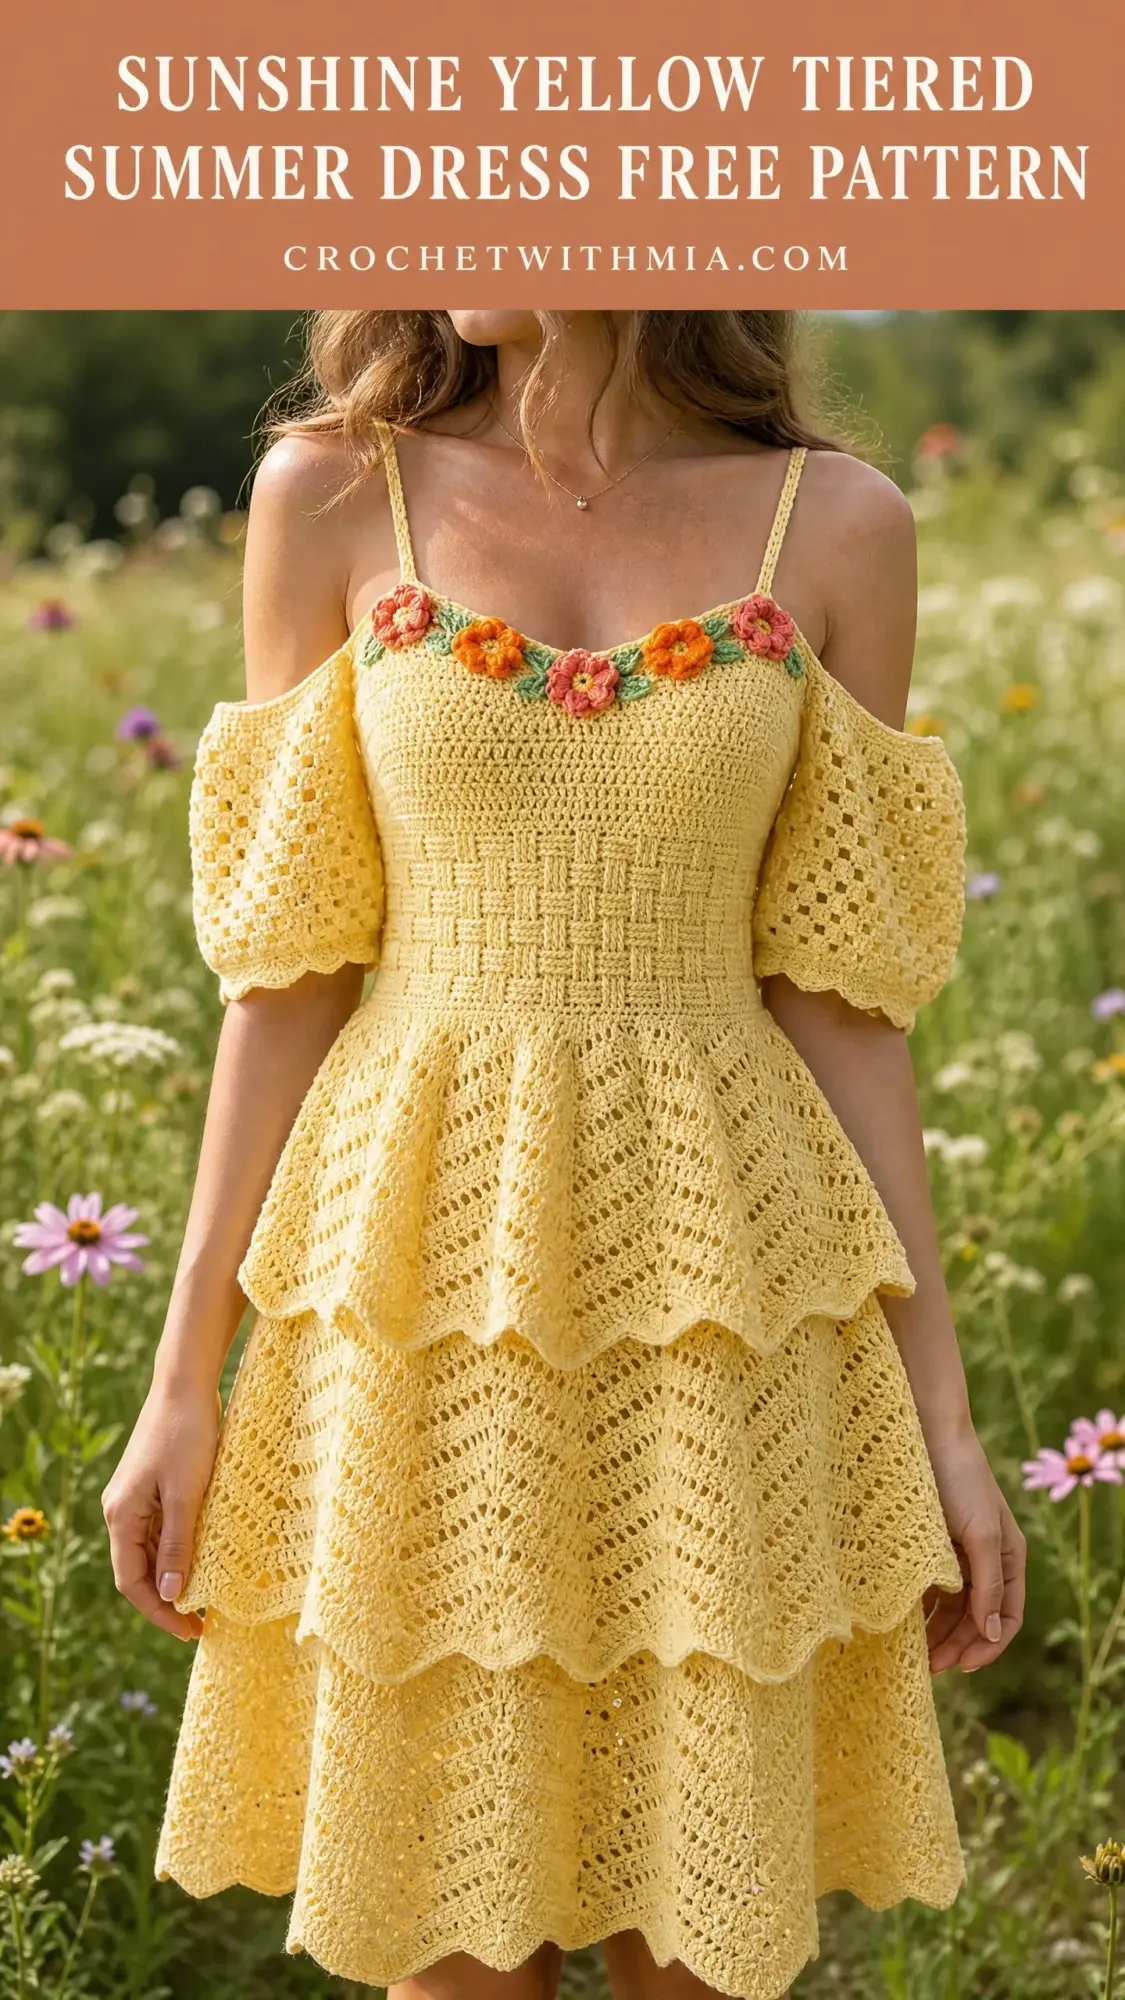
This dress combines a structured basket-weave bodice with three flowing tiers of chevron lace and sweet cold-shoulder puff sleeves. It is absolutely a project that will challenge you, but in the best possible way. If you have been looking for a statement garment that showcases your crochet skills, the Sunshine Yellow Tiered Summer Dress is waiting for you.
About This Crochet Dress Pattern
This is an intermediate to advanced level pattern that requires familiarity with several techniques. You will be working front post double crochet (FPdc) and back post double crochet (BPdc) stitches to create the woven texture of the bodice. The skirt features a chevron lace stitch that creates those beautiful cascading waves. You will also seam pieces together and attach decorative flower embellishments.
The finished dress fits a size Small/Medium with a 34 to 36 inch bust. The bodice length from shoulder to waist measures 13 inches, and the total dress length from shoulder to hem is approximately 38 inches. Expect to spend 40 to 60 hours on this project depending on your working speed.
The construction method is straightforward once you understand the flow. You will work the bodice flat in two panels, seam the sides, work the sleeves flat and seam them into tubes, then work each skirt tier in the round from the waist down. The tiers overlap each other for that beautiful ruffled effect you see in the finished piece.
Materials You Will Need
Yarn:
Yarn Suggestions:
Paintbox Yarns Simply DK in Banana Cream works beautifully for this project. It is 100% acrylic with 276 yards per 100g skein, and you will need approximately 6 skeins. This yarn holds stitch definition well, which is critical for the basket-weave texture.
Lion Brand Comfy Cotton Blend in Yellow is another excellent choice. The cotton content adds drape and breathability, making it ideal for a summer dress. You will need approximately 4 skeins.
Drops Safran in Yellow is the premium option if you want that slight sheen and excellent drape. This 100% Egyptian cotton yarn requires approximately 8 skeins.
Hooks:
Notions:
Gauge
Getting gauge right is absolutely critical for a fitted garment like this dress. Even a half-stitch difference per inch will significantly alter your finished dimensions.
Bodice gauge (US E-4 / 3.5 mm hook, basket-weave pattern):
20 stitches x 16 rows = 4 inches / 10 cm
Skirt gauge (US F-5 / 3.75 mm hook, chevron lace pattern):
One full chevron repeat (18 stitches) = 3.25 inches / 8.25 cm
8 rows = 4 inches / 10 cm
Work gauge swatches in both stitch patterns and block them before measuring. This step will save you heartache later, I promise.
Abbreviations and Stitch Definitions
Let me walk you through every abbreviation you will encounter in this crochet tutorial.
Special Stitches for This Pattern
Basket-Weave Pattern
This creates a woven grid appearance by alternating front post and back post double crochets in panels of three. Work over a multiple of 6 stitches plus 2.
Row 1 (RS): Ch 3 (counts as first dc), dc across. Turn.
Row 2: Ch 3, (FPdc around next 3 sts, BPdc around next 3 sts) across to last st, dc in top of t-ch. Turn.
Row 3: Ch 3, (FPdc around next 3 sts, BPdc around next 3 sts) across to last st, dc in top of t-ch. Turn.
Row 4: Ch 3, (BPdc around next 3 sts, FPdc around next 3 sts) across to last st, dc in top of t-ch. Turn.
Row 5: Ch 3, (BPdc around next 3 sts, FPdc around next 3 sts) across to last st, dc in top of t-ch. Turn.
Repeat Rows 2 through 5 for pattern.
Chevron Lace Stitch
This creates the cascading wave appearance in each skirt tier. Work over a multiple of 18 stitches.
Rnd 1: (Sc in next 3 sts, hdc in next 2 sts, dc in next 2 sts, 3 dc in next st [peak], dc in next 2 sts, hdc in next 2 sts, sc in next st, sk 2 sts [valley]) around. Join.
Rnd 2: Ch 1, (sc in next 3 sts, hdc in next 2 sts, dc in next 2 sts, 3 dc in next st, dc in next 2 sts, hdc in next 2 sts, sc in next st, sk 2 sts) around. Join.
Repeat Rnd 2 for chevron lace pattern. The stitch count remains consistent because the 2 increase stitches at the peak offset the 2 skipped stitches at each valley.
Scallop Edge
Sl st into next st, (sc, hdc, 3 dc, hdc, sc) all into next st, sl st into next st. Repeat across or around.
Step by Step Crochet Pattern Instructions
Front Bodice Panel
Change to E-4 hook. Work flat.
Foundation chain: Ch 92.
Row 1 (RS): Sc in 2nd ch from hook, sc across. Turn. (91 sc)
Row 2 (WS): Ch 3 (counts as first dc here and throughout), dc in each sc across. Turn. (91 dc counting the t-ch)
Row 3 (RS): Ch 3, (FPdc around next 3 sts, BPdc around next 3 sts) 15 times, dc in top of t-ch. Turn. (91 sts)
Row 4 (WS): Ch 3, (FPdc around next 3 sts, BPdc around next 3 sts) 15 times, dc in top of t-ch. Turn. (91 sts)
Row 5 (RS): Ch 3, (BPdc around next 3 sts, FPdc around next 3 sts) 15 times, dc in top of t-ch. Turn. (91 sts)
Row 6 (WS): Ch 3, (BPdc around next 3 sts, FPdc around next 3 sts) 15 times, dc in top of t-ch. Turn. (91 sts)
Rows 7 through 22: Repeat Rows 3 through 6 four more times. At the end of Row 22 the bodice panel is 4 full basket-weave pattern repeats tall. (91 sts each row)
Waist Shaping Decrease Section
Row 23 (RS): Ch 3, dc2tog over next 2 sts, work in established basket-weave pattern across to last 3 sts, dc2tog, dc in top of t-ch. Turn. (89 sts)
Row 24 (WS): Ch 3, work in established basket-weave pattern across. Turn. (89 sts)
Row 25 (RS): Ch 3, dc2tog over next 2 sts, work in established basket-weave pattern across to last 3 sts, dc2tog, dc in top of t-ch. Turn. (87 sts)
Row 26 (WS): Ch 3, work in established basket-weave pattern across. Turn. (87 sts)
Row 27 (RS): Ch 3, dc2tog over next 2 sts, work in established basket-weave pattern across to last 3 sts, dc2tog, dc in top of t-ch. Turn. (85 sts)
Row 28 (WS): Ch 3, work in established basket-weave pattern across. Turn. (85 sts)
Row 29 (RS): Ch 3, dc2tog over next 2 sts, work in established basket-weave pattern across to last 3 sts, dc2tog, dc in top of t-ch. Turn. (83 sts)
Row 30 (WS): Ch 3, work in established basket-weave pattern across. Turn. (83 sts)
Fasten off. This is the front bodice panel.
Checkpoint: After completing the front bodice panel through Row 30, the piece should measure approximately 7.5 inches wide at the waist and 7.5 inches tall.
Back Bodice Panel
Work exactly as for Front Bodice Panel through Row 30. Fasten off.
Side Seams
Hold Front and Back panels with right sides together. Using yarn needle and MC, whipstitch or mattress stitch the side seams. Leave the top 6 rows open on each side for the sleeve openings. The sleeve opening should measure approximately 4 inches from the top edge down each side.
Waist Join Round: Attach MC at side seam. With E-4 hook, sc evenly around the waist edge of the joined bodice, working 162 sc total. Join with sl st to first sc. (162 sc)
Sleeve (Make 2)
The sleeves are puff sleeves with an open-mesh body and eyelet texture, worked flat and seamed.
Change to E-4 hook.
Foundation chain: Ch 73.
Row 1 (RS): Sc in 2nd ch from hook, sc across. Turn. (72 sc)
Row 2: Ch 3, (dc in next st, ch 1, sk 1 st) across to last st, dc in last st. Turn. (72 working sts)
Row 3: Ch 3, (dc in ch-1 sp, ch 1, sk dc) across, dc in last st. Turn. (72 sts)
Rows 4 through 10: Repeat Row 3. (72 sts each row)
Row 11: Ch 1, sc in each st and each ch-1 sp across. Turn. (72 sc)
Row 12: Ch 3, dc in each sc across. Turn. (72 dc)
Row 13: Ch 1, sc in each dc across. Turn. (72 sc)
Scallop edge: Work one scallop edge row along the bottom edge (Row 13): (sl st, sc, hdc, 3 dc, hdc, sc, sl st) into every 8th stitch across, working 9 scallops total. Fasten off.
Seam the sleeve: Fold sleeve in half lengthwise. Seam the short side edges together using mattress stitch to form a tube.
Checkpoint: Each finished sleeve tube should measure approximately 14 inches in circumference at the top opening and 6 inches in length.
Attaching Sleeves
With RS facing, pin each sleeve into the armhole opening of the bodice. The top of the sleeve (Row 1 edge) aligns with the shoulder area. Work a row of sc through both layers all the way around the armhole to join sleeve to bodice. The cold-shoulder effect is achieved by allowing the top of the sleeve to sit slightly off the shoulder seam.
Spaghetti Straps (Make 2)
Method 1 (Crocheted cord): With E-4 hook and MC, ch 120. Sl st in each ch back along the chain to the beginning. Fasten off. This creates a firm, narrow cord approximately 18 to 20 inches long.
Method 2 (Ribbon): Cut two lengths of narrow yellow ribbon or cord, each 22 inches long. Fold under ends and sew to bodice with yarn needle and MC.
Attachment: Sew one end of each strap to the front neckline edge, approximately 3 inches from each side seam. Bring straps over the shoulder and sew to the corresponding position on the back neckline.
Neckline Edging
With E-4 hook and MC, work one round of sc along the front neckline edge, then work a second round of reverse sc (also called crab stitch) for a neat, firm finish. Join and fasten off.
Tier 1 Skirt (First Tier)
Change to F-5 hook.
The working count for Tier 1 is 162 stitches (the waist join round completed earlier). This is 9 chevron repeats of 18 stitches.
Rnd 1: Join MC to any st of waist join round. Ch 1. (Sc in next 3 sts, hdc in next 2 sts, dc in next 2 sts, 3 dc in next st, dc in next 2 sts, hdc in next 2 sts, sc in next st, sk 2 sts) 9 times around. Join with sl st to first sc. (162 sts)
Rnds 2 through 7: Ch 1. (Sc in next 3 sts, hdc in next 2 sts, dc in next 2 sts, 3 dc in next st, dc in next 2 sts, hdc in next 2 sts, sc in next st, sk 2 sts) 9 times around. Join with sl st to first sc. (162 sts each round)
Rnd 8 (transition round): Ch 1, (sc in next 8 sts, 2 sc in next st) 18 times. (180 sts)
Rnds 9 through 14: Ch 1. (Sc in next 3 sts, hdc in next 2 sts, dc in next 2 sts, 3 dc in next st, dc in next 2 sts, hdc in next 2 sts, sc in next st, sk 2 sts) 10 times around. Join. (180 sts each round)
Tier 1 Scallop Hem: (Sl st in next st, sc in next st, hdc in next st, 3 dc in next st, hdc in next st, sc in next st, sl st in next st, sk 2 sts) 20 times around. Join and fasten off.
Checkpoint: Tier 1 should measure approximately 5 inches in length from the waist join round.
Tier 2 Skirt (Second Tier)
Tier 2 is attached at Rnd 6 of Tier 1, creating the overlapping ruffle appearance.
Attachment: With F-5 hook and MC, insert hook through the stitches of Rnd 6 of Tier 1. Work 180 sc around. (180 sc)
Rnd 1 of Tier 2: Ch 1. (Sc in next 9 sts, 2 sc in next st) 18 times. (198 sts)
Rnds 2 through 10 of Tier 2: Ch 1. (Sc in next 3 sts, hdc in next 2 sts, dc in next 2 sts, 3 dc in next st, dc in next 2 sts, hdc in next 2 sts, sc in next st, sk 2 sts) 11 times around. Join. (198 sts each round)
Tier 2 Expansion Round: Ch 1. (Sc in next 9 sts, 2 sc in next st) 18 times. (216 sts)
Rnds 12 through 16 of Tier 2: Ch 1. (Sc in next 3 sts, hdc in next 2 sts, dc in next 2 sts, 3 dc in next st, dc in next 2 sts, hdc in next 2 sts, sc in next st, sk 2 sts) 12 times around. Join. (216 sts each round)
Tier 2 Scallop Hem: (Sl st in next st, sc in next st, hdc in next st, 3 dc in next st, hdc in next st, sc in next st, sl st in next st, sk 2 sts) 24 times around. Join and fasten off.
Checkpoint: Tier 2 should measure approximately 7 inches in length from its attachment point.
Tier 3 Skirt (Third Tier)
Tier 3 is attached at Rnd 9 of Tier 2.
Attachment: With F-5 hook and MC, pick up through the stitches of Rnd 9 of Tier 2. Work 198 sc around. (198 sc)
Tier 3 Rnd 1: Ch 1. (Sc in next 9 sts, 2 sc in next st) 18 times. (216 sts)
Rnds 2 through 12 of Tier 3: Ch 1. (Sc in next 3 sts, hdc in next 2 sts, dc in next 2 sts, 3 dc in next st, dc in next 2 sts, hdc in next 2 sts, sc in next st, sk 2 sts) 12 times around. Join. (216 sts each round)
Tier 3 Expansion Round (Rnd 13): Ch 1. (Sc in next 11 sts, 2 sc in next st) 18 times. (234 sts)
Rnds 14 through 22 of Tier 3: Ch 1. (Sc in next 3 sts, hdc in next 2 sts, dc in next 2 sts, 3 dc in next st, dc in next 2 sts, hdc in next 2 sts, sc in next st, sk 2 sts) 13 times around. Join. (234 sts each round)
Tier 3 Scallop Hem: (Sl st in next st, sc in next st, hdc in next st, 3 dc in next st, hdc in next st, sc in next st, sl st in next st, sk 2 sts) 26 times around. Join and fasten off.
Checkpoint: Tier 3 should measure approximately 10 inches in length from its attachment point. The full dress length from shoulder to hem should measure approximately 38 inches.
Flowers (Make 5)
Make 2 flowers in CA (coral), 2 flowers in CB (orange), and 1 in a combination of both.
Rnd 1: With CA or CB, magic ring, ch 1, 6 sc into ring. Join with sl st. (6 sc)
Rnd 2: (Ch 3, 2 dc into same st, ch 3, sl st into same st, sl st into next st) 6 times. (6 petals)
Fasten off, leaving a 10-inch tail for sewing.
Leaves (Make 5): With CC, ch 8, sl st in 2nd ch from hook, sc in next ch, hdc in next 2 ch, sc in next 2 ch, sl st in last ch. Fasten off, leaving tail for sewing.
Placement: After blocking the dress, arrange 5 flowers evenly along the front neckline edge, spacing them approximately 2 inches apart. Position leaves peeking out from behind each flower. Sew in place securely.
Size Customization Tips
For a larger bust (38 to 40 inches): Add 12 stitches to the foundation chain for each bodice panel (chain 104 instead of 92). Adjust the waist join stitch count to 180 sc (for one additional chevron repeat).
For a smaller bust (30 to 32 inches): Subtract 12 stitches from the foundation chain (chain 80 instead of 92). Reduce waist join stitch count to 144 (8 repeats).
For a shorter dress: Reduce Tier 3 from 22 rounds to 14 rounds for a knee-length result.
Always check that your modified waist stitch count is divisible by 18 before beginning any skirt tier.
Finishing and Blocking Your Dress
Weave in all yarn ends using a yarn needle, running each tail through at least 1 inch of stitches in two directions to secure.
Wet blocking: Fill a basin with cool water and a small amount of wool wash. Submerge the finished dress and gently press to saturate. Do not wring or twist. Lift the dress from the water supporting the full weight, press gently in a towel, then lay flat on blocking mats. Pin the chevron lace tiers to the mat, stretching each scallop point outward to define the wave pattern. Allow to dry fully (24 to 48 hours) before moving.
For acrylic yarn: Use a steam iron held 1 to 2 inches above the surface. Do not press the iron onto the fabric directly.
Care Instructions
Hand wash in cool water with gentle detergent. Do not wring. Roll in a dry towel to remove excess water. Lay flat to dry away from direct sunlight. Do not tumble dry or hang dry, as the weight of the wet yarn will distort the shape. Store flat or folded loosely, not on a hanger.
Final Thoughts on This Crochet Dress Pattern
Thank you so much for choosing this pattern for your next project. The Sunshine Yellow Tiered Summer Dress is truly a labor of love, and I cannot wait to see how you make it your own. Whether you stick with the sunny yellow or choose a completely different palette, this dress is going to turn heads.
I would absolutely love to see your finished dresses! Tag me on Instagram or share your photos in my Facebook group so I can celebrate your beautiful work with you.
If this pattern speaks to you, go ahead and save it to your Pinterest boards so you can find it when you are ready to start. And please drop a comment below if you make this dress. I read every single one and your feedback truly makes my day!