
I don’t know about you, but I’ve always dreamed of making something truly show-stopping. Something that makes people gasp when you walk into a room. Something that proves handmade can be absolutely breathtaking.
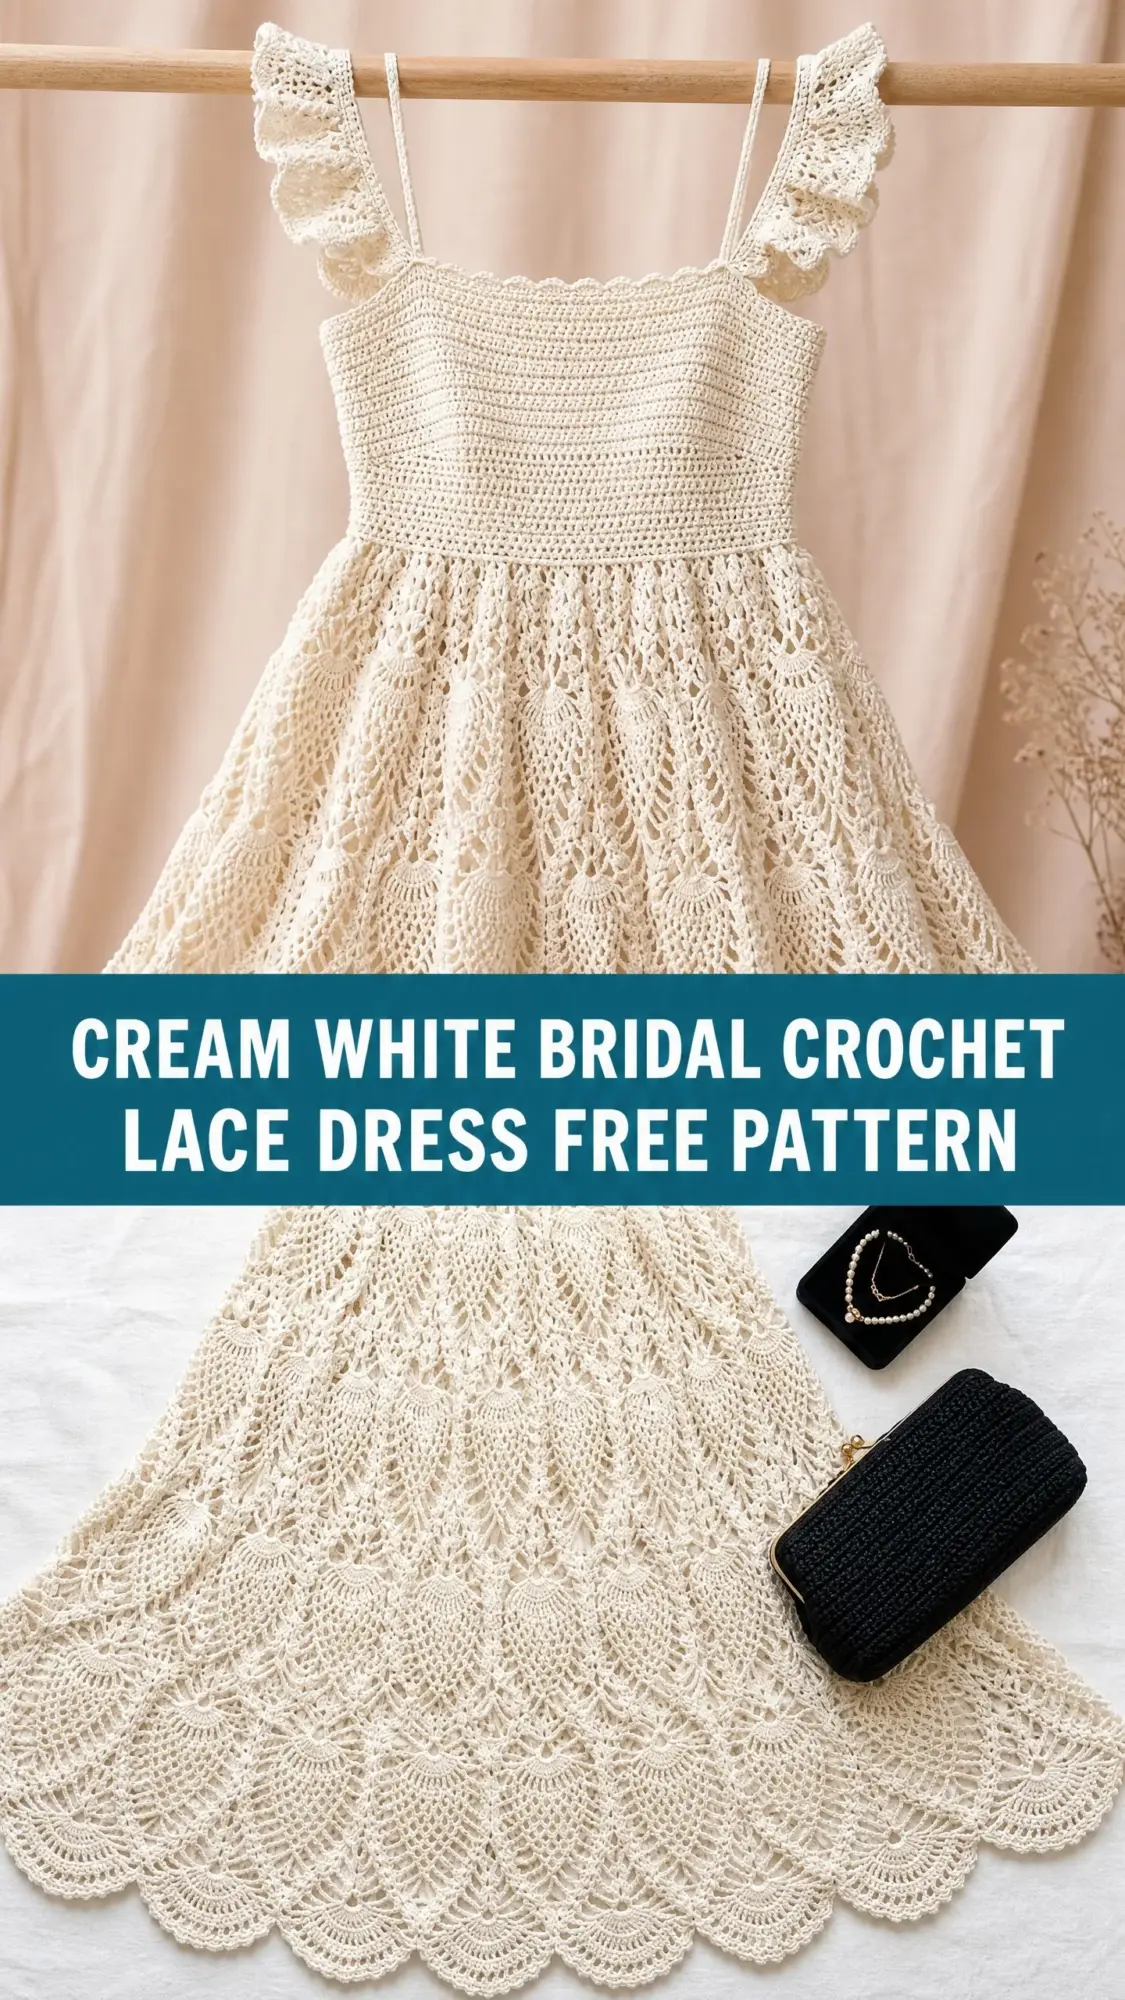
This cream white bridal crochet lace dress is that project. It’s the kind of piece that becomes an heirloom, passed down through generations with stories attached to every delicate pineapple motif.
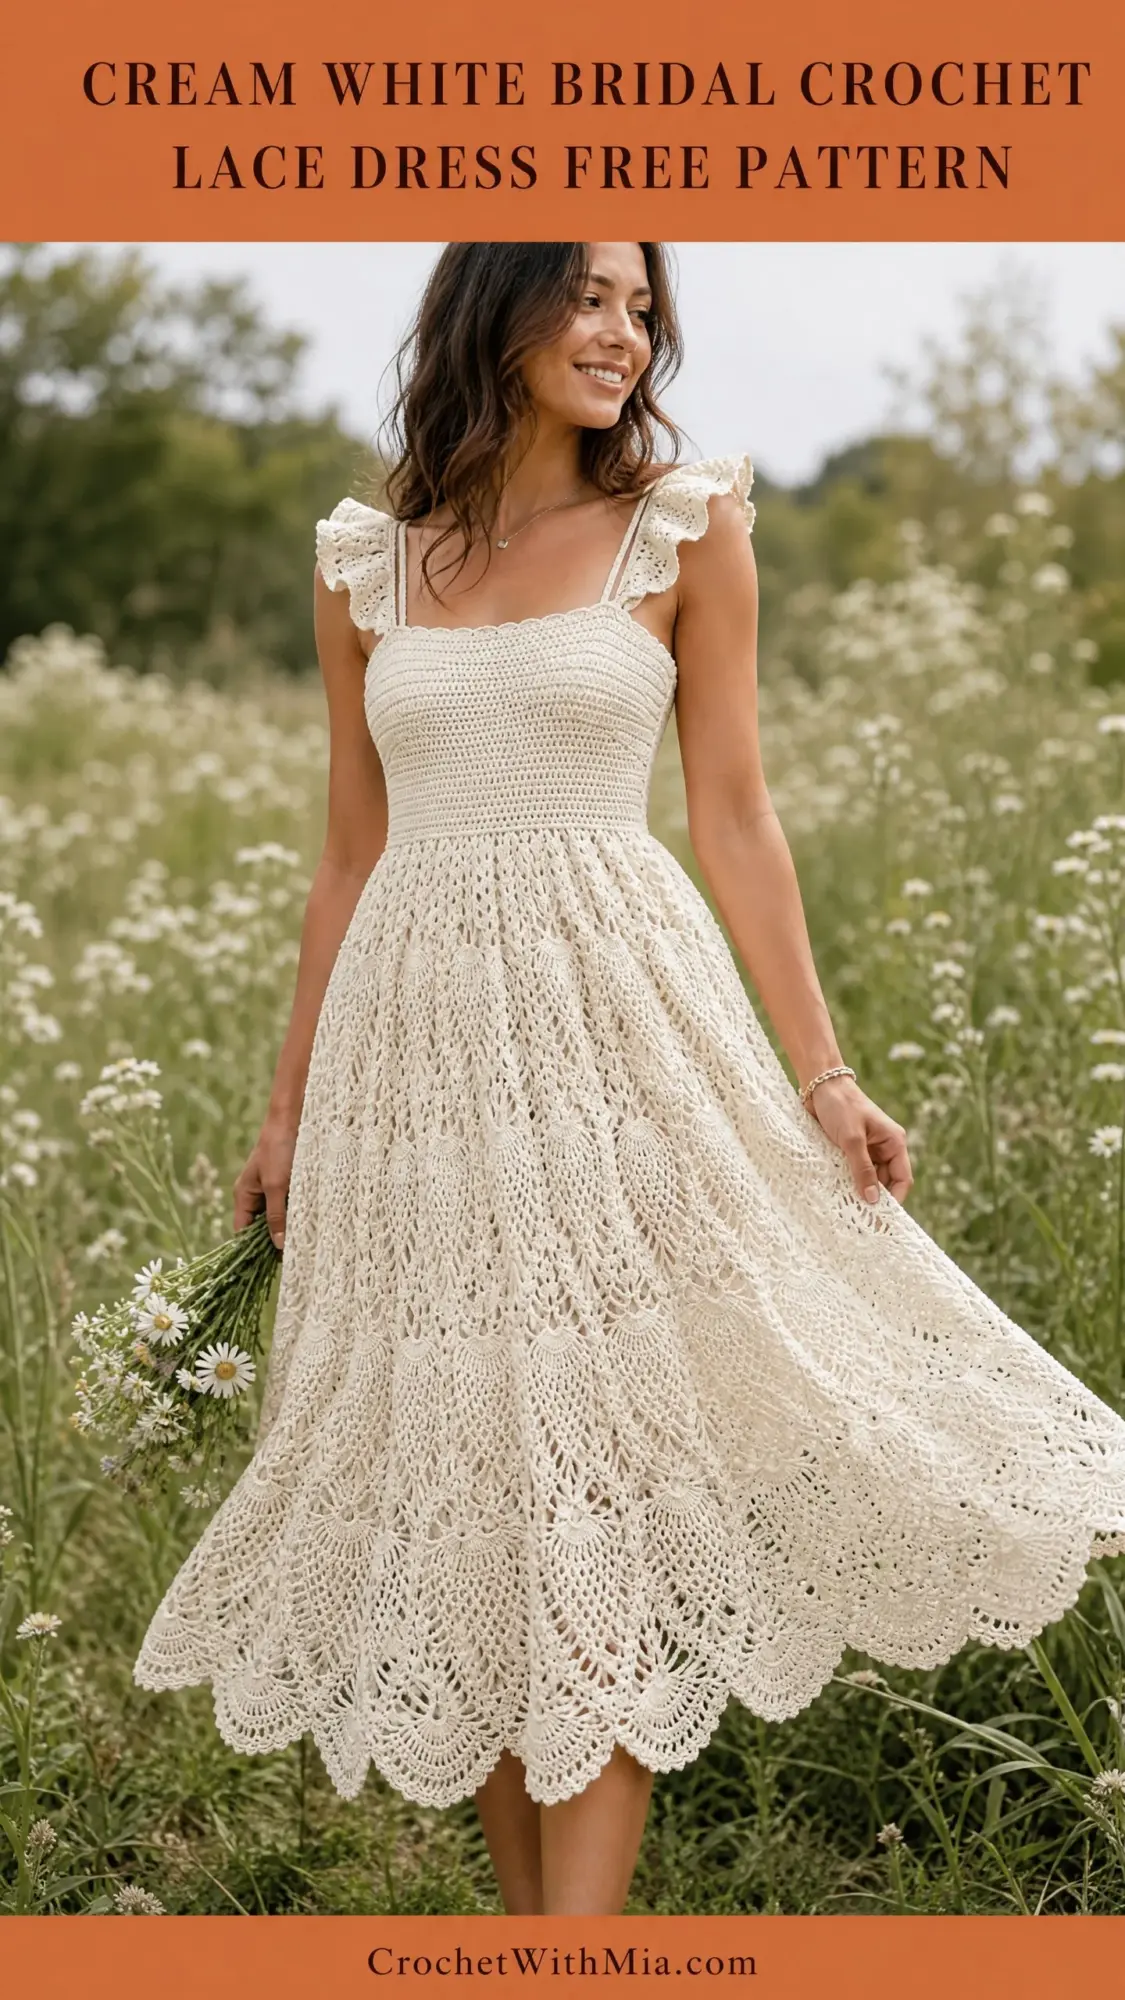
If you’ve been waiting for the right moment to challenge yourself with an ambitious lace project, this is your sign. The smocked bodice, the sweeping A-line skirt, those gorgeous flutter ruffle straps. Every detail is designed to create a garment worthy of the most special occasions in your life.
About This Crochet Lace Dress Pattern
This stunning midi dress features three distinct construction elements that come together beautifully. The fitted bodice uses a special smocking stitch technique that creates natural stretch and a flattering ribbed texture. The skirt showcases traditional pineapple lace worked in the round, starting with 12 repeats and expanding dramatically to create that gorgeous A-line silhouette. And those romantic flutter ruffles at the shoulders? They’re worked separately and attached at the end.
I won’t sugarcoat it. This is an advanced pattern. You’ll be working with fine size 10 crochet cotton thread, mastering pineapple lace construction, and handling multiple special techniques. But if you’ve completed a couple of lace garments before, you absolutely have the skills to make this happen.
The finished dress fits a size Small/Medium with a 32 to 34 inch bust and 26 to 28 inch waist. The total length from bodice top to hem measures 48 inches, creating a beautiful midi length. Don’t worry if you need different measurements. I’ve included detailed size customization tips at the end.
Time commitment: Plan for 80 to 120 hours of stitching time, plus 12 to 24 hours for blocking. This is a labor of love, but every single hour is worth it.
Materials You’ll Need
Yarn: Size 10 crochet cotton thread, also called bedspread weight or size 10 thread, in natural or cream white. You’ll need approximately 3,500 yards (3,200 meters).
Recommended yarn options:
Important: Avoid polyester-heavy blends because they resist blocking and the pineapple lace won’t open properly. Do not substitute fingering weight yarn. The stitch definition and drape will be completely wrong.
Hooks:
Quick note about steel hooks: Steel hook numbers run opposite to standard hooks. A higher steel number means a smaller hook. This confuses everyone at first, so don’t feel bad if you need to double-check.
Additional supplies:
Gauge (Please Don’t Skip This)
I know swatching isn’t glamorous, but for a garment like this, gauge is absolutely critical.
Bodice gauge (size 6 / 1.80 mm hook, smocking stitch pattern):
18 stitches = 2 inches (5 cm)
10 rows = 2 inches (5 cm)
Skirt gauge (size 7 / 1.65 mm hook, pineapple lace pattern after blocking):
One complete pineapple repeat unit (14 stitches wide at base) = 1.75 inches (4.5 cm)
One pineapple repeat unit height (from chain-5 base arch to tip) = 2.25 inches (5.7 cm)
Block your swatch before measuring. Cotton thread grows after blocking, and you need to account for this or your dress won’t fit correctly.
Abbreviations and Stitch Definitions
Let me walk you through every abbreviation you’ll encounter. I’m defining each one in plain terms so you can reference this section whenever you need it.
beg = beginning
BPdc = back post double crochet (insert your hook from back to front around the post of the stitch, yarn over, pull through, complete as a regular double crochet)
BPsc = back post single crochet (same idea, but complete as a single crochet)
ch = chain
ch-sp = chain space (the hole or gap created by chain stitches)
dc = double crochet (yarn over, insert hook, pull up a loop, yarn over and pull through 2 loops twice)
dc2tog = double crochet two together, which is a decrease (start a dc in one stitch but stop before the final yarn over, start another dc in the next stitch, then yarn over and pull through all 3 loops)
FPdc = front post double crochet (insert hook from front to back around the post of the stitch)
FPsc = front post single crochet
hdc = half double crochet
lp(s) = loop(s)
mc = main color (cream white throughout)
rep = repeat
rnd = round
RS = right side (the outside of your work)
sc = single crochet
sk = skip
sl st = slip stitch
sp = space
st(s) = stitch(es)
tr = treble crochet (yarn over twice before inserting hook)
WS = wrong side
yo = yarn over
Special Stitches You’ll Learn
Smocking Stitch
This creates the elastic ribbed texture on the bodice. It’s worked over 2 rows.
Row A (RS): Work across in single crochet (sc), placing each stitch normally.
Row B (WS): Chain 1, turn. Alternate front post single crochet (FPsc) and back post single crochet (BPsc) across. For FPsc, insert your hook from front to back around the post of the sc two rows below. For BPsc, insert from back to front. This creates that lovely gathered smocking texture. Don’t pull too tight. Keep the fabric slightly stretchy.
Pineapple Base Arch
Chain 5, then slip stitch into the designated stitch or space to form a loop arch. This arch is where you’ll build each pineapple cluster.
Pineapple Cluster
Work into a chain space or arch: 7 double crochet (dc), chain 1, 7 double crochet (dc). That’s 14 dc total with a chain-1 center. This forms the classic pineapple shape when you decrease over multiple rows.
Pineapple Decrease Row
On each row above the base, work into the chain-1 space at the pineapple center: 6 dc, ch 1, 6 dc. Next row: 5 dc, ch 1, 5 dc. Continue decreasing until you reach 1 dc, ch 1, 1 dc. Then work dc2tog to close the tip.
Fan Shell
Work 5 double crochet (dc) into the same stitch or space. This is used in transitional rounds between pineapple tiers.
Scallop Edging
Work (sc, hdc, 5 dc, hdc, sc) all into the same stitch or designated space. Each scallop uses 9 stitches.
Ruffle Stitch
Round 1: Work sc evenly around the strap attachment edge.
Round 2: In each sc, work (sc, ch 2, sc). This doubles your stitch count.
Round 3: In each ch-2 space, work (sc, hdc, dc, hdc, sc). This creates the gorgeous layered flutter effect.
Chain Arch Connector
Chain 5, skip the specified number of stitches, single crochet (sc) into the next designated stitch or space. This creates the mesh arches separating pineapple columns.
Pattern Notes Before You Begin
1. The dress is constructed in three separate sections that you’ll join: the bodice (worked flat and seamed), the skirt (worked in the round from the waist down), and the shoulder straps with ruffles (worked separately and attached).
2. The bodice is worked flat to allow for a side seam. This is a slip-over design with no zipper. If your hips are wider than your bust, size the bodice for your hip measurement so you can get it on and off.
3. The skirt begins at the waist with a joining round to the bottom edge of the bodice and is worked downward.
4. Pineapple lace panels are worked over 14-stitch base units. The skirt starts with 12 pineapple repeats and expands to 24, then to 48 in the lower tiers.
5. All rounds are joined with a slip stitch and begun with a turning chain unless noted otherwise.
6. Chain 3 at the beginning of a dc round counts as the first dc throughout.
7. The right side is the outside of the dress.
8. Tension matters here. If your pineapples look tight and don’t open into a fan shape, go up half a hook size. If they’re too loose and floppy, go down half a hook size.
9. Block the dress before attaching straps so your final bodice dimensions are accurate.
Section 1: The Bodice
The bodice is worked flat in rows and forms a tube when seamed.
Using size 6 / 1.80 mm hook, chain 290.
This foundation chain produces a working row of 288 sc plus 2 turning chain stitches. At gauge, this gives approximately 32 inches (81 cm) in circumference.
Row 1 (RS): Sc in 2nd ch from hook and in each ch across. Turn. (288 sc)
Row 2 (WS): Ch 1, turn. FPsc in next st, BPsc in next st; rep from across. (288 sts)
Row 3 (RS): Ch 1, turn. BPsc in next st, FPsc in next st; rep from across. (288 sts)
Rows 4 through 36: Continue alternating Rows 2 and 3 (smocking stitch pattern).
The fabric will naturally gather and compress. After blocking, the bodice should measure approximately 7 inches (18 cm) tall and 32 inches (81 cm) wide before seaming.
Here’s an important note: The smocking creates an elasticized effect. The fabric will be narrower unstretched (approximately 26 inches, reflecting the waist measurement) and stretches to approximately 32 to 34 inches at the bust. This is exactly what you want.
After Row 36, do not fasten off.
Bodice Bottom Edge Preparation
Row 37 (WS, waist edging): Ch 1, turn. Sc evenly across the bottom edge, working 1 sc in each stitch. (288 sc)
Do not fasten off. Place a stitch marker in the last stitch. Set aside.
Bodice Seaming
Fold the bodice with right sides together. Using a tapestry needle and a length of yarn, whip stitch or mattress stitch the left side edge (rows 1 through 36) together. Fasten off and weave in ends. Turn right side out.
Your bodice is now a tube. The bottom open edge (Row 37 edging, 288 sc) will connect to the skirt. The top open edge will receive the shoulder straps.
Checkpoint 1: After completing and seaming the bodice, the tube should measure approximately 7 inches (18 cm) tall. When gently stretched, the circumference at the top edge should be 32 to 34 inches (81 to 86 cm). The fabric should feel elastic and springy with a pronounced ribbed texture.
Section 2: The Skirt
The skirt is worked in rounds, downward from the waist edge of the bodice.
With RS facing and size 7 / 1.65 mm hook, join yarn to any stitch in Row 37 (the bottom waist edge of the bodice).
Skirt Setup Round (Round 1)
This round establishes 12 pineapple arch groups evenly around the waist.
Each group consists of: sc in next 2 sts, ch 5, sk 2 sts, sc in next st, ch 5, sk 2 sts, sc in next st, ch 5, sk 2 sts, sc in next 2 sts.
This group uses 9 working stitches and creates 3 chain-5 arches.
12 groups x 9 working stitches = 108 stitches worked into. The remaining stitches are incorporated by skipping (sk 2 sts x 3 arches x 12 groups = 72 skipped stitches). 108 + 72 + 108 = 288 total.
At the end of Round 1, sl st to first sc to join. (12 pineapple arch groups established, 36 chain-5 arches total)
Round 2 (First Pineapple Base Row)
In each ch-5 arch around, work: (sc, ch 3, 7 dc, ch 1, 7 dc, ch 3, sc). This places a 14-dc pineapple cluster with ch-1 center into every arch.
Between groups (in the sc stitches between arch groups), work: ch 5, sk any connector sts, sc into next sc between groups, ch 5.
Sl st to join. (12 full pineapple clusters placed)
Round 3
*In ch-3 sp before pineapple: sc, ch 3.
In pineapple cluster: sk first dc, work dc in each of next 6 dc, ch 1, dc in each of next 6 dc, sk last dc. (12 dc total in this pineapple)
In ch-3 sp after pineapple: ch 3, sc.
In connector ch-5 arch: sc, ch 5, sc.
Rep from * 11 more times.
Sl st to join. (12 pineapple clusters, 12 dc each with ch-1 center)
Round 4
*In ch-3 sp: sc, ch 3.
In pineapple: sk first dc, dc in next 5 dc, ch 1, dc in next 5 dc. (10 dc)
In ch-3 sp: ch 3, sc.
In connector arch: ch 5, sc, ch 5.
Rep from * around.
Sl st to join. (12 clusters, 10 dc each)
Round 5
*In ch-3 sp: sc, ch 3.
In pineapple: sk first dc, dc in next 4 dc, ch 1, dc in next 4 dc. (8 dc)
In ch-3 sp: ch 3, sc.
In connector arch: (sc, ch 5, sc) in first arch, (sc, ch 5, sc) in second arch.
Rep from * around.
Sl st to join. (12 clusters, 8 dc each)
Round 6
*In ch-3 sp: sc, ch 3.
In pineapple: sk first dc, dc in next 3 dc, ch 1, dc in next 3 dc. (6 dc)
In ch-3 sp: ch 3, sc.
In connector arches: work connector arch sections.
Rep from * around.
Sl st to join. (12 clusters, 6 dc each)
Round 7
*In ch-3 sp: sc, ch 3.
In pineapple: sk first dc, dc in next 2 dc, ch 1, dc in next 2 dc. (4 dc)
In ch-3 sp: ch 3, sc.
In connector arches: work connectors.
Rep from * around.
Sl st to join. (12 clusters, 4 dc each)
Round 8
*In ch-3 sp: sc, ch 3.
In pineapple: dc2tog over first 2 dc, ch 1, dc2tog over next 2 dc. (2 dc groups)
In ch-3 sp: ch 3, sc.
Work connectors.
Rep from * around.
Sl st to join. (12 clusters closing to tips)
Round 9 (Pineapple Tip Closing and Expansion Setup)
This is your expansion round. Each closed pineapple tip becomes the anchor for two new pineapple arches, doubling the repeat count from 12 to 24.
*Sc into the ch-1 sp at pineapple tip.
Ch 5, sc into next connector arch sp.
Ch 5, sc into next connector arch sp.
Ch 5, sc back into the same pineapple tip ch-1 sp (or next available sc).
Ch 5, working into the connector arch between this pineapple and the next, sc.
Rep from * around.
Sl st to join. (24 new ch-5 foundation arches established)
Checkpoint 2: After Round 9, the skirt should have 24 chain-5 arches evenly distributed around. The circumference should measure approximately 24 to 26 inches (61 to 66 cm) at this point (the lace will open wider after blocking). The skirt should hang approximately 4 to 5 inches (10 to 13 cm) below the waist seam.
Tier 2: Second Pineapple Tier (Rounds 10 through 17)
Tier 2 uses the same pineapple construction as Tier 1 but now worked over 24 pineapple positions.
Round 10 (Second tier base):
In each ch-5 arch around, work: (sc, ch 3, 7 dc, ch 1, 7 dc, ch 3, sc).
Between pineapples, work connector arches as established.
Sl st to join. (24 pineapple clusters placed)
Rounds 11 through 17: Work the pineapple decrease sequence identically to Rounds 3 through 9 of Tier 1, but over 24 clusters.
Checkpoint 3: After Round 17, the skirt should measure approximately 14 to 16 inches (35 to 40 cm) below the waist seam. The skirt circumference should be approximately 36 to 40 inches (91 to 101 cm) before blocking.
Tier 3: Third Pineapple Tier (Rounds 18 through 24)
Round 18 (Third tier base):
In each ch-5 arch, work: (sc, ch 3, 7 dc, ch 1, 7 dc, ch 3, sc). (24 clusters)
Between clusters: ch 7 connector arches (slightly longer to build skirt width). Sl st to join.
Rounds 19 through 24: Work pineapple decrease sequence.
Checkpoint 4: After Round 24, the skirt should measure approximately 24 to 26 inches (61 to 66 cm) below the waist. The circumference should be approximately 42 to 46 inches (106 to 117 cm).
Tier 4: Fourth Pineapple Tier (Rounds 25 through 34)
In Tier 4, each connector section now contains a fan shell. New pineapple arches launch from the spaces on either side of each fan shell as well as from the pineapple tips. This creates the dramatic A-line flare.
Round 25 (Fourth tier base):
*Sc into closed pineapple tip from Tier 3.
Ch 5, sc into ch-5 sp before fan shell.
In fan shell (5 dc): ch 3, sk 2 dc, sc into center (3rd) dc of fan shell, ch 3.
Ch 5, sc into ch-5 sp after fan shell.
Ch 5, sc into next closed pineapple tip.
This creates multiple new arches per connector section. Tier 4 effectively has 48 pineapple positions. However, Tier 4 uses a "small pineapple" construction: base of 5 dc, ch 1, 5 dc (12 dc total) to create a denser but graceful lace field.
Sl st to join. (48 pineapple foundation arches, 48 connector arches)
Round 26 (Half-pineapple base):
In each of the 48 designated arches: (sc, ch 2, 5 dc, ch 1, 5 dc, ch 2, sc).
In each of the 48 connector arches: ch 5, sc, ch 5.
Sl st to join. (48 small pineapple clusters)
Rounds 27 through 33: Work pineapple decrease for small pineapples.
Checkpoint 5: After Round 33, the skirt should measure approximately 38 to 40 inches (96 to 101 cm) below the waist seam. The circumference should measure approximately 50 to 54 inches (127 to 137 cm) before blocking.
Scallop Hem (Rounds 34 and 35)
Round 34:
In each arch from Round 33: work (sc, ch 3, dc, ch 3, sc) to create a picot-like bridge. Ch 3 between arches. Sl st to join.
Round 35 (Scallop edging):
*Into each ch-3 center space from Round 34: work (sc, hdc, dc, hdc, dc, hdc, dc, hdc, sc) for a 9-stitch scallop.
Sl st into base of sc at start of scallop to tack gently, then sc between scallops into the ch-3 bridge.
Rep from * around entire hem.
Sl st to join. Fasten off. (48 scallops total)
Checkpoint 6: After the hem, the total skirt length should be approximately 41 inches (104 cm). The scalloped hem circumference after blocking should be approximately 54 inches (137 cm).
Section 3: Shoulder Straps with Flutter Ruffles
The dress has two straps. Each consists of a narrow inner support strap and an outer ruffle band that creates the flutter/wing effect. Make 2 identical straps.
Strap Cord
Chain 100 (approximately 12 to 13 inches unstretched).
Row 1: Sc in 2nd ch from hook and in each ch across. (99 sc)
Fasten off, leaving a 12-inch tail for attachment. Set aside.
Ruffle Band
Chain 25.
Row 1: Sc in 2nd ch from hook and in each ch across. (24 sc)
Row 2: Ch 1, turn. In each sc, work (sc, ch 2, sc). (48 ch-2 spaces)
Row 3: Ch 1, turn. In each ch-2 sp, work (sc, hdc, dc, hdc, sc). (48 ruffle units, 240 stitches)
Fasten off, leaving a 10-inch tail.
Fold the ruffle band in half along its length so the ruffled edge fans out on both sides like wings. Whip stitch the center fold to the top of the strap cord at its midpoint.
Strap Attachment
Position each strap at the front top edge of the bodice, approximately 3 to 4 inches (7.5 to 10 cm) in from each side edge.
Using the long tails and a tapestry needle, sew the strap cord securely to the inside top edge of the bodice with at least 1 inch (2.5 cm) of attachment. Repeat at the back top edge of the bodice, pulling strap over the shoulder to determine comfortable length before securing. Trim excess or knot strap ends.
If using ribbon reinforcement: thread the ribbon through the strap cord chain openings and secure ribbon ends to the bodice interior with a sewing needle and thread.
Size Customization Tips
For a larger bust (36 to 38 inches): Increase the foundation chain to 324 stitches. The skirt setup round will create 13 or 14 pineapple repeats instead of 12.
For a smaller bust (28 to 30 inches): Decrease the foundation chain to 252 stitches. Begin the skirt with 10 pineapple repeats.
For a shorter dress (midi to knee): After Tier 3 (Round 24), work the scallop hem directly. Omit Tier 4 entirely. The dress will measure approximately 28 to 30 inches total length.
For a longer dress (maxi/floor length): After Tier 4, add Tier 5: work a complete third full pineapple tier over 48 positions, then apply the scallop hem. This adds approximately 9 to 10 inches to the skirt length.
Finishing and Blocking
Weaving in Ends
Weave all yarn ends on the wrong side, running each tail through at least 4 to 5 stitches in multiple directions. Do not cut ends shorter than 0.5 inch (1.25 cm).
Blocking (Essential for This Pattern)
1. Fill a basin with cool or lukewarm water. Add wool wash if desired.
2. Submerge the entire dress and gently press out air. Do not agitate or wring.
3. Let the dress soak for 20 to 30 minutes until fully saturated.
4. Lift carefully, supporting its full weight.
5. Gently roll in a clean dry towel and press to remove excess water. Do not twist.
6. Lay flat on blocking mats in the intended final shape.
7. Using rustproof pins, pin the 48 scallop hem points outward first.
8. Pin the side seam edges straight. Pin the top bodice edge straight. Measure and adjust.
9. Use pins to open each pineapple fan so the arch spaces are clearly visible.
10. Allow to dry completely, 12 to 24 hours. Do not move until fully dry.
After blocking, the pineapple lace will be significantly more open and the skirt circumference will increase by approximately 4 to 6 inches from its unblocked measurements.
You Made It!
Thank you so much for choosing this crochet lace dress pattern for your special project. Whether you’re making this for your own wedding, an engagement party, or a summer formal event, I hope every stitch brings you joy. This is the kind of project that becomes part of your story.
I would absolutely love to see your finished dress! Tag me on Instagram or share in my Facebook group. Seeing your creations is genuinely the best part of designing patterns.
If this pattern is calling to you, go ahead and save it to your Pinterest boards so you can find it when you’re ready to start. And once you’ve made this beautiful dress, please come back and leave a comment below. I can’t wait to hear how it turns out for you!