
I have been dreaming about this dress for months. When I sat down to design it, I had three goals in mind: create a stunning ombre gradient that mimics a sunset sky, incorporate sculptural texture that photographs beautifully, and add a show-stopping butterfly embellishment that transforms the whole piece into wearable art. Every decision, from the arch-and-fan stitch pattern to the asymmetrical wrap overlay, was intentional.
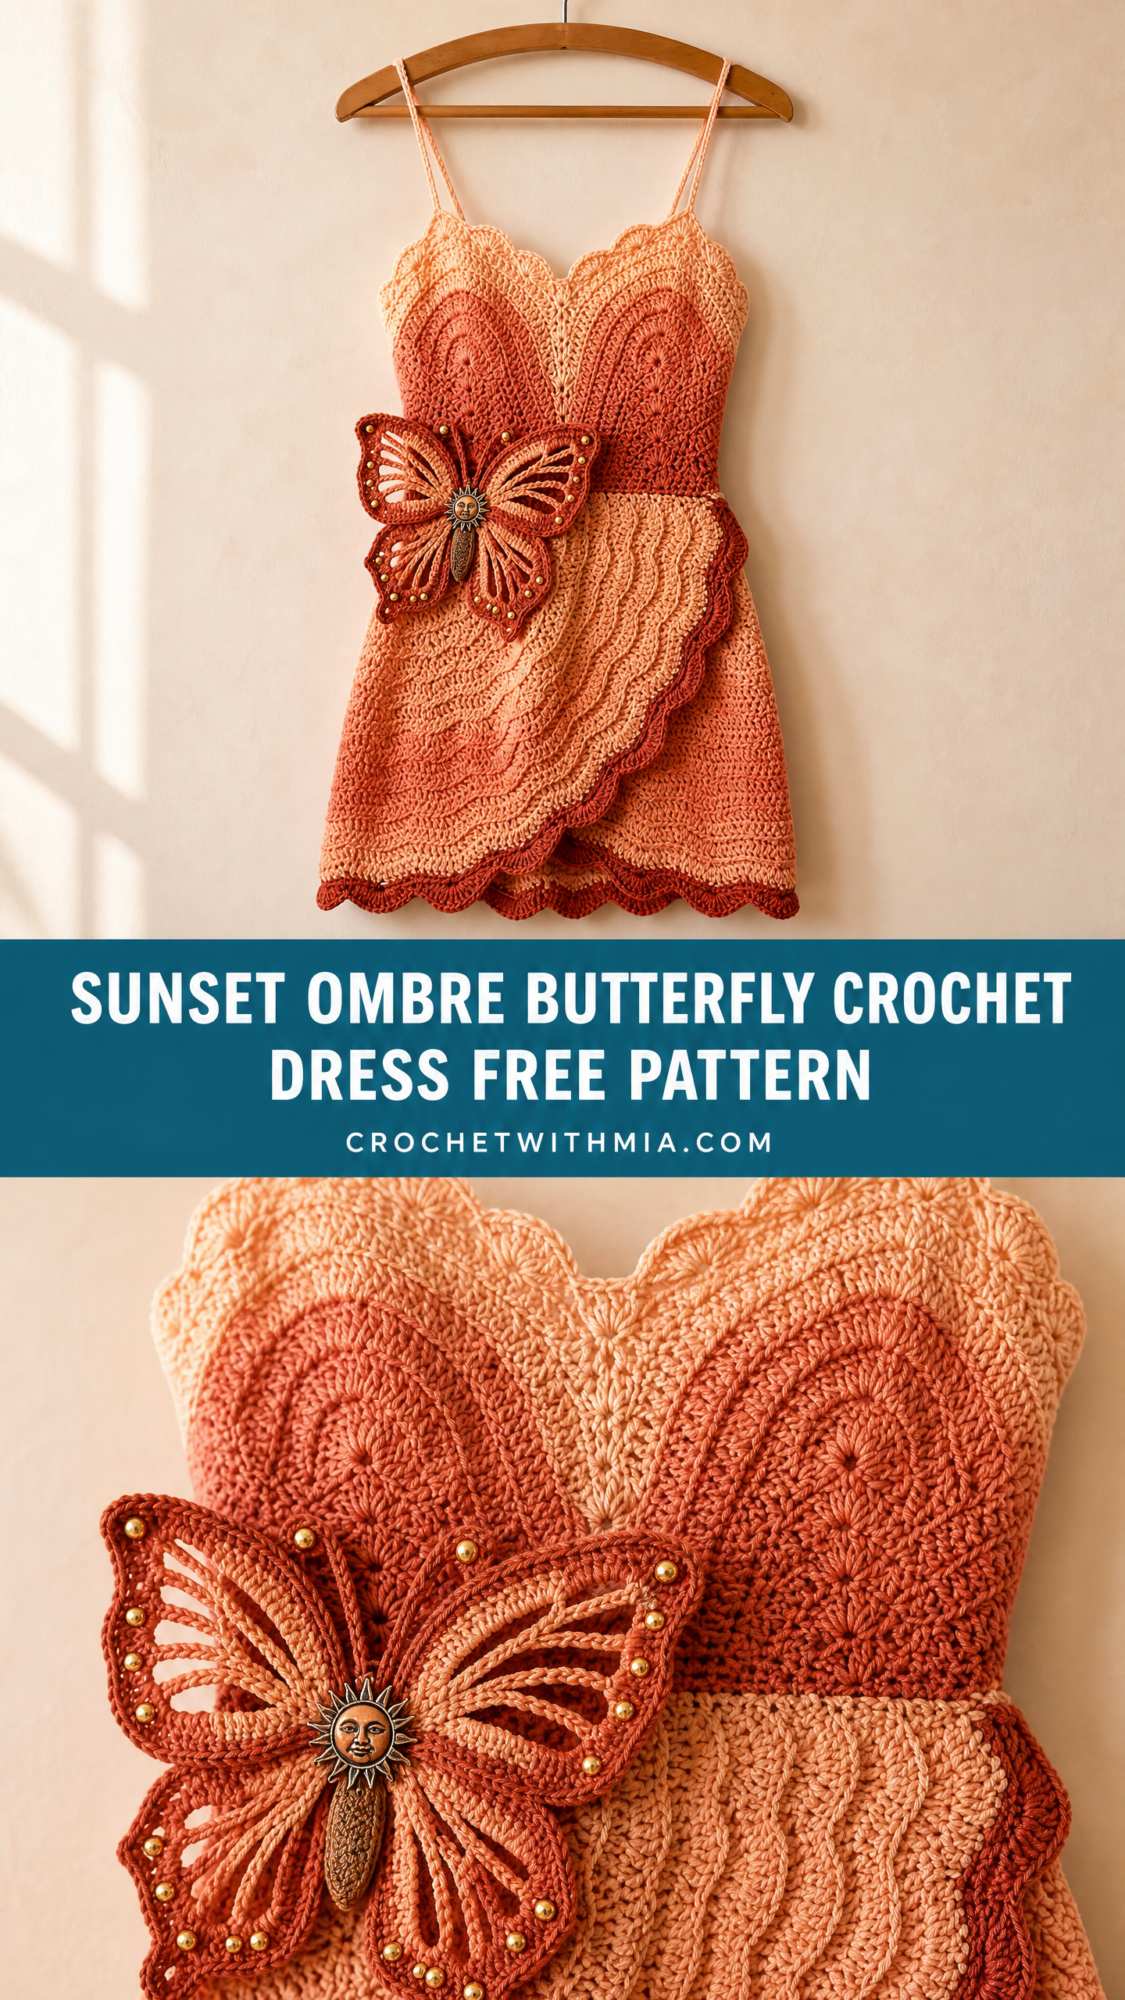
The sweetheart neckline? That took me four attempts to get the shaping just right. The three-dimensional butterfly with its wire-free stiffened wings? I must have crocheted a dozen versions before landing on this construction method.
I am SO pleased with how it turned out. This sunset ombre butterfly crochet dress is everything I hoped it would be, and I cannot wait to walk you through every single step.
About This Crochet Dress Pattern
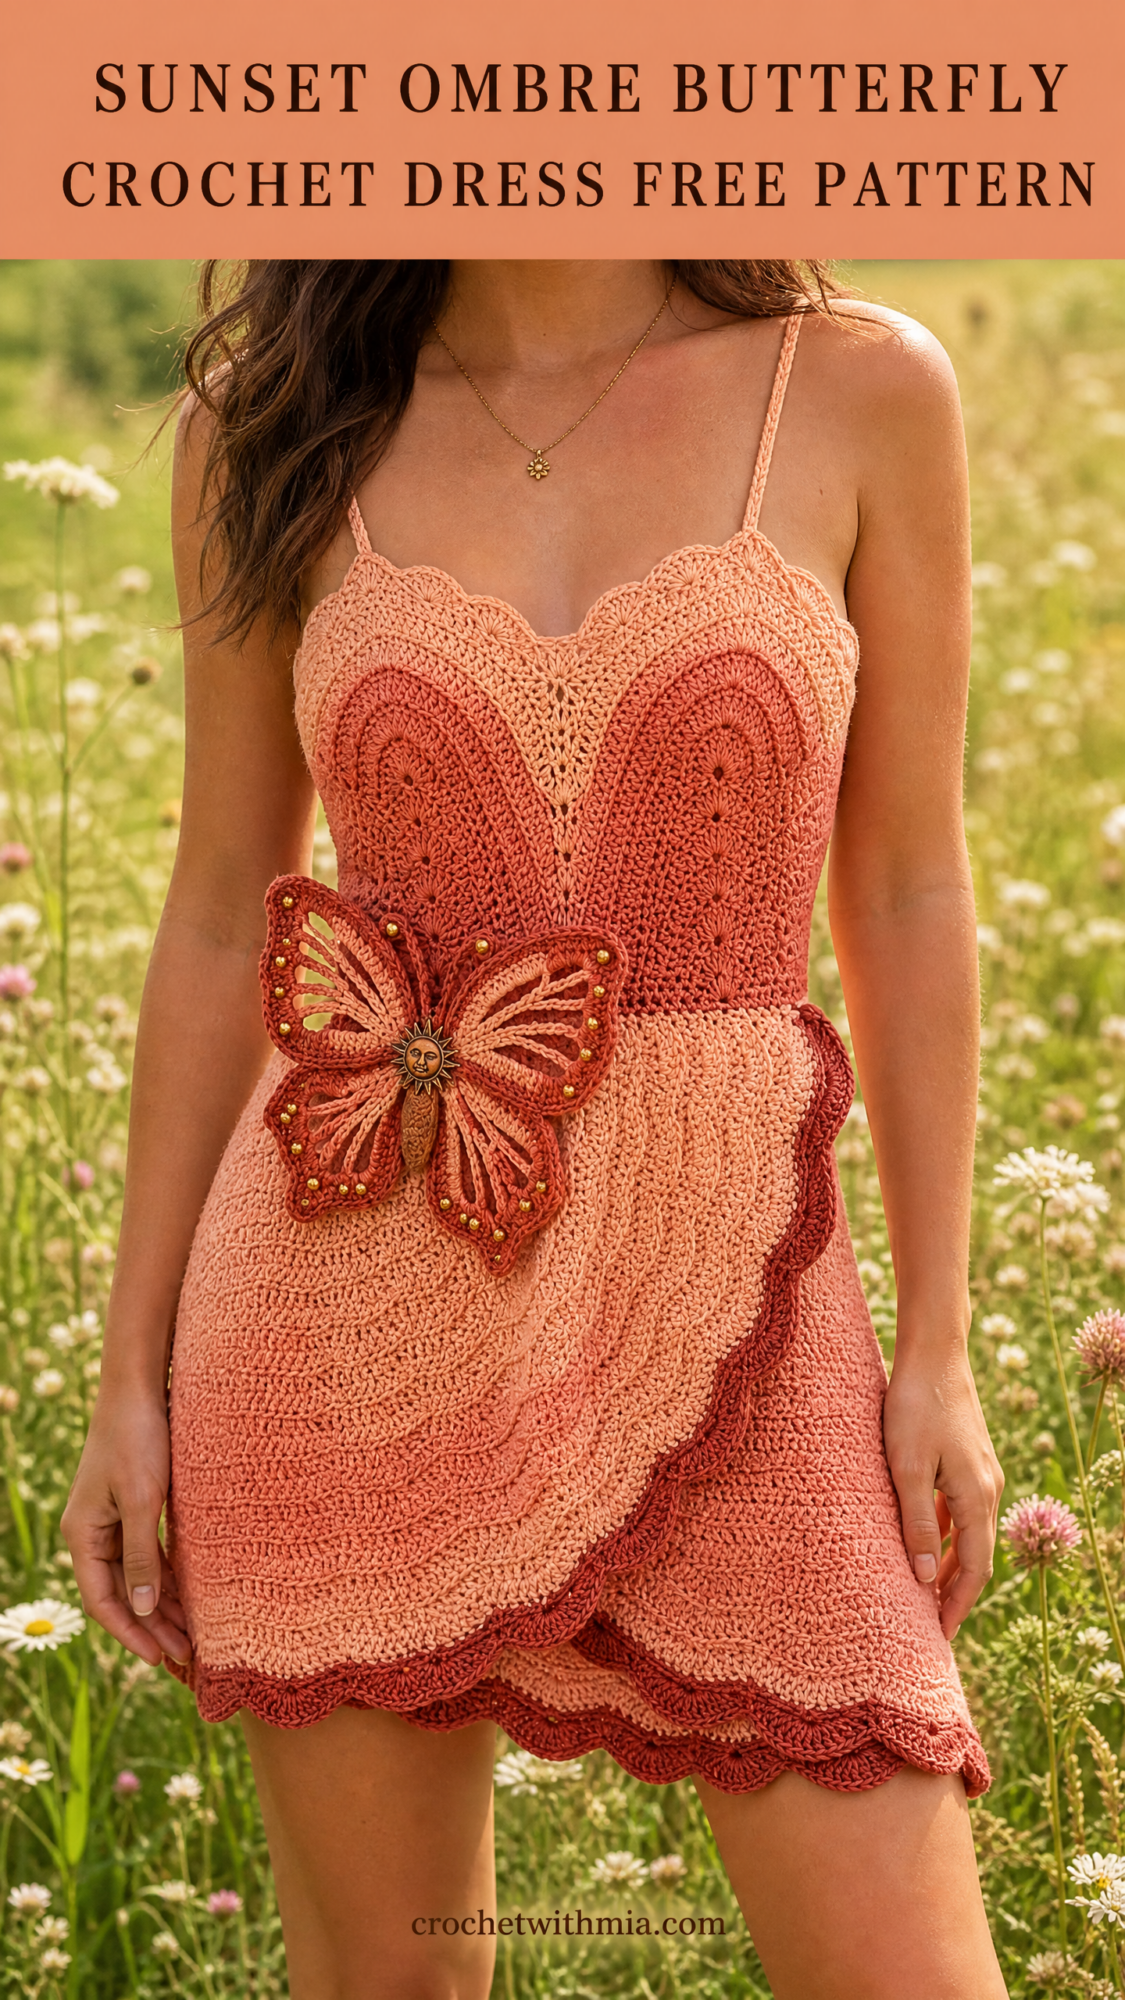
This mini dress features a fitted sweetheart bodice worked in a sculptural arch-and-fan stitch. The texture creates those gorgeous raised ridges you see flowing across the fabric. The tonal ombre effect graduates from deep terracotta at the hem and waistband up to soft peach at the bust, giving you that dreamy sunset vibe.
The skirt is worked separately from the bottom up, then joined at the waist. What makes this design extra special is the dramatic asymmetrical wrap overlay panel on the left hip. Scalloped edging borders everything: the bodice neckline, armhole edges, skirt hem, and that gorgeous overlay panel.
Two adjustable spaghetti straps tie at the back for a customizable fit. And that focal embellishment? A large three-dimensional crocheted monarch-style butterfly applique attached at the left hip with a vintage button center. Trust me, people will ask you where you bought this dress.
Skill Level
This pattern is rated Advanced Intermediate. Here is what that means in practical terms.
You should be comfortable with reading a sweetheart neckline chart, executing an arch-and-fan textured stitch with staggered repeat placement, and managing a three-color ombre gradient without cutting yarn. The yarn gets carried up the side seam, which is simpler than it sounds.
You will also work a shaped asymmetrical overlay panel, crochet a three-dimensional butterfly with wire-free stiffened wings, and assemble multiple pieces with invisible seaming.
If you are a beginner or casual intermediate crocheter, make sure you are confident with increases, decreases, working in both rows and rounds, and joining techniques before diving in. This is not a quick weekend project, but every hour is worth it.
Time Estimate
Plan for approximately 35 to 50 hours total, depending on your experience level.
Here is the breakdown: the skirt tube takes 10 to 14 hours, the bodice runs 8 to 10 hours, and the waistband plus assembly adds another 3 to 4 hours. The overlay panel needs 5 to 6 hours, the butterfly applique requires 4 to 6 hours, and finishing plus blocking takes 3 to 5 hours.
I recommend breaking this into manageable sessions. Work the skirt over a week, then tackle the bodice the following week. The butterfly makes a perfect "TV project" for when you want something portable.
Finished Measurements
Size: Small to Medium (US dress size 4 to 10)
Bust circumference at top of bodice: 30 to 34 in / 76 to 86 cm (with 2 to 4 in / 5 to 10 cm of ease in spaghetti strap adjustment)
Natural waist circumference: 26 to 28 in / 66 to 71 cm
Hip circumference at widest: 34 to 38 in / 86 to 97 cm
Total length from highest point of sweetheart bust to hem: approximately 26 in / 66 cm
Bodice height (bust to waist): 7 in / 18 cm
Skirt height (waist to hem, excluding scallop): 13 in / 33 cm
Scallop hem depth: 1 in / 2.5 cm
Waistband height: 1.5 in / 4 cm
Materials Needed
Yarn
You will need three colors in DK weight (Light 3) yarn. I recommend 100 percent cotton or a cotton-linen blend for the body, stitch definition, and drape this pattern requires.
Color A (Deep Terracotta): 350 yd / 320 m
Color B (Warm Coral / Mid Tone): 400 yd / 366 m
Color C (Soft Blush Peach): 300 yd / 274 m
Yarn Suggestions
Option 1: Lion Brand 24/7 Cotton in shades Terracotta, Peach Cobbler, and Blush. This mercerized cotton offers excellent stitch definition and is widely available at major craft retailers.
Option 2: WeCrochet Dishie in shades Terracotta, Blush, and Almond. This 100 percent cotton DK yarn has beautiful sheen and relaxed drape that enhances the flowing skirt silhouette.
Option 3: Paintbox Yarns Cotton DK in shades Coral Blush, Melon Sorbet, and Vanilla Cream. Budget-friendly with precise dye lots and smooth texture.
Substitution note: Choose any DK weight cotton or cotton-blend that achieves gauge. Avoid fuzzy, hairy, or overly stretchy fibers. Bamboo blends add more drape, which will elongate the skirt. Always swatch in the arch-and-fan stitch pattern, not just single crochet.
Hooks
US Size E-4 / 3.5 mm (primary hook for stitch body)
US Size D-3 / 3.25 mm (edging, scallop borders, and butterfly)
Notions
Gauge
Gauge is mandatory for this garment. A difference of even half a stitch per inch will cause the dress to be too large or too small to wear.
With US E-4 / 3.5 mm hook in arch-and-fan stitch pattern:
In single crochet (sc):
Make a swatch of at least 24 stitches wide and 12 rows tall in arch-and-fan stitch before beginning. I know swatching feels tedious, but for a fitted garment like this, it is essential.
Abbreviations
Let me walk you through every abbreviation used in this pattern. If you are new to reading patterns, bookmark this section.
ch: chain. Wrap yarn over hook and pull through the loop on hook.
sl st: slip stitch. Insert hook, yarn over, pull through both loops at once.
sc: single crochet. Insert hook, yarn over, pull up a loop (2 loops on hook), yarn over, pull through both loops.
sc2tog: single crochet two together. A decrease stitch. Insert hook in first stitch, pull up loop, insert hook in next stitch, pull up loop (3 loops on hook), yarn over, pull through all 3 loops.
dc: double crochet. Yarn over, insert hook, yarn over, pull up loop, yarn over, pull through 2 loops, yarn over, pull through remaining 2 loops.
hdc: half double crochet. Yarn over, insert hook, pull up loop (3 loops), yarn over, pull through all 3 loops.
st(s): stitch(es)
ch-sp: chain space. The gap created by a chain in the previous row.
sk: skip. Pass over the indicated stitch without working into it.
t-ch: turning chain. The chain(s) worked at the beginning of a row to bring hook to correct height.
RS: right side. The side that faces outward when worn.
WS: wrong side. The side that faces your body when worn.
BLO: back loop only. Work into only the back loop of the stitch.
FLO: front loop only. Work into only the front loop.
pm: place marker
rep: repeat
rnd: round
rem: remaining
beg: beginning
yo: yarn over
Special Stitches
Arch-and-Fan Stitch (worked flat, multiple of 12 stitches plus 3)
This stitch creates arching raised ridges that fan out from a central single crochet anchor point. It produces the sculptural wave pattern visible across the skirt and bodice.
Foundation: Any row of single crochet worked in the required stitch count.
Set-Up Row (RS): Ch 3 (counts as first dc), turn. Work 2 dc in first st. Skip 2 sts. Sc in next st. Skip 2 sts, 5 dc in next st, skip 2 sts, sc in next st. Repeat from * across to last 3 sts. Skip 2 sts. 3 dc in last st.
Return Row (WS): Ch 1, turn. Sc in first dc. Ch 3, sc in center dc of next 5-dc fan. Repeat from * across, ending sc in top of t-ch.
Fan Row (RS): Ch 3 (counts as dc), turn. 2 dc in first sc. Sc in ch-3 arch, 5 dc in next sc anchor. Repeat from * across, ending 3 dc in last sc.
These three rows repeat to form the full arch-and-fan fabric. Each full repeat unit equals 2 rows of height.
Scallop Edging (multiple of 6 stitches plus 1, using smaller hook)
Step 1: Join yarn with a sl st in the first corner stitch at the right edge of the piece.
Step 2: Ch 1. Sc in same st.
Step 3: Skip 2 sts. 5 dc in next st. Skip 2 sts. Sc in next st. Repeat from * across edge, adjusting spacing at corners to keep edge flat.
Step 4: Fasten off and weave in ends.
Spaghetti Strap Cord (crocheted version)
Make a foundation chain of 3. Sl st in 3rd ch from hook to form a ring. Ch 3. Sl st in the same ring. Continue making ch 3 loops and slip stitching back in the ring to produce a twisted cord of desired length.
Alternatively, work a chain of 80 sts and sl st back in each chain for a simple flat cord, then fold and twist.
Pattern Notes Before You Begin
1. The dress is worked in three main sections: the skirt (worked in the round from the hem upward), the bodice (worked flat from the sweetheart neckline downward, then seamed), and the overlay hip panel (worked flat). All sections join at the waistband.
2. The ombre color gradient is achieved by carrying unused colors up the inside of the work and switching at the start of a new color section, approximately every 6 to 8 rows. No color blending or stranding required.
3. Color placement: Color A (Terracotta) is used for the hem scallop, the lower 8 rows of the skirt, the waistband, and the butterfly. Color B (Coral) covers the mid skirt and upper skirt rows. Color C (Peach) is used for the upper bodice, sweetheart neckline edge, and strap cords.
4. Turning chains: Ch 3 counts as first dc throughout. Ch 1 counts as first sc in scallop and edging rows only.
5. RS and WS matter for the arch-and-fan stitch because the raised ridges appear on the RS only.
Section 1: Skirt Instructions
The skirt is worked in the round from the hem upward. The arch-and-fan stitch is adapted for circular work by eliminating turning chains and maintaining consistent RS-outward orientation.
Skirt Foundation
With Color A and larger hook (3.5 mm), ch 192. Taking care not to twist, sl st in first ch to form a ring. (192 ch)
Rnd 1 (foundation sc rnd): Ch 1 (does not count as st). Sc in each ch around. Sl st to first sc to join. (192 sc)
Note: 192 is divisible by 12 (192 ÷ 12 = 16 repeats). This produces a hip circumference of approximately 36 in / 91 cm at gauge.
Skirt Scallop Hem (Color A, smaller hook)
Before working upward, work the scallop hem downward into the foundation chain loops.
Turn work upside down so the foundation chain faces up. With Color A and smaller hook (3.25 mm), join yarn in any unused loop of the foundation chain.
Scallop Rnd: Ch 1. Sc in same st. Skip 2 sts. 5 dc in next st. Skip 2 sts. Sc in next st. Repeat from * 32 times around, adjusting to end exactly at beg sc. Sl st to first sc to join. (32 scallop shells)
Note: 192 stitches ÷ 6 stitches per scallop repeat = 32 scallops exactly. Fasten off Color A. Turn work right-side up again.
Skirt Body (worked in the round in arch-and-fan stitch)
Because this is worked in the round without turning, the arch-and-fan pattern adjusts as follows:
Rnd A (fan rnd): Ch 3 (counts as dc). 2 dc in same st. Sc in next st after skipping 2, 5 dc in next st skipping 2 sts before and after. Repeat from * around, ending with 2 dc in same st as beg ch-3. Sl st to top of beg ch-3. (16 fans of 5 dc each, 16 single sc anchors)
Rnd B (arch rnd): Ch 1. Sc in same sl-st join. Ch 3, sc in center dc of next fan. Repeat from * 16 times around. Ch 3. Sl st to first sc. (16 arches, 16 sc)
Rnd C (fan rnd): Ch 3. 2 dc in first sc. Sc in next ch-3 arch, 5 dc in next sc. Repeat from * 15 times around. Sc in last arch. Sl st to top of beg ch-3. (16 fans, 16 sc)
Color Sequence for Skirt Rounds
Rnds 1 to 6: Color A (Terracotta). Work Rnds A, B, C twice (6 rnds total).
Rnds 7 to 12: Color B (Coral). Work Rnds A, B, C twice (6 rnds total).
Rnds 13 to 18: Color B (Coral). Work Rnds A, B, C twice (6 rnds total).
Rnds 19 to 24: Color B (Coral). Work Rnds A, B, C twice (6 rnds total).
Rnds 25 to 30: Color B (Coral). Work Rnds A, B, C twice.
The skirt has 30 rounds of arch-and-fan pattern, producing approximately 15 in / 38 cm of skirt height before the waistband.
At the end of Rnd 30, do not fasten off. Change to Color A.
Skirt Waist Reduction
Rnd 31: With Color A and larger hook, ch 1. Sc in each dc and sc around, skipping the ch-3 arch spaces and working into the base dc anchors. Work approximately 168 sc evenly. To achieve 168 sc from 192 positions, work sc2tog approximately every 8 sts: sc in 7 sts, sc2tog. Repeat from * 24 times. (168 sc)
Rnd 32: Ch 1. Sc in each sc around. (168 sc)
Rnd 33: Ch 1. Sc in 5 sts, sc2tog. Repeat from * 24 times. (144 sc)
Rnd 34: Ch 1. Sc in each sc around. (144 sc)
Checkpoint 1: After Rnd 34, the skirt tube should measure approximately 16 to 17 in / 41 to 43 cm tall from the foundation chain. The skirt opening at the top should have 144 stitches. Do not fasten off. Set skirt aside.
Section 2: Bodice Instructions
The bodice is worked flat in rows from the sweetheart neckline edge downward toward the waist.
Bodice Front Left Cup
With Color C and larger hook, ch 28.
Row 1 (RS): Sc in 2nd ch from hook and each ch across. (27 sc)
Row 2 (WS): Ch 1, turn. Sc across. (27 sc)
Row 3 (RS): Ch 1, turn. Sc across to last 2 sts. Sc2tog. (26 sc)
Row 4 (WS): Ch 1, turn. Sc across. (26 sc)
Row 5 (RS): Ch 1, turn. Sc across to last 2 sts. Sc2tog. (25 sc)
Row 6 (WS): Ch 1, turn. Sc across. (25 sc)
Row 7 (RS): Ch 1, turn. Sc across to last 2 sts. Sc2tog. (24 sc)
Row 8 (WS): Ch 1, turn. Sc across. (24 sc)
Row 9 (RS): Ch 1, turn. Sc across to last 2 sts. Sc2tog. (23 sc)
Row 10 (WS): Ch 1, turn. Sc across. (23 sc)
Do not fasten off. Set aside.
Bodice Front Right Cup
With Color C and larger hook, ch 28.
Row 1 (RS): Sc in 2nd ch from hook and each ch across. (27 sc)
Row 2 (WS): Ch 1, turn. Sc across. (27 sc)
Row 3 (RS): Ch 1, turn. Sc2tog. Sc across. (26 sc)
Row 4 (WS): Ch 1, turn. Sc across. (26 sc)
Row 5 (RS): Ch 1, turn. Sc2tog. Sc across. (25 sc)
Row 6 (WS): Ch 1, turn. Sc across. (25 sc)
Row 7 (RS): Ch 1, turn. Sc2tog. Sc across. (24 sc)
Row 8 (WS): Ch 1, turn. Sc across. (24 sc)
Row 9 (RS): Ch 1, turn. Sc2tog. Sc across. (23 sc)
Row 10 (WS): Ch 1, turn. Sc across. (23 sc)
Join Front Cups
Row 11 (RS): With RS facing and a new strand of Color C, work across right cup: Ch 1. Sc across 23 sts. Ch 2 (center front bridge). Sc across 23 sts of left cup. (48 sc plus 2 ch = 50 working sts)
The ch-2 bridge creates the center dip of the sweetheart neckline.
Row 12 (WS): Ch 1, turn. Sc in each sc and 2 sc in ch-2 sp, adjusting to end with 51 sc total. (51 sc)
Continue working the bodice front body in arch-and-fan stitch, transitioning through Colors C, B, and A as you work downward toward the waist.
Section 3: Butterfly Applique
This three-dimensional butterfly is assembled from 4 wing pieces and 1 body piece.
Upper Wing (make 2)
With Color A and smaller hook (3.25 mm), ch 16.
Row 1 (RS): Sc in 2nd ch from hook and in each ch across. (15 sc)
Row 2: Ch 1, turn. 2 sc in first st. Sc across to last st. 2 sc in last st. (17 sc)
Row 3: Ch 1, turn. 2 sc in first st. Sc across to last st. 2 sc in last st. (19 sc)
Row 4: Ch 1, turn. 2 sc in first st. Sc across to last st. 2 sc in last st. (21 sc)
Rows 5-6: Ch 1, turn. Sc across. (21 sc)
Row 7: Ch 1, turn. Sc2tog. Sc across to last 2 sts. Sc2tog. (19 sc)
Row 8: Ch 1, turn. Sc2tog. Sc across to last 2 sts. Sc2tog. (17 sc)
Row 9: Ch 1, turn. Sc2tog. Sc across to last 2 sts. Sc2tog. (15 sc)
Row 10: Ch 1, turn. Sc2tog. Sc across to last 2 sts. Sc2tog. (13 sc)
Work scallop edging around the outer curved edge of the wing. Fasten off.
Lower Wing (make 2)
With Color A and smaller hook, ch 22.
Row 1 (RS): Sc in 2nd ch from hook and in each ch across. (21 sc)
Row 2: Ch 1, turn. 2 sc in first st. Sc across to last st. 2 sc in last st. (23 sc)
Row 3: Ch 1, turn. 2 sc in first st. Sc across to last st. 2 sc in last st. (25 sc)
Row 4: Ch 1, turn. 2 sc in first st. Sc across to last st. 2 sc in last st. (27 sc)
Row 5: Ch 1, turn. 2 sc in first st. Sc across to last st. 2 sc in last st. (29 sc)
Rows 6-7: Ch 1, turn. Sc across. (29 sc)
Row 8: Ch 1, turn. Sc2tog. Sc across to last 2 sts. Sc2tog. (27 sc)
Row 9: Ch 1, turn. Sc2tog. Sc across to last 2 sts. Sc2tog. (25 sc)
Row 10: Ch 1, turn. Sc2tog. Sc across to last 2 sts. Sc2tog. (23 sc)
Row 11: Ch 1, turn. Sc2tog. Sc across to last 2 sts. Sc2tog. (21 sc)
Row 12: Ch 1, turn. Sc2tog. Sc across to last 2 sts. Sc2tog. (19 sc)
Row 13: Ch 1, turn. Sc2tog. Sc across to last 2 sts. Sc2tog. (17 sc)
Work scallop edging around curved outer edge. Fasten off.
Butterfly Body
With Color A and smaller hook, ch 4.
Row 1: Sc in 2nd ch from hook and next 2 ch. (3 sc)
Row 2: Ch 1, turn. 2 sc in first st. Sc in next. 2 sc in last. (5 sc)
Rows 3-6: Ch 1, turn. Sc across. (5 sc)
Row 7: Ch 1, turn. Sc2tog. Sc in next. Sc2tog. (3 sc)
Row 8: Ch 1, turn. Sc across. (3 sc)
Row 9: Ch 1, turn. Sc2tog. Sc in last. (2 sc)
Row 10: Ch 1, turn. Sc2tog. (1 sc)
Fasten off, leaving a tail for assembly.
Butterfly Assembly
Using Color B threaded on tapestry needle, embroider 3 to 4 straight stitches radiating from the wing body attachment point outward on each wing to create vein detail.
Arrange two upper wings with RS facing outward, straight edges meeting at center. Whipstitch straight edges together. Repeat for two lower wings.
Layer lower wing pair behind upper wing pair and tack at center. Place body piece over center join, RS up, and sew down securely.
Sew button or brooch through all layers at center body. Apply fabric stiffener to wing surfaces if desired and allow to dry flat.
Finishing and Assembly
Block all pieces before assembly. Wet blocking works best for cotton yarn. Pin the skirt tube flat, spray thoroughly, and let dry completely.
Seam the bodice at the sides using mattress stitch for an invisible join. Attach the bodice to the skirt at the waistband, working through both layers with single crochet to create a sturdy join.
Work the scallop edging around the sweetheart neckline and armhole edges using the smaller hook and Color C.
Attach spaghetti straps at the front corners of the bodice. The straps should tie at the back for adjustability.
Finally, position the butterfly applique at the left hip and secure with small whipstitches around the body. The button center adds both decoration and structural support.
Care Instructions
Hand wash in cool water with mild detergent. Lay flat to dry. Store on a padded hanger to maintain the sweetheart neckline shape. The butterfly can be removed before washing if attached with a pin instead of permanently sewn.
Thank you so much for choosing this pattern. This dress has been a labor of love, and I hope you enjoy every stitch of creating your own wearable art piece. If you make one, I would absolutely love to see it. Tag me on Instagram or share in our Facebook group.
Save this sunset ombre butterfly crochet dress pattern to your Pinterest boards so you can find it when you are ready to start. And please leave a comment below if you make one. I read every single one and it truly makes my day to see your creations come to life.