
When I sat down to design this romper, I had a clear vision in my mind. I wanted something that looked like it walked straight off a vintage summer runway. I wanted structured cups that actually hold their shape, vertical ribbing that flatters every curve, and that perfect butter yellow color that makes you feel like sunshine.
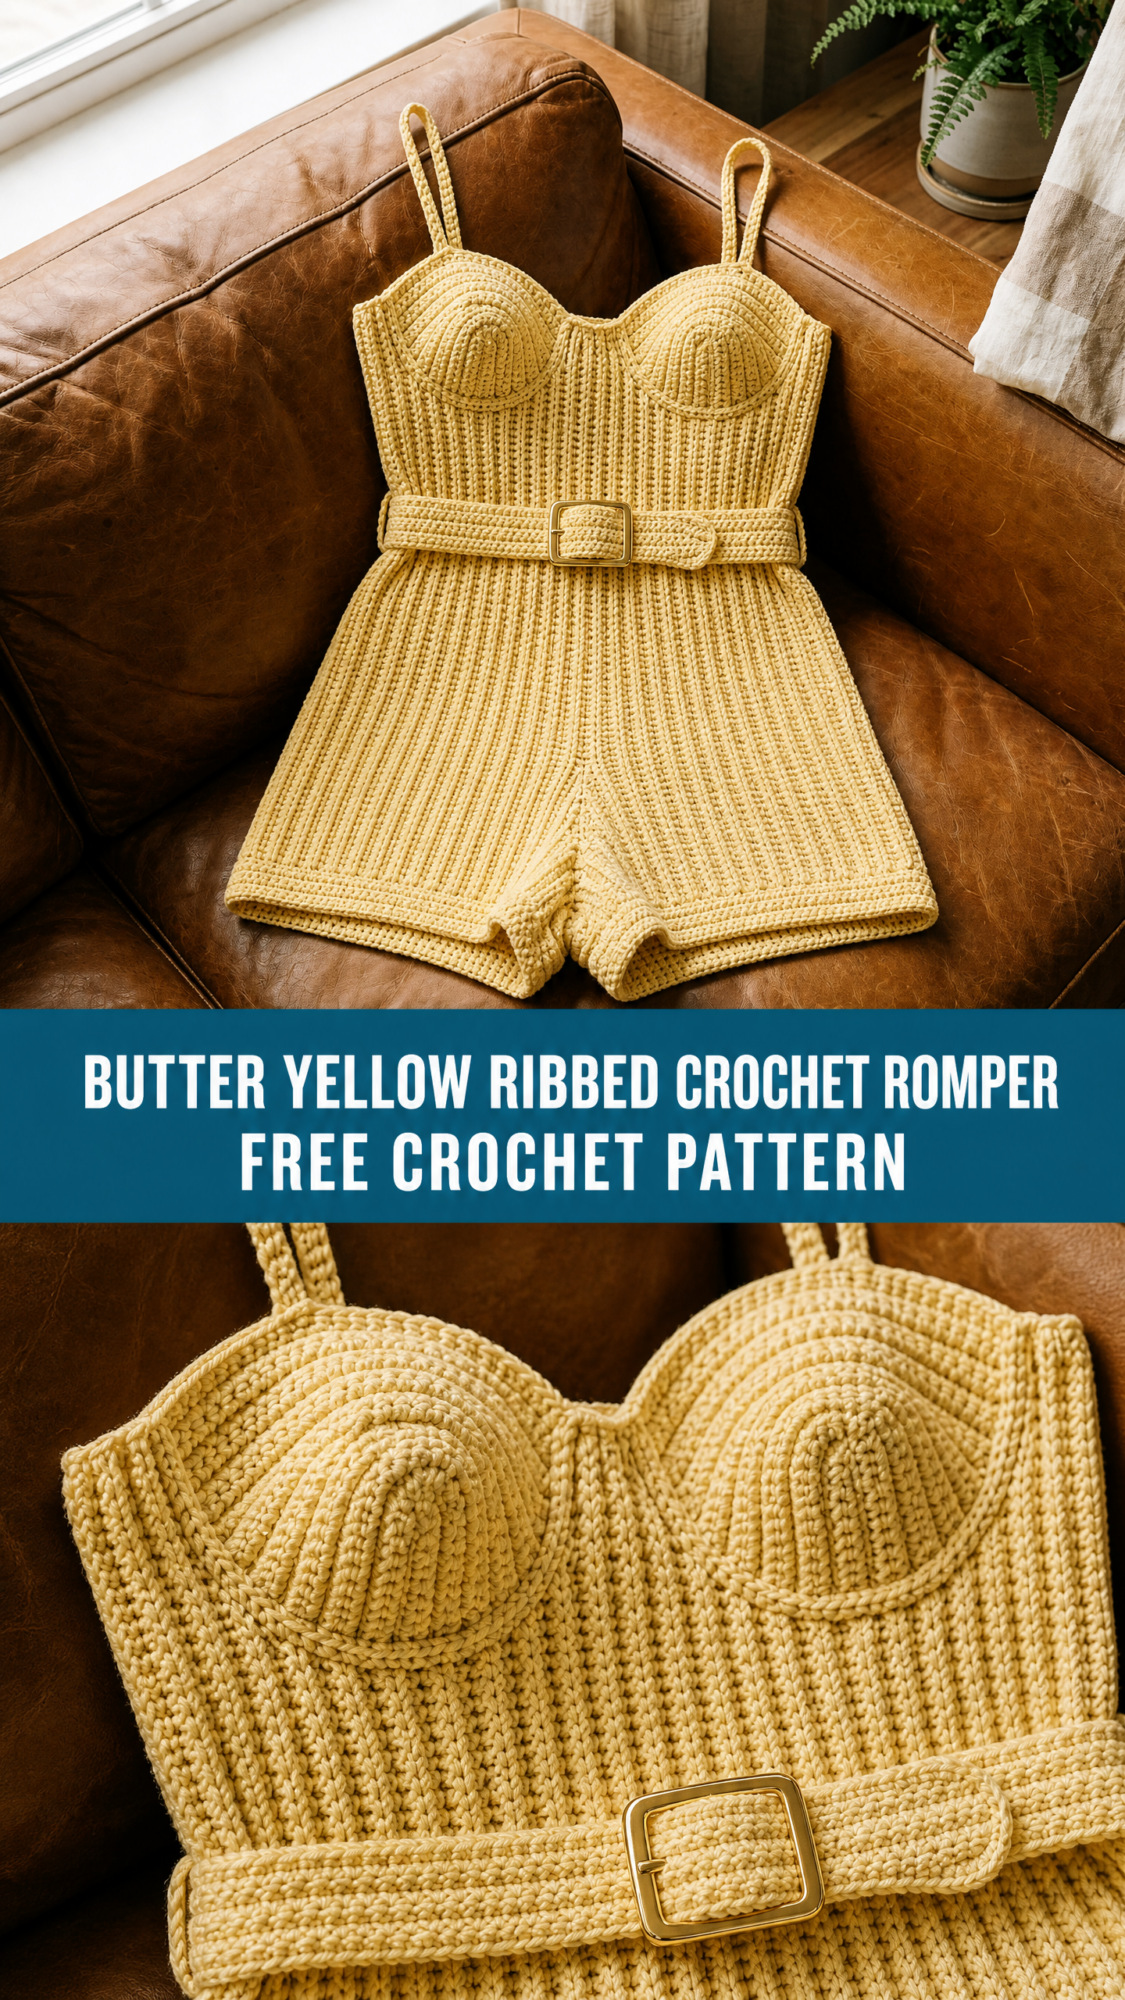
The design decisions came fast once I started sketching. Sideways construction for true vertical ribbing. Molded cups worked in the round. A removable belt with a square buckle for that cinched waist moment. Short shorts with just enough coverage.
I am SO pleased with how this turned out. The silhouette is everything I hoped for, and the construction is totally achievable if you have some garment-making experience under your belt. Let me walk you through every single step.
About This Crochet Romper Pattern
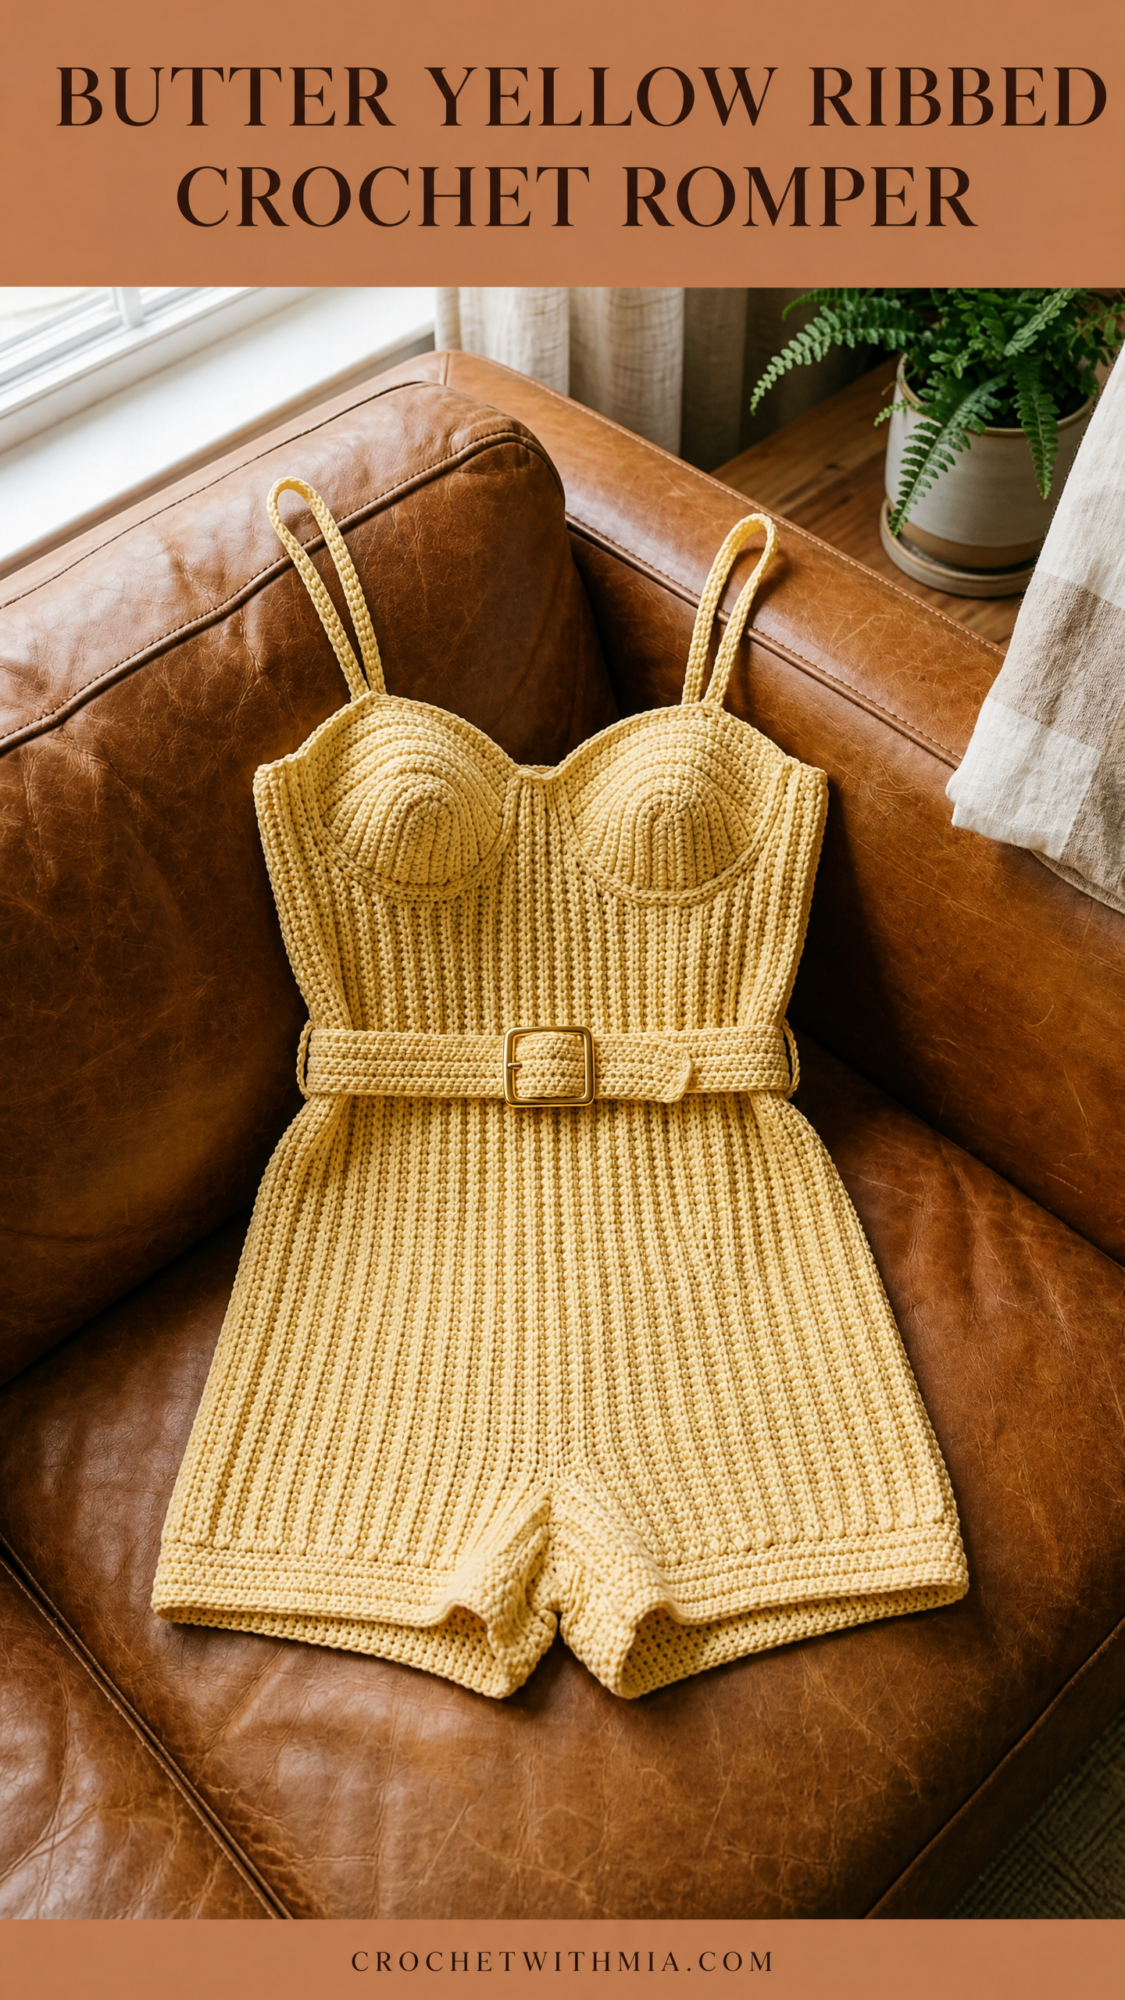
This butter yellow ribbed crochet romper features a bustier-style bodice with shaped cups, a fitted torso with gorgeous vertical ribbing, and tailored short shorts. The whole piece comes together in one cohesive butter yellow shade that photographs beautifully and wears even better.
The construction flows logically from top to bottom. You start with the cups, which are worked in the round using simple increases to create gentle domes. Then you work the bodice panels flat in back loop only single crochet, which creates that signature ribbed texture. The shorts panels come next, also worked flat. Finally, everything gets seamed together, and you add the straps and belt as finishing touches.
Skill level: Advanced Intermediate. You should be comfortable working in the round, creating flat ribbed panels, joining separately worked pieces, and basic garment construction. If you have made a crocheted top or dress before, you can absolutely handle this.
Time estimate: Plan for 25 to 35 hours of work, depending on your pace and how much time you spend on finishing details.
Finished Measurements
This pattern is written for size Small, which fits US sizes 4 to 6. Here are the key measurements:
I have included size customization tips at the end of the pattern if you need to adjust up or down.
Materials You Will Need
Yarn: Approximately 650 to 750 yards (595 to 685 meters) of DK weight cotton or cotton-blend yarn in butter yellow. I recommend smooth, non-fuzzy yarn so the ribbed texture shows clearly. Avoid boucle, chenille, or heavily textured options.
Great yarn choices include:
Hooks:
Notions:
Gauge Information
Getting gauge right is mandatory for this garment. Even one stitch difference per 4 inches will throw off the fit across the full circumference.
Main gauge using E-4 hook in back loop only single crochet, worked flat:
18 stitches x 22 rows = 4 inches (10 cm), blocked
Cup gauge using D-3 hook, worked in the round in single crochet:
5 rounds = 2.5 inches (6.5 cm) in diameter from center magic ring
Swatch, block your swatch, and measure carefully before starting. Cotton yarn can relax up to 5 percent after washing and blocking.
Abbreviations and Stitch Definitions
Let me walk you through every abbreviation used in this pattern. If you are newer to garment patterns, read this section carefully.
Special Techniques
BLO Ribbing Stitch: Insert your hook into the back loop only of the indicated stitch. Yarn over and pull up a loop. Yarn over and draw through both loops on hook. When worked consistently in rows, this creates raised ridges that read as vertical ribbing.
Slip Stitch Rib: Used at edges and cup seam lines for dense structure. Insert hook into back loop only of indicated stitch. Yarn over and draw through both the stitch and the loop on hook in one motion. Work this loosely compared to standard slip stitches.
Surface Slip Stitch: With the right side facing you and working yarn held behind the fabric, insert hook from front to back through any stitch. Pull a loop of working yarn through to the front, then through the loop on hook. Continue across indicated stitches. This adds a ridge line under the cups for definition.
Important Pattern Notes
Before you dive in, here are some key things to understand:
1. The ribbing runs vertically up and down the body. To achieve this, you work your rows horizontally, then the fabric orients so the rows become the width and the stitches become the height. This is called sideways rib construction.
2. In sideways construction, your starting chain length equals the HEIGHT of the panel, not the width. You add rows until the panel reaches the desired WIDTH.
3. All turning chains in this pattern count as chain only, not as a stitch, unless stated otherwise.
4. The right side of the fabric faces you on odd-numbered rows when working BLO single crochet flat.
5. The belt is worked separately and is not permanently attached to the romper. You can remove it if desired.
Crochet Pattern Instructions
Section 1: Cups (Make 2)
Work with your D-3 (3.25 mm) hook. Each cup is worked in a continuous spiral in the round using standard single crochet, not BLO. Do not join rounds unless instructed. Use a stitch marker to track round beginnings.
Rnd 1: Starting with a magic circle, work 6 sc into ring. Pull tail to close ring. Do not join. (6 sc)
Rnd 2: Inc in each st around. (12 sc)
Rnd 3: (Sc in next st, inc in next st) around. (18 sc)
Rnd 4: (Sc in next 2 sts, inc in next st) around. (24 sc)
Rnd 5: (Sc in next 3 sts, inc in next st) around. (30 sc)
Rnd 6: (Sc in next 4 sts, inc in next st) around. (36 sc)
Rnd 7: (Sc in next 5 sts, inc in next st) around. (42 sc)
Rnd 8: (Sc in next 6 sts, inc in next st) around. (48 sc)
Rnd 9: (Sc in next 7 sts, inc in next st) around. (54 sc)
Rnd 10: Sc in each st around. (54 sc) This round stabilizes the cup before edging.
Rnd 11: Sl st in each st around to create a firm edge. Fasten off, leaving a 12-inch (30.5 cm) tail for sewing.
Cup diameter after Rnd 10 should measure approximately 4.5 inches (11.5 cm). If your cup is larger or smaller, adjust hook size and rework.
Make 2 identical cups.
Checkpoint: Each finished cup should be a gently domed circle approximately 4.5 inches in diameter. The edges should lie flat when pressed, and the dome should hold its shape without puckering at the center.
Section 2: Bodice Front Panel
Switch back to your E-4 (3.5 mm) hook.
The bodice front panel is worked sideways in BLO sc ribbing. Remember, the starting chain equals the HEIGHT of the panel, and the number of rows equals the WIDTH.
Foundation Chain: Ch 32 (this gives 30 working stitches after turning, since the t-ch does not count as a stitch).
Row 1 (RS): Sc in 2nd ch from hook and in each ch across. Ch 1, turn. (30 sc)
Row 2 (WS): BLO sc in each st across. Ch 1, turn. (30 sc)
Row 3 (RS): BLO sc in each st across. Ch 1, turn. (30 sc)
Repeat Rows 2 and 3 alternately, working BLO sc every row, until you have completed a total of 94 rows from the foundation.
After Row 94, do not fasten off. Continue to waist shaping.
Section 3: Waist Shaping on Bodice Front
After Row 94, the panel sits with 30 sts in height. Work the following short rows to taper at the waist:
Short Row 1: BLO sc in first 21 sts. Ch 1, turn. (21 sc worked, 9 sts unworked)
Short Row 2: BLO sc in first 21 sts. Ch 1, turn. (21 sc)
Short Row 3: BLO sc in first 21 sts. Ch 1, turn. (21 sc)
Short Row 4: BLO sc in first 21 sts. Ch 1, turn. (21 sc)
Work 4 short rows on each end of the panel. This creates a slight curve inward at the waist, producing a combined 3.2-inch reduction that works with the belt cinching to create the fitted waist silhouette.
Fasten off. Weave in ends. Set front panel aside.
Section 4: Bodice Back Panel
Work the bodice back panel identically to the front panel through Row 94, then apply the same waist short rows. The back panel does not have cup attachment.
Foundation Chain: Ch 32. (30 working sts)
Work BLO sc in every row for 94 rows total. Work the waist short rows as described in Section 3. Fasten off.
Checkpoint: After completing both bodice panels, each should measure approximately 17 inches wide and 6.5 inches tall before short-row shaping. Together they form the full 34-inch bust circumference.
Section 5: Attaching Cups to Bodice Front
Hold one finished cup against the right side of the bodice front panel. Position the cup so its center is approximately 8.5 inches from each side edge, with cup centers approximately 3.5 inches apart from each other.
Using the 12-inch tail left on each cup and a tapestry needle, whipstitch the outer edge of the cup to the right side of the bodice front panel. Work all the way around the cup base, pulling snugly to ensure the cup dome stands away from the flat panel. Knot securely and weave in ends.
After both cups are attached, use your E-4 hook and a new length of yarn to work a surface slip stitch along the underside curve of each cup. This creates the defined ridge line beneath each cup that mimics an underwire channel.
Section 6: Joining Bodice Side Seams
Hold bodice front and bodice back panels with right sides together. Match up the long edges (the 94-row edges, which become the side seams). Using a tapestry needle and yarn, seam each side using mattress stitch along corresponding BLO ridges to keep seams invisible. Leave the top edge and bottom edge open.
After seaming both sides, the bodice forms a tube measuring 34 inches around at the bust and approximately 28 inches around at the waist.
Section 7: Shorts Front Panel
Foundation Chain: Ch 38. (36 working sts)
Row 1 (RS): Sc in 2nd ch from hook and in each ch across. Ch 1, turn. (36 sc)
Rows 2 through 99: BLO sc in each st across. Ch 1, turn. (36 sc)
Fasten off after Row 99. Set aside.
Section 8: Shorts Back Panel
The back panel has 2 additional inches of rise to accommodate back seat shaping.
Foundation Chain: Ch 47. (45 working sts)
Row 1 (RS): Sc in 2nd ch from hook and in each ch across. Ch 1, turn. (45 sc)
Rows 2 through 99: BLO sc in each st across. Ch 1, turn. (45 sc)
Fasten off after Row 99.
Checkpoint: Front panel measures approximately 18 inches wide and 8 inches tall. Back panel measures approximately 18 inches wide and 10 inches tall.
Section 9: Joining Bodice to Shorts
Hold the bodice so the open waist edge faces downward. Position the shorts front panel top edge along the waist edge of the bodice front.
Using your E-4 hook and working yarn, join the shorts front top edge to the bodice bottom edge using a slip stitch seam worked through both thicknesses with right sides facing outward.
Repeat to attach the shorts back panel to the bodice back waist edge.
Section 10: Shorts Side Seams and Leg Openings
After joining both shorts panels to the bodice, seam the shorts side seams. With right sides held together, mattress stitch the side edges of the shorts front and back panels together from waist to leg hem, stopping 3 inches from the bottom edge on each side to leave the leg opening.
Crotch Seam: Match the center-bottom edges of front and back. Seam from front hem center to back hem center, approximately 6 inches total, using mattress stitch.
Section 11: Leg Opening Edging
Using E-4 hook and working yarn, join yarn at the side seam of one leg opening.
Work 1 round of sc evenly around the entire leg opening circumference. Adjust sc spacing so the edge lies flat without puckering.
After completing 1 round sc, work 1 round BLO sc. Join with sl st to first st of round. Fasten off.
Repeat for other leg opening.
Section 12: Underarm and Bodice Top Edging
Using E-4 hook, join yarn at one side seam at the top edge of the bodice.
Round 1: Sc evenly around top edge of bodice. Approximately 152 sc. (152 sc)
Round 2: BLO sc in each st around. Join with sl st to first BLO sc. (152 sc)
Fasten off.
Section 13: Spaghetti Straps (Make 2)
Using E-4 hook, ch 110.
Row 1: Sc in 2nd ch from hook and in each ch across. Fasten off, leaving a 10-inch tail on each end. (109 sc)
Fold the top 0.5 inch of each strap end into a small loop and sew down securely. Attach the front end of each strap to the top bodice edge approximately 4 inches from center front. Attach the back end approximately 3.5 inches from center back. Try on to check strap length before final attachment.
Section 14: Belt
Using D-3 hook.
Foundation Chain: Ch 9. (7 working sts)
Row 1: Sc in 2nd ch from hook and in each ch across. Ch 1, turn. (7 sc)
Rows 2 through 176: BLO sc in each st across. Ch 1, turn. (7 sc)
After Row 176, fasten off and weave in ends. Finished belt measures approximately 32 inches long and 1.5 inches wide.
Section 15: Belt Buckle
To attach yarn to the buckle frame, hold the square buckle and join yarn at one corner with a sl st. Work sc closely around the entire frame, covering all four sides. Join with sl st when complete. Fasten off.
Alternatively, thread the belt end through a purchased buckle bar, fold the belt end back 1 inch, and whipstitch the fold down.
Final Checkpoint: The romper body is complete with cups attached, straps sewn on, and belt ready. Total length from strap tip to shorts hem should be 24 inches.
Size Customization Tips
To adjust bust size: Add or remove rows from the bodice panels. Each row adds approximately 0.18 inches to each panel width. For a 36-inch bust (Medium), add 11 rows per panel.
To adjust bodice length: Change the starting chain length. Each additional 2 stitches adds approximately 0.44 inches of height.
To adjust hip circumference: Add or remove rows from the shorts panels following the same math as the bust adjustment.
For plus sizes (XL and above): Increase both bodice and shorts panels by 12 to 24 rows per panel. For cup sizing above B, add 2 additional rounds to the cup before the stabilizing round. Increase strap length to 130 chains.
For petite heights: Reduce bodice panel starting chain by 4 stitches and reduce shorts panels by 4 stitches in height.
Blocking and Finishing
After all seams are joined, weave in all remaining ends securely.
Blocking: Wet block the finished romper by submerging in cool water for 10 minutes. Gently press out excess water in a clean towel. Do not wring. Lay flat on a blocking mat and pin to finished measurements. Shape the cups carefully to hold their dome dimension. Allow to dry completely, which takes 12 to 24 hours for cotton.
After blocking, the BLO ribbing will relax slightly and the fabric will gain drape and a polished appearance.
Care Instructions
Machine wash cold on gentle cycle. Lay flat to dry. Do not tumble dry, iron directly on crochet fabric, or dry clean. Expect slight relaxation after first wash with cotton yarn. The garment will return to shape when dried flat.
Store flat or rolled, not hung, to prevent stretching at the strap attachment points.
You Did It!
Thank you so much for making this butter yellow ribbed crochet romper with me. I truly hope you love wearing it as much as I loved designing it. This is one of those projects that feels so rewarding when you slip it on and see how beautifully the ribbing flatters and the cups hold their shape.
If you make this romper, I would absolutely love to see it! Tag me on Instagram or share your finished piece in my Facebook group. Seeing your versions is honestly the best part of sharing patterns.
Go ahead and save this crochet romper pattern to your Pinterest boards so you can find it easily when you are ready to start. And if you have any questions or want to share your progress, drop a comment below. I read every single one and I am always here to help.