
I don’t know about you, but I have a serious weakness for dramatic evening wear that looks like it belongs on a runway. The kind of piece that makes people stop and ask where you got it. The kind you can proudly say you made yourself.
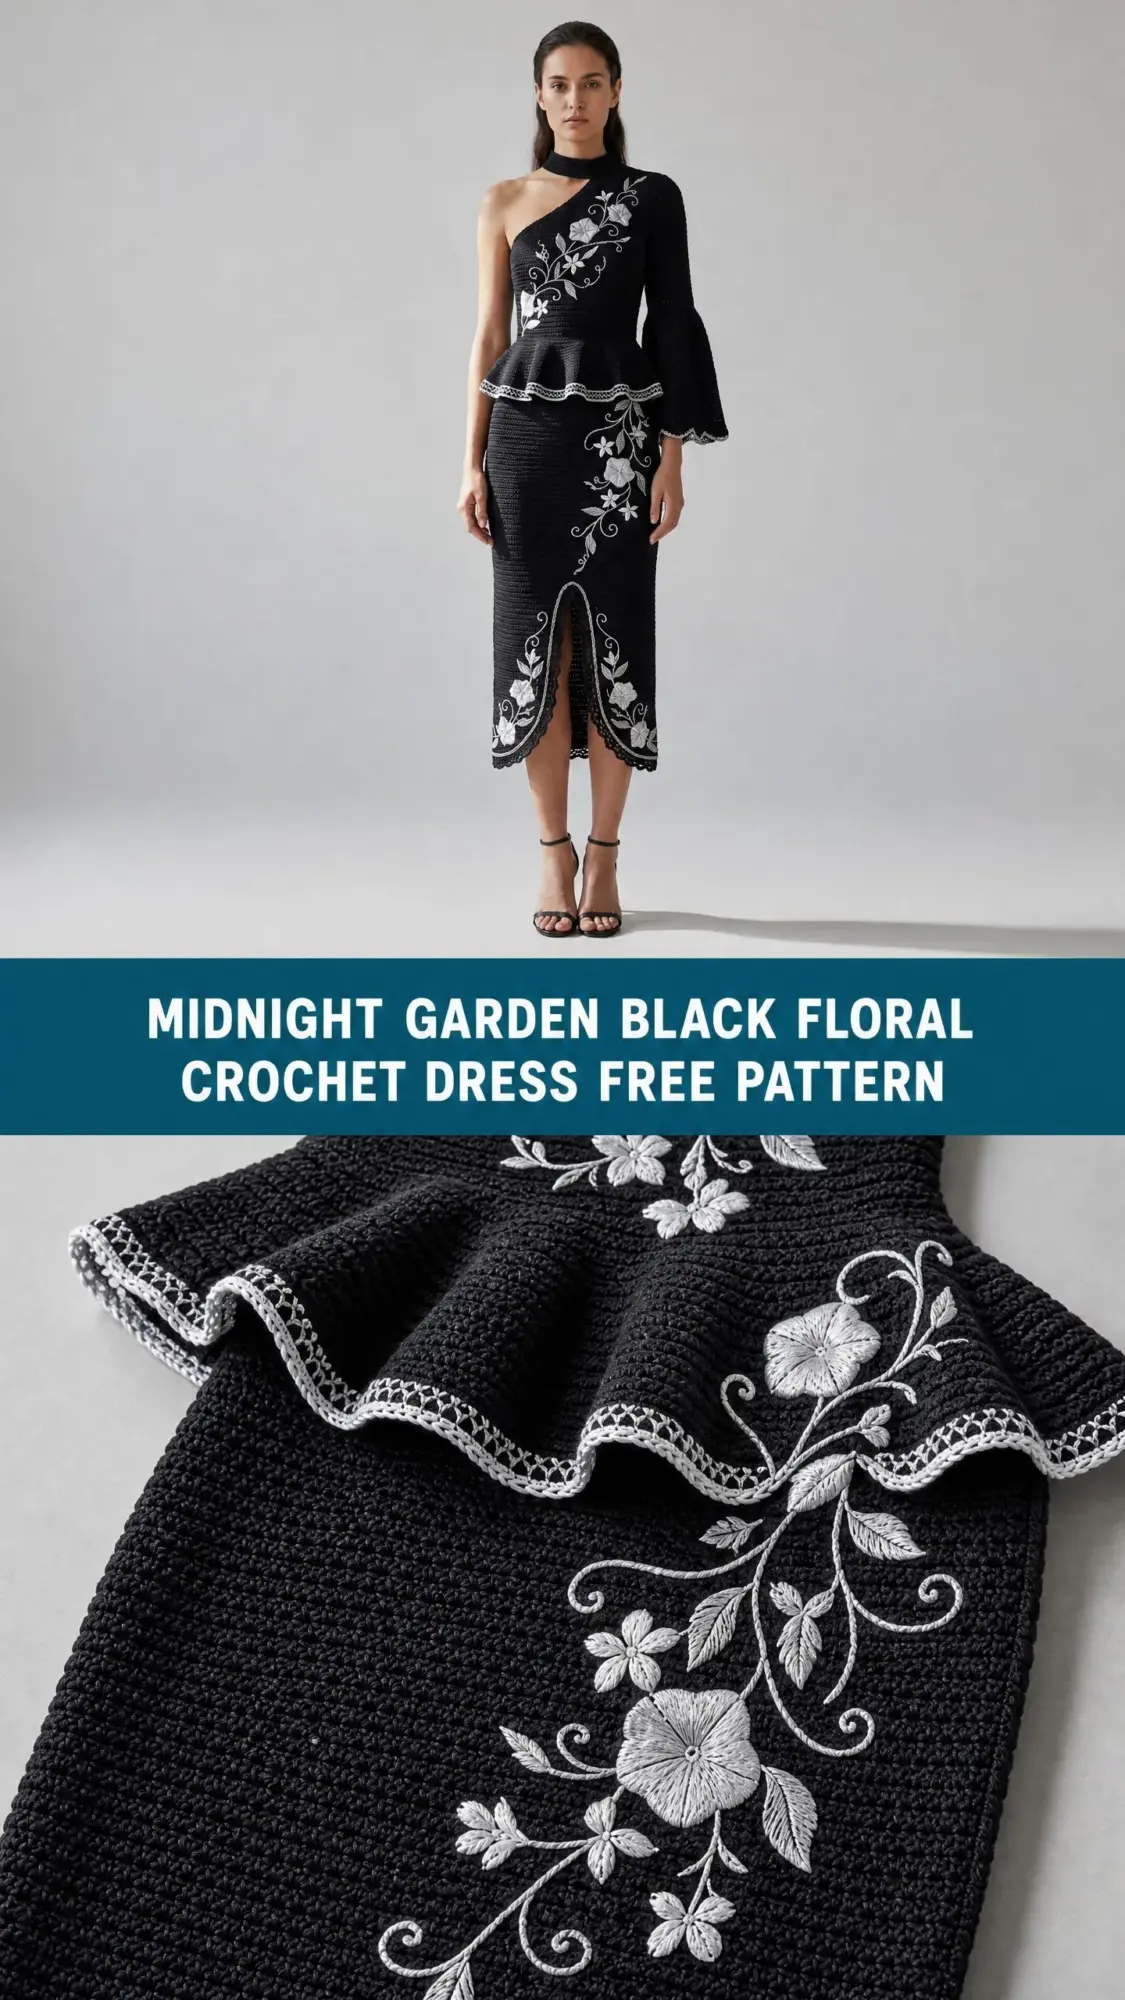
This two-piece crochet dress set delivers exactly that feeling. A one-shoulder peplum top with a choker neckband paired with a fitted midi skirt, both worked in fine black cotton with stunning silver-white floral embroidery. It’s bold, it’s elegant, and yes, you absolutely can make it.
Fair warning though. This is an advanced project that requires patience and skill. But if you’ve been craving a challenge that results in genuine wearable art, keep reading. I’m walking you through every single detail.
About This Midnight Garden Crochet Dress Pattern
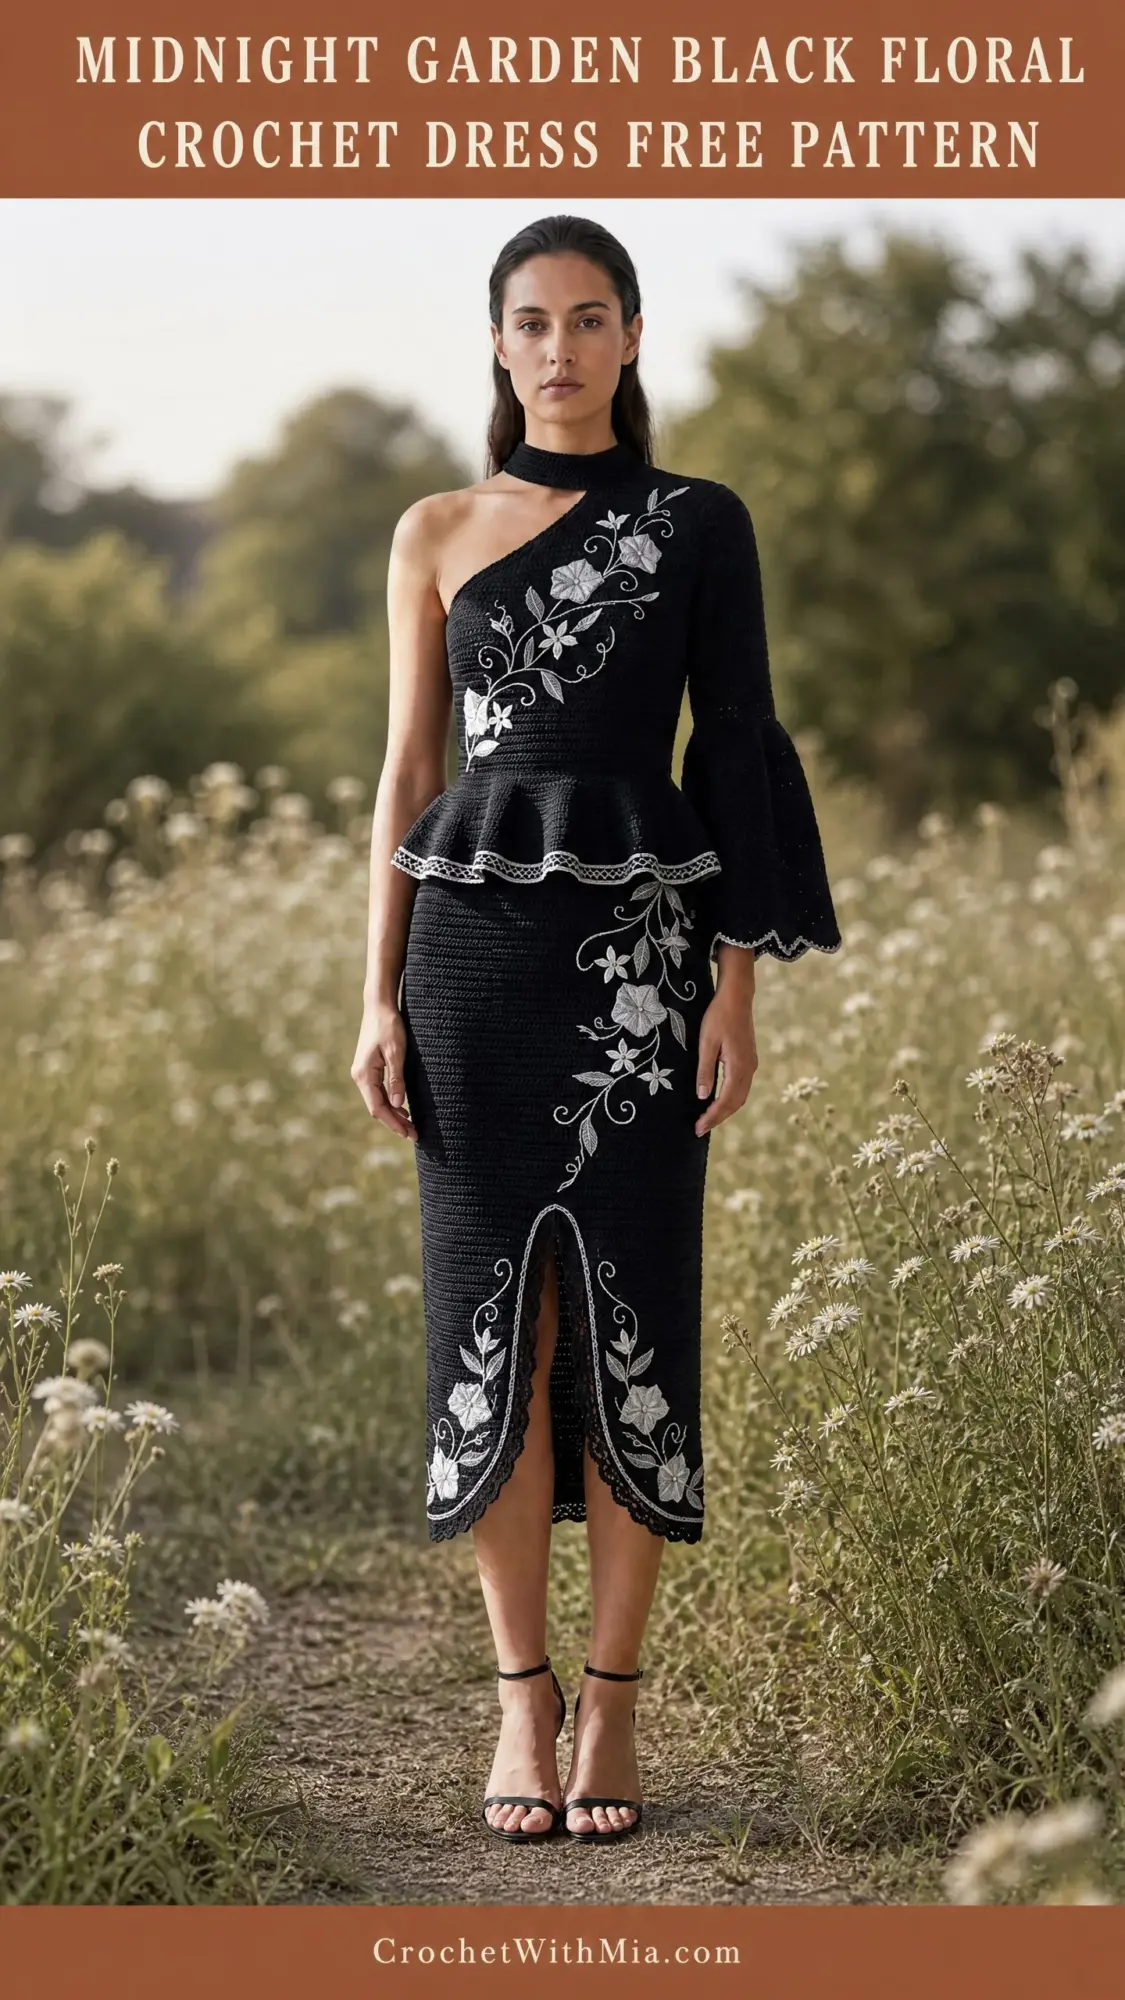
This stunning set consists of two coordinating pieces. The top features an asymmetrical one-shoulder design with a dramatic bell sleeve, fitted bodice, flared peplum, and an attached choker neckband. The skirt is a body-skimming midi length with a center front slit and matching scalloped hem details.
Both pieces are worked flat in rows using fine crochet cotton thread, then seamed together. The beautiful floral motifs are applied after blocking using surface crochet techniques and dimensional flower and leaf appliqués.
What makes this pattern special:
Skill Level and Time Commitment
Let me be honest with you. This is an advanced crochet pattern. You should feel comfortable with fitted garment construction, working at a fine gauge, shaping bodices, and applying surface embroidery before attempting this project.
Skills you’ll need:
Estimated time: 120 to 180 hours total for both pieces, including all embroidery and finishing work. I recommend working in sessions of 2 to 3 hours and checking your gauge frequently throughout the project.
Finished Measurements
This pattern is written for size Small, with sizes Medium and Large in parentheses throughout.
Bust: 34 inches or 86 cm (36 inches or 91 cm, 38 inches or 97 cm)
Waist at peplum join: 26 inches or 66 cm (28 inches or 71 cm, 30 inches or 76 cm)
Hip at widest skirt point: 36 inches or 91 cm (38 inches or 97 cm, 40 inches or 102 cm)
Total length of top, shoulder to peplum hem: 18 inches or 46 cm (18.5 inches or 47 cm, 19 inches or 48 cm)
Skirt length, waist to hem: 26 inches or 66 cm (26.5 inches or 67 cm, 27 inches or 69 cm)
Sleeve length, shoulder to cuff: 22 inches or 56 cm (22.5 inches or 57 cm, 23 inches or 58 cm)
Materials You’ll Need
Yarn:
Recommended Yarn Options:
1. Aunt Lydia’s Classic Crochet Thread Size 10 in Black and White. This is widely available with consistent twist and excellent stitch definition at gauge.
2. DMC Cebelia Crochet Cotton Size 10 in Noir and White. The mercerized finish gives a slight sheen that enhances the embroidery contrast beautifully.
3. Coats and Clark South Maid Cotton Crochet Thread Size 10 in Black and White. A budget-friendly option with consistent yardage per ball.
Important substitution note: Any size 10 crochet cotton thread that achieves the stated gauge will work. Do not substitute a heavier weight yarn. The fabric will not drape correctly and your embroidery motifs will lose their fine detail.
Hooks:
Notions:
Gauge
28 single crochet and 32 rows = 4 inches or 10 cm worked flat in main stitch pattern (alternating single crochet and chain 1 spaces), blocked.
Gauge swatch instructions: Chain 36. Row 1: Single crochet (sc) in 2nd chain from hook, chain 1, skip 1, repeat across, sc in last chain. Turn. Row 2: Chain 1, sc in first sc, chain 1, skip chain 1 space, repeat across. Turn. Repeat Row 2 until piece measures at least 6 inches or 15 cm. Block. Measure interior 4 inches or 10 cm only. Adjust hook size as needed.
Gauge is mandatory for this pattern. A single stitch difference per inch changes the finished bust measurement by 1.5 to 2 inches. Take the time to swatch properly before beginning.
Abbreviations and Stitch Definitions
Let me walk you through every abbreviation used in this pattern.
beg: beginning
CC: contrast color, which is your silver-white thread
ch: chain, the basic foundation stitch where you yarn over and pull through
ch-sp: chain space, the gap created by a chain in the previous row
dc: double crochet, a taller stitch made by yarning over before inserting your hook
dec: decrease, reducing your stitch count
hdc: half double crochet, a stitch that falls between single crochet and double crochet in height
inc: increase, which means working 2 single crochet in the same stitch
lp(s): loop or loops
MC: main color, which is your black thread
pm: place marker
rem: remaining
rep: repeat
rnd: round
RS: right side, the public-facing side of your work
sc: single crochet, a short compact stitch that forms the foundation of this fabric
sc2tog: single crochet 2 together, a decrease made by inserting your hook into the next stitch and pulling up a loop, then inserting your hook into the following stitch and pulling up another loop, then yarning over and pulling through all 3 loops on your hook
sk: skip
sl st: slip stitch, used for joining and moving across stitches without adding height
sm: slip marker
sp: space
st(s): stitch or stitches
tch: turning chain
WS: wrong side, the interior-facing side of your work
yo: yarn over
Special Stitches and Techniques
Mesh Ground Stitch (MGS)
This is your main fabric stitch throughout the entire pattern. It creates an open, even grid that reads as fine crochet fabric with excellent stitch definition for embroidery application.
Row 1 (foundation): Sc in 2nd ch from hook, (ch 1, sk 1 ch, sc in next ch) across. Turn.
Row 2: Ch 1, sc in first sc, (ch 1, sk ch-1 sp, sc in next sc) across. Turn.
Repeat Row 2 for pattern. Every row ends with sc in last sc. Count sc stitches only unless otherwise noted in the instructions.
Scallop Edging
This decorative edge is used at the peplum hem and skirt hem.
Insert hook into edge stitch or chain space, work (sl st, ch 3, 2 dc, ch 3, sl st) in same space, sl st in next space. Repeat across.
Bell Sleeve Increase
Work in pattern across to last 2 sts, 2 sc in next st, sc in last st. At beginning of same row, after turning ch, 2 sc in first st, then continue in pattern. This adds 2 sts total per increase row, one at each end.
Peplum Flare Stitch
At peplum rows, work (sc, ch 1, sc) in each ch-1 sp across to create double density, then work additional ch-1 sps between groups to widen circumference. Full instructions are included in the peplum section below.
Surface Slip Stitch
This technique creates the embroidery stems. With CC and hook, insert hook through mesh openings from RS, draw up a loop of CC, insert hook in next mesh opening, draw CC through both loops on hook. Continue along marked embroidery path. This creates raised stem lines on the right side.
Applied Petal Motif
Ch 6, sl st in 1st ch to form ring.
Rnd 1: Ch 1, 12 sc in ring. Sl st to first sc. (12 sc)
Rnd 2: (Ch 3, dc in same st, ch 3, sl st in same st, sl st in next st) 6 times. (6 petals)
Fasten off leaving 10 inches or 25 cm tail for sewing. Petals are sewn to surface over stem lines.
Applied Leaf Motif
Ch 10.
Row 1: Sc in 2nd ch from hook, hdc in next, dc in next 3, hdc in next, sc in next 2, 3 sc in last ch (tip). Rotate to work back along other side: sc in next 2, hdc in next, dc in next 3, hdc in next, sc in last, sl st to first sc. Fasten off leaving 10 inches or 25 cm tail. (Approximately 22 sts total around leaf)
Important Pattern Notes Before You Begin
Please read these notes carefully before starting.
1. The top and skirt are worked as separate pieces. Work the skirt first so you can reference the waistband for fitting the top.
2. All pieces are worked flat, back and forth in rows, except the choker neckband which is worked in rounds.
3. The back seam of the skirt receives a zipper. Leave the left side seam of the top open until after final fitting.
4. The one-shoulder design means the right strap goes up to the choker neckband. The left shoulder is bare. You can mirror these instructions if you prefer a left-shoulder dominant style.
5. The peplum is picked up from the bottom edge of the bodice and worked outward in rows, then hemmed with scallop edging.
6. All embroidery motifs are applied after both pieces are blocked and seamed. Mark placement with removable stitch markers or water-soluble fabric marking pen before attaching.
7. Instructions are written for size Small. Changes for Medium and Large are in parentheses throughout: Small (Medium, Large).
8. At the end of every row in MGS pattern, the turning chain (ch 1) does NOT count as a stitch.
9. The skirt has a front center slit worked by leaving sts unworked and re-joining at the hem.
10. Block each piece before seaming and before applying embroidery.
Pattern Instructions
Skirt
Skirt Back Panel
The skirt is worked as two flat panels, front and back, then seamed at the sides and back with a zipper at the back seam.
Finished back panel width at waist: 9 inches or 23 cm (9.5 inches or 24 cm, 10 inches or 25 cm)
Total waist circumference when seamed: 36 inches or 91 cm (38 inches or 97 cm, 40 inches or 102 cm)
The waistband will be drawn in with slip stitch edging to 26 inches or 66 cm (28 inches or 71 cm, 30 inches or 76 cm).
With MC and 1.65 mm hook, ch 128 (136, 144).
Row 1 (RS): Sc in 2nd ch from hook, (ch 1, sk 1, sc in next ch) across. Turn. 64 sc (72 sc, 80 sc)
For clarity, stitch counts count sc stitches only unless noted.
Row 2: Ch 1, sc in first sc, (ch 1, sk ch-sp, sc in next sc) across. Turn. 64 sc (72 sc, 80 sc)
Rows 3 through 14: Rep Row 2. No shaping. 64 sc (72 sc, 80 sc)
Hip Expansion Rows
These are worked every 4th row, 5 times.
Row 15: Ch 1, 2 sc in first sc, work in MGS across to last sc, 2 sc in last sc. Turn. 66 sc (74 sc, 82 sc)
Rows 16 through 18: Work even in MGS. Turn. 66 sc (74 sc, 82 sc)
Row 19: Ch 1, 2 sc in first sc, work in MGS across to last sc, 2 sc in last sc. Turn. 68 sc (76 sc, 84 sc)
Rows 20 through 22: Work even in MGS. Turn. 68 sc (76 sc, 84 sc)
Row 23: Ch 1, 2 sc in first sc, work in MGS across to last sc, 2 sc in last sc. Turn. 70 sc (78 sc, 86 sc)
Rows 24 through 26: Work even in MGS. Turn. 70 sc (78 sc, 86 sc)
Row 27: Ch 1, 2 sc in first sc, work in MGS across to last sc, 2 sc in last sc. Turn. 72 sc (80 sc, 88 sc)
Rows 28 through 30: Work even in MGS. Turn. 72 sc (80 sc, 88 sc)
Row 31: Ch 1, 2 sc in first sc, work in MGS across to last sc, 2 sc in last sc. Turn. 74 sc (82 sc, 90 sc)
Rows 32 through 34: Work even in MGS. Turn. 74 sc (82 sc, 90 sc)
Checkpoint: After Row 34, the back panel should measure approximately 4.25 inches or 11 cm from cast-on edge. The hip width should be approximately 10.5 inches or 27 cm (11.75 inches or 30 cm, 12.85 inches or 33 cm).
Hold at Hip
Rows 35 through 50: Work even in MGS across. Turn. 74 sc (82 sc, 90 sc)
Checkpoint: After Row 50, the panel should measure approximately 6.25 inches or 16 cm from waist.
Gradual Hem Taper
The skirt narrows slightly below the hip to the hem for a body-skimming fit.
Row 51: Ch 1, sc2tog over first 2 sts, work in MGS across to last 2 sts, sc2tog. Turn. 72 sc (80 sc, 88 sc)
Rows 52 through 57: Work even. Turn. 72 sc (80 sc, 88 sc)
Row 58: Ch 1, sc2tog, work in MGS to last 2 sts, sc2tog. Turn. 70 sc (78 sc, 86 sc)
Rows 59 through 64: Work even. Turn. 70 sc (78 sc, 86 sc)
Row 65: Ch 1, sc2tog, work in MGS to last 2 sts, sc2tog. Turn. 68 sc (76 sc, 84 sc)
Rows 66 through 71: Work even. Turn. 68 sc (76 sc, 84 sc)
Row 72: Ch 1, sc2tog, work in MGS to last 2 sts, sc2tog. Turn. 66 sc (74 sc, 82 sc)
Rows 73 through 78: Work even. Turn. 66 sc (74 sc, 82 sc)
Row 79: Ch 1, sc2tog, work in MGS to last 2 sts, sc2tog. Turn. 64 sc (72 sc, 80 sc)
Rows 80 through 86: Work even. Turn. 64 sc (72 sc, 80 sc)
Row 87: Ch 1, sc2tog, work in MGS to last 2 sts, sc2tog. Turn. 62 sc (70 sc, 78 sc)
Rows 88 through 94: Work even. Turn. 62 sc (70 sc, 78 sc)
Row 95: Ch 1, sc2tog, work in MGS to last 2 sts, sc2tog. Turn. 60 sc (68 sc, 76 sc)
Rows 96 through 102: Work even. Turn. 60 sc (68 sc, 76 sc)
Checkpoint: After Row 102, the back panel should measure approximately 12.75 inches or 32 cm from waist. Hem width is approximately 8.5 inches or 22 cm (9.75 inches or 25 cm, 10.85 inches or 28 cm).
Rows 103 through 200: Continue working even in MGS. Turn. 60 sc (68 sc, 76 sc)
Scallop Edging Row
Switch to 1.80 mm hook.
Row 201: Ch 1, work Scallop Edging across bottom edge of panel. Do not turn. Fasten off.
Total skirt back panel measures approximately 26 inches or 66 cm from waist to scallop hem point. Set aside.
Skirt Front Panel
The front panel is identical to the back panel through Row 140.
With MC and 1.65 mm hook, ch 128 (136, 144).
Work Rows 1 through 140 exactly as written for Skirt Back Panel. 60 sc (68 sc, 76 sc)
After Row 140, you will begin the center front slit.
Center Front Slit
The front slit runs up the center front from hem for approximately 10 inches or 25 cm. Work each side separately.
Right side of front slit:
Row 141: Ch 1, work in MGS across first 30 (34, 38) sc. Turn. 30 sc (34 sc, 38 sc)
Rows 142 through 200: Work even in MGS over these sts only. Turn.
After Row 200, work Scallop Edging across bottom of right slit panel. Fasten off.
Left side of front slit:
With RS facing, join MC with sl st to 31st (35th, 39th) sc of Row 140.
Row 141: Ch 1, sc in same st, work in MGS across rem 30 (34, 38) sc. Turn. 30 sc (34 sc, 38 sc)
Rows 142 through 200: Work even in MGS. Turn.
After Row 200, work Scallop Edging across bottom of left slit panel. Fasten off.
Slit inner edges: With MC and 1.65 mm hook, work a single row of sc along each inner slit edge from hem to where slit begins at Row 140, then work Scallop Edging along the curved slit opening at the hem.
Skirt Assembly
Block both skirt panels thoroughly.
With RS together, sew side seams using whip stitch or mattress stitch. Join right side of front panel to right side of back panel and left side of front panel to left side of back panel. Leave back seam open from waist to hem for zipper.
Install 22 inch or 56 cm invisible zipper along back seam per zipper manufacturer instructions, beginning at waist edge.
Waistband Finishing:
With MC and 1.65 mm hook, work 1 row of sc evenly around entire waist opening, approximately 1 sc per row end, adjusting as needed to produce exactly 180 (192, 204) sc around. Sl st to first sc. Do not turn. Work 2 more rnds of sc. Sl st to join each rnd. After 3 rnds, work 1 rnd of sl st pulling tightly to draw waist to 26 inches or 66 cm (28 inches or 71 cm, 30 inches or 76 cm). Fasten off and weave in ends.
Top
Bodice Back Panel
The bodice back is worked flat and spans the full back width at bust.
Finished back panel width at bust: 17 inches or 43 cm (18 inches or 46 cm, 19 inches or 48 cm)
Finished back panel height: 12 inches or 30 cm from underarm to shoulder strap
With MC and 1.65 mm hook, ch 238 (252, 266).
Row 1 (RS): Sc in 2nd ch from hook, (ch 1, sk 1, sc in next ch) across. Turn. 119 sc (126 sc, 133 sc)
Rows 2 through 4: Work even in MGS. Turn. 119 sc (126 sc, 133 sc)
Bust Shaping
Row 5: Ch 1, sc2tog, work in MGS to last 2 sts, sc2tog. Turn. 117 sc (124 sc, 131 sc)
Rows 6 through 8: Work even. Turn.
Row 9: Ch 1, sc2tog, work in MGS to last 2 sts, sc2tog. Turn. 115 sc (122 sc, 129 sc)
Rows 10 through 12: Work even. Turn.
Row 13: Ch 1, sc2tog, work in MGS to last 2 sts, sc2tog. Turn. 113 sc (120 sc, 127 sc)
Rows 14 through 16: Work even. Turn.
Row 17: Ch 1, sc2tog, work in MGS to last 2 sts, sc2tog. Turn. 111 sc (118 sc, 125 sc)
Rows 18 through 20: Work even. Turn.
Row 21: Ch 1, sc2tog, work in MGS to last 2 sts, sc2tog. Turn. 109 sc (116 sc, 123 sc)
Rows 22 through 24: Work even. Turn.
Row 25: Ch 1, sc2tog, work in MGS to last 2 sts, sc2tog. Turn. 107 sc (114 sc, 121 sc)
Rows 26 through 28: Work even. Turn.
Checkpoint: After Row 28, the bodice back panel should measure approximately 3.5 inches or 9 cm tall.
Continue Shaping for Peplum Waist
Row 29: Ch 1, sc2tog, work in MGS to last 2 sts, sc2tog. Turn. 105 sc (112 sc, 119 sc)
Rows 30 through 32: Work even. Turn.
Row 33: Ch 1, sc2tog, work in MGS to last 2 sts, sc2tog. Turn. 103 sc (110 sc, 117 sc)
Rows 34 through 40: Work even. Turn.
Checkpoint: After Row 40, back panel measures approximately 5 inches or 13 cm. This is the narrowest waist point. Width is approximately 14.7 inches or 37 cm (15.7 inches or 40 cm, 16.7 inches or 42 cm).
Shoulder and Back Neck Shaping
Row 41: Ch 1, sl st across first 7 sc (armhole bind off), ch 1, work in MGS across to last 7 sc, leave last 7 unworked. Turn. 89 sc (96 sc, 103 sc)
Row 42: Ch 1, sc2tog, work in MGS to last 2 sts, sc2tog. Turn. 87 sc (94 sc, 101 sc)
Row 43: Ch 1, sc2tog, work in MGS to last 2 sts, sc2tog. Turn. 85 sc (92 sc, 99 sc)
Row 44: Ch 1, sc2tog, work in MGS to last 2 sts, sc2tog. Turn. 83 sc (90 sc, 97 sc)
Row 45: Ch 1, sc2tog, work in MGS to last 2 sts, sc2tog. Turn. 81 sc (88 sc, 95 sc)
Rows 46 through 60: Work even in MGS. Turn. 81 sc (88 sc, 95 sc)
Checkpoint: After Row 60, the back panel should measure approximately 7.5 inches or 19 cm tall from foundation.
Back Neck Bind Off
Row 61: Ch 1, work in MGS across first 20 (22, 24) sc. Leave rem sts unworked. Turn. These are the right shoulder strap stitches.
Rows 62 through 68: Work even over 20 (22, 24) sc. Turn. 20 sc (22 sc, 24 sc)
Rejoin yarn at Row 60 at left side (bare shoulder side). Skip center 41 (44, 47) sc for back neck opening. Rejoin MC to next st.
Row 61 left: Work in MGS over last 20 (22, 24) sc. Turn. 20 sc (22 sc, 24 sc)
Rows 62 through 68: Work even. Turn. 20 sc (22 sc, 24 sc)
Both back shoulder straps should now be the same width and height. Fasten off.
Bodice Front Panel
The front bodice covers only the right shoulder and chest in this one-shoulder design.
With MC and 1.65 mm hook, ch 238 (252, 266).
Row 1 (RS): Sc in 2nd ch from hook, (ch 1, sk 1, sc in next ch) across. Turn. 119 sc (126 sc, 133 sc)
Rows 2 through 40: Work shaping identical to back panel Rows 2 through 40. After Row 40: 103 sc (110 sc, 117 sc)
Front Armhole and One-Shoulder Shaping
Row 41 (RS): Ch 1, sl st across first 7 sc (left armhole), work in MGS across rem sts. Turn. 96 sc (103 sc, 110 sc)
Row 42: Ch 1, work in MGS to last 2 sts, sc2tog. Turn. 95 sc (102 sc, 109 sc)
Row 43: Ch 1, sc2tog, work in MGS across. Turn. 94 sc (101 sc, 108 sc)
Row 44: Ch 1, work in MGS to last 2 sts, sc2tog. Turn. 93 sc (100 sc, 107 sc)
Row 45: Ch 1, sc2tog, work in MGS across. Turn. 92 sc (99 sc, 106 sc)
Rows 46 through 50: Work even. Turn. 92 sc (99 sc, 106 sc)
Front Neckline Diagonal Shaping
Row 51: Ch 1, work in MGS across to last 3 sts, sc2tog, sc in last. Turn. 91 sc (98 sc, 105 sc)
Row 52: Work even. Turn.
Row 53: Ch 1, work in MGS across to last 3 sts, sc2tog, sc in last. Turn. 90 sc (97 sc, 104 sc)
Row 54: Work even. Turn.
Row 55: Decrease 1 at neckline end. Turn. 89 sc (96 sc, 103 sc)
Row 56: Work even. Turn.
Row 57: Decrease 1 at neckline end. Turn. 88 sc (95 sc, 102 sc)
Row 58: Work even. Turn.
Row 59: Decrease 1 at neckline end. Turn. 87 sc (94 sc, 101 sc)
Row 60: Work even. Turn.
Continue decreasing 1 st at neckline (right side) every right side row until 20 (22, 24) sts remain for shoulder strap. This requires 67 (72, 77) more decrease rows, working decreases every RS row.
Work even over shoulder strap stitches to match back shoulder strap length. Fasten off.
Finishing Your Midnight Garden Dress
Blocking
Block all pieces thoroughly before assembly. Pin to blocking mats and spray with water or cotton-safe blocking solution. Allow to dry completely.
Seaming
Join shoulder seams using mattress stitch or whip stitch. Join side seams, leaving left side of top open for fitting adjustments.
Peplum
Pick up stitches along the bottom edge of the bodice waist. Work peplum flare rows as described in the special stitches section, increasing to create the characteristic flare. Finish with scallop edging.
Bell Sleeve
The single sleeve is worked from the shoulder down, increasing gradually to create the dramatic bell shape. Finish the cuff with scallop edging to match the peplum.
Choker Neckband
Work the choker in rounds, then attach to the right shoulder strap of the bodice.
Embroidery Motifs
Mark placement for all floral motifs using removable stitch markers. Work surface slip stitch stems first, then attach applied petal and leaf motifs using the long tails.
Care Instructions
Hand wash in cool water with mild detergent. Lay flat to dry on blocking mats. Steam lightly if needed to restore shape. Store flat or hanging to prevent creasing.
Thank you so much for taking on this gorgeous project with me. I know it’s a commitment, but the result is truly stunning wearable art that you’ll treasure for years.
If you found this crochet dress pattern helpful, save it to your Pinterest boards so you can find it easily when you’re ready to start. And please, if you make this beauty, leave a comment below or tag me on social media. I would absolutely love to see your finished Midnight Garden dress!