
I call this one the Coastal Dreamer, and she’s been living in my pattern notebook for almost three years now. The original sketch came to me during a beach vacation when I watched the waves roll in at sunset. Each tier of water seemed to cascade over the one before it, darker teal at the horizon fading to soft aqua where the foam kissed the sand. I scribbled the basic concept on a napkin that night and promised myself I’d bring her to life someday.
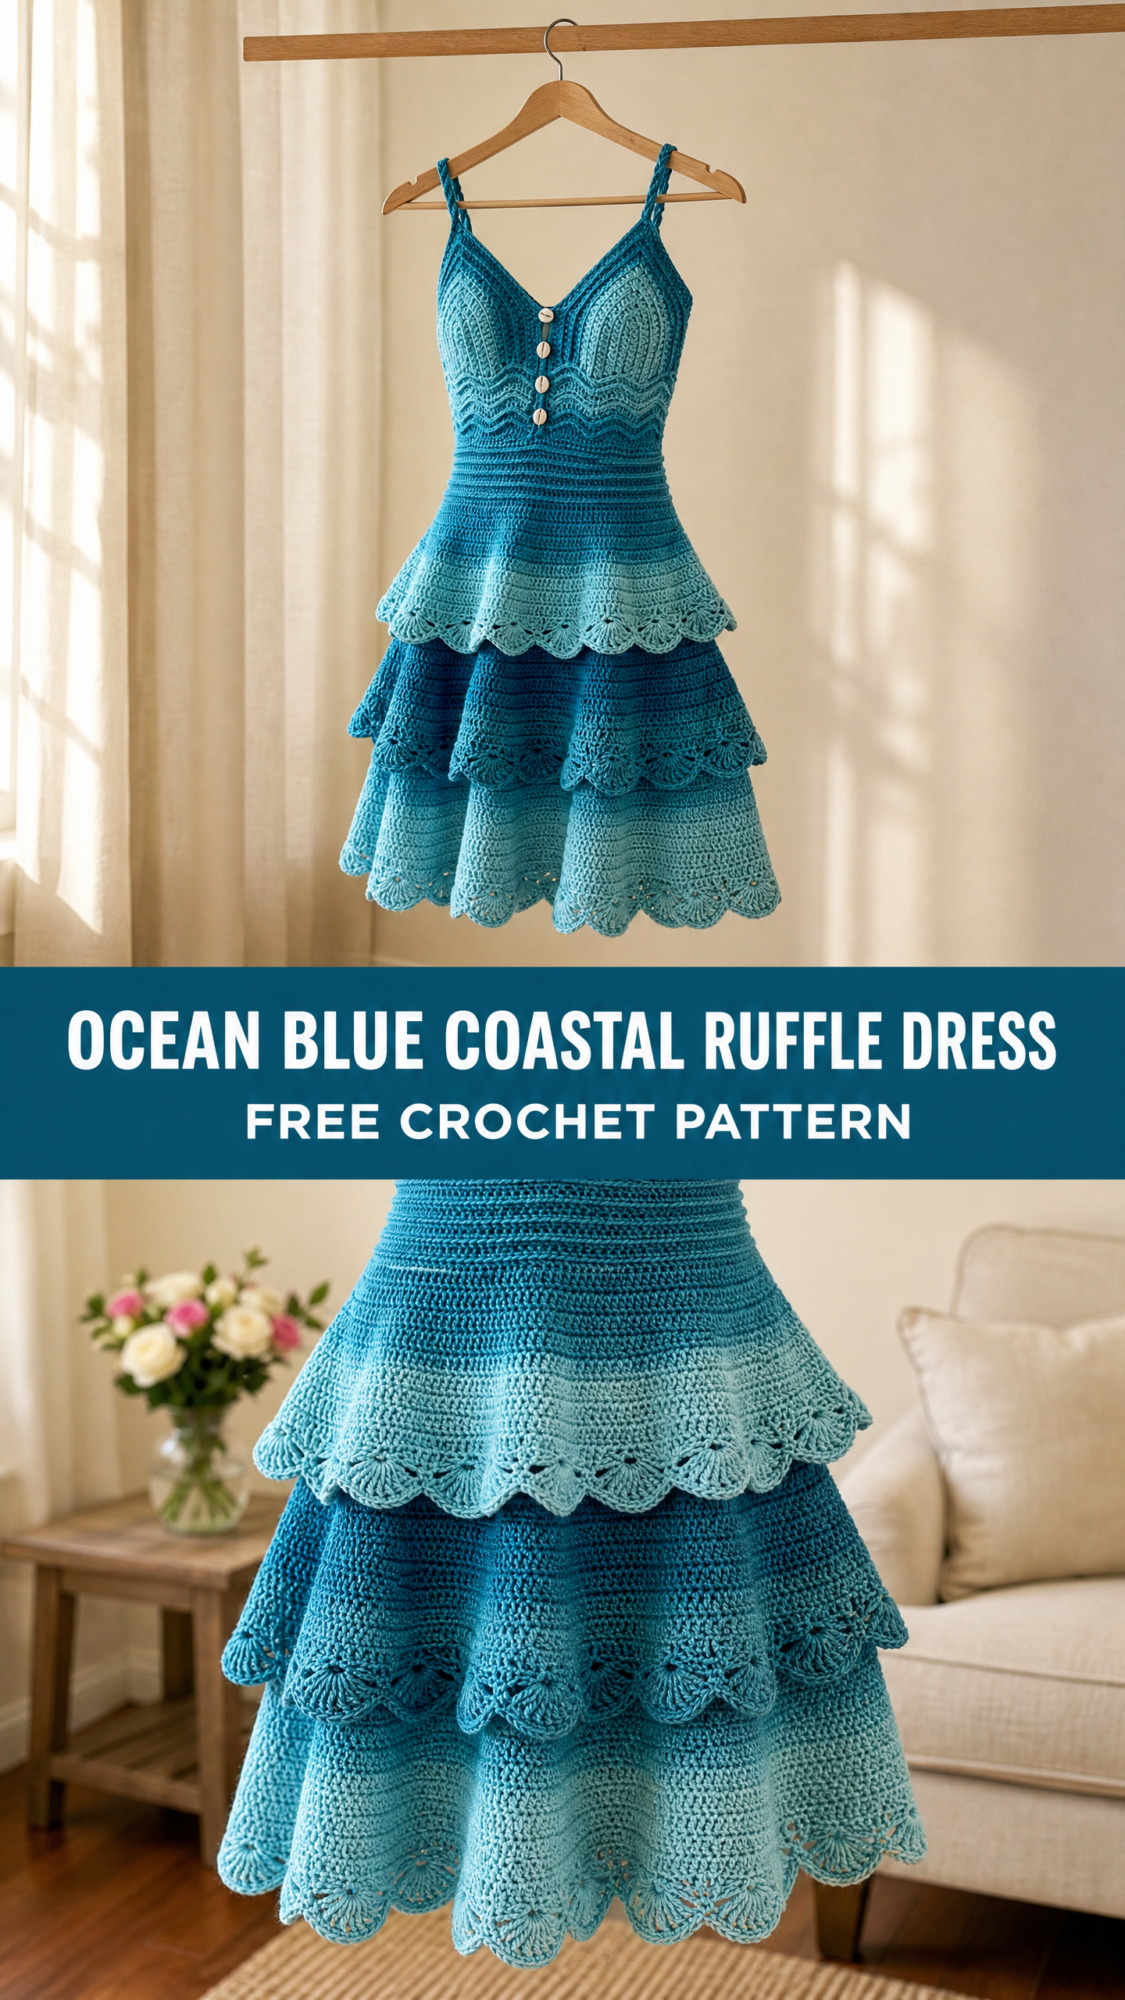
Well, someday finally arrived. After countless swatches, several frogged attempts at getting the ruffle proportions just right, and one very patient dress form named Mabel, the Coastal Dreamer is ready to share with you.
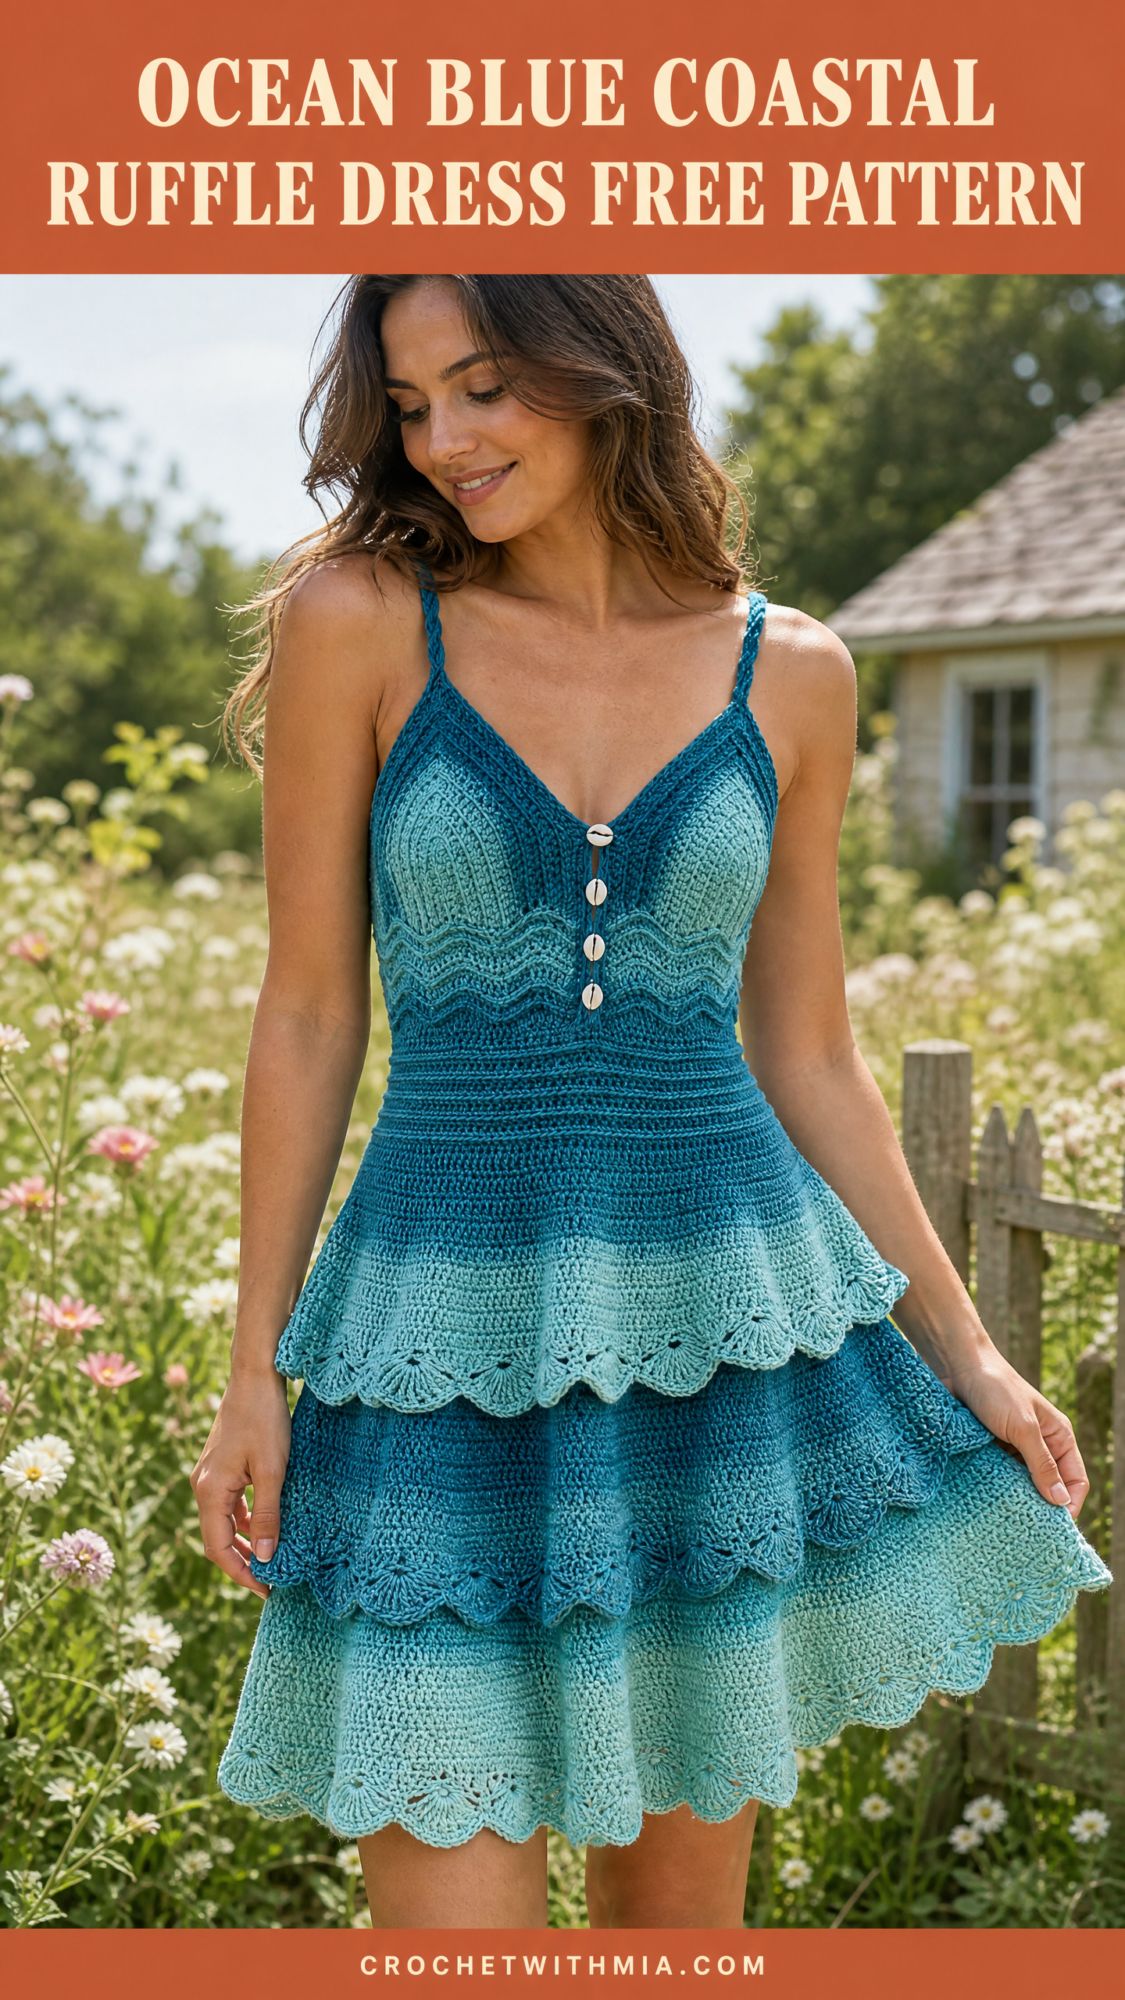
This fitted summer dress features everything I love about ocean-inspired design. A chevron ripple band mimics gentle waves across the bodice. Three cascading ruffle tiers create that beautiful layered water effect. And the ombre colorway transitions from deep ocean teal at the top to soft seafoam at the hem. She’s romantic, flowy, and surprisingly practical to construct once you understand the building blocks.
About This Ocean Blue Tiered Dress Pattern
This crochet dress pattern works from the top down in one continuous piece after joining the bodice panels. You’ll start with the back bodice, then create two separate front panels that shape a deep V-neckline. Once joined at the underarms, the waist gets cinched with stretchy ribbing before exploding into three gorgeous ruffle tiers.
The construction might sound intimidating, but I promise each section uses familiar stitches. If you’ve completed at least one garment before, you have all the skills you need. The magic happens through strategic increases and a simple shell stitch edging that creates those dreamy scalloped hems.
Skill level: Advanced Beginner to Intermediate
Time estimate: Approximately 30 to 45 hours for a size Small or Medium, depending on your working pace
Finished Measurements
Size Small (S): Bust 34 inches, Waist 28 inches, Hip and Hem 52 inches circumference at widest tier, Length 27 inches from shoulder to hem
Size Medium (M): Bust 36 inches, Waist 30 inches, Hip and Hem 56 inches, Length 27.5 inches
Size Large (L): Bust 38 inches, Waist 32 inches, Hip and Hem 60 inches, Length 28 inches
Throughout this pattern, numbers are written as Small (Medium, Large). When only one number appears, it applies to all sizes.
Materials You’ll Need
Yarn: 600 (680, 760) yards of DK weight yarn in a teal-to-aqua ombre colorway. The color transition should cover approximately one third deep teal, one third mid teal, and one third soft aqua. If using separate colors instead of ombre yarn, purchase Color A deep teal 200 (230, 260) yards, Color B mid teal 200 (230, 260) yards, and Color C soft aqua 200 (220, 240) yards.
Hook: US size E-4 / 3.5 mm crochet hook
Notions:
Recommended Yarn Options
Paintbox Yarns Simply DK in colorway Ombre Teal works beautifully for this project. You can also combine individual shades like Kingfisher Blue, Seafarer Blue, and Duck Egg Blue. This 100 percent acrylic yarn offers excellent stitch definition, easy care, and affordability at 273 yards per 100 gram skein.
Lion Brand Comfy Cotton Blend DK gives a slightly heavier drape that enhances the ruffle cascade wonderfully. This 60 percent cotton and 40 percent acrylic blend comes in 369 yards per 100 gram skein. Try shades Teal, Cerulean, and Mist.
Scheepjes Cahlista combined with Scheepjes Softfun creates a lovely cotton-blend option. The cotton content provides beautiful drape and breathability for warm weather wear.
When substituting yarn, look for any DK weight yarn with 250 to 280 yards per 100 grams that achieves the stated gauge. Avoid 100 percent wool since it runs too warm for a summer dress and may not drape as fluidly. Cotton or cotton-blend yarns give the best drape and stitch definition for the ruffle tiers.
Gauge (Please Swatch!)
20 single crochet (sc) stitches = 4 inches
22 rows of sc = 4 inches
Using US E-4 / 3.5 mm hook
For the chevron ripple pattern: one full 12-stitch repeat equals 2.4 inches wide
For the shell tier pattern: one 6-stitch shell repeat equals 1.2 inches wide
Gauge matters for a fitted garment like this dress. If your swatch measures smaller than stated, go up one hook size. If larger, go down one hook size. Taking ten minutes to swatch will save you hours of frustration later.
Abbreviations and Stitch Definitions
Let me walk you through every stitch abbreviation you’ll encounter. I’ve included plain-English definitions so nothing feels mysterious.
ch = chain. Wrap yarn over hook, pull through loop on hook. This creates the foundation and spacing throughout.
sl st = slip stitch. Insert hook, yarn over, pull through both loops at once. Used for joining rounds.
sc = single crochet. Insert hook in stitch, yarn over, pull up a loop (2 loops on hook), yarn over, pull through both loops. The shortest and most basic stitch.
sc2tog = single crochet two together. This is a decrease. Insert hook in next stitch, pull up loop, insert hook in following stitch, pull up loop (3 loops on hook), yarn over, pull through all 3 loops. You’ve turned 2 stitches into 1.
hdc = half double crochet. Yarn over, insert hook, pull up loop (3 loops), yarn over, pull through all 3 loops.
dc = double crochet. Yarn over, insert hook, pull up loop (3 loops), yarn over, pull through 2 loops (2 loops remain), yarn over, pull through final 2 loops. Taller than single crochet.
BLO = back loop only. Instead of inserting your hook under both loops at the top of the stitch, insert under only the back loop. This creates ribbing texture.
ch-sp = chain space. The gap created by chains in the previous row.
RS = right side. The public-facing side of your work.
WS = wrong side. The inside of your garment.
t-ch = turning chain. The chain worked at the beginning of a row to bring your hook up to the correct height.
st(s) = stitch or stitches
rep = repeat
rnd = round
sm = stitch marker
sk = skip
Special Stitches Explained
Shell Stitch
Work 5 double crochet stitches all into the same stitch or chain space. This creates a beautiful fan-shaped cluster. To work: yarn over, insert hook into designated stitch, yarn over, pull up loop, yarn over, pull through 2 loops. That’s 1 dc made. Work 4 more dc into the same stitch. Shell complete. You’ll see 5 posts fanning out from one spot.
Chevron Ripple Row
This stitch pattern creates the wave effect across the bodice. It’s worked over a multiple of 12 stitches plus 2.
Here’s how one complete ripple works:
1. Ch 1, turn. Sc in first st.
2. Sc in next 4 sts.
3. Sc3tog over next 3 sts to create a valley. Insert hook in next st, pull up loop, insert hook in next st, pull up loop, insert hook in next st, pull up loop, yarn over and pull through all 4 loops on hook.
4. Sc in next 4 sts.
5. Work 3 sc in next st to create a peak.
6. Sc in next 4 sts.
7. Repeat sc3tog for another valley.
8. Sc in next 4 sts.
9. Continue this pattern across, ending with sc in last st.
The peaks add 2 stitches and the valleys subtract 2, keeping your stitch count perfectly balanced.
Scallop Shell Edging
This creates the gorgeous scalloped hem on each ruffle tier. It’s worked over a multiple of 6 stitches.
1. Sl st to first st.
2. Ch 1, sc in same st.
3. Skip 2 sts, work Shell (5 dc) in next st.
4. Skip 2 sts, sc in next st.
5. Repeat steps 3 and 4 across.
Sc Ribbing Row
Work all single crochet through the back loop only. This creates a stretchy ribbed fabric that cinches beautifully at the waist.
Braided Strap
Cut 9 lengths of yarn each 36 inches long. Hold 3 together and fold in half, creating 6 working strands. Divide into 3 pairs and braid firmly to desired length. Knot at both ends and trim. This creates the rounded rope-like straps visible in the finished dress.
Important Pattern Notes Before You Begin
The bodice back is worked flat in rows from top down to the underarm. The two front bodice panels are worked separately from each shoulder down, shaping the V-neckline with decreases at center front edges. All three pieces join at the underarms.
Once joined, the waist is worked in continuous rounds.
Each ruffle tier picks up stitches from the row below and increases into every stitch at the beginning to create flare.
Stitch counts appear in parentheses at the end of each row or round.
For the ombre effect with single-color ombre yarn, allow natural color shifting. With separate colors, join Color B at the beginning of waist ribbing and Color C at the beginning of Tier 3.
Ch 1 at the beginning of sc rows does NOT count as a stitch.
Ch 3 at the beginning of dc rows DOES count as a stitch.
The dress has approximately 1 to 2 inches of negative ease at the waist for a fitted silhouette.
Section 1: Back Bodice Panel
The back bodice starts at the top back neckline edge and works downward.
Foundation: Ch 86 (98, 110).
Row 1 (RS): Sc in 2nd ch from hook and in each ch across. Turn. (85, 97, 109 sc)
Row 2 (WS): Ch 1, sc in each st across. Turn. (85, 97, 109 sc)
Rows 3 through 6: Work Chevron Ripple Row. Turn after each row. (85, 97, 109 sts after each row)
Row 7: Ch 1, sc in each st across. Turn. (85, 97, 109 sc)
Row 8: Ch 1, sc in each st across. Turn. (85, 97, 109 sc)
Rows 9 and 10: Repeat Row 7. Turn. (85, 97, 109 sc)
Begin Bust Shaping
Row 11 (RS): Ch 1, 2 sc in first st, sc across to last st, 2 sc in last st. Turn. (87, 99, 111 sc)
Row 12: Ch 1, sc across. Turn. (87, 99, 111 sc)
Row 13: Ch 1, 2 sc in first st, sc across to last st, 2 sc in last st. Turn. (89, 101, 113 sc)
Row 14: Ch 1, sc across. Turn. (89, 101, 113 sc)
Row 15: Ch 1, 2 sc in first st, sc across to last st, 2 sc in last st. Turn. (91, 103, 115 sc)
Row 16: Ch 1, sc across. Turn. (91, 103, 115 sc)
Row 17: Ch 1, 2 sc in first st, sc across to last st, 2 sc in last st. Turn. (93, 105, 117 sc)
Row 18: Ch 1, sc across. Turn. (93, 105, 117 sc)
Row 19: Ch 1, 2 sc in first st, sc across to last st, 2 sc in last st. Turn. (95, 107, 119 sc)
Row 20: Ch 1, sc across. Turn. (95, 107, 119 sc)
Checkpoint: After Row 20, your back bodice should measure approximately 3.75 inches from the top edge. The piece is wider at the bottom than the top, reflecting the flare from shoulder to underarm.
Fasten off. Set aside.
Section 2: Front Bodice Left Panel
The left front panel shapes the left side of the V-neckline. Stitches decrease at center front on every RS row while increasing at the side edge.
Foundation: Ch 44 (52, 58).
Row 1 (RS): Sc in 2nd ch from hook and in each ch across. Turn. (43, 51, 57 sc)
Row 2 (WS): Ch 1, sc across. Turn. (43, 51, 57 sc)
Rows 3 through 6 Chevron Ripple: Ch 1, sc in first 4 sts (plain border), work Chevron Ripple Row over next 36 (48, 54) sts, sc in last 3 sts. Turn. (43, 51, 57 sts)
Row 7: Ch 1, sc across. Turn. (43, 51, 57 sc)
Rows 8 through 10: Ch 1, sc across. Turn. (43, 51, 57 sc)
Neckline Shaping
Row 11 (RS): Ch 1, sc2tog at center front edge (first 2 sts), sc across to last st, 2 sc in last st (side edge increase). Turn. (43, 51, 57 sc)
Row 12 (WS): Ch 1, sc across. Turn. (43, 51, 57 sc)
Rows 13 through 20: Repeat Rows 11 and 12. (43, 51, 57 sc after each row)
The decrease at the neckline and increase at the side edge cancel each other out, keeping the stitch count constant while shaping both the V and side curve.
Fasten off. Set aside.
Section 3: Front Bodice Right Panel
Work identically to the Left Panel with all shaping mirrored.
Foundation: Ch 44 (52, 58).
Row 1 (RS): Sc in 2nd ch from hook and in each ch across. Turn. (43, 51, 57 sc)
Row 2 (WS): Ch 1, sc across. Turn. (43, 51, 57 sc)
Rows 3 through 6 Chevron Ripple: Ch 1, sc in first 3 sts, work Chevron Ripple Row over next 36 (48, 54) sts, sc in last 4 sts. Turn. (43, 51, 57 sts)
Row 7: Ch 1, sc across. Turn. (43, 51, 57 sc)
Rows 8 through 10: Ch 1, sc across. Turn. (43, 51, 57 sc)
Row 11 (RS): Ch 1, 2 sc in first st (side edge increase), sc across to last 2 sts, sc2tog (neckline decrease). Turn. (43, 51, 57 sc)
Row 12: Ch 1, sc across. Turn. (43, 51, 57 sc)
Rows 13 through 20: Repeat Rows 11 and 12. (43, 51, 57 sc after each row)
Fasten off.
Checkpoint: All three bodice panels should measure approximately 3.75 inches tall. Back panel width: 18.5 (20.75, 23) inches. Each front panel width: 8.5 (10, 11.5) inches.
Section 4: Joining Bodice at Underarms
With RS facing, lay the back panel flat. Place the left front panel on top of the left side of the back, aligning the outermost stitches of each panel. Using yarn and hook, slip stitch through both thicknesses along the 20-row side edge to join the left side seam.
Repeat for the right side seam, joining the right front panel to the right side of the back panel.
Leave underarm openings of approximately 1 inch at the base of each side seam by skipping the last 5 rows. These small openings allow armhole ease.
Total stitches around bottom edge: 95 + 43 + 43 = 181 (209, 233) total stitches around the bottom edge for the waist.
Section 5: Waist Ribbing
Join yarn at the left side seam at the bottom of the bodice. Work in continuous rounds. Place a stitch marker at the beginning of each round and move it up as you go.
Rnd 1: Ch 1, sc BLO in each st around. Sl st to first sc. (181, 209, 233 sc)
Rnds 2 through 14: Ch 1, sc BLO in each st around. Sl st to first sc. (181, 209, 233 sc)
After Round 14, the waist ribbing band measures approximately 2.5 inches tall. This creates the cinched waist effect. The BLO ribbing has approximately 20 percent stretch for a fitted but comfortable fit.
Checkpoint: Your piece should measure approximately 6.5 inches from shoulder edge to bottom of ribbing. The waist should feel snug but comfortable.
Do NOT fasten off. Proceed directly to Tier 1.
Section 6: First Ruffle Tier
The first ruffle tier begins immediately after the waist ribbing. You’ll double the stitch count to create flare.
Rnd 15 (Tier 1 Foundation): Ch 3 (counts as first dc), dc in same st, 2 dc in each remaining st around. Sl st to top of ch-3. (362, 418, 466 dc)
Rnds 16 through 19: Ch 3 (counts as dc), dc in each st around. Sl st to top of ch-3. (362, 418, 466 dc)
Rnd 20 (Adjust): Ch 1, sc in first st, increase 4 (2, 2) sts evenly around by working 2 sc in every 91st st for S, every 210th st for M, every 234th st for L. (366, 420, 468 sc)
Rnd 21 Scallop Edging: Work Scallop Shell Edging around all sts: sl st to first st, ch 1, sc in same st, (sk 2 sts, Shell in next st, sk 2 sts, sc in next st) repeat to end. Sl st to first sc. Fasten off. (61, 70, 78 shells)
Checkpoint: Tier 1 hem should measure approximately 10.5 inches down from the shoulder.
Section 7: Second Ruffle Tier
Tier 2 attaches at Round 14 of the waist ribbing and hangs behind and below Tier 1, creating the cascading effect.
Attach yarn to any stitch of Round 14.
Rnd 1 of Tier 2: Ch 3 (counts as dc), 2 dc in same st, 3 dc in each remaining st around. Sl st to top of ch-3. (543, 627, 699 dc)
The triple increase creates more dramatic flare than Tier 1.
Rnds 2 through 6: Ch 3, dc in each st around. Sl st to top of ch-3. (543, 627, 699 dc)
Rnd 7 (Adjust): Ch 1, sc in each st around, working 3 sc2tog evenly to reduce to nearest multiple of 6. (540, 624, 696 sc)
Rnd 8 Scallop Edging: Work Scallop Shell Edging around: sc in first st, (sk 2, Shell in next, sk 2, sc in next) to end. Sl st to first sc. Fasten off. (90, 104, 116 shells)
Checkpoint: Measure from shoulder to Tier 2 hem. It should be approximately 16 inches.
Section 8: Third Ruffle Tier
Tier 3 attaches at Round 13 and creates the widest, longest tier for the full flowing hem.
Attach yarn to any stitch of Round 13.
Rnd 1 of Tier 3: Ch 3 (counts as dc), 3 dc in same st, 4 dc in each remaining st around. Sl st to top of ch-3. (724, 836, 932 dc)
The quadruple increase creates maximum flare for the dramatic hemline.
Rnds 2 through 8: Ch 3, dc in each st around. Sl st to top of ch-3. (724, 836, 932 dc)
Rnd 9 (Adjust): Ch 1, sc in each st around, adjusting to nearest multiple of 6. Reduce by 4 sc2tog to 720 for S, by 2 sc2tog to 834 for M, by 2 to 930 for L. (720, 834, 930 sc)
Rnd 10 Scallop Edging: Work Scallop Shell Edging around. Fasten off. (120, 139, 155 shells)
Checkpoint: Total dress length from shoulder to Tier 3 hem should be approximately 27 (27.5, 28) inches.
Section 9: Neckline Edging
With RS facing, attach yarn at the right shoulder corner.
Rnd 1: Ch 1, sc evenly around entire neckline and V-front opening. Place 3 sc in each outer corner and work sc2tog at the base of the V-center.
Rnd 2: Sl st in each st around the neckline back. For front V edges only, work Scallop Shell Edging along each front V-neckline edge. Fasten off.
Section 10: Shoulder Straps
Make 2 braided straps.
Cut 9 lengths of yarn each 36 inches long per strap. Divide into 3 groups of 3 strands. Fold the group in half, creating 6 working strands total. Divide into 3 pairs and braid firmly to your desired length. Knot at both ends and trim.
Attach straps securely at the top corners of the bodice back and front panels using yarn needle and matching yarn.
Finishing Your Coastal Ruffle Dress
Weave in all remaining ends with your yarn needle.
Block the dress on blocking mats using rust-proof pins. Wet blocking works best for cotton and cotton-blend yarns. Gently stretch each ruffle tier to open up the shells and encourage beautiful drape.
Using sewing needle and matching thread, attach 3 cowrie shells or shell buttons down the center front V-neckline opening.
Try on your dress and adjust strap length as needed by re-knotting.
Styling Tips for Your Ocean-Inspired Dress
This dress works beautifully as a beach coverup or a summer evening outfit. Pair with strappy sandals and simple jewelry to let those gorgeous ruffles take center stage. The fitted bodice and flowing tiers are incredibly flattering and comfortable in warm weather.
The ombre colorway truly does evoke ocean waves, especially when you’re walking and the tiers flutter with movement. It photographs beautifully and makes an absolute statement piece.
I hope you love making your own Coastal Dreamer as much as I loved designing her. This tiered ruffle dress pattern brings together so many satisfying techniques, from the chevron ripple bodice to those show-stopping scalloped hems. Thank you for trusting me with your crafting time, and I cannot wait to see your finished dresses come to life.
If you make this ocean blue coastal ruffle dress, please save this pattern to your Pinterest boards so you can find it easily when you’re ready to start. And I would absolutely love to see your creations, so drop a comment below or tag me on Instagram with your progress photos. Happy crocheting!