
I don’t know about you, but I have always dreamed of creating a statement piece that makes people stop and ask, "Wait, you made that?" This dress is exactly that kind of project.
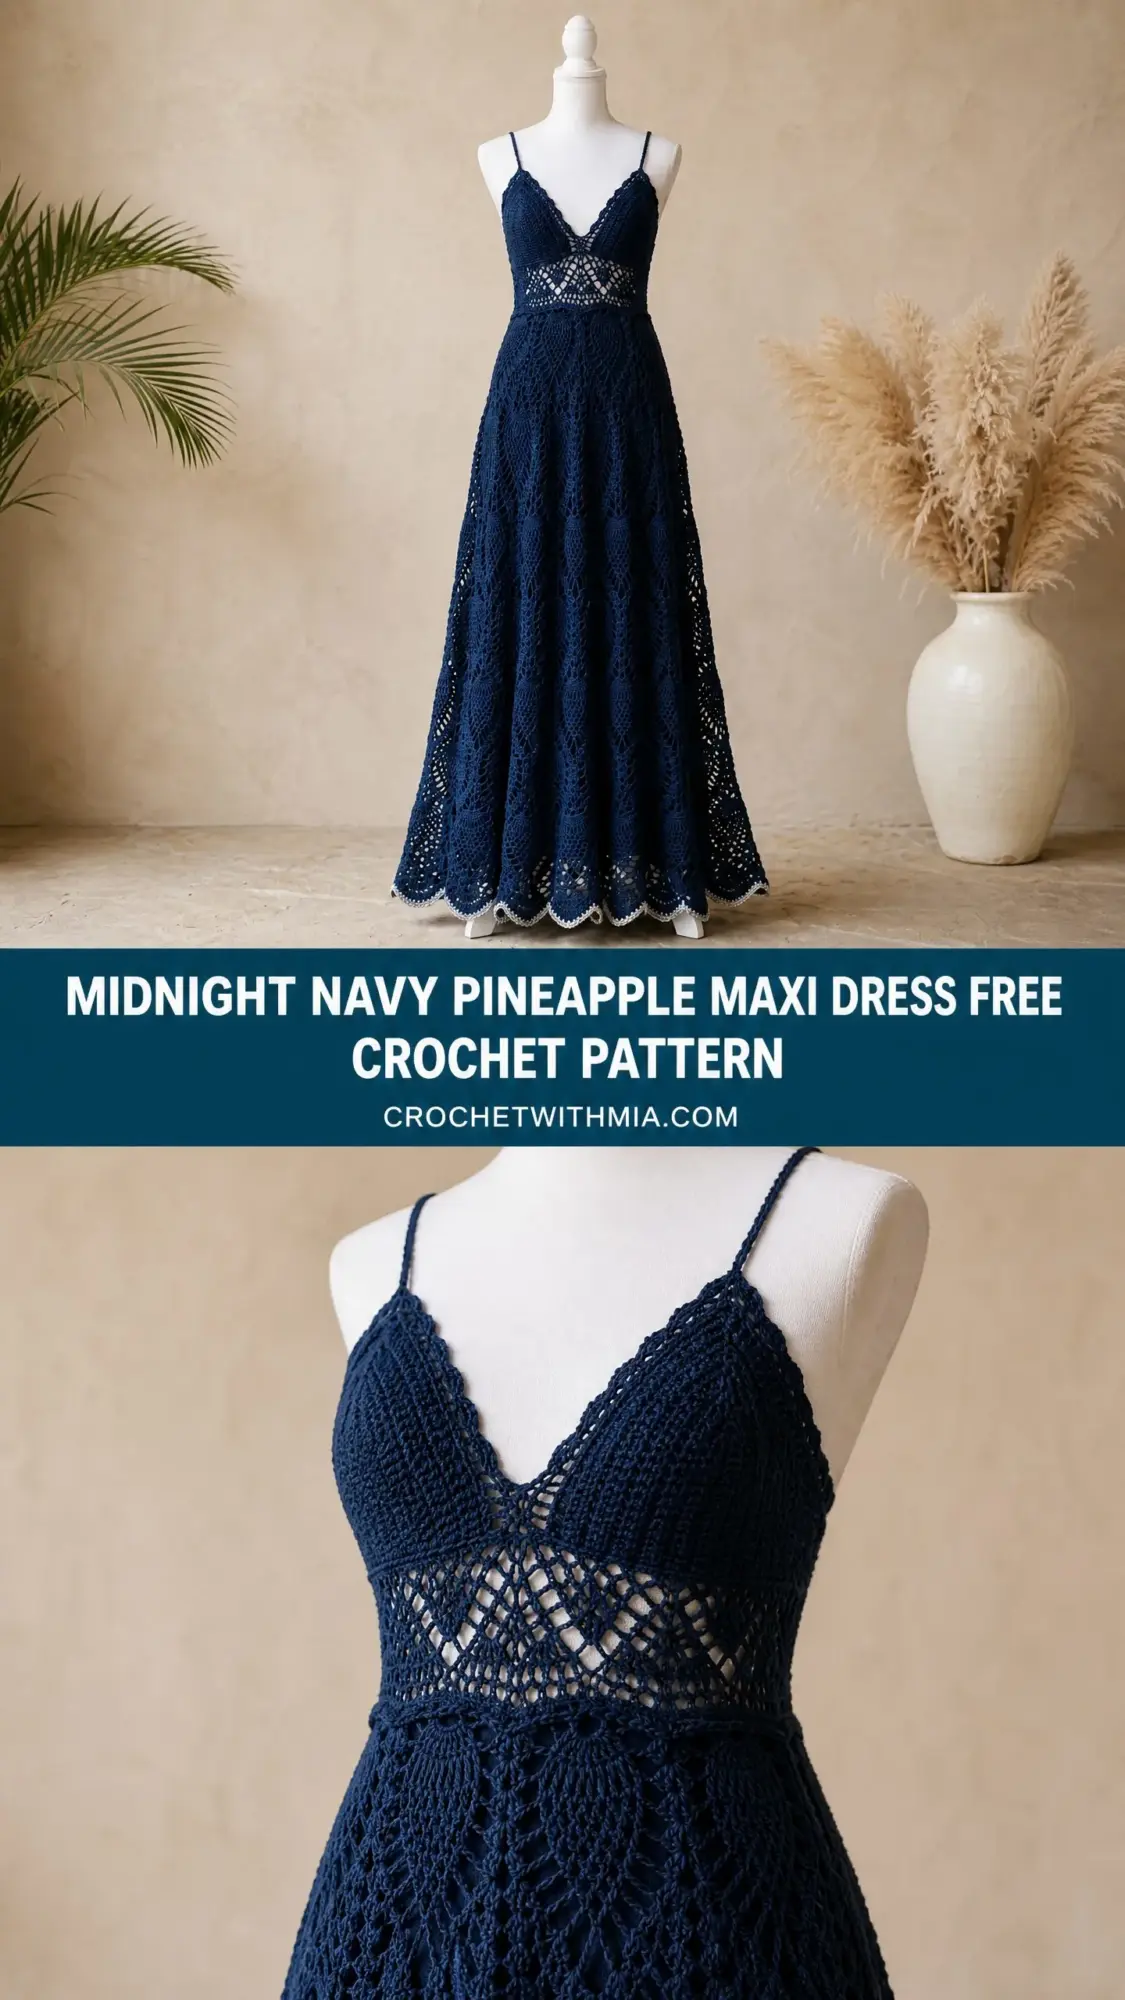
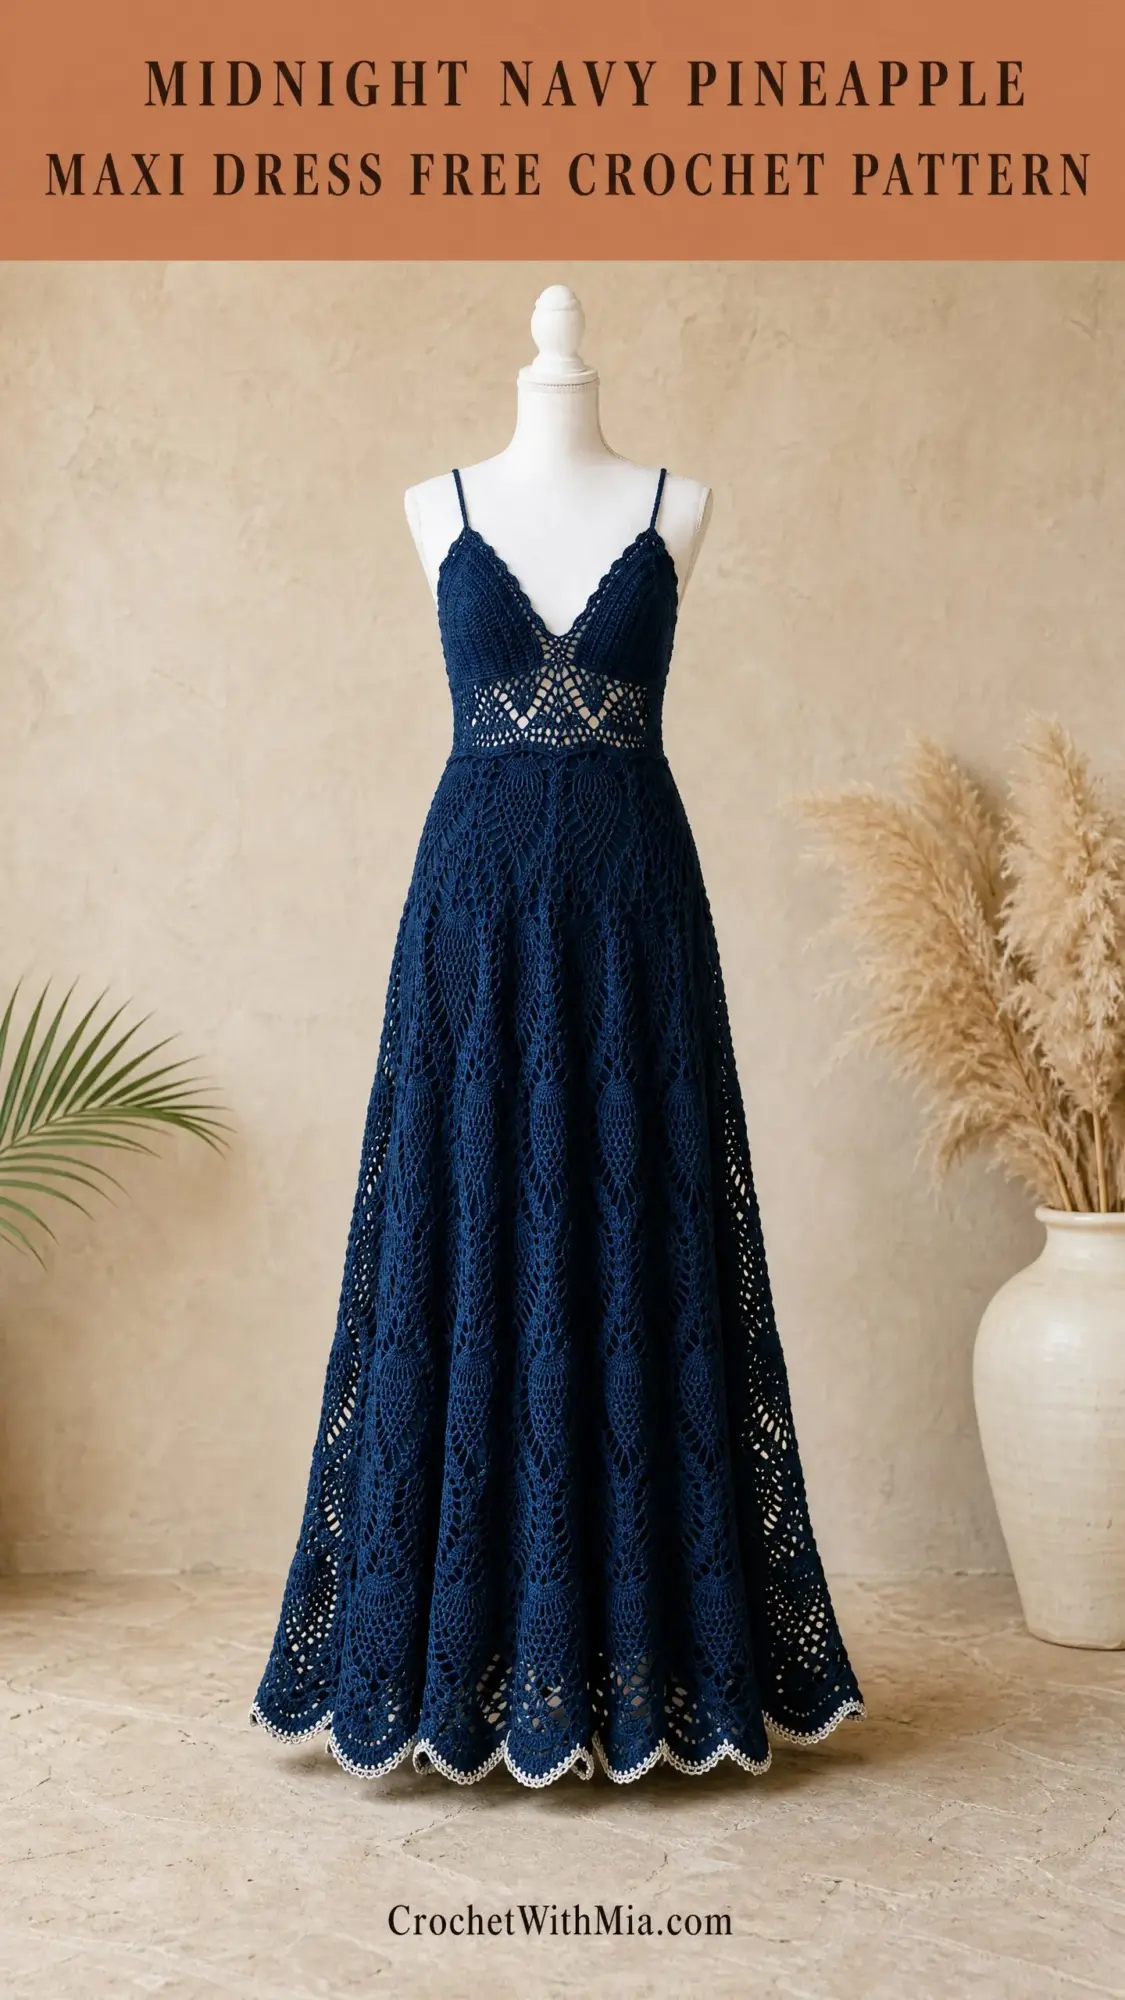
The pineapple lace stitch has been on my crochet bucket list for years, and when I finally committed to a full floor-length gown, I knew it had to be something showstopping. This midnight navy maxi dress delivers all the drama with its sweeping A-line silhouette, delicate spaghetti straps, and that gorgeous geometric diamond panel at the waist.
Fair warning: this is not a weekend project. We are talking 80 to 120 hours of dedicated stitching. But if you have been craving a true heirloom piece that showcases everything you have learned as a crocheter, this pattern will challenge you in the best possible way.
Why This Crochet Dress Pattern Is Worth the Commitment
Let me be honest with you. This is an advanced pattern. The pineapple fan motifs, the top-down construction, the fitted bodice shaping, and the careful management of stitch counts across multiple sections all require confidence and experience.
But here is the thing. If you have made lace shawls, worked garments in the round, and feel comfortable reading complex stitch patterns, you are ready for this. The construction is logical. The bodice works flat in two pieces, joins into a tube, transitions through a beautiful diamond lace waistband, and then the skirt flows downward in those iconic pineapple fans that get wider as they approach the hem.
The result is absolutely stunning. A dress worthy of weddings, galas, or any occasion where you want to feel like the most impressive person in the room.
Materials You Will Need
Yarn: Approximately 2,800 to 3,200 yards of fingering weight (size 1) 100 percent mercerized cotton yarn in midnight navy. You will also need about 50 yards of fingering weight cotton in off-white or cream for the hem edging.
Hooks: US B-1 / 2.25 mm for the bodice and waistband. US C-2 / 2.75 mm for the skirt section to encourage better drape.
Notions:
Yarn Suggestions:
Paintbox Yarns Cotton DK used at fingering tension works beautifully. The Navy Blue colorway has excellent stitch definition for lace. You will need approximately 14 skeins of 280 yards each.
Drops Safran in Navy is another excellent choice. The mercerization gives that subtle sheen you see in the photos. Plan for approximately 10 skeins of 175 yards each, plus a few extra to be safe.
Whatever you choose, look for tightly spun, mercerized 100 percent cotton. Avoid fuzzy fibers, acrylic, or loosely plied yarns. They will completely obscure the beautiful lace structure.
Finished Measurements
This pattern is written for size Small/Medium, which fits US sizes 4 through 8 with a bust measurement of 32 to 36 inches.
Size customization guidance is included at the end of the instructions.
Gauge (Do Not Skip This)
With your B-1 / 2.25 mm hook:
For the pineapple lace pattern with your C-2 / 2.75 mm hook:
I cannot stress this enough. Gauge is mandatory for a fitted garment. Make a swatch of at least 4 inches by 4 inches in both the single crochet bodice pattern and the pineapple lace pattern. Your finished bust will be directly determined by gauge accuracy.
Abbreviations and Stitch Definitions
Before we dive in, let me define every stitch and abbreviation you will encounter. If any of these feel unfamiliar, practice them on a small swatch first.
Basic Abbreviations:
Special Stitches for This Pattern
These are the techniques that give this dress its distinctive character.
Pineapple Shell (PS): Work 9 double crochet stitches all into the same stitch or space. This forms the base fan of each pineapple motif. Yarn over, insert hook into designated stitch or space, draw up a loop, yarn over and draw through 2 loops, yarn over and draw through 2 loops. Repeat this process 8 more times into the exact same location. You will have 9 double crochets fanning out from one point.
Pineapple Decrease Row Cluster (PDC): This narrows the pineapple as it rises. Yarn over, insert hook into next double crochet, yarn over, draw up loop, yarn over, draw through 2 loops. Then yarn over, insert hook into the following double crochet, yarn over, draw up loop, yarn over, draw through 2 loops. Finally, yarn over and draw through all 3 loops on hook. This joins 2 double crochets into 1 stitch.
5-dc Shell (SH): Work 5 double crochet stitches all into the same stitch or space. Used in the diamond waistband panel.
Beginning Shell (beg-SH): Chain 3 (counts as first double crochet), work 4 more double crochets into same stitch or space, giving you 5 double crochets total.
Picot: Chain 3, slip stitch into first chain of that chain-3. This creates a small decorative loop used in the hem edging.
V-Stitch (V-st): Work (double crochet, chain 2, double crochet) all into the same stitch or space.
Diamond Mesh (DM): Work (double crochet, chain 1, double crochet) all into the same chain-space. Used in the waistband section.
Join with sc: Make a slip knot on hook, insert hook into designated stitch, yarn over, draw up loop, yarn over, draw through both loops. Used when joining a new color or new section.
Pattern Notes Before You Begin
Read through these carefully. They will save you confusion later.
1. The bodice is worked flat in two mirrored halves to create the V-neck shaping, then joined at the sides and worked in the round from the underbust down.
2. The waistband panel is worked in the round as a transitional section between the bodice and the skirt.
3. The skirt is worked in the round from waist to hem. Increases are built into the pineapple repeat structure.
4. For bodice single crochet rows, chain 1 does not count as a stitch. For double crochet rows, chain 3 counts as first double crochet throughout.
5. Always join rounds with a slip stitch to the top of the first stitch unless otherwise stated.
6. Use stitch markers at the beginning of each round and at side seam points.
7. Switch to the C-2 / 2.75 mm hook at the beginning of the skirt section.
8. The straps are worked separately and sewn on at the end.
9. The cream edging is worked as the final round of the hem only.
Bodice Left Cup Instructions
The bodice cups are worked flat, then joined.
Foundation: With main color and B-1 hook, chain 24.
Row 1 (RS): Single crochet in 2nd chain from hook and in each chain across. (23 sc)
Row 2 (WS): Chain 1, turn. Single crochet in each stitch across. (23 sc)
Row 3 (RS): Chain 1, turn. Sc2tog over first 2 stitches, single crochet to last 2 stitches, sc2tog. (21 sc)
Row 4 (WS): Chain 1, turn. Single crochet in each stitch across. (21 sc)
Row 5 (RS): Chain 1, turn. Sc2tog over first 2 stitches, single crochet to last 2 stitches, sc2tog. (19 sc)
Row 6 (WS): Chain 1, turn. Single crochet in each stitch across. (19 sc)
Row 7 (RS): Chain 1, turn. Sc2tog over first 2 stitches, single crochet to last 2 stitches, sc2tog. (17 sc)
Row 8 (WS): Chain 1, turn. Single crochet in each stitch across. (17 sc)
Row 9 (RS): Chain 1, turn. Sc2tog over first 2 stitches, single crochet to last 2 stitches, sc2tog. (15 sc)
Row 10 (WS): Chain 1, turn. Single crochet in each stitch across. (15 sc)
Row 11 (RS): Chain 1, turn. Sc2tog, single crochet to end. (14 sc)
From this point, you are only decreasing on the V-neck center edge.
Row 12 (WS): Chain 1, turn. Single crochet in each stitch across. (14 sc)
Row 13 (RS): Chain 1, turn. Sc2tog, single crochet to end. (13 sc)
Row 14 (WS): Chain 1, turn. Single crochet in each stitch across. (13 sc)
Row 15 (RS): Chain 1, turn. Sc2tog, single crochet to end. (12 sc)
Row 16 (WS): Chain 1, turn. Single crochet in each stitch across. (12 sc)
Row 17 (RS): Chain 1, turn. Sc2tog, single crochet to end. (11 sc)
Row 18 (WS): Chain 1, turn. Single crochet in each stitch across. (11 sc)
Row 19 (RS): Chain 1, turn. Sc2tog, single crochet to end. (10 sc)
Row 20 (WS): Chain 1, turn. Single crochet in each stitch across. (10 sc)
Fasten off. This is your Left Cup.
Checkpoint: Left cup should measure approximately 4 inches wide at widest point and approximately 3.5 inches tall.
Bodice Right Cup Instructions
Work the Right Cup as a mirror of the Left Cup.
Foundation: With main color and B-1 hook, chain 24.
Rows 1 through 10: Work exactly as Left Cup Rows 1 through 10.
Row 11 (RS): Chain 1, turn. Single crochet to last 2 stitches, sc2tog. (14 sc)
Notice the decrease is now at the opposite end.
Row 12 (WS): Chain 1, turn. Single crochet in each stitch across. (14 sc)
Row 13 (RS): Chain 1, turn. Single crochet to last 2 stitches, sc2tog. (13 sc)
Row 14 (WS): Chain 1, turn. Single crochet in each stitch across. (13 sc)
Row 15 (RS): Chain 1, turn. Single crochet to last 2 stitches, sc2tog. (12 sc)
Row 16 (WS): Chain 1, turn. Single crochet in each stitch across. (12 sc)
Row 17 (RS): Chain 1, turn. Single crochet to last 2 stitches, sc2tog. (11 sc)
Row 18 (WS): Chain 1, turn. Single crochet in each stitch across. (11 sc)
Row 19 (RS): Chain 1, turn. Single crochet to last 2 stitches, sc2tog. (10 sc)
Row 20 (WS): Chain 1, turn. Single crochet in each stitch across. (10 sc)
Do not fasten off. You will join the cups next.
Joining the Cups and Beginning the Bodice Body
With right side facing, place the Left Cup and Right Cup side by side so the pointed V-neck centers meet at center front. The cups are oriented with the wide outer edges at the bottom.
Working across the bottom edge of the Right Cup (10 stitches), chain 14 for the center front panel, then single crochet across the bottom edge of the Left Cup (10 stitches).
This chain-14 bridge connects the two cups under the V-neck where the diamond insert will sit.
Join to work in the round.
Bodice Body Rounds
Round 1: Single crochet across 10 stitches of Right Cup, single crochet in each of the 14 chains of the center bridge, single crochet across 10 stitches of Left Cup, chain 10 for back panel, join with slip stitch to first single crochet.
Work into the chain-10 back panel to complete the round. Total: 54 single crochet. Place marker at start of round.
Round 2: Single crochet in each stitch around. (54 sc)
Round 3: Single crochet in each of first 10 stitches, 2 single crochet in next stitch, single crochet in each of next 32 stitches, 2 single crochet in next stitch, single crochet to end. (56 sc)
Round 4: Single crochet in each stitch around. (56 sc)
Round 5: Single crochet in each of first 10 stitches, 2 single crochet in next stitch, single crochet in each of next 34 stitches, 2 single crochet in next stitch, single crochet to end. (58 sc)
Round 6: Single crochet in each stitch around. (58 sc)
Continue in this established pattern, working increase rounds on odd-numbered rounds and even rounds straight, until you reach Round 26 with 78 single crochet.
Rounds 7 through 26: Follow the increase pattern, adding 2 stitches every other round. By Round 26, you should have 78 single crochet.
Checkpoint: After Round 26, the bodice body should measure approximately 6 inches from the joining round.
Waistband Diamond Lace Panel
Transition round: With B-1 hook, work 1 round of single crochet evenly, increasing 6 stitches evenly spaced. (84 sc)
The 84 stitches divide evenly for the 14-stitch diamond repeat, giving you 6 repeats around.
Waistband Round 1: Chain 3 (counts as double crochet), 4 double crochet in same stitch (beginning shell made), chain 2, skip 2 stitches, single crochet in next stitch, chain 2, skip 2 stitches, 5-dc shell in next stitch, skip 2 stitches, single crochet in next stitch, skip 2 stitches. Repeat from beginning for a total of 6 repeats around, join with slip stitch to top of chain-3.
Waistband Rounds 2 through 4: Continue the diamond mesh pattern as established, creating the crossing diamond lines visible in the waistband.
Waistband Round 5: Single crochet in each stitch and 1 single crochet in each chain-1 space, 2 single crochet in each chain-2 space, 3 single crochet in each chain-3 space around, adjusting to return to 84 single crochet evenly.
Checkpoint: After the waistband panel, your piece should measure approximately 9 to 10 inches from the cup join. The waistband panel itself should be approximately 3 inches tall.
Skirt Foundation and Pineapple Pattern
Switch to your C-2 / 2.75 mm hook from this point forward.
Skirt Increase Round 1: Single crochet in each of first 6 stitches, 2 single crochet in next stitch. Repeat around. (96 sc)
Skirt Increase Round 2: Single crochet in each of first 5 stitches, 2 single crochet in next stitch. Repeat around. (112 sc)
Skirt Increase Round 3: Work even. Single crochet in each stitch around. (112 sc)
With 112 stitches and a 14-stitch repeat, you have 8 pineapple motifs around.
Skirt Round 1 (establishes pineapple bases): Chain 4 (counts as double crochet plus chain 1), skip 1 stitch, double crochet in next stitch, chain 1, skip 1 stitch. Work pineapple shell in next stitch, chain 2, skip 3 stitches, single crochet in next stitch, chain 2, skip 3 stitches, pineapple shell in next stitch, chain 1, skip 1 stitch, double crochet in next stitch, chain 1, skip 1 stitch, double crochet in next stitch, chain 1, skip 1 stitch. Repeat around, join with slip stitch.
Continue working Rounds 2 through 20 following the pineapple pattern, where each round builds the characteristic narrowing and widening of the pineapple fans. The skirt naturally increases in circumference as the pineapple bases widen.
By Round 20, your skirt will have a circumference of approximately 220 to 240 inches at the hem.
Finishing Touches
Straps: Chain a length sufficient to reach from the bodice front, over your shoulder, cross at the back, and attach at the opposite side back. Work single crochet into each chain. Sew securely to the bodice.
Hem Edging: Join off-white yarn at any point along the bottom edge. Work a round of single crochet, then work picot edging (single crochet, picot, skip 1 stitch) around the entire hem. This creates the delicate cream scalloped trim visible in the photos.
Blocking: Wet block aggressively. Pin out every pineapple fan to open the lace fully. Allow to dry completely before removing pins.
Lining: Because of the open lace construction, a slip dress lining or body-con underdress is recommended for modesty.
Tips for Success
Take your time with this pattern. The pineapple motif is forgiving once you understand its rhythm, but rushing leads to miscounts.
Use lifelines. Thread a contrasting yarn through your stitches every 10 rounds so you can rip back without losing everything if needed.
Try the bodice on frequently during construction. Adjust increases or work additional rounds as needed for your body.
The skirt section alone will take 50 to 70 hours. Break it into sessions and enjoy the meditative quality of the repetitive lace work.
I hope this crochet maxi dress pattern inspires you to tackle something truly ambitious. It is a labor of love, but the finished piece is absolutely breathtaking. If you make this dress, please tag me on Instagram or share a photo in my Facebook group. I would be thrilled to see your version!
If you want to save this midnight navy pineapple maxi dress pattern for later, go ahead and pin it to your favorite Pinterest board. And please drop a comment below if you decide to make it. I love hearing how these projects turn out and seeing the colors you choose!