
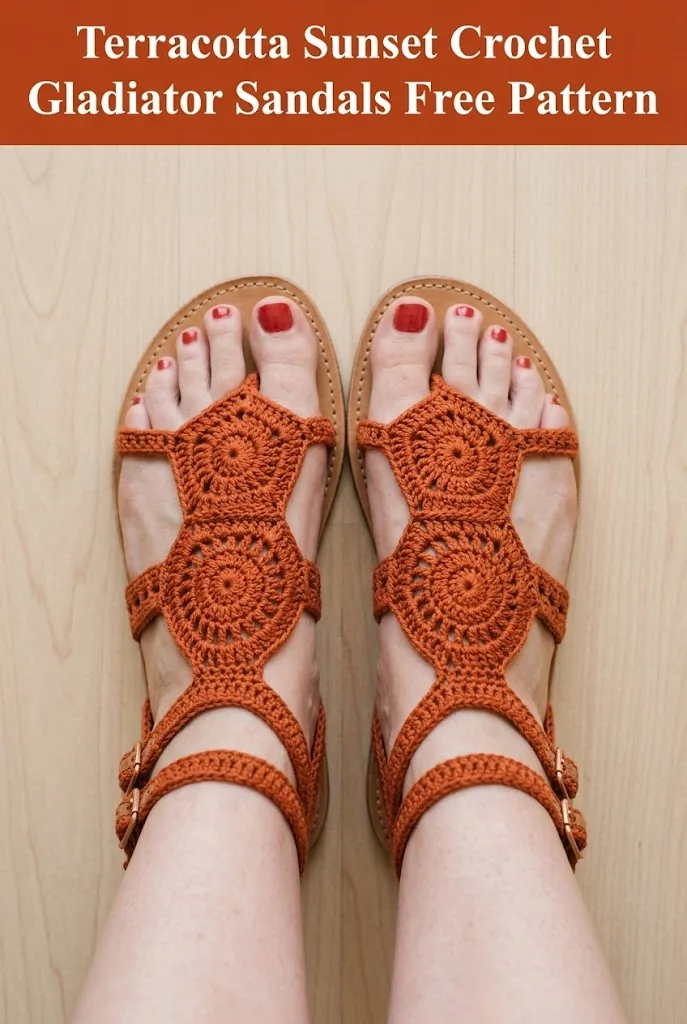
I’ve been looking for the perfect summer crochet accessory that actually feels fresh and modern, and this is my favourite find yet. These gladiator sandals combine beautiful circular motifs with a sturdy leather sole base, creating wearable crochet footwear you’ll actually want to show off. The terracotta shade feels bohemian and earthy, perfect for warm weather adventures.
Why You’ll Love This Crochet Gladiator Sandals Pattern
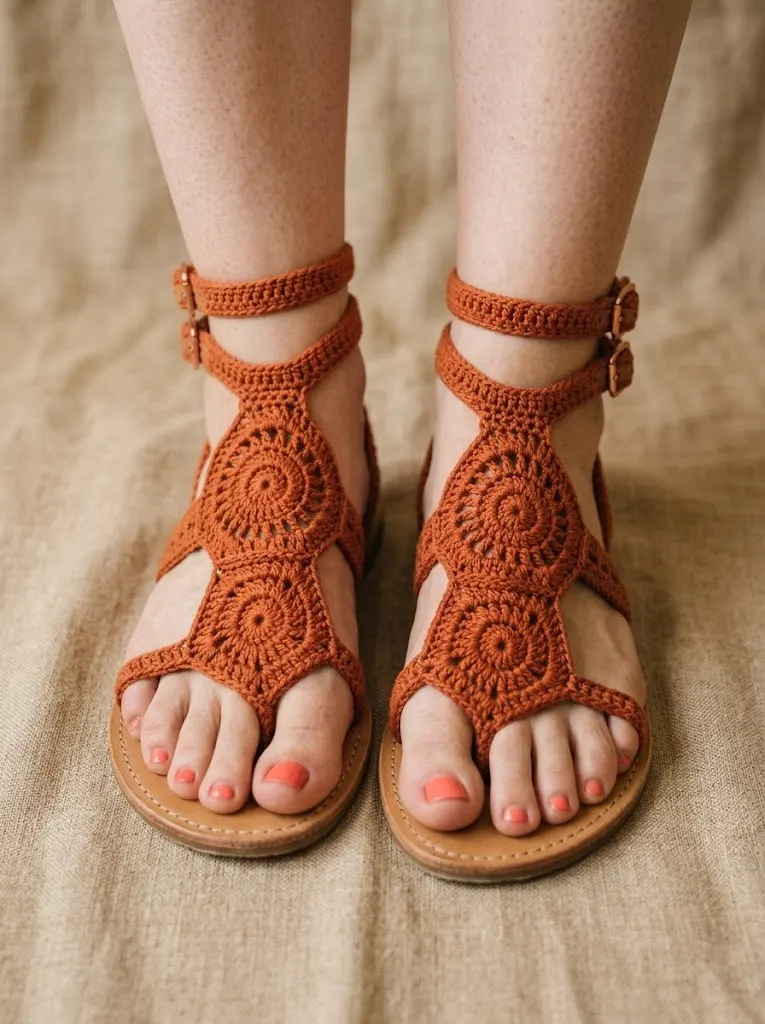
These sandals are a true statement piece. The design features connected circular motifs that create an open, lacy look while still providing structure and coverage. You’ll work with basic stitches arranged in rounds to form the medallion shapes, then join them together to build the sandal upper.
What makes this pattern special:
The finished sandals feature five connected medallions per foot, double ankle straps, and a professional finish that looks store-bought. Trust me, people will ask where you purchased these.
Materials Needed for Crochet Sandals
Yarn:
Hook:
Additional Supplies:
Gauge Information
Work 5 rounds of the medallion motif. Your finished circle should measure approximately 2.5 inches in diameter.
Gauge matters here because the medallions need to fit together properly and cover your foot comfortably. If your medallions are too large, go down a hook size. Too small? Go up a hook size.
Abbreviations and Stitch Definitions
Let me walk you through every stitch you’ll use in this pattern. Even if you know these well, a quick refresher never hurts.
Ch = Chain. Wrap yarn over hook and pull through the loop on your hook. This creates one chain stitch.
Sl st = Slip stitch. Insert hook into stitch, yarn over, pull through both the stitch and the loop on your hook in one motion. Used for joining rounds.
Sc = Single crochet. Insert hook into stitch, yarn over and pull up a loop (2 loops on hook), yarn over and pull through both loops.
Hdc = Half double crochet. Yarn over, insert hook into stitch, yarn over and pull up a loop (3 loops on hook), yarn over and pull through all 3 loops.
Dc = Double crochet. Yarn over, insert hook into stitch, yarn over and pull up a loop (3 loops on hook), yarn over and pull through 2 loops (2 loops remain), yarn over and pull through remaining 2 loops.
Tr = Treble crochet. Yarn over twice, insert hook into stitch, yarn over and pull up a loop (4 loops on hook), yarn over and pull through 2 loops three times until one loop remains.
Ch-sp = Chain space. The gap created by chains in the previous round. You’ll work into this space, not into individual chain stitches.
Understanding the Construction
Before diving into the pattern, let me explain how these sandals come together. This helps you visualize what you’re making and reduces confusion later.
Each sandal consists of:
1. One toe medallion (sits over the front of your foot)
2. Two side medallions (cover the sides of your foot)
3. One instep medallion (covers the top of your foot)
4. One ankle medallion (wraps around your ankle)
5. Two ankle straps with buckle attachments
The medallions are worked individually, then joined as you go on the final round. The straps are worked directly onto the ankle medallion. Finally, everything attaches to your leather sandal sole.
Circular Medallion Motif Pattern
You’ll make 5 medallions per sandal, 10 total for the pair. I recommend making all medallions first, then joining them.
Round 1: Create a magic ring. Ch 1 (does not count as a stitch throughout), work 8 sc into the ring. Sl st to first sc to join. Pull magic ring closed. (8 sc)
Round 2: Ch 3 (counts as first dc here and throughout), dc in same st, 2 dc in each st around. Sl st to top of ch-3 to join. (16 dc)
Round 3: Ch 3, dc in same st, dc in next st, *2 dc in next st, dc in next st* around. Sl st to top of ch-3 to join. (24 dc)
Round 4: Ch 4 (counts as dc plus ch-1), skip next st, *dc in next st, ch 1, skip next st* around. Sl st to 3rd ch of beginning ch-4 to join. (12 dc, 12 ch-1 spaces)
Round 5: Sl st into first ch-1 sp, ch 3, 2 dc in same sp, ch 1, *3 dc in next ch-1 sp, ch 1* around. Sl st to top of ch-3 to join. (12 groups of 3 dc, 12 ch-1 spaces)
Round 6: Ch 1, sc in same st, sc in next 2 dc, 2 sc in ch-1 sp, *sc in next 3 dc, 2 sc in ch-1 sp* around. Sl st to first sc to join. (60 sc)
This completes one medallion. The finished circle should measure approximately 2.5 to 3 inches across. Make 10 total.
Joining the Medallions
Now comes the fun part. You’ll connect your medallions to form the sandal shape.
Joining Method: Hold two medallions with wrong sides together (or right sides together if you prefer a raised seam on the outside). Using sl sts, join through both layers for approximately 8 to 10 stitches. Fasten off and weave in ends.
Layout for Each Sandal:
Lay out 5 medallions in this configuration:
Each join should be approximately 8 to 10 stitches wide. This creates gaps between medallions for a gladiator sandal look.
Pro tip: Before permanently joining, lay the medallions on your foot or the leather sole to check placement. Adjust join lengths as needed for your foot shape.
Ankle Strap Pattern
You’ll make two straps per sandal, four total.
First Strap (Lower):
Join yarn to the edge of the ankle medallion at the right side.
Row 1: Ch 1, work 6 sc evenly across the medallion edge. Turn. (6 sc)
Rows 2 through 35: Ch 1, sc in each st across. Turn. (6 sc)
This creates a strap approximately 10 to 12 inches long. Adjust length based on your ankle measurement. You need the strap to wrap around your ankle with 2 inches of overlap for the buckle.
Buckle End:
On the last row, ch 1, sc in first 2 sts, ch 4, skip 2 sts, sc in last 2 sts. This creates a buttonhole for the buckle prong. Fasten off.
Second Strap (Upper):
Work the same as the first strap, attaching it to the ankle medallion approximately half an inch above the first strap attachment point.
Attaching to Leather Soles
This step requires some patience, but the result is worth it.
Step 1: Position your crocheted upper on the leather sole base. The toe medallion should sit over the front of the sole, and the ankle piece should align with the back.
Step 2: Using a leather punch or awl, create holes around the edge of the sole approximately every half inch. Space them evenly where the crochet will attach.
Step 3: Thread your tapestry needle with matching yarn. Starting at the toe, whipstitch the crochet upper to the sole through the punched holes and the edge stitches of your medallions.
Step 4: Work around the entire perimeter where crochet meets leather. Keep stitches firm but not so tight that they pucker the crochet.
Step 5: For extra durability, you can apply a thin line of fabric glue or leather adhesive between the crochet and the sole before stitching.
Attaching the Buckles
Step 1: Position each buckle at the loose end of each strap (the end not attached to the medallion).
Step 2: Fold the strap end over the buckle bar approximately 1 inch. Whipstitch this fold securely in place.
Step 3: The other end of the strap (with the buttonhole) wraps around the ankle and the buckle prong goes through the buttonhole to secure.
Step 4: Repeat for all four straps.
Sizing Adjustments
For Smaller Feet:
For Larger Feet:
Care Instructions
These sandals hold up beautifully with proper care.
Cleaning: Spot clean with a damp cloth. For deeper cleaning, hand wash gently in cool water with mild soap. Do not machine wash.
Drying: Stuff toe area with paper towels to maintain shape. Lay flat to dry away from direct heat or sunlight.
Storage: Store flat or stuffed to maintain medallion shape. Avoid hanging, which can stretch the straps.
Helpful Tips for Success
Blocking: Steam block your medallions before joining for a professional finish. This evens out your stitches and helps the motifs lay flat.
Yarn choice matters: Cotton yarn works best for wearable sandals. It doesn’t stretch like acrylic and handles moisture from summer feet. Mercerized cotton adds durability and a subtle sheen.
Test the fit: Before committing to final joins and sole attachment, hold the piece against your foot repeatedly. Nothing is worse than completing the project and finding it doesn’t fit.
Secure your ends: These sandals see a lot of movement. Weave in ends extra securely, going back and forth through stitches at least three times.
Customization Ideas
Color variations: Try natural cream for a neutral boho look, deep navy for sophistication, or soft sage green for something unexpected.
Embellishments: Add wooden beads at the center of each medallion, or work small crochet flowers to attach at join points.
Different soles: Cork soles work beautifully and are eco-friendly. Rubber flip-flop soles offer more cushion.
Closed-toe option: Add a half-medallion at the front for more toe coverage.
I hope you absolutely love making these Terracotta Sunset Crochet Gladiator Sandals. They’re a labor of love, but the compliments you’ll receive make every stitch worthwhile. I designed this crochet sandal pattern to be both beautiful and practical, and I genuinely believe you’ll wear these all summer long.
Thank you so much for choosing this pattern. Working through a project like this together, even from opposite sides of a screen, genuinely makes my heart happy. If you make these sandals, I would absolutely love to see them. Tag me on Instagram or share in my Facebook group. Your versions always inspire me and the whole community.
If this pattern spoke to you, go ahead and pin it to your Pinterest boards so you can find it when sandal season calls. And please drop a comment below if you give these a try. I read every single one, and hearing about your projects truly makes my day.