
Go dig through your yarn stash right now. I know you have those skeins of lavender and sage green tucked away, waiting for the perfect project. This is it.
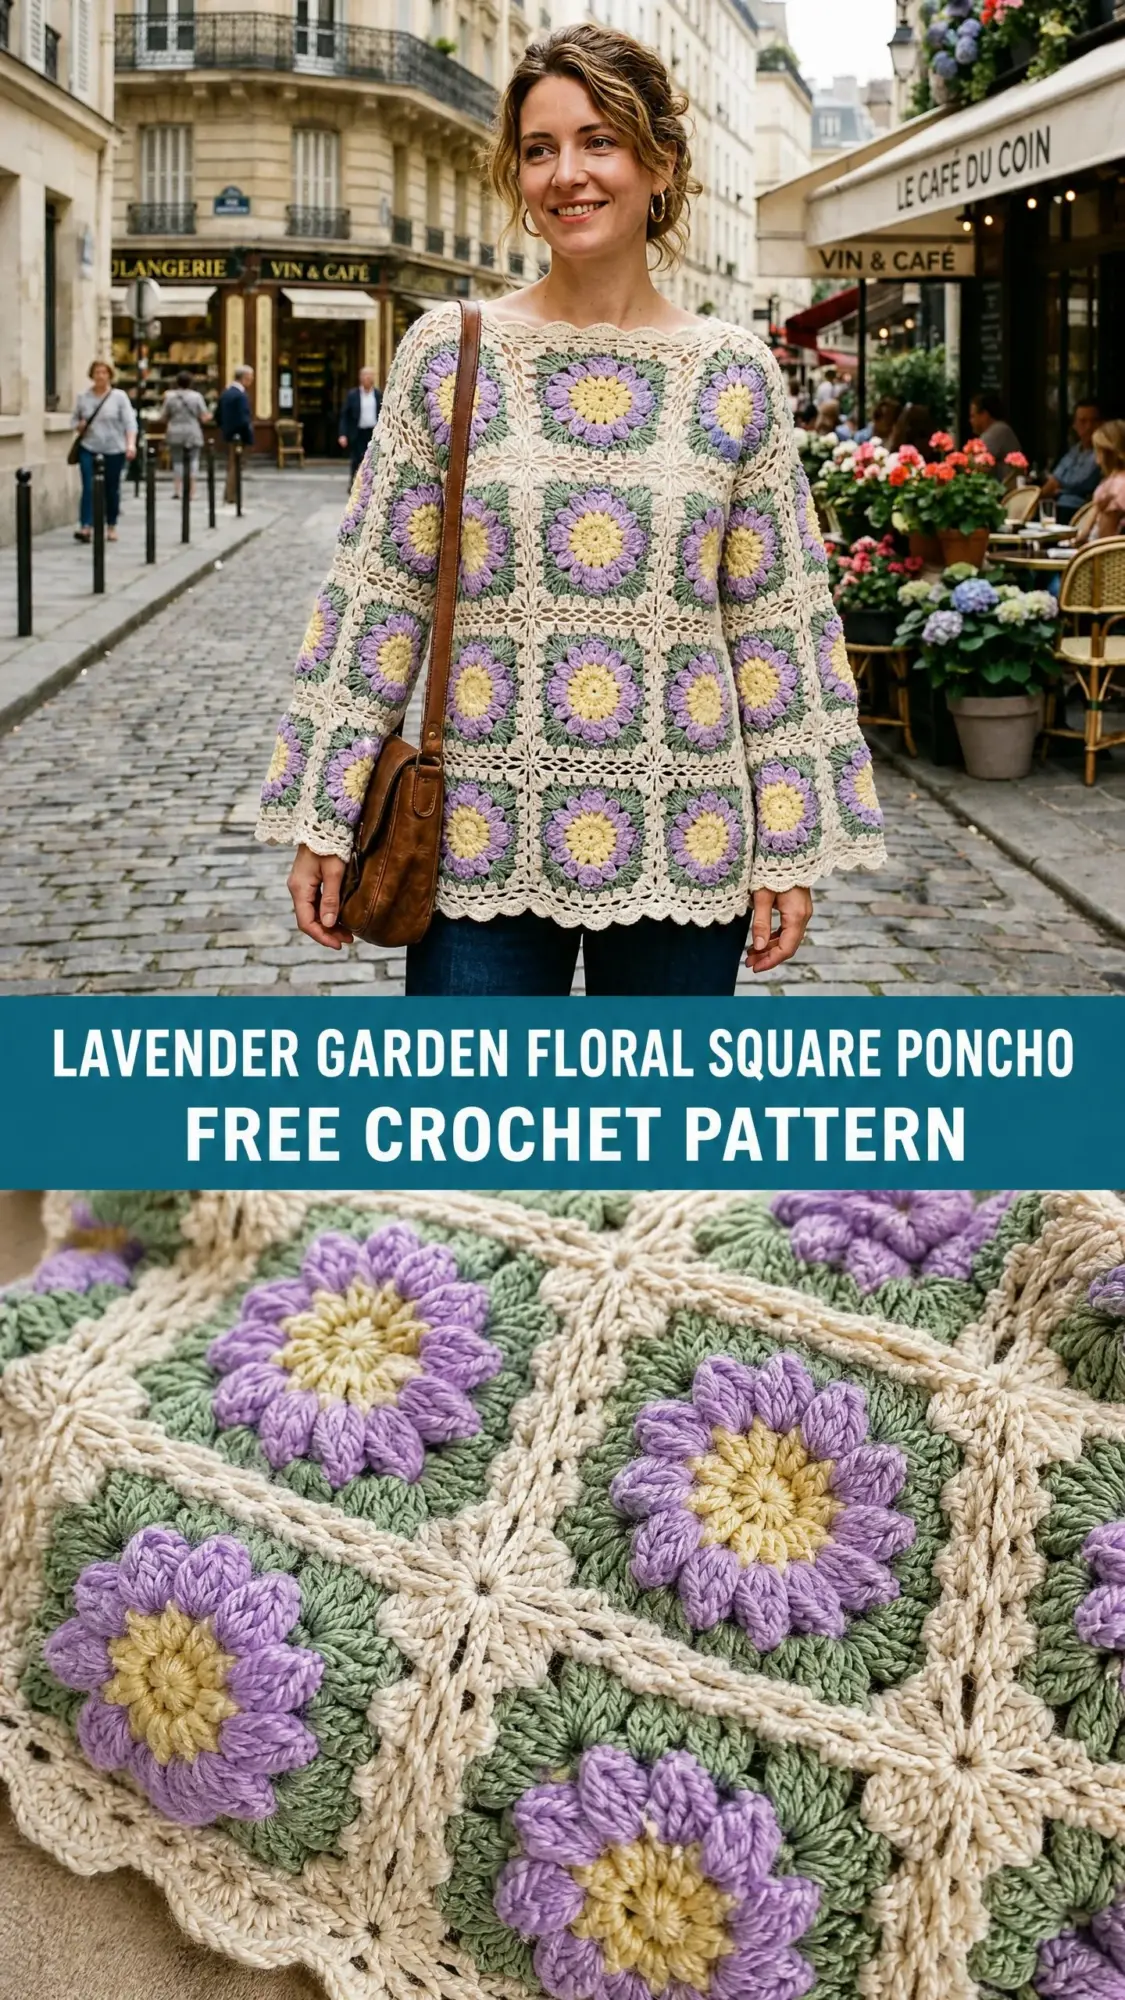
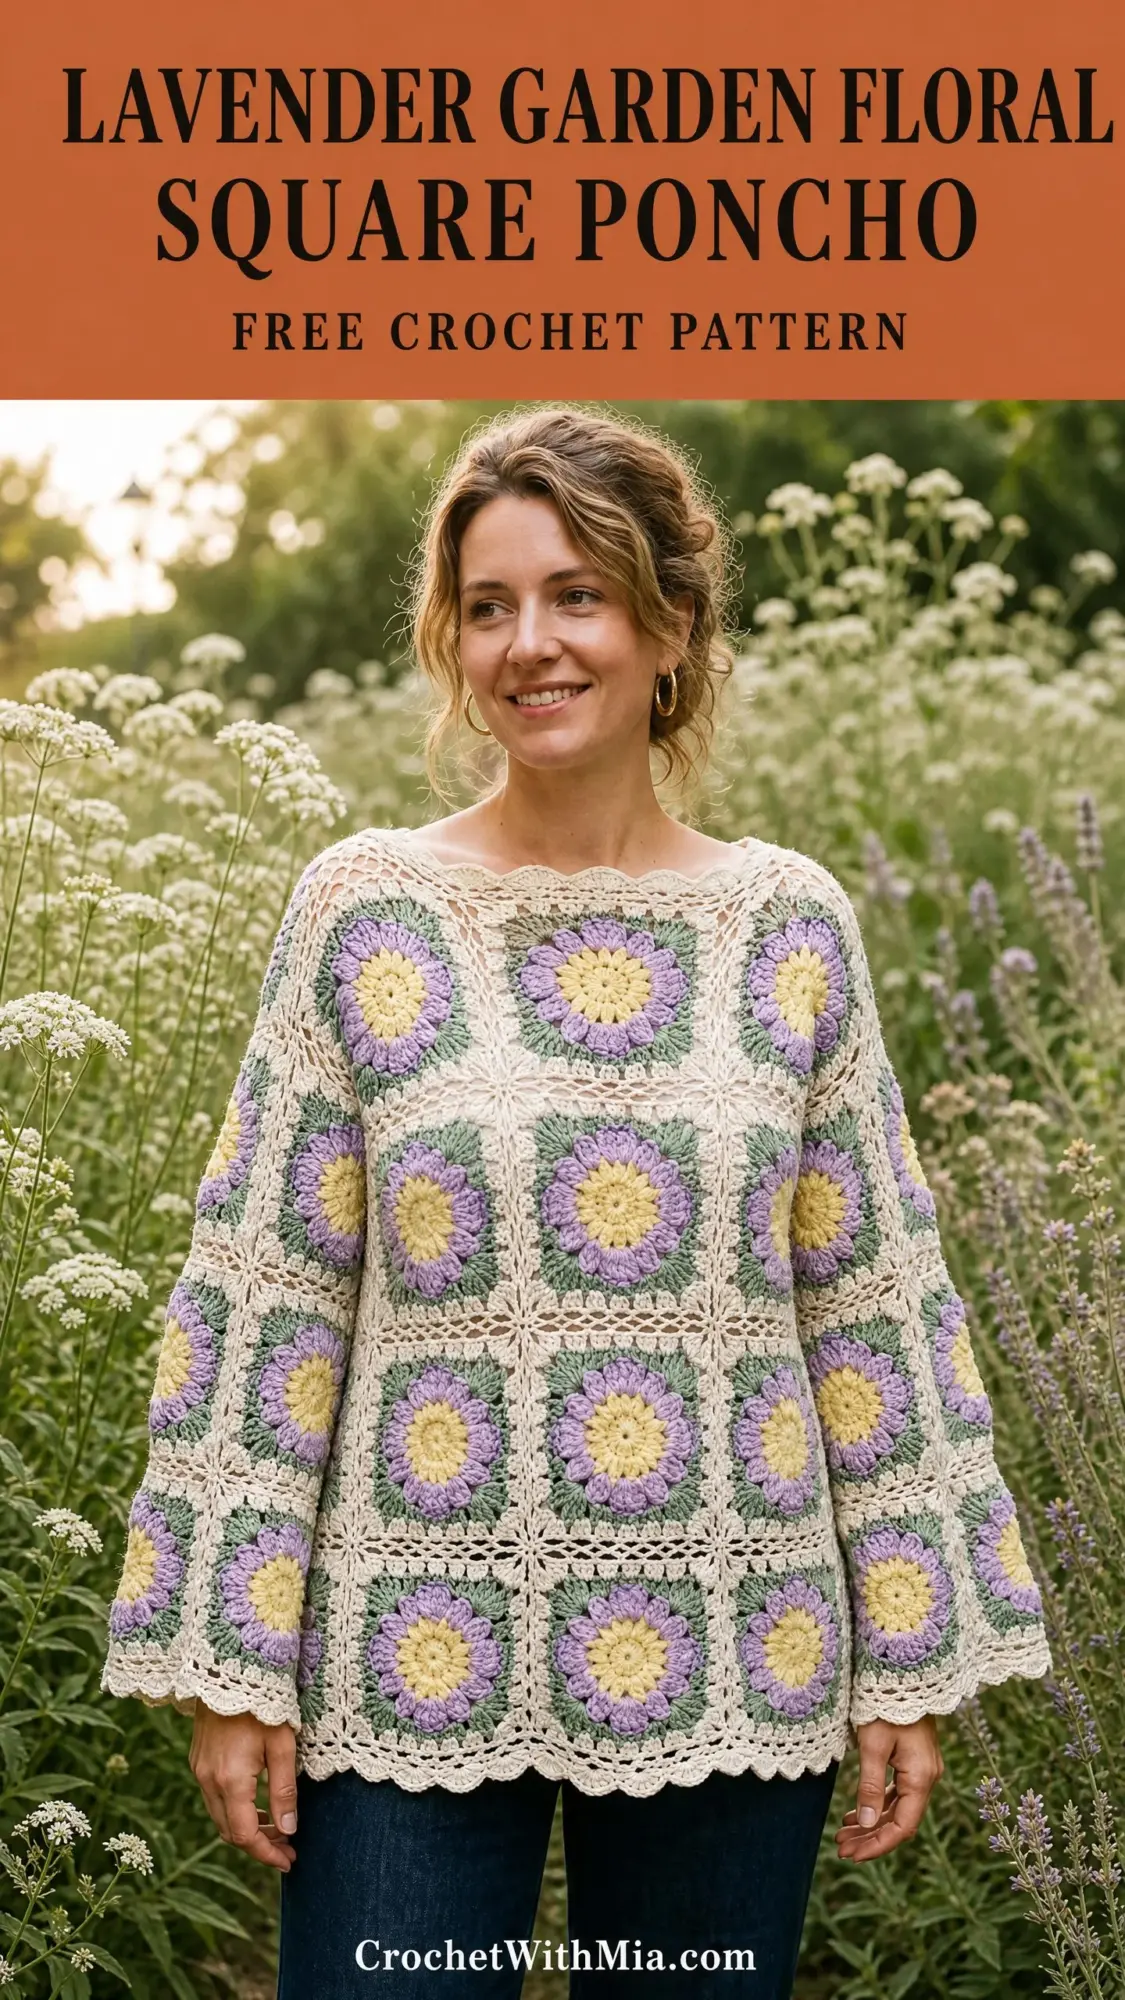
The Lavender Garden Floral Square Poncho is built entirely from dimensional flower squares joined with a cream lattice. Each square features a raised petal cluster that actually pops forward from the fabric. The construction is straightforward once you understand the rhythm. You make 48 identical squares, join them into two flat panels, then seam the shoulders and sides. The sleeves form naturally from the architecture of the joined squares.
This is an intermediate project. If you have made a basic granny square and seamed a garment before, you can absolutely do this. Plan for 60 to 90 hours of work. Yes, that is a time investment. But you will end up with a stunning bohemian piece that looks like it came from a high-end boutique.
Why This Floral Granny Square Poncho Works
The magic of this crochet pattern is in the dimensional petals. Unlike flat granny squares, these flowers have texture you can feel. The lavender petals curve forward on the right side, creating real depth. When you join all 48 squares together, you get a field of raised flowers across the entire garment.
The silhouette is relaxed and flattering. The A-line shape skims the body without clinging. The wide boat neckline sits elegantly across the shoulders. The bell sleeves add movement and drama. And the scallop edging at the hem and cuffs gives the whole piece a finished, polished look.
This poncho layers beautifully over jeans and a simple tee. It also works as a statement piece over a dress. The cream lattice joining creates visible ridges that become part of the design rather than something to hide.
Materials You Will Need
Yarn: Worsted weight yarn, weight category 4. You will need approximately 1,600 yards or 1,463 meters total.
Hook: US Size J/10 or 6.0 mm crochet hook
Notions:
Yarn Suggestions
Lion Brand Wool-Ease works wonderfully here. The slight halo enhances the dimensional petals and the color range includes excellent matches for this palette.
Cascade 220 is my top pick if you want the most professional result. It blocks beautifully and the stitch definition is incredible.
Paintbox Yarns Simply DK used doubled also produces great results. The color range is consistent and affordable.
Avoid chenille or heavily textured yarns. The petal definition will disappear in fuzzy fibers.
Gauge
Each finished and blocked square should measure 5.5 inches by 5.5 inches (14 cm by 14 cm).
In standard double crochet (dc) worked flat: 14 dc by 8 rows equals 4 inches or 10 cm using a US J/10 or 6.0 mm hook.
Gauge matters a lot in this pattern. Your finished garment dimensions depend entirely on your square size. If your square measures larger than 5.5 inches, go down one hook size. If it measures smaller, go up one hook size. Always block your gauge swatch before measuring.
Finished Measurements
Abbreviations (US Terms)
Special Stitches
Petal Cluster (Used in Round 3)
This is what gives the flowers their dimensional look. Here is exactly how to work one:
1. Insert hook into the designated chain space
2. Yarn over and pull up a loop. You now have 2 loops on the hook
3. Yarn over and pull through both loops (this is a single crochet base)
4. Chain 2
5. Work 4 double crochets into the same chain space, inserting the hook into the space each time
6. Chain 2
7. Work 1 single crochet into the same chain space
That completes one Petal Cluster. The petal will naturally curve forward on the right side. Do not press it flat. This curve is the whole point.
Scallop Edging (Used for Hem and Cuffs)
1. Slip stitch into the first stitch or chain space
2. Chain 3
3. Work 2 double crochets into the same stitch
4. Skip 2 stitches
5. Work 1 single crochet into the next stitch
6. Skip 2 stitches
7. Work 3 double crochets into the next stitch
8. Repeat steps 4 through 7 to end of round
9. Join with slip stitch to the top of the starting chain 3. Fasten off
Flat Join (Used for Assembly)
With wrong sides facing each other and right sides facing outward, hold two squares together. Using Color A (Cream), insert hook through the back loop only of the corresponding stitch on the front square and the back loop only of the corresponding stitch on the back square simultaneously. Work a slip stitch through both loops. Move to the next pair of corresponding stitches and repeat.
This creates a visible cream ridge on the right side that echoes the cream lattice and becomes a design feature.
Magic Ring (MR)
1. Wrap yarn around two fingers to form a loop, with the working yarn behind
2. Insert hook into the loop, catch the working yarn, and pull through
3. Chain the required number to begin the first round
4. Work all stitches of Round 1 into the center of the ring
5. Pull the yarn tail firmly to close the ring completely
Floral Granny Square Pattern Instructions
Make 48 squares total. That is 24 for the front panel and 24 for the back panel.
Round 1 (Color C, Yellow)
Make a magic ring. Chain 3 (counts as first dc here and throughout). Work 11 dc into the magic ring. Join with sl st to top of beginning ch-3. Pull ring closed. (12 dc)
Round 2 (Color B, Lavender)
Join Color B with sl st to any st. Chain 1. Work 1 sc into the same st. Chain 3. Skip 1 st. Work 1 sc into the next st. Chain 3. Repeat from skip around, placing sc into each alternate stitch. You will work 6 sc and 6 ch-3 spaces. Join with sl st to first sc. (6 sc, 6 ch-3 sp)
Round 3 (Color B, Lavender, Petal Clusters)
Sl st into the first ch-3 sp. Work 1 Petal Cluster (as described above) into each ch-3 sp around. You will work 6 Petal Clusters total. Join with sl st to the sc at the base of the first Petal Cluster. (6 Petal Clusters)
Round 4 (Color D, Sage Green)
Join Color D with sl st into the back of the work, directly into any sc from Round 2 that sits behind the petals. To access this, push the petals forward and insert hook into the Round 2 sc from behind. Chain 3 (counts as first dc). Work 2 dc into the same st. Chain 2. Work 3 dc into the same Round 2 sc (this creates the first corner cluster).
Now work 3 dc into the next Round 2 sc (this is a side cluster). Continue around, placing corners at every other sc point: 3 dc corner, ch 2, 3 dc corner, 3 dc side. Join with sl st to top of beginning ch-3. (4 ch-2 corner sp, 48 dc total)
Round 5 (Color D, Sage Green)
Sl st across 2 dc to first ch-2 corner sp. Chain 3. Work 2 dc, ch 2, 3 dc into corner sp. Work 3 dc into the space between each cluster along each side. There are 2 gaps between the 2 side clusters on each side, so work 3 dc twice per side. Work 3 dc, ch 2, 3 dc into each remaining corner sp. Join with sl st to top of beginning ch-3. (48 dc, 4 ch-2 corner sp)
Round 6 (Color A, Cream)
Sl st to first ch-2 corner sp. Chain 3. Work 2 dc, ch 2, 3 dc into corner sp (corner made). Chain 1. Work 3 dc into next sp between clusters. Chain 1. Work 3 dc into next sp. Chain 1. Work 3 dc into next sp. Chain 1. Work 3 dc, ch 2, 3 dc into corner sp. Repeat for all 4 sides. Join with sl st to top of beginning ch-3. Fasten off Color A. (60 dc, 4 ch-2 sp, 12 ch-1 sp)
Each square should measure 5.5 inches by 5.5 inches after blocking.
Important checkpoint: Before joining, block all 48 squares. Pin each to 5.5 inches square on your blocking mats, mist lightly with water, and allow to dry completely. Squares should all be the same size.
Assembly Instructions
Panel Layout
Both front and back panels are 4 squares wide by 6 squares tall. Number your columns 1 through 4 (left to right) and rows A through F (top to bottom).
Step 1: Assemble the Front Panel
Join the 24 front squares into a 4 by 6 grid using the Flat Join method. Begin by joining squares in rows (join each row of 4 squares horizontally first), then join the completed rows vertically.
For each join, work through the back loops of the outermost dc stitches and chain spaces of Round 6 on both squares simultaneously.
Step 2: Assemble the Back Panel
Identical process. 24 squares joined into a flat 4 by 6 panel.
Step 3: Join Panels at the Shoulders
With wrong sides together, align front and back panels. Join the top edge of front square A1 to back square A1 (right shoulder). Join front square A4 to back square A4 (left shoulder).
Leave the top edges of squares A2 and A3 on both panels entirely free. This creates the boat neckline, measuring approximately 11 inches across.
Step 4: Join Panels at the Sides
Beginning at the bottom hem edge, join the side edges working upward. However, leave the top 3 rows (Rows A, B, and C) of the outer columns unjoined on both sides. These open sections form the sleeve openings.
Join only Rows D, E, and F of columns 1 and 4 on each side. That is 3 squares worth of seaming on each side.
The open sleeve tube is created by Rows A, B, and C on each side. Each sleeve measures approximately 16.5 inches from shoulder to cuff and approximately 11 inches in circumference.
Neckline Edging
Join Color A with sl st to any stitch along the neckline opening. Chain 1. Work 1 sc into each dc and chain space evenly around the neckline opening. You will work approximately 72 sc total around the full neckline circumference. Adjust count as needed to keep the neckline flat. Join with sl st to first sc.
Round 2: Join Color A with sl st to first sc. Chain 1. Work 1 sc into each sc around. Join with sl st. Fasten off. Weave in ends. (Approximately 72 sc)
Cuff Edging
Work this on each sleeve opening.
Round 1: Join Color A with sl st to any stitch around the cuff opening. Chain 1. Work 1 sc into each dc and ch-sp evenly around. You will work approximately 48 sc around each cuff. Join with sl st to first sc. (48 sc per cuff)
Round 2 (Scallop Edging): Work the Scallop Edging around the 48 sc. That gives you 8 scallop units per cuff (48 divided by 6). Join with sl st to beginning ch-3. Fasten off. (8 scallops)
Repeat for second cuff.
Hem Edging
Round 1: Join Color A with sl st to any stitch along the hem edge. Chain 1. Work 1 sc into each dc and ch-sp evenly around the full hem perimeter. Target approximately 174 sc or 180 sc (adjust to nearest multiple of 6 for the scallop edging). Join with sl st to first sc. (174 sc, or nearest multiple of 6)
Round 2 (Scallop Edging): Work the Scallop Edging around all 174 sc. That gives you 29 scallop units. Join with sl st to top of beginning ch-3. Fasten off. (29 scallops)
Size Customization Tips
To make it wider: Add a column of squares on each side, changing from 4 squares wide to 5 or 6. Each square adds approximately 5.5 inches of width.
To make it longer: Add rows below the sleeve join line. Each row adds approximately 5.5 inches of body length.
To make sleeves shorter: Join more rows at the side seams. Joining Row C as well reduces sleeve length by approximately 5.5 inches.
Finishing and Care
Weave in all remaining ends. Each square has approximately 6 to 8 color change tails. Weave each tail at least 1 inch in two directions. Do not knot ends.
Wet blocking: Submerge the completed garment in cool water. Press out excess water by rolling in a clean towel. Lay flat on blocking mats, pin to shape, and allow to dry completely. This may take 24 to 48 hours.
For acrylic yarns: Machine wash cold, gentle cycle. Lay flat to dry. Never put in the dryer.
For wool yarns: Hand wash in cool water with gentle wool wash. Lay flat to dry.
Store folded flat, not hung. The weight of the squares will stretch the shoulders over time if hung.
You Did It
This Lavender Garden Floral Square Poncho crochet pattern is a labor of love, and every single one of those 48 squares is worth it. When you slip it on and see those dimensional petals cascading across your shoulders, you will understand why this project exists.
Thank you so much for choosing this pattern. I hope it brings you many happy hours of hooking and a finished piece you will treasure for years.
If you make this poncho, I would absolutely love to see it. Tag me on Instagram or share a photo in my Facebook group. Seeing your finished projects is genuinely the best part of my day.
Save this crochet tutorial to your Pinterest boards so you can find it when you are ready to start. And if you make this beautiful floral poncho, please drop a comment below. I read every single one and love hearing about your projects.