
I’ve been looking for the perfect cozy house boot pattern for months now, and this one has become my absolute favourite. The combination of granny square flower motifs with a sleek solid foot creates something truly special. This is my go-to recommendation for anyone wanting to crochet stylish indoor boots that actually stay on your feet and keep you warm all winter long.
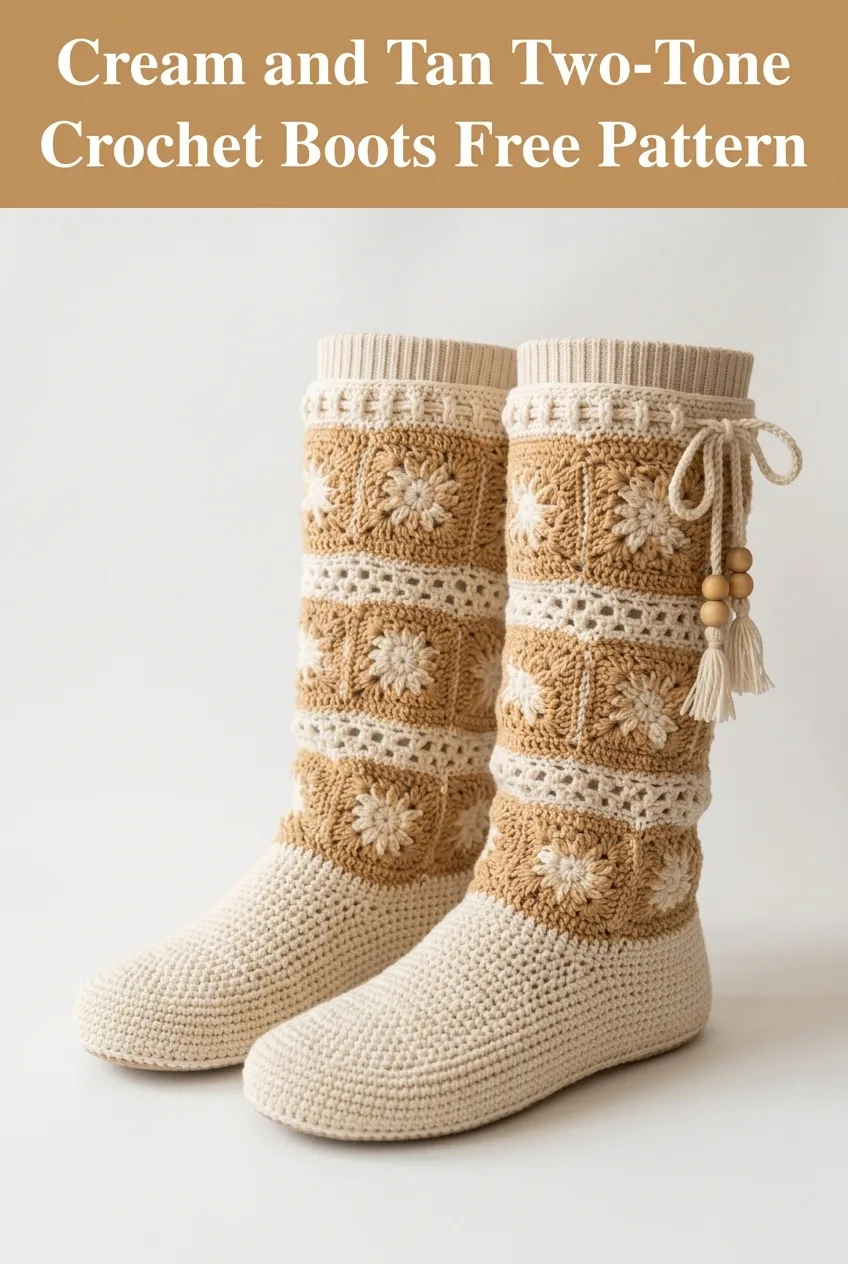
These cream and tan two-tone crochet boots combine classic granny square techniques with practical slipper construction. The result is a mid-calf boot that looks impressive but breaks down into manageable sections. If you can crochet a granny square and work basic stitches in the round, you can absolutely make these.
Why You’ll Love This Crochet Boot Pattern
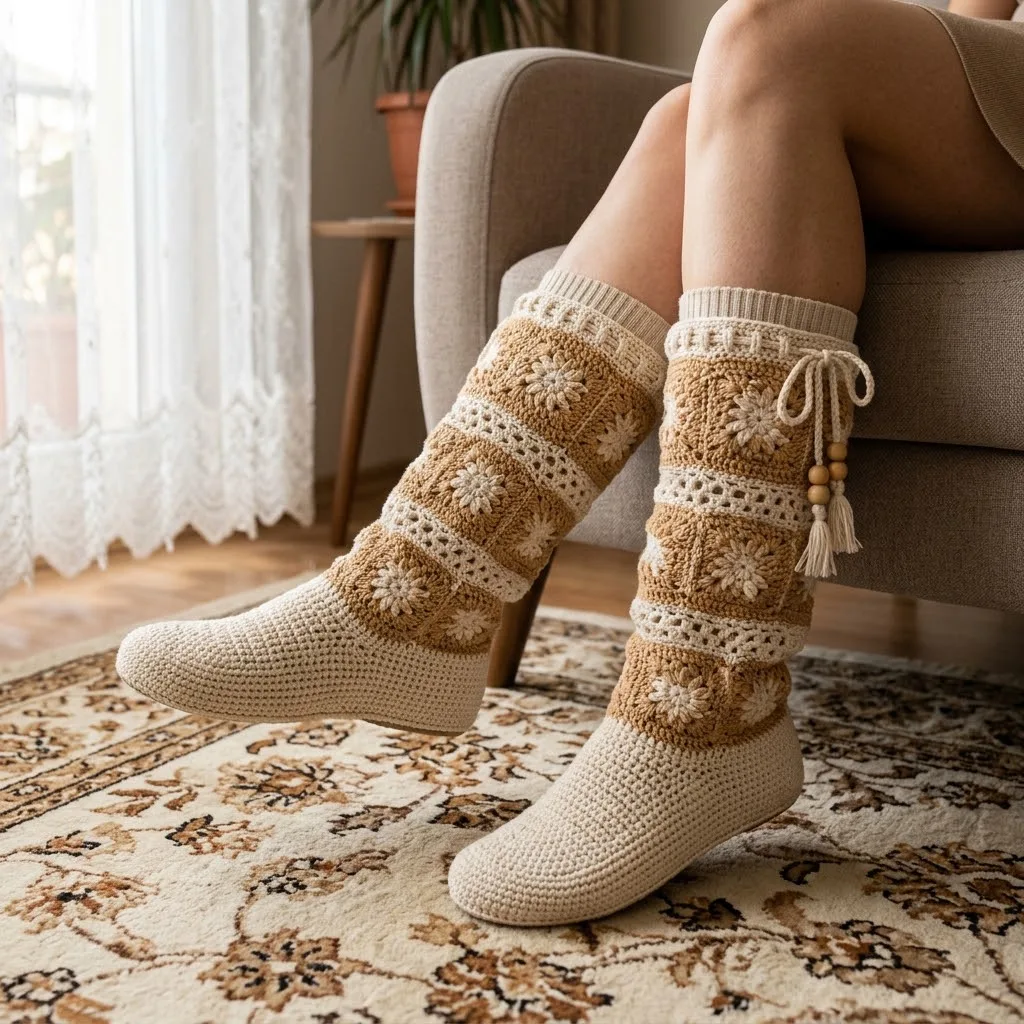
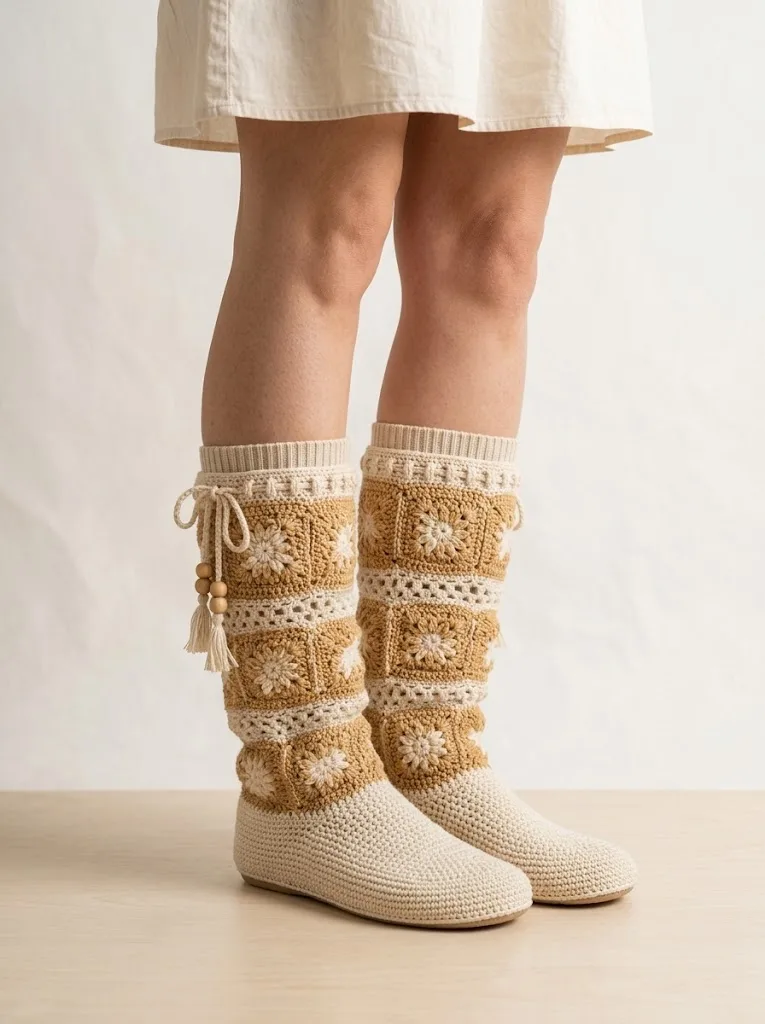
The construction method here is genuinely clever. Rather than working the entire boot as one overwhelming piece, you create separate components that join together beautifully. The foot portion uses tight, dense stitches for durability and warmth. The shaft features those gorgeous flower motifs with lacy divider rows that give the whole design its boho charm.
The decorative ties with wooden beads add a finishing touch that elevates these from basic slippers to statement pieces. They also serve a practical purpose, helping you adjust the fit around your calf.
Skill level: Intermediate. You should be comfortable with basic granny squares, working in the round, and simple increases and decreases.
Finished measurements: Approximately 12 inches tall from sole to cuff. Foot length is adjustable based on your size.
Materials Needed for Your Crochet Boots
Gathering your supplies before starting makes the whole process smoother. Here is everything you need.
Yarn:
A cotton-acrylic blend works beautifully for this project. The cotton adds structure while the acrylic provides softness. I recommend something like Lion Brand 24/7 Cotton or Paintbox Yarns Cotton Aran.
Hook:
Notions:
Gauge Information
Gauge matters for wearable items, especially boots that need to fit your foot comfortably.
For the sole and foot: 14 single crochet stitches and 16 rows equals 4 inches square.
For granny square motifs: Each completed flower square should measure approximately 3 inches across.
Take time to check your gauge before diving in. If your stitches are too loose, go down a hook size. If too tight, go up a hook size.
Abbreviations and Stitch Definitions
Let me walk you through every stitch abbreviation you will encounter. Even experienced crocheters appreciate a quick refresher.
ch = chain. Wrap yarn over hook and pull through the loop on your hook. This creates the foundation for most crochet work.
sl st = slip stitch. Insert hook into stitch, yarn over, pull through both the stitch and the loop on your hook in one motion. Used for joining and moving across stitches without adding height.
sc = single crochet. Insert hook into stitch, yarn over and pull up a loop (2 loops on hook), yarn over and pull through both loops. The shortest and most basic crochet stitch.
hdc = half double crochet. Yarn over, insert hook into stitch, yarn over and pull up a loop (3 loops on hook), yarn over and pull through all 3 loops. Slightly taller than single crochet.
dc = double crochet. Yarn over, insert hook into stitch, yarn over and pull up a loop (3 loops on hook), yarn over and pull through 2 loops, yarn over and pull through remaining 2 loops. Creates a taller, more open stitch.
tr = treble crochet. Yarn over twice, insert hook into stitch, yarn over and pull up a loop (4 loops on hook), yarn over and pull through 2 loops three times. The tallest stitch used in this pattern.
sc2tog = single crochet 2 together (decrease). Insert hook in first stitch, pull up a loop, insert hook in next stitch, pull up a loop (3 loops on hook), yarn over and pull through all 3 loops. This turns 2 stitches into 1.
3-dc cluster = 3 double crochet cluster. Work 3 dc into the same stitch or space. This creates the petal effect in the flower motifs.
Step by Step Crochet Boot Pattern
Part One: The Sole
We start from the ground up with a sturdy oval sole. Work this section in cream yarn.
Row 1: Ch 16. Sc in 2nd ch from hook and in next 13 ch. Work 3 sc in the last ch (this creates your turn). Working along the opposite side of the foundation chain, sc in next 13 ch. Work 2 sc in the last ch. Do not join. (32 sc)
Row 2: Working in a continuous spiral, place a stitch marker in the first stitch. Sc in next 14 sts, 2 sc in each of the next 3 sts, sc in next 14 sts, 2 sc in each of the next 3 sts. Move marker up. (38 sc)
Row 3: Sc in next 14 sts, (2 sc in next st, sc in next st) 3 times, sc in next 14 sts, (2 sc in next st, sc in next st) 3 times. (44 sc)
Row 4: Sc in next 14 sts, (2 sc in next st, sc in next 2 sts) 3 times, sc in next 14 sts, (2 sc in next st, sc in next 2 sts) 3 times. (50 sc)
Row 5: Sc in each st around. (50 sc)
Sl st to next st. Fasten off.
Your sole should measure approximately 9 inches long and 3.5 inches wide. Adjust by adding or removing foundation chains for different foot sizes.
Part Two: The Foot Section
This section builds up from the sole to create the foot covering. Continue working in cream.
Round 1: Join cream yarn to any stitch on the sole with a sl st. Ch 1, working in back loops only, sc in each st around. Sl st to first sc to join. (50 sc)
Working in back loops only creates a defined edge between the sole and the sides. This is a nice detail that also helps the boot keep its shape.
Rounds 2 through 8: Ch 1, sc in each st around. Sl st to join. (50 sc)
At this point, your foot section should be about 2.5 inches tall.
Part Three: Toe Shaping
Now we shape the toe box. Mark the center front of your boot with a stitch marker.
Round 9: Ch 1, sc in next 15 sts, sc2tog 10 times across the toe area, sc in remaining 15 sts. Sl st to join. (40 sc)
Round 10: Ch 1, sc in next 15 sts, sc2tog 5 times, sc in remaining 15 sts. Sl st to join. (35 sc)
Rounds 11 and 12: Ch 1, sc in each st around. Sl st to join. (35 sc)
Fasten off cream yarn. The foot portion is complete.
Part Four: Flower Granny Squares (Make 8 Total)
These gorgeous flower motifs create the decorative shaft. Make 4 squares for each boot.
With tan yarn:
Round 1: Create a magic ring. Ch 3 (counts as first dc), 2 dc into ring, ch 2, (3-dc cluster into ring, ch 2) 3 times. Sl st to top of beginning ch-3 to join. (4 clusters, 4 ch-2 spaces)
Round 2: Change to cream yarn. Sl st into ch-2 space. Ch 3, 2 dc in same space, ch 1, 3 dc in same space (corner made). Ch 1, (3 dc, ch 1, 3 dc, ch 1) in each remaining ch-2 space around. Sl st to top of ch-3 to join.
Round 3: Change to tan yarn. Sl st to corner ch-1 space. Ch 3, 2 dc in same space, ch 1, 3 dc in same space. Ch 1, 3 dc in next ch-1 space, ch 1, (3 dc, ch 1, 3 dc in corner space, ch 1, 3 dc in next space, ch 1) around. Sl st to join.
Fasten off, leaving a long tail for joining.
Each square should measure approximately 3 inches. The cream flower center pops beautifully against the tan background.
Part Five: Lacy Divider Rows
Between the flower square rows, we add delicate openwork sections. This creates that lovely layered look.
With cream yarn:
Ch 36 (or enough to wrap around your boot shaft comfortably).
Row 1: Dc in 4th ch from hook, dc in each ch across. (34 dc)
Row 2: Ch 3, turn. Skip first dc, dc in next dc, (ch 1, skip 1 dc, dc in next dc) across.
Row 3: Ch 3, turn. Dc in each dc and ch-1 space across. (34 dc)
Fasten off. Make 3 lacy divider strips for each boot.
Part Six: Assembly
Assembling the boot feels like putting together a puzzle, and watching it come together is so satisfying.
Step 1: Join 2 flower squares side by side using a whip stitch along one edge. Repeat with remaining 2 squares. You now have 2 strips of 2 squares each.
Step 2: Attach the first flower strip to the top edge of the foot section using slip stitches or whip stitch. The squares should wrap around the ankle area.
Step 3: Attach a lacy divider strip above the first row of flowers.
Step 4: Attach the second flower strip above the divider.
Step 5: Add another lacy divider strip.
Step 6: Seam the back of the boot shaft closed using mattress stitch for an invisible seam.
Part Seven: Ribbed Cuff
The ribbed cuff at the top adds structure and a polished finish.
Join cream yarn at the top edge of the shaft.
Round 1: Ch 1, sc evenly around the top edge, working approximately 36 sc. Sl st to join.
Rounds 2 through 6: Ch 1, working in back loops only, sc in each st around. Sl st to join. (36 sc)
Working in back loops only creates that ribbed texture you see in the finished boots. It also provides stretch for getting the boots on and off.
Fasten off and weave in ends.
Part Eight: Decorative Ties
Step 1: Cut 4 lengths of cream yarn, each about 24 inches long.
Step 2: Braid or twist 2 strands together to create a cord. Repeat with remaining strands.
Step 3: Thread wooden beads onto the cord ends. Tie knots below each bead to secure.
Step 4: Weave the cord through the lacy divider section, creating a drawstring effect. Tie in a bow at the side of the boot.
The beaded ties add that beautiful boho finishing touch and allow you to adjust the fit around your calf.
Helpful Tips for Success
For beginners: If the construction feels overwhelming, make one boot completely before starting the second. This lets you learn from any mistakes before repeating them.
Sizing adjustments: Add or subtract foundation chains on the sole for different foot lengths. Add or subtract squares for wider or narrower calves.
Non-slip option: Consider adding fabric paint dots or a suede sole to the bottom for traction on smooth floors.
Care instructions: Hand wash in cool water and lay flat to dry. The boots will soften with wear while maintaining their shape.
Why This Crochet Boot Tutorial Works
This pattern breaks an intimidating project into completely manageable pieces. You are never working on anything too large or complicated. Each component, the sole, the foot, the squares, the dividers, is its own small win.
The two-tone color scheme means you can customize endlessly. Try grey and white for a modern look, or burgundy and cream for holiday vibes. The flower motifs work up quickly once you get the rhythm.
These boots make incredible gifts. They look far more complicated than they actually are, which is always a bonus when gift-giving. Pair them with a cozy pair of socks and you have a thoughtful handmade present.
Thank you so much for choosing this pattern for your next cozy project. I genuinely hope you love making these boots as much as I loved designing them. If you create a pair, I would absolutely love to see them! Tag me on Instagram or share in our Facebook group.
If this pattern sparked your creativity, save it to your Pinterest boards so you can find it whenever you are ready to start. And please drop a comment below to let me know if you make them. I read every single one and your photos always make my day!