
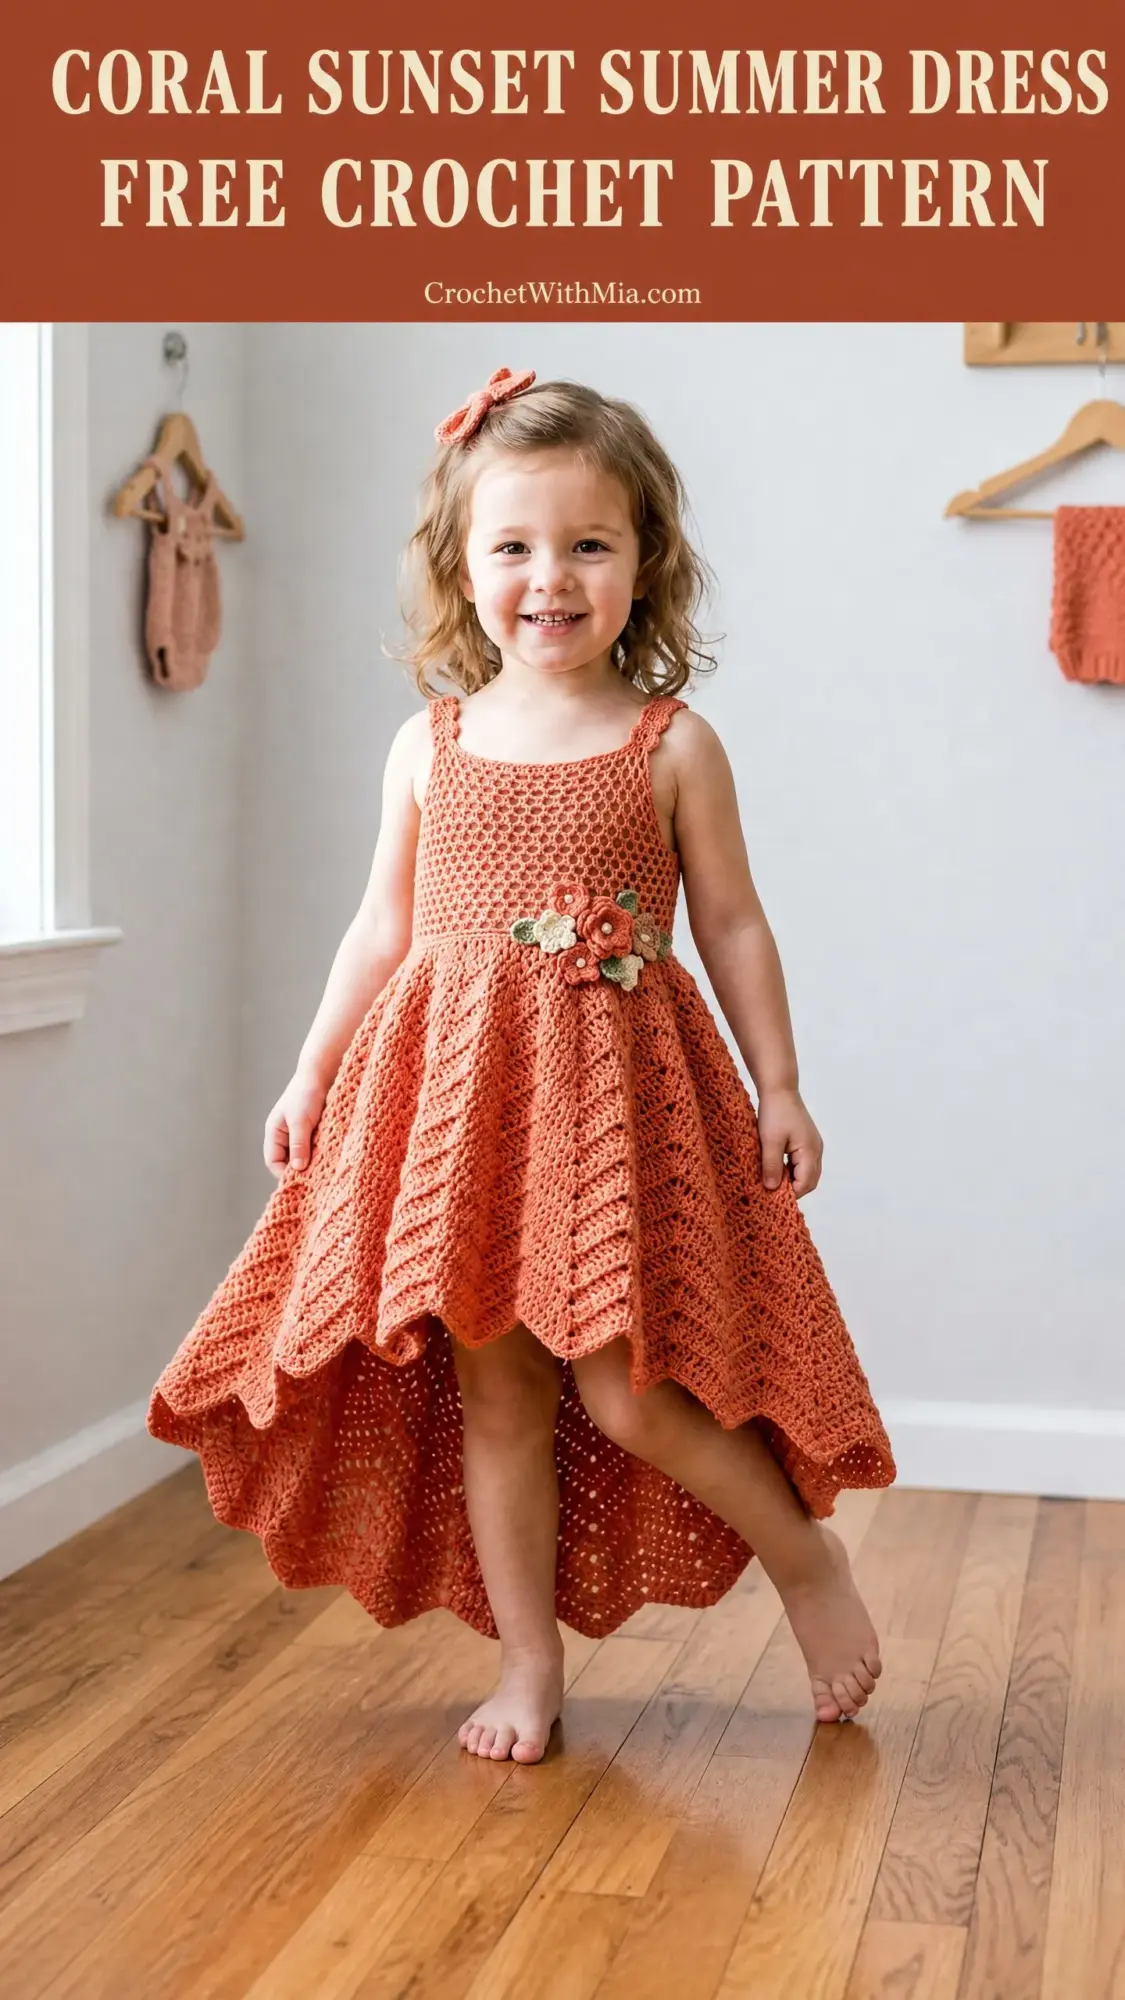
This is a fitted toddler dress with a honeycomb mesh bodice and a diagonal chevron lace skirt. The high-low handkerchief hem creates those dramatic pointed dips you see in the photo. It uses DK weight cotton yarn and two hook sizes.
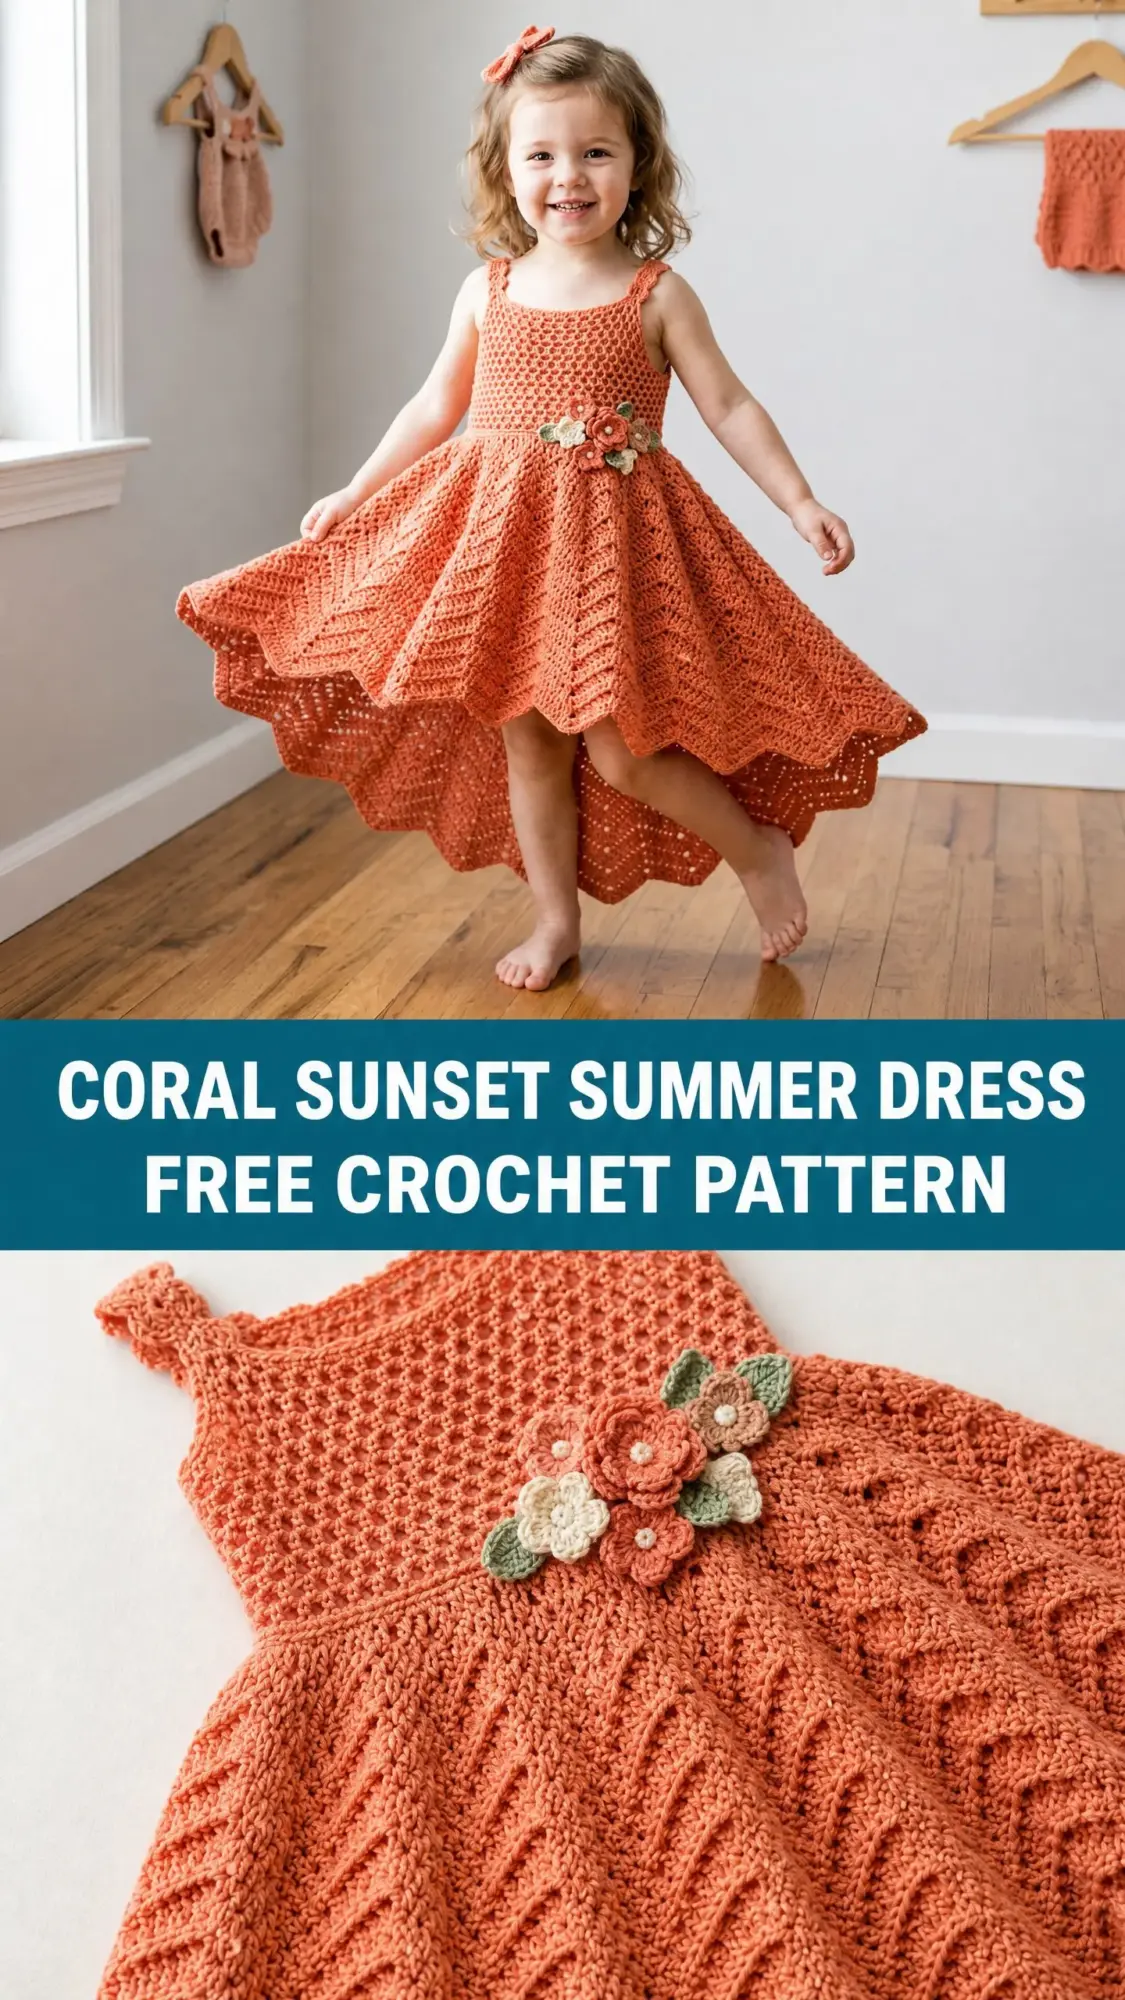
The bodice works from the waist up. The skirt works from the waist down in six bias panels. Three crocheted flowers cluster at the hip for a sweet finishing touch.
Fair warning: this is an advanced pattern. You will need experience with fitted garments, lace repeats, and precise gauge management. But if you have those skills in your toolbox, this dress is absolutely worth the 18 to 28 hours it takes to complete.
Why This Coral Sunset Summer Dress Pattern Works So Well
The construction method here is clever. Instead of trying to work the entire dress in one piece, you build it in sections. The honeycomb mesh bodice gives structure and a fitted silhouette. The chevron lace skirt panels create that beautiful diagonal texture and flowing movement.
The bias shaping on the front panels is what creates the high-low effect. By increasing at one edge and decreasing at the other on every right side row, the chevron pattern rotates to sit at an angle. The back panels work straight, so they hang longer. When you seam everything together, you get that gorgeous asymmetrical sweep.
Cotton yarn is essential for this project. It blocks beautifully, holds stitch definition in both the honeycomb and chevron patterns, and feels comfortable against little skin on warm days. Avoid fuzzy or halo yarns because they will obscure all that pretty texture you are working so hard to create.
Finished Sizes for This Crochet Dress Pattern
Size 2T: Chest 20 inches, waist 19 inches, length center front 14 inches, length center back 20 inches
Size 3T: Chest 21 inches, waist 20 inches, length center front 15 inches, length center back 21.5 inches
Size 4T: Chest 22 inches, waist 21 inches, length center front 16 inches, length center back 23 inches
Size 5: Chest 23 inches, waist 22 inches, length center front 17 inches, length center back 24 inches
Size 6: Chest 24.5 inches, waist 23 inches, length center front 18 inches, length center back 25.5 inches
All measurements include approximately 1 inch of ease at chest and waist.
Materials You Will Need
Yarn: DK weight, 100% cotton or cotton-blend
You will need one main color in coral or terracotta, plus small amounts of rust, cream, and sage green for the three crochet flowers.
Recommended Yarns:
Hooks: US size E-4 (3.5 mm) for the bodice and US size F-5 (3.75 mm) for the skirt and straps. You need both hooks.
Notions: At least 6 stitch markers, yarn needle, small pearl or shell beads for flower centers (optional, 6 to 9 beads), rust-proof blocking pins, blocking mat, spray bottle with water
Gauge (Please Do Not Skip This)
Bodice gauge with E-4 hook in honeycomb mesh:
20 single crochet (sc) stitches = 4 inches
22 rows = 4 inches
Skirt gauge with F-5 hook in chevron lace:
One 12-stitch chevron lace repeat = 2.4 inches wide
8 rows of chevron lace = 2 inches tall
Work a 5 inch by 5 inch swatch in each stitch pattern. Block the swatch flat and measure through the center before beginning. This is a fitted garment, so gauge swatches are mandatory.
Abbreviations and Stitch Definitions
sc = single crochet: Insert hook into stitch, yarn over, pull up a loop (2 loops on hook), yarn over, pull through both loops.
dc = double crochet: Yarn over, insert hook into stitch, yarn over and pull up a loop (3 loops on hook), yarn over and pull through 2 loops (2 loops remain), yarn over and pull through remaining 2 loops.
ch = chain
ch-sp = chain space
sl st = slip stitch
sk = skip
st(s) = stitch(es)
BLO = back loop only: Work your stitch into only the back loop of the stitch below, leaving the front loop unworked.
sc2tog = single crochet two together (decrease): Insert hook into first stitch, yarn over and pull up a loop, insert hook into next stitch, yarn over and pull up a loop (3 loops on hook), yarn over and pull through all 3 loops.
dc2tog = double crochet two together (decrease)
RS = right side
WS = wrong side
MC = main color
CC1, CC2, CC3 = contrast colors 1, 2, and 3
Special Stitches You Need to Know
Honeycomb Mesh (for the bodice)
This creates a beautiful textured fabric with offset holes that look like honeycomb cells.
Row 1 (foundation): sc in each st across.
Row 2: ch 1, turn, sc in first st, (ch 1, sk 1 st, sc in next st) to end.
Row 3: ch 1, turn, sc in first sc, (sc in ch-1 sp, ch 1, sk next sc) to last 2 sts, sc in ch-1 sp, sc in last sc.
Row 4: ch 1, turn, sc in first sc, (ch 1, sk 1 st, sc in next st) to end.
Repeat rows 3 and 4 for pattern. The staggered offset of sc and ch-1 spaces creates the honeycomb cell appearance.
Chevron Lace (for the skirt, multiple of 12 + 1 stitches)
Foundation row: sc across.
Row 1 (RS): ch 3 (counts as dc), dc in same st, (sk 2 sts, dc in next st, ch 1, sk 1 st, dc in next st, ch 1, sk 1 st, dc in next st, sk 2 sts, 3 dc in next st, sk 2 sts, 3 dc in next st) across to last 7 sts, sk 2 sts, dc in next st, ch 1, sk 1 st, dc in next st, ch 1, sk 1 st, dc in next st, sk 2 sts, 2 dc in last st.
Row 2: ch 1, turn, sc in each dc and ch-1 sp across.
Rows 1 and 2 form the chevron lace repeat. The peaks form at the 3-dc clusters and the valleys between the skip-2 pairs.
Crochet Flower (make 3 total, one each in CC1, CC2, CC3)
Magic ring, ch 1, work 5 sc into ring, sl st to first sc to join. (5 sc)
Round 2: (ch 3, tr in same st, ch 3, sl st in same st, sl st in next st) 5 times. (5 petals)
Fasten off leaving a 12 inch tail for attaching. Thread a pearl bead through center if desired before attaching.
Step-by-Step Crochet Pattern Instructions
Section 1: Waistband Foundation
With MC and E-4 hook, ch 97 (101, 107, 111, 117).
Row 1: sc in 2nd ch from hook and in each ch across. 96 (100, 106, 110, 116) sc
Row 2: ch 1, turn, sc in BLO of each sc across. 96 (100, 106, 110, 116) sc
Row 3: ch 1, turn, sc in BLO of each sc across. 96 (100, 106, 110, 116) sc
Row 4: ch 1, turn, sc in BLO of each sc across. 96 (100, 106, 110, 116) sc
The waistband is 4 rows of BLO sc, creating a firm ribbed band approximately 0.75 inch tall. Do not fasten off. Place markers at stitch 24 (25, 27, 28, 29) and stitch 72 (75, 79, 82, 87) to indicate side seam positions.
Checkpoint: Your waistband should measure approximately 0.75 inch tall and 19 inches wide (before seaming).
Section 2: Bodice Front Panel
The bodice front is worked across the center 48 (50, 52, 54, 58) stitches.
Row 1 (Foundation): With E-4 hook, attach MC at left side marker, ch 1, sc in each of the next 48 (50, 52, 54, 58) sts to right side marker. 48 (50, 52, 54, 58) sc
Begin Honeycomb Mesh:
Row 2: ch 1, turn, sc in first st, (ch 1, sk 1 st, sc in next st) across to end. 24 (25, 26, 27, 29) sc plus 23 (24, 25, 26, 28) ch-1 sps
Row 3: ch 1, turn, sc in first sc, (sc in ch-1 sp, ch 1, sk next sc) to last 2 sts, sc in ch-1 sp, sc in last sc. 48 (50, 52, 54, 58) units
Row 4: ch 1, turn, sc in first sc, (ch 1, sk 1 st, sc in next st) across to end. 48 (50, 52, 54, 58) units
Repeat rows 3 and 4 for the honeycomb mesh pattern.
Continue honeycomb mesh on front panel for:
Do not fasten off. Place a locking stitch marker in the working loop.
Section 3: Bodice Back Panels
The bodice back is worked in two halves. Each back panel starts at the side seam marker and works to the center back.
Left Back Panel:
Attach MC at right side marker, ch 1.
Row 1: sc across the 24 (25, 27, 28, 29) sts from right side marker to end of waistband row.
Adjust to even counts: For sizes 3T and 4T, work one sc2tog at the beginning of row 1. Adjusted counts: 24 (24, 26, 28, 28) sc
Row 2: ch 1, turn, sc in first st, (ch 1, sk 1 st, sc in next st) across. 24 (24, 26, 28, 28) units
Continue honeycomb mesh for the same number of rows as the front panel. Fasten off.
Right Back Panel:
Attach MC at left side marker, ch 1.
Row 1: sc across the 24 (25, 27, 28, 29) sts from left side marker to next boundary. Adjust stitch count as for left back panel. 24 (24, 26, 28, 28) sc
Work honeycomb mesh for same number of rows as left back panel. Fasten off.
Section 4: Seaming the Bodice
With yarn needle and MC, seam front panel to each back panel at side seams using mattress stitch or slip stitch seam on WS.
Seam the center back panels together from the waist up, stopping 1.5 (1.5, 2, 2, 2) inches before the top edge. Leave this gap open for the back neckline.
Section 5: Neckline and Strap Edging
Round 1: With E-4 hook and RS facing, attach MC at left back seam, ch 1, sc evenly around entire top opening:
Round 2: ch 1, do not turn, sl st in each sc around. Fasten off.
Section 6: Straps
Each strap is approximately 2 inches wide.
Foundation: With E-4 hook and MC, ch 11.
Row 1: sc in 2nd ch from hook and each ch across. 10 sc
Row 2: ch 1, turn, sc in first st, (ch 1, sk 1 st, sc in next st) across. 10 units
Row 3: ch 1, turn, sc in first sc, (sc in ch-1 sp, ch 1, sk sc) to last 2 sts, sc in ch-1 sp, sc in last sc. 10 units
Repeat rows 2 and 3 for:
Work 1 row sc edging along each long edge of the strap. Fasten off.
Pin straps to front and back bodice top with approximately 2 inches in from each side seam. Sew straps securely with yarn needle.
Section 7: Skirt Panels
The skirt is constructed from 6 bias-cut chevron lace panels. All sizes work the skirt with 18 sts per panel at the waist edge, and 108 total waistband pickup sts.
Panel Foundation Pickup Row:
With F-5 hook and RS of waistband facing, attach MC at panel start position. Pick up and sc across 18 sts.
Row 0 (pickup): sc across 18 sts, then work 7 additional ch sts at the end. Turn. 25 sts total
Row 1 (RS, chevron lace on 25 sts):
ch 3 (counts as dc), dc in same st, sk 2 sts, dc in next st, ch 1, sk 1, dc in next, ch 1, sk 1, dc in next, sk 2, 3 dc in next (peak), sk 2, dc in next, ch 1, sk 1, dc in next, ch 1, sk 1, dc in next, sk 2, 2 dc in last st. 25 sts and sps
Row 2: ch 1, turn, sc in each dc and ch-sp across. 25 sc
For the 3 FRONT panels (bias shaping):
Row 3 (bias RS): ch 3, 2 dc in same st (increase at right selvage), work chevron lace to last 2 sts, dc2tog (decrease at left selvage). 25 sts
Row 4: ch 1, turn, sc across. 25 sc
Continue this bias shaping for 28 (30, 32, 34, 36) total rows per front panel.
For the 3 BACK panels:
Work chevron lace rows 1 and 2 straight (no bias) for 36 (38, 40, 42, 44) rows total.
Panel hem edging (work on each panel):
With F-5 hook, attach MC at bottom corner, ch 1, sc evenly along hem edge. Work (sc, ch 2, sc) at each chevron point and work sc2tog at each chevron valley. Fasten off.
Make all 6 panels: Front Left, Front Center, Front Right, Back Left, Back Center, Back Right.
Section 8: Assembling the Skirt
Seam the 6 panels together in this order (as worn): Back Left, Back Center, Back Right, Front Right, Front Center, Front Left.
Seam the final edges (Front Left to Back Left) and (Front Right to Back Right) to close the skirt tube.
The shorter front panel edges fall at center front, creating the dramatic V dip points. The longer back panels create the sweeping back hem.
Section 9: Waist Seam Finishing
Turn garment WS out. Fold the waistband BLO rows to the inside and whipstitch the remaining free loops of the foundation chain to the inside of the skirt pickup row. This creates a neat self-belt effect at the waistline.
Section 10: Adding the Crochet Flowers
Make three flowers following the special stitch instructions. Arrange the three flowers overlapping slightly at the left hip, approximately 1 inch below the waistband on the front panel. Sew each flower securely through all layers. Stitch bead to center of each flower if desired.
Blocking Your Finished Dress
Fill a basin with cool water and submerge the entire dress. Allow to soak for 20 minutes. Remove and gently press out excess water in a towel. Do not wring.
Lay flat on blocking mat. Pin waistband, neckline, and all hem points to finished measurements using rust-proof pins. Stretch the chevron lace skirt panels gently to open the lace. Allow to dry completely before unpinning, typically 24 to 48 hours for DK cotton.
Care Instructions
Hand wash in cool water with mild detergent or machine wash on delicate cycle in a mesh laundry bag. Lay flat to dry. Do not tumble dry as heat will shrink cotton and distort the lace. Steam blocking between wearings will restore the chevron lace definition.
Tips for Customizing This Crochet Dress Pattern
To lengthen or shorten the bodice: Add or remove 2 rows of honeycomb mesh at a time. Adding 2 rows adds approximately 0.35 inch. Adjust strap length proportionally.
To widen the chest: Increase the foundation chain by 4 stitches and add 4 stitches evenly to the back panel counts. Ensure the total remains divisible by 6 for skirt panel planning.
To lengthen the skirt: Add rows in pairs. Each 2-row addition adds approximately 0.5 inch to skirt length.
To add a modesty layer: Sew a cotton jersey or batiste slip to the inside of the waistband before wearing.
I really hope you enjoy making this beautiful summer dress. It is a project that takes time and skill, but the finished result is absolutely stunning. That high-low hem with the diagonal chevron texture creates such gorgeous movement when a little one twirls around.
If you make this dress, I would absolutely love to see it! Share your photos on Instagram or in my Facebook group. Tag me so I can admire your work.
Save this pattern to your Pinterest boards so you can find it when you are ready to start. And please leave a comment below if you have any questions or when you finish your dress. I love hearing from you!