
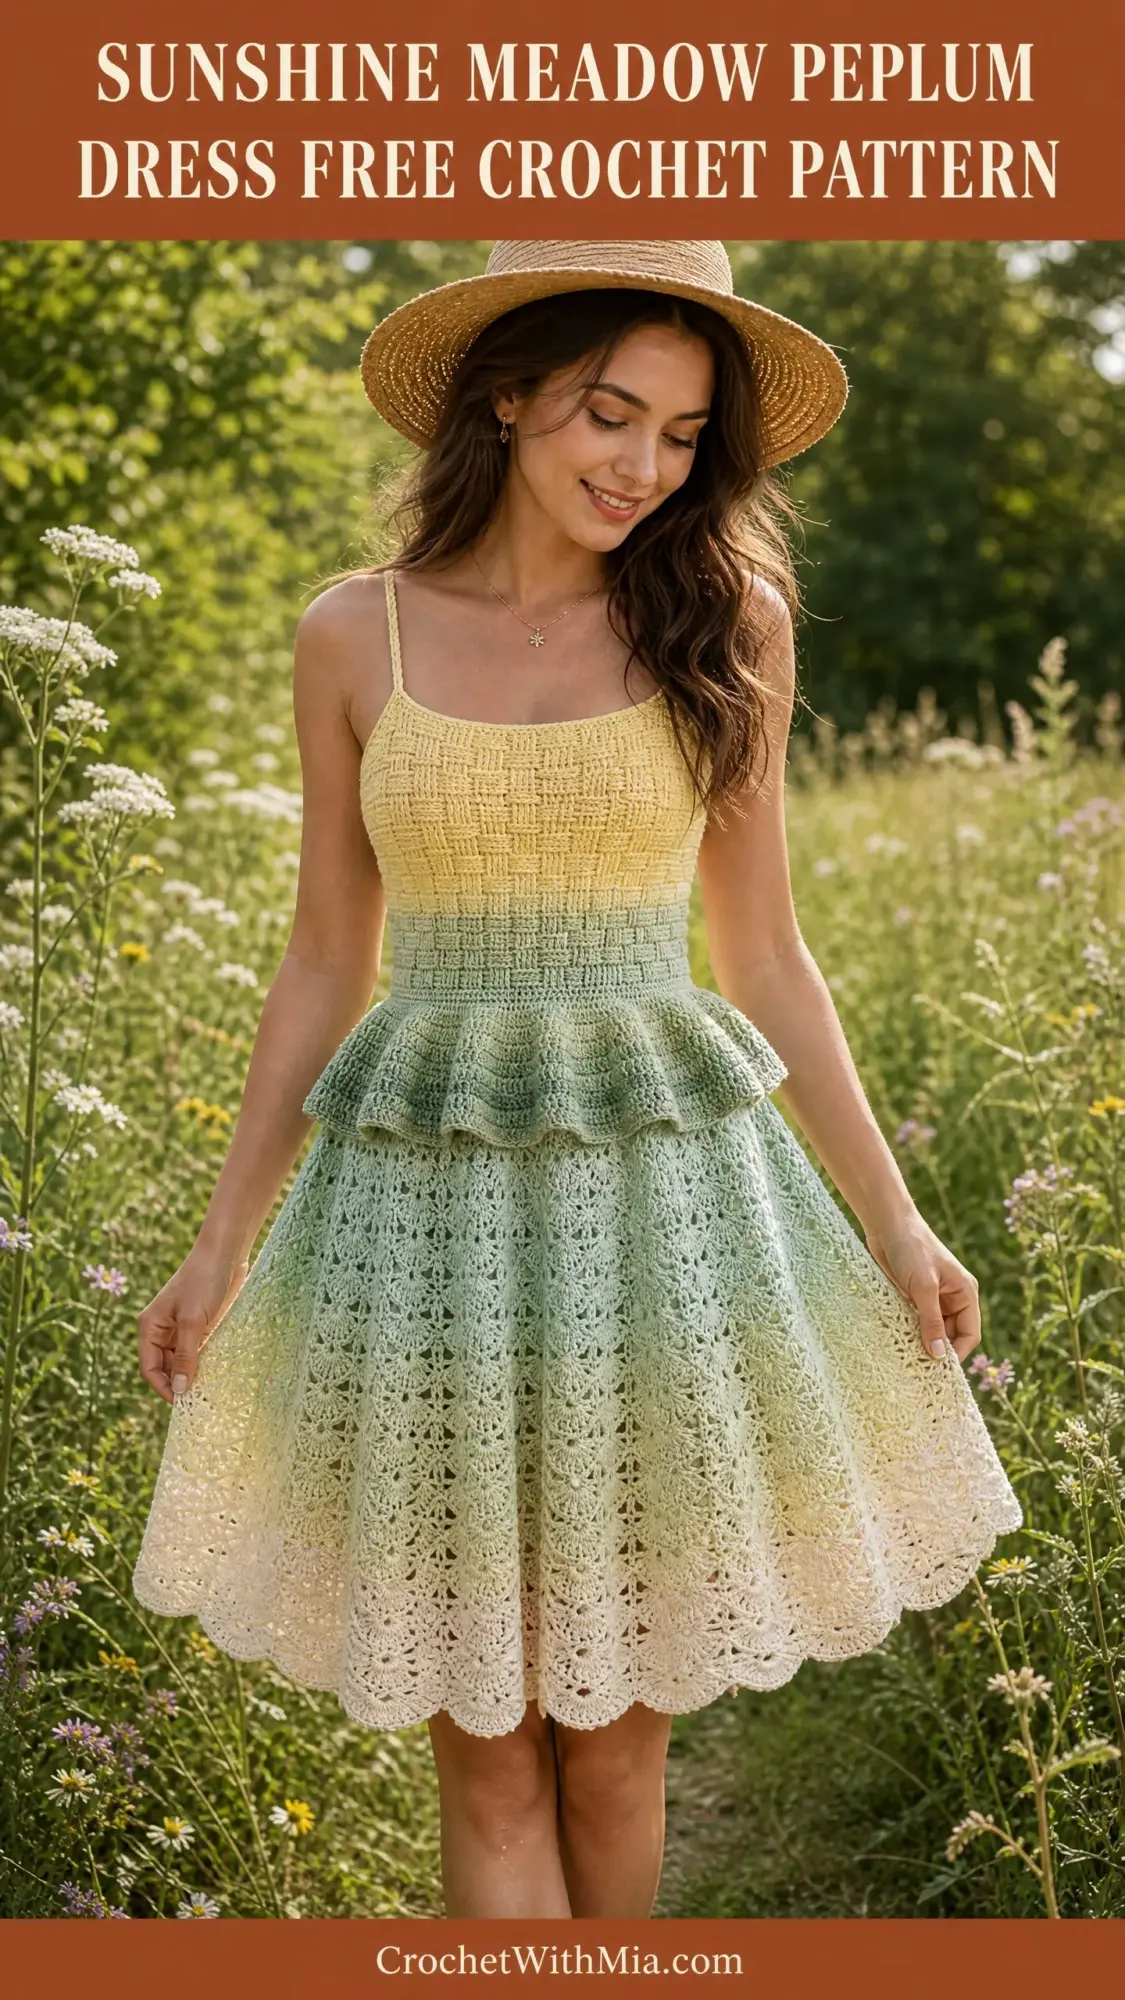
Let me guess. You saw this dress and thought, "There is no way I can make that." The gradient ombre effect, the basket-weave texture on the bodice, the delicate lace skirt with those perfect scalloped edges. It looks like something from a boutique, not something you could create with a hook and some yarn.
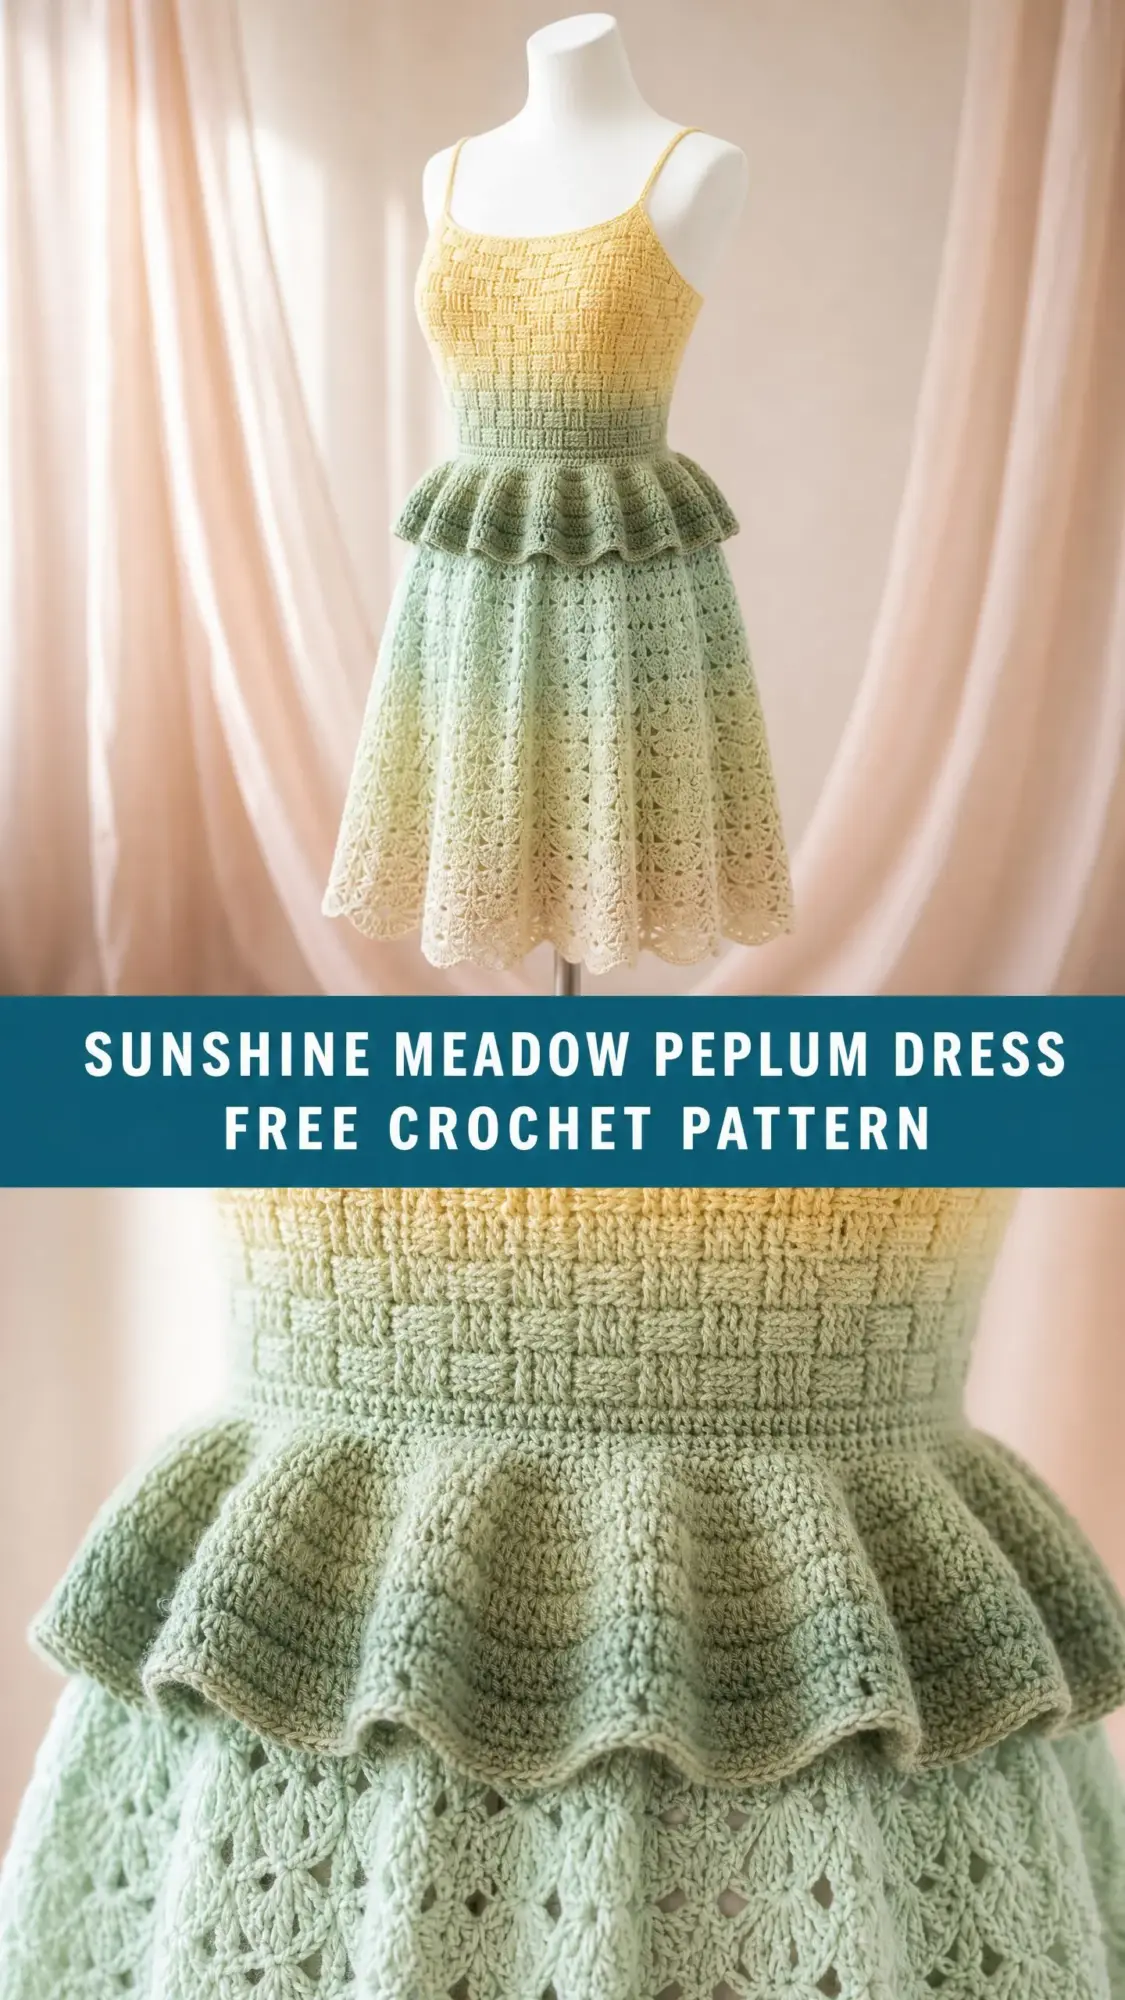
Here is the truth. If you can work a double crochet and you are willing to learn front post and back post stitches, you can absolutely make this dress. The basket-weave pattern looks intricate, but it is really just alternating between two simple post stitches in a predictable sequence. The lace skirt? It is a repeating fan shell pattern that becomes almost meditative once you get into the rhythm.
I am going to walk you through every single step. We will tackle this together, section by section. By the time you finish, you will have a stunning handmade summer dress that fits beautifully and shows off a gorgeous color gradient from butter yellow through sage green to creamy ivory. Deep breath. You have got this.
About This Crochet Pattern
The Sunshine Meadow Peplum Dress is a women’s sleeveless summer dress worked in three distinct sections. First, you will create a structured bodice using basket-weave texture stitches worked in rows. Next comes a flared peplum ruffle worked directly from the bodice waistline. Finally, you will work a full circular lace skirt using a repeating fan shell motif that flows downward from the peplum.
The construction method is thoughtfully designed. The bodice is worked flat as a single panel, then seamed at the side. This flat construction makes working those post stitches much easier than trying to manage them in the round. Once seamed, the peplum and skirt are worked in rounds, creating that beautiful seamless flow.
Thin spaghetti straps are crocheted as simple chains and attached at the neckline. The back has a modest open neckline and the entire dress is slip-on style with no closure needed.
Skill Level
This pattern is rated Advanced Beginner to Intermediate. Do not let that intimidate you. Here is what you actually need to know:
Single crochet (sc): Insert hook, yarn over, pull up a loop, yarn over, pull through both loops.
Double crochet (dc): Yarn over, insert hook, yarn over, pull up a loop, yarn over and pull through two loops, yarn over and pull through remaining two loops.
Front post double crochet (FPdc): Instead of working into the top of the stitch, you work around the post (the vertical bar) of the stitch below. Insert your hook from the front, going right to left around the post.
Back post double crochet (BPdc): Same idea, but insert your hook from the back, going right to left around the post.
If you have never worked post stitches before, I recommend practicing on a small swatch first. Make about 20 double crochets, then try alternating FPdc and BPdc on the next row. You will feel the fabric start to develop texture. That clicking moment when you understand how the posts work? It is incredibly satisfying.
Time Estimate
Plan for approximately 20 to 30 hours of work depending on your experience level:
This is definitely a project dress, not a weekend quickie. But because each section is distinct, you can easily work on it in sessions without losing your place.
Finished Measurements
This pattern is written for size Small/Medium:
Materials You Will Need
Yarn: Fingering weight yarn in an ombre or gradient colorway, approximately 800 to 900 yards / 730 to 820 meters total. Look for a colorway that transitions from soft butter yellow through sage green to creamy ivory.
If you prefer working with separate solid colors, you will need:
Recommended Yarn Options:
1. Freia Fine Handpaints Ombre Lace (100% superwash merino wool, approximately 650 yards per skein). Purchase two skeins in a yellow-green-cream colorway.
2. Scheepjes Whirl (60% cotton / 40% acrylic, approximately 1094 yards per ball). One ball is sufficient. The cotton content gives beautiful stitch definition for the basket-weave texture.
3. WeCrochet Chroma Fingering (70% superwash wool / 30% nylon, approximately 396 yards per skein). Purchase two to three skeins in a coordinating gradient.
Hook: US B-1 / 2.25 mm crochet hook for gauge swatch, or US C-2 / 2.75 mm as needed to meet gauge.
Notions:
Gauge
Bodice basket-weave stitch: 28 stitches and 20 rows = 4 in / 10 cm in basket-weave pattern. Measure after blocking.
Skirt fan-shell lace: 1 complete fan-shell repeat (10 stitches wide) = 1.5 in / 3.8 cm and 4 rounds of lace pattern = 1 in / 2.5 cm. Measure after blocking.
Gauge matters here. This is a fitted garment. Please take the time to work a swatch. If your gauge is tighter than stated, go up one hook size. If looser, go down.
Abbreviations
Special Stitches Explained
Front Post Double Crochet (FPdc)
This stitch creates a raised ridge on the right side of your work.
1. Yarn over.
2. Insert hook from the front of the work, going from right to left around the post (vertical bar) of the indicated stitch in the previous row. Do not insert into the top loops.
3. Yarn over and pull up a loop. You now have 3 loops on hook.
4. Yarn over and pull through 2 loops. You now have 2 loops on hook.
5. Yarn over and pull through remaining 2 loops. FPdc complete.
Back Post Double Crochet (BPdc)
This stitch creates an indented groove on the right side.
1. Yarn over.
2. Insert hook from the back of the work, going from right to left around the post of the indicated stitch.
3. Yarn over and pull up a loop. 3 loops on hook.
4. Yarn over and pull through 2 loops. 2 loops on hook.
5. Yarn over and pull through remaining 2 loops. BPdc complete.
Together, FPdc and BPdc create the basket-weave texture. The key is consistency. What pushes forward on the right side must be worked as a BPdc on the wrong side to maintain the woven illusion.
Fan Shell Stitch
This creates the lacy skirt pattern:
1. Skip 2 stitches.
2. Work 5 dc into the next stitch or chain space. This is the shell.
3. Skip 2 stitches.
4. Work 1 sc into the next stitch. This is the base of the next fan.
The basic repeat unit is: (sk 2, 5 dc in next st, sk 2, sc in next st) around.
Step by Step Instructions
Section 1: The Bodice
The bodice is worked as a flat rectangle that wraps around the body. Before seaming, it measures approximately 34 in / 86 cm wide and 6 in / 15 cm tall.
Foundation Chain:
Using yellow (or the yellow end of your gradient yarn), ch 241.
Row 1 (RS): Dc in 4th ch from hook (ch 3 counts as dc), dc in each ch across. Turn. (239 dc)
Row 2 (WS): Ch 3 (counts as dc), FPdc around next 3 sts, (BPdc around next 4 sts, FPdc around next 4 sts) 29 times, BPdc around next 3 sts, dc in top of tch. Turn. (239 sts)
Row 3 (RS): Ch 3 (counts as dc), BPdc around next 3 sts, (FPdc around next 4 sts, BPdc around next 4 sts) 29 times, FPdc around next 3 sts, dc in top of tch. Turn. (239 sts)
Row 4 (WS): Rep Row 2. (239 sts)
Row 5 (RS): Rep Row 3. (239 sts)
Row 6 (WS): Ch 3, BPdc around next 3 sts, (FPdc around next 4 sts, BPdc around next 4 sts) 29 times, FPdc around next 3 sts, dc in top of tch. Turn. (239 sts)
Row 6 shifts the basket-weave blocks by 4 stitches to create the woven illusion.
Row 7 (RS): Ch 3, FPdc around next 3 sts, (BPdc around next 4 sts, FPdc around next 4 sts) 29 times, BPdc around next 3 sts, dc in top of tch. Turn. (239 sts)
Row 8 (WS): Rep Row 6. (239 sts)
Row 9 (RS): Rep Row 7. (239 sts)
Row 10 (WS): Rep Row 6. (239 sts)
Rows 11 through 18: Rep Rows 3 through 10 to complete two full squares of the basket-weave texture vertically.
Continue in basket-weave as established, shifting the post stitch block every 4 rows, until bodice measures exactly 6 in / 15 cm. End after a WS row.
CHECKPOINT 1: Your flat piece should measure 34 in / 86 cm wide and 6 in / 15 cm tall. The basket-weave texture should be clearly visible with raised columns creating a woven appearance.
Seaming the Bodice:
Fold the bodice panel so RS faces RS. Using your tapestry needle and a length of yarn, whipstitch or mattress stitch the short edges together, leaving the top 1 in / 2.5 cm open at each top corner for strap attachment points.
Section 2: The Peplum Ruffle
The peplum creates a short flared ruffle approximately 2.5 in / 6.5 cm deep, worked in rounds from the waist edge.
Setup Round (RS): With RS facing, join yarn at the side seam of the waist edge.
Rnd 1 (Increase Setup): Ch 3 (counts as dc), (dc in 3 sts, 2 dc in next st) rep around to increase stitch count by approximately 25%. Join with sl st to top of beg ch 3. (299 dc)
Rnd 2: Ch 3, (FPdc around next 4 sts, BPdc around next 4 sts) rep around, adjusting last repeat as needed. Join with sl st to top of beg ch 3. (299 sts)
Rnd 3: Ch 3, (BPdc around next 4 sts, FPdc around next 4 sts) rep around to last 3 sts, BPdc around next 3 sts. Join. (299 sts)
Rnd 4: Rep Rnd 2. (299 sts)
Rnd 5: Rep Rnd 3. (299 sts)
Rnd 6 (Shift blocks): Ch 3, (BPdc around next 4 sts, FPdc around next 4 sts) rep around. Adjust last 3 sts as in Rnd 3. Join. (299 sts)
Rnd 7: Ch 3, (FPdc around next 4 sts, BPdc around next 4 sts) rep around. Adjust last 3 sts. Join. (299 sts)
Rnd 8: Rep Rnd 6. (299 sts)
Continue in basket-weave as established until peplum measures 2.5 in / 6.5 cm from the waist join. Fasten off.
CHECKPOINT 2: Your bodice-plus-peplum piece should measure approximately 8.5 in / 21.5 cm from the top neckline edge to the bottom of the peplum ruffle.
Section 3: The Skirt
The skirt is worked in rounds from the peplum, using the Fan Shell Stitch throughout. It increases every 6 rounds for the flared shape.
Setup Rnd: Join yarn to any st at base of peplum. Ch 1 (does not count as st). Sc in each st around, working 2 sc into one stitch once to bring total to 300. Join with sl st to first sc. (300 sc)
SKIRT TIER 1 (Rounds 1 through 6):
Rnd 1: Ch 3 (counts as first dc of first shell), work 2 more dc in same st as join, sk 2 sts, sc in next st, sk 2 sts, (5 dc in next st, sk 2 sts, sc in next st, sk 2 sts) 48 times, 2 dc in same st as original ch 3. Join with sl st to top of beg ch 3. (50 shells established)
Rnd 2: Sl st into next dc, sl st into center (3rd) dc of first shell. Ch 1. Sc in center dc of first shell, (ch 2, 5 dc into next sc, ch 2, sc in center dc of next shell) rep around. Join with sl st to first sc. (300 sts)
Rnd 3: Sl st to center of first shell. Ch 3 + 2 dc in same st, (sc in next sc, 5 dc in center of next shell) rep 48 times, sc in next sc, 2 dc in same as start. Join. (300 sts)
Rnds 4 through 6: Rep Rnds 2 and 3 alternately.
Increase Rnd (after Rnd 6): Ch 1, sc in every st around, working a second sc into every 5th stitch: (sc in 4 sts, 2 sc in next st) around. (360 sc)
SKIRT TIER 2 (Rounds 7 through 12): Rep the fan shell pattern with 60 shells around.
Increase Rnd (after Rnd 12): (sc in 5 sts, 2 sc in next st) around. (420 sc)
SKIRT TIER 3 (Rounds 13 through 18): Rep fan shell pattern with 70 shells.
Increase Rnd (after Rnd 18): (sc in 6 sts, 2 sc in next st) around. (480 sc)
SKIRT TIER 4 (Rounds 19 through 24): Rep fan shell pattern with 80 shells.
Increase Rnd (after Rnd 24): (sc in 7 sts, 2 sc in next st) around. (540 sc)
SKIRT TIER 5 (Rounds 25 through 30): Rep fan shell pattern with 90 shells.
Increase Rnd (after Rnd 30): (sc in 8 sts, 2 sc in next st) around. (600 sc)
SKIRT TIER 6 (Rounds 31 through 36): Rep fan shell pattern with 100 shells.
Increase Rnd (after Rnd 36): (sc in 9 sts, 2 sc in next st) around. (660 sc)
SKIRT TIER 7 (Rounds 37 through 42): Rep fan shell pattern with 110 shells.
Increase Rnd (after Rnd 42): (sc in 10 sts, 2 sc in next st) around. (720 sc)
SKIRT TIER 8 (Rounds 43 through 48): Rep fan shell pattern with 120 shells.
Increase Rnd (after Rnd 48): (sc in 11 sts, 2 sc in next st) around. (780 sc)
SKIRT TIER 9 (Rounds 49 through 54): Rep fan shell pattern with 130 shells.
Increase Rnd (after Rnd 54): (sc in 12 sts, 2 sc in next st) around. (840 sc)
SKIRT TIER 10 (Rounds 55 through 60): Rep fan shell pattern with 140 shells.
Continue adding tiers as needed until skirt measures 17.5 in / 44.5 cm from the peplum base. Fasten off.
Section 4: Spaghetti Straps
Make 2 straps:
Ch approximately 80 (or desired length to go from front neckline, over shoulder, to back neckline). Sl st in 2nd ch from hook and each ch across. Fasten off.
Sew straps to bodice neckline, positioning them approximately 4 inches apart at the front and back. Try on the dress and adjust strap length before final attachment.
Finishing
Blocking: This step is essential. The lace skirt will not open properly until blocked. Soak your finished dress in lukewarm water with a splash of wool wash. Gently squeeze out excess water (do not wring). Lay flat on blocking mats, pin the fan shells to their full width, and allow to dry completely.
Weave in all ends using your tapestry needle.
Optional waistband elastic: Thread narrow elastic through the waist join between bodice and peplum for extra support. This is not visible from the outside but adds comfort.
Pattern Notes and Tips
The turning chain (ch 3) counts as the first double crochet throughout the bodice and peplum. Keep this consistent or your stitch counts will drift.
If using separate yarn colors instead of gradient yarn, join new colors at the beginning of a right-side row for the cleanest transition.
Blocking transforms this project. I cannot stress this enough. The skirt will look bunched and cramped before blocking. After blocking, those fan shells will open up beautifully and the hem will develop its signature scalloped edge.
The gradient naturally occurs if you are using ombre yarn. If blending colors manually, consider carrying two strands and gradually transitioning by dropping one color and adding another every few rows.
Thank you so much for choosing this pattern for your next crochet project. I truly hope you love making this dress as much as I loved designing it. The moment you slip it on and feel that handmade pride? Nothing beats it.
If you make this Sunshine Meadow Peplum Dress, I would absolutely love to see it. Tag me on Instagram or share a photo in my Facebook group. Seeing your finished projects is the highlight of my day.
Go ahead and save this pattern to your Pinterest boards so you can find it easily when you are ready to start. And if you make this gorgeous dress, please drop a comment below. I read every single one and love hearing about your crochet adventures.