
Looking for a lightweight summer top that actually keeps you cool while looking put together? This cheerful yellow crochet crop top is perfect for warm weather days, farmers market trips, or backyard gatherings. The fitted silhouette flatters your shape while the flutter sleeves add a touch of playful movement.
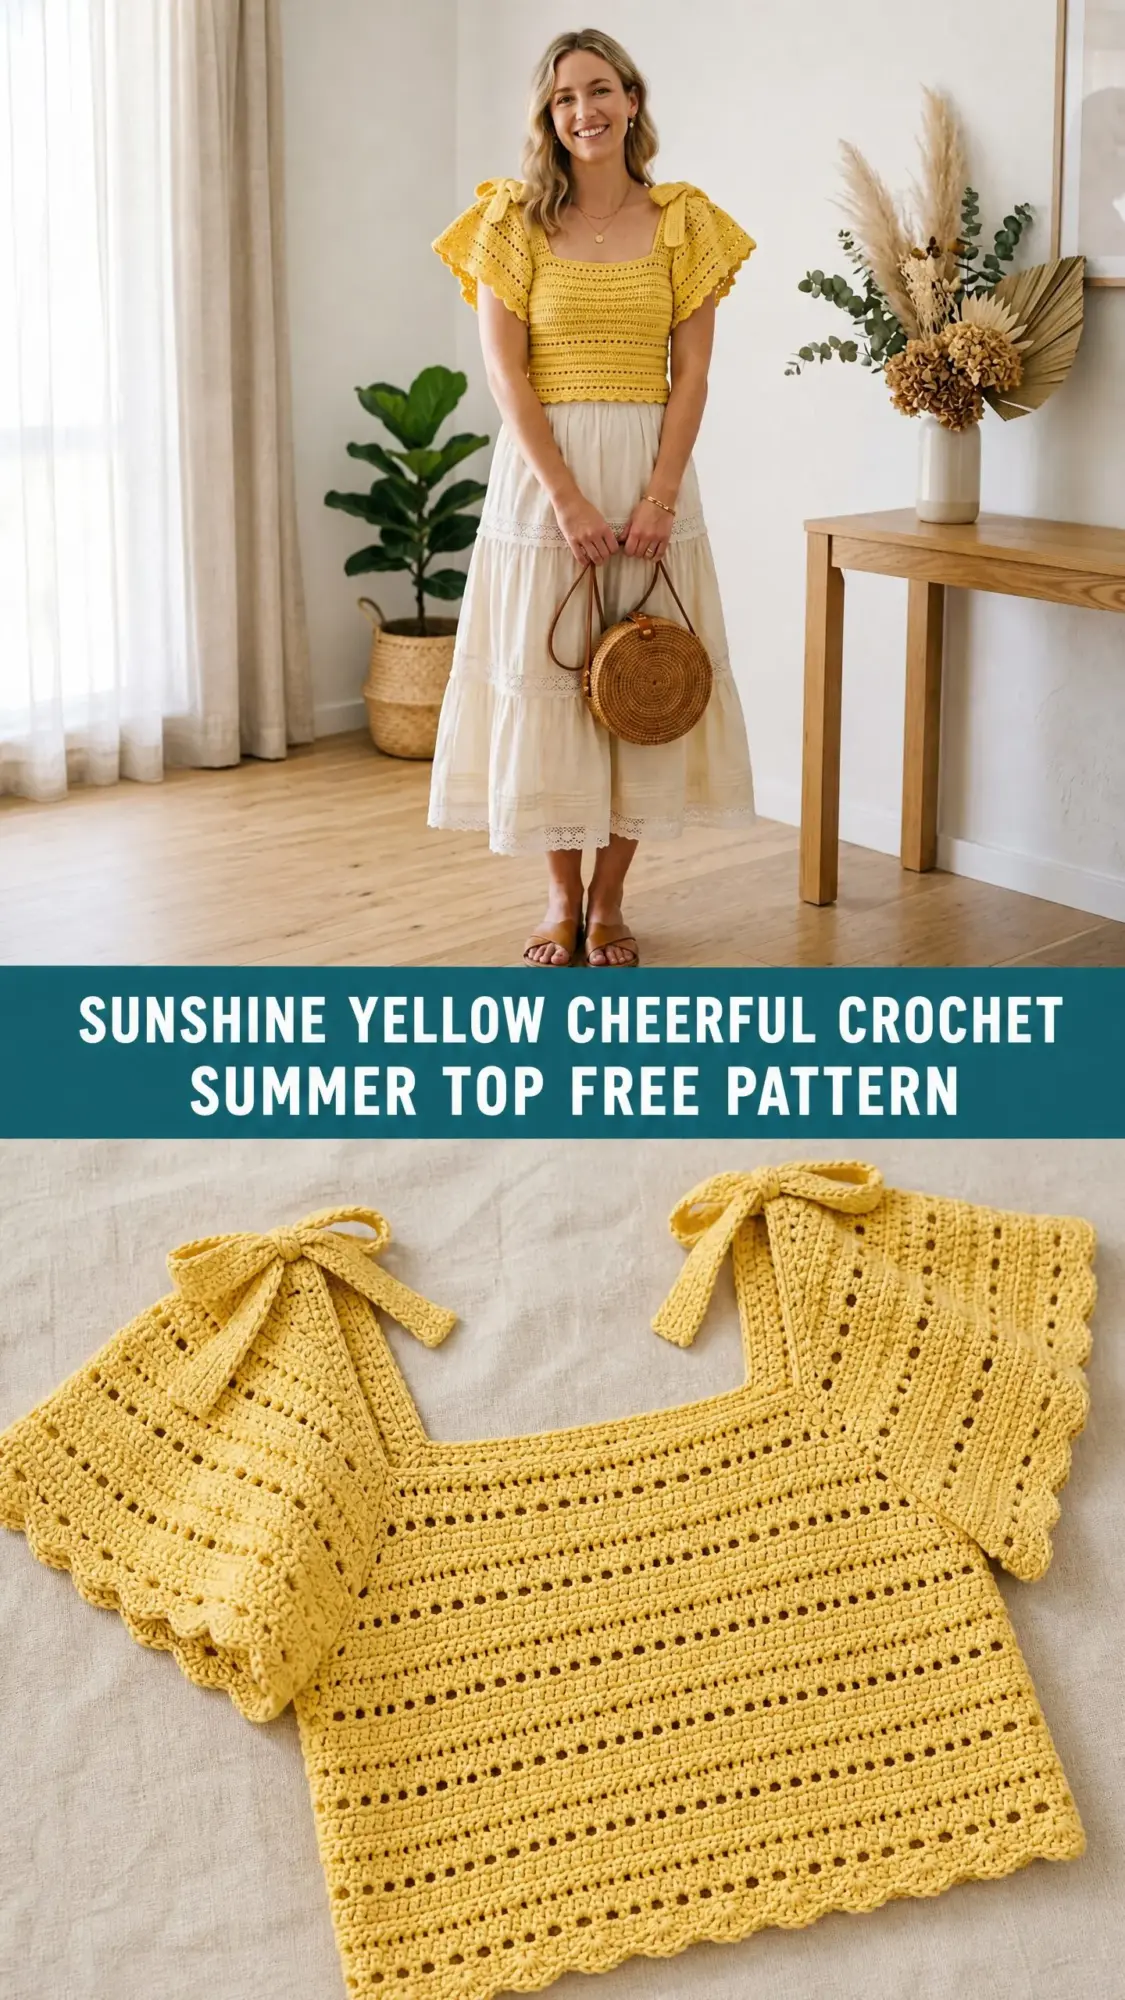
This pattern uses basic stitches like single crochet (sc), double crochet (dc), and chains (ch). It works up in about 12 to 18 hours depending on your pace. The construction is straightforward once you understand the flow: you work the body in the round, divide for the front and back yoke, then add those gorgeous flutter sleeves by picking up stitches around each armhole.
Whether you are making this for yourself or as a gift for a friend who loves cottagecore style, the finished top makes a real statement. The decorative bow ties at each shoulder and the scalloped edging give it that feminine, handmade charm that store bought pieces simply cannot match.
Why You Will Love This Crochet Summer Top Pattern
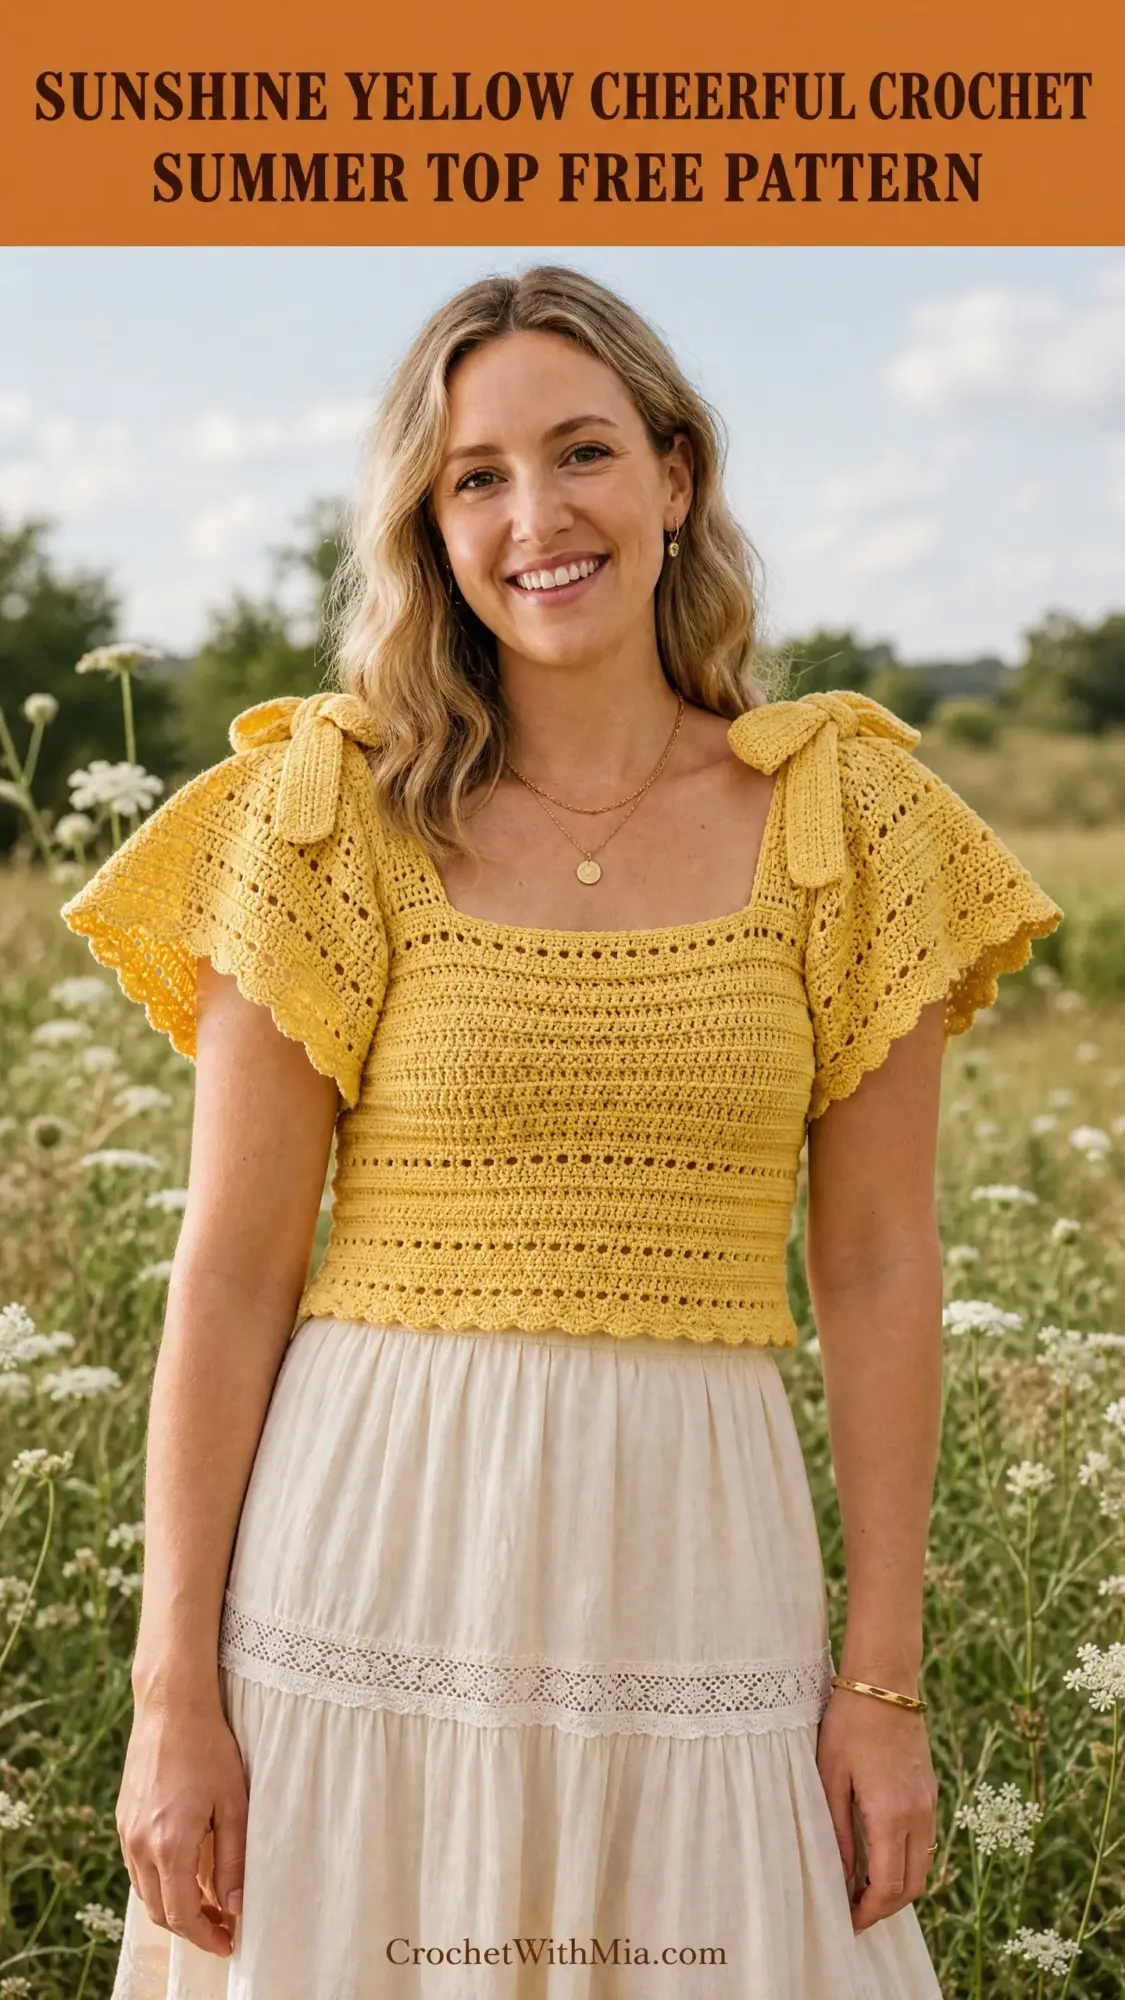
This crochet summer top hits all the right notes for a warm weather wardrobe staple. The cotton yarn keeps you cool and breathable. The cropped length pairs beautifully with high waisted skirts or jeans. And those flutter sleeves with their scalloped edges? Absolutely dreamy.
The design includes two horizontal lace eyelet stripes on the lower bodice that add visual interest without complicated techniques. These little details make the top look far more advanced than it actually is.
I especially love how the square neckline frames the collarbone area. It is flattering on so many body types and gives the top a modern feel while the bows and ruffles keep things soft and romantic.
Skill Level
This pattern is rated Advanced Beginner to Intermediate. You should feel comfortable working in the round, seaming pieces together, and picking up stitches along an edge. If you have completed at least one garment project before, you will do great here.
The construction relies on stitches you probably already know. The trickiest part is the armhole shaping and picking up stitches for the sleeves, but I will walk you through both.
Finished Sizes
This pattern is written for four sizes. The measurements below show bust circumference with 1 to 2 inches of positive ease:
Size Small (S): 32 to 34 inches / 81 to 86 cm
Size Medium (M): 35 to 37 inches / 89 to 94 cm
Size Large (L): 38 to 40 inches / 96 to 101 cm
Size Extra Large (XL): 41 to 43 inches / 104 to 109 cm
Finished garment bust laid flat:
S: 16 in / 40.5 cm
M: 17.5 in / 44.5 cm
L: 19 in / 48 cm
XL: 20.5 in / 52 cm
Finished length from hem to shoulder:
S: 14 in / 35.5 cm
M: 14.5 in / 37 cm
L: 15 in / 38 cm
XL: 15.5 in / 39.5 cm
Throughout the pattern, size instructions appear as S (M, L, XL). When only one number appears, it applies to all sizes.
Materials Needed
Yarn: Worsted weight (CYCA 4), 100% cotton or cotton blend recommended
Yardage:
Hook: US size G-6 / 4.0 mm (adjust as needed to meet gauge)
Notions:
Yarn Suggestions
Lion Brand 24/7 Cotton in Lemon (color 158) is my top recommendation. This 100% mercerized cotton works up with consistent tension, holds its shape beautifully, and is machine washable.
Paintbox Yarns Cotton Aran is another excellent choice. It offers crisp stitch definition with excellent color retention, which is perfect for showcasing those scallop and lace details.
When substituting yarn, choose something with good stitch definition. Avoid overly fuzzy or hairy fibers so the textures read clearly. Cotton and cotton blends behave better for fitted tops than acrylic alone because they have less stretch and better drape.
Gauge
18 sc x 20 rows = 4 in / 10 cm worked in single crochet, in the round, after blocking
16 dc x 9 rows = 4 in / 10 cm worked in double crochet rows, after blocking
Please do not skip the gauge swatch for a fitted garment like this. Your finished top will not fit properly if your gauge is off.
To make a gauge swatch: Chain 22. Row 1: sc in second ch from hook and each ch across. (21 sc) Turn. Rows 2 to 21: ch 1, sc across. (21 sc) Fasten off, block, and measure. Adjust hook size as needed.
Abbreviations and Stitch Definitions
Let me explain each abbreviation you will encounter. Understanding these terms before you start will make the pattern much easier to follow.
ch = chain: Yarn over, pull through the loop on your hook. This creates the foundation of most crochet work.
sl st = slip stitch: Insert hook, yarn over, pull through both the stitch and the loop on your hook in one motion. Used for joining rounds.
sc = single crochet: Insert hook into stitch, yarn over and pull up a loop (2 loops on hook), yarn over and pull through both loops. The shortest and most basic crochet stitch.
hdc = half double crochet: Yarn over, insert hook, yarn over and pull up a loop (3 loops on hook), yarn over and pull through all 3 loops.
dc = double crochet: Yarn over, insert hook, yarn over and pull up a loop (3 loops on hook), yarn over and pull through 2 loops, yarn over and pull through remaining 2 loops. Taller than single crochet.
sc2tog = single crochet 2 together: This is a decrease. Insert hook in first stitch, pull up a loop, insert hook in next stitch, pull up a loop (3 loops on hook), yarn over and pull through all 3 loops. You have turned 2 stitches into 1.
st(s) = stitch(es)
rnd = round
RS = right side
WS = wrong side
pm = place marker
sm = stitch marker
sk = skip
rem = remaining
rep = repeat
sp = space
ch-sp = chain space
BLO = back loop only
FLO = front loop only
t-ch = turning chain
inc = increase (2 stitches in same stitch)
dec = decrease
beg = beginning
YO = yarn over
lp(s) = loop(s)
Special Stitches for This Crochet Top Pattern
Shell Stitch
Work 5 dc into the same stitch or space indicated. This creates a fan shaped shell that forms the base of the scallop edging.
Scallop Edging
This decorative edge appears on the hem, neckline, and sleeves. Here is how it works:
Step 1: Join yarn to edge with a sl st.
Step 2: Ch 1, sc in same st.
Step 3: Skip 2 sts.
Step 4: Work 5 dc (shell) into the next st.
Step 5: Skip 2 sts.
Step 6: Sc into the next st.
Step 7: Repeat Steps 3 through 6 across or around the entire edge.
The edge stitch count must be a multiple of 6 for this edging to work out evenly. The pattern accounts for this at every edge.
Lace Eyelet Row
Ch 3 (counts as dc), skip 1 st, dc in next st, (ch 1, skip 1 st, dc in next st) across to end. This creates the decorative horizontal stripes visible on the lower bodice.
Pattern Notes Before You Begin
1. The top is worked in the round from hem upward through the full lower bodice. The piece is then divided at the underarm into front and back panels, each worked flat in rows.
2. The flutter sleeves are worked separately after the yoke panels are complete. Stitches are picked up around each armhole opening.
3. Right side (RS) is always facing outward when working in the round. When the piece is divided and worked flat, turn at the end of every row.
4. Turning chain at the beginning of a double crochet row: ch 3, which counts as the first dc throughout unless otherwise stated.
5. Turning chain at the beginning of a single crochet row: ch 1, which does NOT count as a stitch throughout.
6. Stitch markers should be placed at the two side points (left underarm and right underarm) to separate front and back stitch counts.
7. All stitch counts in parentheses at the end of rows and rounds reflect the TOTAL stitch count for that row or round.
Step by Step Instructions
Section 1: Lower Body (Worked in the Round, Hem to Underarm)
Foundation chain: Chain 144 (156, 168, 180). Taking care not to twist the chain, join with a sl st to the first ch to form a ring. Place a stitch marker in the joining st to mark the beginning of the round.
These chain counts create the following finished circumferences at gauge:
Rnd 1 (RS): Ch 1 (does not count as a st here or throughout), sc in each ch around, join with sl st to first sc. (144, 156, 168, 180 sc)
Rnd 2: Ch 1, sc in each st around, join with sl st to first sc. (144, 156, 168, 180 sc)
Rnd 3: Ch 1, sc in each st around, join with sl st to first sc. (144, 156, 168, 180 sc)
Rnd 4 (Eyelet Rnd): Ch 3 (counts as dc), skip 1 st, dc in next st, (ch 1, skip 1 st, dc in next st) around, ch 1, join with sl st to top of ch-3. (72, 78, 84, 90 dc plus 72, 78, 84, 90 ch-1 sps)
Rnd 5: Ch 1, sc in each dc and each ch-1 sp around, join with sl st to first sc. (144, 156, 168, 180 sc)
Rnds 6 through 8: Ch 1, sc in each st around, join with sl st to first sc. (144, 156, 168, 180 sc)
Rounds 1 through 8 form the waistband section. The eyelet row at Round 4 creates the decorative lace stripe visible at the lower bodice.
Rnd 9 (Begin increase for bust): Ch 1, sc in first 36 (39, 42, 45) sts, 2 sc in next st (inc), sc in next 72 (78, 84, 90) sts, 2 sc in next st (inc), sc in rem 35 (38, 41, 44) sts, join with sl st to first sc. (146, 158, 170, 182 sc)
The two increase points are the side seam positions. Place stitch markers in the increased stitches to track side seams throughout.
Rnd 10: Ch 1, sc in each st around, join with sl st to first sc. (146, 158, 170, 182 sc)
Rnd 11: Ch 1, sc to 1 st before right side marker, 2 sc in next st, sm, sc to 1 st before left side marker, 2 sc in next st, sm, sc to end, join with sl st to first sc. (148, 160, 172, 184 sc)
Rnd 12: Ch 1, sc in each st around, join with sl st to first sc. (148, 160, 172, 184 sc)
Rnd 13: Ch 1, sc to 1 st before right side marker, 2 sc in next st, sm, sc to 1 st before left side marker, 2 sc in next st, sm, sc to end, join with sl st to first sc. (150, 162, 174, 186 sc)
Rnd 14: Ch 1, sc in each st around, join with sl st to first sc. (150, 162, 174, 186 sc)
Rnd 15: Ch 1, sc to 1 st before right side marker, 2 sc in next st, sm, sc to 1 st before left side marker, 2 sc in next st, sm, sc to end, join with sl st to first sc. (152, 164, 176, 188 sc)
Rnds 16 through 20: Ch 1, sc in each st around, join with sl st to first sc. (152, 164, 176, 188 sc)
Rnd 21 (Second Eyelet Rnd): Ch 3 (counts as dc), skip 1 st, dc in next st, (ch 1, skip 1 st, dc in next st) around, ch 1, join with sl st to top of ch-3. (76, 82, 88, 94 dc plus matching ch-1 sps)
Rnd 22: Ch 1, sc in each dc and each ch-1 sp around, join with sl st to first sc. (152, 164, 176, 188 sc)
Rnds 23 through 28: Ch 1, sc in each st around, join with sl st to first sc. (152, 164, 176, 188 sc)
Checkpoint 1: After Round 28, your tube should measure approximately 7 in / 18 cm from the foundation chain. The two eyelet rows should be clearly visible as horizontal lace stripes. Total stitches: 152 (164, 176, 188).
Section 2: Divide for Front and Back Yoke
At the end of Round 28, do not join. The front and back are now worked flat in rows.
The total stitch count divides evenly in half at the two side markers:
Front Yoke
Row 1 (RS): Join yarn at right side marker with sl st. Ch 1, sc across 76 (82, 88, 94) sts of front panel only. Leave back panel sts unworked. Turn. (76, 82, 88, 94 sc)
Row 2 (WS): Ch 1, sc in each st across. Turn. (76, 82, 88, 94 sc)
Row 3 (RS): Ch 1, sc2tog over first 2 sts (armhole decrease), sc across to last 2 sts, sc2tog. Turn. (74, 80, 86, 92 sc)
Row 4 (WS): Ch 1, sc in each st across. Turn. (74, 80, 86, 92 sc)
Row 5 (RS): Ch 1, sc2tog, sc across to last 2 sts, sc2tog. Turn. (72, 78, 84, 90 sc)
Row 6 (WS): Ch 1, sc in each st across. Turn. (72, 78, 84, 90 sc)
Row 7 (RS): Ch 1, sc2tog, sc across to last 2 sts, sc2tog. Turn. (70, 76, 82, 88 sc)
Row 8 (WS): Ch 1, sc in each st across. Turn. (70, 76, 82, 88 sc)
Row 9 (RS): Ch 1, sc2tog, sc across to last 2 sts, sc2tog. Turn. (68, 74, 80, 86 sc)
Rows 10 through 14: Ch 1, sc in each st across. Turn. (68, 74, 80, 86 sc)
These five plain rows complete the main body of the yoke panel before the neckline shaping begins.
Front Neckline Shaping
The front neckline is a square neckline. The center stitches are bound off and the two shoulder straps are worked separately.
Row 15 (RS): Ch 1, sc across first 20 (22, 24, 26) sts (right shoulder strap). Fasten off center 28 (30, 32, 34) sts (neckline opening) by drawing up a loop in the 21st (23rd, 25th, 27th) st, pulling the yarn through all loops. Then join yarn to begin left shoulder strap on remaining 20 (22, 24, 26) sts. Turn. (Right strap: 20, 22, 24, 26 sc. Left strap: 20, 22, 24, 26 sc)
Right Front Shoulder Strap
Row 16 (WS): Join yarn at neckline edge of right strap. Ch 1, sc across 20 (22, 24, 26) sts. Turn. (20, 22, 24, 26 sc)
Rows 17 through 20: Ch 1, sc in each st across. Turn. (20, 22, 24, 26 sc)
Fasten off and leave a 12 in / 30.5 cm tail for seaming.
Left Front Shoulder Strap
Join yarn at armhole edge of left strap with RS facing.
Row 16 (WS): Ch 1, sc across 20 (22, 24, 26) sts. Turn. (20, 22, 24, 26 sc)
Rows 17 through 20: Ch 1, sc in each st across. Turn. (20, 22, 24, 26 sc)
Fasten off and leave a 12 in / 30.5 cm tail for seaming.
Checkpoint 2: After completing the front yoke, each shoulder strap should measure approximately 2 in / 5 cm in width. The armhole opening on each side should measure approximately 6 in / 15 cm in depth from underarm row to shoulder edge. The neckline opening should measure approximately 6.2 (6.7, 7.1, 7.6) in / 15.7 (17, 18, 19.3) cm across.
Back Yoke
Reattach yarn at the left side marker (right side of back panel as you look at the back), RS facing.
Row 1 (RS): Ch 1, sc across 76 (82, 88, 94) sts of back panel. Turn. (76, 82, 88, 94 sc)
Row 2 (WS): Ch 1, sc in each st across. Turn. (76, 82, 88, 94 sc)
Row 3 (RS): Ch 1, sc2tog, sc across to last 2 sts, sc2tog. Turn. (74, 80, 86, 92 sc)
Row 4 (WS): Ch 1, sc in each st across. Turn. (74, 80, 86, 92 sc)
Row 5 (RS): Ch 1, sc2tog, sc across to last 2 sts, sc2tog. Turn. (72, 78, 84, 90 sc)
Row 6 (WS): Ch 1, sc in each st across. Turn. (72, 78, 84, 90 sc)
Row 7 (RS): Ch 1, sc2tog, sc across to last 2 sts, sc2tog. Turn. (70, 76, 82, 88 sc)
Row 8 (WS): Ch 1, sc in each st across. Turn. (70, 76, 82, 88 sc)
Row 9 (RS): Ch 1, sc2tog, sc across to last 2 sts, sc2tog. Turn. (68, 74, 80, 86 sc)
Rows 10 through 14: Ch 1, sc in each st across. Turn. (68, 74, 80, 86 sc)
Back Neckline Shaping
Back neckline mirrors the front exactly to create a matching square back neck.
Row 15 (RS): Ch 1, sc across first 20 (22, 24, 26) sts. Fasten off center 28 (30, 32, 34) sts. Join yarn for remaining 20 (22, 24, 26) sts. Turn.
Right Back Shoulder Strap
Row 16 (WS): Ch 1, sc across 20 (22, 24, 26) sts. Turn. (20, 22, 24, 26 sc)
Rows 17 through 20: Ch 1, sc in each st across. Turn. (20, 22, 24, 26 sc)
Fasten off, leaving a 12 in / 30.5 cm tail.
Left Back Shoulder Strap
Row 16 (WS): Ch 1, sc across 20 (22, 24, 26) sts. Turn. (20, 22, 24, 26 sc)
Rows 17 through 20: Ch 1, sc in each st across. Turn. (20, 22, 24, 26 sc)
Fasten off, leaving a 12 in / 30.5 cm tail.
Joining Shoulders
Align front and back shoulder straps with WS held together (RS facing outward). Using the yarn tails and yarn needle, seam the front and back shoulder strap edges together using a whip stitch or mattress stitch. Work across all 20 (22, 24, 26) sts of each strap. Secure and weave in ends.
Checkpoint 3: After joining shoulders, the garment should have two clear armhole openings, a square neckline on both front and back, and joined shoulder seams. Total garment height from hem foundation chain to shoulder seam: approximately 14 (14.5, 15, 15.5) in / 35.5 (37, 38, 39.5) cm.
Section 3: Flutter Sleeves
The flutter sleeve is worked outward from the armhole opening. Stitches are picked up along the armhole edge.
Pickup stitch count: 60 (66, 72, 78) sts evenly spaced around each armhole opening.
With RS facing, join yarn at the bottom of the armhole (underarm point). Ch 1, pick up and sc evenly around the armhole: 60 (66, 72, 78) sc total, distributing stitches approximately 1 sc per row end along the side edges and 1 sc per stitch across the underarm. Join to first picked up sc with sl st. Turn.
The flutter sleeve is worked back and forth in rows, not in the round, to create the open flutter effect.
Row 1 (WS): Ch 3 (counts as dc), dc in same st, 2 dc in each st across. Turn. (120, 132, 144, 156 dc)
Doubling the stitch count in Row 1 creates the gathered, fluttery fullness of the sleeve.
Row 2 (RS): Ch 3 (counts as dc), dc in each st across. Turn. (120, 132, 144, 156 dc)
Row 3 (WS): Ch 3 (counts as dc), dc in each st across. Turn. (120, 132, 144, 156 dc)
Row 4 (RS): Ch 1, work Scallop Edging along Row 3: sc in first st, skip 2 sts, 5 dc in next st, skip 2 sts, (sc in next st, skip 2 sts, 5 dc in next st, skip 2 sts) across to last st, sc in last st. Do not turn. Fasten off.
Repeat sleeve construction for the second armhole.
Checkpoint 4: After completing both flutter sleeves, each sleeve should measure approximately 3 in / 7.5 cm from the armhole pickup row to the scalloped edge.
Section 4: Hem Scallop Edging
Turn the garment upside down to work along the foundation chain edge (bottom hem).
Join yarn to any chain space along the foundation edge with RS facing.
Rnd 1: Ch 1, sc in each foundation ch around, join with sl st to first sc. (144, 156, 168, 180 sc)
Rnd 2 (Scallop Edging): Ch 1, sc in first st, skip 2 sts, 5 dc in next st, skip 2 sts, (sc in next st, skip 2 sts, 5 dc in next st, skip 2 sts) around, join with sl st to first sc. Fasten off.
Section 5: Neckline Scallop Edging
With RS facing, join yarn at the right back shoulder seam.
Pick up sc evenly around the entire neckline opening, working into the sts and row ends of the bound off neckline edges of both front and back panels continuously.
Target pickup count: 84 (90, 96, 102) sc.
Distribute pickups evenly: approximately 28 (30, 32, 34) sc along back neckline, 14 (15, 16, 17) sc down each shoulder strap side, and 28 (30, 32, 34) sc along front neckline. Adjust by 1 stitch at corners if needed to ensure total is a multiple of 6.
Join with sl st to first sc to form a ring. (84, 90, 96, 102 sc)
Rnd 1 (Scallop Edging): Ch 1, sc in first st, skip 2 sts, 5 dc in next st, skip 2 sts, (sc in next st, skip 2 sts, 5 dc in next st, skip 2 sts) around, join with sl st to first sc.
Fasten off and weave in ends.
Section 6: Shoulder Tie Bows
Each shoulder seam receives one decorative tie bow. The bow is made from a separate crocheted chain.
Bow tie chain (make 4, two per shoulder):
Chain 40. Sl st in second ch from hook and each ch across. (39 sl sts)
Fasten off leaving a 6 in / 15 cm tail.
Fold each chain into a loop and arrange in a bow shape. Using the yarn tail, stitch the center of the bow securely to the shoulder seam at the top of the strap. Wrap the tail around the bow center twice before stitching down to cinch the bow shape. Knot securely on the WS and weave in ends.
Alternatively, work longer chains (chain 60) and stitch the center to the shoulder seam, leaving the ends free to tie into a bow that can be adjusted.
Repeat for both shoulders, mirroring placement.
Size Customization Tips
To customize the circumference, each stitch at gauge equals approximately 0.22 in / 0.56 cm. Add or subtract 6 stitches (one full repeat) at a time to the foundation chain to resize in 1.3 in / 3.3 cm increments while keeping the scallop edging divisibility intact.
To lengthen the body, add additional plain sc rounds between Round 15 and Round 20 in the lower body section. Each round adds approximately 0.2 in / 0.5 cm of length.
To add length to the flutter sleeve, add additional plain dc rows between Row 2 and the scallop edging row. Each row adds approximately 0.44 in / 1.1 cm of sleeve depth.
Finishing and Blocking Your Crochet Summer Top
Weave in all yarn ends securely using a yarn needle, working tails in at least two directions.
Wet blocking is strongly recommended for all cotton and cotton blend yarn garments:
1. Fill a basin with cool water and a small amount of gentle wool wash or dish soap.
2. Submerge the top fully and gently press to saturate. Do not wring or twist.
3. Remove and gently press out excess water by rolling in a clean towel.
4. Lay flat on a blocking board or clean dry towel.
5. Gently stretch to finished dimensions and pin at the hem, neckline, and sleeve edges using T-pins.
6. Allow to dry completely (12 to 24 hours). Do not wear or move the garment until fully dry.
Blocking relaxes the cotton fibers, opens up the lace eyelet pattern and scallop details, and sets the garment to its intended dimensions.
Care Instructions
Machine wash cold on a gentle cycle in a mesh laundry bag. Lay flat to dry. Do not tumble dry, as heat can cause cotton to shrink. Do not iron directly on crochet texture. If pressing is needed, use a damp pressing cloth.
Final Thoughts on This Cheerful Summer Crochet Top
Thank you so much for choosing this crochet summer top pattern for your next project. I hope the detailed instructions, checkpoints, and tips help you create something beautiful that you will reach for all season long. The combination of the fitted bodice, lace eyelet details, and those fluttery scalloped sleeves really does create something special.
If you make this top, I would absolutely love to see it. Tag me on Instagram or share your finished piece in our Facebook group. Seeing your creations is honestly the best part of sharing patterns.
Go ahead and save this pattern to your Pinterest boards so you can find it easily when you are ready to start. And if you have any questions or want to share your progress, drop a comment below. I always love hearing from you, and your feedback helps other makers feel confident diving in too. Happy crocheting!