
You know that gorgeous skein of mercerized cotton you’ve been saving for something truly special? This is the project. Dig it out of your stash because this navy blue tiered ruffle dress deserves every yard of that beautiful yarn you’ve been hoarding.
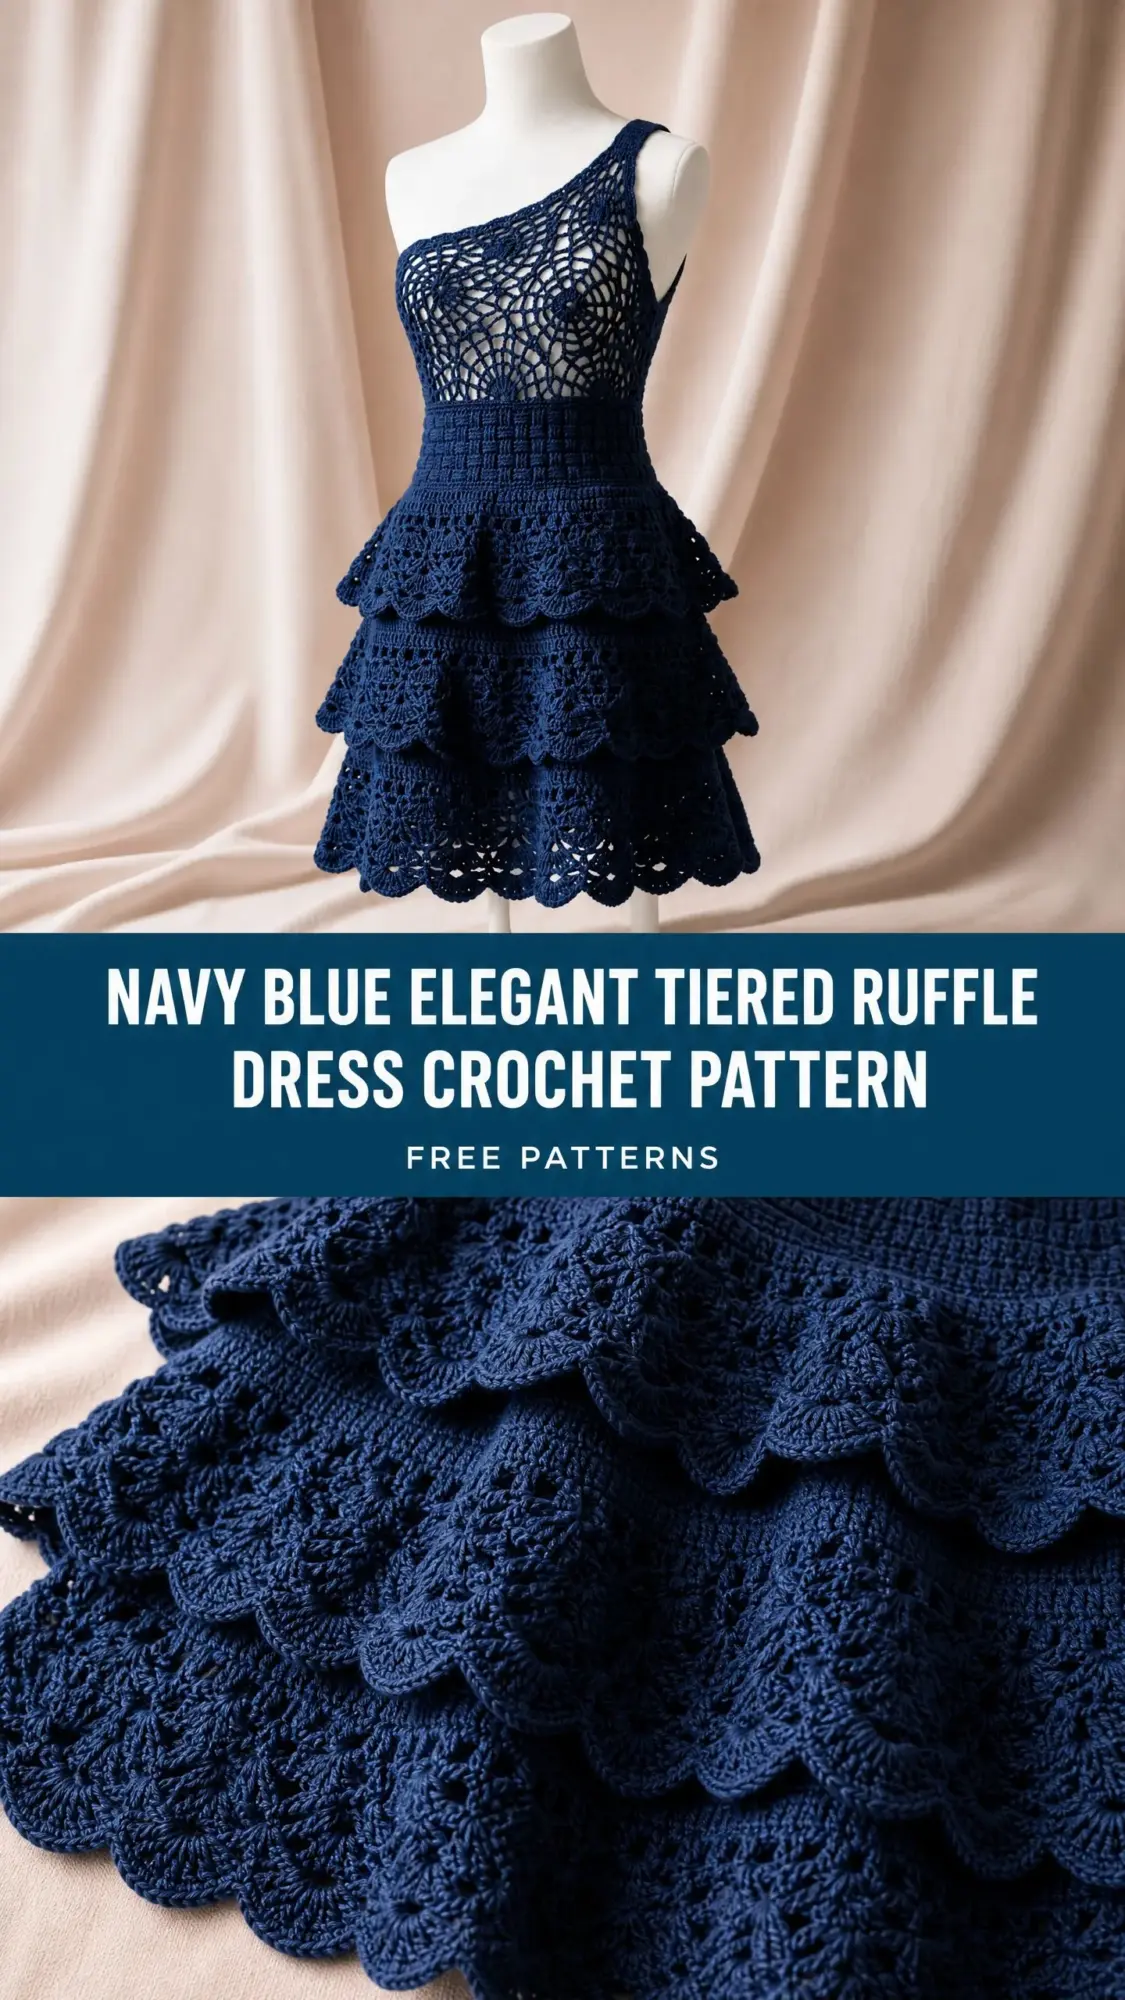
This crochet pattern combines open pineapple lacework, a structured basketweave waistband, and three cascading ruffle tiers into one absolutely stunning garment. The construction is genuinely fascinating. You’ll work a flat lace bodice panel, seam it into a tube, pick up stitches for a fitted waistband, then build each dramatic ruffle tier outward from the one above it.
Let me be honest with you. This is an advanced pattern. If you’re comfortable reading lace charts, working post stitches, and managing stitch counts across hundreds of stitches, you’re ready. If you’re newer to garment construction, bookmark this one for later and come back when you’ve got a few projects under your belt.
Why This Dress Pattern Stands Out
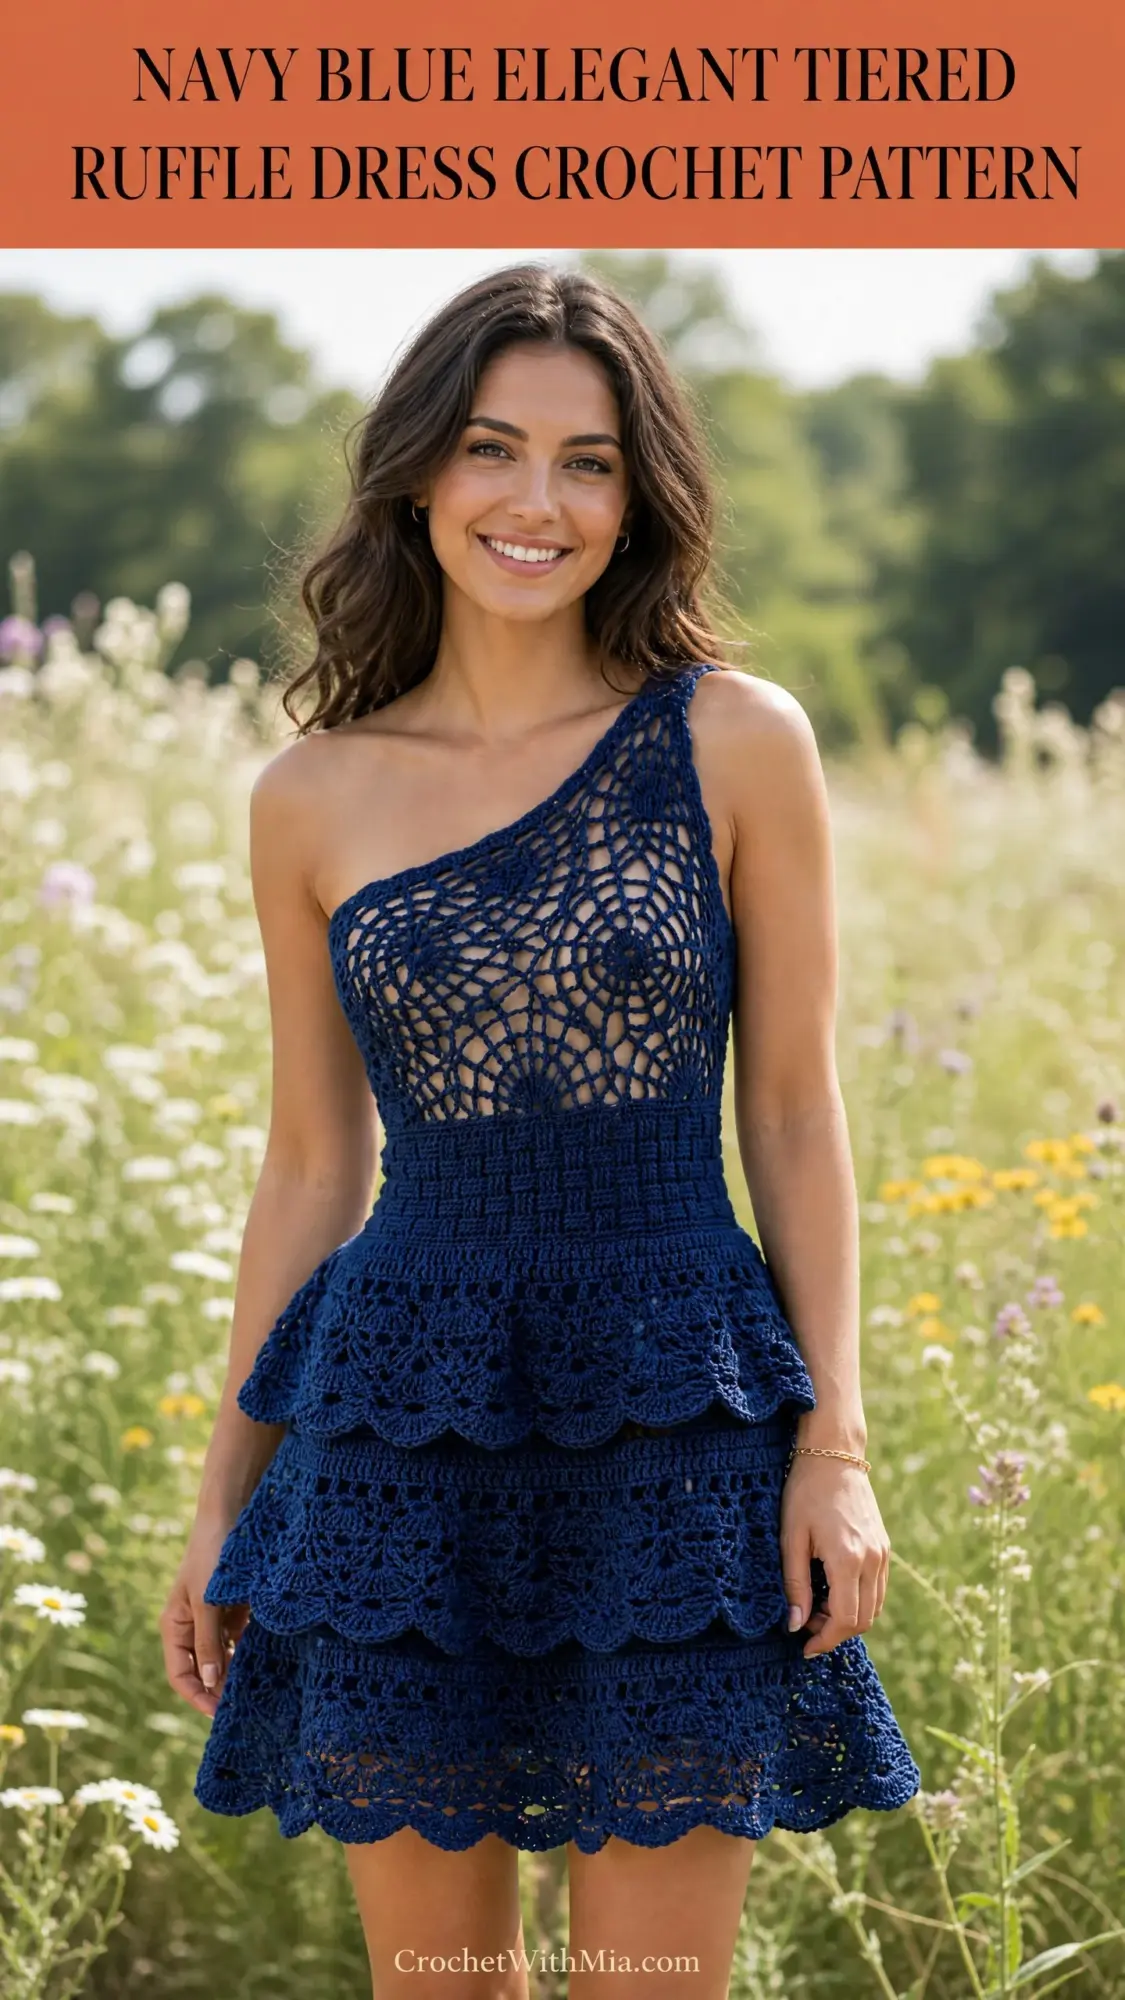
This one-shoulder silhouette creates a show-stopping effect that looks far more complicated than it actually is once you understand the construction logic. The bodice features delicate fan motifs and pineapple clusters that create an open, airy texture. Below that, a dense basketweave waistband provides structure and a flattering fit. Then comes the magic: three tiered ruffles that cascade downward, each larger than the last, finishing with gorgeous scalloped edges.
The entire dress uses a single color throughout. No color changes, no ends to weave in at color joins. Just beautiful navy blue from top to bottom.
Materials You’ll Need
Yarn: Approximately 1,400 yards of DK weight cotton or cotton-blend yarn in navy blue. Look for mercerized cotton for the best stitch definition in those lace sections.
Great yarn choices include:
Hooks:
Additional supplies:
Finished Measurements
This pattern is written for size Small/Medium:
Gauge (Please Check This!)
Using D-3 / 3.25 mm hook and DK cotton:
In the basketweave waistband pattern:
Using E-4 / 3.5 mm hook in the shell pattern:
Gauge matters here. This is a fitted garment. Check all three gauges before you begin. I know it feels tedious, but trust me on this one.
Abbreviations and Stitch Definitions
Let me walk you through every stitch you’ll encounter in this crochet pattern.
Basic stitches:
Post stitches:
Other abbreviations:
Special Stitches for This Pattern
Pineapple Cluster (PC): Yarn over, insert hook in designated stitch or space, yarn over, pull up a loop, yarn over, draw through 2 loops on hook. That’s one incomplete double crochet. Repeat 4 more times in the same spot for a total of 5 incomplete double crochets. Yarn over and draw through all 6 loops on hook. Chain 1 to close. This creates those beautiful rounded tops in the lace bodice.
Shell Stitch (SH): Work 5 double crochets all into the same stitch or space. Simple but effective.
Large Shell (LSH): Work 7 double crochets all into the same stitch or space. Used in the bottom tier for maximum drama.
Fan Motif: In the same stitch, work (dc, ch 1) 5 times, then dc once more. That gives you 6 double crochets with 5 chain-1 spaces between them, creating an open fan shape.
Basketweave Crossed Stitch: Alternate rows of back post double crochet and front post double crochet to create that raised grid texture at the waistband.
Scallop Edge: Slip stitch into first stitch, chain 3, work 4 dc in same stitch, skip 2 stitches, slip stitch into next stitch, chain 3, work 4 dc in same stitch. Repeat across for those beautiful curved scallops at the hem of each tier.
Step by Step Instructions
Section 1: Bodice Panel
The bodice is worked flat in rows, then seamed to form a tube. It wraps around your torso with the shoulder strap over the right shoulder.
Using D-3 / 3.25 mm hook, ch 91.
Row 1 (WS): Dc in 4th ch from hook (counts as dc), dc in next 2 ch, (ch 2, sk 2 ch, dc in next ch, ch 2, sk 2 ch, dc in next 3 ch) across to last 7 ch, ch 2, sk 2 ch, dc in next ch, ch 2, sk 2 ch, dc in last 3 ch. Turn. (88 sts)
Row 2 (RS): Ch 5 (counts as dc + ch 2), sk first 2 sts, dc in next dc, (ch 2, PC in next ch-2 sp, ch 2, dc in next dc, ch 2, sk 2 dc, dc in next dc) across, ending ch 2, PC in last ch-2 sp, ch 2, dc in top of t-ch. Turn. (88 units)
Row 3 (WS): Ch 3 (counts as dc), dc in first ch-2 sp, dc in next dc, (ch 1, FAN MOTIF in top of PC, ch 1, dc in next dc, dc in next ch-2 sp, dc in next dc) across, ending dc in last ch-2 sp, dc in 3rd ch of t-ch. Turn. (7 fan motifs)
Row 4 (RS): Ch 4 (counts as dc + ch 1), sk first 2 dc, (dc in first dc of fan, (ch 1, dc) in each of next 5 ch-1 sps of fan, ch 1, sk 2 dc) across, ending dc in top of t-ch. Turn. (88 units)
Row 5 (WS): Ch 3 (counts as dc), (2 dc in next ch-1 sp, dc in next dc) across, ending dc in 3rd ch of t-ch. Turn. (88 dc)
Row 6 (RS): Ch 5 (counts as dc + ch 2), sk 2, dc in next dc, (ch 2, sk 2, dc in next dc) across to last 2 sts, ch 2, sk 1, dc in top of t-ch. Turn. (88 units)
Row 7 (WS): Ch 3, dc in first ch-2 sp, (ch 2, PC in next ch-2 sp, ch 2, dc in next ch-2 sp) across, ending dc in last sp, dc in 3rd ch of t-ch. Turn. (88 units)
Row 8 (RS): Ch 3 (counts as dc), dc in each dc and 2 dc in each ch-2 sp across to top of t-ch, dc in top of t-ch. Turn. (88 dc)
Rows 9-12: Ch 1, sc in each st across. Turn. (88 sc)
Your bodice panel should measure approximately 17 inches wide and 6 inches tall. Do not fasten off.
Section 2: Shoulder Strap
Join yarn at top right corner of bodice panel with RS facing.
Row 1: Ch 1, sc in each of first 8 sts along top edge of bodice. Turn. (8 sc)
Continue working back and forth in sc on these 8 stitches for 14 inches or until the strap reaches over the shoulder to the back.
Slip stitch the strap end to the upper back corner of the bodice panel. Fasten off and weave in the end.
Work 1 round of sc evenly around the entire upper opening edge for a clean finish, approximately 110 sc. Slip stitch to join and fasten off.
Section 3: Side Seam
Fold the bodice so the short edges align at the left underarm. Whipstitch or slip stitch the seam closed from the lower edge upward for 3 inches only. Leave the upper 3 inches open as the underarm opening.
Checkpoint: The bodice should now form a tube approximately 34 inches around at the bust.
Section 4: Waistband
Still using D-3 / 3.25 mm hook.
Setup round: With RS facing, join yarn at side seam at lower edge of bodice. Ch 1, sc evenly around entire lower edge, adjusting to achieve exactly 140 sc. Sl st to join. (140 sc)
Round 1 (RS): Ch 3 (counts as dc), dc in each sc around. Sl st to top of beg ch-3 to join. (140 dc)
Round 2: Ch 2 (does not count as st), BPdc around each dc around. Sl st to top of first BPdc. (140 BPdc)
Round 3: Ch 3 (counts as dc), FPdc around each BPdc around. Sl st to top of beg ch-3. (140 sts)
Rounds 4-9: Continue alternating BPdc rounds and FPdc rounds as established. (140 sts each round)
Do not fasten off. The waistband should measure 3 inches tall.
Section 5: Tier One Ruffle
Switch to E-4 / 3.5 mm hook.
Setup round: Working into the lower edge of the waistband, ch 1, work 2 sc in each st around. Sl st to join. (280 sc)
Round 1: Ch 3 (counts as dc), 2 dc in next sc, (dc in next sc, 2 dc in next sc) around. Sl st to join. (420 dc)
Rounds 2-3: Ch 3, dc in each dc around. Sl st to join. (420 dc)
Round 4: Ch 1, sc in first dc, sk 2 dc, SH (5 dc) in next dc, sk 2 dc, (sc in next dc, sk 2 dc, SH in next dc, sk 2 dc) around. Sl st to first sc. (70 shells, 70 sc)
Round 5: Ch 3, 2 dc in same sc, sc in center dc of shell, (SH in next sc, sc in center dc of next shell) around, ending 2 dc in beg sc, sl st to top of beg ch-3. (70 shells, 70 sc)
Round 6: Ch 1, sc in first sc, SH in next sc, (sc in next sc, SH in next sc) around. Sl st to first sc. (70 shells, 70 sc)
Round 7 (Scallop Hem): Ch 1, sc in first sc, ch 3, 4 dc in same sc, sk 2 dc, sl st in center of shell, ch 3, 4 dc in same sl st, sk 2 dc, (sl st in next sc, ch 3, 4 dc in same sl st, sk 2 dc, sl st in center of shell, ch 3, 4 dc in same sl st, sk 2 dc) around. Sl st to beg sc. Fasten off.
Tier one should measure approximately 4 inches tall.
Section 6: Tier Two Ruffle
Join yarn at Round 3 of tier one (the last plain dc round before the shells).
Setup round: Ch 1, sc in each dc around. Sl st to join. (420 sc)
Round 1: Ch 3, dc in same st, 2 dc in each sc around. Sl st to join. (840 dc)
Rounds 2-3: Ch 3, dc in each dc around. Sl st to join. (840 dc)
Round 4: Ch 1, sc in first dc, sk 2 dc, SH in next dc, sk 2 dc, (sc in next dc, sk 2 dc, SH in next dc, sk 2 dc) around. Sl st to first sc. (140 shells, 140 sc)
Rounds 5-7: Continue shell pattern as established. (140 shells, 140 sc each round)
Round 8 (Scallop Hem): Work scallop hem as in tier one. Fasten off.
Tier two should extend approximately 5 inches below tier one.
Section 7: Tier Three Ruffle
Join yarn at Round 3 of tier two.
Setup round: Ch 1, sc in each dc around. Sl st to join. (840 sc)
Round 1: Ch 3, dc in same st, dc in next sc, (2 dc in next sc, dc in next sc) around. Sl st to join. (1,260 dc)
Rounds 2-4: Ch 3, dc in each dc around. Sl st to join. (1,260 dc)
Round 5: Ch 1, sc in first dc, sk 2 dc, LSH (7 dc) in next dc, sk 2 dc, (sc in next dc, sk 2 dc, LSH in next dc, sk 2 dc) around. Sl st to first sc. (210 large shells, 210 sc)
Rounds 6-9: Continue large shell pattern as established. (210 LSH, 210 sc each round)
Round 10 (Scallop Hem): Ch 1, sc in first sc, ch 3, 4 dc in same sc, sk 3 dc, sl st in center dc of LSH, ch 3, 4 dc in same sl st, sk 3 dc, (sl st in next sc, ch 3, 4 dc in same sl st, sk 3 dc, sl st in center of LSH, ch 3, 4 dc in same sl st, sk 3 dc) around. Sl st to beg. Fasten off.
Tier three should extend approximately 7 inches below its joining point.
Finishing Your Dress
Weave in all ends securely on the wrong side, burying each end at least 1 inch in multiple directions. Check all tier joins for loose loops and tack closed with your yarn needle if needed.
Blocking (Essential!)
Wet blocking is absolutely required for this dress. The lace will not look right without it.
Submerge the entire dress in cool water for 20-30 minutes. Gently squeeze out water (never wring) and roll in a clean towel. Lay flat on blocking mats or hang on a dress form.
Pin the bodice lace open so the fan motifs spread to their full width. Pin each scalloped hem to its maximum curve. Allow to dry completely, at least 12 hours. Cotton can take up to 24 hours in humid conditions.
Size Customization Tips
To size up: Add one 12-stitch lace repeat to the bodice foundation chain for each additional 2.4 inches of bust circumference. Add 10 stitches to the waistband setup round. Recalculate tier stitch counts to remain divisible by 6.
To size down: Remove one 12-stitch lace repeat and reduce the waistband by 10 stitches.
To lengthen tiers: Add plain dc rounds between the setup and shell rounds. Each round adds about 0.5 inches.
To shorten: Stop after tier two for a mini-dress silhouette.
Pattern Notes and Tips
The lace bodice is intentionally open. Plan to wear a bandeau or slip underneath for modesty.
Expect this project to take 40-60 hours. The lace bodice alone accounts for 15-20 hours. This is not a weekend project, but the results are absolutely worth the time investment.
This crochet tutorial walks you through every step, but if you get stuck on the pineapple clusters or fan motifs, work a small swatch first to get comfortable with the stitch placement before committing to the full bodice.
Care Instructions
Machine wash cold on gentle cycle if using mercerized cotton like Lion Brand 24/7. Hand wash in mild detergent for finer cottons. Never tumble dry. Lay flat to dry and store folded rather than hung.
Thank you so much for choosing this pattern for your next ambitious crochet project. I really hope you love making this dress as much as I loved designing it. When you finish yours, I would absolutely love to see it. Tag me on Instagram or share a photo in our Facebook group.
If this pattern caught your eye, go ahead and save it to your Pinterest boards so you can find it when you’re ready to cast on. And please drop a comment below if you make this dress. I love hearing about your finished projects and any modifications you tried along the way!