
Looking for a show-stopping garment that will turn heads at every summer event? This stunning halter dress keeps you cool while making a serious style statement, and it works up into a wearable piece of art perfect for weddings, garden parties, or special date nights.
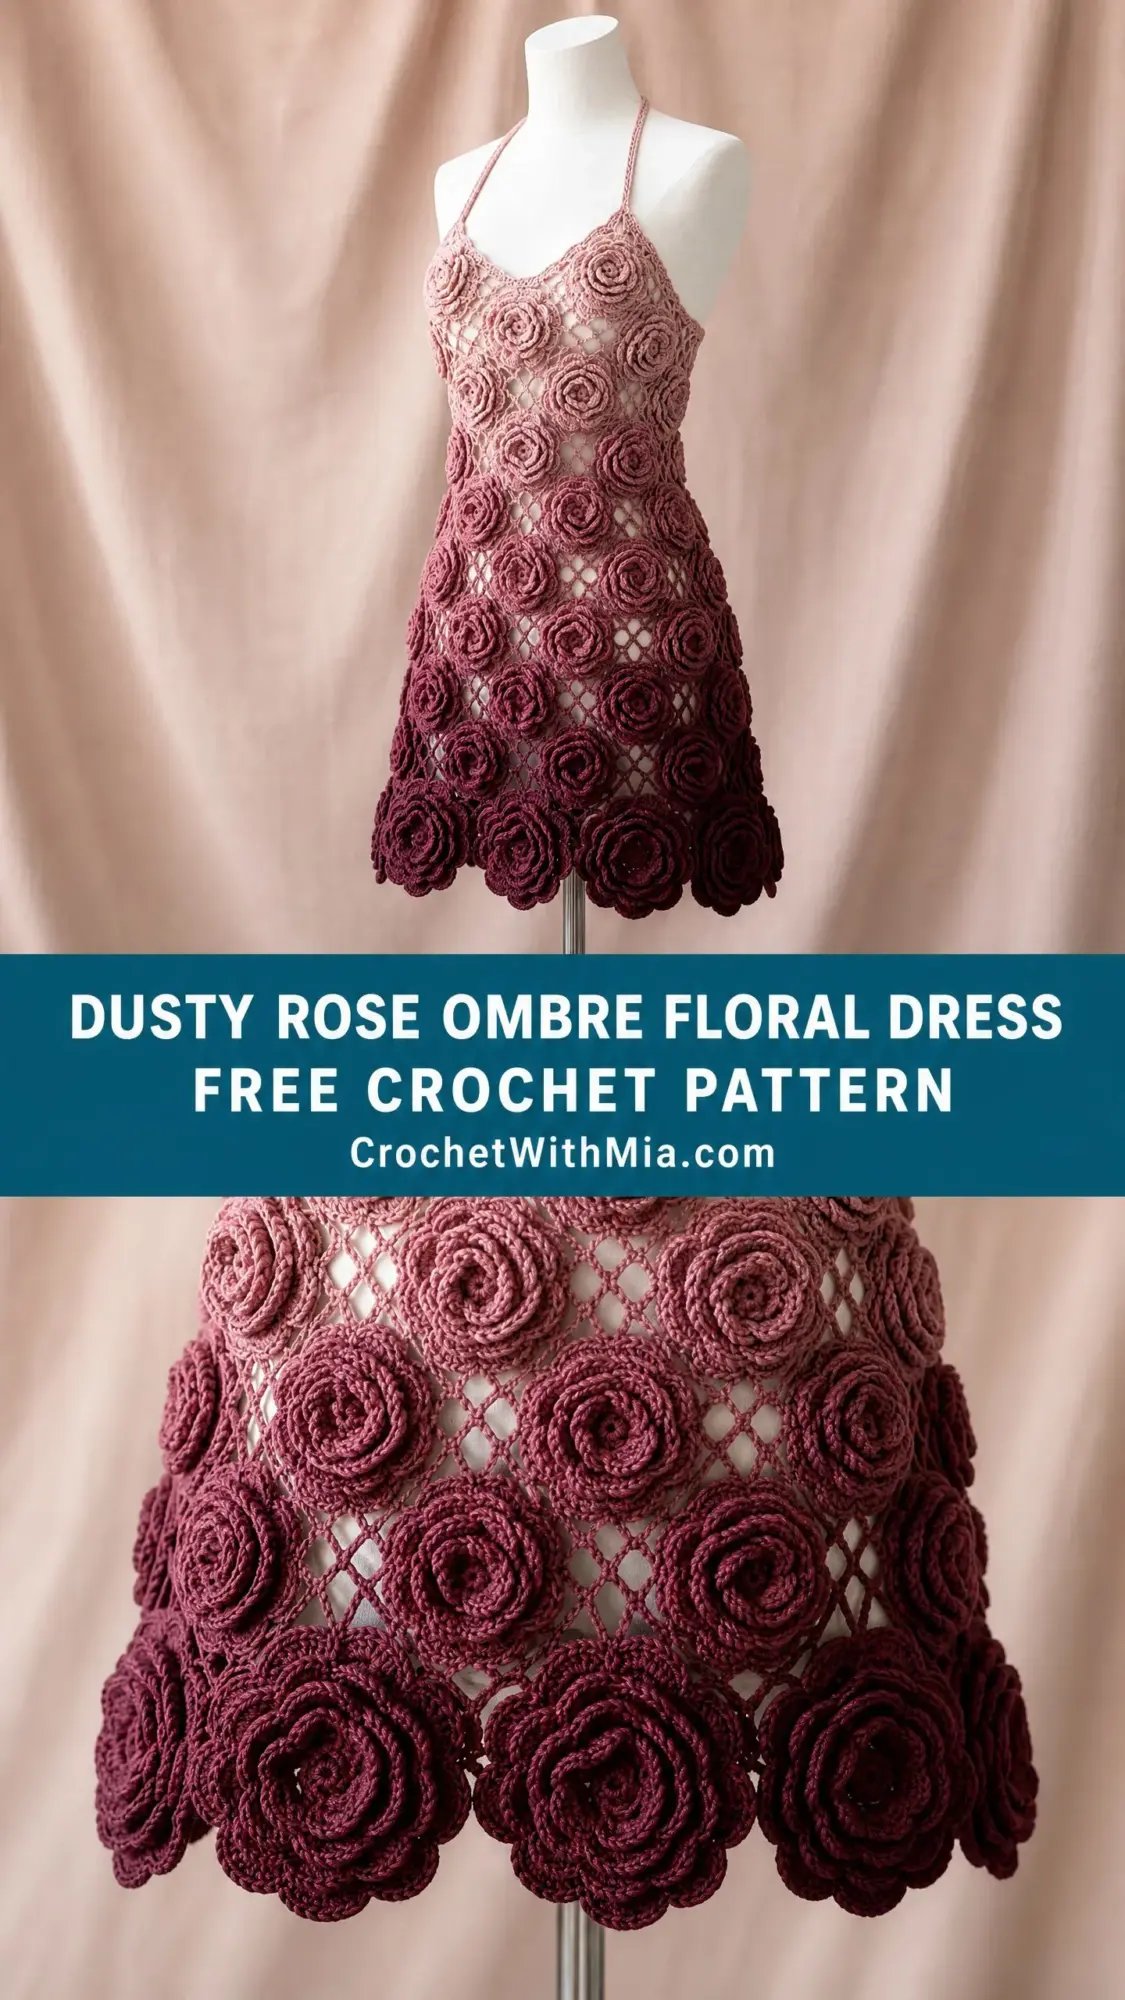
The construction uses a simple diamond mesh base paired with individually crocheted three-dimensional roses. If you can work single crochet, double crochet, and chains, you already have the skills needed. The real magic happens when you attach over a hundred handmade roses in a gorgeous gradient from pale dusty pink at the neckline down to deep burgundy at the hem.
This dress makes an unforgettable gift for a bride-to-be, a daughter graduating, or yourself when you deserve something truly special. Fair warning though: this is an advanced project requiring 80 to 120 hours of dedicated work. But every single hour is worth it when you slip on the finished piece.
About This Crochet Pattern
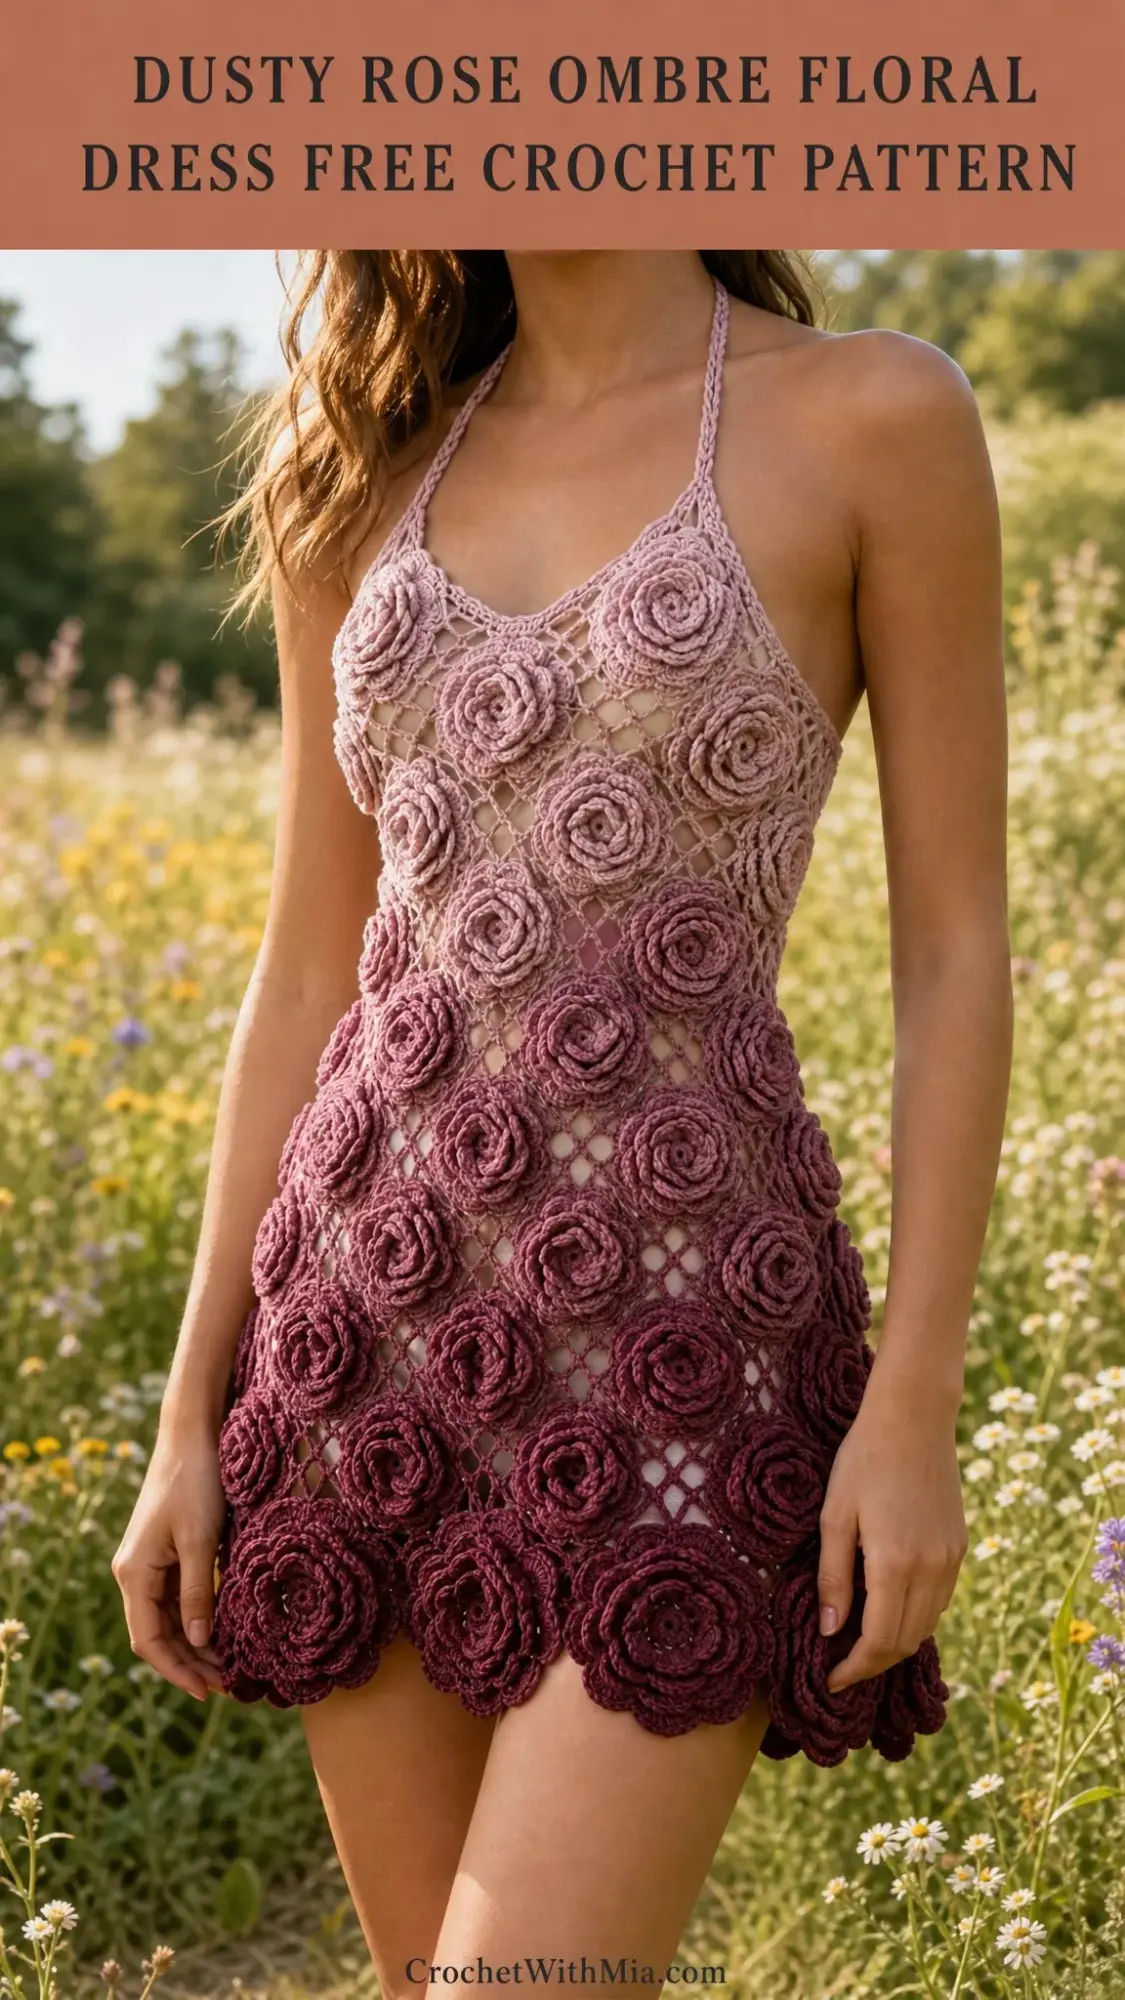
This mini dress features a fitted halter-neck bodice and a gently flared skirt constructed entirely from crocheted roses arranged in horizontal rows. The roses attach to a diamond-mesh base fabric that acts as invisible scaffolding beneath all those gorgeous blooms.
The ombre colorway transitions through seven distinct shades. You will start with the palest dusty rose at the top and work your way down through mauve tones until you reach a rich, deep burgundy at the scalloped hem. The effect is absolutely breathtaking in person.
The bodice is worked flat with an open back design, making it adjustable and comfortable. The skirt then joins in the round with gradual increases that create a flattering A-line silhouette. The whole garment is designed to be worn over a slip or bodysuit since the mesh base is intentionally open and sheer.
Skill Level
This pattern is rated advanced. You should feel comfortable working diamond mesh in the round, managing precise colorwork across multiple yarn shades, constructing three-dimensional roses, and shaping a garment with increases.
If you have never made a wearable garment before, I recommend completing at least two simpler garment projects first. Practice making freestanding flower motifs until you can create them without constantly checking the pattern. Then come back to this beauty when you feel ready.
That said, nothing in this pattern is technically difficult. The challenge lies in the sheer volume of roses you will make and the patience required to attach them all perfectly. If you can handle repetitive work and enjoy meditative crafting sessions, you will do great.
Materials Needed
Yarn
You will need DK weight yarn in seven coordinating shades that transition smoothly from pale dusty rose to dark burgundy. Here are the approximate yardage requirements for each shade:
Total yardage: approximately 1430 yards / 1308 m
Recommended Yarn Brands
Paintbox Yarns Simply DK works beautifully for this project. This 100% acrylic yarn offers excellent stitch definition, blocks well, and is machine washable. Purchase one ball each of seven coordinating shades from the dusty rose through plum range.
Drops Safran is a 100% cotton option that produces a drapier, heavier mesh with excellent color retention. The matte finish suits the romantic rose aesthetic perfectly. Purchase two balls of each shade. Note that cotton has less elasticity than acrylic, so work the mesh one hook size larger to maintain correct gauge.
Lion Brand Feels Like Butta DK creates an exceptionally soft, lightweight fabric with a subtle sheen that enhances the floral texture. One ball per shade for lighter shades, two balls for Shades 6 and 7.
Hooks
Notions
Finished Measurements
This pattern fits bust 34 to 36 inches (86 to 91 cm) and hip 36 to 38 inches (91 to 97 cm).
Gauge
Getting gauge right is absolutely essential for this garment. Incorrect gauge will alter both the fit of the mesh base and the proportion of roses to mesh openings.
Mesh base gauge: One diamond mesh repeat (4 chain spaces) = 2 inches (5 cm) wide by 1 inch (2.5 cm) tall on US E-4 (3.5 mm) hook.
Rose gauge: One completed standard rose = 2 inches (5 cm) in diameter at widest point on US D-3 (3.25 mm) hook.
Make and block your gauge swatch before starting the actual project. Trust me on this one.
Abbreviations
Let me walk you through every abbreviation used in this pattern with plain-English definitions:
Special Stitches
Diamond Mesh Stitch
This creates the scaffolding for your dress. The mesh is composed of chain-5 arches connecting single crochets, forming a diamond grid where each opening is framed by four chain segments.
Row 1 (foundation): sc in first st, (ch 5, sk 3 sts, sc in next st) repeat across.
Row 2: ch 3, turn, sc in center of first ch-5 arch (the 3rd chain of the 5), (ch 5, sc in center of next ch-5 arch) repeat across, ending sc in last arch, ch 2, dc in last sc of previous row.
The ch 2 plus dc at the end counts as a half-arch at the selvedge. This maintains your stitch counts at the edges and is important for shaping.
Standard Rose
Each rose is worked in a spiral across three tiers of petals. You will build volume from a tight center outward. Use your D-3 hook and the designated shade for each rose.
Foundation ring: ch 4, join with sl st to form ring.
Rnd 1 (center core): ch 1, work 8 sc into ring, join with sl st to first sc. (8 sc)
Rnd 2 (inner petal base): (ch 3, sk 1 sc, sl st in next sc) 4 times. (4 ch-3 loops)
Rnd 3 (inner petals): For each ch-3 loop: sl st into loop, ch 1, work (1 sc, 3 hdc, 1 sc) into the loop, sl st at base of loop. (4 small petals formed)
Rnd 4 (middle petal base): Working behind Rnd 3 petals into the skipped sc stitches of Rnd 1: insert hook from front to back into first skipped sc, sl st. (ch 4, sl st in next skipped sc) 4 times. (4 ch-4 loops)
Rnd 5 (middle petals): For each ch-4 loop: sl st into loop, ch 1, work (1 sc, 2 hdc, 3 dc, 2 hdc, 1 sc) into the loop. (4 medium petals formed)
Rnd 6 (outer petal base): Working behind Rnd 5 petals into the sl st connections between ch-4 loops: sl st into first connection. (ch 5, sl st into next connection) 4 times. (4 ch-5 loops)
Rnd 7 (outer petals): For each ch-5 loop: sl st into loop, ch 1, work (1 sc, 2 hdc, 5 dc, 2 hdc, 1 sc) into the loop. (4 large petals formed)
Fasten off, leaving a 12-inch tail for sewing. Gently coax the petals into a rounded, overlapping arrangement and lightly steam block each rose before attaching.
Large Hem Rose
Work exactly as Standard Rose through Rnd 7, then continue:
Rnd 8 (extra outer petal base): Working behind Rnd 7 petals into sl st connections: (ch 6, sl st into next connection) 4 times. (4 ch-6 loops)
Rnd 9 (extra outer petals): For each ch-6 loop: sl st into loop, ch 1, work (1 sc, 2 hdc, 7 dc, 2 hdc, 1 sc) into the loop. (4 extra-large petals formed)
Fasten off, leaving a 12-inch tail. Large Hem Roses finish at approximately 2.75 inches (7 cm) in diameter. Use these only in the bottom two rows.
Pattern Instructions
Section 1: Mesh Base Bodice
The bodice front and back panels are worked simultaneously as a single flat piece from the underarm down. The center back remains open.
Foundation chain: ch 109.
Row 1 (RS): sc in 2nd ch from hook, (ch 5, sk 3 ch, sc in next ch) 27 times. (27 ch-5 arches, 28 sc)
Row 2 (WS): ch 3, turn, sc in center of first arch, (ch 5, sc in center of next arch) 26 times, ch 2, dc in last sc. (26 full arches plus 2 half-arch selvedges)
Row 3 (RS): ch 1, turn, sc in first ch-2 sp, (ch 5, sc in center of next arch) 26 times, ch 5, sc in top of turning ch-3. (27 arches)
Rows 4 through 11: Rep Rows 2 and 3 alternately for 8 more rows. (27 arches per RS row)
Checkpoint: Your flat bodice piece should measure approximately 13.5 inches wide and 5.5 inches tall. Count 27 diamond openings across.
Section 2: Bodice Shaping and Waist
Row 12 (WS): ch 3, turn, sl st across first half-arch, sc in center of 2nd arch, (ch 5, sc in center of next arch) 24 times, ch 5, sc in center of 26th arch, leave final arch unworked. (25 arches)
Row 13 (RS): ch 1, turn, sc in first ch-sp, (ch 5, sc in center of next arch) 24 times, ch 2, dc at end. (25 arches)
Rows 14 and 15: Work even with no further decrease. (25 arches)
Checkpoint: Waist section should measure approximately 12.5 inches wide and approximately 7 inches total height.
Section 3: V-Neck and Halter Shaping
Left front panel:
Row 16 (RS): ch 1, turn, sc in first ch-sp, (ch 5, sc in center of next arch) 11 times, ch 2, dc at end of arch 12. Leave remaining arches unworked. (12 arches)
Row 17 (WS): ch 3, turn, sc in first arch, (ch 5, sc in center of next arch) 10 times, ch 2, dc. (11 arches)
Row 18 (RS): ch 1, turn, sc in first ch-sp, (ch 5, sc in center of next arch) 10 times, ch 2, dc. (11 arches)
Row 19 (WS): ch 3, turn, sc in first arch, (ch 5, sc in center of next arch) 9 times, ch 2, dc. (10 arches)
Row 20 (RS): ch 1, turn, sc in first ch-sp, (ch 5, sc in center of next arch) 9 times, ch 2, dc. (10 arches)
Rows 21 and 22: Work even. (10 arches)
Row 23 (WS): ch 3, turn, sc in first arch, (ch 5, sc in center of next arch) 8 times, ch 2, dc. (9 arches)
Row 24 (RS): Work even. (9 arches)
Fasten off.
Right front panel: With RS facing, join Shade 1 yarn to center arch of Row 15. Work to mirror left front panel exactly, with shaping decreases at the center edge on each WS row through Row 24. Fasten off.
Section 4: Halter Straps
Join Shade 1 at top right corner of right front bodice panel.
Strap right: ch 65 (approximately 13 inches). Fasten off, leaving a 6-inch tail. Reinforce the join with your tapestry needle.
Strap left: Repeat from top left corner of left front panel, ch 65.
The straps meet at the back neck and tie together in a bow.
Section 5: Side Seams and Joining
Lay the flat bodice piece RS up. Fold so the two short side edges meet at the side seams. Using Shade 1 and your tapestry needle, mattress stitch the side seams, matching diamond rows carefully.
Leave the center back open from the top of the foundation chain down 2 inches, then seam the remaining 2 inches at the base of the bodice opening.
After joining, you will have 50 mesh arch openings around the lower edge.
Section 6: Skirt in the Round
Setup round: Join Shade 1 with sl st to any corner sc at the lower edge of the bodice. Ch 5, (sc in next arch midpoint, ch 5) 49 times, sl st to beg ch-5 base sc to join. (50 arches)
Round 1: sc in first arch, (ch 5, sc in next arch) 49 times, ch 2, dc in first sc. (50 arches)
Rounds 2 and 3: Work even. (50 arches each round)
Increase Round 1 (Round 4): sc in first arch, ch 5, sc in same arch, (ch 5, sc in next arch) 4 times, ch 5, sc in same arch, rep increase every 5 arches (10 increases total), join. (60 arches)
Rounds 5 and 6: Work even. (60 arches)
Increase Round 2 (Round 7): Increase every 6 arches (10 increases total). (70 arches)
Rounds 8 and 9: Work even. (70 arches)
Increase Round 3 (Round 10): Increase every 7 arches (10 increases total). (80 arches)
Rounds 11 and 12: Work even. (80 arches)
Increase Round 4 (Round 13): Increase every 8 arches (10 increases total). (90 arches)
Rounds 14 and 15: Work even. (90 arches)
Increase Round 5 (Round 16): Increase every 9 arches (10 increases total). (100 arches)
Rounds 17 and 18: Work even. (100 arches)
Round 19 (final hem round): Work one more plain round. (100 arches)
Fasten off.
Checkpoint: Total piece from bodice top to skirt hem should measure approximately 21 inches before roses are attached.
Section 7: Rose Construction
Make all your roses before attaching them. This keeps the process organized and lets you batch by color.
Approximate rose counts by zone:
Block all roses flat before attachment. Pin to your blocking mat, lightly steam or wet block, and allow to dry completely.
Section 8: Rose Attachment
Pin roses onto the blocked mesh base before sewing. Place one rose over each diamond opening, positioning the rose center over the mesh intersection point. The petals should overlap into adjacent diamonds. Pin adjacent roses so their outer petal edges gently meet or overlap by no more than 0.25 inch.
Step back and view the full arrangement from a distance to check evenness and gradient before sewing.
To attach each rose: Thread the 12-inch tail onto a tapestry needle. Bring needle from back to front through the rose center, then stitch through the nearest mesh intersection point and back up through the rose center. Repeat 3 to 4 times, creating a firm anchor. Then tack down 2 to 3 outer petal points to the mesh surface. Weave in end securely on the WS.
For the hem roses: Position Large Hem Roses so the bottom third of each rose hangs freely below the mesh edge, creating the scalloped hem. Anchor the rose center and upper petals to the mesh while allowing lower petals to remain free.
Size Customization Tips
To increase bust size by approximately 2 inches: Add 5 chains to the foundation chain. Add 4 additional arches to the total count. Adjust the V-neck split to 13 arches per side instead of 12.
To lengthen the skirt: Add additional plain rounds between increase rounds. Each additional full round adds approximately 0.5 inch to skirt length and requires 50 to 100 additional roses.
To shorten the skirt: Omit the final one or two increase rounds and work fewer plain rounds. Every 2 rounds removed eliminates approximately 1 inch of length.
To adjust strap length: Each chain equals approximately 0.25 inch. Add or remove chains in multiples of 5.
Finishing and Blocking
Wet block the completed mesh base before attaching roses. Submerge in cool water for 20 minutes, gently press out water without wringing, pin to blocking mat, and allow to dry fully.
After all roses are attached, lightly steam the entire finished dress on a padded surface. Hold your steam iron 2 inches above the surface. Do not press down onto the roses.
Care Instructions
Hand wash in cool water with gentle wool wash or mild soap. Do not wring. Roll in a clean towel to absorb excess moisture. Lay flat to dry away from direct sunlight. Do not tumble dry. Do not iron directly on roses. Steam refresh as needed by holding iron above surface. Store folded gently with tissue paper between layers to prevent rose petals from being crushed.
Final Thoughts on This Crochet Rose Dress Pattern
This dusty rose ombre floral dress crochet pattern is truly a labor of love. The hours you invest will result in a one-of-a-kind wearable masterpiece that nobody else will have. Every rose you make brings you closer to that final moment when you try it on and see the full gradient effect come to life.
Take your time with this project. Make it a meditative practice rather than a race to the finish line. Put on your favorite shows, settle into your coziest spot, and enjoy the journey of creating something extraordinary with your own two hands.
Thank you so much for choosing this pattern for your next big project. I truly hope you love making it as much as I loved designing it. If you complete this dress, I would absolutely love to see your finished piece. Tag me on Instagram or share in my Facebook group so I can celebrate your accomplishment with you.
If this gorgeous ombre rose dress caught your eye, go ahead and pin it to your Pinterest boards so you can find it when you are ready to start. And please drop a comment below if you make one. I would love to hear which colors you choose for your version!