
When I sat down to design this tote, I had a clear vision in my mind. I wanted a bag with serious structure, a sophisticated color palette that would go with everything, and a construction method that felt satisfying rather than tedious. The classic granny square seemed like the perfect building block, but I wanted to push it into modern territory with a monochrome gray gradient.
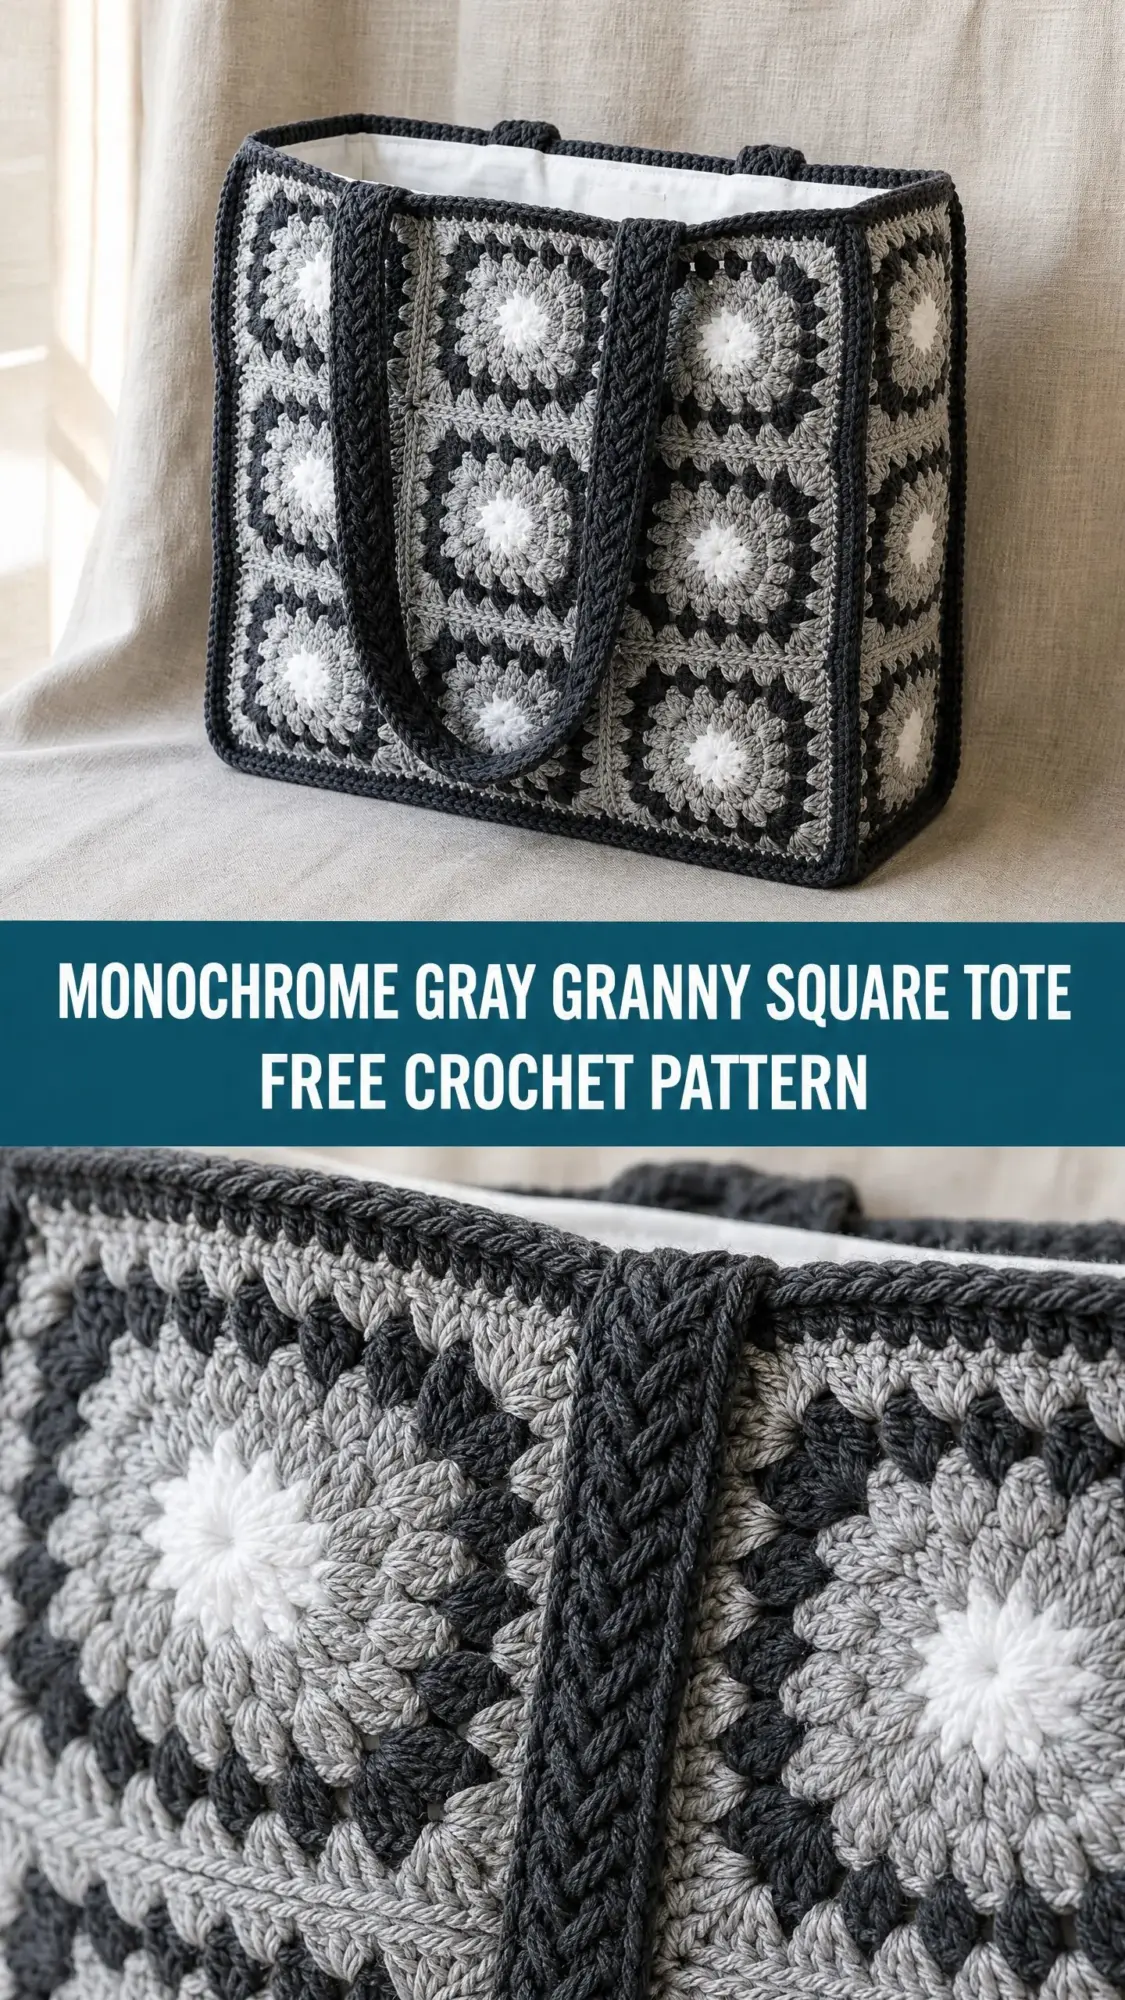
I am SO pleased with how this turned out. The boxy silhouette holds its shape beautifully. The braided handles feel substantial and secure. And that four-tone gray progression from white centers to charcoal borders gives every single square a subtle depth that catches the eye without screaming for attention.
This is the kind of project that looks impressive but builds logically, one square at a time. If you can make a granny square and sew a straight seam, you can absolutely make this bag.
Why This Granny Square Tote Works So Well
The secret to this crochet pattern is the structure. Unlike floppy market bags that stretch and sag, this tote uses a fabric lining sewn inside to give the walls body and protect your belongings. The bottom stays flat. The sides stay crisp. Your books, laptop, or craft supplies sit upright instead of tumbling around.
The granny square is one of the most beloved motifs in crochet history, and for good reason. Each square works up quickly in joined rounds. The color changes happen naturally at the end of each round. And when you join sixteen of them together with a simple slip stitch seam, you get a fabric that is both beautiful and sturdy.
I chose a monochrome palette because gray goes with literally everything. But the construction works just as well in navy and white, terracotta and cream, or a wild rainbow if that is more your style. The bones of the pattern stay the same.
Skill Level and Time Estimate
This is an intermediate level crochet project. You should be comfortable working in joined rounds, changing colors within a motif, and joining squares with a flat seam. Basic hand sewing is required to attach the fabric lining.
Plan for 12 to 18 hours of total work time if you are an experienced crocheter working at a comfortable pace. If you have never done join as you go construction before, give yourself extra time to get the rhythm down.
Finished Dimensions
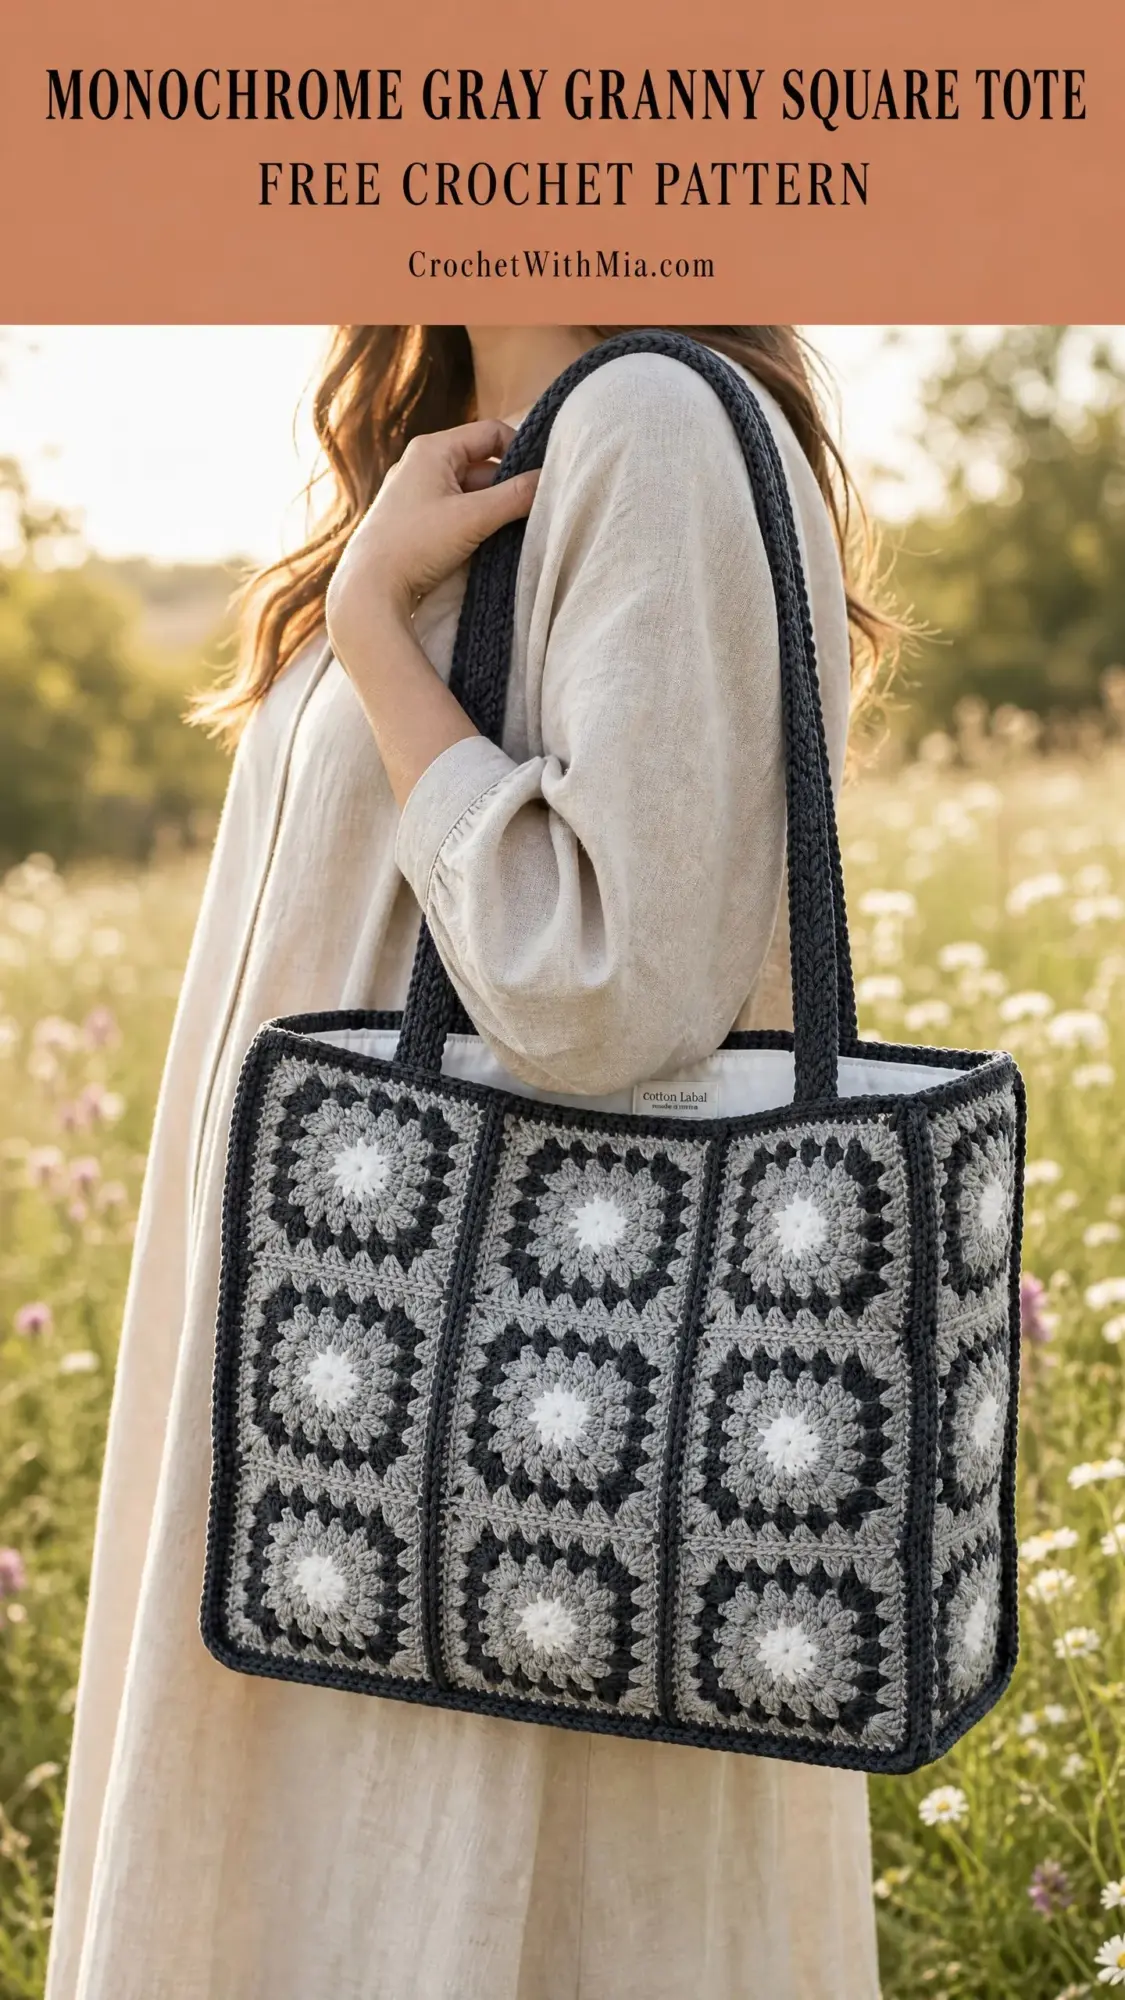
Your completed tote will measure approximately 14 inches wide by 13 inches tall by 4.5 inches deep (35.5 cm by 33 cm by 11.5 cm), not including handles.
The handles add approximately 10 inches (25.5 cm) of usable drop from the top edge, which is perfect for carrying over your shoulder or in the crook of your arm.
Each individual granny square measures 4.5 inches by 4.5 inches (11.5 cm by 11.5 cm) after joining and border.
Materials You Will Need
Yarn
You will need worsted weight yarn (category 4) in four shades. Smooth cotton or cotton blend works best for stitch definition and structure.
Main Color (MC): Charcoal gray, approximately 420 yards (384 m)
Color A (CA): Medium gray, approximately 210 yards (192 m)
Color B (CB): Light gray, approximately 130 yards (119 m)
Color C (CC): White, approximately 60 yards (55 m)
Yarn suggestions: Lion Brand 24/7 Cotton in Charcoal, Silver, Ecru, and White gives excellent stitch definition with minimal stretch. WeCrochet Dishie in Coal, Almond, Cream, and White is another great 100% cotton option.
Avoid yarns with heavy texture or halo. You want the granny square definition to show clearly.
Hooks
US size H-8 (5.0 mm) for squares and border
US size G-6 (4.0 mm) for handles (optional, the same hook works if your tension is firm)
Notions
Tapestry needle for weaving ends
Scissors
6 to 8 locking stitch markers
Sewing needle and white or off-white thread
1/2 yard (0.46 m) cotton fabric for lining, at least 44 inches wide
Straight pins
Sewing machine or hand sewing supplies
Gauge
One completed granny square (worked through Round 4 and joined) should measure 4.5 inches by 4.5 inches (11.5 cm by 11.5 cm).
As a flat gauge check: 14 double crochet (dc) and 8 rows = 4 inches (10 cm) in standard double crochet using MC and the H-8 hook.
Gauge matters here. If your square is larger than 4.5 inches, go down one hook size. If it is smaller, go up one hook size. The finished bag dimensions depend directly on square size.
Abbreviations
ch: chain, wrap yarn over hook and pull through the loop on hook
sl st: slip stitch, insert hook, pull up loop, pull directly through loop on hook
sc: single crochet, insert hook, pull up loop (2 loops on hook), yarn over and pull through both loops
dc: double crochet, yarn over, insert hook, pull up loop (3 loops on hook), yarn over and pull through 2 loops, yarn over and pull through remaining 2 loops
sp: space
ch-sp: chain space
rep: repeat
pm: place marker
RS: right side
WS: wrong side
rnd: round
st(s): stitch(es)
beg: beginning
sk: skip
rem: remaining
Special Stitches and Techniques
Classic Granny Cluster
This is simply three double crochets worked into the same chain space consecutively. Nothing fancy. Yarn over, insert hook into the space, pull up a loop, yarn over and pull through two loops, yarn over and pull through two loops. That is one dc. Repeat two more times in the same space. You have made a 3-dc group.
Flat Slip Stitch Join
This creates a nearly invisible seam on the right side. Hold two squares with right sides facing each other. Insert your hook through the back loop only of the corresponding stitches on both pieces simultaneously. Draw up a loop of MC, yarn over, and pull through both loops on hook. Continue along the seam, keeping tension firm but not tight.
Braided Handle Cord
Cut 12 strands of MC, each 80 inches (203 cm) long. Fold all 12 strands in half so you have a bundle of 24 strands. Secure the folded end. Divide the 24 strands into three groups of 8 strands each. Braid the three groups in a standard three-strand braid for 20 inches (51 cm). Knot and trim the open end.
Step by Step Crochet Pattern Instructions
Granny Square (Make 16)
Each square is worked in four rounds with color changes:
Round 1: CC (white)
Round 2: CB (light gray)
Round 3: CA (medium gray)
Round 4: MC (charcoal)
Round 1 (CC):
Make a magic ring.
Ch 3 (counts as first dc here and throughout).
Work 2 dc into the ring. Ch 2.
(Work 3 dc into the ring, ch 2) 3 times.
Join with sl st to top of beg ch-3.
Pull magic ring closed.
Fasten off CC.
(4 groups of 3 dc, 4 ch-2 corner spaces)
If magic rings make you nervous, substitute a ch-4 joined into a ring with a sl st. Either method works perfectly.
Round 2 (CB):
Join CB with sl st into any ch-2 corner space.
Ch 3, work 2 dc into same corner space. Ch 2. Work 3 dc into same corner space.
Ch 1.
(Work 3 dc, ch 2, 3 dc into next ch-2 corner space, ch 1) 3 times.
Join with sl st to top of beg ch-3.
Fasten off CB.
(8 groups of 3 dc, 4 ch-2 corner spaces, 4 ch-1 side spaces)
Round 3 (CA):
Join CA with sl st into any ch-2 corner space.
Ch 3, work 2 dc into same corner space. Ch 2. Work 3 dc into same corner space.
Ch 1.
Work 3 dc into next ch-1 side space. Ch 1.
(Work 3 dc, ch 2, 3 dc into next ch-2 corner space, ch 1, work 3 dc into next ch-1 side space, ch 1) 3 times.
Join with sl st to top of beg ch-3.
Fasten off CA.
(12 groups of 3 dc, 4 ch-2 corner spaces, 8 ch-1 side spaces)
Round 4 (MC):
Join MC with sl st into any ch-2 corner space.
Ch 3, work 2 dc into same corner space. Ch 2. Work 3 dc into same corner space.
Ch 1.
Work 3 dc into next ch-1 side space. Ch 1.
Work 3 dc into next ch-1 side space. Ch 1.
(Work 3 dc, ch 2, 3 dc into next ch-2 corner space, ch 1, work 3 dc into next ch-1 side space, ch 1, work 3 dc into next ch-1 side space, ch 1) 3 times.
Join with sl st to top of beg ch-3.
Fasten off MC.
(16 groups of 3 dc, 4 ch-2 corner spaces, 12 ch-1 side spaces)
Checkpoint: One completed square should measure 4.5 inches by 4.5 inches. Check your gauge before making all 16 squares. Block lightly if your yarn benefits from it.
Assembly Layout
You will assemble the 16 squares into four panels:
Front panel: 2 squares wide by 3 squares tall (6 squares)
Back panel: 2 squares wide by 3 squares tall (6 squares)
Left side panel: 1 square wide by 2 squares tall (2 squares)
Right side panel: 1 square wide by 2 squares tall (2 squares)
Label your squares loosely with stitch markers for tracking.
Joining the Front Panel
Arrange 6 squares in a 2 by 3 grid. Using the flat slip stitch join method and MC:
Step 1: Join the top-left square to the top-right square along their shared vertical edge. Hold RS together. Sl st join across the edge. (1 vertical seam)
Step 2: Join the middle-left square to the middle-right square along their shared vertical edge. (1 vertical seam)
Step 3: Join the bottom-left square to the bottom-right square along their shared vertical edge. (1 vertical seam)
Step 4: Join the top row to the middle row along the horizontal shared edge. Align seam intersections carefully. (1 horizontal seam)
Step 5: Join the middle row to the bottom row along the horizontal shared edge. (1 horizontal seam)
Repeat all steps for the back panel. For each side panel, join 2 squares vertically.
Checkpoint: The front panel should measure approximately 9 inches wide by 13.5 inches tall before the edging border.
Border Edging on Each Panel
Work this round on each of the four panels separately.
Join MC into any corner ch-2 space.
Ch 1, work 1 sc into same space.
Work sc evenly along all four edges: 1 sc into each dc, 1 sc into each ch-1 space, 2 sc into each ch-2 corner space at original square corners, and 3 sc into the four outer corners of the full panel.
Join with sl st to first sc.
Fasten off MC.
Assembling the Bag Body
Step 1: Place the front panel flat, RS up. Hold the left side panel with RS facing the front panel’s left edge. Sl st join the full left edge using MC.
Step 2: Fold the left side panel perpendicular to the front panel. Join the left side panel to the left edge of the back panel.
Step 3: Repeat for the right side.
Step 4: The bag is now a tube open at top and bottom.
Step 5: Hold the bottom edge of the front panel and bottom edge of the back panel together. Sl st join across the full bottom edge. Reinforce corners with extra stitching.
Checkpoint: The assembled bag body should measure approximately 14 inches wide by 13 inches tall by 4.5 inches deep.
Top Border
Join MC into any top edge stitch.
Ch 1, sc in same stitch.
Work 1 sc into each sc around the entire top opening, placing 3 sc into each corner stitch at the four top corners.
Join with sl st to first sc.
Round 2: Ch 1, sc in same stitch. Work 1 sc into each sc around, again placing 3 sc into the 4 corner stitches. Join with sl st. Fasten off MC.
Handle Attachment
Make 2 braided handles following the special stitch instructions above.
On the front panel, measure 3 inches in from each top corner and mark. Insert both ends of one handle down through the top border stitches by approximately 2 inches. Using MC and a tapestry needle, stitch each handle end firmly in a box pattern for reinforcement. Repeat on the back panel.
Lining
Cut your lining fabric:
Two rectangles: 15 inches by 14 inches (front and back)
Two rectangles: 5.5 inches by 14 inches (side panels)
One rectangle: 15 inches by 5.5 inches (bottom)
Using a 0.5-inch seam allowance, sew the side pieces to the front and back, then attach the bottom to form a box shape. Fold the top edge down by 0.75 inches and press. Insert the lining into the crochet bag with wrong sides together. Whip stitch the folded hem to the inside of the crochet top border.
Care Instructions
Hand wash in cool water with gentle detergent. Reshape while damp and lay flat to dry. Do not machine wash unless your yarn label confirms it is safe. Do not tumble dry. Store stuffed lightly with tissue paper to maintain the boxy shape.
Customization Ideas
Make it larger: Add more squares per panel. One additional row adds 4.5 inches in height.
Make it smaller: Use DK weight yarn with a G-6 hook. Squares will measure about 3.5 inches.
Change the colors: Try navy, blue, pale blue, and white for a nautical look. Or terracotta, rust, blush, and cream for warmth.
I really hope you love making this monochrome gray granny square tote as much as I loved designing it. It is the kind of project you can pick up and put down, making one square at a time until suddenly you have a whole bag. Thank you so much for choosing this crochet tutorial for your next project.
If you want to save this granny square tote crochet pattern for later, go ahead and pin it to your favorite Pinterest board. And please leave a comment below if you make one. I would absolutely love to see your finished bag and hear which colors you chose!