
I don’t know about you, but I have a serious soft spot for bags that actually look like they belong in a boutique window. The kind you see someone carrying and immediately wonder where they got it. That’s exactly what this monochrome gray granny square bag delivers.
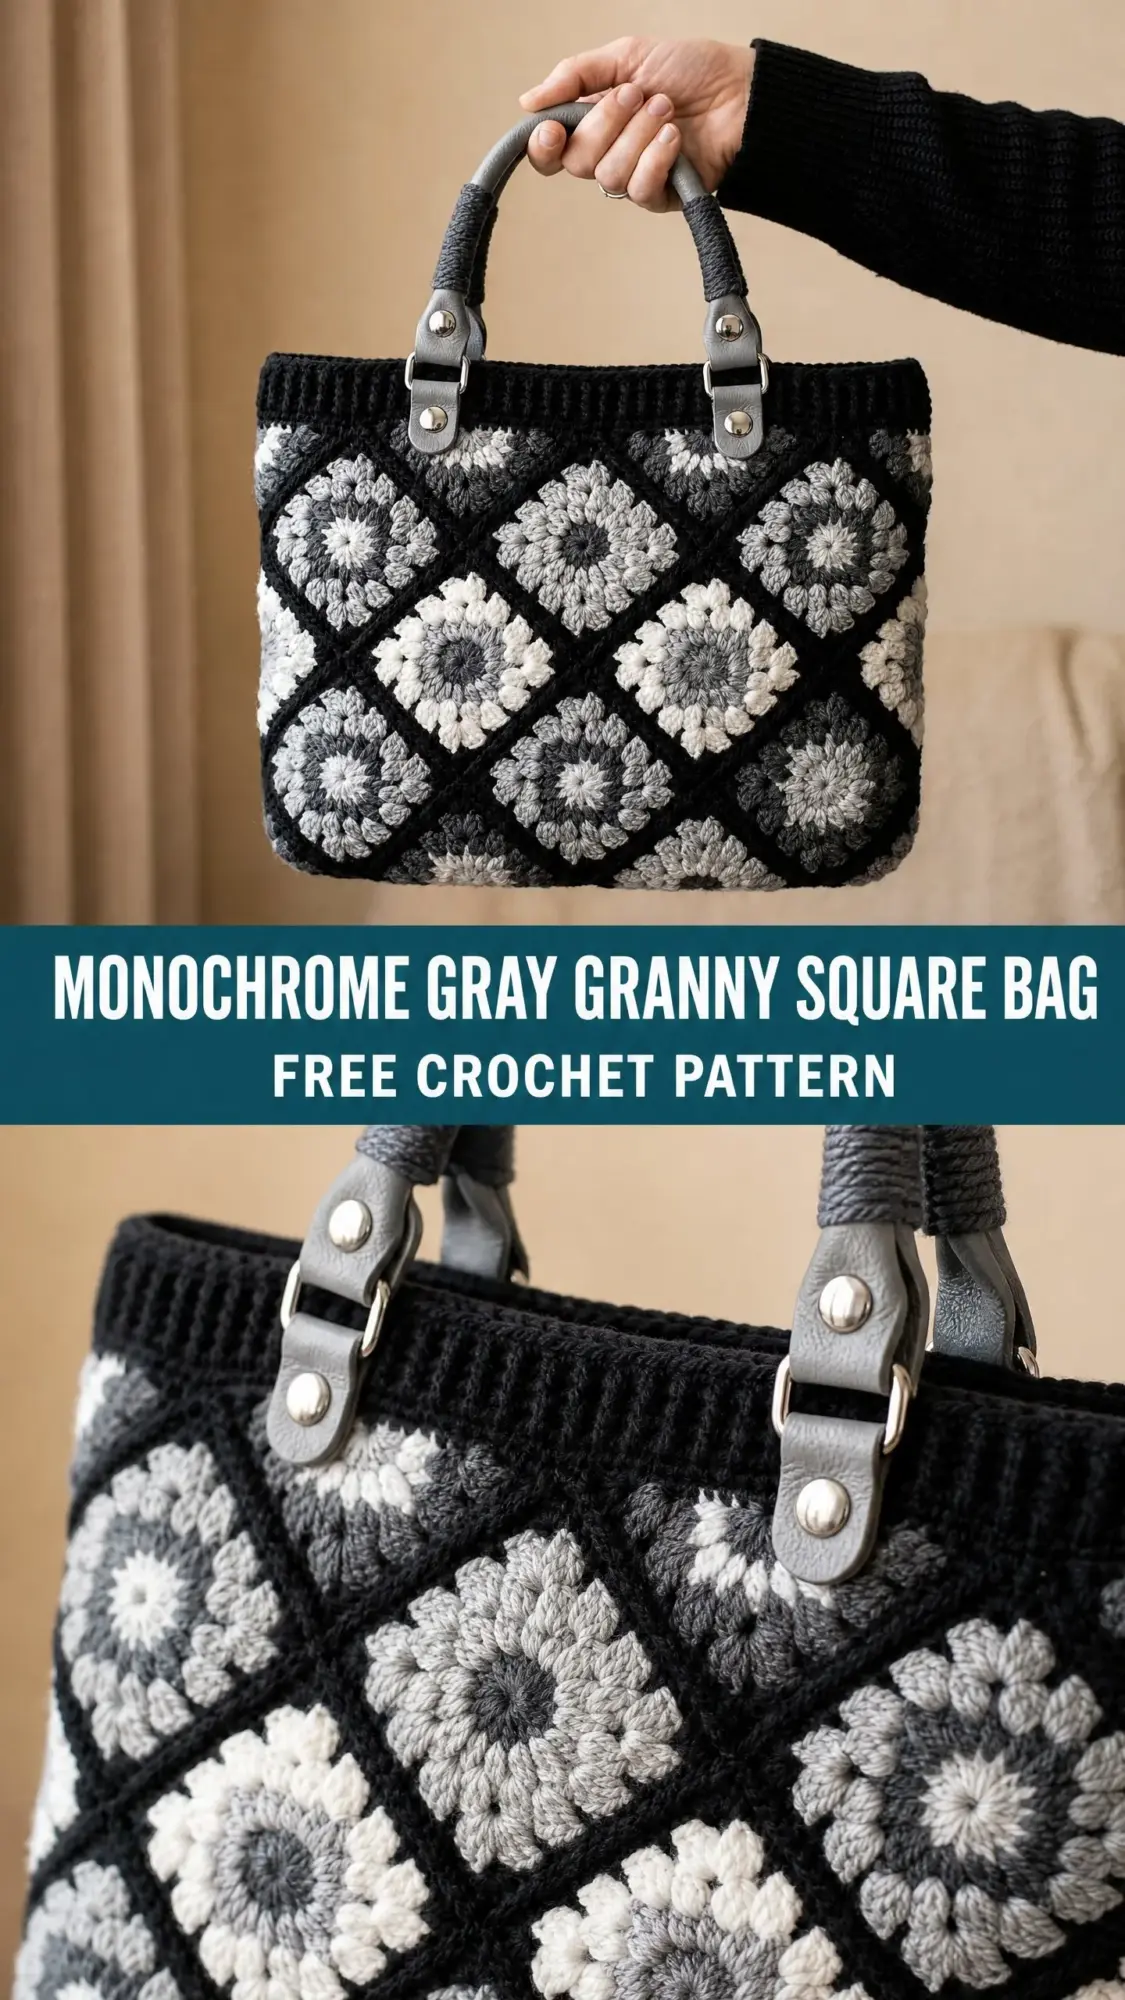
The best part? You made it yourself. With your own two hands and a hook.
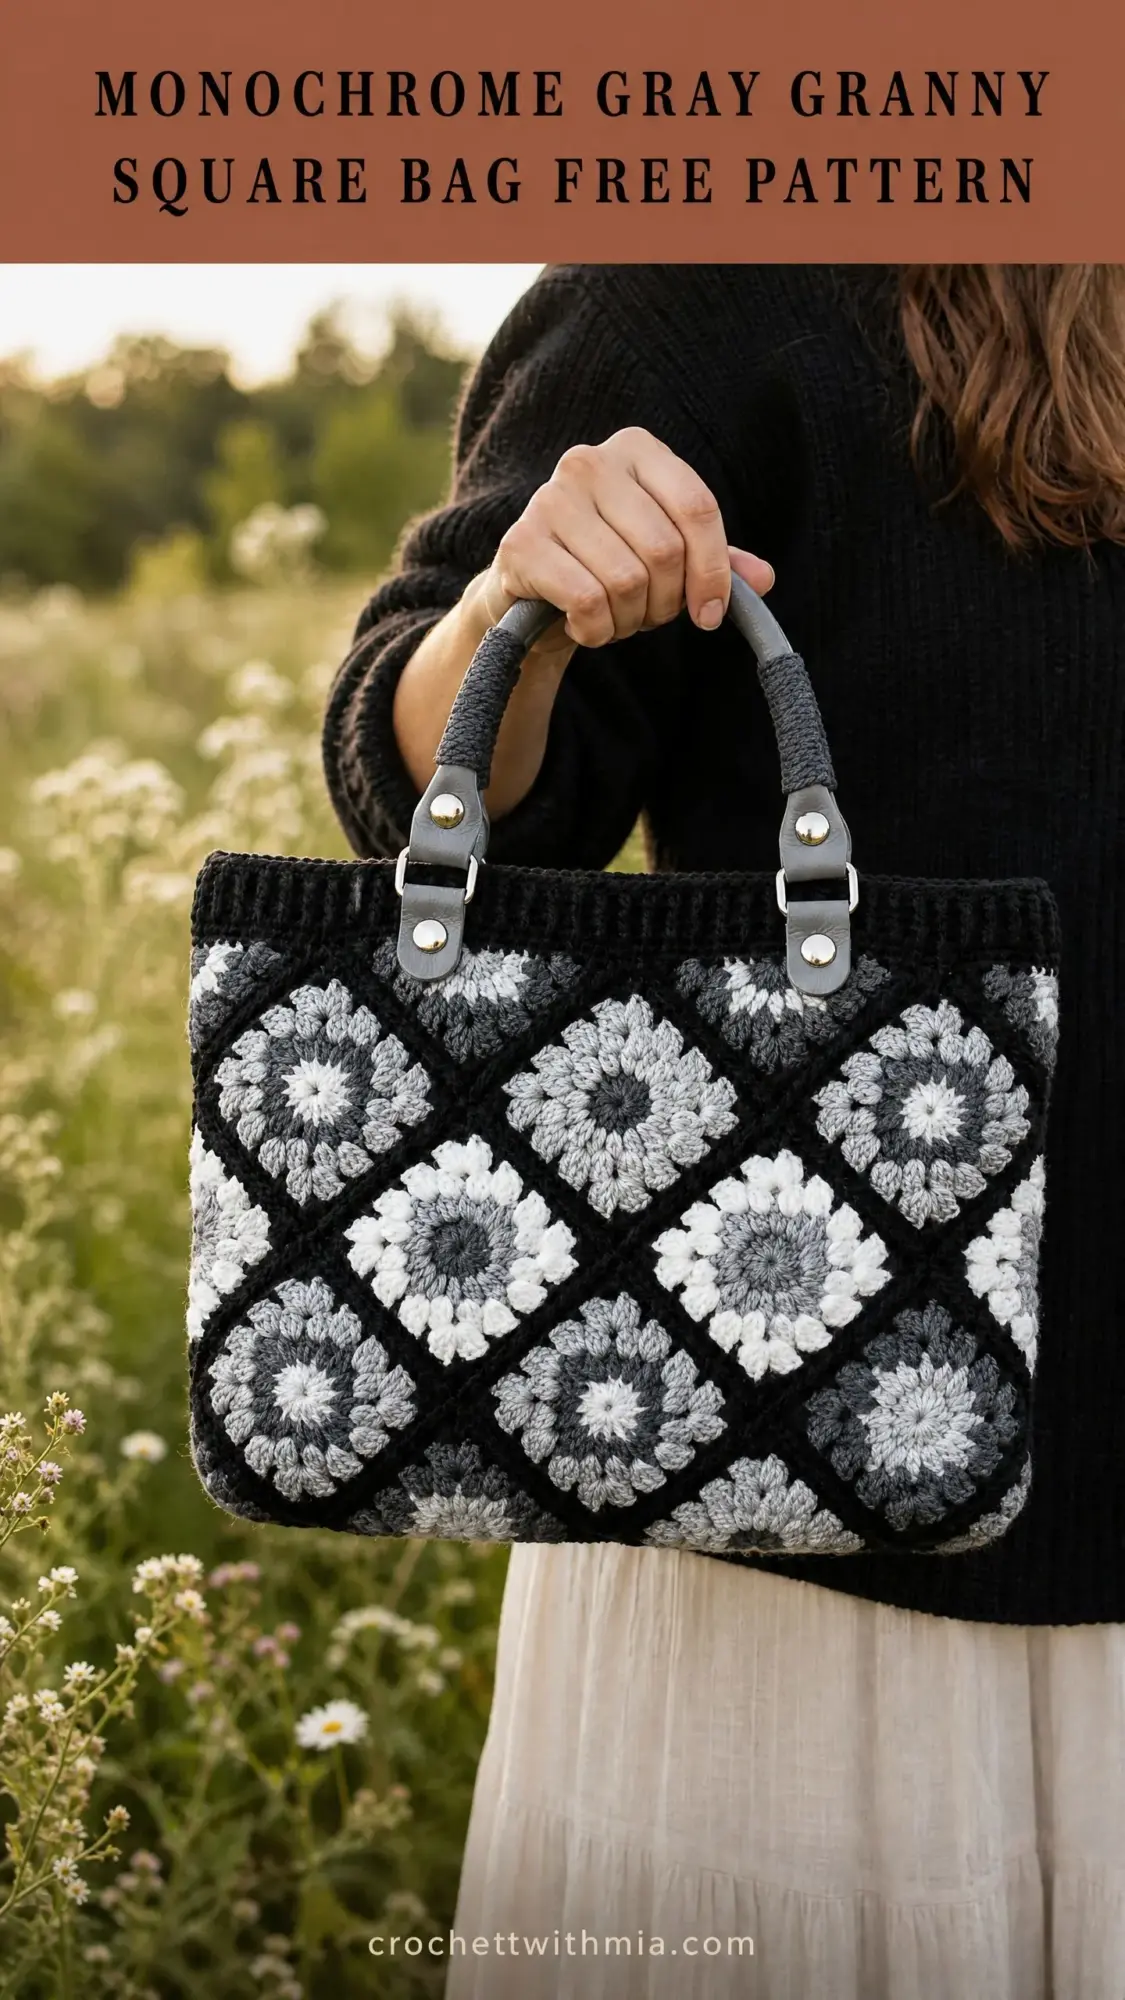
This structured tote combines the nostalgic charm of classic granny squares with a sophisticated color palette that works with absolutely everything in your closet. Black, white, and every shade of gray in between come together to create something that feels modern, polished, and surprisingly elegant for a technique your grandmother probably taught you.
Why This Granny Square Bag Pattern Works So Well
Traditional granny squares sometimes get written off as old-fashioned or overly bohemian. But when you strip away the rainbow colors and commit to a monochrome palette, something magical happens. The geometric pattern suddenly reads as intentional and design-forward rather than craft-fair casual.
The squares in this bag are arranged on point, meaning they’re rotated 45 degrees to create a diamond grid effect. This simple twist transforms the familiar granny square into something that looks far more complex than it actually is. Each square features a radiating floral center that pops against the black background, creating depth and visual interest without any complicated colorwork.
The finished bag has a structured rectangular silhouette with real presence. It measures approximately 13 inches wide by 11 inches tall by 3.5 inches deep, which is the perfect size for daily essentials without becoming a bottomless pit where your keys disappear forever.
Materials You’ll Need
Before you dive in, gather everything on this list. Having all your supplies ready makes the project flow smoothly from start to finish.
Yarn (Worsted Weight):
Hook: US size J-10 (6.0 mm) crochet hook
Notions:
Yarn Suggestions: Lion Brand Wool-Ease works beautifully for this project. The 80% acrylic and 20% wool blend gives excellent stitch definition that makes those cluster petals really pop. Paintbox Yarns Simply DK offers a budget-friendly alternative with a clean matte finish. For a premium natural-fiber option, Cascade 220 blocks to perfection and holds its shape well.
Gauge and Finished Dimensions
Gauge: One granny square, after blocking, measures 3.25 inches (8.25 cm) from flat side to flat side.
Getting gauge right matters for this project. A square smaller than 3 inches will make your bag too narrow. A square larger than 3.5 inches will leave you with something too wide and floppy. Swatch one square, block it, and measure before committing to all 32 squares.
Finished Size: Approximately 13 inches wide by 11 inches tall (not including handles) by 3.5 inches deep. In metric, that’s approximately 33 cm wide by 28 cm tall by 9 cm deep.
Abbreviations and Stitch Definitions
Let me walk you through every abbreviation you’ll encounter. If you’re newer to crochet patterns, bookmark this section for easy reference.
Special Stitches Explained
These techniques might be new to you, so I’ve broken them down step by step.
Standing Double Crochet
This stitch lets you start a new color without a visible joining chain. Make a slip knot on your hook. Yarn over, insert hook into the indicated stitch or space, yarn over and pull up a loop (3 loops on hook), yarn over and pull through 2 loops, yarn over and pull through the remaining 2 loops. Done! This creates a clean, nearly invisible color join.
3-dc Cluster
Yarn over, insert hook into the indicated space, yarn over and pull up a loop, yarn over and pull through 2 loops (2 loops remain on hook). Yarn over, insert hook into the same space, yarn over and pull up a loop, yarn over and pull through 2 loops (3 loops on hook). Yarn over, insert hook into the same space again, yarn over and pull up a loop, yarn over and pull through 2 loops (4 loops on hook). Yarn over and pull through all 4 loops. The cluster is complete.
BLO Single Crochet
Insert your hook under the back loop only of the indicated stitch (that’s the loop farthest from you as you look at your work). Yarn over and pull up a loop, yarn over and pull through both loops on hook. This creates the beautiful raised horizontal ridges that give the top band its ribbed texture.
Join-As-You-Go (JAYG) Corner Join
When working Round 4 of a new square and reaching a corner that connects to a finished neighbor square, work ch-1, drop your hook, insert it from front to back through the corresponding corner ch-2 space of the neighbor, pick up your working loop and pull it through, then ch-1 to complete the corner join. For side joins along straight edges, work to where a ch-1 space would normally go, drop your hook, insert it from front to back into the corresponding ch-1 space of the neighbor, and pull your working loop through.
Pattern Notes Before You Begin
This bag uses 32 granny squares total: 12 for the front panel, 12 for the back panel, and 8 for the two side/bottom panels.
Each square is worked in 4 rounds. Rounds 1 through 3 create the floral center in your chosen color. Round 4 is always worked in black.
For that beautiful variegated monochrome effect, distribute your colors like this: approximately 6 squares with Color B (off-white) centers, 8 squares with Color C (light gray) centers, 10 squares with Color D (medium gray) centers, and 8 squares with Color E (dark gray) centers. Mix them freely across both panels.
All rounds are worked on the right side. Do not turn unless specified.
Granny Square Instructions (Make 32)
Repeat these instructions 32 times, varying the center colors as noted above. Rounds 1 through 3 use your chosen center color. Round 4 always uses Color A (black).
Round 1 (Center Color)
Make a magic ring. Ch 3 (counts as first dc throughout). Work 2 dc into ring. Ch 2. [3 dc into ring, ch 2] 3 times. Join with sl st to top of beginning ch-3. Pull ring closed.
Stitch count: 12 dc, 4 ch-2 corner spaces.
Round 2 (Center Color)
Sl st into next 2 dc and into corner ch-2 sp. Ch 3, work 2 dc into same ch-2 sp. Ch 1. [3 dc, ch 2, 3 dc] into next corner ch-2 sp. Ch 1. Rep from bracket 2 more times. 3 dc into first corner ch-2 sp (where ch-3 began). Ch 2. Join with sl st to top of beginning ch-3.
Stitch count: 24 dc, 4 ch-2 corner spaces, 4 ch-1 side spaces.
Round 3 (Center Color)
Sl st into next 2 dc and into ch-1 sp. Ch 3, work 2 dc into same ch-1 sp. Ch 1. [3 dc, ch 2, 3 dc] into corner ch-2 sp. Ch 1. 3 dc into next ch-1 sp. Ch 1. Rep from bracket 3 more times (the last repeat omits the final 3 dc into ch-1 sp as it was worked at the beginning). After the last corner of the 4th repeat, ch 1, join with sl st to top of beginning ch-3.
Stitch count: 36 dc, 4 ch-2 corner spaces, 8 ch-1 side spaces.
Fasten off center color and weave in ends.
Round 4 (Color A, Black)
For standalone squares (not yet joined), work as written. For JAYG squares, substitute joins at corners and sides as described in Special Stitches.
Join Color A with standing dc into any corner ch-2 sp. Work 2 dc into same sp. Ch 2. 3 dc into same sp. [Ch 1. 3 dc into next ch-1 sp. Ch 1. 3 dc into next ch-1 sp. Ch 1. (3 dc, ch 2, 3 dc) into corner ch-2 sp.] Rep 3 more times, omitting final corner group on last rep. Join with sl st to top of standing dc.
Stitch count: 48 dc, 4 ch-2 corner spaces, 12 ch-1 side spaces.
Fasten off and weave in ends. Block each square to 3.25 inches from flat side to flat side.
Assembling the Panels Using JAYG
Front Panel Layout (4 squares wide by 3 squares tall = 12 squares):
Work the first square (top left) through all 4 rounds as a standalone. For all subsequent squares in that row, join the left side of each new square to the right side of the previous square during Round 4 using JAYG. Work the second row of 4 squares, joining the top side of each new square to the bottom of the corresponding square in Row 1, plus lateral neighbors. Work Row 3 the same way. You’ll end up with a 4×3 grid.
Back Panel Layout: Identical to front panel. Make 12 squares and join in the same configuration.
Side/Bottom Panel Layout (1 square wide by 4 squares tall = 4 squares per strip, 2 strips total):
Join 4 squares in a vertical column for each side strip. These strips wrap around the sides and bottom of the bag.
Assembling the Bag Body
Hold the front panel and one long edge of the side/bottom strip with right sides facing out. Using Color A, seam the left side edge of the front panel to the left 3.25-inch edge of the strip, then across the bottom edge, then up the right side. The strip wraps around three sides of the front panel.
Position the back panel against the open side of the strip. Seam the back panel to the strip on both sides and along the bottom.
For seaming, hold pieces together with wrong sides facing each other. Insert your hook through the outermost loops of both edges simultaneously and work a slip stitch seam. This creates a visible seam ridge that mimics the black joining lines already present.
Ribbed Top Band
The ribbed band is worked sideways in rows of blo-sc, then attached to the top opening.
Foundation Chain: With Color A, ch 9.
Row 1: Sc in 2nd ch from hook and in each ch across. Turn. (8 sc)
Row 2: Ch 1. Blo-sc in each st across. Turn. (8 sc)
Repeat Row 2 until band measures approximately 33 inches (84 cm), which is the full circumference of the bag opening. This takes approximately 150 rows.
Attaching the Band: Pin the long edge of the band to the top opening, easing it evenly around the full circumference. The band should sit approximately 0.5 inch above the top edge of the uppermost squares. Whipstitch the bottom long edge of the band to the top of the bag. Seam the two short ends together to close the band into a ring.
Handle Attachment
On the front panel top band, measure 3 inches in from the left edge and place a marker. Measure 3 inches in from the right edge and place a second marker. Repeat on the back panel.
Position each handle tab at the marked points, with the D-ring facing up. Fold the tab over the top edge of the ribbed band, sandwiching the band between front and back of the tab. Push the rivet through the pre-punched hole, through the crochet band, and through the back of the tab. Secure tightly. Repeat for all 4 attachment points.
Optional Fabric Lining
Cut two rectangles 14 inches wide by 12 inches tall for front and back lining panels. Cut two rectangles 4.5 inches wide by 12 inches tall for side/bottom lining.
Sew lining pieces together along sides and bottom with a 0.5-inch seam allowance, leaving the top open. Fold the top raw edge down 0.75 inch and press. Insert the lining into the bag and hand-stitch the folded edge to the inside of the ribbed band.
Blocking and Finishing
Wet block your assembled bag by submerging it in cool water and gently pressing out excess moisture with a towel. Pin to blocking mats, squaring the corners and ensuring flat sides. Allow to dry completely.
For care, machine wash cold on gentle cycle if using acrylic yarn. Lay flat to dry. Store stuffed lightly with tissue paper to help maintain that beautiful rectangular shape.
Tips for Customizing Your Crochet Bag Pattern
Want a wider bag? Add more squares per row. Each additional square adds approximately 3.25 inches to the width.
Want it taller? Add more rows of squares to the front and back panels.
Want more depth? Make the side/bottom strips wider by adding additional squares.
You can also scale the entire project up or down by changing yarn weight. Bulky yarn creates larger squares; sport or DK weight creates smaller ones.
I really hope you love making this monochrome granny square bag as much as I loved designing it. There’s something deeply satisfying about watching those individual squares come together into something so polished and practical.
If you found this crochet pattern helpful, I’d love it if you saved it to your Pinterest boards so you can find it whenever you’re ready to start. And please drop a comment below if you make one! Seeing your finished bags honestly makes my whole day.