
I have been dreaming about this bag for months. I wanted to create something that combined two of my favorite techniques: granny stripes and classic granny squares. The goal was a tote that felt cheerful and springlike but still structured enough to actually use for errands or farmers market trips.
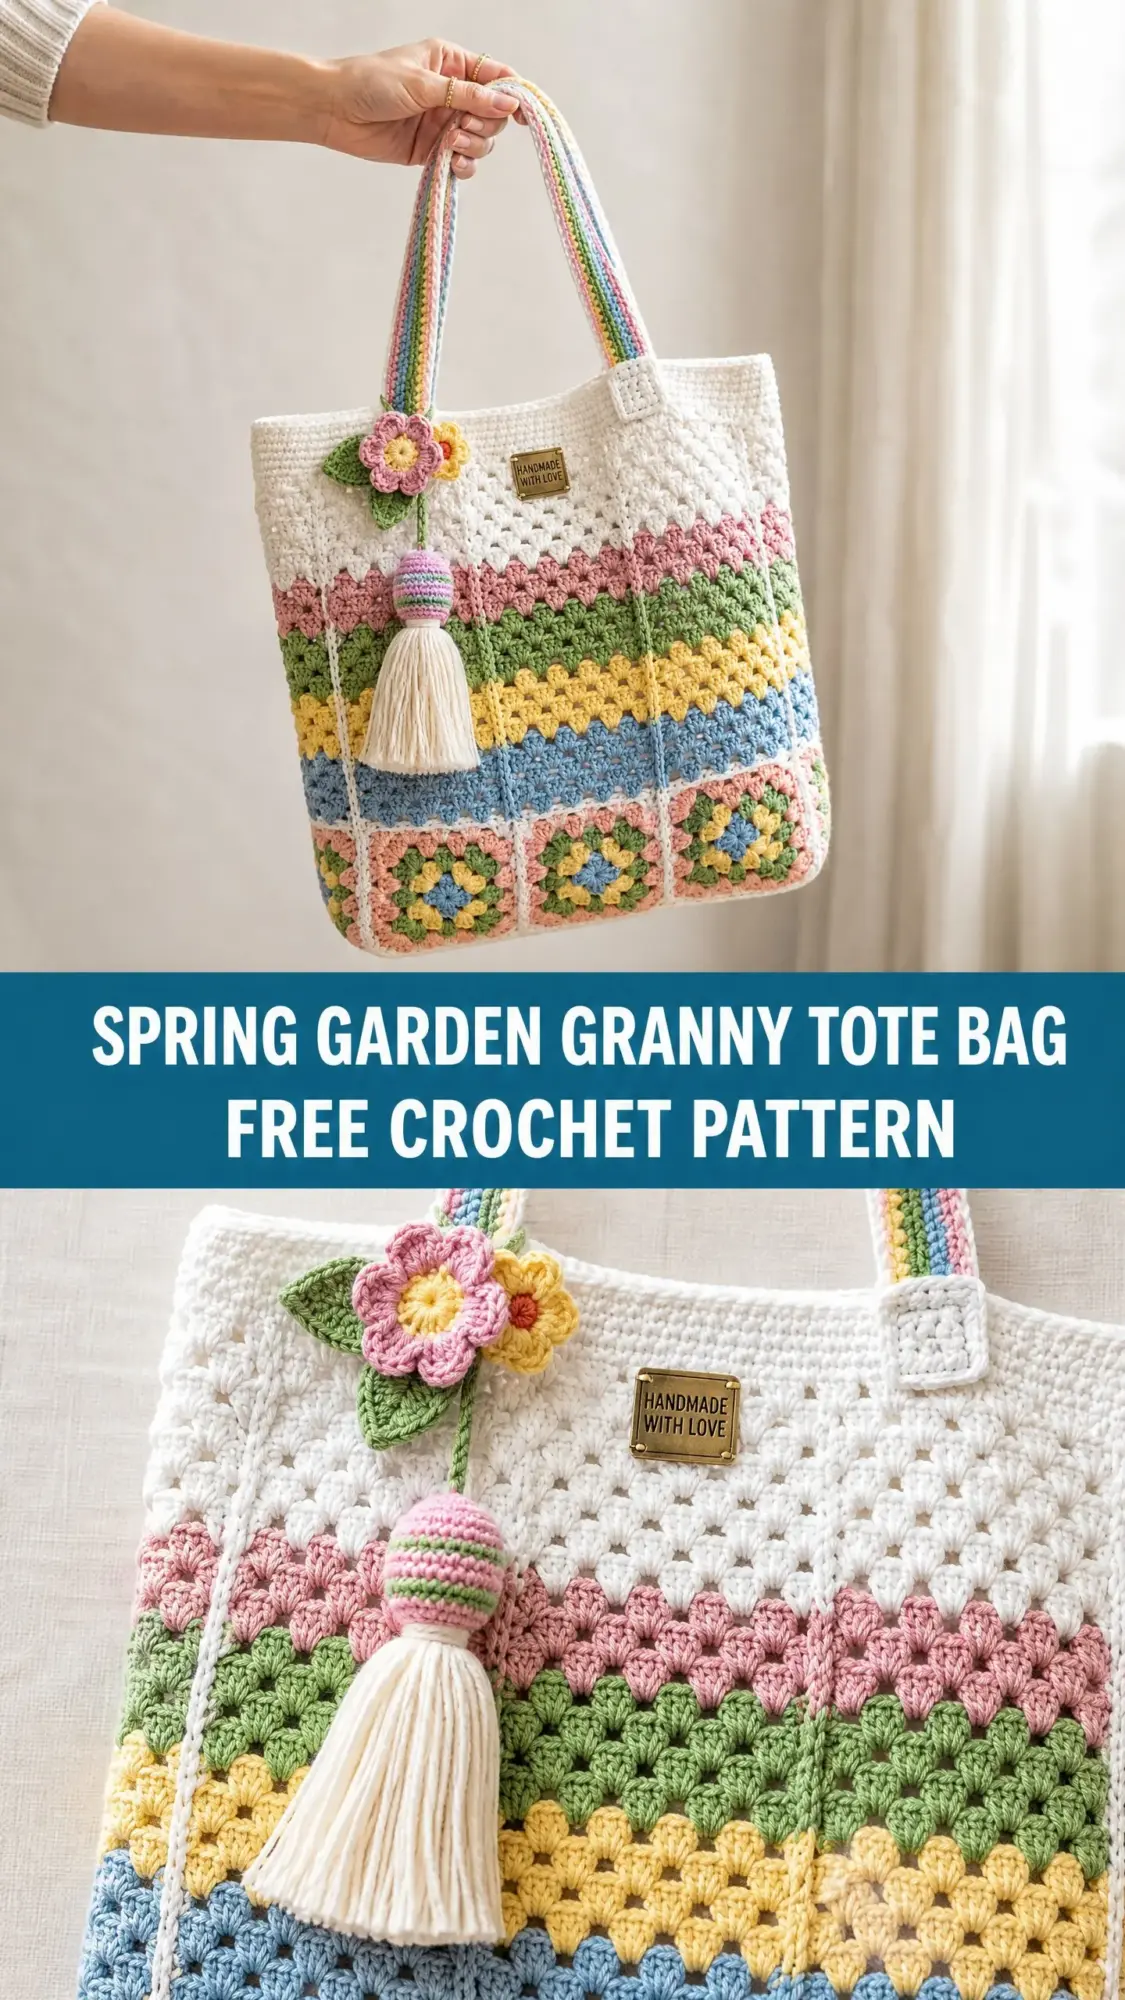
The color palette took forever to nail down. I needed pastels that looked fresh together without veering into baby shower territory. Pink, sage green, butter yellow, cornflower blue, and peach against a crisp white background ended up being the winning combination.
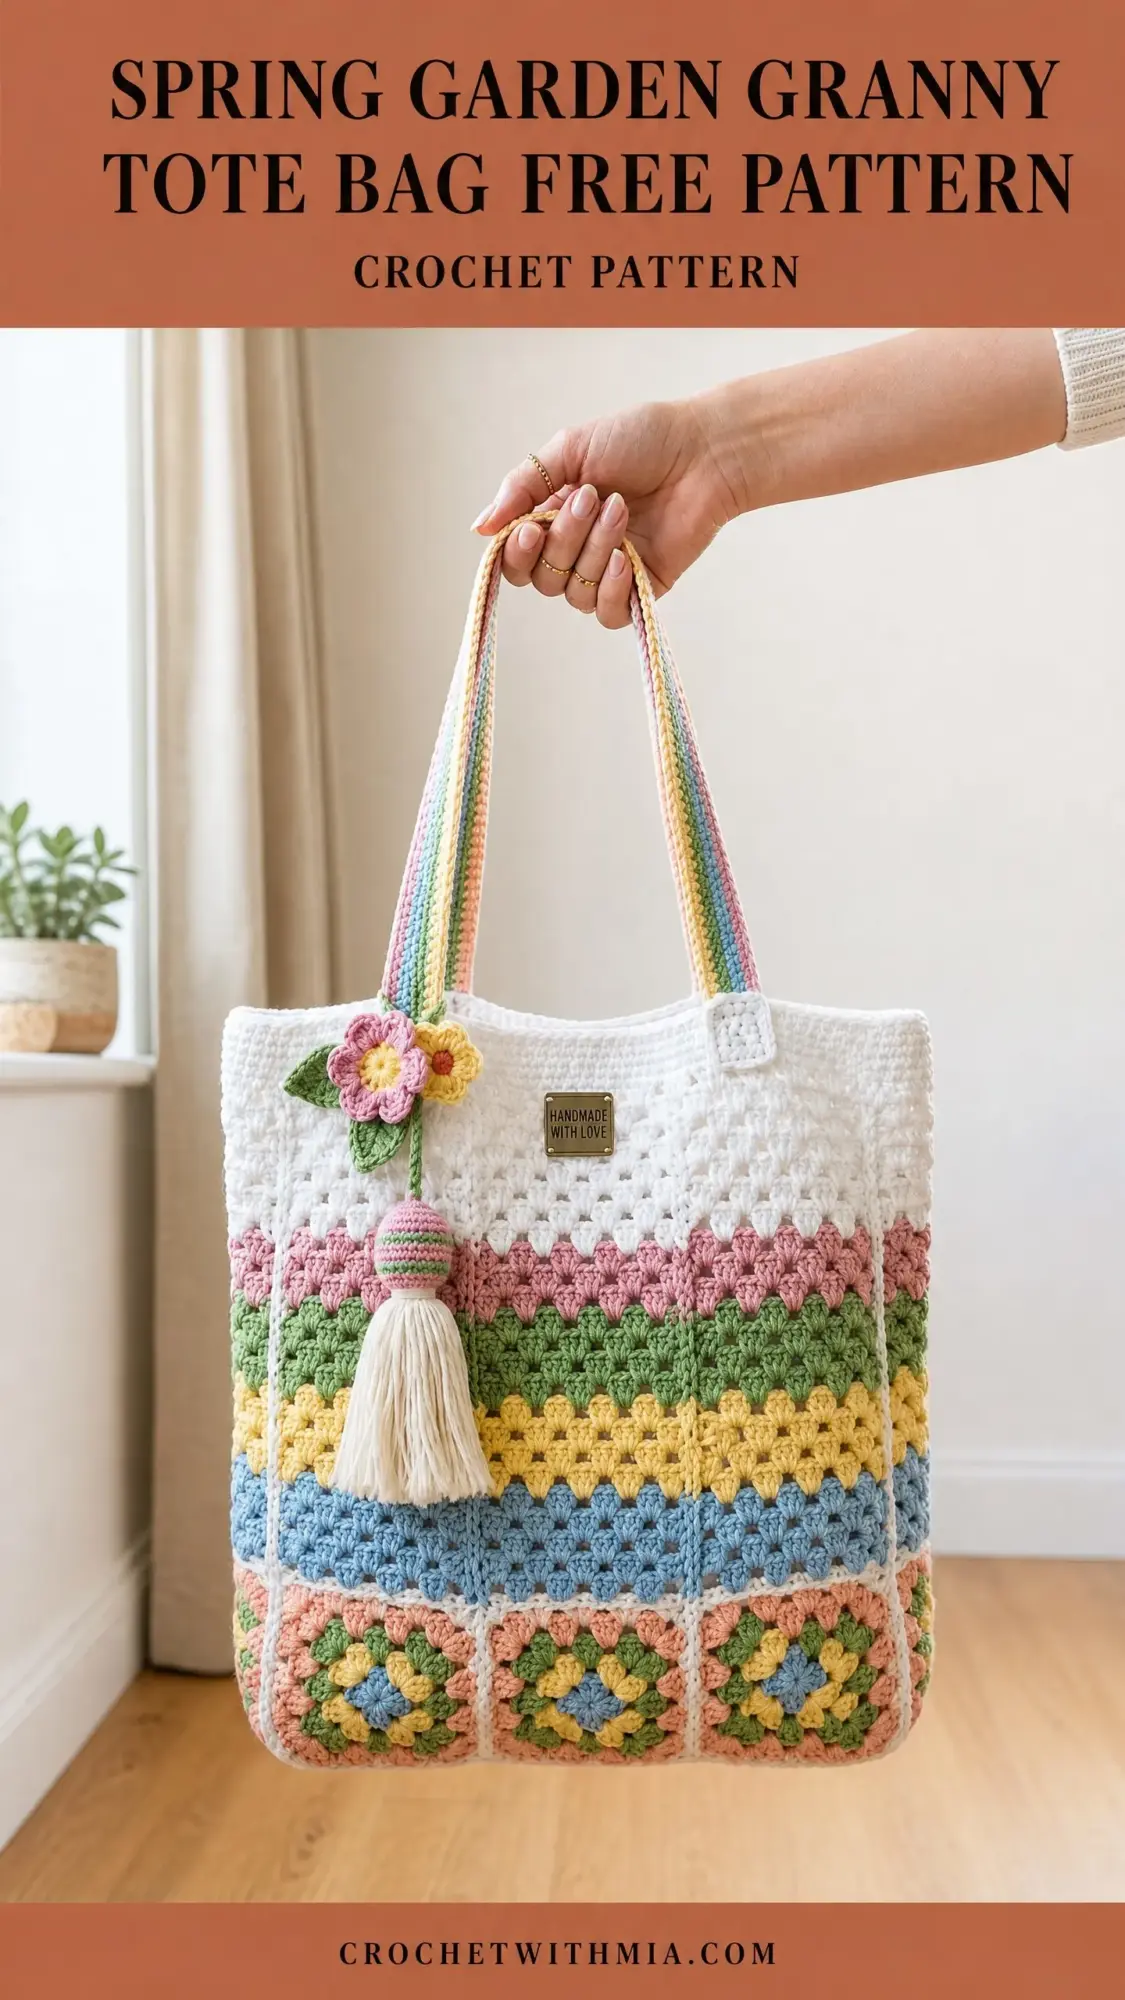
I am SO thrilled with how this Spring Garden Granny Tote turned out. The striped body gives you that satisfying granny stitch texture while the granny square border along the bottom adds visual interest and a nod to vintage crochet. Plus those rainbow striped handles? Total showstopper.
About This Crochet Pattern
This tote bag combines horizontal granny stripe rows for the main body with traditional granny squares along the lower edge. The construction is straightforward once you understand the rhythm. You will work flat panels for the front and back, create gussets for the sides and bottom, then join everything together. The handles use a tapestry slip stitch technique that creates those gorgeous pastel stripes.
Skill level: Intermediate. If you are comfortable with basic granny squares and color changes, you can absolutely tackle this project. The techniques build on familiar skills, just in new combinations.
Finished dimensions: Approximately 14 inches wide by 14 inches tall (not including handles) by 4 inches deep. Handle drop is about 11 inches from the top edge of the bag to the top of the handle loop.
Time estimate: 12 to 18 hours for an experienced crocheter. Budget extra time for blocking and adding the embellishments.
Materials Needed
Yarn: Worsted weight (Category 4) 100% cotton yarn in the following colors and amounts:
Total yarn needed: Approximately 760 yards / 695 meters across all colors.
Hook: US Size H-8 / 5.0 mm (or size needed to obtain gauge)
Notions:
Yarn Suggestions
Lion Brand 24/7 Cotton in Ecru, Blush, Fern, Buttercup, Periwinkle, and Peach works beautifully. It holds stitch definition well and creates a sturdy fabric perfect for bags.
Paintbox Yarns Simply DK Cotton is slightly lighter weight. If you substitute this yarn, go up to a 5.5 mm hook and recheck your gauge.
Drops Safran is another excellent choice with the exact pastel palette you need.
Stick with smooth 100% cotton or cotton blend yarns. Avoid fuzzy or textured yarns since they will obscure the open granny cluster structure that makes this bag so pretty.
Gauge
With Color A and your H-8 / 5.0 mm hook:
Gauge matters here. An incorrect gauge will significantly affect your finished bag dimensions. Please swatch before diving in.
Abbreviations and Special Stitches
Special Stitches Defined
Granny Cluster (GC): Yarn over, insert hook into designated chain space or space, yarn over and pull up a loop, yarn over and draw through 2 loops on hook. Repeat the yarn over, insert, pull up, draw through 2 loops sequence two more times. Yarn over and draw through all 4 loops on hook. This creates a 3 double crochet cluster worked into one space.
Granny Stripe Row (GSR): Starting after the turning chain, work [GC, ch 2, GC] into the first ch-2 space. Then work ch 1, [GC, ch 2, GC] into the next ch-2 space. Repeat across to the last space, ch 1, GC into the last space, turn.
Joining Slip Stitch (JSS): With right sides facing, hold two pieces together with wrong sides touching. Insert hook through both corresponding stitches, yarn over, pull through both stitches and the loop on hook. This creates a visible ridged seam on the right side.
Pattern Notes Before You Begin
1. The bag body is worked as two flat panels (front and back), then seamed at the sides and bottom. The bottom gusset creates the 4 inch depth.
2. The lower granny square border uses individual 4 round granny squares joined together. You will need 10 squares total: 4 for the front, 4 for the back, and 1 for each side gusset.
3. Color changes happen at the beginning of each new row. You can carry unused yarn loosely up the side or cut and weave in ends.
4. The turning chain at the start of granny stripe rows counts as the first double crochet of the first cluster.
5. All granny squares are worked in rounds, not rows.
Step by Step Instructions
Section 1: Front and Back Panels (Make 2)
Each panel forms the upper and middle sections of your bag. Work from the top edge down to where the granny square border will attach.
Foundation Chain:
With Color A, ch 83.
Row 1 (setup row, RS): Sc into 2nd ch from hook, sc into each ch across, turn. (82 sc)
Row 2 (cluster setup row, WS): Ch 3 (counts as dc), sk next 2 sc, [GC, ch 2, GC] into next sc, sk 2 sc, ch 1, sk 2 sc, [GC, ch 2, GC] into next sc; rep from across to last 3 sc, sk 2 sc, dc into last sc, turn. (13 V-pairs established)
Checkpoint: After Row 2 your panel should measure approximately 14 inches / 35.5 cm wide.
Row 3 (Color A, granny stripe row): Ch 3, turn, [GC, ch 2, GC] into first ch-2 sp, ch 1, [GC, ch 2, GC] into next ch-2 sp; rep from across all 13 ch-2 spaces, ch 1, dc into top of ch-3, turn. (13 V-pairs)
Row 4: Rep Row 3 with Color A. (13 V-pairs)
Row 5: Change to Color B (Soft Pink). Rep Row 3. (13 V-pairs)
Row 6: Color B. Rep Row 3. (13 V-pairs)
Row 7: Change to Color A. Rep Row 3. (13 V-pairs)
Row 8: Color A. Rep Row 3. (13 V-pairs)
Row 9: Change to Color C (Sage Green). Rep Row 3. (13 V-pairs)
Row 10: Color C. Rep Row 3. (13 V-pairs)
Row 11: Change to Color A. Rep Row 3. (13 V-pairs)
Row 12: Color A. Rep Row 3. (13 V-pairs)
Row 13: Change to Color D (Butter Yellow). Rep Row 3. (13 V-pairs)
Row 14: Color D. Rep Row 3. (13 V-pairs)
Row 15: Change to Color A. Rep Row 3. (13 V-pairs)
Row 16: Color A. Rep Row 3. (13 V-pairs)
Row 17: Change to Color E (Cornflower Blue). Rep Row 3. (13 V-pairs)
Row 18: Color E. Rep Row 3. (13 V-pairs)
Row 19: Change to Color A. Rep Row 3. (13 V-pairs)
Row 20: Color A. Rep Row 3. (13 V-pairs)
Fasten off Color A. Leave a long tail for seaming.
Checkpoint: After Row 20 the panel should measure approximately 10 inches / 25.5 cm tall and 14 inches / 35.5 cm wide. The color stripe sequence from top to bottom reads: white, pink, white, green, white, yellow, white, blue, white.
Section 2: Bottom Gusset Panel (Make 1)
This piece creates the 4 inch depth of your bag.
With Color A, ch 15.
Row 1: Sc into 2nd ch from hook, sc into each ch across, turn. (14 sc)
Row 2: Ch 3, sk 2 sc, [GC, ch 2, GC] into next sc, sk 2 sc, ch 1, sk 2 sc, [GC, ch 2, GC] into next sc, sk 2 sc, dc into last sc, turn. (2 V-pairs)
Rows 3 through 20: Rep Row 2 granny stripe pattern, continuing in Color A only. (2 V-pairs per row)
Fasten off with a long tail.
The gusset should measure approximately 4 inches wide by 14 inches long after blocking.
Section 3: Side Gussets (Make 2)
Each side gusset measures 4 inches wide by 14 inches tall.
With Color A, ch 15.
Row 1: Sc into 2nd ch from hook, sc into each ch across, turn. (14 sc)
Row 2: Ch 3, sk 2 sc, [GC, ch 2, GC] into next sc, sk 2 sc, ch 1, sk 2 sc, [GC, ch 2, GC] into next sc, sk 2 sc, dc into last sc, turn. (2 V-pairs)
Rows 3 through 20: Rep Row 2. (2 V-pairs)
These use only Color A to maintain clean white side panels.
Fasten off with a long tail.
Section 4: Lower Granny Square Border
You will make 10 squares total using the multi color arrangement below.
Granny Square (Make 10)
Round 1 (center): With Color D (Yellow), make a magic ring (or ch 4, sl st to join into ring). Ch 3 (counts as dc), work 2 dc into ring, ch 2, [3 dc into ring, ch 2] 3 times, sl st into top of beg ch-3 to join. Fasten off. (4 clusters, 4 ch-2 corner spaces)
Round 2: Join Color B (Pink) into any ch-2 corner sp. Ch 3, work 2 dc into same sp, ch 2, 3 dc into same sp (corner made), ch 1, [3 dc, ch 2, 3 dc] into next ch-2 sp; rep from 2 more times, ch 1, sl st into top of beg ch-3. Fasten off. (8 clusters, 4 ch-2 corners, 4 ch-1 side spaces)
Round 3: Join Color E (Blue) into any ch-2 corner sp. Ch 3, 2 dc into same sp, ch 2, 3 dc into same sp, ch 1, 3 dc into next ch-1 sp, ch 1, [3 dc, ch 2, 3 dc] into next ch-2 corner sp; rep from 2 more times, ch 1, 3 dc into last ch-1 sp, ch 1, sl st into top of beg ch-3. Fasten off. (12 clusters, 4 ch-2 corners, 8 ch-1 side spaces)
Round 4: Join Color F (Peach) into any ch-2 corner sp. Ch 3, 2 dc into same sp, ch 2, 3 dc into same sp, [ch 1, 3 dc into next ch-1 sp] twice, ch 1, [3 dc, ch 2, 3 dc] into next ch-2 corner sp; rep from 2 more times, [ch 1, 3 dc into next ch-1 sp] twice, ch 1, sl st into top of beg ch-3. Fasten off. (16 clusters, 4 ch-2 corners, 12 ch-1 side spaces)
Each completed square measures 4 inches / 10 cm after blocking.
Block all 10 squares to 4 inches before joining. Pin to blocking mats or foam to ensure consistent sizing.
Joining the Squares:
For the front border, arrange 4 squares side by side. Using Color A and the JSS method, join squares along their edges. Work JSS through the corresponding ch-1 side spaces and dc tops along one full edge of each adjoining square. The joined strip should measure approximately 16 inches wide by 4 inches tall before attachment.
Repeat for the back border with 4 more squares. The side squares (1 each) remain unjoined.
Section 5: Assembling the Bag Body
Step 1: Hold front panel and one side gusset with RS together. Using Color A and JSS, seam along the vertical side edge from top to bottom. Repeat on the other side with the second side gusset.
Step 2: Hold back panel to the other edges of both side gussets with RS together. Seam both vertical edges using JSS.
Step 3: Hold bottom gusset to the bottom edge of the front panel with RS together. Seam using JSS. Then seam the bottom gusset to the back panel bottom edge. Finally seam the two short ends of the bottom gusset to the bottoms of the side gussets.
Step 4: With RS facing, hold the front granny square strip to the bottom edge of the front panel. Using Color A and JSS, seam the top edge of the joined square strip to the bottom row of the front panel body. Repeat for back. Attach single squares to each side gusset bottom edge.
Step 5: Turn bag so bottom faces up. With Color A, work a row of sl sts across the bottom gusset seam join on both the front and back sides to reinforce. Fasten off.
Section 6: Top Border
With RS facing and Color A, join yarn at any corner of the top opening.
Round 1: Ch 1, sc evenly around the entire top opening, working 1 sc into each dc, 1 sc into each ch-1 space, and 2 sc into corner spaces to keep the fabric flat. Place markers at each of the 4 corners. Sl st to first sc to join. Do not fasten off. (approximately 76 sc)
Round 2: Ch 1, sc into each sc around, sl st to join. Fasten off and weave in ends. (76 sc)
Section 7: Handle Attachment Loops (Make 4)
These small tabs secure the handles to your bag.
With Color A, ch 9.
Row 1: Sc into 2nd ch from hook, sc across, turn. (8 sc)
Rows 2 through 6: Ch 1, sc across, turn. (8 sc)
Fasten off with a long tail.
Fold tab in half to form a loop approximately 1.5 inches long and 0.75 inches wide. Sew securely to the top edge of the bag front panel at one quarter and three quarters of the way across the width. Repeat for the back panel.
Section 8: Handles (Make 2)
The handles are worked as tapestry slip stitch cords in the pastel stripe sequence.
With two strands held together (one Color A, one Color B), ch 4, sl st into first ch to form a small ring.
Row 1: Ch 1, work 8 sc into ring, sl st to join. Do not turn. (8 sc)
Handle cord method: Ch 1, insert hook into next sc, pull up loop, keeping both strands on hook, insert hook into next sc, pull through both stitches and loop on hook (sl st made); rep from around continuously in a tight spiral until handle reaches approximately 24 inches / 61 cm total length.
Color change sequence: Change the second strand color every 8 rounds:
When handle reaches 24 inches, sl st to close. Fasten off.
Thread each end of one handle through one front tab loop and one back tab loop on the same side. Fold the handle end over by 1 inch and sew securely. Repeat for second handle.
Section 9: Flower Charm Embellishment
Large Flower:
With Color B (Pink), make a magic ring.
Round 1: Ch 1, 6 sc into ring, sl st to join. (6 sc)
Round 2: Ch 1, 2 sc into each sc around, sl st to join. (12 sc)
Round 3 (petals): Ch 3, 3 dc into next sc, ch 3, sl st into next sc; rep from 5 more times. (6 petals)
Fasten off leaving a long tail. With Color D (Yellow), embroider a French knot cluster into the center.
Small Flower:
With Color D (Yellow), make a magic ring.
Round 1: Ch 1, 5 sc into ring, sl st to join. (5 sc)
Round 2 (petals): Ch 2, 2 dc into next sc, ch 2, sl st into next sc; rep from 4 more times. (5 petals)
Fasten off leaving a long tail.
Leaf:
With Color C (Green), ch 8.
Row 1: Sl st into 2nd ch from hook, sc, hdc, dc, hdc, sc, sl st into last ch. Do not turn. Work along opposite side of foundation ch: sl st, sc, hdc, dc, hdc, sc, sl st. (14 sts around leaf)
Fasten off leaving a long tail.
Assembly: Layer small flower on top of large flower, sew together at center. Attach leaf behind both flowers. Sew assembled charm to the left handle base at the front panel attachment point.
Section 10: Tassel
Cut approximately 40 strands of Color G (Cream), each 10 inches long.
Fold all strands together. Cut one additional 12 inch piece of Color G. Tie this piece tightly around the folded strands at the midpoint. Fold the bundle in half at the tie point. Cut another 12 inch piece and wrap it approximately 0.75 inches from the fold to form the tassel neck. Knot tightly and thread ends up into the tassel body.
Trim tassel ends to approximately 3 to 3.5 inches in length.
Attach tassel to the left handle at the same handle base as the flower charm, so both hang together.
Finishing and Blocking
Weave in all ends securely, running them through at least 1 inch of fabric in two directions.
Wet blocking: Submerge the bag fully in cool water. Gently squeeze out excess water without wringing. Roll in a clean towel to remove most moisture. Shape to exact dimensions: 14 inches wide, 14 inches tall, 4 inches deep. Stuff the interior with plastic bags or tissue paper to hold the 3D form. Pin corners square. Allow to dry completely, which may take 24 to 48 hours.
After blocking, the fabric should have good body and stand upright when empty.
Care Instructions
Hand wash in cool water with mild soap. Do not wring. Roll in a towel to remove excess moisture. Reshape and lay flat or stuff to dry. Do not tumble dry since cotton shrinks under high heat. Do not iron directly over the granny clusters.
Making This Pattern Your Own
To make the bag wider: Add multiples of 3 stitches to your foundation chain. Each additional 6 stitches adds approximately 1.5 inches of width. Add 1 additional granny square per row in the lower border.
To make the bag taller: Add granny stripe rows in pairs. Each 2 row addition adds approximately 0.5 inch of height.
To add a closure: After completing the top border rounds, add a ch-30 loop on one side and a crocheted button on the other. You could also sew in a magnetic snap through a lining.
Thank you so much for choosing this Spring Garden Granny Tote pattern. I really hope you love making it as much as I loved designing it. Those pastel stripes against the crisp white background make my heart happy every single time.
If you make this tote, I would absolutely love to see it! Tag me on Instagram or share in our Facebook group. Seeing your finished projects is honestly the best part of sharing patterns.
Go ahead and save this pattern to your Pinterest boards so you can find it when you are ready to start. And please drop a comment below if you make one. I read every single comment and love hearing how your projects turn out!