
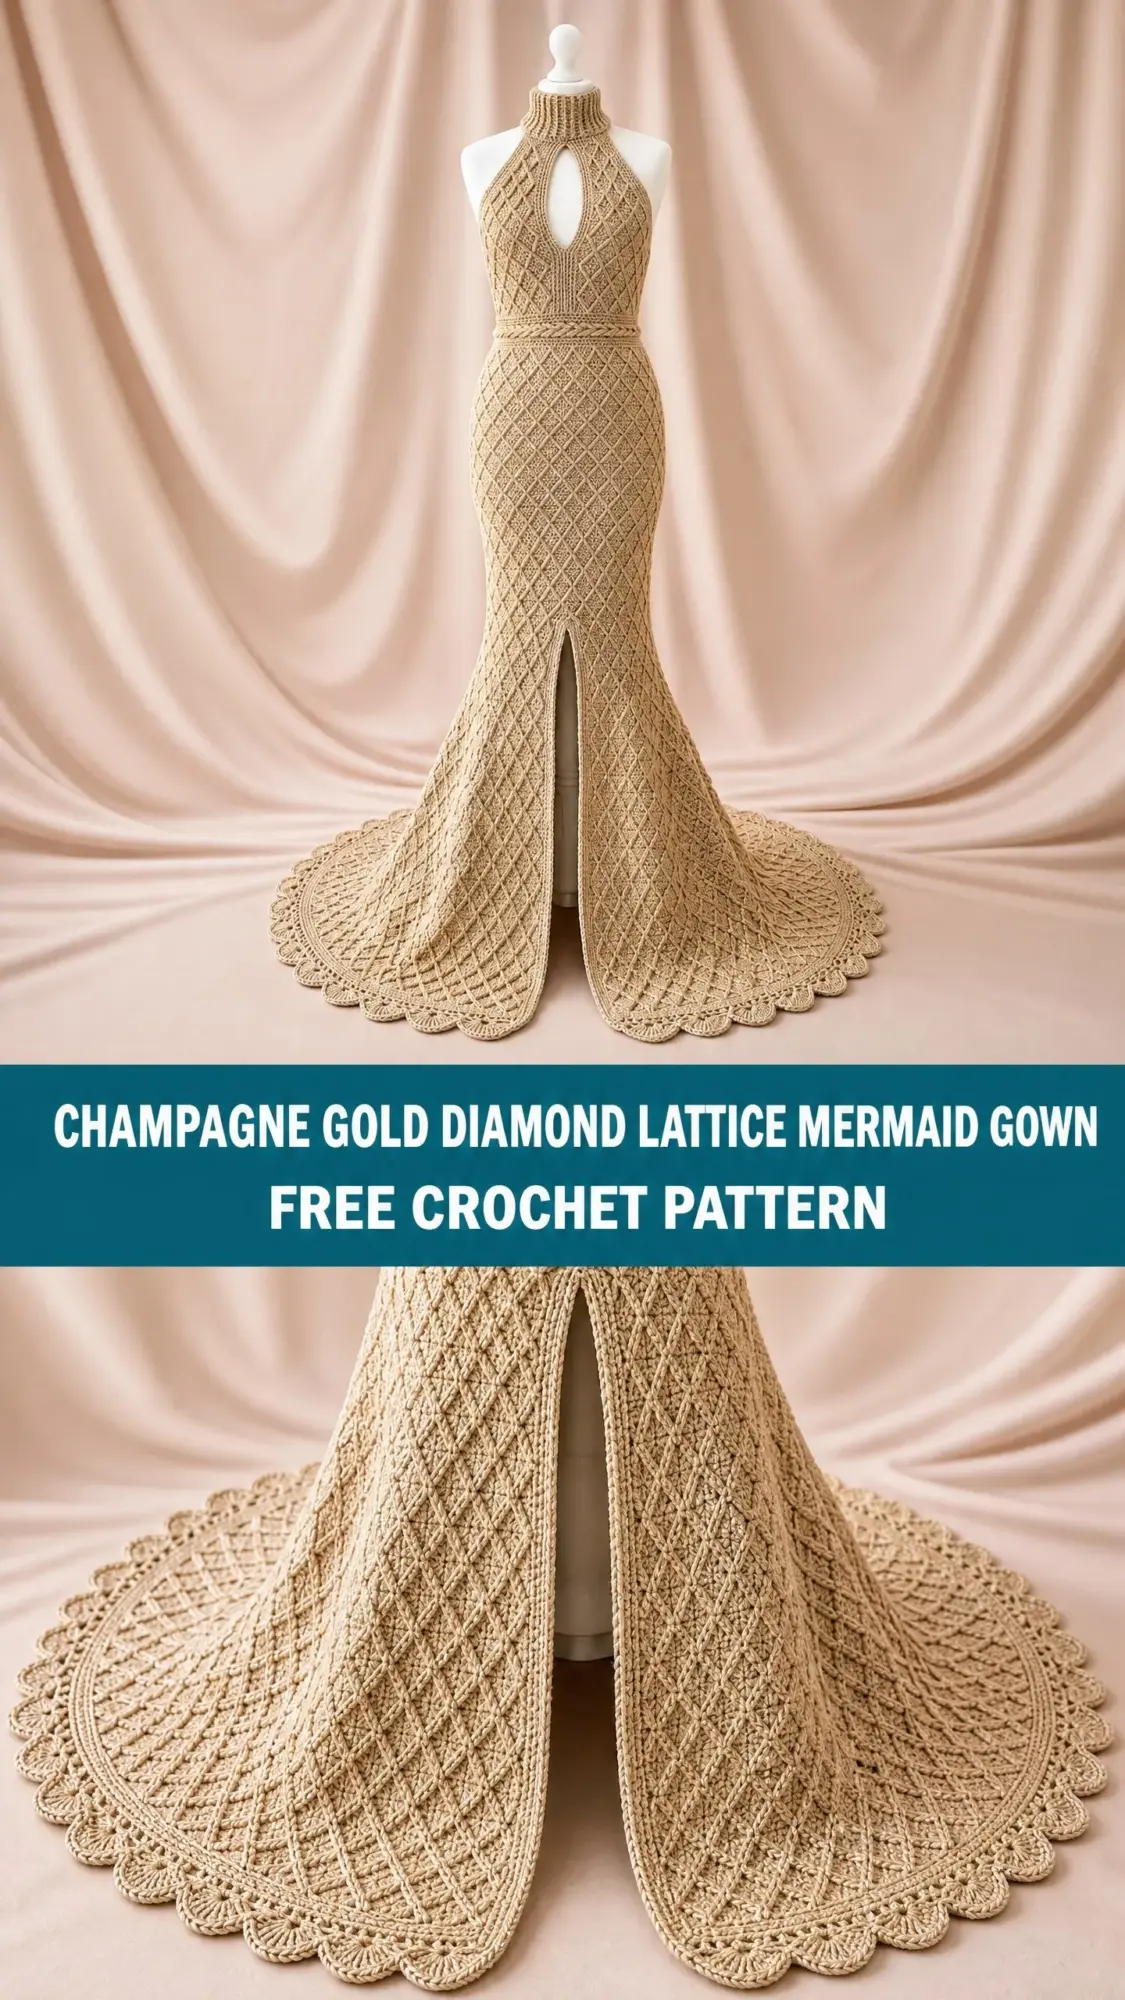
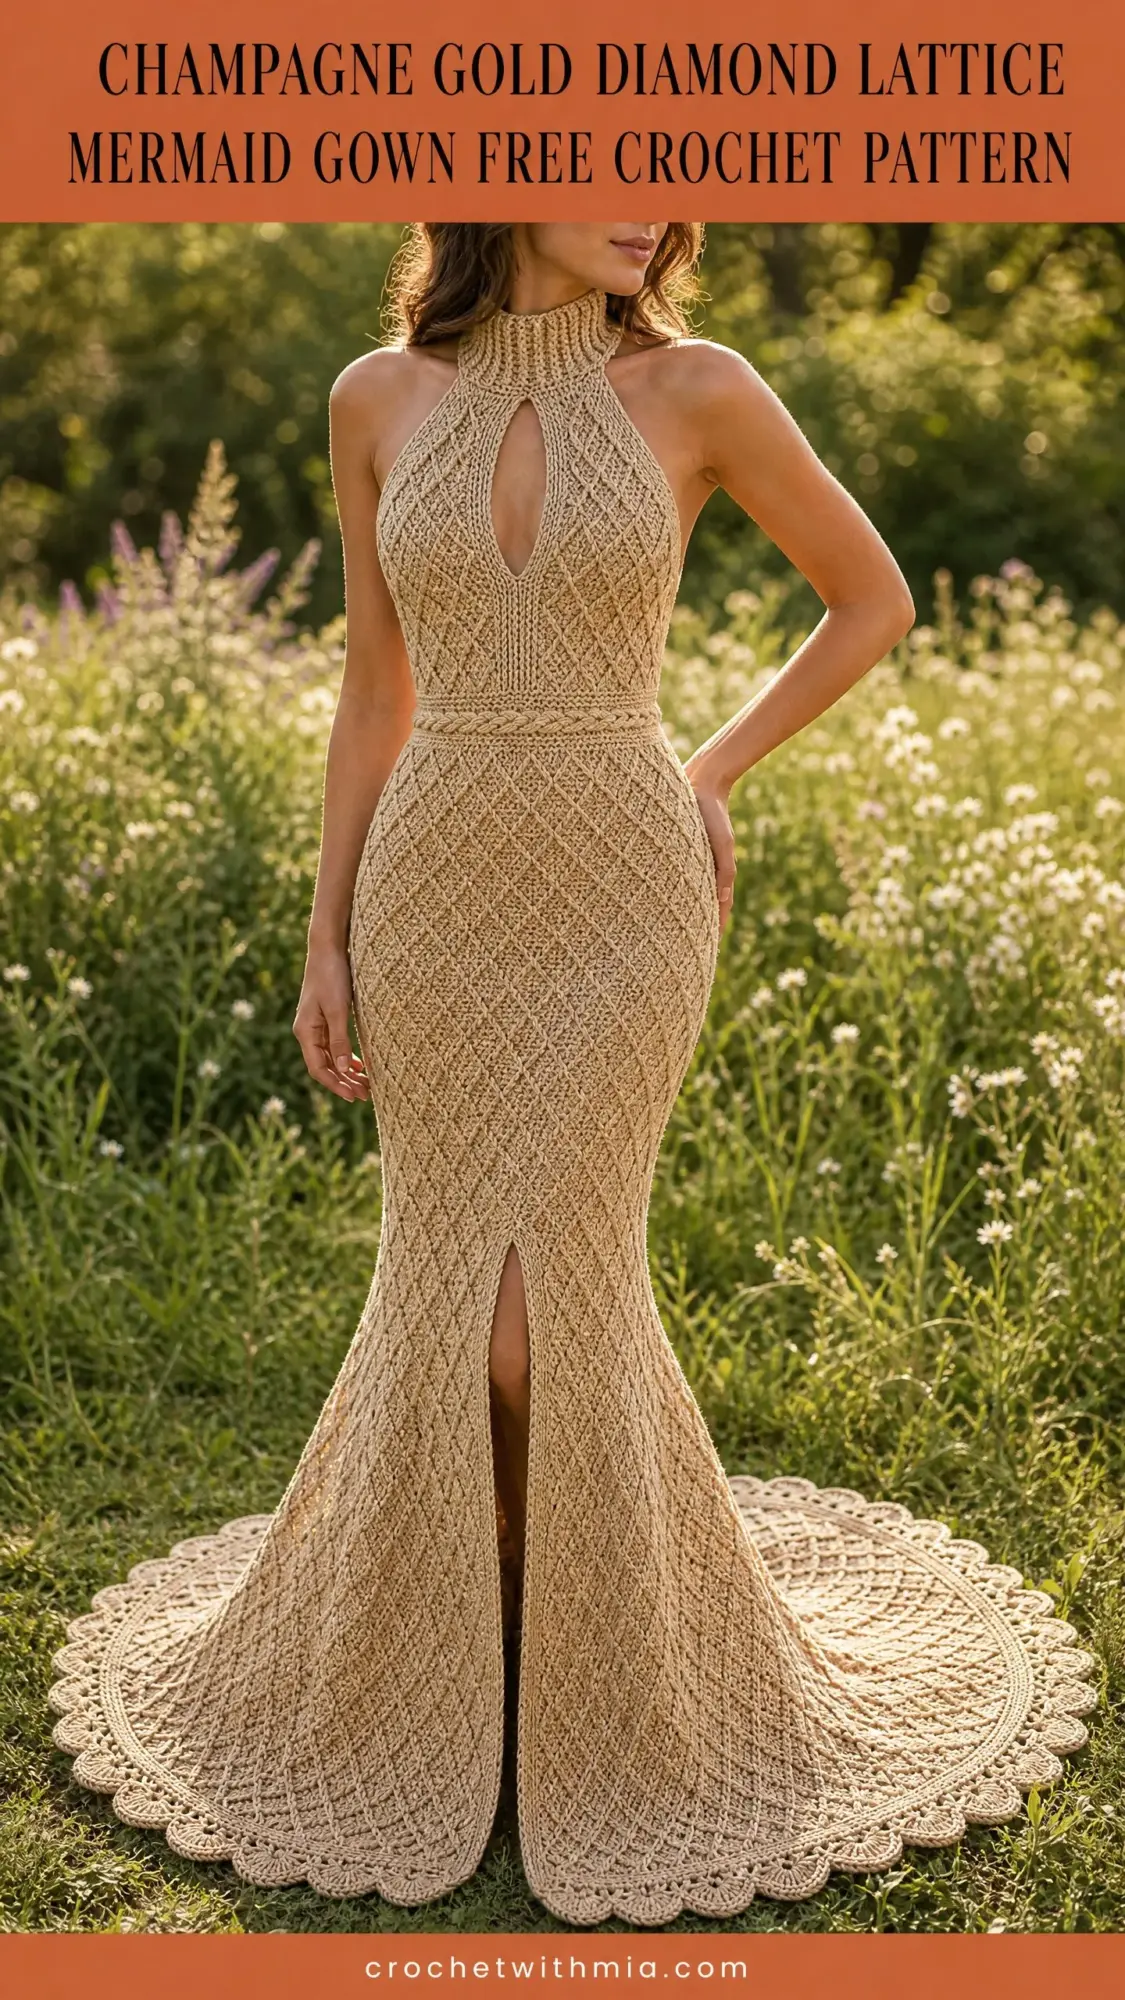
This is a showstopper. A floor-length mermaid gown with a fitted halter bodice, dramatic cathedral train, and raised diamond lattice texture from collar to hem. The construction combines post stitches, cable techniques, and garment shaping worked in pieces and seamed.
I need to be upfront with you. This is an advanced pattern. We are talking 120 to 180 hours of work, multiple construction phases, and serious blocking. If you have made structured garments before and feel comfortable with front post and back post stitches, you are ready.
The silhouette is classic mermaid: fitted through the bust, waist, and hip, then flaring at the knee into that sweeping train. A teardrop keyhole cutout at the chest, open back with halter ties, braided cable waist band, front center slit, and scalloped lace edging on the train. Every detail you see in the finished piece is achievable with the techniques in this crochet pattern.
Why This Diamond Lattice Mermaid Gown Works
The raised diamond grid texture comes from alternating front post double crochets and back post double crochets in a specific 8-row repeat. These post stitches wrap around the posts of stitches in the row below rather than working into the top loops. The result is a woven, almost quilted surface that catches light beautifully in the champagne gold yarn.
The mermaid shape is built through careful shaping. Increases at the bust, decreases at the waist, increases again at the hip, then a taper to the knee before the dramatic trumpet flare. Every measurement is calculated for sizes Small through Extra Large.
Materials You Will Need
Yarn: Approximately 3,200 (3,500, 3,900, 4,300) yards of DK weight yarn in champagne gold or warm sand. Look for a yarn with subtle sheen or mercerized finish. A cotton-acrylic blend or cotton-linen blend works best for drape and stitch definition.
Yarn suggestions that work beautifully:
Hooks: US size E-4 (3.5 mm) for the main body. US size D-3 (3.25 mm) for the collar and waist band.
Notions:
Finished Sizes
This crochet pattern is written for size Small with changes for Medium, Large, and Extra Large noted in parentheses as S (M, L, XL).
Gauge (Critical for This Pattern)
With E-4 (3.5 mm) hook in Diamond Lattice Cable Pattern:
With E-4 (3.5 mm) hook in single crochet:
Please swatch. A difference of even one stitch per inch will alter the finished measurements by several inches across the full circumference. Work a gauge swatch of at least 6 inches by 6 inches, wash and block it, then measure the center 4 inches only.
Abbreviations Used
Special Stitches Explained
Diamond Lattice Cable Panel (DLC)
This is the signature texture covering the entire gown. It creates raised diagonal cables forming diamond shapes. Work on a foundation that is a multiple of 6 stitches plus 2.
Row 1 (RS): Ch 3 (counts as dc here and throughout), turn. Dc in each st across.
Row 2 (WS): Ch 3, turn. [FPdc around next st, BPdc around next st] rep to last st, dc in last st.
Row 3 (RS): Ch 3, turn. [BPdc around next st, FPdc around next st] rep to last st, dc in last st.
Row 4 (WS): Ch 3, turn. [FPdc around next 2 sts, BPdc around next 2 sts, FPdc around next 2 sts] rep to last st, dc in last st.
Row 5 (RS): Ch 3, turn. [BPdc around next 2 sts, FPdc around next 2 sts, BPdc around next 2 sts] rep to last st, dc in last st.
Row 6 (WS): Same as Row 2.
Row 7 (RS): Same as Row 3.
Row 8 (WS): Dc in each st across.
Repeat Rows 1 through 8 for pattern.
Front Post Double Crochet (FPdc)
Yarn over, insert hook from front to back to front around the post of the indicated stitch in the row below, yarn over and pull up a loop, [yarn over and pull through 2 loops] twice. This creates a raised ridge on the right side.
Back Post Double Crochet (BPdc)
Yarn over, insert hook from back to front to back around the post of the indicated stitch in the row below, yarn over and pull up a loop, [yarn over and pull through 2 loops] twice. This creates a recessed valley on the right side.
Cable Twist (CT)
Skip 2 stitches, FPdc around the 3rd and 4th stitches, then FPdc around the 2 skipped stitches working in front of the previously made FPdcs.
Scallop Edging
[Sc in next st, skip 1 st, 5 dc in next st, skip 1 st] rep around. Each scallop repeat uses 4 stitches and produces one shell.
Construction Overview
This gown is built in sections and seamed:
1. Mock turtleneck collar (worked flat, seamed into tube)
2. Halter bodice front panel (worked flat from collar down, with keyhole shaping)
3. Waist cable band (worked flat, seamed)
4. Skirt (worked in the round from waist to knee, then in rows with front slit)
5. Circular train panel (worked separately)
6. Scallop edging on train
7. Edge finishing and assembly
Section 1: Mock Turtleneck Collar
The collar is a ribbed band worked flat in back loop only single crochet, then seamed into a tube.
With D-3 (3.25 mm) hook, ch 17.
Row 1: Sc in 2nd ch from hook and in each ch across. Turn. (16 sc)
Rows 2 through 60 (62, 64, 66): Ch 1, turn. Sc in blo of each st across. (16 sc)
The collar strip should measure approximately 15 (15.5, 16, 16.5) inches long.
Seaming: Fold the strip so short edges meet. Sl st through both layers in blo to seam. Do not fasten off.
Checkpoint: Finished collar tube measures approximately 15 (15.5, 16, 16.5) inches around and 2.5 inches tall. Ribs run vertically.
Section 2: Halter Bodice Front Panel
The bodice is worked flat from the collar downward. The keyhole cutout is formed by working two side panels separately, then joining them.
With E-4 (3.5 mm) hook, working into the bottom edge of the collar tube, attach yarn and pick up 40 (44, 48, 52) stitches across the front half only.
Setup Row (WS): Ch 3, dc in each of the 40 (44, 48, 52) picked up sts. Turn. (40, 44, 48, 52 dc)
Keyhole Shaping
Right Front Panel:
Row 1 (RS): Ch 3, turn. Work DLC Row 1 across first 18 (20, 22, 24) sts. Leave remaining sts on hold. (18, 20, 22, 24 sts)
Rows 2 through 8: Work DLC Rows 2 through 8. (18, 20, 22, 24 sts each row)
Row 9: Work DLC Row 1 across all sts. At end of row, ch 4 for bridge. Do not turn.
Left Front Panel: Attach separate yarn to the 19th (21st, 23rd, 25th) stitch from right edge.
Row 1 (RS): Ch 3, work DLC Row 1 across remaining 18 (20, 22, 24) sts. Turn.
Rows 2 through 8: Work DLC Rows 2 through 8. (18, 20, 22, 24 sts each row)
Row 9: Work DLC Row 1 across all sts. Do not chain at end.
Joining Row (Row 10, WS): With main yarn from right panel, ch 3, turn. Work DLC Row 2 across right panel 18 (20, 22, 24) sts, work 4 dc across ch-4 bridge, work DLC Row 2 across left panel 18 (20, 22, 24) sts. (40, 44, 48, 52 dc)
Bodice Shaping
Continue working DLC 8-row repeat across all stitches for Rows 11 through 40 (42, 44, 46), with the following shaping:
Bust Increases:
Waist Taper:
Checkpoint: Bodice measures approximately 14 (14.5, 15, 15.5) inches from collar pickup to bottom edge.
Section 3: Waist Cable Band
Change to D-3 (3.25 mm) hook. This decorative cable strip encircles the waist.
Ch 11.
Row 1: Dc in 4th ch from hook and in each ch across. Turn. (9 dc)
Row 2: Ch 3, turn. BPdc around next 2 sts, [CT across next 4 sts], BPdc around next 2 sts, dc in last st. (9 sts)
Row 3: Ch 3, turn. FPdc around next 2 sts, dc in next 4 sts, FPdc around next 2 sts, dc in last st. (9 sts)
Rows 4 and 5: Same as Rows 2 and 3.
Repeat Rows 2 through 5 until band measures 26 (30, 34, 38) inches.
Seam short edges together. Attach to bottom edge of bodice front panel by slip stitching.
Checkpoint: Waist band measures 26 (30, 34, 38) inches around and 1.75 inches tall.
Section 4: Skirt in the Round
Switch to E-4 (3.5 mm) hook.
Pick up 130 (150, 170, 190) stitches around the inner bottom edge of the waist band. Join with sl st to work in the round.
Round 1: Ch 3 (counts as dc), dc in each st around. Join. (130, 150, 170, 190 sts)
Rounds 2 through 8: Work DLC in the round. (130, 150, 170, 190 sts)
Hip Increases
Place markers at left side (65th/66th stitch) and right side (130th/1st stitch).
Round 9: Work to 1 st before left marker, 2 dc in next st, sm, work to 1 st before right marker, 2 dc in next st, sm. (132, 152, 172, 192 sts)
Continue increasing 2 sts every 4th round (1 at each side marker) for 8 increase events.
After Round 41: (146, 166, 186, 206 sts)
Hip Plateau: Work even for 8 rounds. (146, 166, 186, 206 sts)
Upper Thigh Taper
Work dc2tog at each side marker every 6th round, 6 times.
After decreases: (134, 154, 174, 194 sts)
Work even for 12 more rounds to the knee.
Checkpoint: At knee, piece measures approximately 38 (39, 40, 41) inches from waist band top.
Section 5: Knee to Train Flare and Front Slit
At knee round, identify center front stitch. From here, work in rows to create the slit opening.
Row 1 (RS): Ch 3, turn. Work DLC Row 1 across all 134 (154, 174, 194) sts, increasing 2 dc in every 6th stitch. (158, 180, 204, 228 sts)
Row 2: Work DLC Row 2 even.
Row 3: Work DLC Row 3, increasing 1 st in every 8th st. (178, 202, 230, 256 sts)
Rows 4 through 8: Continue pattern with increases on Row 5 (every 10th st) and even rows between. After Row 8: (196, 224, 254, 284 sts)
Row 9: Increase 1 st in every 12th st. (212, 242, 278, 308 sts)
Rows 10 through 16: Work even.
Row 17: Increase 1 st in every 14th st. (228, 260, 298, 332 sts)
Rows 18 through 24: Work even.
Continue until total length from waist to front hem measures 56 (57, 58, 59) inches.
Section 6: Circular Train Panel
The train is a semicircular panel worked separately and attached to the back hem.
Ch 121 (131, 141, 151).
Row 1 (RS): Dc in 4th ch from hook, dc in each ch across. Turn. (119, 129, 139, 149 dc)
Row 2: Ch 3, turn. Dc in each st across.
Rows 3 through 8: Work DLC, increasing 2 sts (1 each end) every row. After Row 8: (129, 139, 149, 159 sts)
Rows 9 through 16: Increase 2 sts every other row. After Row 16: (133, 143, 153, 163 sts)
Rows 17 through 40: Increase 2 sts every 3rd row. After Row 40: (149, 159, 169, 179 sts)
Rows 41 through 60: Work even.
Checkpoint: Train measures approximately 20 to 22 inches from straight edge to deepest curved point.
Section 7: Scallop Edging on Train
Attach yarn at one end of the curved arc.
Round 1: Work sc evenly along entire curved arc. Work approximately 3 sc for every 2 row ends along sides. Adjust to a multiple of 4 sts. Join.
Round 2 (Scallop): [Sc in next st, skip 1 st, 5 dc in next st, skip 1 st] rep around. Join. Fasten off.
Section 8: Finishing
Front Slit Edges: Attach yarn at top of slit. Work sc evenly down each edge to the hem.
Bodice Back Edges: Work a row of sc along both back vertical edges from waist to collar.
Collar Top Edge: Work 1 round of sl st around top edge.
Armhole Edges: Finish with a single round of sc.
Assembly
1. Create halter ties: cut two 24-inch lengths of yarn or crochet two 24-inch chains and attach to back collar edges.
2. Seam back waist band closed at center back, or install optional invisible zipper.
3. Attach straight edge of train panel to back lower edge of skirt. Pin the front edge of train along the back skirt hem, matching center back. Whip stitch or slip stitch in place.
4. Wet block aggressively. Pin train into circular shape before blocking. The gown will not drape correctly without thorough blocking.
5. Add optional lining for wearability and modesty.
Final Tips for Success
This diamond lattice mermaid gown crochet pattern is a marathon, not a sprint. Take breaks. Check your gauge periodically throughout the project. The post stitches can tighten up as you work, so drop down a hook size if your fabric feels loose.
Block each section before assembly if possible. It makes seaming much easier and helps you catch any sizing issues early.
The lining is technically optional but strongly recommended. Two yards of lightweight fabric in a matching nude or champagne shade will make this gown truly wearable and photograph beautifully.
I really hope you enjoy making this stunning gown. It is a true heirloom piece, the kind of project you will be proud of for years. If you make one, please save this pattern to your Pinterest boards so you can find it again, and I would absolutely love to see your finished gown in the comments below. Tag me on Instagram or share in my Facebook group. Your makes always brighten my day.