
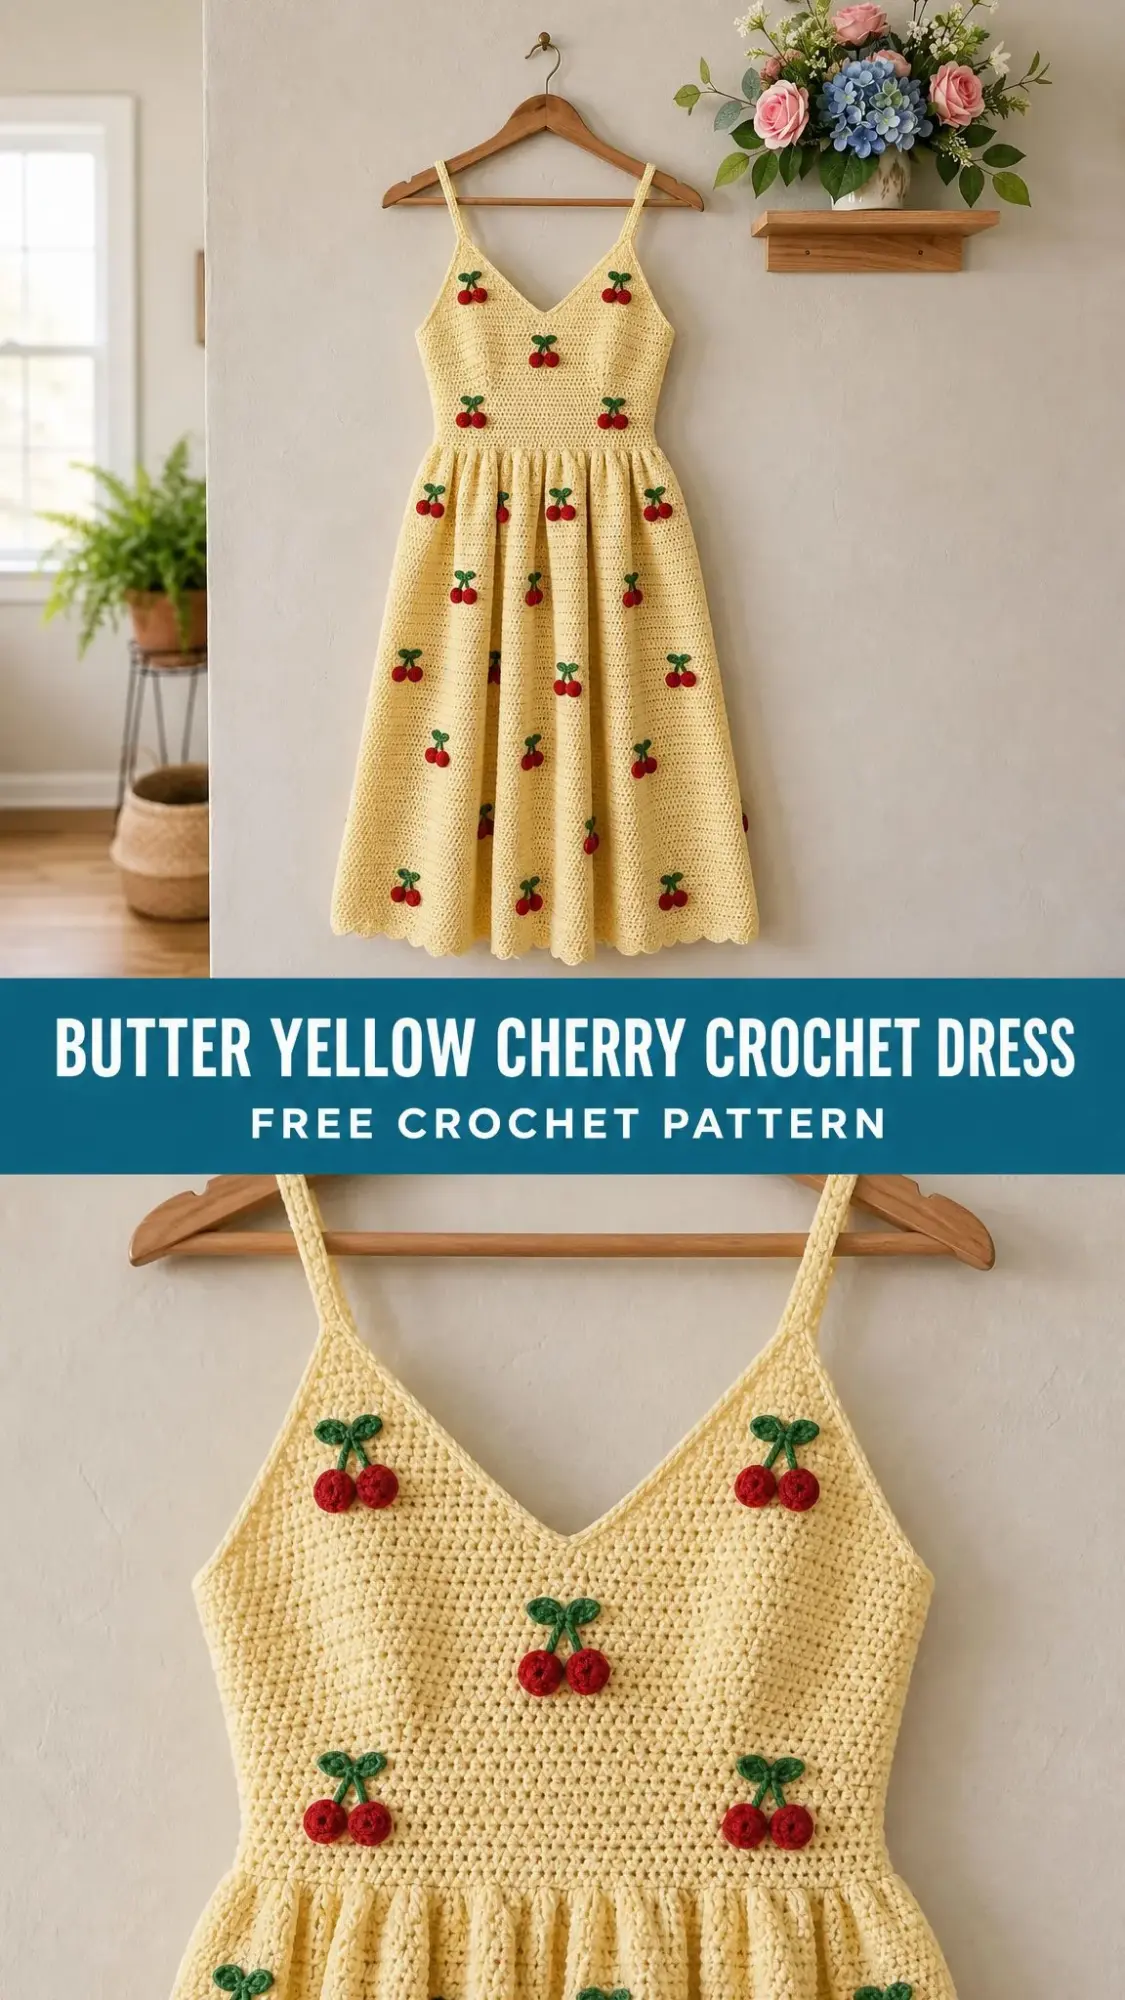
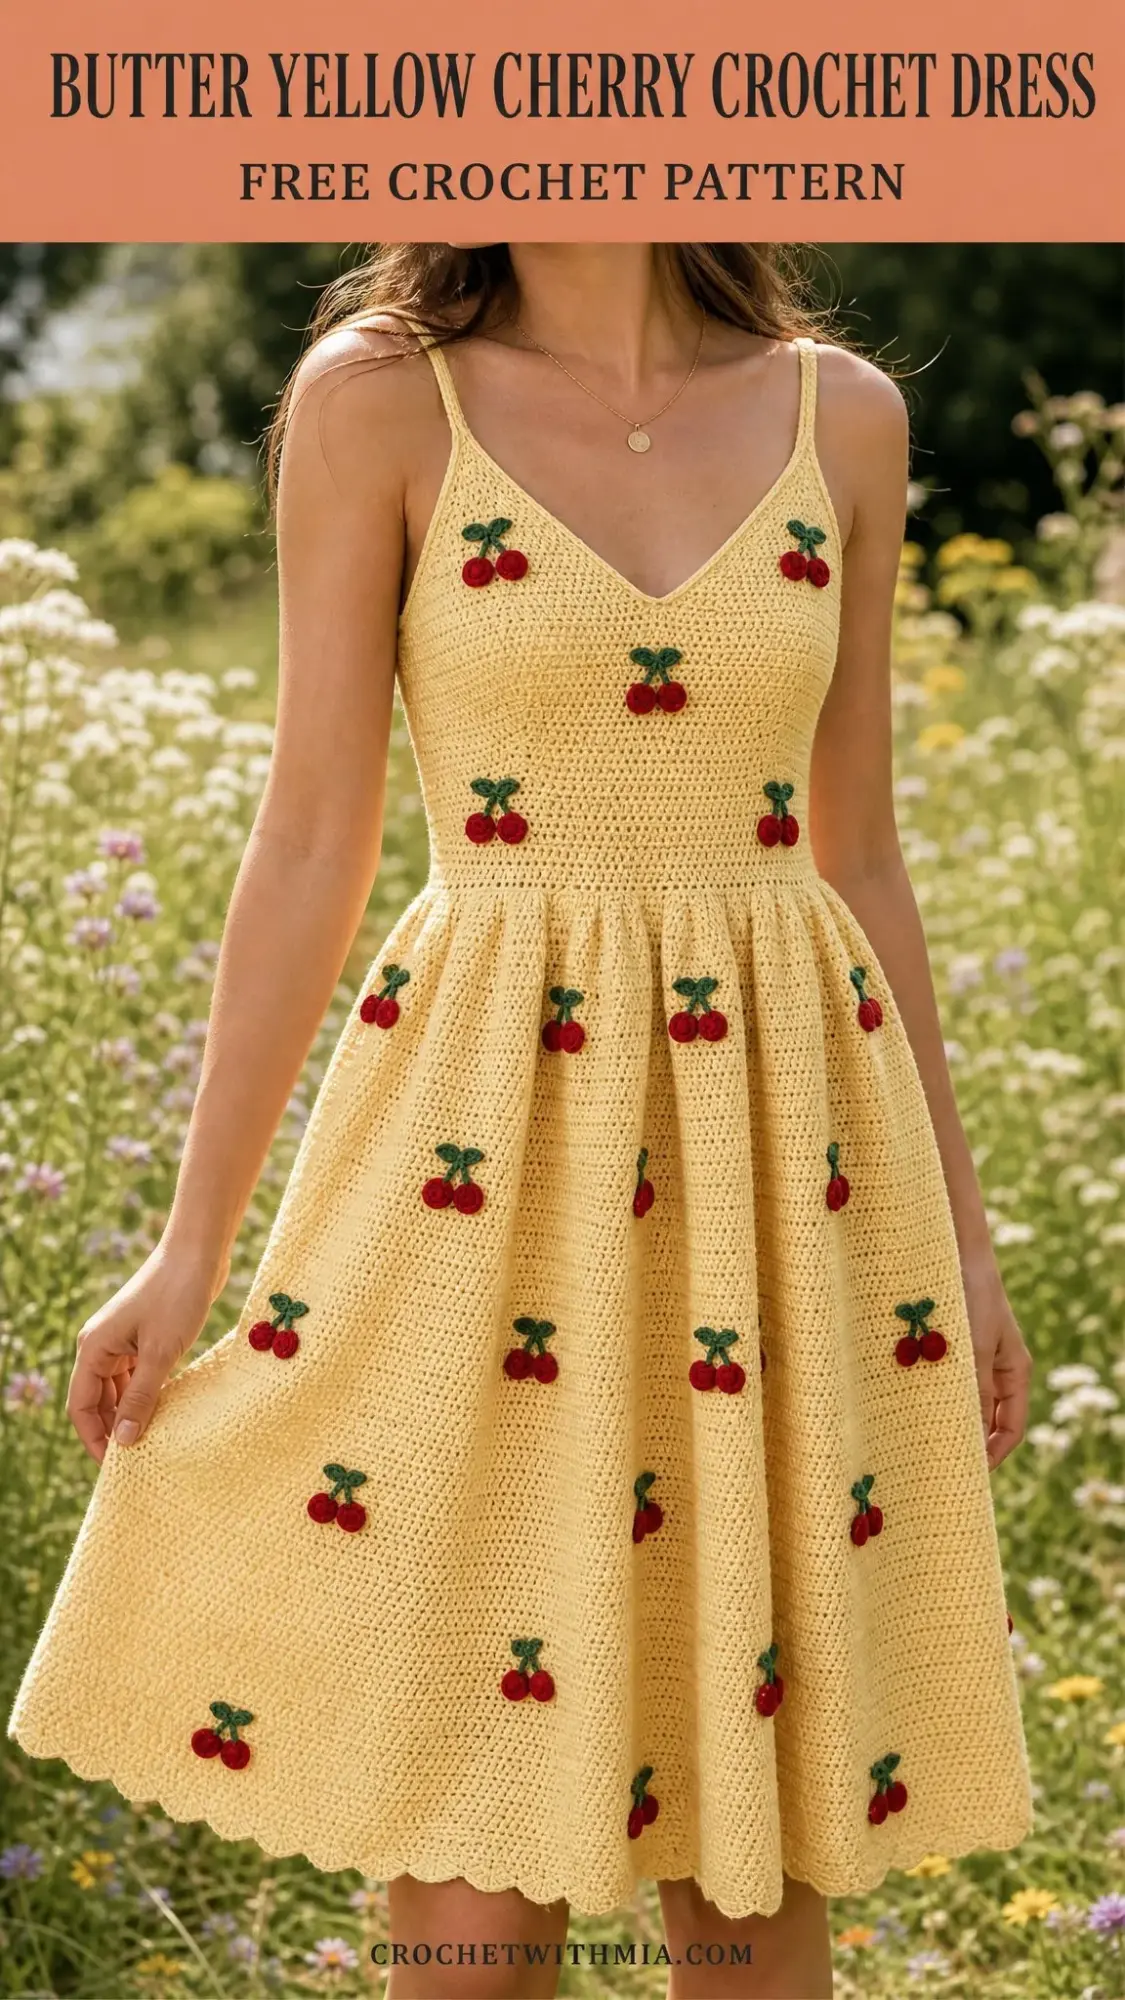
THIS IS THE SUMMER DRESS of your crochet dreams, and I am not even exaggerating. We are talking a stunning butter yellow midi dress covered in the cutest three dimensional cherry appliques, complete with a fitted V-neck bodice, spaghetti straps, and a full gathered skirt with a scalloped hem. It looks like it walked straight out of a vintage boutique.
Yes, this is an intermediate to advanced project. Yes, it will take you 30 to 45 hours to complete. But here is the thing. Every single hour is worth it when you slip this dress over your head and see yourself in the mirror. The construction is straightforward once you break it down, and I am going to walk you through every step.
If you have been searching for a statement piece that shows off your crochet skills, this is it. The mesh stitch body is simple but elegant. The cherries are worked separately and sewn on at the end. And that scalloped hem? Absolute perfection. Let us dive in.
About This Crochet Dress Pattern
This butter yellow cherry crochet dress is worked from the top down. You will start with the bodice, which is constructed in two separate pieces (front and back) using single crochet stitches for structure and fit. The bodice front features V-neck shaping, while the back has a straight neckline for that classic sundress silhouette.
Once the bodice is assembled, you will transition into the skirt, which is worked in the round using an open mesh stitch pattern. The mesh creates a beautiful lattice texture that gives the dress its airy, summery feel. Gradual increases throughout the skirt create the full, gathered look you see in the finished piece.
The cherry appliques are the showstopper. Each cherry set includes two plump berries in red, joined by a Y-shaped stem with a sweet little leaf cluster at the fork. You will make 22 to 26 sets and scatter them across the entire dress after blocking.
Skill Level
Intermediate to Advanced
This pattern requires comfort with:
The mesh stitch itself is simple, but it must be executed consistently for the open fabric to lie correctly. If you have made a few garments before and feel confident reading detailed instructions, you can absolutely tackle this project.
Time Estimate
Approximately 30 to 45 hours for a size Medium, not including the cherry appliques. Add 6 to 8 hours for crocheting and attaching all the cherries.
I know that sounds like a lot. But think of it this way: you are creating a wearable work of art. Break it into sessions. Work on the bodice over a weekend. Tackle the skirt during your evening crochet time throughout the week. Make a few cherries while watching your favorite show. Before you know it, you will have a finished dress.
Finished Measurements
The pattern is written for size Small with adjustments for Medium and Large.
Size Small:
Size Medium:
Size Large:
Materials Needed
Yarn:
Hooks:
Notions:
Recommended Yarn Brands
1. Paintbox Yarns Simply DK (100% cotton, 137 yards per 50 g ball). Clean stitch definition that shows the mesh beautifully. You will need approximately 10 to 11 balls in Buttercup Yellow, 1 ball in Pillar Box Red, and 1 ball in Grass Green.
2. Lion Brand 24/7 Cotton DK (100% cotton, 186 yards per 100 g ball). Excellent drape for a flowing skirt, easy care, widely available. You will need approximately 8 balls in Yellow, 1 ball in Red, 1 ball in Green.
3. Drops Safran (100% cotton, 175 yards per 50 g ball). Slightly mercerized finish gives the butter yellow a soft sheen. You will need approximately 8 to 9 balls in color 02 (Yellow), 1 ball in 09 (Red), 1 ball in 17 (Green).
Substitution Note: Any smooth DK weight cotton or cotton-blend yarn will work. Avoid fuzzy or hairy fibers as they obscure the open mesh texture and will hide the cherry appliques.
Gauge (Critical for Fit)
With MC and G-6 / 4.0 mm hook in Mesh Stitch pattern:
18 stitches and 10 rows = 4 in / 10 cm, blocked
With MC and E-4 / 3.5 mm hook in single crochet:
20 stitches and 22 rows = 4 in / 10 cm, blocked
Gauge is mandatory for this pattern. An error of even half a stitch per inch across the circumference of the bodice will result in a dress that does not fit as written. Make a 6-inch swatch in mesh stitch with the G-6 hook, block it, and measure before beginning. I cannot stress this enough. Cotton has very little stretch, so accuracy matters.
Abbreviations Used (US Terms)
Special Stitches and Techniques
Mesh Stitch (Worked in Rounds)
The mesh stitch creates the open lattice texture of the dress body. It is an alternating pattern of double crochets and chain-1 spaces.
Setup Round: Work (dc, ch 1, sk 1 st) around. The stitch count for mesh stitch is always expressed as the number of dc-ch1 units, called mesh units.
Subsequent Rounds: Chain 3 (counts as first dc), turn or continue in round. Work dc into each ch-1 sp and ch 1 over each dc of previous round. The mesh "zippers" so that the chain spaces align vertically.
To increase in mesh stitch: Work (dc, ch 1, dc) into the same ch-1 space. This adds one mesh unit per increase point.
To decrease in mesh stitch: Work dc2tog over two adjacent dc posts, then ch 1. This removes one mesh unit per decrease point.
Shell Stitch (For Scalloped Hem)
Work 5 dc into the same stitch or space. This forms one shell.
Cherry Applique Instructions
Each cherry motif consists of two round berry shapes joined at a stem with a leaf cluster. You will make approximately 22 to 26 complete sets.
Berry (Make 2 Per Cherry Set Using Color A)
With E-4 hook and Color A, make a magic ring.
Round 1: Ch 1, work 6 sc into ring, pull ring closed. (6 sc)
Round 2: Work 2 sc into each st around. (12 sc)
Round 3: Work (sc, inc) 6 times. (18 sc)
Round 4: Work (sc in next 2 sts, inc) 6 times. (24 sc)
Round 5: Work sc in each st around. (24 sc)
Round 6: Work (sc in next 2 sts, sc2tog) 6 times. (18 sc)
Stuff lightly with yarn scraps or a small amount of polyfill if a dimensional effect is desired.
Round 7: Work (sc, sc2tog) 6 times. (12 sc)
Round 8: Work sc2tog 6 times. (6 sc)
Fasten off, leaving a 6-inch tail. Thread tail through remaining 6 sts and pull tight to close. Do not cut tail yet.
Stem and Leaf (Make 1 Per Cherry Set Using Color B)
With E-4 hook and Color B, ch 10.
Row 1: Starting in the 2nd ch from hook, sl st 4 (this creates the stem for the first cherry), ch 5 for leaf, starting in 2nd ch from hook: sc, hdc, dc, hdc into the next 4 chs, sl st back into the stem junction (this creates the first leaf), ch 5 for second leaf, starting in 2nd ch from hook: sc, hdc, dc, hdc, sl st back into the same junction, sl st 4 along the remaining ch sts (this creates the stem for the second cherry).
You now have a Y-shaped stem piece with a leaf cluster at the fork and two stem ends. Fasten off, leaving long tails at both stem ends for attaching berries.
Joining Cherry Set
Attach one berry to each stem end by threading the stem tail through the closed bottom of the berry. Stitch the berry firmly to the stem end using the berry’s own tail for security.
Pattern Instructions
Section 1: Bodice Front
Using MC and E-4 hook, ch 79.
Row 1 (RS): Sc in 2nd ch from hook and in each ch across. Turn. (78 sc)
Row 2 (WS): Ch 1, sc in each st across. Turn. (78 sc)
Row 3: Ch 1, sc in each st across. Turn. (78 sc)
Row 4: Ch 1, sc in each st across. Turn. (78 sc)
Begin V-Neck Shaping
The center front st is stitch 39 (between sts 39 and 40). You will work left and right bodice halves separately.
Row 5 (RS): Ch 1, sc in first 38 sts. Place a stitch marker in the last st worked. Leave remaining 40 sts unworked. Turn. (38 sc, left front)
Left Front
Row 6: Ch 1, sc across to last 2 sts, sc2tog. Turn. (37 sc)
Row 7: Ch 1, sc2tog, sc across. Turn. (36 sc)
Row 8: Ch 1, sc across to last 2 sts, sc2tog. Turn. (35 sc)
Row 9: Ch 1, sc2tog, sc across. Turn. (34 sc)
Row 10: Ch 1, sc across to last 2 sts, sc2tog. Turn. (33 sc)
Row 11: Ch 1, sc2tog, sc across. Turn. (32 sc)
Row 12: Ch 1, sc across to last 2 sts, sc2tog. Turn. (31 sc)
Row 13: Ch 1, sc across. Turn. (31 sc)
Row 14: Ch 1, sc across to last 2 sts, sc2tog. Turn. (30 sc)
Row 15: Ch 1, sc across. Turn. (30 sc)
Row 16: Ch 1, sc across to last 2 sts, sc2tog. Turn. (29 sc)
Row 17: Ch 1, sc across. Turn. (29 sc)
Row 18: Ch 1, sc across to last 2 sts, sc2tog. Turn. (28 sc)
Rows 19 to 22: Ch 1, sc across. Turn. (28 sc each row)
Fasten off, leaving a 12-inch tail for seaming shoulder.
Right Front
Return to Row 5. Skip the center stitch (stitch 39, which forms the base of the V), rejoin yarn in stitch 40.
Row 5 (RS, right front): Ch 1, sc in st 40 and across to end. Turn. (39 sc)
Row 6: Ch 1, sc2tog, sc across. Turn. (38 sc)
Row 7: Ch 1, sc across to last 2 sts, sc2tog. Turn. (37 sc)
Row 8: Ch 1, sc2tog, sc across. Turn. (36 sc)
Row 9: Ch 1, sc across to last 2 sts, sc2tog. Turn. (35 sc)
Row 10: Ch 1, sc2tog, sc across. Turn. (34 sc)
Row 11: Ch 1, sc across to last 2 sts, sc2tog. Turn. (33 sc)
Row 12: Ch 1, sc2tog, sc across. Turn. (32 sc)
Row 13: Ch 1, sc across. Turn. (32 sc)
Row 14: Ch 1, sc2tog, sc across. Turn. (31 sc)
Row 15: Ch 1, sc across. Turn. (31 sc)
Row 16: Ch 1, sc2tog, sc across. Turn. (30 sc)
Row 17: Ch 1, sc across. Turn. (30 sc)
Row 18: Ch 1, sc2tog, sc across. Turn. (29 sc)
Rows 19 to 22: Ch 1, sc across. Turn. (29 sc each row)
Note: Right front has 29 sts, left front has 28 sts due to the asymmetry of excluding the center V st. This is intentional.
Checkpoint 1: After completing both halves, each panel should measure approximately 6 in / 15 cm tall at the side edge and the neckline should form a clear V shape.
Section 2: Bodice Back
Using MC and E-4 hook, ch 79.
Row 1 (RS): Sc in 2nd ch from hook and in each ch across. Turn. (78 sc)
Rows 2 to 22: Ch 1, sc in each st across. Turn. (78 sc each row)
The back neckline is straight (no V shaping). Fasten off, leaving long tails for seaming.
Checkpoint 2: The bodice back should be a flat rectangle measuring approximately 17.5 in / 44 cm wide and 6 in / 15 cm tall.
Section 3: Shoulder Seams and Bodice Assembly
Align the bodice front right side with the bodice back right side (RS facing RS). Using yarn needle and the reserved tail, whip stitch the right shoulder seam: join the top 28 sts of the right back to the top 28 sts of the right front panel. Repeat for the left shoulder: join the top 29 sts of the left back to the top 29 sts of the left front panel.
After seaming, you will have approximately 21 sts at the center back neck open and the front neckline open in the V shape.
Side seams: With right sides together, sew the side edges of the bodice front and back together from the underarm down, leaving the bottom edge open. You will have approximately 2 in / 5 cm of open armhole above the side seam start on each side.
Checkpoint 3: The assembled bodice should be a fitted tube measuring approximately 34 in / 86 cm at the bust and 28 in / 71 cm at the lower edge.
Section 4: Waistband Transition Row
With RS facing and E-4 hook, join MC at the right side seam at the bottom edge of the bodice.
Round 1 (RS): Ch 1, sc evenly around the entire bottom circumference of the bodice. Work exactly 140 sc, join with sl st to first sc. (140 sc)
Round 2: Ch 1, sc in each st around. Join. (140 sc)
Round 3: Ch 1, sc in each st around. Join. (140 sc)
These three rounds form a tidy waistband border.
Section 5: Spaghetti Straps (Make 2)
With MC and E-4 hook, ch 60 (approximately 12 in / 30 cm).
Row 1: Sl st in 2nd ch from hook and in each ch across. (59 sl sts)
Fasten off, leaving long tails at both ends.
Pin each strap to the bodice front V-neck and back top edge, positioning each strap approximately 2.5 in / 6 cm from the center front and 2.5 in / 6 cm from the center back. Try on the bodice and adjust strap length before final attachment. Sew each strap end securely.
Section 6: Skirt
Switch to G-6 / 4.0 mm hook.
Setup Round (Mesh Foundation): With RS facing, join MC at the right side seam of the waistband. Ch 3 (counts as dc throughout skirt). Sk first st, (dc in next st, ch 1, sk 1 st) around, ending with ch 1. Join with sl st to top of beg ch-3. (140 sts total, 70 mesh units)
Skirt Round 1: Ch 3, (dc in ch-1 sp, ch 1) around. Join. (70 mesh units, 140 sts)
Skirt Round 2: Ch 3, (dc in ch-1 sp, ch 1) around. Join. (70 mesh units, 140 sts)
Skirt Increases
To build the full skirt silhouette, increase 8 mesh units every 4 rounds.
Skirt Round 3 (Increase): Place markers at 8 evenly spaced ch-1 sps. At each marked sp, work (dc, ch 1, dc, ch 1) into the sp. Work standard mesh in all other sps. Join. (78 mesh units, 156 sts)
Skirt Rounds 4 to 6: Work standard mesh around. Join. (78 mesh units, 156 sts each round)
Skirt Round 7 (Increase): Work increase at 8 evenly spaced points. (86 mesh units, 172 sts)
Skirt Rounds 8 to 10: Work standard mesh. Join. (86 mesh units, 172 sts each round)
Continue this pattern of increasing 8 mesh units every 4 rounds through Round 70. The complete increase schedule is:
Revised Round 70: Work increases at 4 evenly spaced points to reach 210 mesh units. (210 mesh units, 420 sts)
Checkpoint 4: The skirt should measure approximately 27 in / 69 cm from the waistband join, and the hem circumference should be approximately 92 in / 234 cm around.
Section 7: Scalloped Hem
Hem Round 1 (Transition): Ch 1, sc in each dc and each ch-1 sp around. Join. (420 sc)
Hem Round 2 (Scallop): Ch 1. (Sk 2 sts, 5 dc in next st, sk 2 sts, sl st in next st) repeat around. Join with sl st to first sc. (70 shells)
Fasten off and weave in end.
Section 8: Attaching Cherry Appliques
After blocking the dress, pin cherry sets to the body. The photographs show cherries distributed across the bodice (approximately 4 cherries), waistline area (approximately 4 cherries), and scattered across the skirt in a loose, random arrangement (approximately 14 to 18 cherries).
To attach: thread tail onto yarn needle, pass through the mesh holes at the attachment point several times, then run the tail along the wrong side for approximately 1 in / 2.5 cm and fasten securely.
Size Customization
For Size Medium (Bust 36 in / 91 cm):
Increase the bodice foundation chain by 10 sts: ch 89 for both front and back (yields 88 sc). Adjust shoulder seam stitches to 32 sts per side. Add 1 extra mesh unit to the setup round of the skirt (78 mesh units instead of 70).
For Size Large (Bust 38 in / 97 cm):
Foundation chain: ch 99 for both panels (yields 98 sc). Shoulder seams: 36 sts per side. Skirt setup: 86 mesh units (172 sts).
For a longer or shorter skirt: Each additional or removed 4-round mesh segment adds or removes approximately 1.6 in / 4 cm of skirt length.
Finishing and Blocking
Weave in all ends securely before blocking.
Fill a basin with cool to lukewarm water. Submerge the dress entirely and press gently to saturate. Do not wring or twist. Lift the dress out supporting its full weight and press gently to remove excess water. Roll in a clean towel and press again.
Lay flat on blocking mats. Pin the bodice to the correct bust and waist measurements. Smooth the skirt into an even A-line shape, pinning the hem scallops into gentle waves. Allow to dry completely, at least 24 hours.
Do not skip blocking. The mesh will open and soften, the scallops will set, and the overall drape will improve dramatically.
Care Instructions
Final Thoughts on This Butter Yellow Cherry Crochet Dress Pattern
You did it. You now have everything you need to create this absolutely stunning crochet dress from start to finish. The fitted bodice, the flowing mesh skirt, the adorable cherry appliques, and that perfect scalloped hem. This is the kind of project that makes all those hours of practice worth it.
Take your time with it. Enjoy the process. And when you finish, you will have a one of a kind handmade garment that nobody else on earth owns.
Thank you so much for choosing this pattern. I truly hope you love making it as much as I loved designing it. If you make this dress, I would absolutely love to see it! Tag me on Instagram or share a photo on Facebook. Seeing your finished projects is honestly the best part of sharing patterns.
If you found this butter yellow cherry crochet dress pattern helpful, save it to your Pinterest boards so you can find it when you are ready to start. And please leave a comment below if you give it a try. I read every single one and love hearing about your crochet adventures!