
I’ve been looking for the perfect summer dress pattern for ages. Something that feels handmade in the best way, with that beautiful vintage vibe that only crochet can deliver. This coastal blue striped crochet dress is exactly what I had in mind.
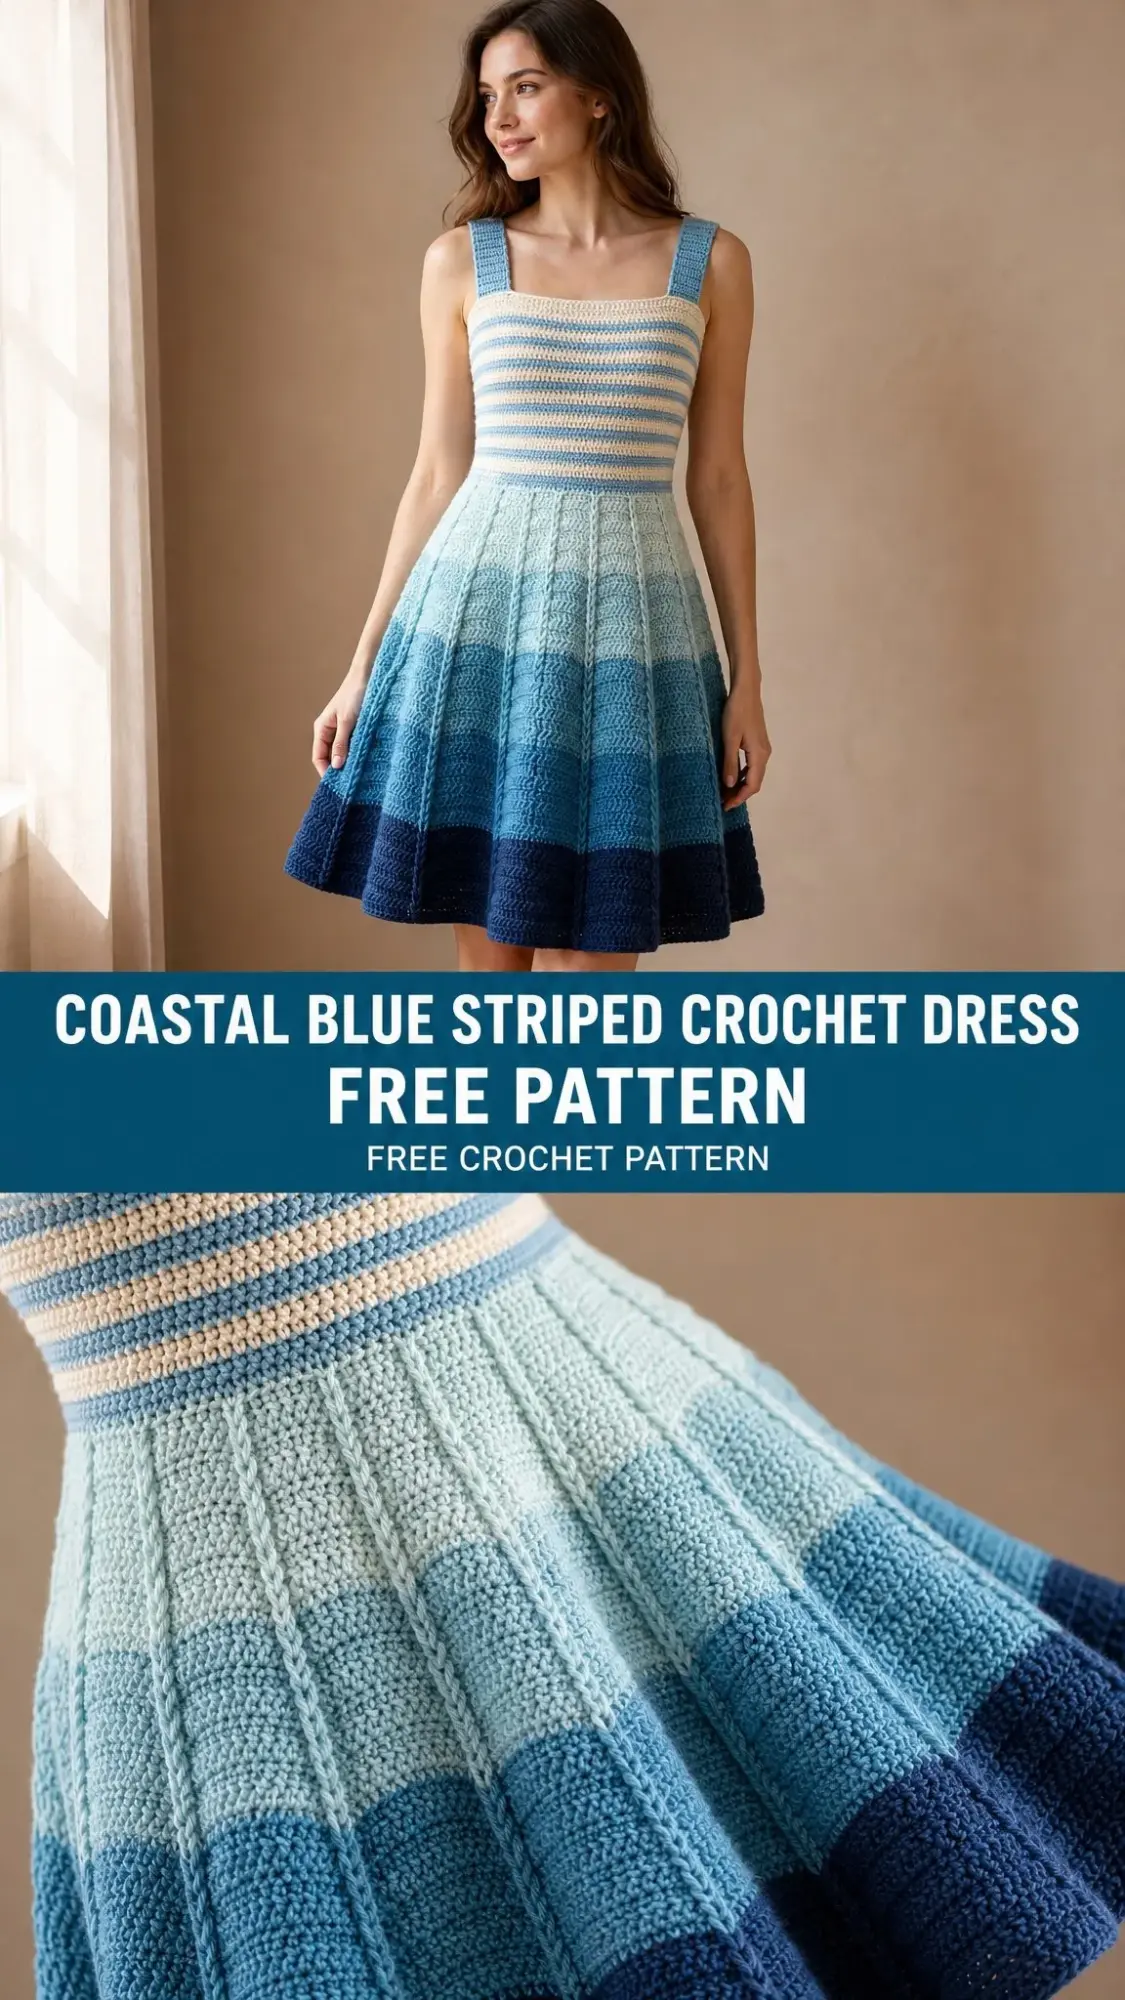
The ombre skirt sold me immediately. That gentle fade from pale aqua down to deep navy reminds me of ocean water getting deeper as you wade out from shore. Combined with the fitted striped bodice in cream and sky blue, it creates a piece that looks like it belongs in a boutique window.
This is an intermediate to advanced project, so it does require some experience. But if you can work in the round and manage color changes, you absolutely have the skills to make this gorgeous dress.
Why This Crochet Dress Pattern Stands Out
Let me walk you through what makes this design special. The construction is clever. You work the entire dress from the top down in one continuous piece, starting with the shoulder straps and ending at the hem. No seaming the bodice to the skirt. No awkward joins that might show.
The bodice uses single crochet (sc) throughout, which creates that dense, structured fabric you see in the striped section. Single crochet is simply inserting your hook into a stitch, yarning over, pulling through, yarning over again, and pulling through both loops on your hook. It gives you a tight, neat fabric perfect for a fitted garment.
The skirt switches to a shell and ridge stitch pattern that creates those beautiful wave-like vertical panels. As the skirt flares outward, these panels become more pronounced, giving the dress movement and visual interest.
The ombre effect in the skirt comes from five different yarn colors worked in zones. You start with pale aqua at the hip and gradually transition through medium blue until you reach deep navy at the hem. The result looks far more complicated than it actually is.
Skill Level and Time Commitment
I want to be honest with you. This dress requires 40 to 55 hours of work depending on your speed. It is not a weekend project. But spread across a few weeks of evening crafting, it becomes very doable.
You should be comfortable with:
If any of these make you nervous, practice on a smaller project first. A simple hat or cowl worked in the round will build your confidence.
Materials You Will Need
Yarn
This pattern uses DK weight yarn, which is also called Light #3 weight. DK creates crisp stitch definition while still having enough drape for a wearable garment.
You need five colors:
Total yarn needed: approximately 1800 yards / 1646 meters
Recommended Yarn Brands
1. Paintbox Yarns Simply DK in Cream, Pale Blue, Spearmint, Sailor Blue, and Navy Blue. This is 100% acrylic, affordable, and widely available with excellent stitch clarity.
2. Lion Brand Yarn 24/7 Cotton DK gives beautiful drape with a slight sheen that enhances the coastal look. Cotton also blocks beautifully.
3. Cascade Yarns 220 Superwash Sport in cream, baby blue, aqua, medium blue, and navy. This is a luxurious machine-washable merino option.
Any smooth DK weight yarn that achieves gauge will work. Avoid fuzzy or highly textured yarns as they will obscure the shell stitch pattern in the skirt.
Hook and Notions
Gauge (Do Not Skip This)
22 single crochet stitches = 4 inches / 10 cm
24 rows/rounds of single crochet = 4 inches / 10 cm
Work your gauge swatch in single crochet using your E-4 hook, then block it before measuring. Gauge is critical for this garment. A difference of even one stitch per 4 inches can change the finished bust measurement by over 2 inches.
For the skirt stitch pattern, one full 10-stitch repeat measures approximately 1.8 inches / 4.6 cm, and one round measures approximately 0.45 inches / 1.1 cm.
Finished Measurements
This pattern is written for size Small/Medium (US 6-8).
Abbreviations
Special Stitches Explained
Shell Stitch: Work 5 double crochet stitches into a single stitch. This creates a fan shape. The shell sits on top of skipped stitches from the round below and is flanked by single crochet on both sides.
Ridge Single Crochet: Work single crochet in the back loop only (BLO) of each stitch. This creates a horizontal ridge that adds texture between shell rounds.
Shell-Ridge Pattern (worked in the round over a multiple of 10 stitches):
Round A (shell round): Work \sc in next st, sk 2 sts, 5 dc in next st, sk 2 sts, sc in next st, sc in each of next 3 sts; rep from \ around. Join.
Round B (ridge round): sc in BLO of each st around. Join.
These two rounds form the full repeat. The shell round creates the fan texture while the ridge round creates horizontal definition. The vertical panel appearance develops as shells stack in alignment.
Stripe Sequence (bodice): Alternate 2 rounds Yarn A (Cream) then 2 rounds Yarn B (Sky Blue). Do not cut yarn between stripes. Carry the unused yarn loosely along the inside and pick up each color as needed.
Pattern Instructions
Straps (Make 2)
Using Yarn B and your E-4 hook, ch 11.
Row 1: sc in 2nd ch from hook and in each ch across. Turn. (10 sc)
Row 2: ch 1, sc in each st across. Turn. (10 sc)
Repeat Row 2 until the strap measures 10 inches / 25.5 cm from the foundation chain. Do not fasten off on the first strap. Fasten off on the second strap, leaving a 12-inch tail for joining.
Set both straps aside.
Joining Straps and Establishing Bodice
This step creates the foundation round by joining both straps into a continuous ring.
With Yarn B, hold the first strap with right side facing. Beginning at one long edge (this will be the front left), join yarn at the lower left corner of the strap.
Foundation Round: Work 10 sc across the lower edge of Strap 1, then work 10 sc across the lower edge of Strap 2, then work 47 sc across the back body edge connecting strap 2 back to strap 1, then work 47 sc across the front body edge, join with sl st to first sc. (114 sc)
The 47 stitches on front and back represent the body width between straps. The 10 stitches per strap sit at the shoulder. Total: 10 + 10 + 47 + 47 = 114.
Place a marker in the first stitch of the round.
Bodice
The bodice is worked in the round in single crochet using the 2-round stripe sequence with Yarn A and Yarn B.
Rnds 1-2 (Yarn A): sc in each st around. (114 sc each round)
Rnds 3-4 (Yarn B): sc in each st around. (114 sc each round)
Rnds 5-6 (Yarn A): sc in each st around. (114 sc each round)
Rnds 7-8 (Yarn B): sc in each st around. (114 sc each round)
Rnds 9-10 (Yarn A): sc in each st around. (114 sc each round)
Rnds 11-12 (Yarn B): sc in each st around. (114 sc each round)
Checkpoint: After Round 12, the bodice should measure approximately 2 inches / 5 cm from the foundation round. Stripes should be clearly visible and even.
Rnds 13-14 (Yarn A): sc in each st around. (114 sc each round)
Rnds 15-16 (Yarn B): sc in each st around. (114 sc each round)
Rnds 17-18 (Yarn A): sc in each st around. (114 sc each round)
Rnds 19-20 (Yarn B): sc in each st around. (114 sc each round)
Rnds 21-22 (Yarn A): sc in each st around. (114 sc each round)
Rnds 23-24 (Yarn B): sc in each st around. (114 sc each round)
Checkpoint: After Round 24, the bodice should measure approximately 4 inches / 10 cm from the foundation round.
Waist Shaping (Decrease Rounds)
Continue in Yarn B. Waist shaping is achieved over 8 rounds with evenly spaced decreases.
Rnd 25 (Yarn B): \sc in each of next 17 sts, sc2tog; rep from \ around. (108 sc)
Rnd 26 (Yarn B): sc in each st around. (108 sc)
Rnd 27 (Yarn A): \sc in each of next 16 sts, sc2tog; rep from \ around. (102 sc)
Rnd 28 (Yarn A): sc in each st around. (102 sc)
Rnd 29 (Yarn B): \sc in each of next 15 sts, sc2tog; rep from \ around. (96 sc)
Rnd 30 (Yarn B): sc in each st around. (96 sc)
Rnd 31 (Yarn A): sc in each st around. (96 sc)
Rnd 32 (Yarn A): sc in each st around. (96 sc)
Checkpoint: After Round 32, the piece should measure approximately 6 inches / 15 cm from the foundation round. The waist should pull in noticeably.
Hip Transition (Increase Rounds)
Increase from 96 stitches to 120 stitches to create the hip flare and establish the multiple of 10 needed for the skirt pattern.
Rnd 33 (Yarn B): \sc in each of next 15 sts, sc-inc in next st; rep from \ around. (102 sc)
Rnd 34 (Yarn B): \sc in each of next 16 sts, sc-inc in next st; rep from \ around. (108 sc)
Rnd 35 (Yarn A): \sc in each of next 17 sts, sc-inc in next st; rep from \ around. (114 sc)
Rnd 36 (Yarn A): \sc in each of next 18 sts, sc-inc in next st; rep from \ around. (120 sc)
Checkpoint: After Round 36, confirm your stitch count is 120 (divisible by 10 for 12 repeats). The hip section should measure approximately 8 inches / 20 cm from the foundation round.
Skirt
The skirt uses the Shell-Ridge Pattern. Starting stitch count: 120 sc (12 repeats of 10 stitches each).
Skirt Color Zones:
Color Transition Tip: For a smooth ombre, alternate one round of the current color and one round of the next color for 4 rounds before committing fully to the new color.
Fasten off Yarn A. Join Yarn C.
Rnd 37 (shell round, Yarn C): \sc in next st, sk 2 sts, 5 dc in next st, sk 2 sts, sc in next st, sc in each of next 3 sts; rep from \ 11 more times, sl st to first sc. (120 sts)
Rnd 38 (ridge round, Yarn C): sc in BLO of each st around. (120 sc)
Rnds 39-41: Continue alternating shell and ridge rounds. (120 sts)
Rnd 42 (increase ridge round, Yarn C): sc in BLO of each st around, working sc-inc in the first st of each repeat 12 times. (132 sc)
Rnd 43 (shell round, Yarn C): \sc in next st, sk 2 sts, 5 dc in next st, sk 2 sts, sc in next st, sc in each of next 4 sts; rep from \ 11 more times, join. (132 sts)
Continue working the shell-ridge pattern through all five color zones, adding increase rounds every 6th round. Each increase round adds 12 stitches (one per repeat), and you adjust the travel stitches accordingly.
Continue until the skirt measures 20 inches from the waist or desired length.
Finishing
Weave in all ends securely using your tapestry needle. Block the entire dress on blocking mats, pinning the skirt into a circle to open up the stitch pattern. Allow to dry completely before wearing.
For the neckline and armhole edges, work a slip stitch border for a clean finish if desired.
Tips for Success
Take your time with color changes. The ombre effect is what makes this dress stunning. Rushing the transitions will show.
Count your stitches regularly. The fitted bodice requires accurate stitch counts. Check at every checkpoint noted in the pattern.
Block generously. This dress transforms with blocking. The shell pattern in the skirt will open up beautifully.
Try it on as you go. Once you finish the bodice, slip it over your head to check the fit before committing to the skirt.
Final Thoughts on This Coastal Blue Striped Crochet Dress
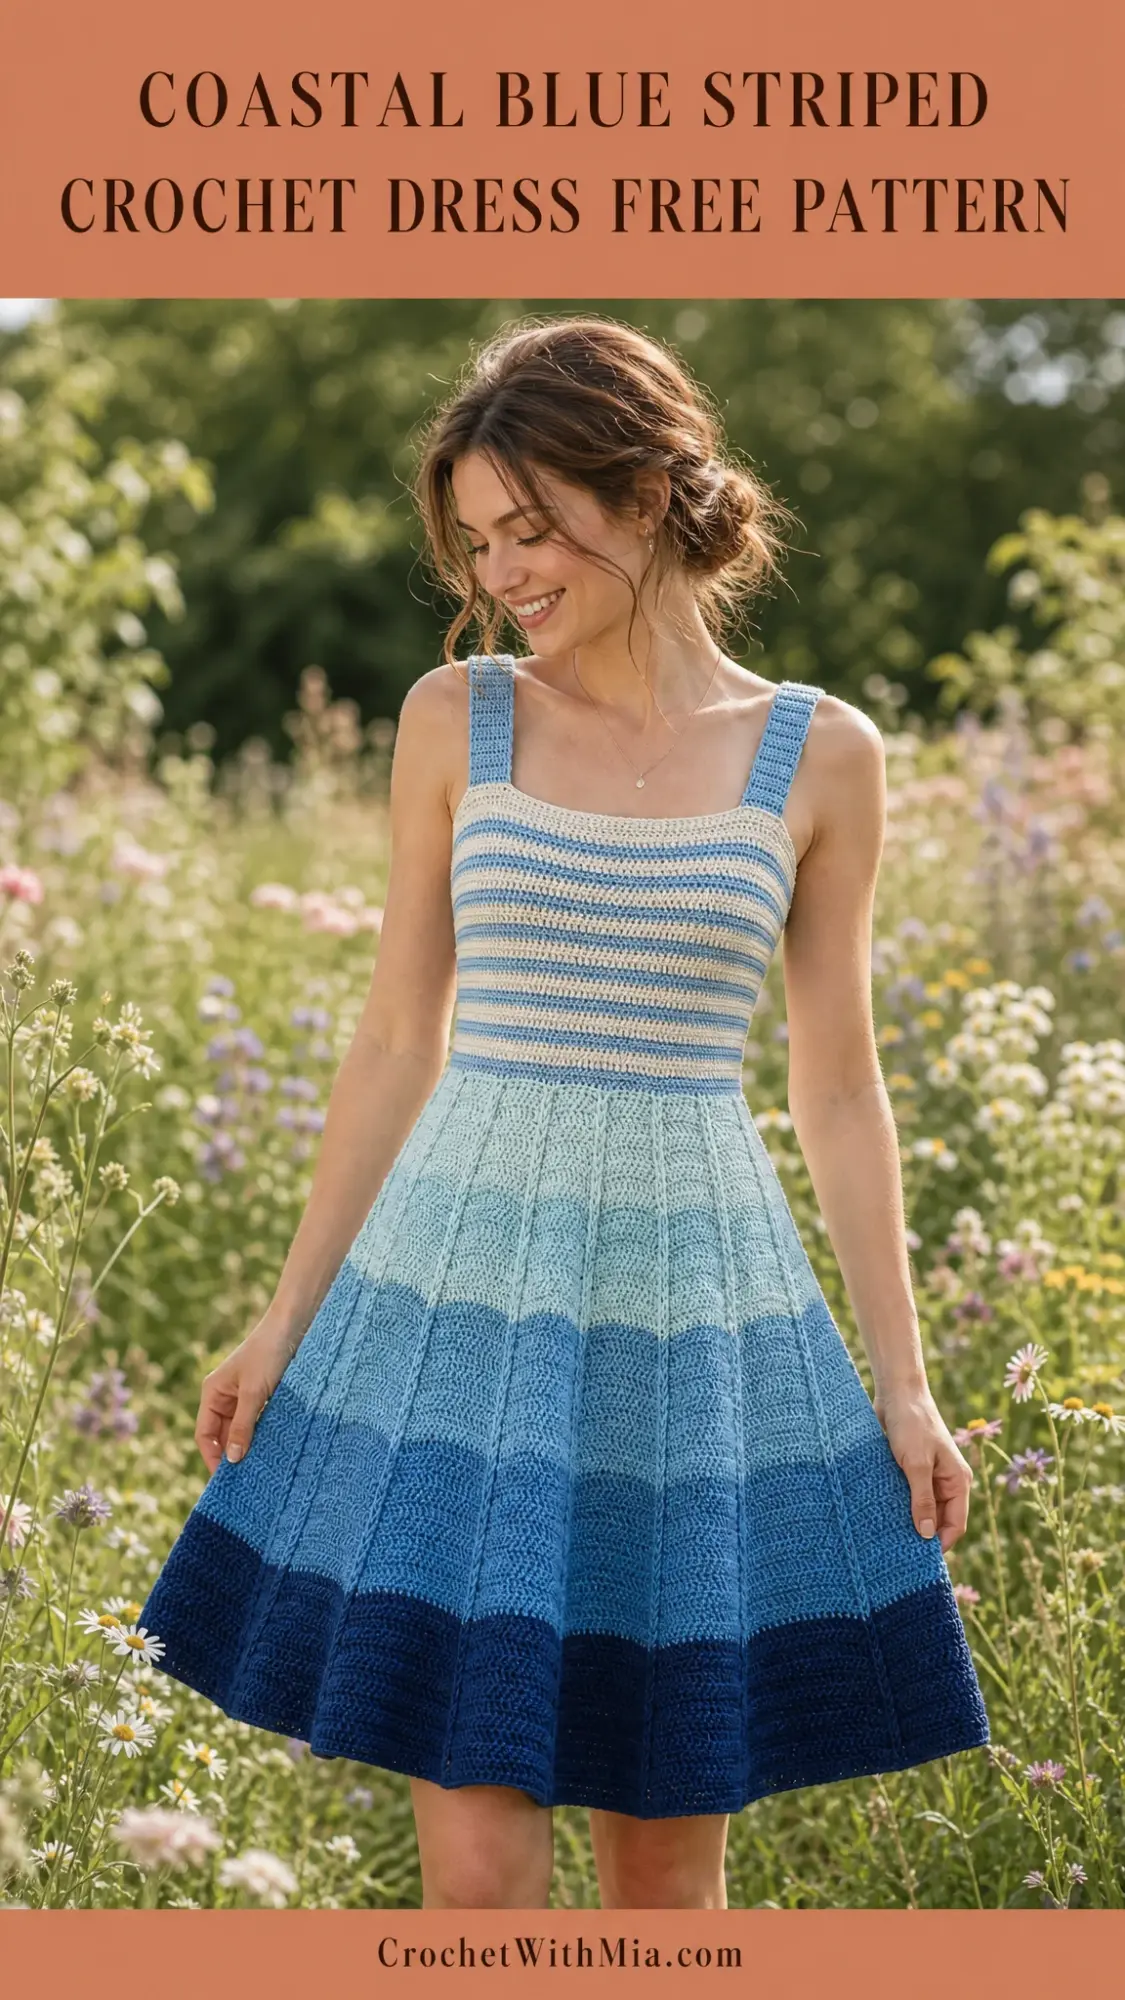
This handmade crochet dress is truly a statement piece. The combination of the structured striped bodice with the flowing ombre skirt creates something that looks like it came from a designer collection. Yes, it takes time. Yes, it requires focus. But when you slip on a dress you made entirely by hand, the feeling is absolutely worth every hour.
The coastal color palette works beautifully for summer events, beach weddings, or just feeling fancy on a Tuesday. Pair it with sandals for casual wear or dress it up with heels for something special.
Thank you so much for choosing this pattern for your next project. I hope you love making it as much as I loved designing it. If you complete your dress, I would absolutely love to see it! Tag me on Instagram or share a photo on Facebook. Nothing makes my day like seeing your finished makes.
If this pattern caught your eye, go ahead and save it to your Pinterest boards so you can find it when you are ready to start. And please drop a comment below if you make this dress. I read every single one and would love to hear how it turns out for you!