
This is THE dress project you have been waiting for. SERIOUSLY. If you have ever wanted to create a stunning handmade garment that looks straight out of a boutique, this crochet sundress delivers in the most satisfying way possible. We are talking a gorgeous sweetheart neckline, delicate tie straps with bows, and a flowy granny square skirt that moves beautifully. Yes, it takes some time (40 to 60 hours for the dedicated crocheter), but every single hour is worth it when you slip this beauty on.
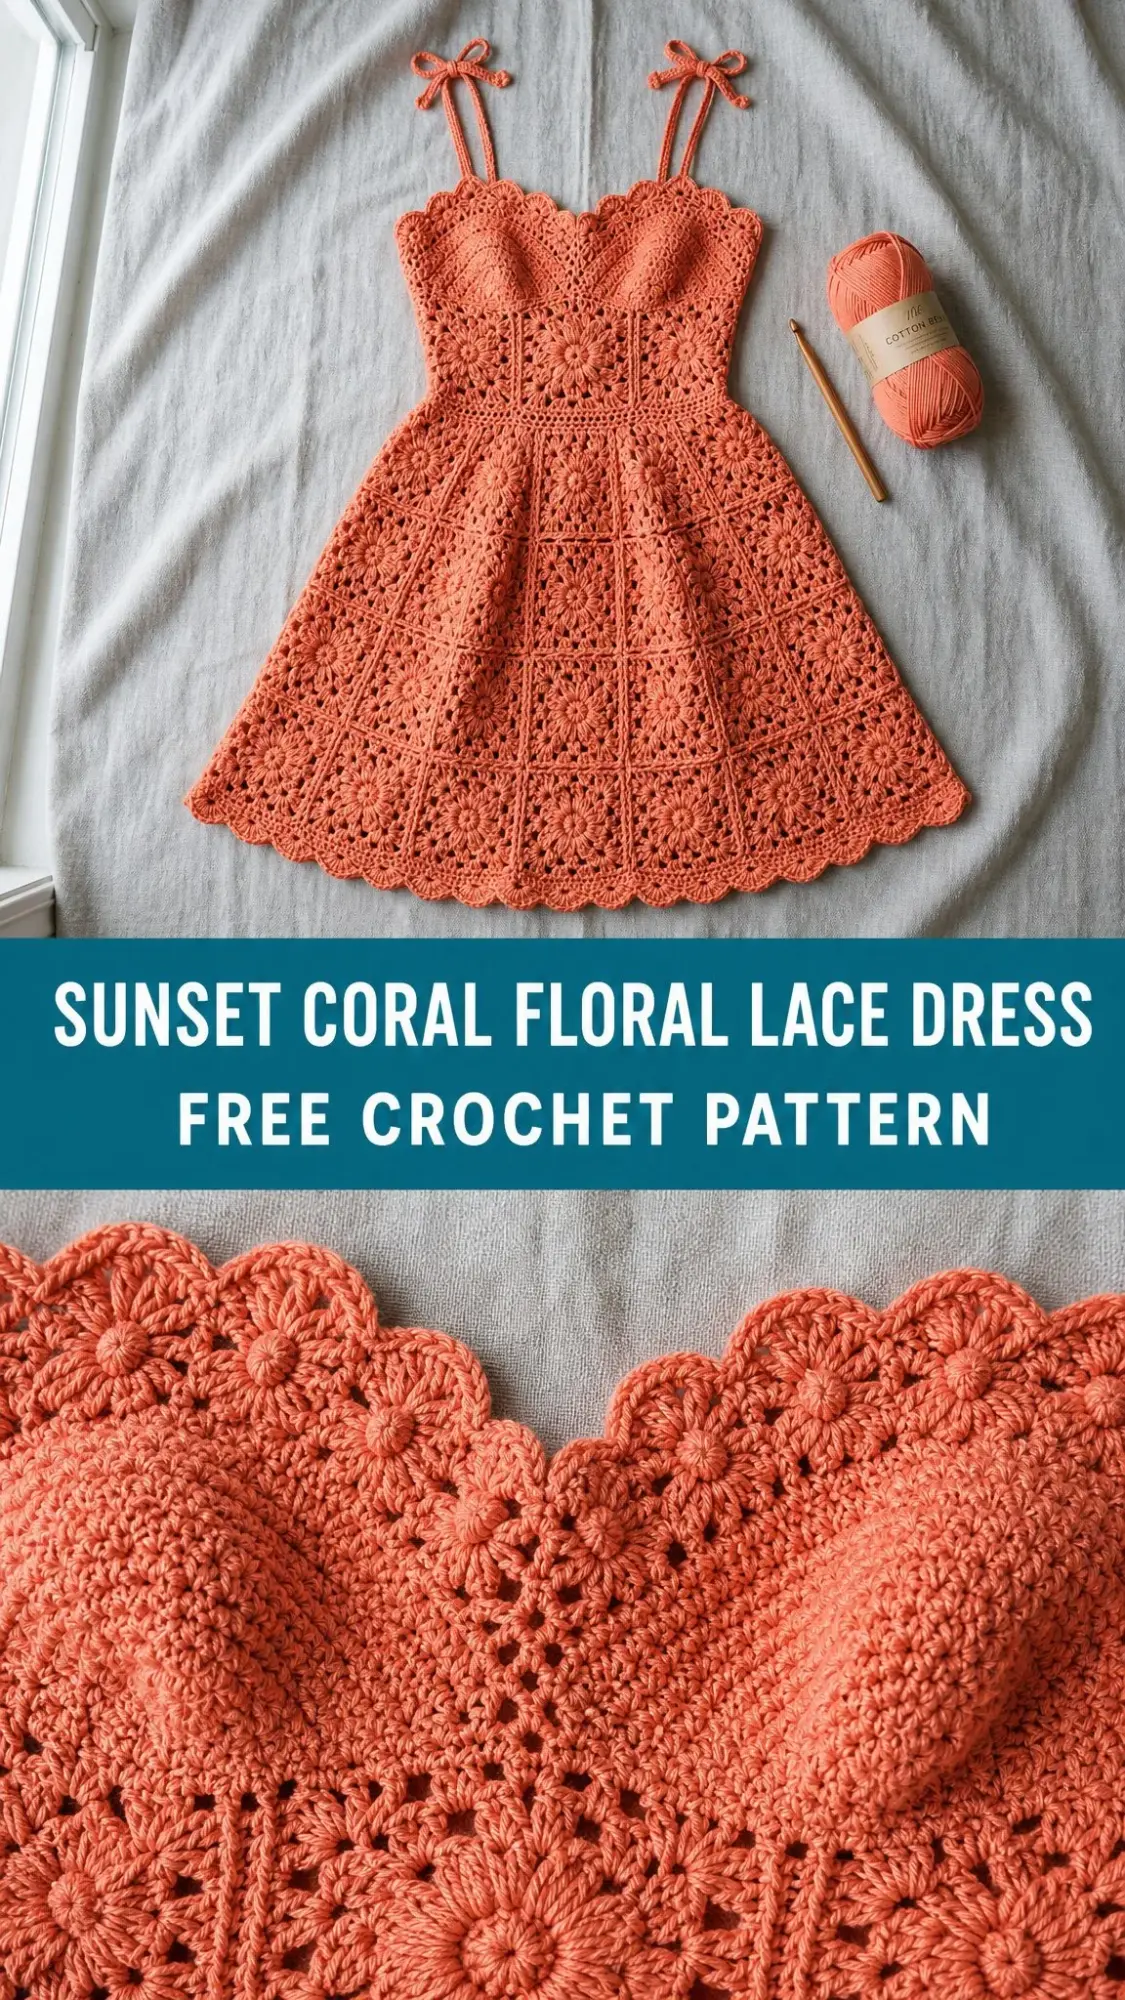
I cannot stop staring at this finished piece. The warm coral color, the scalloped edging, the way those granny squares create that perfect A-line silhouette. It is the kind of project that makes people stop you on the street and ask "Did you MAKE that?" And you get to say yes.
This crochet pattern uses basic stitches you probably already know. Single crochet, double crochet, chains, and slip stitches combine to create something that looks incredibly complex but is actually just methodical and straightforward. If you can make a granny square and follow row-by-row instructions, you can absolutely make this dress.
Why This Crochet Dress Pattern Works So Well
The construction of this sundress is genuinely clever. You work the bodice flat in rows from the top down, shaping each cup of the sweetheart neckline separately before joining them together. Then you create granny square motifs and join them as you go to build the skirt. The result is a fitted bodice that flows into a romantic, swishy skirt with beautiful drape.
The negative ease (meaning the garment is slightly smaller than your body measurements) in the bodice creates that lovely fitted look without any zippers or buttons. Cotton yarn has just enough give to make this work comfortably.
Materials You Will Need
Gather these supplies before you begin:
Yarn: DK weight (CYCA #3) cotton or cotton-blend yarn, approximately 1,400 yards or 1,280 meters total
Recommended Yarn Options:
Hook: US size E-4 (3.5 mm)
Notions: Yarn needle, scissors, stitch markers (6), measuring tape, blocking mats and pins
Important yarn note: Choose a smooth, tightly plied cotton yarn. Avoid fluffy or loosely spun yarns because the open lace structure of the motifs needs stitch clarity to look its best.
Gauge Information
Getting gauge right is critical for a fitted garment like this dress.
Granny Square Motif: One motif worked through Round 3 should measure 3 inches by 3 inches (7.5 cm by 7.5 cm) after blocking.
Bodice Fabric: 20 stitches by 22 rows equals 4 inches by 4 inches (10 cm by 10 cm) after blocking.
Please swatch both before beginning. If your gauge is off, try going up or down a hook size.
Finished Measurements
This pattern is written for size Small (US 4-6):
Abbreviations and Stitch Definitions
Let me break down every stitch and term you will encounter:
ch = chain: Wrap yarn over hook, pull through loop on hook. This creates the foundation for most crochet work.
sl st = slip stitch: Insert hook into stitch, yarn over, pull through both the stitch and the loop on your hook in one motion. Used for joining and moving across stitches without adding height.
sc = single crochet: Insert hook into stitch, yarn over, pull up a loop (2 loops on hook), yarn over, pull through both loops. Creates a short, tight stitch.
dc = double crochet: Yarn over, insert hook into stitch, yarn over, pull up a loop (3 loops on hook), yarn over, pull through 2 loops, yarn over, pull through remaining 2 loops. Creates a taller stitch with nice drape.
hdc = half double crochet: Yarn over, insert hook into stitch, yarn over, pull up a loop (3 loops on hook), yarn over, pull through all 3 loops at once.
sc2tog = single crochet two together (decrease): Insert hook into next stitch, yarn over, pull up loop. Insert hook into following stitch, yarn over, pull up loop. Yarn over, pull through all 3 loops on hook. This decreases by 1 stitch.
ch-sp = chain space: The gap or hole created by a chain in the previous row or round. You work into this space, not into the chain stitches themselves.
sk = skip: Pass over the indicated stitch without working into it.
RS = right side: The front or public-facing side of your work.
WS = wrong side: The back or hidden side of your work.
yo = yarn over: Wrap the yarn around your hook from back to front.
inc = increase: Work 2 stitches into 1 stitch to add stitches.
rep = repeat: Do the bracketed or described sequence again.
beg = beginning
rnd = round
st(s) = stitch(es)
sp = space
rem = remaining
tog = together
Special Stitches and Techniques
Granny Square Motif (GSM)
Each motif is worked in the round from a central ring. These form the entire skirt of the dress.
Round 1: Make a magic ring (or chain 4, slip stitch to join into ring). Chain 3 (counts as first double crochet), work 2 double crochet into ring, chain 2, (3 double crochet into ring, chain 2) 3 times. Slip stitch to top of beginning chain-3 to join. (4 clusters of 3 double crochet, 4 chain-2 corner spaces)
Round 2: Slip stitch into next 2 stitches and into chain-2 corner space. Chain 3 (counts as first double crochet), work 2 double crochet in same space, chain 1, (3 double crochet, chain 2, 3 double crochet) in next corner space, chain 1. Repeat from parentheses 2 more times, then work (3 double crochet, chain 2) in first corner space (the same one you began in), slip stitch to top of beginning chain-3. (8 clusters of 3 double crochet, 4 chain-2 corner spaces, 4 chain-1 side spaces)
Round 3: Slip stitch into next 2 stitches and into chain-2 corner space. Chain 3 (counts as first double crochet), work 2 double crochet in same space, chain 1, 3 double crochet in next chain-1 side space, chain 1, (3 double crochet, chain 2, 3 double crochet) in corner space, chain 1, 3 double crochet in chain-1 side space, chain 1. Repeat from parentheses around, ending with (3 double crochet, chain 2) in first corner space, slip stitch to top of beginning chain-3. (12 clusters of 3 double crochet, 4 chain-2 corner spaces, 8 chain-1 side spaces)
Your finished Round 3 motif should measure 3 inches by 3 inches (7.5 cm by 7.5 cm) after blocking.
Join-As-You-Go (JAYG)
When attaching adjacent motifs during Round 3, replace the chain 2 at corners or the chain 1 at sides with: chain 1, slip stitch into corresponding space of neighboring motif, chain 1 (for corner joins) or slip stitch only into neighboring space (for side joins). This creates a flat, seamless join without cutting yarn.
Shell Stitch
Work (double crochet, chain 1, double crochet, chain 1, double crochet) all into the same stitch or space. This creates one shell unit.
Scallop Edging
Slip stitch into first stitch. Chain 1. (Single crochet in next stitch, skip 1 stitch, 5 double crochet in next stitch, skip 1 stitch) repeat around. Slip stitch to first single crochet to join.
Pattern Notes Before You Begin
The bodice is worked flat in rows from the top down, beginning with the sweetheart neckline. Each cup of the sweetheart is shaped separately and then joined. After the bodice is complete, motifs are joined to the lower edge of the bodice to form the waist and skirt.
The right side is always facing for the motifs (worked in the round). Bodice rows are worked back and forth, turning at the end of each row.
Stitch counts are given in parentheses at the end of each row or round.
Place stitch markers at the center front of the neckline and at each side seam point for easier shaping reference.
The dress has no zipper or button closure. The bodice is designed with approximately 1 to 2 inches of negative ease at the bust, and the open-stitch fabric provides stretch.
Chain 3 at the beginning of a double crochet row or round counts as the first double crochet unless otherwise stated.
All edgings are worked with the right side facing.
Step by Step Crochet Pattern Instructions
Section 1: Bodice Left Cup
The sweetheart neckline is formed by working two separate cups and joining them at center front.
Foundation Row (Left Cup): Chain 18. Single crochet in 2nd chain from hook and in each chain across. Turn. (17 sc)
Row 1 (WS): Chain 1. Single crochet in first stitch, (double crochet in next stitch, single crochet in next stitch) across. Turn. (17 sts)
Row 2 (RS): Chain 1. Single crochet in each stitch across. Turn. (17 sc)
Row 3 (WS): Repeat Row 1. (17 sts)
Row 4 (RS): Chain 1. Single crochet in first stitch. Increase (2 single crochet) in next stitch. Single crochet across to last 2 stitches. Increase in next stitch. Single crochet in last stitch. Turn. (19 sc)
Row 5 (WS): Repeat Row 1. (19 sts)
Row 6 (RS): Chain 1. Single crochet across. Turn. (19 sc)
Row 7 (WS): Repeat Row 1. (19 sts)
Row 8 (RS): Chain 1. Single crochet in first stitch. Increase in next stitch. Single crochet across to last 2 stitches. Increase in next stitch. Single crochet in last stitch. Turn. (21 sc)
Row 9 (WS): Repeat Row 1. (21 sts)
Row 10 (RS): Chain 1. Single crochet across. Turn. (21 sc)
Row 11 (WS): Repeat Row 1. (21 sts)
Row 12 (RS): Chain 1. Single crochet in first stitch. Increase in next stitch. Single crochet across to last 2 stitches. Increase in next stitch. Single crochet in last stitch. Turn. (23 sc)
Do not fasten off. Set Left Cup aside with yarn attached.
Section 2: Bodice Right Cup
Foundation Row (Right Cup): Attach yarn. Chain 18. Single crochet in 2nd chain from hook and in each chain across. Turn. (17 sc)
Work Rows 1 through 12 exactly as written for Left Cup. (23 sc)
Do not fasten off.
Section 3: Joining Cups and Working Full Bodice
With right side facing and yarn still attached to Right Cup, you will now join both cups into one working row.
Join Row (RS): Chain 1. Single crochet across Right Cup (23 sts). Chain 2. Working across Left Cup, single crochet across (23 sts). Turn. (48 sc plus 2 ch = 50 working sts)
The chain-2 at center front forms the V-point of the sweetheart neckline. On the following row, work 2 single crochet into this chain-2 space.
Row 13 (WS): Chain 1. (Single crochet in next stitch, double crochet in next stitch) across to chain-2 space. Work 2 single crochet in chain-2 space. (Single crochet in next stitch, double crochet in next stitch) across. Turn. (50 sts)
Row 14 (RS): Chain 1. Single crochet across. Turn. (50 sc)
Row 15 (WS): Chain 1. (Single crochet in next stitch, double crochet in next stitch) across. Turn. (50 sts)
Row 16 (RS): Chain 1. Single crochet across. Turn. (50 sc)
Row 17 (WS): Chain 1. (Single crochet in next stitch, double crochet in next stitch) across. Turn. (50 sts)
Row 18 (RS): Chain 1. Single crochet across. Turn. (50 sc)
Begin Waist Shaping
Row 19 (WS): Chain 1. (Single crochet in next stitch, double crochet in next stitch) 5 times. Sc2tog. (Single crochet in next stitch, double crochet in next stitch) 9 times. Sc2tog. (Single crochet in next stitch, double crochet in next stitch) 5 times. Turn. (48 sts)
Row 20 (RS): Chain 1. Single crochet across. Turn. (48 sc)
Row 21 (WS): Chain 1. (Single crochet in next stitch, double crochet in next stitch) 4 times. Sc2tog. (Single crochet in next stitch, double crochet in next stitch) 9 times. Sc2tog. (Single crochet in next stitch, double crochet in next stitch) 4 times. Turn. (46 sts)
Row 22 (RS): Chain 1. Single crochet across. Turn. (46 sc)
Row 23 (WS): Chain 1. (Single crochet in next stitch, double crochet in next stitch) 4 times. Sc2tog. (Single crochet in next stitch, double crochet in next stitch) 8 times. Sc2tog. (Single crochet in next stitch, double crochet in next stitch) 4 times. Turn. (44 sts)
Row 24 (RS): Chain 1. Single crochet across. Turn. (44 sc)
Row 25 (WS): Chain 1. (Single crochet in next stitch, double crochet in next stitch) 3 times. Sc2tog. (Single crochet in next stitch, double crochet in next stitch) 8 times. Sc2tog. (Single crochet in next stitch, double crochet in next stitch) 3 times. Turn. (42 sts)
Row 26 (RS): Chain 1. Single crochet across. Turn. (42 sc)
Row 27 (WS): Chain 1. (Single crochet in next stitch, double crochet in next stitch) 3 times. Sc2tog. (Single crochet in next stitch, double crochet in next stitch) 7 times. Sc2tog. (Single crochet in next stitch, double crochet in next stitch) 3 times. Turn. (40 sts)
Row 28 (RS): Chain 1. Single crochet across. Turn. (40 sc)
Checkpoint: After completing Row 28, your bodice front panel should measure approximately 6 inches (15 cm) tall from the foundation chain and approximately 8 inches (20 cm) wide.
Section 4: Bodice Back Panel
The back is worked identically to the front bodice panels but without the sweetheart cup shaping. The back neckline is a simple straight edge.
Foundation Row (Back): Chain 49. Single crochet in 2nd chain from hook and in each chain across. Turn. (48 sc)
Row 1 (WS): Chain 1. (Single crochet in next stitch, double crochet in next stitch) across. Turn. (48 sts)
Row 2 (RS): Chain 1. Single crochet across. Turn. (48 sc)
Rows 3 through 18: Continue alternating wrong side textured rows and right side single crochet rows as established (9 complete repetitions, ending after a right side row). (48 sts throughout)
Begin Back Waist Shaping
Row 19 (WS): Chain 1. (Single crochet in next stitch, double crochet in next stitch) 5 times. Sc2tog. (Single crochet in next stitch, double crochet in next stitch) 9 times. Sc2tog. (Single crochet in next stitch, double crochet in next stitch) 5 times. Turn. (46 sts)
Row 20 (RS): Chain 1. Single crochet across. Turn. (46 sc)
Row 21 (WS): Chain 1. (Single crochet in next stitch, double crochet in next stitch) 4 times. Sc2tog. (Single crochet in next stitch, double crochet in next stitch) 9 times. Sc2tog. (Single crochet in next stitch, double crochet in next stitch) 4 times. Turn. (44 sts)
Row 22 (RS): Chain 1. Single crochet across. Turn. (44 sc)
Row 23 (WS): Chain 1. (Single crochet in next stitch, double crochet in next stitch) 4 times. Sc2tog. (Single crochet in next stitch, double crochet in next stitch) 8 times. Sc2tog. (Single crochet in next stitch, double crochet in next stitch) 4 times. Turn. (42 sts)
Row 24 (RS): Chain 1. Single crochet across. Turn. (42 sc)
Row 25 (WS): Chain 1. (Single crochet in next stitch, double crochet in next stitch) 3 times. Sc2tog. (Single crochet in next stitch, double crochet in next stitch) 8 times. Sc2tog. (Single crochet in next stitch, double crochet in next stitch) 3 times. Turn. (40 sts)
Row 26 (RS): Chain 1. Single crochet across. Turn. (40 sc)
Row 27 (WS): Chain 1. (Single crochet in next stitch, double crochet in next stitch) 3 times. Sc2tog. (Single crochet in next stitch, double crochet in next stitch) 7 times. Sc2tog. (Single crochet in next stitch, double crochet in next stitch) 3 times. Turn. (38 sts)
Row 28 (RS): Chain 1. Single crochet across. Turn. (38 sc)
Fasten off and weave in ends.
The back panel has 2 fewer stitches at the waist than the front (38 vs 40 stitches) to account for a slightly slimmer back panel.
Section 5: Assembling the Bodice
With right sides together, align front and back bodice panels. Using a yarn needle and a length of matching yarn, seam the two side edges of the bodice using a whip stitch or mattress stitch. Leave the top (neckline) and bottom (waist) edges open.
When laid flat, the assembled bodice tube measures approximately 6 inches (15 cm) tall and 15 inches (38 cm) wide when flat (30 inches / 76 cm circumference).
Checkpoint: The assembled bodice tube should fit snugly around the bust and taper noticeably at the waist. Circumference at waist should be approximately 24 inches (61 cm).
Section 6: Neckline Edging and Sweetheart Scallop
With right side facing and starting at right shoulder edge, attach yarn at the top right edge of the front bodice.
Round 1: Chain 1. Single crochet evenly around the entire neckline edge, working 1 single crochet per row end along the sides and 1 single crochet per stitch along the horizontal edges. At the center V of the sweetheart, work sc2tog to pull the point inward. Join with slip stitch to first single crochet.
The exact stitch count around the neckline will vary slightly based on individual tension, but aim for a count divisible by 4 to accommodate the scallop pattern. Approximate count: 80 single crochet.
Round 2 (Scallop): Slip stitch in first stitch. (Single crochet in next stitch, skip 1 stitch, 5 double crochet in next stitch, skip 1 stitch) repeat around. Slip stitch to first single crochet to join. Fasten off. (20 scallop shells)
Section 7: Shoulder Tie Straps (Make 2)
Each strap is a double chain worked as follows:
Chain 80. Slip stitch back along the bottom of the chain, working 1 slip stitch into each chain from hook back to start, creating a cord. (80 chain / 80 slip stitch cord)
Fold the cord in half and attach the folded midpoint to the shoulder point of the bodice with 3 slip stitches (creating a looped attachment point). Tie the two free ends of the cord together into a bow. Trim ends if needed. Repeat for second shoulder strap.
Section 8: Granny Square Motifs for Skirt
The skirt is composed of joined granny square motifs using the join-as-you-go method. Each motif measures 3 inches by 3 inches (7.5 cm by 7.5 cm) after blocking.
The skirt is arranged in horizontal rows of motifs, with each row having more motifs than the row above to create the A-line flare.
Skirt Motif Layout (for size Small):
Total motifs: 10 + 12 + 14 + 16 + 18 + 18 = 88 motifs
Checkpoint: Ten motifs joined in a ring at the waist creates a circumference of 30 inches (76 cm), matching the bodice waist circumference.
Checkpoint: Eighteen motifs joined in a ring at the hem creates a circumference of 54 inches (137 cm), matching the stated finished hem circumference.
Work each granny square motif through Round 3 as written in the Special Stitches section. Join motifs using the JAYG method.
When beginning Row B, attach the first motif of Row B to the bottom edge of Row A motifs by joining into the lower chain-2 corners and chain-1 side spaces of Row A motifs during Round 3 of each Row B motif.
Continue in this manner for Rows C through F.
To add motifs at the sides for each expanding row, the extra motifs are added at evenly spaced intervals around the ring. For example, from Row A (10 motifs) to Row B (12 motifs), add 2 extra motifs distributed evenly (one added every 5th position).
Section 9: Attaching Skirt to Bodice
With right side facing and the assembled bodice on a flat surface, hold the top ring of Row A motifs (waist ring) against the lower edge of the bodice.
Using a yarn needle and matching yarn, whip stitch the top edge of the Row A motif ring to the bottom edge of the bodice, aligning the 10-motif ring (30 inches / 76 cm) with the bodice waist (24 inches / 61 cm). Ease in any slight difference by pinching small folds at even intervals as you seam.
Alternatively, work a joining round: With right side of bodice facing, attach yarn to the lower edge of the bodice at a side seam. Chain 1. Single crochet evenly around the lower bodice edge (approximately 80 single crochet around). Then, slip stitch into the top chain space of the first Row A motif, single crochet in next bodice stitch, slip stitch into next motif space, continuing around to join the motif ring to the bodice in one smooth round. Fasten off.
Section 10: Hem Scallop Edging
With right side facing, attach yarn to any bottom corner chain-2 space of a Row F motif.
Round 1: Chain 1. Single crochet into each chain space and double crochet cluster top across all 18 motifs of Row F, working (single crochet, chain 1, single crochet) into each corner chain-2 space. Join with slip stitch to first single crochet. (Approximately 144 single crochet around the hem)
Round 2 (Scallop): Slip stitch in first stitch. (Single crochet in next stitch, skip 1 stitch, 5 double crochet in next stitch, skip 1 stitch) repeat around. Slip stitch to first single crochet to join. Fasten off. (Approximately 36 scallop shells)
Adjust the single crochet count in Round 1 as needed to reach a count divisible by 4 before beginning the scallop. Add or omit single crochet stitches in the joining spaces between motifs.
Section 11: Waist Accent Row (Optional)
For a more defined waist join between bodice and skirt, work one additional round of single crochet with chain 1 spacing across the motif join line as follows:
With right side facing, attach yarn at side seam. Chain 3 (counts as double crochet). (Skip 1 stitch, double crochet in next stitch, chain 1) around. Join with slip stitch to top of beginning chain-3. Fasten off. This creates a subtle open-stitch accent row at the waist transition.
Size Customization Tips
To make a larger size, add stitches to the foundation of each bodice cup in increments of 2 stitches (for example, chain 20 for a size Medium cup). Each additional 2 stitches at the foundation will add approximately 0.4 inches (1 cm) to the bust circumference per cup (0.8 inches / 2 cm total). Scale the waist decrease rows to remove 2 to 4 extra stitches over the same number of rows.
For a longer bodice (tall torsos), add 2 to 4 additional plain rows before beginning waist shaping.
For a longer skirt, add more rows of motifs. Each row adds 3 inches (7.5 cm) of length.
To increase skirt fullness more aggressively, add 4 motifs per row instead of 2 (for example, 10, 14, 18, 22, 26 motifs). This creates a fuller, more gathered A-line.
To make a smaller size (XS), use a foundation chain of 16 per cup and the size E hook without change to gauge.
Finishing and Blocking Your Crochet Dress
Weave in all ends using a yarn needle, working ends through the backs of stitches in multiple directions to secure.
Wet blocking is strongly recommended and will transform this dress. Soak the completed dress in cool water with a small amount of wool wash or gentle soap for 15 to 20 minutes. Gently squeeze out excess water (do not wring). Lay flat on blocking mats and pin the scalloped hem and neckline edges out to their finished dimensions using blocking pins. Shape the motifs so each granny square is square and open. Allow to dry completely (12 to 24 hours depending on humidity).
After blocking, the fabric will relax, the motifs will open up, and the scalloped edgings will lie flat and defined.
Care Instructions
Hand wash in cool water with mild detergent. Do not wring. Lay flat to dry away from direct sunlight. Do not tumble dry or hang dry (hanging will stretch the garment). Store folded. If using a cotton-acrylic blend, check the fiber content label because some blends are machine washable on a delicate cycle in a mesh laundry bag.
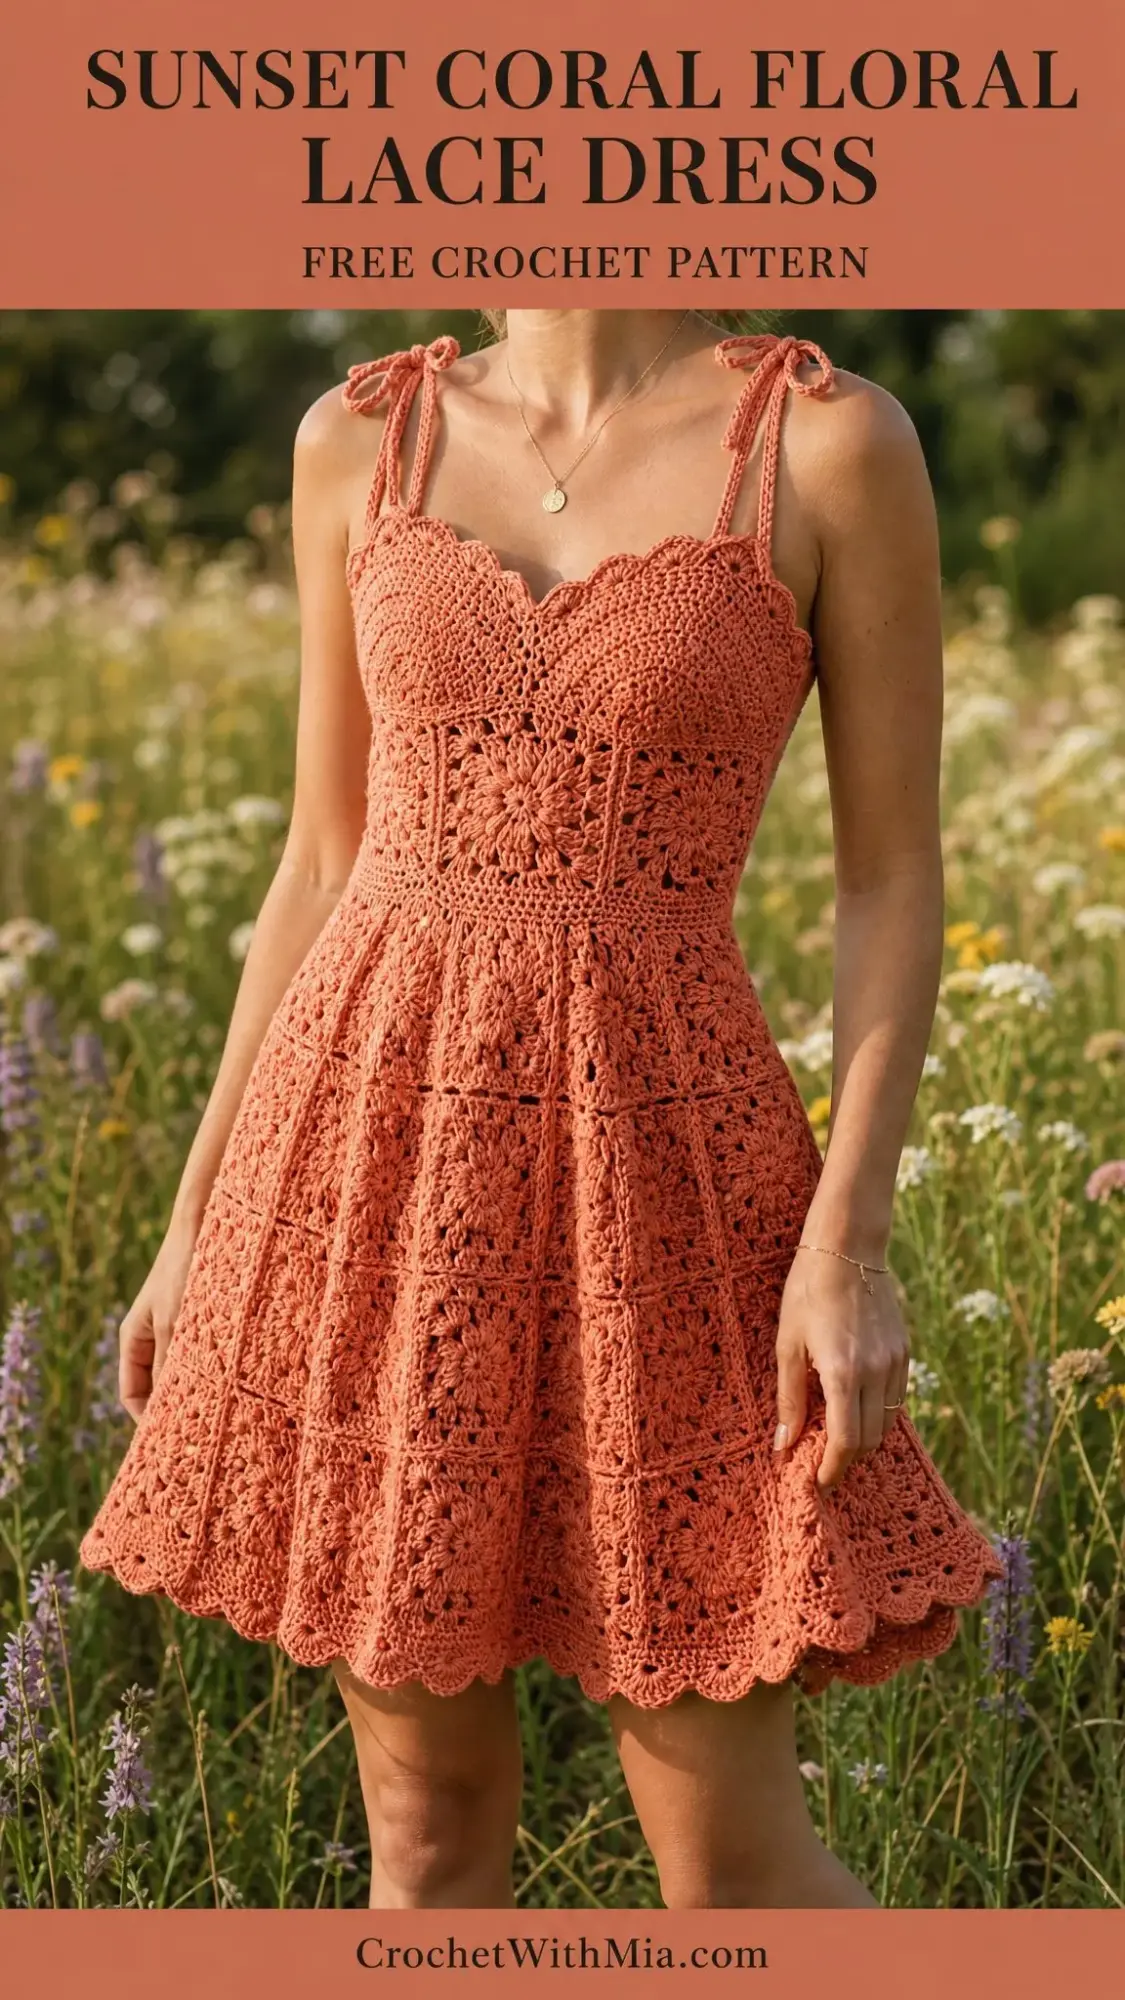
You Made It!
Thank you so much for choosing this pattern for your next crochet project. I truly hope you love making this dress as much as I loved designing it. When you finish yours, I would absolutely love to see it. Tag me on Instagram or share your photos in my Facebook group. Seeing your creations is honestly the best part of sharing patterns.
If this Sunset Coral Floral Lace Dress crochet pattern is calling your name but you are not quite ready to start today, go ahead and pin this page to your Pinterest boards so you can find it easily later. And if you do make this beauty, please drop a comment below. I read every single one, and your feedback means the world to me. Happy crocheting!