
Last summer, my best friend called me in a panic. She had booked a spontaneous beach elopement and wanted something handmade, something meaningful, something that felt like her. Store-bought dresses felt wrong, and she had three weeks. I stayed up late sketching, swatching, and frogging more times than I care to admit.
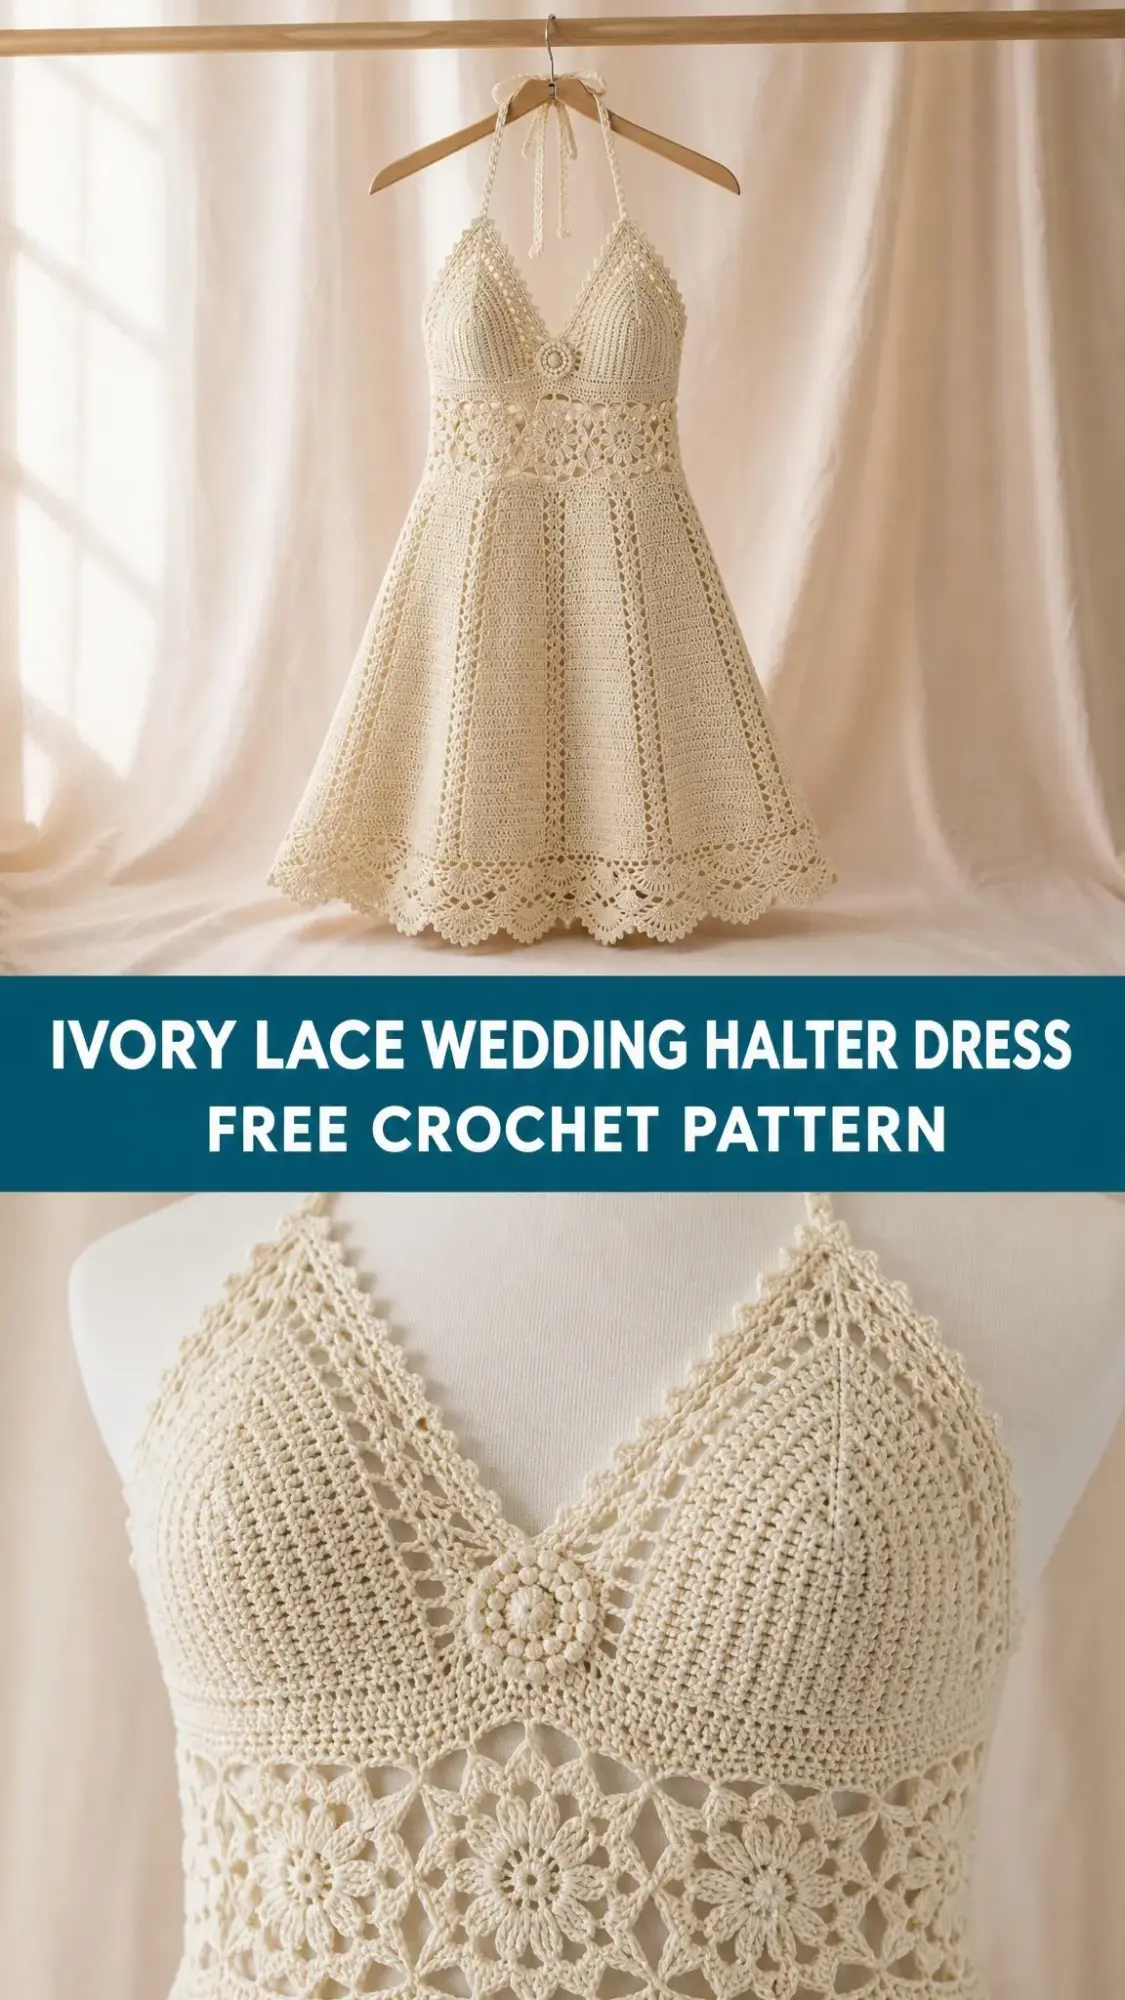
But when she slipped this dress over her head on that sandy shore, with the ocean breeze catching the flared skirt and the lace catching the golden hour light, I cried. She cried. Her partner definitely cried. It was one of those moments that reminded me why I picked up a hook in the first place.
This romantic halter dress has become one of my most requested patterns, and today I am thrilled to share every single detail with you. Whether you are creating your own bridal moment, crafting a special anniversary gift, or simply want a stunning summer dress that turns heads, this crochet pattern will guide you through every stitch.
About This Ivory Lace Wedding Halter Dress Crochet Pattern
This dress is a showstopper. I will not sugarcoat that for you. It is an advanced project requiring approximately 30 to 45 hours of work. But here is what I want you to know: if you have completed at least two fitted garments and one motif-based project, you absolutely have the skills for this.
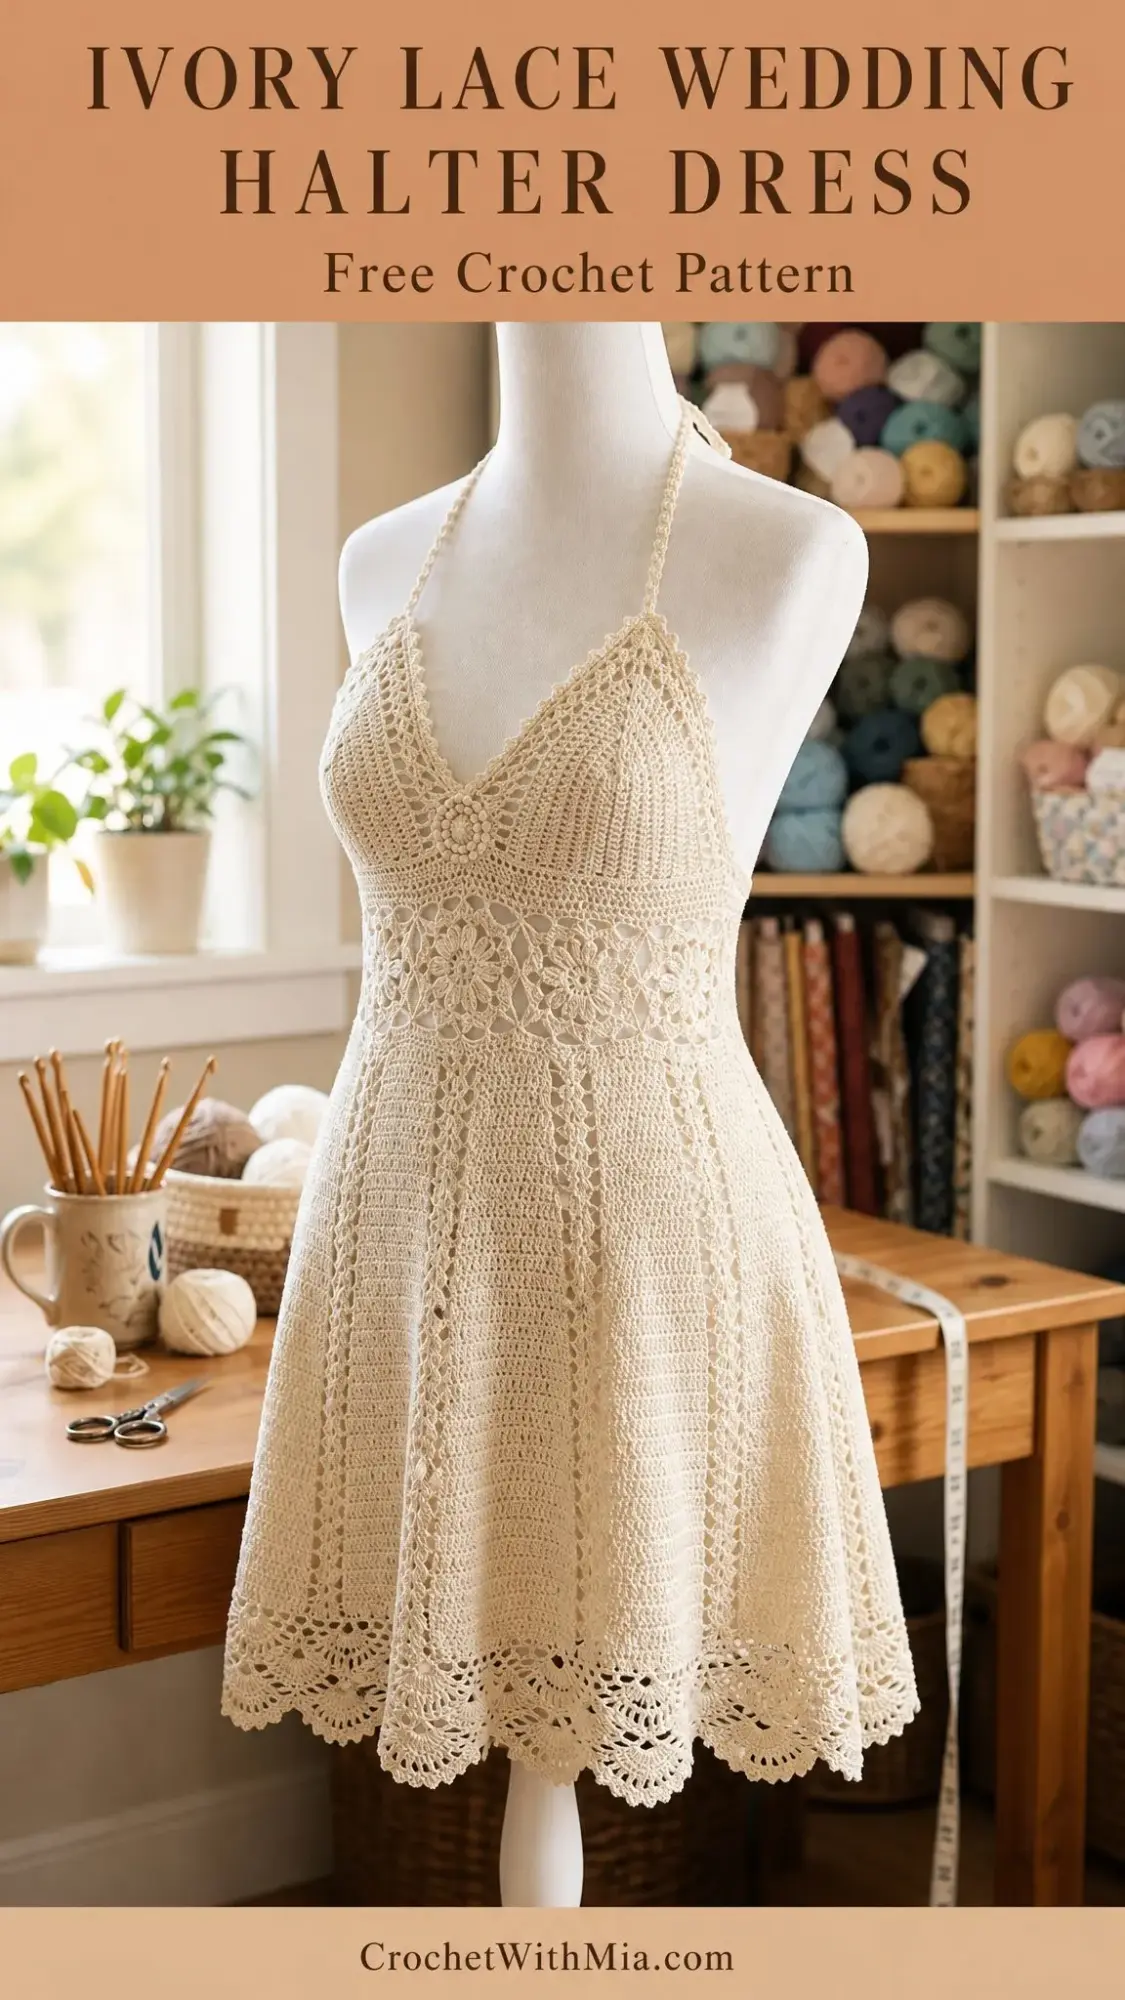
The construction breaks down into manageable phases. You will work the bodice cups separately, then join them. The waistband features gorgeous linked floral motifs worked flat and seamed into a ring. The skirt flows downward from the waistband in joined rounds, using alternating textured and lace panels that create that dreamy A-line flare. Finally, you will add halter straps and a deep scalloped picot edging at the hem.
The finished look is a mini-length dress ending at approximately mid-thigh with a full, softly swinging silhouette. It is perfect for warm-weather wear, beach ceremonies, bohemian bridal occasions, or any event where you want to feel absolutely radiant.
Finished Measurements
This pattern is written for size Small/Medium with the following measurements:
Materials Needed
Yarn: 800 to 950 yards (730 to 870 m) of DK weight (Light 3) 100 percent mercerized cotton yarn in ivory or natural cream.
Mercerized cotton is strongly preferred here. It blocks to crisp lace definition, has a gentle sheen that reads as bridal, and provides structural drape. Trust me on this one.
Specific Yarn Suggestions:
1. Paintbox Yarns Cotton DK in shade Champagne White. You will need 7 balls (137 yd / 125 m per 50 g ball). This yarn is affordable and blocks beautifully.
2. Drops Safran in shade Off White. You will need 5 to 6 balls (175 yd / 160 m per 50 g ball). The viscose content adds subtle luster and makes the skirt swing gracefully.
3. Lion Brand 24/7 Cotton in DK weight, shade Ecru. You will need 5 balls (186 yd / 170 m per 100 g ball). Widely available in craft stores across North America.
Substitution Note: Choose any DK weight cotton or cotton-blend yarn that achieves the stated gauge. Avoid high acrylic content yarns because they will not block to the crisp lace definition this dress requires.
Hooks:
Having both hooks on hand is essential.
Notions:
Gauge
Getting gauge right is critical for a fitted garment like this. Please do not skip this step.
Using C/2 (2.75 mm) hook:
24 single crochet (sc) x 28 rows = 4 inches x 4 inches (10 cm x 10 cm), blocked
Using D/3 (3.25 mm) hook:
One complete lace panel repeat (12 stitches wide) = 2 inches (5 cm) wide, blocked
10 rows of skirt pattern = 3 inches (7.5 cm) tall, blocked
Block your swatch before measuring. This is non-negotiable for accurate results.
Abbreviations and Stitch Definitions
Let me walk you through every abbreviation you will encounter. If you are newer to lace work, bookmark this section.
Special Stitches for This Crochet Tutorial
These special stitch combinations create the lace effects throughout the dress.
Shell Stitch: Work 5 double crochet (dc) into the same stitch or space. This creates a fan-shaped cluster. One shell counts as one stitch unit.
Bobble: Yarn over, insert hook into indicated stitch, pull up a loop, yarn over, pull through 2 loops. Repeat this sequence 4 more times into the same stitch (you now have 6 loops on hook). Yarn over and pull through all 6 loops at once.
V-Stitch: Work (dc, ch 2, dc) into the same stitch or space. This counts as one V-stitch unit.
Picot Edging: Single crochet into indicated stitch, chain 3, slip stitch into the first chain made (this forms the picot nub), single crochet into the next indicated stitch.
Scallop Edging: Slip stitch into first stitch, (chain 3, 4 dc into same stitch, skip 2 stitches, slip stitch into next stitch) repeated to end.
FLO Ridge Row: Work all stitches of the row into the front loop only. This creates a visible horizontal ridge on the right side of the fabric.
Pattern Notes Before You Begin
Take a moment to read through these notes. They will save you confusion later.
All turning chains count as follows: ch-1 does NOT count as a stitch. Ch-2 does NOT count as a stitch. Ch-3 DOES count as one dc throughout this pattern.
The right side of fabric is always facing you during skirt rounds. Turn work at the end of each bodice row. Motifs are worked with right side always facing.
When instructed to join yarn, use a standing stitch unless otherwise noted.
Stitch counts in parentheses at the end of each row or round reflect total working stitches at that point.
The waistband motif ring must be assembled and measured to confirm it matches your waistband circumference before attaching to the bodice. Do not skip this check.
Step by Step Instructions
Section 1: Left Bodice Cup
The left cup is shaped from the center of the V toward the underarm using increases along a diagonal seam line.
Using C/2 hook, leave a 12-inch tail, make a slip knot.
Foundation: Ch 4, sl st into first ch to form a small ring.
Rnd 1 (RS): Ch 1, work 8 sc into ring, sl st to first sc to join. Do not turn. (8 sc)
Rnd 2: Ch 1, inc in each st around, sl st to join. (16 sc)
Rnd 3: Ch 1, (sc in next st, inc in next st) 8 times, sl st to join. (24 sc)
Rnd 4: Ch 1, (sc in next 2 sts, inc in next st) 8 times, sl st to join. (32 sc)
The medallion is complete. You will now work back and forth in rows to form the triangular cup shape.
Row 5 (RS): Ch 1, turn. Working across sts 1 through 16 of the medallion ring only, sc across all 16 sts. (16 sc)
Row 6 (WS): Ch 1, turn. Sc across. (16 sc)
Row 7 (RS): Ch 1, turn. Inc in first st, sc to last st, inc in last st. (18 sc)
Row 8 (WS): Ch 1, turn. Sc across. (18 sc)
Row 9 (RS): Ch 1, turn. Inc in first st, sc to last st, inc in last st. (20 sc)
Row 10 (WS): Ch 1, turn. Sc across. (20 sc)
Row 11 (RS): Ch 1, turn. Inc in first st, sc to last st, inc in last st. (22 sc)
Row 12 (WS): Ch 1, turn. Sc across. (22 sc)
Row 13 (RS): Ch 1, turn. Inc in first st, sc to last st, inc in last st. (24 sc)
Row 14 (WS): Ch 1, turn. Sc across. (24 sc)
Row 15 (RS): Ch 1, turn. Inc in first st, sc to last st, inc in last st. (26 sc)
Row 16 (WS): Ch 1, turn. Sc across. (26 sc)
Row 17 (RS): Ch 1, turn. Inc in first st, sc to last st, inc in last st. (28 sc)
Row 18 (WS): Ch 1, turn. Sc across. (28 sc)
This is the underarm edge. The cup now measures approximately 3 inches (7.5 cm) tall and 4.5 inches (11.5 cm) wide at the base.
Fasten off, leaving a long tail for seaming.
Section 2: Right Bodice Cup
Join yarn to stitch 17 of the Rnd 4 medallion ring (directly opposite from where the left cup began).
Row 5 (RS): Ch 1, sc across sts 17 through 32. (16 sc)
Repeat Rows 6 through 18 exactly as written for the left cup. (28 sc at completion)
Fasten off, leaving a long tail for seaming.
Checkpoint 1: You now have two separate cup pieces. Each should measure approximately 3 inches (7.5 cm) tall from the medallion center.
Section 3: Bodice Band
Hold both cups with right sides facing you.
Join yarn at the top right corner of the right cup (underarm edge, Row 18).
Row 19 (RS): Ch 1, sc across 28 sts of right cup, ch 4 (this bridge connects the cups at the neckline base), sc across 28 sts of left cup from Row 18 edge. (60 sts total)
Row 20 (WS): Ch 1, turn. Sc across all 60 sts. (60 sc)
Row 21 (RS): Ch 1, turn. Sc2tog at beg, sc to last 2 sts, sc2tog. (58 sc)
Row 22 (WS): Ch 1, turn. Sc across. (58 sc)
Row 23 (RS): Ch 1, turn. Sc2tog at beg, sc to last 2 sts, sc2tog. (56 sc)
Row 24 (WS): Ch 1, turn. Sc across. (56 sc)
Row 25 (RS): Ch 1, turn. Sc2tog at beg, sc to last 2 sts, sc2tog. (54 sc)
Row 26 (WS): Ch 1, turn. Sc across. (54 sc)
Row 27 (RS): Ch 1, turn. Sc2tog at beg, sc to last 2 sts, sc2tog. (52 sc)
Row 28 (WS): Ch 1, turn. Sc across. (52 sc)
Row 29 (RS): Ch 1, turn. Sc across. (52 sc)
Row 30 (WS): Ch 1, turn. Sc across. (52 sc)
Fold the piece so the two short side edges meet. Using the long tails, whipstitch the side seams closed, matching rows carefully. Turn right side out.
Join yarn at the right side seam to work in rounds.
Rnd 31 (RS): Ch 1, sc evenly around the entire lower edge of the bodice tube, working 52 sc across the front panel and 52 sc across the back panel. Sl st to join. (104 sc)
Rnd 32: Ch 1, (sc2tog, sc in next 24 sts) 4 times, sl st to join. (100 sc)
Rnd 33: Ch 1, sc around, sl st to join. (100 sc)
Rnd 34: Ch 1, (sc2tog, sc in next 23 sts) 4 times, sl st to join. (96 sc)
Rnd 35: Ch 1, sc around, sl st to join. (96 sc)
Rnd 36: Ch 1, sc around, sl st to join. (96 sc)
Do not fasten off. Set the bodice aside.
Checkpoint 2: The bodice tube should measure approximately 6 inches (15 cm) from the top of the V to the lower edge.
Section 4: Waistband Floral Motifs
Each motif measures approximately 3 inches (7.5 cm) wide and tall. You will make 9 motifs total, joining as you go.
Individual Motif (make 9):
Using C/2 hook, make a magic ring (MR).
Motif Rnd 1: Ch 3 (counts as dc), work 11 dc into ring, sl st to top of ch-3 to join. (12 dc)
Motif Rnd 2: Ch 1, sc in same st, (ch 5, sk 2 sts, sc in next st) 3 times, ch 5, sk 2 sts, sl st to first sc. (4 ch-5 loops)
Motif Rnd 3: Sl st into first ch-5 sp, ch 1, into each ch-5 sp work (sc, hdc, 3 dc, hdc, sc), sl st to first sc. (4 petals)
Motif Rnd 4: Working behind the petals and into the skipped sts of Rnd 1, ch 1, (sc in skipped st, ch 7) 4 times, sl st to first sc. (4 ch-7 loops)
Motif Rnd 5: Sl st into first ch-7 sp, ch 1, into each ch-7 sp work (sc, hdc, 5 dc, hdc, sc), sl st to first sc. (4 outer petals)
Motif Rnd 6 (joining round for motifs 2 through 9): Working in the small spaces at the tip of each petal, ch 1, (sc into petal tip dc, ch 3, sl st to corresponding ch-3 picot of previous motif, ch 3, sc into next petal tip dc) at joining side. At free sides work (sc into petal tip dc, ch 3, picot, ch 3, sc into next petal tip dc). Sl st to join.
For motif 1, Rnd 6 is worked as free picots on all four sides.
After completing all 9 motifs, join the last motif to the first to close the ring.
Checkpoint 3: The assembled waistband motif ring should measure approximately 27 inches (68.5 cm) along the inner edge.
Attaching Waistband to Bodice
Align the inner edge of the waistband ring to the lower edge of the bodice tube (Rnd 36 edge), spacing the 9 motifs evenly around the 96-stitch circumference.
Using C/2 hook, join yarn at the right side seam. Sl st through both layers all the way around. Sl st to join. Fasten off, weave in ends.
Section 5: Skirt
Switch to D/3 hook for all skirt sections. Attach yarn to any picot point on the outer edge of the waistband motif ring.
Setup Round: Ch 3 (counts as dc), work dc evenly around all outer picot loops. Work 4 dc into each anchor point for a total of 144 dc. Sl st to top of ch-3 to join. (144 dc)
Skirt Rnd 1: Ch 3, dc in each st around, sl st to join. (144 dc)
Skirt Rnd 2 (FLO Ridge): Ch 1, sc in FLO of each st around, sl st to join. (144 sc)
Skirt Rnd 3: Ch 3, dc in each st around, sl st to join. (144 dc)
Skirt Rnd 4 (increase round): Ch 3, (dc in next 11 sts, inc in next st) 12 times, sl st to join. (156 dc)
Skirt Rnd 5: Ch 3, dc in each st around, sl st to join. (156 dc)
Skirt Rnd 6 (FLO Ridge): Ch 1, sc in FLO of each st around, sl st to join. (156 sc)
Skirt Rnd 7: Ch 3, dc in each st around, sl st to join. (156 dc)
Skirt Rnd 8 (lace round): Ch 4 (counts as dc, ch 1), (sk 1 st, dc in next st, ch 1) around, sl st to 3rd ch of ch-4 to join. (78 dc, 78 ch-1 sps)
Skirt Rnd 9: Ch 5 (counts as dc, ch 2), (sk ch-1 sp, V-st in next dc, ch 2) around, sl st to 3rd ch of ch-5. (78 V-sts)
Skirt Rnd 10: Ch 3, into each ch-2 sp of each V-st work 3 dc, dc into the dc between V-sts, around. Sl st to join. (312 dc)
Skirt Rnd 11 (FLO Ridge): Ch 1, sc in FLO of each st around, sl st to join. (312 sc)
Skirt Rnd 12: Ch 3, dc in each st around, sl st to join. (312 dc)
Skirt Rnd 13: Ch 3, dc in each st around, sl st to join. (312 dc)
Skirt Rnd 14 (FLO Ridge): Ch 1, sc in FLO of each st around, sl st to join. (312 sc)
Skirt Rnd 15: Ch 3, dc in each st around, sl st to join. (312 dc)
Skirt Rnd 16 (lace mesh): Ch 4 (counts as dc, ch 1), (sk 1 st, dc in next st, ch 1) around, sl st to join. (156 dc, 156 ch-1 sps)
Skirt Rnd 17: Sl st into first ch-1 sp, ch 3, 2 dc into same sp, ch 1, (3 dc into next ch-1 sp, ch 1) around, sl st to top of ch-3. (156 x 3-dc clusters)
Skirt Rnd 18 (FLO Ridge): Ch 1, work sc evenly around in FLO, maintaining 468 sts. Sl st to join. (468 sc)
Skirt Rnd 19: Ch 3, dc in each st around, sl st to join. (468 dc)
Skirt Rnd 20: Ch 3, dc in each st around, sl st to join. (468 dc)
Checkpoint 4: The skirt should measure approximately 8 inches (20 cm) from the outer waistband edge.
Section 6: Hem Lace Panel
Hem Rnd 1: Ch 5 (counts as dc, ch 2), sk 2 sts, (dc in next st, ch 2, sk 2 sts) around, sl st to 3rd ch of ch-5. (156 dc, 156 ch-2 sps)
Hem Rnd 2: Sl st into first ch-2 sp, ch 3, 4 dc into same sp, sk 1 dc, (5 dc into next ch-2 sp, sk 1 dc) around, sl st to top of ch-3. (156 shells)
Hem Rnd 3: Ch 1, sc into the center dc of each shell around, ch 4 between each sc. (156 sc, 156 ch-4 sps)
Hem Rnd 4: Sl st into first ch-4 sp, ch 3, 6 dc into same sp, sc into next sc, (7 dc into next ch-4 sp, sc into next sc) around, sl st to top of ch-3. (156 large shells)
Hem Rnd 5: Ch 1, sc into 1st dc of shell, (ch 3, sk 1 dc, sc into next dc) 3 times across the 7-dc shell, sc into next sc between shells, continue around. (468 ch-3 arches)
Section 7: Scallop Edging
Edging Rnd: Sl st into first ch-3 sp, (ch 3, 4 dc into same sp, sl st into next ch-3 sp) around, ending sl st to base of first ch-3. (468 scallops)
Fasten off, weave in end.
Section 8: Back Bodice Finishing
Join yarn at top left back edge. Ch 1, sc evenly down the left back edge to the waistband. Fasten off. Repeat on right back edge.
Section 9: Halter Straps and Ties
Left Strap:
Join yarn at the top left outer corner of the left cup.
Row 1: Ch 1, sc in 3 sts along top cup edge. (3 sc)
Rows 2 onward: Ch 1, turn. Sc in 3 sts. Repeat until strap measures 16 inches (40.5 cm) or desired length. Fasten off.
Make a matching strap for the right cup.
Back Waist Tie:
Ch until cord measures 36 inches (91.5 cm). Sl st in 2nd ch from hook and each ch across. Fasten off. Thread through waistband motif back section through picot loops.
Section 10: Center Front Medallion Embellishment
Return to the center front medallion. Using C/2 hook, join yarn.
Embellishment Rnd: Sl st to any st of Rnd 4 of medallion, ch 1, (sc in next st, ch 3, sl st to first ch of ch-3 for picot) 32 times around the medallion perimeter, sl st to join. Fasten off.
Finishing and Blocking
Weave in all remaining ends securely. Wet blocking is essential for lace definition.
Step 1: Fill a basin with cool water and gentle detergent. Submerge the dress and soak for 20 minutes.
Step 2: Gently squeeze out water without wringing. Roll in a clean towel to remove excess moisture.
Step 3: Lay flat on blocking mats. Shape the bodice cups and smooth the V-neck. Stretch the waistband motifs so each petal is distinct. Fan the skirt into a circle, pinning each scallop point individually.
Step 4: Allow to dry completely, 24 to 48 hours.
Step 5: Unpin and check all sections. Re-block any area that contracted.
Size Customization Tips
To size up, add one additional motif to the waistband ring and increase bodice rows proportionally. To size down, remove one motif and decrease bodice rows. Always measure against your body at each checkpoint.
You Did It!
Thank you so much for choosing this pattern for your special project. Whether this dress is destined for a beach wedding, a summer celebration, or simply a Tuesday when you want to feel beautiful, I hope every stitch brings you joy. I would absolutely love to see your finished dress! Tag me on Instagram or share in our Facebook group so I can cheer you on.
If you loved working on this ivory lace wedding halter dress crochet pattern, save it to your Pinterest boards so you can find it again. And please drop a comment below if you make one. Your photos and notes help other crocheters, and honestly, they make my whole week.