
This is a fitted crochet skater dress with a ribbed bodice and a flared circular skirt. The construction uses half double crochet through the back loop for the bodice and double crochet for the skirt. You will need intermediate skills, a 3.5mm hook for the bodice, a 3.75mm hook for the skirt, and approximately 1500 yards of DK weight cotton yarn in four shades of blue.
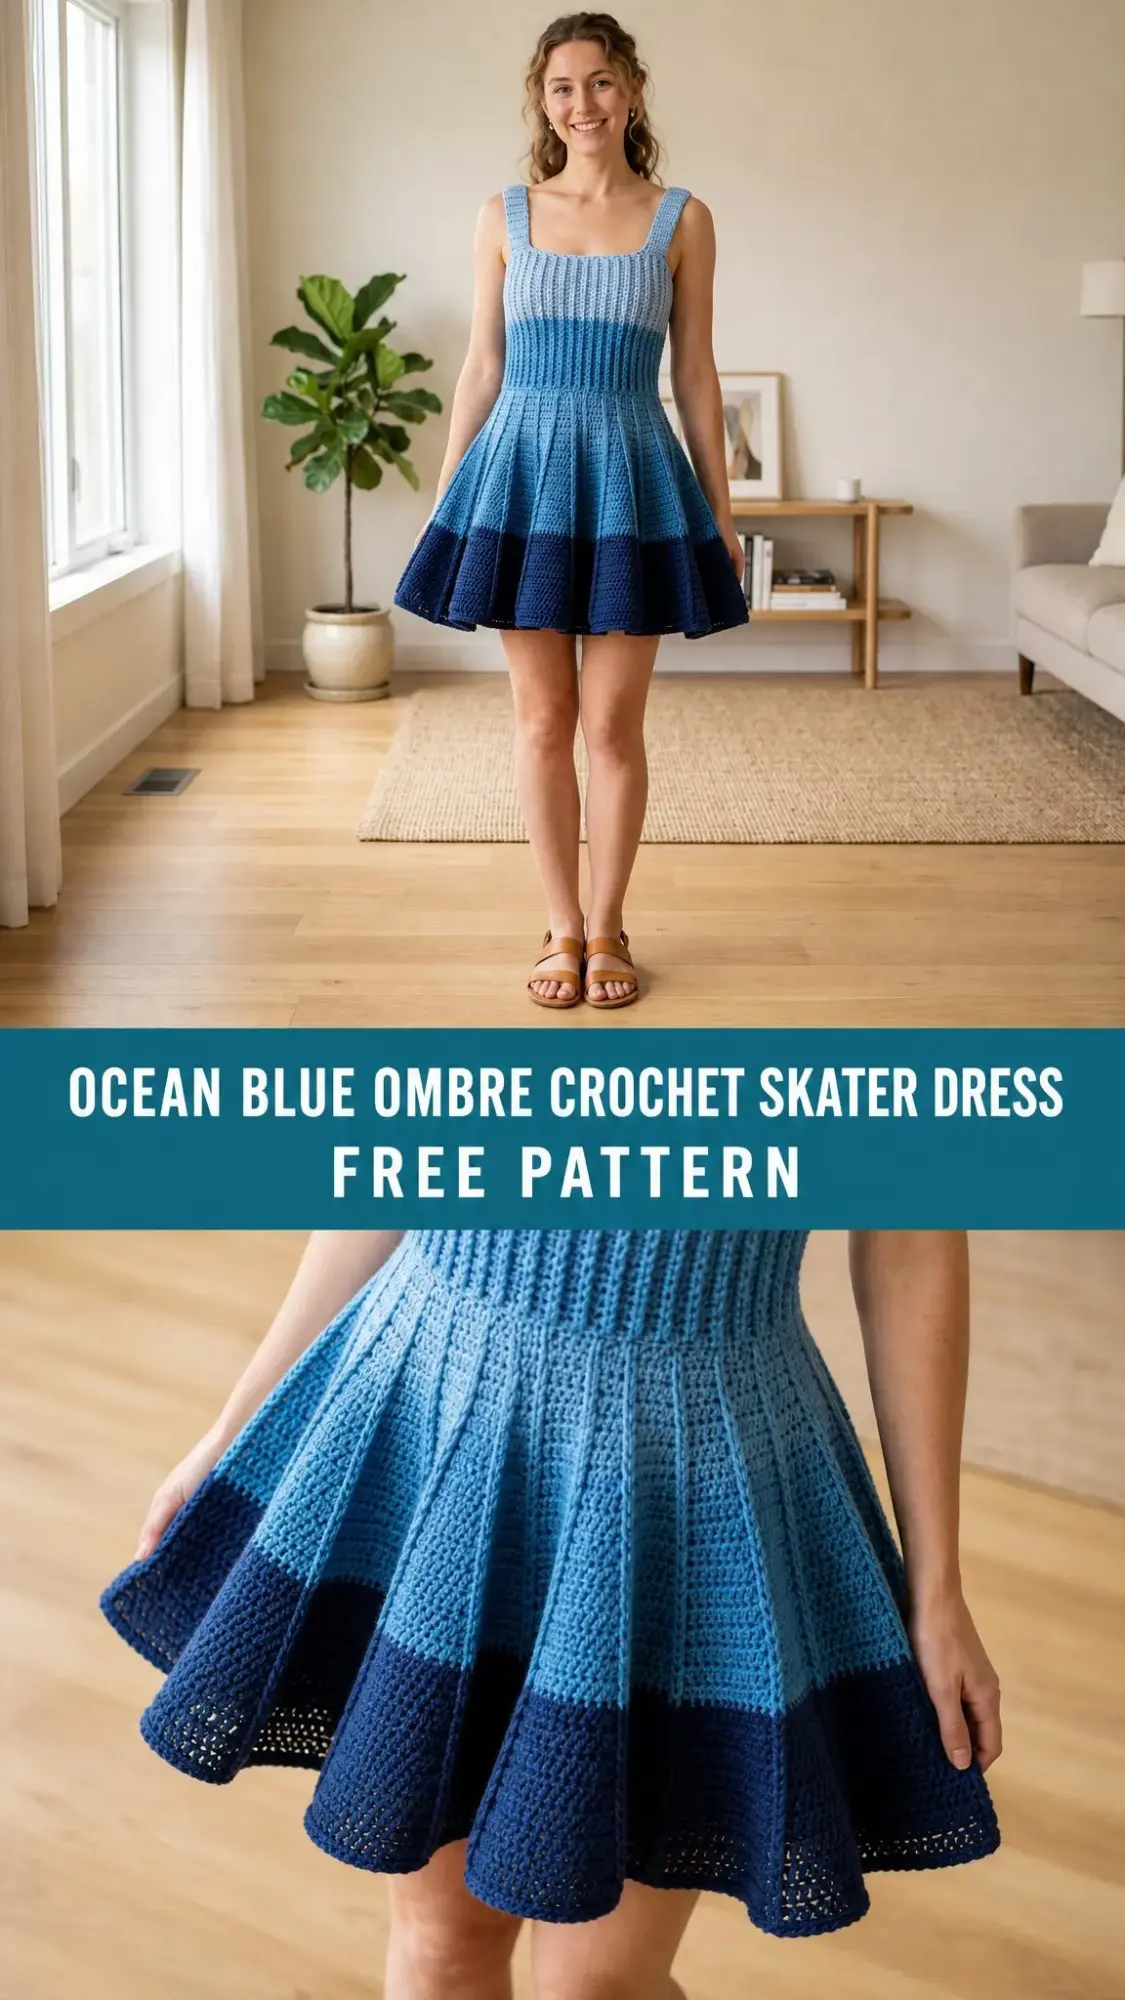
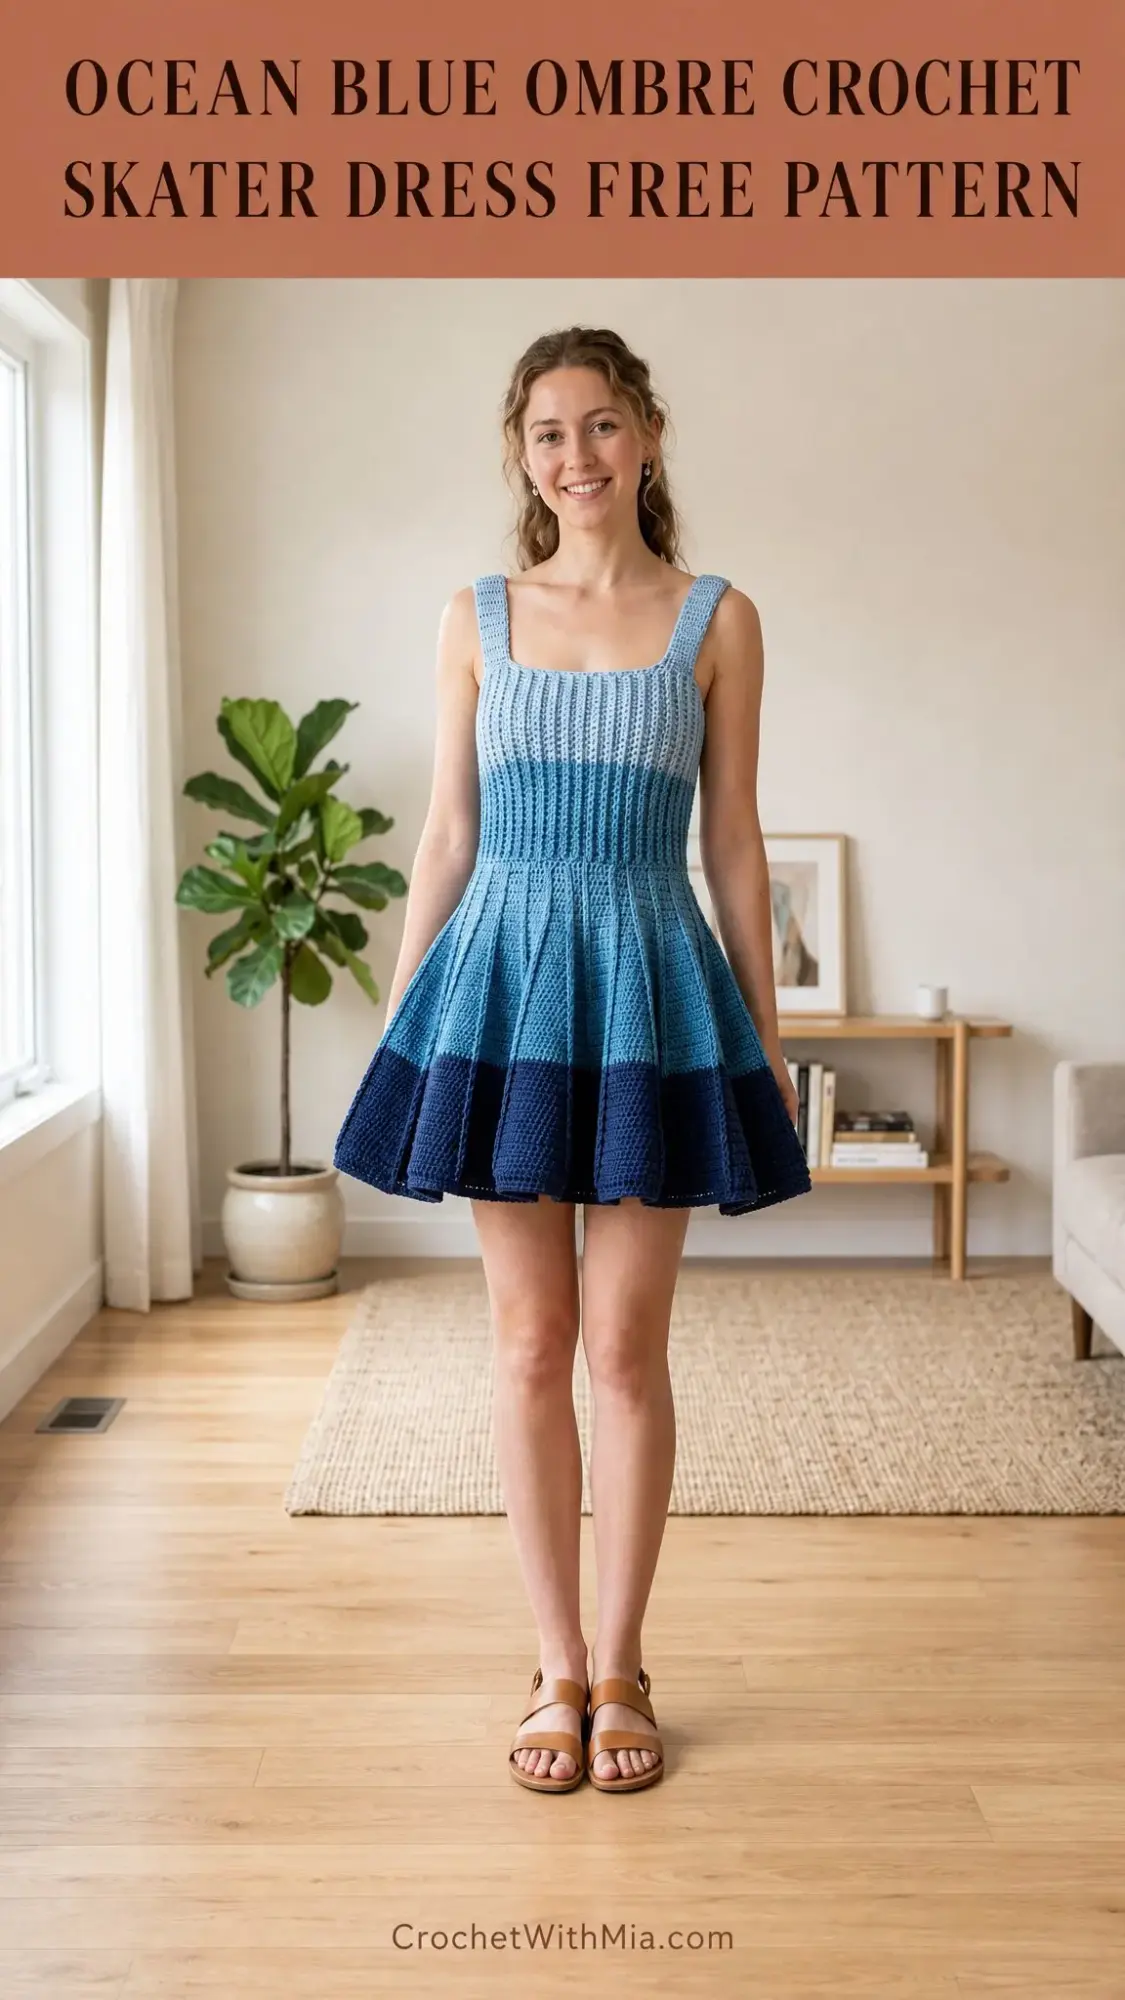
The ombre effect flows from pale sky blue at the neckline through cornflower and teal into deep navy at the hem. The bodice is worked flat in two panels and seamed. The skirt is worked in the round with structured increases every three rounds to create that beautiful flare.
If you have completed at least two wearable garments before, you are ready for this project. Expect around 30 to 45 hours of work. The result is a stunning dress that fits close through the torso and lands mid-thigh with dramatic movement.
Why This Crochet Dress Pattern Works So Well
The genius of this design is in the stitch choices. The bodice uses half double crochet through the back loop (hdc-blo) which creates vertical ribbing with natural stretch. This means the fitted bodice moves with your body instead of feeling stiff or restrictive.
The skirt switches to regular double crochet (dc) worked in rounds. The increase system adds exactly 26 stitches every third round, creating clean vertical increase lines that you can actually see in the finished fabric. This mathematical precision gives the skirt its even, professional flare.
The four-color ombre transition happens gradually through alternating rows during the color changes. You will never have a harsh line where one color ends and another begins. Instead, you get that beautiful ocean gradient effect that makes this dress such a showstopper.
Materials You Will Need
Yarn: DK weight (CYCA 3), cotton or cotton-blend recommended for structure and drape
Approximate yardage by color:
Hooks:
Notions:
Yarn Suggestions
Paintbox Yarns Simply DK (100% cotton, 137 yards per 50g skein) has excellent stitch definition and comes in a wide range of blues. It is machine washable, which is a huge bonus for a wearable garment.
Lion Brand 24/7 Cotton DK (100% mercerized cotton, 186 yards per 100g ball) offers a beautiful sheen that enhances the ombre transitions. The larger ball size means fewer ends to weave in during color changes.
Drops Safran (70% cotton, 30% viscose, 175 yards per 50g ball) adds subtle drape from the viscose content. This makes the skirt fall beautifully and is slightly more fluid than pure cotton.
Choose any DK weight yarn with a firm, smooth twist and low halo. Fuzzy or bouclé yarns will obscure the stitch definition in the ribbing. Test your gauge carefully and aim for at least 50% natural fiber content to prevent excessive stretching.
Gauge Information
Bodice (US E-4 / 3.5 mm hook, working hdc-blo ribbing in rows):
20 stitches x 24 rows = 4 inches x 4 inches (10 cm x 10 cm)
Skirt (US F-5 / 3.75 mm hook, working dc in rounds):
18 stitches x 9 rounds = 4 inches x 4 inches (10 cm x 10 cm)
Gauge is critical for a fitted garment like this dress. Please swatch both sections before beginning. Wash and block your swatch before measuring, then adjust hook size as needed to match gauge exactly.
Finished Measurements
This pattern is written for size Small/Medium:
Abbreviations and Stitch Definitions
Before we dive into the instructions, let me define every abbreviation you will encounter. Even if you know these stitches, the definitions ensure we are on the same page.
Special Stitches Explained
Hdc-blo Ribbing
This stitch creates the stretchy vertical ribbing texture throughout the bodice. On every row, insert your hook into the back loop only of each hdc stitch from the previous row and work a standard hdc. The front loops left unworked create a raised ridge on the right side of the fabric.
Because the bodice is worked flat, the right side faces you on odd-numbered rows when using the ch-2 turning chain. Always count the turning chain as a stitch for the bodice section.
Shell Stitch
Work 5 dc into the same stitch or space. This creates a fan-shaped cluster that adds decorative width at the hem.
Standing Double Crochet
To begin a new color or round without a slip stitch and chain, insert your hook into the first stitch, yarn over with new yarn leaving a 6-inch tail, yarn over and pull up a loop to the height of a dc, yarn over and pull through 2 loops, yarn over and pull through remaining 2 loops. This creates a neat, joinless start.
Pattern Notes Before You Begin
The bodice is worked in two flat panels: a front panel and a back panel. Each is worked separately in rows and then seamed at the sides and shoulders.
The straps are integral to the front and back panels. They are continuations of the outer columns of the bodice ribbing narrowed to strap width.
The skirt is worked entirely in the round, picking up stitches along the joined lower edge of the bodice.
Color changes: Complete the last yarn-over of the final stitch of a row or round with the new color yarn. Carry the old color loosely along the inside of the bodice for short transitions (2 to 3 rows), or cut and rejoin for longer skips to avoid bulk.
Ombre color placement:
Adjust blend rows to taste. Blending means alternating one row or round per color for a soft fade effect.
Work all turning chains tightly to prevent gaps at row edges in the ribbing.
The waist shaping is achieved by gradually decreasing stitch count over several rows then increasing back out toward the hip. Decreases and increases happen at the side edges only, not centrally, to maintain the vertical ribbing lines.
The skirt begins with a multiple of 6 stitches for the shell increase pattern to divide evenly.
Front Bodice Panel Instructions
The front panel is worked from neckline down to waist.
Using Color A and US E-4 hook, chain 86.
Row 1 (RS): Hdc in 3rd chain from hook and in each chain across. Turn. (85 hdc including t-ch)
Note: The t-ch-2 counts as the first hdc throughout the bodice. Always skip the first stitch below the t-ch.
Row 2 (WS): Ch 2, turn. Hdc-blo in each st across. Turn. (85 hdc)
Row 3: Ch 2, turn. Hdc-blo in each st across. Turn. (85 hdc)
Rows 4 through 10: Rep row 3. Work in Color A throughout. (85 hdc each row)
Begin Color Transition
After Row 10, begin introducing Color B. Alternate Color A and Color B every row.
Row 11 (Color B): Ch 2, turn. Hdc-blo in each st across. Turn. (85 hdc)
Row 12 (Color A): Ch 2, turn. Hdc-blo in each st across. Turn. (85 hdc)
Row 13 (Color B): Ch 2, turn. Hdc-blo in each st across. Turn. (85 hdc)
Row 14 (Color A): Ch 2, turn. Hdc-blo in each st across. Turn. (85 hdc)
Row 15 (Color B): Ch 2, turn. Hdc-blo in each st across. Turn. (85 hdc)
Row 16 (Color A): Ch 2, turn. Hdc-blo in each st across. Turn. (85 hdc)
Row 17 onwards: Work in Color B only.
Row 17: Ch 2, turn. Hdc-blo in each st across. Turn. (85 hdc)
Bust Shaping (Rows 18 through 22)
These rows maintain bust measurement. No increases or decreases.
Rows 18 through 22: Ch 2, turn. Hdc-blo in each st across. Turn. (85 hdc each row)
Waist Shaping (Rows 23 through 32)
Decrease 2 stitches per decrease row (one at each side edge) on every other row.
Row 23: Ch 2, turn. Hdc2tog over first 2 sts (right edge decrease), hdc-blo across to last 2 sts, hdc2tog over last 2 sts. Turn. (83 hdc)
Row 24: Ch 2, turn. Hdc-blo in each st across (no decrease). Turn. (83 hdc)
Row 25: Ch 2, turn. Hdc2tog, hdc-blo to last 2 sts, hdc2tog. Turn. (81 hdc)
Row 26: Ch 2, turn. Hdc-blo across. Turn. (81 hdc)
Row 27: Ch 2, turn. Hdc2tog, hdc-blo to last 2 sts, hdc2tog. Turn. (79 hdc)
Row 28: Ch 2, turn. Hdc-blo across. Turn. (79 hdc)
Row 29: Ch 2, turn. Hdc2tog, hdc-blo to last 2 sts, hdc2tog. Turn. (77 hdc)
Row 30: Ch 2, turn. Hdc-blo across. Turn. (77 hdc)
Row 31: Ch 2, turn. Hdc2tog, hdc-blo to last 2 sts, hdc2tog. Turn. (75 hdc)
Row 32: Ch 2, turn. Hdc-blo across. Turn. (75 hdc)
Begin Color B to C blend on rows 29 through 32 as noted in Pattern Notes.
Waist Hold Rows (Rows 33 through 36)
Work even at 75 hdc in Color C.
Row 33: Ch 2, turn. Hdc-blo across. Turn. (75 hdc)
Row 34: Ch 2, turn. Hdc-blo across. Turn. (75 hdc)
Row 35: Ch 2, turn. Hdc-blo across. Turn. (75 hdc)
Row 36: Ch 2, turn. Hdc-blo across. Turn. (75 hdc)
Checkpoint: After row 36, your front panel should measure approximately 13 inches (33 cm) from the foundation chain edge (neckline) to the current working edge (waist). Width at this point should measure approximately 14 inches (35.5 cm) unstretched.
Hip Increase Rows (Rows 37 through 40)
Increase 2 stitches per increase row at side edges.
Row 37: Ch 2, turn. 2 hdc-blo in first st (right edge increase), hdc-blo to last st, 2 hdc-blo in last st. Turn. (77 hdc)
Row 38: Ch 2, turn. Hdc-blo across. Turn. (77 hdc)
Row 39: Ch 2, turn. 2 hdc-blo in first st, hdc-blo to last st, 2 hdc-blo in last st. Turn. (79 hdc)
Row 40: Ch 2, turn. Hdc-blo across. Turn. (79 hdc)
Fasten off Color C. Leave an 18-inch tail for seaming.
Strap Shaping for Front Panel
The front straps are the two outer columns of the panel maintained over the shoulder. Each strap is 8 stitches wide.
Rejoin Color A to the right side of row 1 (neckline edge) of the front panel at the outer 8 sts.
Right Strap:
Row 1: Ch 2, hdc-blo in same st and next 7 sts. Turn. (8 hdc)
Rows 2 through 14: Ch 2, hdc-blo across. Turn. (8 hdc each row)
Fasten off leaving 12-inch tail.
Left Strap:
Rejoin Color A to neckline edge at the left outer 8 sts. Work same as right strap.
Rows 1 through 14: Ch 2, hdc-blo across. Turn. (8 hdc each row)
Fasten off leaving 12-inch tail.
After the straps are complete, the center 69 stitches of the neckline edge are open, creating the square neckline opening.
Back Bodice Panel Instructions
Work the back panel identical to the front panel in all stitch counts, shaping rows, and color sequence. The back neckline is also square and mirrors the front. The back straps are also 8 stitches wide.
Repeat all rows 1 through 40 plus strap rows exactly as written for the front panel.
Checkpoint: Both panels should measure approximately 13 inches (33 cm) tall from neckline to waist with straps extending an additional 3.5 inches (9 cm) above the neckline edge. Each panel should measure approximately 17 inches (43 cm) wide at the bust (rows 1 through 22) and approximately 15 inches (38 cm) wide at the waist (rows 33 through 36).
Assembling the Bodice
Step 1, Side seams: Hold front and back panels with wrong sides together. Align side edges carefully. Using yarn needle and matching yarn color (Color C at waist), whipstitch or mattress stitch the two side seams from the bottom waist edge upward to the armhole opening. Leave approximately 7 inches (18 cm) open at each side for the armhole. The armhole opening runs from the top of the side seam upward to the strap.
Step 2, Shoulder and strap seam: Align front and back straps with right sides together. Using yarn needle and Color A, seam across the tops of the straps using mattress stitch for 8 sts.
Step 3, Armhole edging: Join Color B at the base of one armhole opening. Work 1 round of sc evenly around the armhole opening, working approximately 1 sc per row end. Sl st to join. Fasten off. Rep for second armhole.
Checkpoint: With the bodice assembled and laid flat, the total circumference at the bust should measure approximately 34 inches (86 cm), at the waist approximately 28 inches (71 cm). The total bodice height including straps should be approximately 16.5 inches (42 cm).
Skirt Instructions
The skirt is worked in the round beginning at the waist edge of the assembled bodice.
Setup Round: Join Color C at the right side seam at the base of the bodice (waist edge). Work 1 sc in each st across the front lower edge and 1 sc in each st across the back lower edge, working through both layers at the side seams to close them. Do not work additional stitches at the seam points. Sl st to join into a round. (156 sc)
Note: To achieve a multiple of 6 required for the shell increase pattern, work 1 additional sc evenly at two points: one on the front and one on the back, centered. This brings the total to 156 sts, which is divisible by 6. Place a stitch marker at the join.
Switch to US F-5 hook.
Skirt Increase Rounds
Round 1 (setup dc round): Ch 3 (counts as first dc throughout skirt), dc in next st and in each st around. Sl st to top of ch-3 to join. (156 dc)
Round 2: Ch 3, dc in each st around. Sl st to join. (156 dc)
Round 3 (increase round): Ch 3, dc in next 5 sts, 2 dc in next st; rep from around to last 6 sts, dc in last 6 sts. Sl st to join. (182 dc)
Round 4: Ch 3, dc in each st around. Sl st to join. (182 dc)
Round 5: Ch 3, dc in each st around. Sl st to join. (182 dc)
Round 6 (increase round): Ch 3, dc in next 6 sts, 2 dc in next st; rep from around to last st, dc in last st. Sl st to join. (208 dc)
Round 7: Ch 3, dc in each st around. Sl st to join. (208 dc)
Round 8: Ch 3, dc in each st around. Sl st to join. (208 dc)
Round 9 (increase round): Ch 3, dc in next 7 sts, 2 dc in next st; rep from around. Sl st to join. (234 dc)
Round 10: Ch 3, dc in each st around. Sl st to join. (234 dc)
Begin Color C to D blend on rounds 10 through 13.
Round 11: Ch 3, dc in each st around. Sl st to join. (234 dc)
Round 12 (increase round): Ch 3, dc in next 8 sts, 2 dc in next st; rep from around. (260 dc)
Switch fully to Color D at this point.
Round 13: Ch 3, dc in each st around. Sl st to join. (260 dc)
Round 14: Ch 3, dc in each st around. Sl st to join. (260 dc)
Round 15 (increase round): Ch 3, dc in next 9 sts, 2 dc in next st; rep from around. (286 dc)
Round 16: Ch 3, dc in each st around. Sl st to join. (286 dc)
Round 17: Ch 3, dc in each st around. Sl st to join. (286 dc)
Round 18 (increase round): Ch 3, dc in next 10 sts, 2 dc in next st; rep from around. (312 dc)
Round 19: Ch 3, dc in each st around. Sl st to join. (312 dc)
Round 20: Ch 3, dc in each st around. Sl st to join. (312 dc)
Round 21 (increase round): Ch 3, dc in next 11 sts, 2 dc in next st; rep from around. (338 dc)
Round 22: Ch 3, dc in each st around. Sl st to join. (338 dc)
Round 23: Ch 3, dc in each st around. Sl st to join. (338 dc)
Checkpoint: After round 23, the skirt should measure approximately 10 inches (25 cm) from the waist pickup round to the current working edge. The hem circumference at this point should measure approximately 75 inches (190 cm).
Skirt Hem (Rounds 24 through 27)
Continue in Color D.
Round 24: Ch 3, dc in each st around. Sl st to join. (338 dc)
Round 25 (final increase round): Ch 3, dc in next 12 sts, 2 dc in next st; rep from around. (364 dc)
Round 26: Ch 3, dc in each st around. Sl st to join. (364 dc)
Hem Edging Round
Round 27: Ch 1, sc in next 2 sts, sk next st, 5 dc in next st (shell), sk next st, sc in next 2 sts; rep from around. Sl st to ch-1 to join.
Fasten off Color D. Weave in all ends.
Checkpoint: The finished skirt, measured flat from the waist join to the hem edging, should be approximately 15 inches (38 cm). The full skirt circumference at the hem (before edging flare) should be approximately 81 inches (206 cm).
Size Customization Tips
For a larger bust, add stitches to the foundation chain in multiples of 2. Every 4 additional stitches (2 on front panel, 2 on back panel) adds approximately 0.8 inches (2 cm) to bust circumference.
For a longer bodice (taller torso), add rows in the waist hold section (rows 33 through 36). Adding 2 rows adds approximately 0.33 inches (0.85 cm) in length.
For a longer skirt, add additional non-increase rounds between increase rounds. Every 2 additional plain rounds add approximately 0.9 inches (2.3 cm) to skirt length.
For longer straps, add rows to the strap section in sets of 2 rows. Every 2 additional rows adds approximately 0.33 inches (0.85 cm) to strap length.
For plus sizes, increase the starting chain by 10 stitches for each size up (approximately 2 inches per size) for both front and back panels. Increase the skirt setup round accordingly and adjust the skirt increase divisors to maintain even spacing.
Finishing and Blocking Your Dress
Step 1: Weave in all yarn ends securely on the wrong side using a yarn needle. Weave each end in two directions for security.
Step 2: Soak the finished dress in cool water for 20 minutes. Gently press out excess water. Do not wring.
Step 3: Lay the dress flat on blocking mats. Pin the bodice to its finished measurements: 17 inches wide at bust, 14 inches wide at waist. Smooth the ribbing lines vertically.
Step 4: Shape the skirt by spreading it outward evenly from the waist. Pin the hem to maintain the circular flare.
Step 5: Allow to dry completely, at least 24 hours, before unpinning and wearing.
Step 6: If desired, a light steaming with a pressing cloth on the wrong side of the bodice will enhance the ribbing definition. Do not steam the skirt directly as this can distort the fabric.
Care Instructions
Machine wash cold on a gentle cycle in a mesh laundry bag. Use mild detergent. Do not tumble dry. Lay flat to dry away from direct sunlight to preserve the blue color saturation. Do not iron directly. Store folded rather than hung to prevent the skirt from stretching under its own weight.
Final Thoughts on This Crochet Skater Dress Pattern
This ocean blue ombre crochet skater dress is a true labor of love. The combination of structured ribbing, beautiful color transitions, and that gorgeous flared skirt creates a garment that looks absolutely stunning when worn. Take your time with the gauge swatches, trust the stitch counts, and enjoy watching this dress come together.
The mathematical precision built into the pattern means your increases will line up beautifully. Your skirt will flare evenly. And that ombre effect will make everyone ask where you bought this dress. You get to smile and say you made it yourself.
Thank you so much for choosing this pattern. I would absolutely love to see your finished dress! Tag me on Instagram or share it in my Facebook group. Seeing your work genuinely makes my day.
If this pattern caught your eye, go ahead and save it to your Pinterest boards so you can find it when you are ready to start. And if you make this dress, please leave a comment below. I love hearing about your color choices, any modifications you made, and how the finished dress fits. Happy crocheting!