
THIS CARDIGAN IS GOING TO BE YOUR NEW FAVORITE PROJECT. I’m not even exaggerating. The moment I finished the first one, I immediately wanted to make another in every color imaginable.
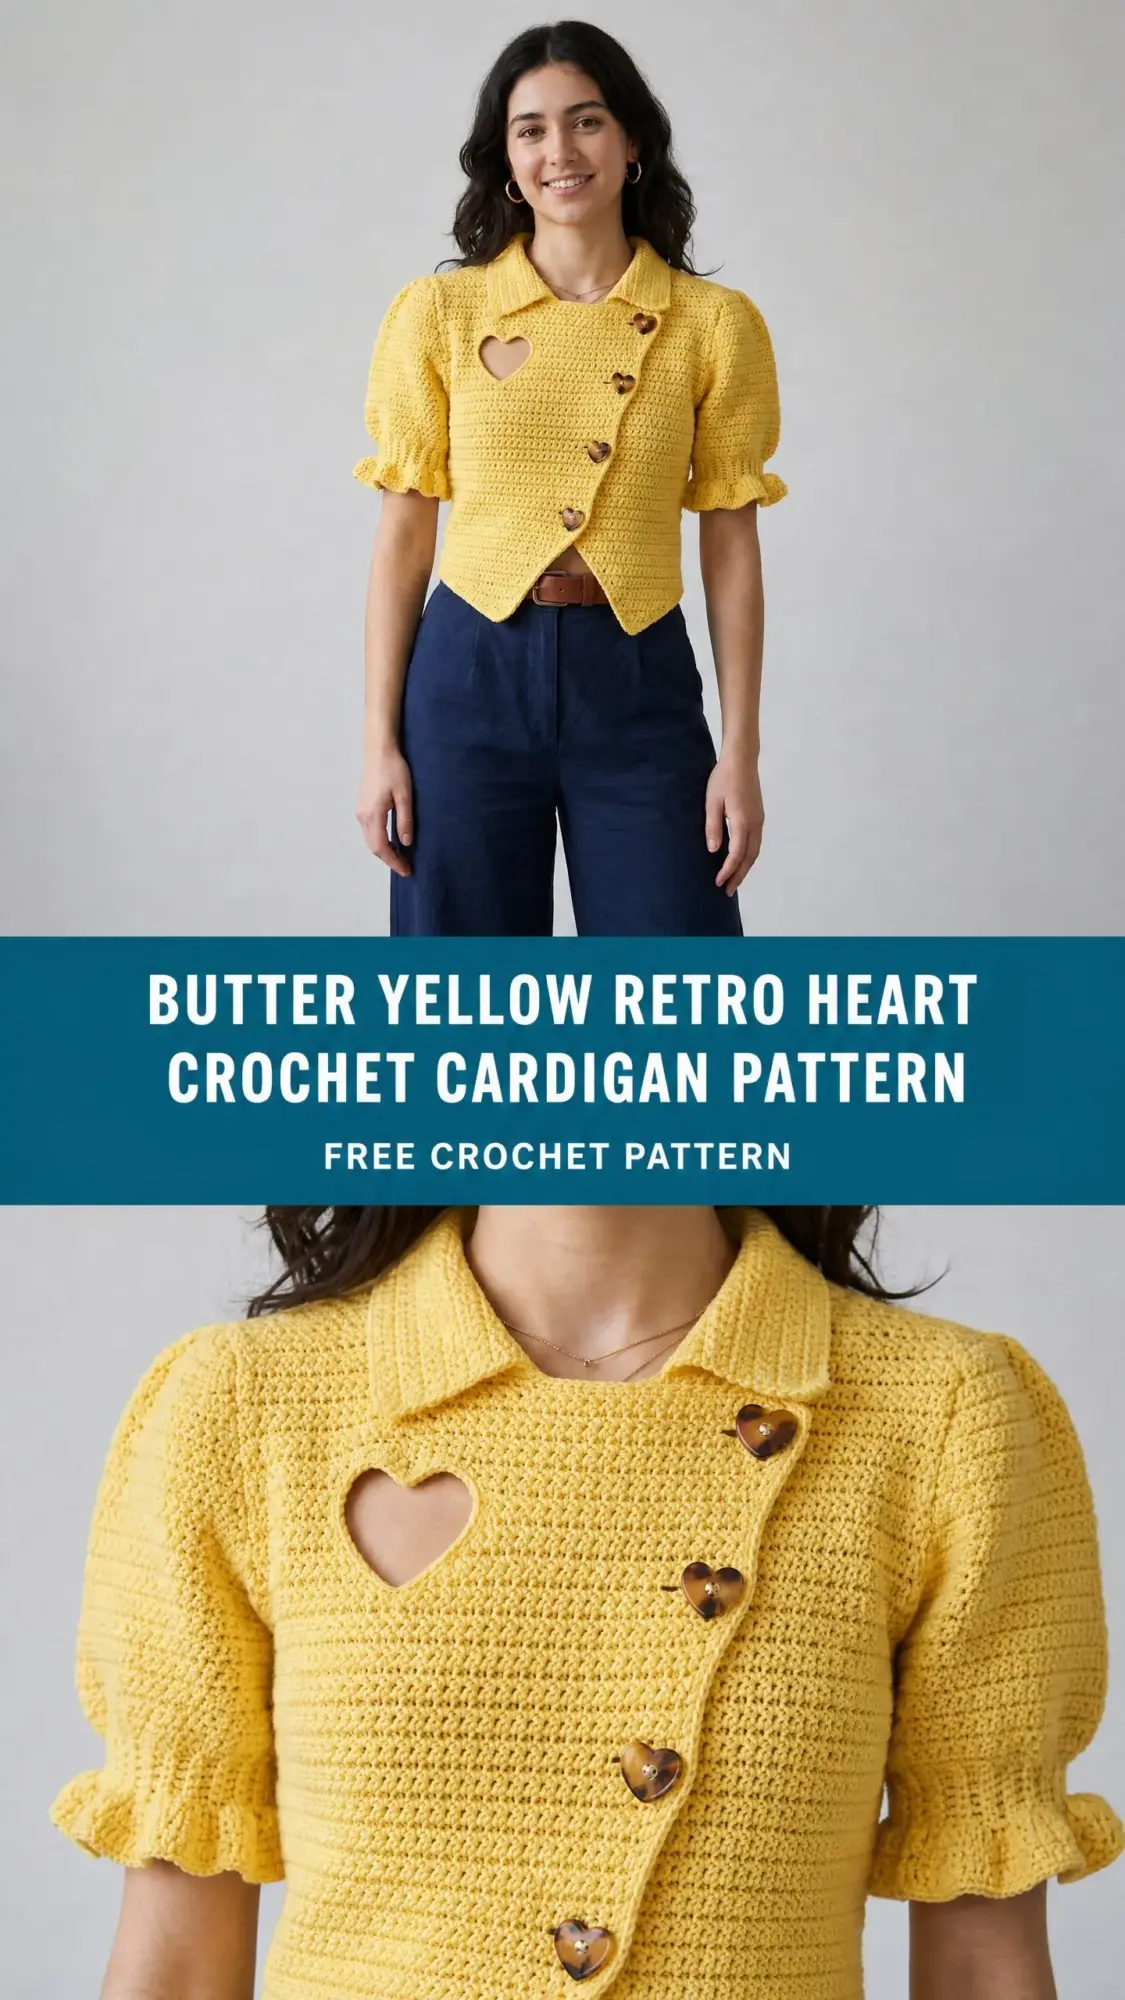
Yes, it takes some time. We’re looking at roughly 18 to 26 hours depending on your pace. But hear me out. This is the kind of project that makes people stop you on the street to ask where you bought it. The heart cutout? Showstopper. The puff sleeves with ruffled cuffs? Absolutely adorable. The asymmetrical button front with those gorgeous heart-shaped wooden buttons? Chef’s kiss.
If you’ve been crocheting for a little while and you’re ready to level up from scarves and hats, this butter yellow retro heart crochet cardigan pattern is calling your name. It looks way more complicated than it actually is. Trust me on this one.
Why This Crochet Cardigan Pattern Is Worth Your Time
Let me tell you what makes this project so satisfying. The main stitch throughout the entire body is single crochet (sc). That’s it. If you can single crochet, you can make this cardigan. The magic happens in the construction details, not complicated stitchwork.
The cropped silhouette sits just above your natural waist, which is universally flattering. The double-breasted front creates that vintage 1940s vibe without looking costumey. And that little heart cutout near the collarbone? It’s worked by simply splitting your stitches into two sections for a few rows and then rejoining them. No fancy techniques required.
The puff sleeves get their shape from gathering during seaming, not from difficult puff stitches. The ruffled cuffs are created by doubling your stitch count in one row. Simple techniques, stunning results.
Skill Level and Time Commitment
I’d call this an advanced beginner to intermediate project. If you’ve completed at least two crochet garments before, you’ll feel right at home. If this is your first garment, it’s still absolutely doable. Just take your time with the shaping instructions and read through everything before you start.
The pattern is worked flat in pieces and then seamed together. You’ll make a back panel, a front panel with the asymmetrical shaping and heart cutout, two sleeves with ruffled cuffs, and finally pick up stitches for the collar.
Plan for about 18 to 26 hours of work time. I like to break big projects into sections. Do the back panel while watching a movie. Tackle the front panel heart cutout when you can focus. Save the sleeves for podcast listening time.
Materials You’ll Need
Yarn: Worsted weight, 100% cotton or a cotton blend works best. You’ll need approximately 800 to 900 yards (730 to 820 meters) in butter yellow.
Some great yarn options include:
Hook: US Size G-6 / 4.00 mm. Adjust as needed to meet gauge.
Notions:
Gauge (Don’t Skip This!)
20 single crochet stitches and 22 rows = 4 inches (10 cm), worked flat and blocked.
I know checking gauge feels tedious. But this is a fitted garment. Even one stitch difference per 4 inches will throw off your entire bust measurement. Make a swatch at least 6 inches by 6 inches, block it, then measure. Your future self wearing this gorgeous cardigan will thank you.
Finished Measurements
This pattern is written for size Small (US 4-6). Here are the finished garment measurements:
Size customization tips are included at the end of the pattern.
Abbreviations and Stitch Definitions
Let me walk you through every abbreviation you’ll encounter. I’m defining them in plain English so nothing feels confusing.
beg = beginning
BLO = back loop only (insert your hook under just the back loop of the stitch instead of both loops)
ch = chain (yarn over, pull through the loop on your hook)
ch-sp = chain space (the gap created by a chain stitch in the previous row)
dec = decrease
inc = increase (work 2 single crochet stitches into the same stitch)
MC = main color
rep = repeat
RS = right side (the pretty side that faces outward when worn)
sc = single crochet (insert hook, yarn over, pull up a loop, yarn over, pull through both loops)
sc2tog = single crochet two together (a decrease where you start a single crochet in one stitch, stop before completing, start another in the next stitch, then yarn over and pull through all three loops at once)
sk = skip
sl st = slip stitch (insert hook, yarn over, pull through both the stitch and the loop on your hook in one motion)
sp = space
st(s) = stitch(es)
WS = wrong side
yo = yarn over
Special Techniques
Ruffle Stitch (for sleeve cuffs)
This creates that gorgeous fluttery edge at the sleeves. Here’s how it works:
Row 1 of ruffle: Work 2 sc in every stitch across. This doubles your stitch count.
Row 2 of ruffle: Chain 1, turn. Work 1 sc in each stitch across.
The ruffle waves and flutes naturally because you’ve doubled the stitches. No fancy work required.
Heart Cutout
This sounds intimidating but it’s surprisingly simple. You’ll split your work into two sections for 4 rows, creating a gap. Then you rejoin the sections while shaping the curved top of the heart with a few decreases. Full row-by-row instructions are included in the pattern.
Pattern Notes Before You Begin
1. The cardigan body is worked in two separate flat pieces: the Back Panel and the Front Panel. The Front Panel is one continuous piece that wraps asymmetrically when worn.
2. Construction order: Back Panel, Front Panel (including heart cutout), both Sleeves, seaming, Collar, Cuffs, Button Bands, button attachment.
3. Right side (RS) of the fabric is the side facing you on all odd-numbered rows. Row 1 is always RS.
4. Turning chain: Chain 1 at the beginning of every row. This chain 1 does NOT count as a stitch unless specifically noted.
5. All measurements given are after blocking.
Step-by-Step Crochet Pattern Instructions
Back Panel
The back panel is worked flat from the bottom hem upward.
Foundation chain: Ch 87.
Row 1 (RS): Sc in 2nd ch from hook and in each ch across. Ch 1, turn. (86 sc)
Rows 2 through 36: Sc in each st across. Ch 1, turn. (86 sc each row)
After Row 36, your piece should measure approximately 6.5 inches (16.5 cm) tall and 17.2 inches (43.7 cm) wide.
Armhole Shaping
Row 37 (RS): Sl st across first 5 sts, ch 1, sc in same st as last sl st (this is the 5th st), sc across to last 4 sts, leave last 4 sts unworked. Ch 1, turn. (78 sc)
Row 38: Sc2tog, sc across to last 2 sts, sc2tog. Ch 1, turn. (76 sc)
Row 39: Sc2tog, sc across to last 2 sts, sc2tog. Ch 1, turn. (74 sc)
Row 40: Sc2tog, sc across to last 2 sts, sc2tog. Ch 1, turn. (72 sc)
Row 41: Sc across even. Ch 1, turn. (72 sc)
Rows 42 through 60: Sc in each st across. Ch 1, turn. (72 sc each row)
Shoulder Shaping
After Row 60, the back should measure approximately 14.5 inches (37 cm) from foundation chain.
Shoulder markers: Place a stitch marker in st 1, st 22, st 51, and st 72 to mark the two shoulder sections (22 sts each) and the neckline center (28 sts).
Row 61 (Right Shoulder): Sc in first 22 sts only. Ch 1, turn. (22 sc)
Row 62: Sc2tog, sc across. Ch 1, turn. (21 sc)
Row 63: Sc across to last 2 sts, sc2tog. Ch 1, turn. (20 sc)
Fasten off, leaving a 12 inch tail for seaming.
Rejoin yarn at st 51 (left shoulder section begins here).
Row 61 (Left Shoulder): Sc in last 22 sts. Ch 1, turn. (22 sc)
Row 62: Sc across to last 2 sts, sc2tog. Ch 1, turn. (21 sc)
Row 63: Sc2tog, sc across. Ch 1, turn. (20 sc)
Fasten off, leaving a 12 inch tail for seaming.
The center 28 sts between the shoulders form the back neckline opening. Do not work these. They will be picked up for the collar.
Front Panel
The front panel creates the full asymmetrical double-breasted front in one piece, worked flat from the bottom hem upward.
Foundation chain: Ch 97.
Row 1 (RS): Sc in 2nd ch from hook and in each ch across. Ch 1, turn. (96 sc)
Rows 2 through 10: Sc in each st across. Ch 1, turn. (96 sc each row)
Pointed Hem Shaping
The pointed hem is created by working decreases at the right edge to form a gradual diagonal ending in a sharp point.
Row 11: Sc across to last 2 sts, sc2tog. Ch 1, turn. (95 sc)
Row 12: Sc across to last 2 sts, sc2tog. Ch 1, turn. (94 sc)
Row 13: Sc across to last 2 sts, sc2tog. Ch 1, turn. (93 sc)
Row 14: Sc across to last 2 sts, sc2tog. Ch 1, turn. (92 sc)
Row 15: Sc across to last 2 sts, sc2tog. Ch 1, turn. (91 sc)
Row 16: Sc across to last 2 sts, sc2tog. Ch 1, turn. (90 sc)
Row 17: Sc across to last 2 sts, sc2tog. Ch 1, turn. (89 sc)
Row 18: Sc across to last 2 sts, sc2tog. Ch 1, turn. (88 sc)
Row 19: Sc across to last 2 sts, sc2tog. Ch 1, turn. (87 sc)
Row 20: Sc across to last 2 sts, sc2tog. Ch 1, turn. (86 sc)
Rows 21 through 36: Sc in each st across. Ch 1, turn. (86 sc each row)
Heart Cutout Setup
The heart cutout is positioned on the upper left of the front panel (as worn). The cutout begins at Row 37 and sits between sts 58 and 74.
Row 37 (RS): Sc across first 57 sts. Place marker in st 57. Sc in next 17 sts (sts 58 through 74). Place marker in st 74. Sc in remaining 12 sts. Ch 1, turn. (86 sc)
Row 38 (WS): Sc across first 57 sts to first marker. You will now work only these 57 sts for the right section of the heart. Ch 1, turn. (57 sc working section)
Right Section of Heart Cutout
Row 39 (RS): Sc across 57 sts. Ch 1, turn. (57 sc)
Row 40 (WS): Sc across 57 sts. Ch 1, turn. (57 sc)
Row 41 (RS): Sc across 57 sts. Do not fasten off. Place working loop on a stitch marker and set aside.
Left Section of Heart Cutout
With a new length of yarn, rejoin at st 75 on Row 38.
Row 38 Left (WS): Sc in st 75 through st 86. Ch 1, turn. (12 sc)
Row 39 Left (RS): Sc across 12 sts. Ch 1, turn. (12 sc)
Row 40 Left (WS): Sc across 12 sts. Ch 1, turn. (12 sc)
Row 41 Left (RS): Sc across 12 sts. Do not fasten off.
Heart Lobe Shaping and Rejoining
Row 42 (WS, rejoining row): Pick up working loop of right section. Sc across right section (57 sts). Now work across the gap to create the top of the heart: sc2tog over the last st of the right section and the first st of the heart gap zone. Sk 5 sts (center of gap). Sc2tog over next gap st and first st of left section. Sc across left section 12 sts. Ch 1, turn. (71 sc)
Front Panel Armhole Shaping
Row 43 (RS): Sl st across first 5 sts, ch 1, sc in same st as last sl st, sc across to last 4 sts, leave last 4 sts unworked. Ch 1, turn. (63 sc)
Row 44: Sc2tog, sc across to last 2 sts, sc2tog. Ch 1, turn. (61 sc)
Row 45: Sc2tog, sc across to last 2 sts, sc2tog. Ch 1, turn. (59 sc)
Row 46: Sc2tog, sc across to last 2 sts, sc2tog. Ch 1, turn. (57 sc)
Row 47: Sc across even. Ch 1, turn. (57 sc)
Rows 48 through 60: Sc in each st across. Ch 1, turn. (57 sc each row)
Front Neckline and Shoulder Shaping
Place a stitch marker at st 20 and st 37 to define your sections.
Right Shoulder Section:
Row 61 (RS): Sc across first 20 sts only. Ch 1, turn. (20 sc)
Rows 62 through 63: Sc across even. Ch 1, turn. (20 sc each row)
Fasten off, leaving a 12 inch tail for seaming.
Left Shoulder and Lapel Section:
Rejoin yarn at st 38.
Row 61 (RS): Sc across sts 38 through 57. Ch 1, turn. (20 sc)
Rows 62 through 63: Sc across even. Ch 1, turn. (20 sc each row)
Fasten off, leaving a 12 inch tail for seaming.
Sleeves (Make 2)
Each sleeve is worked flat and seamed into a tube, then set into the armhole.
Foundation chain: Ch 53.
Row 1 (RS): Sc in 2nd ch from hook and in each ch across. Ch 1, turn. (52 sc)
Rows 2 through 6: Sc in each st across. Ch 1, turn. (52 sc each row)
Sleeve Body Shaping
Row 7: Sc2tog, sc across to last 2 sts, sc2tog. Ch 1, turn. (50 sc)
Rows 8 through 12: Sc across even. Ch 1, turn. (50 sc each row)
Row 13: Sc2tog, sc across to last 2 sts, sc2tog. Ch 1, turn. (48 sc)
Rows 14 through 18: Sc across even. Ch 1, turn. (48 sc each row)
Row 19: Sc2tog, sc across to last 2 sts, sc2tog. Ch 1, turn. (46 sc)
Rows 20 through 24: Sc across even. Ch 1, turn. (46 sc each row)
Sleeve Cap Shaping
Row 25: Sl st across first 4 sts, ch 1, sc in same st as last sl st, sc across to last 3 sts, leave last 3 sts unworked. Ch 1, turn. (40 sc)
Row 26: Sc2tog, sc across to last 2 sts, sc2tog. Ch 1, turn. (38 sc)
Row 27: Sc2tog, sc across to last 2 sts, sc2tog. Ch 1, turn. (36 sc)
Row 28: Sc2tog, sc across to last 2 sts, sc2tog. Ch 1, turn. (34 sc)
Row 29: Sc2tog, sc across to last 2 sts, sc2tog. Ch 1, turn. (32 sc)
Row 30: Sc2tog, sc across to last 2 sts, sc2tog. Ch 1, turn. (30 sc)
Row 31: Sc2tog, sc across to last 2 sts, sc2tog. Ch 1, turn. (28 sc)
Row 32: Sc2tog, sc across to last 2 sts, sc2tog. Ch 1, turn. (26 sc)
Row 33: Sc2tog, sc across to last 2 sts, sc2tog. Ch 1, turn. (24 sc)
Row 34: Sc2tog, sc across to last 2 sts, sc2tog. Ch 1, turn. (22 sc)
Row 35: Sc2tog, sc across to last 2 sts, sc2tog. Ch 1, turn. (20 sc)
Row 36: Sc2tog, sc across to last 2 sts, sc2tog. Ch 1, turn. (18 sc)
Fasten off, leaving a 16 inch tail for seaming into armhole.
Sleeve Cuff Ruffle
With RS facing, rejoin yarn at foundation chain edge of sleeve.
Ruffle Row 1: Work 2 sc in every foundation chain st across. Ch 1, turn. (104 sc)
Ruffle Row 2: Sc in each st across. Ch 1, turn. (104 sc)
Ruffle Row 3: Sc in each st across. (104 sc)
Fasten off and weave in ends.
Collar
Seam both shoulder seams first using whipstitch on the wrong side, matching the 20 stitch shoulder sections.
Collar Pickup Row
With RS facing, rejoin yarn at back right shoulder seam. Work 1 sc in each available st around the entire neckline opening, working into the row ends at the front neckline sides at a rate of 1 sc per row end.
Pickup total: Approximately 62 sc around neckline. Adjust as needed for a flat pickup. Ch 1, turn. (62 sc)
Collar Rows
Row 1 (WS of collar): Sc in each st across. Ch 1, turn. (62 sc)
Row 2 (RS of collar): Inc in first st, sc across to last st, inc in last st. Ch 1, turn. (64 sc)
Row 3: Sc across even. Ch 1, turn. (64 sc)
Row 4: Inc in first st, sc across to last st, inc in last st. Ch 1, turn. (66 sc)
Row 5: Sc across even. Ch 1, turn. (66 sc)
Row 6 (collar fold line): Working in BLO, sc in each st across. Ch 1, turn. (66 sc)
Rows 7 through 10: Sc across even. Ch 1, turn. (66 sc each row)
Fasten off. The BLO row creates a natural fold line so the collar lapel folds over cleanly.
Button Band Edging
With RS facing, rejoin yarn at the top right corner of the front panel. Work 1 sc in each row end down the diagonal front edge, across the bottom pointed hem, and up the opposite front edge to the left shoulder.
Work 3 rows of sc along this entire front edge. On Row 2, place 4 buttonholes evenly spaced on the right front overlap edge:
Buttonhole: Ch 2, sk 2 sts. On the following row, work 2 sc into the ch-2 sp.
Position buttons: one near the top collar break, two evenly spaced between, and one at the lower overlap.
Finishing and Assembly
Step 1: Block all pieces before seaming. Wet block by soaking in cool water for 10 minutes, pressing out excess water in a towel, and pinning to measurements on a foam mat. Allow to dry completely.
Step 2: Seam shoulder seams as described in the collar section.
Step 3: Seam side seams with WS together using whipstitch or slip stitch from hem to armhole.
Step 4: Seam sleeves by folding each sleeve flat and seaming the side edge to form a tube.
Step 5: Set in sleeves with RS facing outward. Pin the sleeve cap around the armhole, gathering slightly at the top for the puff effect. Seam with slip stitch from the RS for a visible seam finish.
Step 6: Attach collar to any remaining open neckline edges using slip stitch on WS.
Step 7: Sew buttons onto the left front overlap using coordinating thread.
Step 8: Weave in all remaining ends securely.
Size Customization Tips
To adjust bust size: Add or remove stitches from the foundation chain in multiples of 2. Each additional 2 sts adds approximately 0.4 inches (1 cm) to the bust.
To lengthen the body: Add rows between the foundation and the armhole shaping section. Every 2.2 rows equals approximately 0.4 inches (1 cm).
To adjust sleeve circumference: Add or remove stitches from the sleeve foundation chain. Adjust sleeve cap decreases proportionally.
For Medium or Large: Add 10 sts (Medium) or 20 sts (Large) to the back and front panel foundation chains. Adjust shoulder stitch counts proportionally, keeping the neckline opening at approximately 28 sts for the back.
Care Instructions
Hand wash in cool water with gentle detergent. Do not wring. Press out excess water by rolling in a clean towel. Reshape and lay flat to dry. Do not tumble dry. If pressing is needed, use a pressing cloth and low steam iron on the wrong side only.
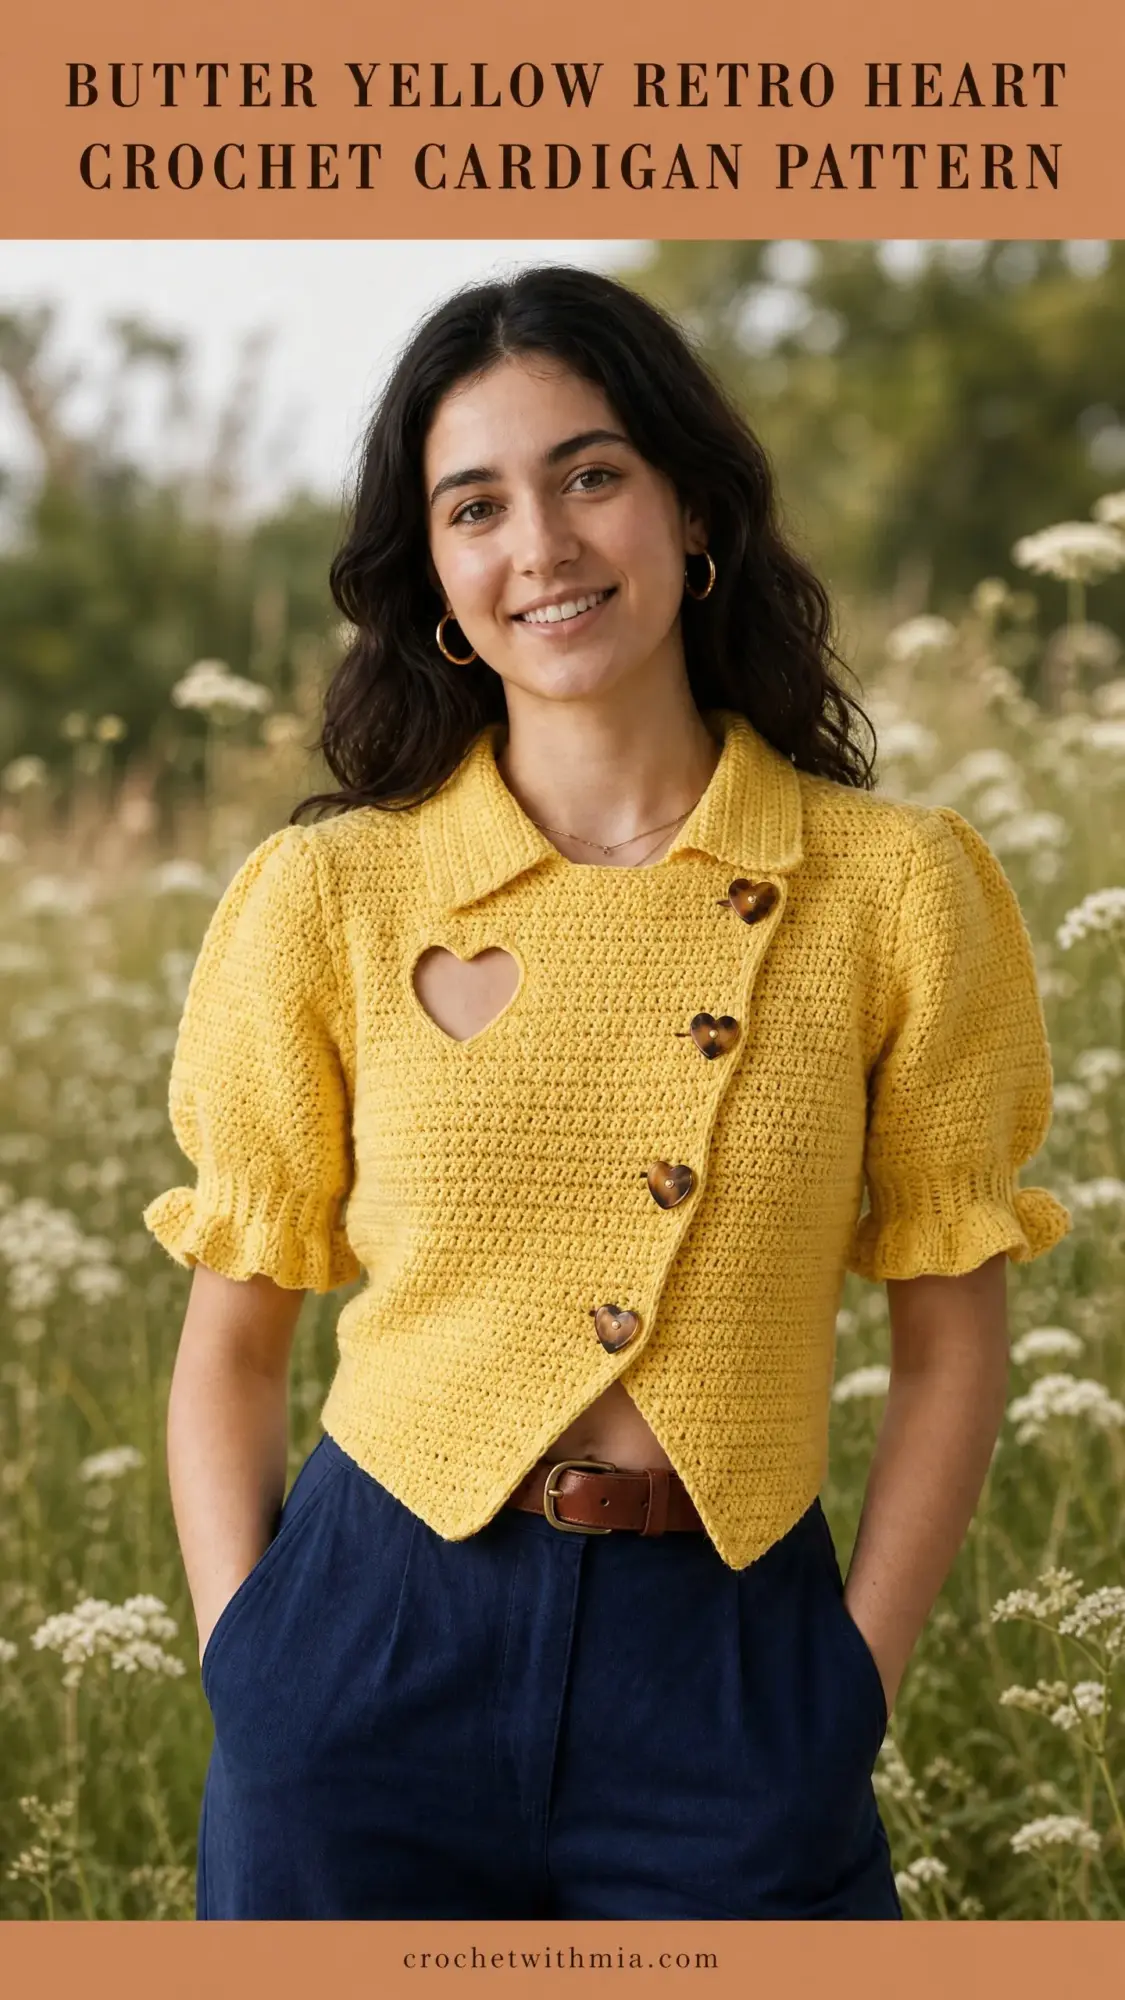
You Did It!
Thank you so much for choosing this pattern. I genuinely hope you love wearing your finished butter yellow retro heart crochet cardigan as much as I loved designing it. The first time you button it up and see that heart cutout in the mirror, you’re going to feel like a million bucks.
If you found this crochet tutorial helpful, I’d love for you to save it to your Pinterest boards so you can find it easily later. And please, please leave a comment below if you make this cardigan. I’d absolutely love to see your finished projects and hear which color you chose!