
I call this one the Maple Grove Runner, and it has quite the story behind it. The design started in my notebook about three years ago when I was sketching autumn leaf motifs during a particularly beautiful October. My grandmother had this vintage doily on her sideboard that I always admired as a kid, and I wanted to capture that same heirloom feeling while adding something unmistakably fall. The burnt orange petals with their deep crimson centers remind me of the maple tree in her backyard, and every time I look at this finished piece on my own table, I think of those crisp autumn afternoons at her house.
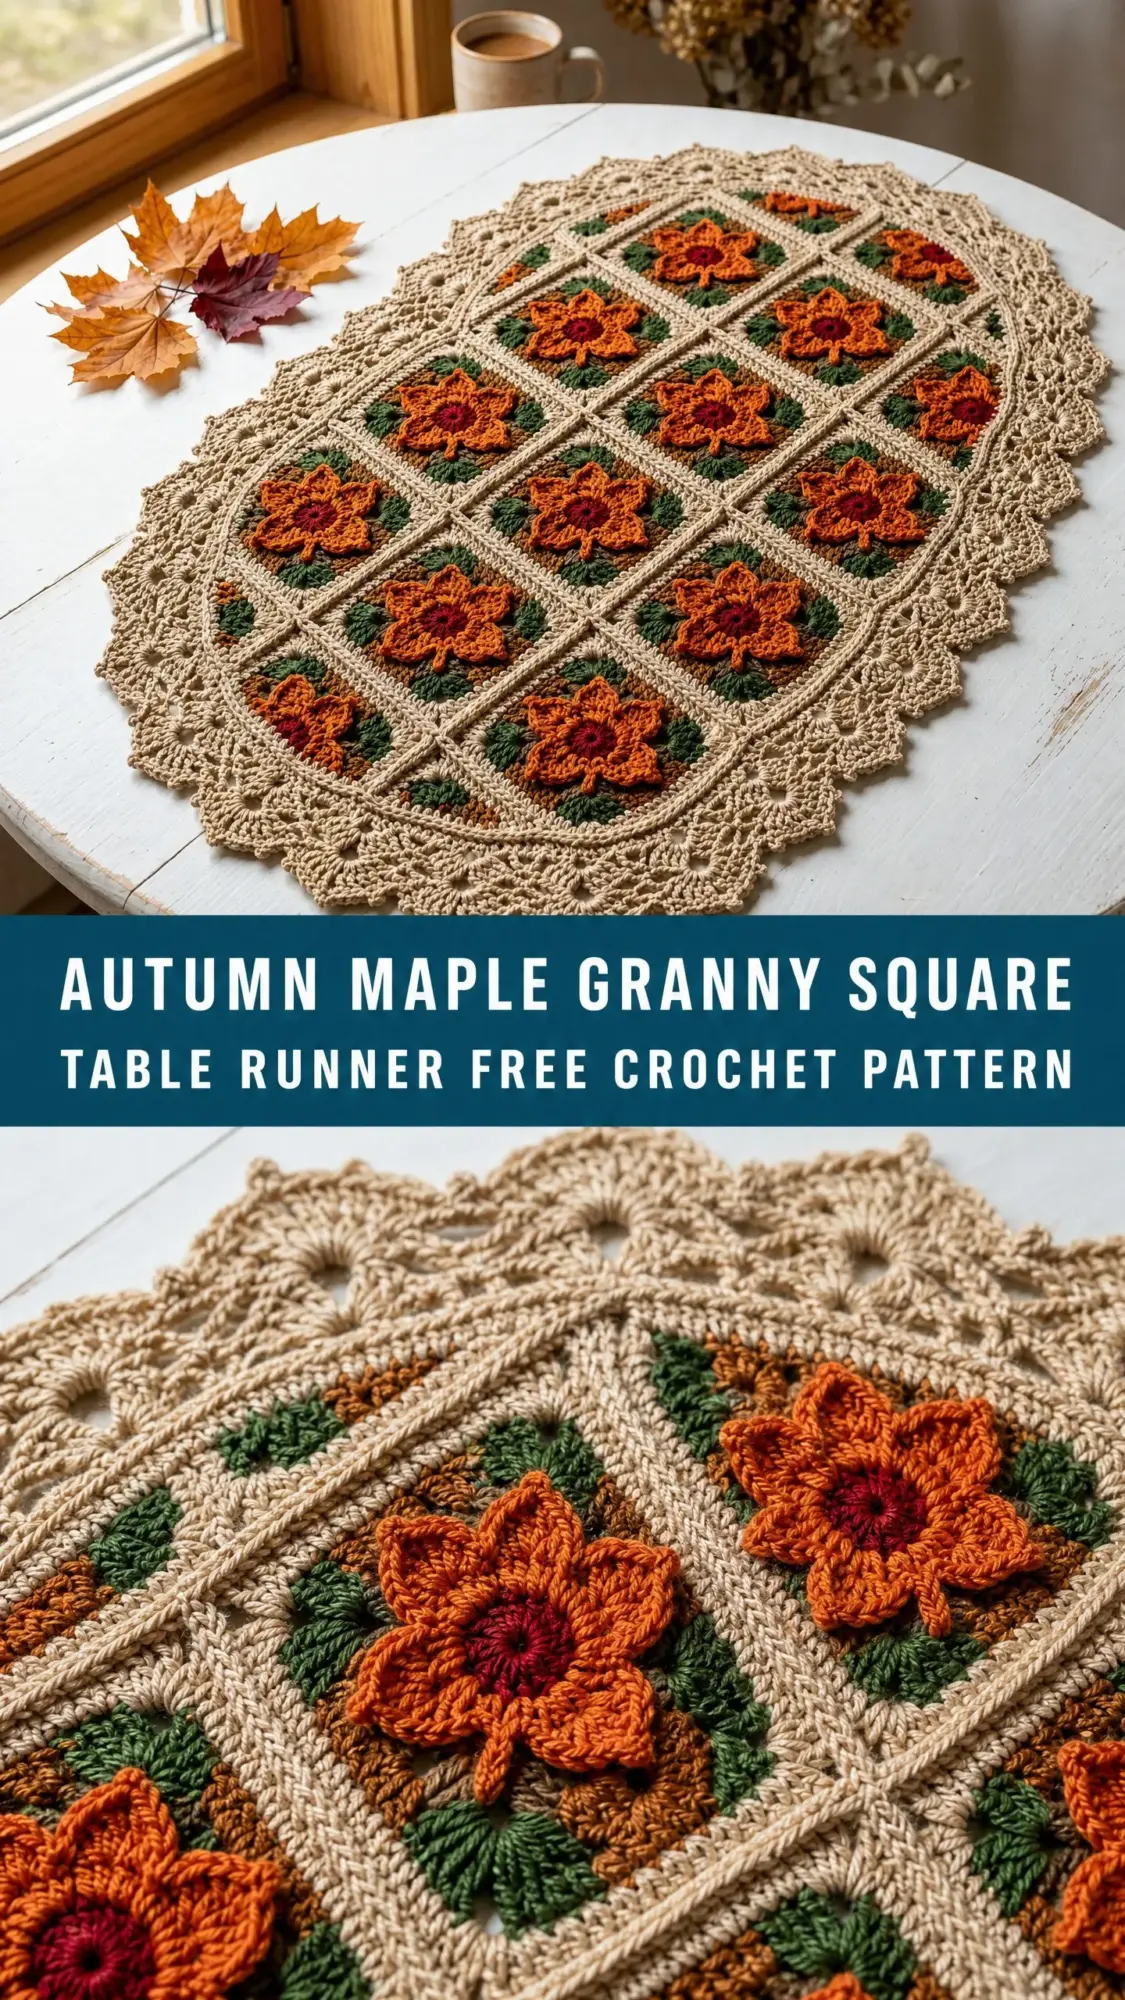
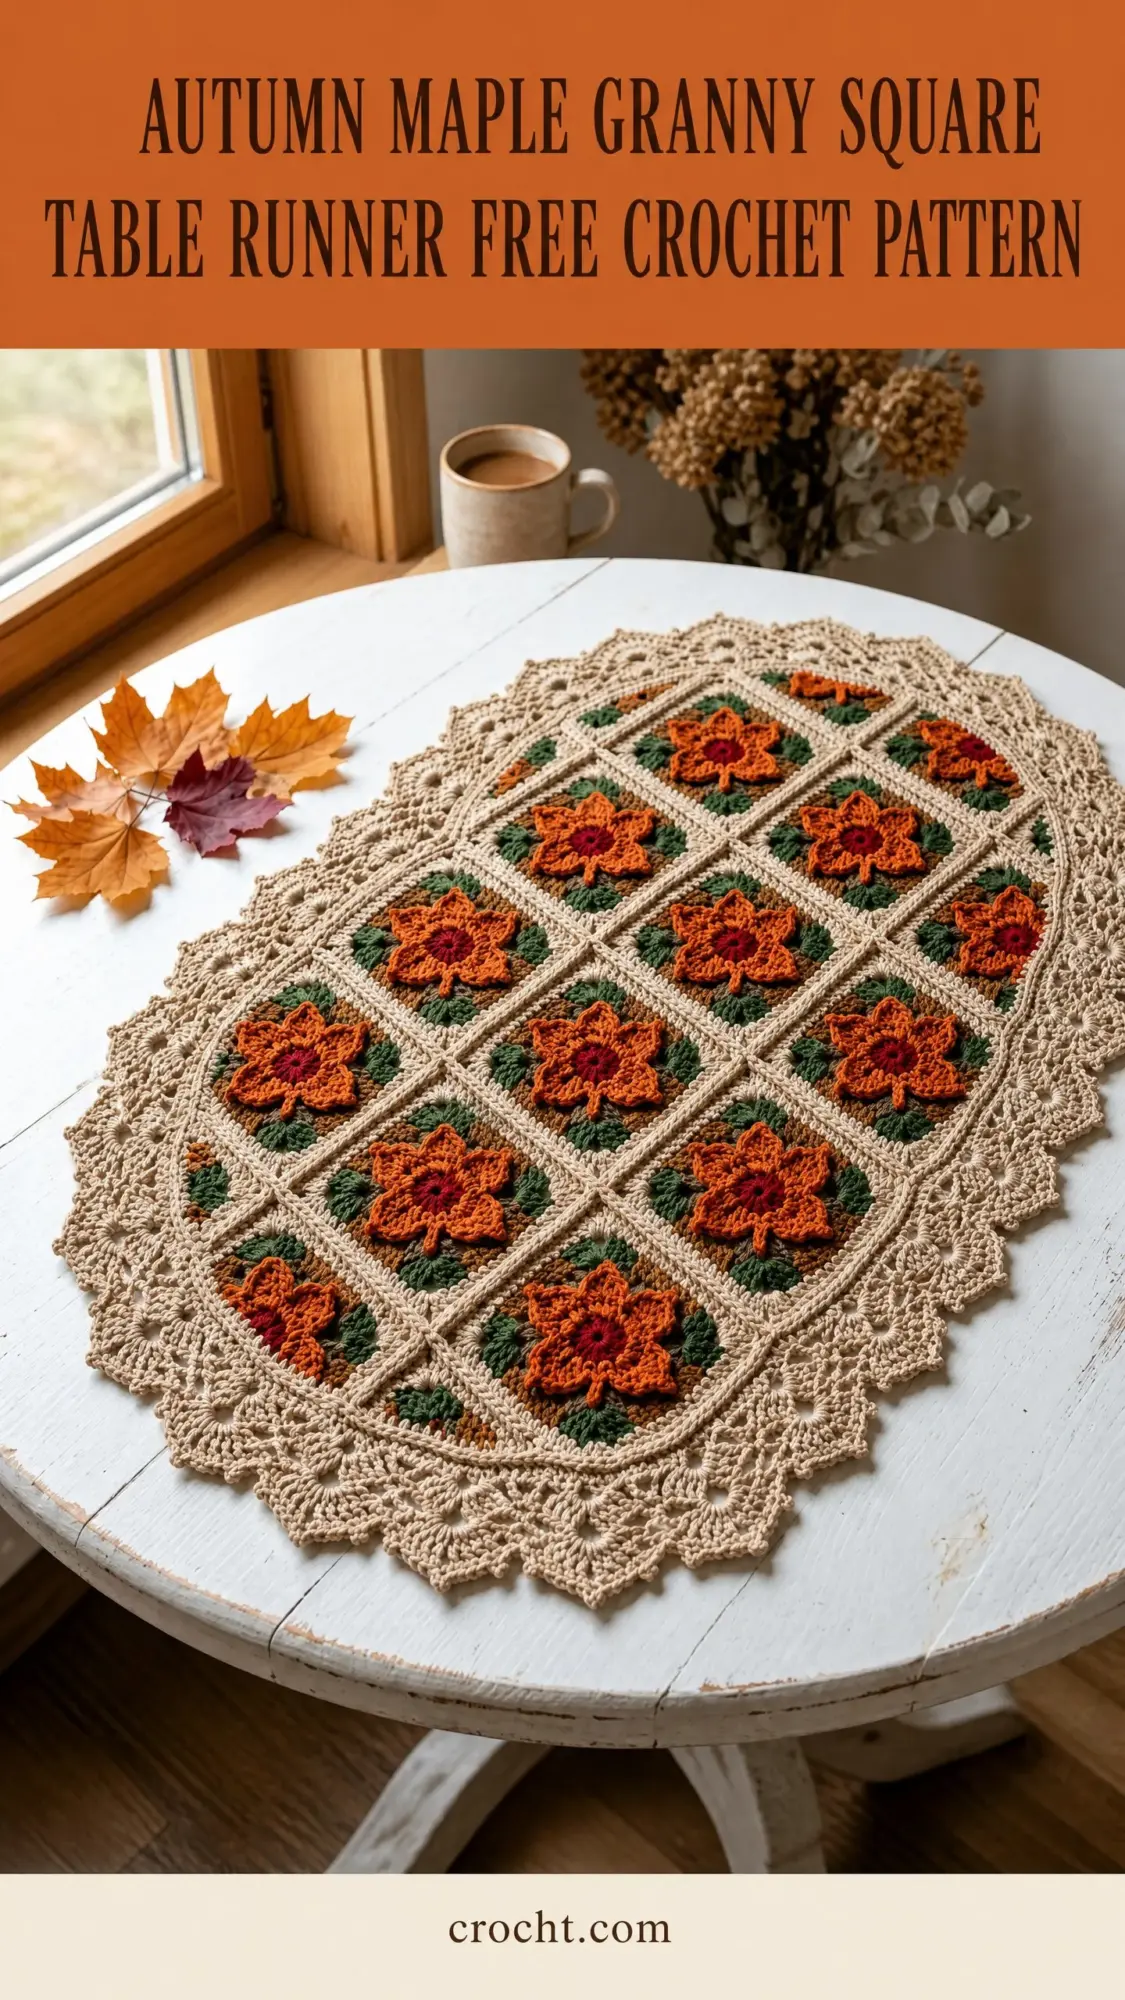
This table runner combines the cozy familiarity of granny squares with an elegant oval frame and a delicate lace border that gives it that treasured, passed-down-through-generations quality. You will work twelve identical flower squares, join them into a neat grid, then build outward with a smooth transition frame and a pointed picot edging.
If you have been wanting to try a project that looks impressive but uses stitches you probably already know, this is the one. The construction is straightforward once you understand the flow, and I will walk you through every single step.
Pattern Overview and Skill Level
This crochet pattern falls into the advanced beginner to intermediate range. The granny squares themselves use only chains, slip stitches, double crochets, and clusters, which are accessible if you have completed a few basic projects. The raised flower petal technique requires working into skipped rounds and paying attention to your tension, but it is not as tricky as it sounds once you see the logic behind it.
The oval frame shaping and final lace edging require careful counting and working increases at set intervals. No complex construction seams or garment shaping are involved. If you can follow a pattern and count your stitches, you can absolutely make this.
Time estimate: Approximately 18 to 24 hours total for an average-speed crocheter. Each granny square takes roughly 45 to 60 minutes. Assembly and frame take 3 to 4 hours. The lace edging takes 2 to 3 hours.
Finished Measurements
Your completed Autumn Maple Granny Square Table Runner will measure approximately 14 inches wide by 22 inches long (35.5 cm by 56 cm), including the lace border.
The joined granny square panel before adding the frame measures approximately 9 inches wide by 12 inches long (23 cm by 30.5 cm). Each individual granny square measures 3 inches by 3 inches (7.5 cm by 7.5 cm) when blocked.
Materials You Will Need
Yarn
You will need four colors of DK weight yarn (also called light worsted or 8-ply):
Yarn Suggestions
Paintbox Yarns Simply DK (100% acrylic, 137 yards per 50 g ball) is smooth, affordable, and widely available in all four colorways. It blocks to a crisp finish and holds its shape well. You will need 2 balls of Color A, 2 balls of Color B, 1 ball of Color C, and 1 ball of Color D.
Lion Brand 24/7 Cotton (100% mercerized cotton, 186 yards per 100 g ball) gives the runner a beautiful drape, subtle sheen, and excellent stitch definition. It is machine washable and durable for frequent use. You will need 2 balls of Color A, 1 ball of Color B, 1 ball of Color C, and 1 ball of Color D.
Scheepjes Catona (100% mercerized cotton, 62 yards per 25 g ball) is a premium choice with outstanding color clarity. You will need 4 balls of Color A, 3 balls of Color B, 1 ball of Color C, and 2 balls of Color D.
Any smooth DK weight yarn will work. Avoid fluffy, hairy, or textured yarns because the flower petal detail will be lost. Cotton or cotton-blend yarns are especially well suited to table accessories as they lie flat and wash cleanly.
Hook and Notions
Gauge
One completed granny square, blocked = 3 inches by 3 inches (7.5 cm by 7.5 cm)
In double crochet flat fabric with Color A: 18 dc and 9 rows = 4 inches (10 cm)
Gauge matters here. Take the time to swatch and adjust your hook size as needed so your table runner achieves the stated finished size and the oval frame sits correctly around the joined panel.
Abbreviations and Stitch Definitions
Let me walk you through every abbreviation used in this pattern. If you are newer to crochet, read through this section before starting.
Special Stitches Explained
Front Post Double Crochet (fpdc)
This stitch creates raised texture by working around the post (vertical bar) of a stitch rather than into its top loops. Yarn over, insert hook from front to back to front around the post of the indicated stitch in a lower round, yarn over and pull up a loop, then yarn over and pull through 2 loops twice. The stitch sits on the front surface of the fabric.
Three Double Crochet Cluster (3dc-cl)
Work three incomplete double crochets in the same stitch or space, then join them at the top. Yarn over, insert hook, pull up a loop, yarn over and pull through 2 loops. Repeat this two more times in the same spot. You will have 4 loops on your hook. Yarn over and pull through all 4 loops. This creates one closed cluster that counts as 1 stitch unit.
Four Double Crochet Cluster (4dc-cl)
Same concept as above, but work four incomplete double crochets before pulling through all 5 loops on the hook.
Picot
Chain 3, then slip stitch into the first chain made (the chain closest to the hook). This forms a small closed decorative loop.
Shell
Work 5 dc into the same stitch or space unless otherwise stated.
V-Stitch (V-st)
Work (dc, ch 2, dc) into the same stitch or space.
Pattern Notes Before You Begin
Read through these notes before starting. They will save you confusion later.
1. The granny squares are worked in joined rounds with the right side always facing you. Do not turn at the end of each round unless specifically instructed.
2. At the start of each round, the beginning chain counts as stated. A beg-ch-3 counts as 1 dc. A beg-ch-4 counts as 1 tr.
3. For color changes, join with a standing stitch for the cleanest finish, or join with a slip stitch and chain to begin. Fasten off and weave in ends before proceeding to the next color.
4. The flower petal forms over two stages. Rounds 1 and 2 build the flower base. Round 3 works the green background but skips specific stitches. Round 4 reaches back into those skipped positions and works fpdc to pull the petals forward.
5. Make all 12 granny squares before beginning the join.
6. The join uses a flat JAYG seam. Place squares wrong sides together and slip stitch through both sets of back loops along the shared edge.
7. The oval frame is worked in continuous rounds directly onto the outside of the joined panel.
8. Weave in all ends securely before blocking. Wet blocking is strongly recommended.
Granny Square Pattern (Make 12)
Each square measures 3 inches by 3 inches when blocked. Work in 6 rounds using Colors C, B, D, and A.
Round 1 (Color C)
Make a magic ring.
Ch 3 (counts as first dc), work 11 dc into the ring, sl st to top of beg ch-3 to join. Pull ring closed.
(12 dc)
Round 2 (Color B)
Join Color B in any stitch. Ch 3 (counts as first dc of first cluster).
Work a 3dc-cl starting in the same stitch as join (first leg is the standing chain, so work 2 more legs in same st), ch 2. Skip next st.
(3dc-cl in next st, ch 2, skip next st) 5 times.
Sl st to top of first cluster to join.
(6 clusters, 6 ch-2 spaces)
Fasten off Color C. Do not fasten off Color B yet.
Round 3 (Color D)
Join Color D in any ch-2 space.
Ch 3 (counts as dc), work 2 dc in same ch-2 sp (3 dc total in first sp).
Ch 1. In next ch-2 sp: work 3 dc. Ch 1.
Rep (3 dc in next ch-2 sp, ch 1) around all 6 spaces.
Sl st to top of beg ch-3 to join.
(18 dc, 6 ch-1 spaces)
This round forms the background between petals.
Round 4 (Color B, Petal Round)
Do not fasten off Color D yet. Join Color B with a standing sc in the top of any Color B cluster from Round 2.
This round works front post stitches around Round 2 clusters, pulling them forward to create raised petals.
Sl st into ch-1 sp between first and second dc group of Round 3.
(Fpdc around nearest Round 2 cluster, ch 1, fpdc around same Round 2 cluster, sl st into next ch-1 sp of Round 3) 6 times around.
Sl st to first sl st to join.
(12 fpdc, 6 ch-1 spaces, forming 6 two-pronged petals)
Fasten off Color B.
Round 5 (Color D, Green Square Border)
Join Color D in any ch-1 sp between petals.
Ch 3 (counts as dc), 2 dc in same sp (first side group). Ch 1. 3 dc in next ch-1 sp. Ch 2 (first corner made). 3 dc in next ch-1 sp. Ch 1. 3 dc in next ch-1 sp. Ch 2 (second corner made). 3 dc in next ch-1 sp. Ch 1. 3 dc in last ch-1 sp. Ch 2 (third corner made).
Now return to start: work 2 dc in the base of the beg ch-3. Ch 2 (fourth corner made).
Sl st to top of beg ch-3 to join.
(24 dc, 4 ch-2 corner spaces, 3 ch-1 side spaces)
Fasten off Color D.
Round 6 (Color A, Outer Frame)
Join Color A in any ch-2 corner space.
Ch 3 (counts as dc), (dc, ch 2, 2 dc) in same corner sp (corner cluster made).
Dc across each dc and ch-1 sp to next corner (work 1 dc in each dc, 1 dc in each ch-1 sp).
(2 dc, ch 2, 2 dc) in each corner sp.
Dc across each dc and ch-1 sp along each side.
Sl st to top of beg ch-3 to join.
(48 dc, 4 ch-2 corner spaces)
Fasten off Color A. Weave in all ends. Square should measure 3 inches x 3 inches blocked.
Checkpoint 1
After completing all 12 granny squares, each should measure 3 inches by 3 inches after a light blocking. Lay them out in a 3-column by 4-row grid and confirm the arrangement looks symmetrical with all flowers facing the same direction.
Joining the Squares
Arrange the 12 squares in a 3-wide by 4-long grid with RS facing up. Join squares in horizontal rows first (3 squares per row, 4 rows), then join the rows to each other.
Joining Method (Flat Slip Stitch Seam)
Hold two squares with WS together and RS facing outward.
Join Color A in the corner ch-2 space at one end of the shared edge.
Ch 1, sl st through both corner spaces.
Working through the back loops only of both squares simultaneously, sl st in each dc across the shared edge (approximately 8 sts per side between corners).
Sl st through both corner ch-2 spaces at the other end.
Fasten off.
Repeat for all horizontal seams within each row, then join the rows. At intersections where four squares meet, sl st through all available loops cleanly.
Checkpoint 2
Your joined panel should measure 9 inches wide by 12 inches long. Lay it flat and confirm there is no cupping or warping. If needed, wet block the joined panel at this stage.
Oval Transition Frame
The oval frame converts the rectangular panel into an oval shape by working increased corner rounds at the two short ends and straight rounds along the two long sides.
Before beginning, count the stitches around the outer perimeter of the joined panel:
Frame Round 1 (Color A)
Join Color A in the middle dc of any long side.
Ch 3 (counts as dc), dc in each st across long side: 34 dc.
At each short-end corner: work (2 dc, ch 2, 2 dc) for the oval curve start.
Work 1 dc in each st across short end: 26 dc.
At each long-side corner: work (2 dc, ch 2, 2 dc).
Rep for second long side and second short end.
Sl st to top of beg ch-3 to join.
(136 dc, 4 ch-2 corner spaces)
Frame Round 2
Ch 3, dc in each dc around.
At each ch-2 corner space: (2 dc, ch 2, 2 dc).
Sl st to join.
(152 dc, 4 ch-2 corner spaces)
Frame Round 3
Ch 3, dc in each dc around.
At each ch-2 corner space: (2 dc, ch 2, 2 dc).
Sl st to join.
(168 dc, 4 ch-2 corner spaces)
Frame Round 4 (Mesh Round)
Ch 5 (counts as dc + ch 2), skip 2 sts, (dc in next st, ch 2, skip 2 sts) across each side.
At each corner sp: (dc, ch 2, dc, ch 2, dc) into the ch-2 corner space.
Sl st to 3rd ch of beg ch-5 to join.
(Approximately 60 total V-units)
Frame Round 5
Ch 3, work 2 dc in each ch-2 sp around, 1 dc in each dc around.
At each corner: work (2 dc, ch 2, 2 dc) in the center corner ch-2 sp.
Sl st to join.
(Approximately 196 dc, 4 ch-2 spaces)
Checkpoint 3
After Frame Round 5, the piece should be firmly oval-shaped and measure approximately 12 inches wide by 20 inches long. The edge should lie flat without ruffling or pulling.
Lace Border
The lace border produces the deep pointed scallop edging that gives this runner its characteristic silhouette.
Border Round 1
Join Color A in any dc along the long side.
Ch 1, sc in same st.
(Skip 2 sts, shell (5 dc) in next st, skip 2 sts, sc in next st) around, adjusting repeats as needed at the short ends.
At the short ends, work (shell, ch 2, shell) in the corner ch-2 space for added fullness.
Sl st to first sc to join.
(Approximately 34 shell units total)
Border Round 2 (Picot Points)
Sl st to center dc of first shell (3rd dc of 5-dc shell).
Ch 3, (dc, ch 1, dc, ch 1, dc) in same center dc (mini-fan).
Ch 1, sc in next sc (between shells).
Ch 1, (dc, ch 1, dc, ch 1, dc) in center dc of next shell.
Ch 1, sc in next sc.
Rep around.
At double-shell corners: work the same mini-fan in each of the two shell centers with a sc and ch-2 between them.
Sl st to top of beg ch-3 to join.
(Approximately 34 mini-fans, 32 sc)
Border Round 3 (Final Picot Tips)
Sl st to first ch-1 sp of first fan.
Sc in ch-1 sp, picot, sc in next ch-1 sp, picot, sc in last ch-1 sp of fan.
Ch 2, sc in sc between fans, ch 2.
Rep around.
At corners: work an extra (sc, picot) in the corner sc for fullness.
Sl st to first sc to join. Fasten off.
(Approximately 68 picots total)
Checkpoint 4
After the lace border, the runner should measure approximately 14 inches wide by 22 inches long. The pointed picot border should stand out cleanly all around the oval edge.
Size Customization Tips
To make a longer table runner: Add more squares in the long direction. Each additional row of 3 squares adds approximately 3 inches to the length. Add 8 dc to each long side of the frame per additional row.
To make a wider runner: Add another column of 4 squares to make a 4 x 4 grid. This adds approximately 3 inches to the width.
To make a larger table centerpiece: Use a 4 x 4 grid of squares (16 squares total) and work an additional 2 rounds of plain dc in the oval frame before the mesh round.
To scale up the yarn weight: Moving from DK to worsted weight and a size G-6 or H-8 hook will increase finished dimensions by approximately 20 to 25 percent.
Finishing and Blocking
Before blocking, weave in all yarn ends securely using a yarn needle. Bury ends by weaving in different directions to prevent unraveling.
Fill a basin with cool water and a small amount of gentle wool wash. Submerge the runner fully and gently squeeze until saturated. Lift carefully and press out excess water. Roll in a clean dry towel and press gently.
Lay the runner on a blocking board and shape it into an even oval. Use rust-proof pins to pin the picot points outward at regular intervals. Pin the short ends into smooth curves and the long sides into straight lines.
Allow to dry completely, which may take 24 hours. Do not move or use until fully dry. Remove pins once dry, and the lace border will hold its scalloped shape.
Care Instructions
For acrylic yarn: Machine wash on gentle cycle in cold water. Lay flat to dry.
For cotton yarn: Machine wash on delicate cycle in cool water, or hand wash. Lay flat to dry. Light ironing on cotton setting is acceptable.
For wool yarn: Hand wash only in cool water with wool wash. Lay flat to dry away from direct sunlight.
Store the table runner laid flat or loosely rolled, not folded on sharp creases, to preserve the lace edging shape.
Final Thoughts on the Autumn Maple Granny Square Table Runner
This crochet table runner pattern brings together so many techniques I love: the rhythm of granny squares, the satisfaction of watching raised petals emerge, and the elegance of a lace border that transforms a simple rectangle into something truly special. Whether you make it for your own autumn table or as a gift for someone who appreciates handmade treasures, this piece is sure to become a favorite.
Thank you so much for choosing to make this pattern. I genuinely appreciate you trusting me with your crafting time. If you make a Maple Grove Runner, I would absolutely love to see it. Tag me on Instagram or share a photo in my Facebook group. Seeing your finished projects is honestly the best part of designing.
If this pattern caught your eye, go ahead and pin it to your Pinterest boards so you can find it when you are ready to start. And please drop a comment below if you give it a try. I read every single one, and hearing about your experience helps me create better patterns for you in the future. Happy crocheting!