
Let me guess. You took one look at a hexagon blanket and thought, "That looks way too complicated for me." Maybe you assume joining all those motifs is a nightmare, or that keeping track of a rainbow color sequence will make your head spin. I get it. I really do. But here’s the truth: this Sunny Lemon Hexagon Kitchen Throw is genuinely easier than it looks, and I’m going to break down every single step so you can tackle it with confidence.
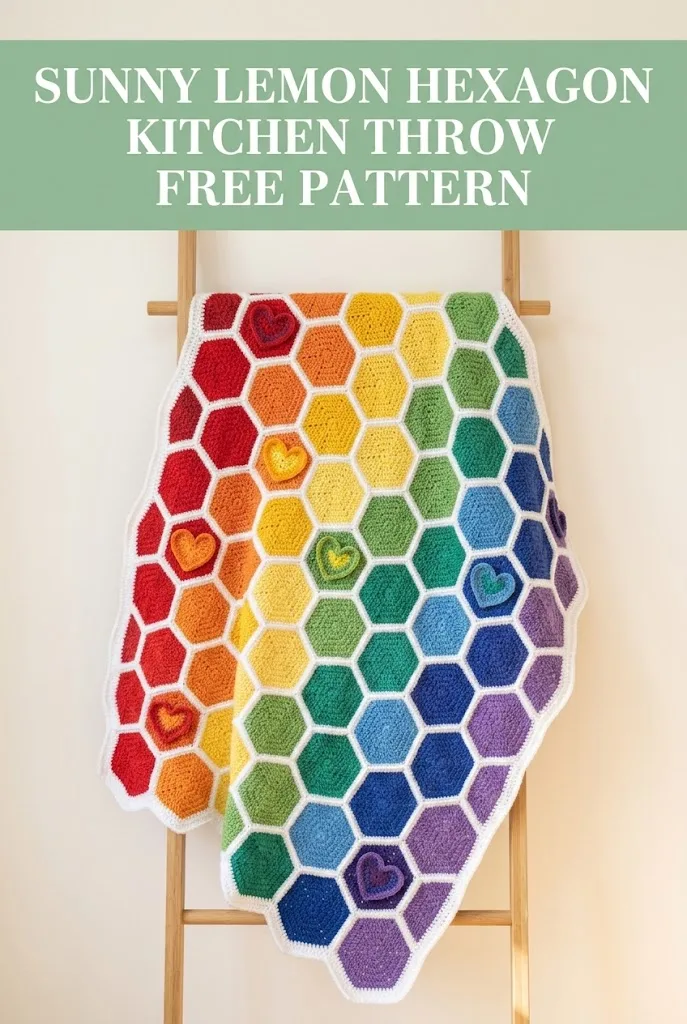
Whether you’re a beginner who has mastered the basics and wants a fun challenge, or an experienced crocheter looking for a satisfying portable project, this pattern meets you where you are. The hexagons use simple stitches you probably already know. The color placement follows a logical rainbow flow. And those adorable little hearts scattered across the surface? They’re added at the end, so you can skip them entirely if you prefer a cleaner look.
Why This Rainbow Hexagon Throw Works So Well
This throw brings together everything I love about modular crochet. You’re working small, manageable pieces that fit in your bag. You can see progress quickly. And the rainbow gradient creates a stunning visual impact without requiring complicated colorwork within each motif.
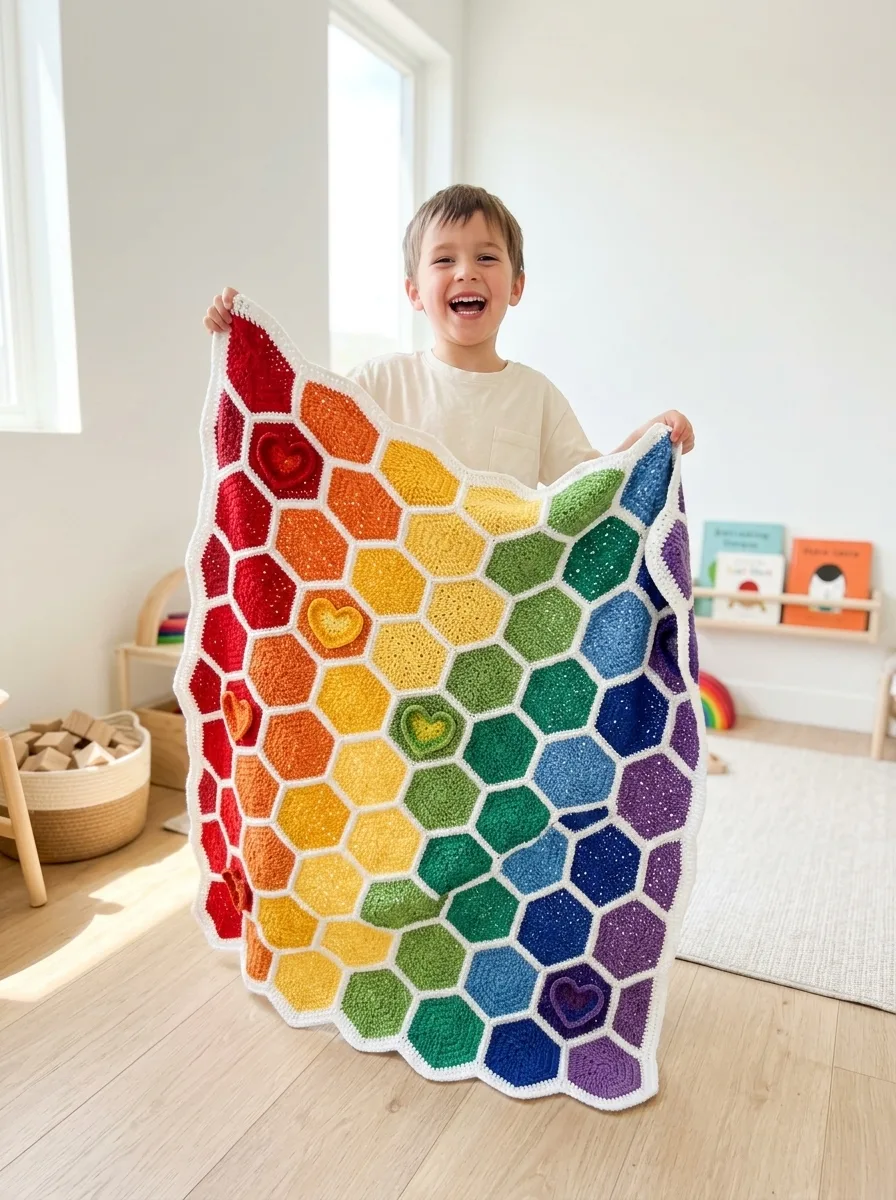
The finished throw measures approximately 45 by 55 inches, making it perfect for draping over a sofa, adding color to a reading nook, or gifting to someone who needs a little brightness in their life. The white border and join lines create a honeycomb effect that makes each color pop beautifully.
I designed this piece to be a relaxing project you can pick up and put down. Each hexagon takes roughly 15 to 20 minutes once you find your rhythm, and because they’re all made the same way, you’ll memorize the pattern after just a few motifs.
Materials You Will Need
Yarn:
– Red: approximately 150 yards
– Orange: approximately 150 yards
– Yellow: approximately 150 yards
– Green: approximately 150 yards
– Blue: approximately 150 yards
– Purple: approximately 150 yards
– White: approximately 300 yards for joining and border
I used a soft acrylic blend with good stitch definition. Look for yarn that holds its shape well since hexagons need crisp edges for clean joining. Cotton blends also work beautifully and give the throw a lovely drape.
Hook:
Notions:
Gauge
One completed hexagon measures approximately 4.5 inches from flat edge to flat edge. Work one hexagon and check your size. If your hexagon is larger, go down a hook size. If smaller, go up a hook size. Consistent gauge across all your hexagons ensures they join smoothly.
Skill Level
This crochet pattern is intermediate beginner friendly. You should be comfortable with basic stitches and working in the round. The construction is repetitive and predictable, which makes it perfect for learning hexagon techniques.
Abbreviations and Stitch Definitions
Before we dive in, let me explain every stitch you’ll use:
ch = chain. Wrap yarn over hook and pull through the loop on your hook. This creates the foundation for your work.
sl st = slip stitch. Insert hook into stitch, yarn over, pull through both the stitch and the loop on your hook in one motion. Used for joining rounds.
sc = single crochet. Insert hook into stitch, yarn over, pull up a loop (two loops on hook), yarn over, pull through both loops. Creates a short, tight stitch.
dc = double crochet. Yarn over, insert hook into stitch, yarn over, pull up a loop (three loops on hook), yarn over, pull through two loops (two loops remain), yarn over, pull through remaining two loops. Creates a taller stitch.
hdc = half double crochet. Yarn over, insert hook into stitch, yarn over, pull up a loop (three loops on hook), yarn over, pull through all three loops. Height falls between single and double crochet.
2dc = two double crochet stitches worked into the same stitch. This creates an increase.
dc2tog = double crochet two together. A decrease that joins two stitches into one. Yarn over, insert into stitch, pull up loop, yarn over, pull through two (two loops remain), yarn over, insert into next stitch, pull up loop, yarn over, pull through two (three loops remain), yarn over, pull through all three.
How to Crochet the Basic Hexagon Motif
Each hexagon is worked from the center outward in continuous rounds. You will make approximately 63 hexagons total for the throw shown.
Magic Ring Setup:
Create a magic ring by wrapping yarn around your fingers twice, inserting hook, pulling up a loop, and chaining to secure. This gives you an adjustable center that closes tightly.
If magic rings intimidate you, chain 4 and slip stitch to form a ring instead. Either method works perfectly.
Round 1: Into the magic ring, work ch 3 (this counts as your first dc), then work 11 dc into the ring. Sl st to the top of the beginning ch 3 to join. Pull the magic ring tail to close the center hole. (12 dc)
Round 2: Ch 3 (counts as dc), dc in same stitch. Work 2dc in each stitch around. Sl st to top of beginning ch 3 to join. (24 dc)
Round 3: Ch 3 (counts as dc), dc in same stitch, dc in next 3 stitches. *Work 2dc in next stitch, dc in next 3 stitches.* Repeat from * to * around. Sl st to join. (30 dc)
You should now see 6 points beginning to form where your increases sit.
Round 4: Ch 3 (counts as dc), dc in same stitch, dc in next 4 stitches. *Work 2dc in next stitch, dc in next 4 stitches.* Repeat from * to * around. Sl st to join. (36 dc)
Round 5: Ch 3 (counts as dc), dc in same stitch, dc in next 5 stitches. *Work 2dc in next stitch, dc in next 5 stitches.* Repeat from * to * around. Sl st to join. (42 dc)
The hexagon shape should be clearly visible now with 6 distinct sides and 6 corner points.
Round 6: Ch 3 (counts as dc), dc in same stitch, dc in next 6 stitches. *Work 2dc in next stitch, dc in next 6 stitches.* Repeat from * to * around. Sl st to join. Fasten off and weave in ends. (48 dc)
You now have one completed hexagon. Take a moment to admire it. Seriously. Each one is a tiny accomplishment.
Color Distribution Guide
The throw in the image follows a diagonal rainbow gradient flowing from red in one corner through to purple in the opposite corner. Here is a suggested distribution:
Feel free to adjust quantities based on your desired throw size. Adding or removing a row of hexagons changes the dimensions easily.
Arranging Your Hexagons
Before joining, lay out all your hexagons on a flat surface. Hexagons nestle together in an offset pattern, like a honeycomb. Each hexagon touches six neighbors when fully surrounded.
Start with your red hexagons in one corner. Gradually transition through orange, yellow, green, blue, and finally purple. The key is creating a smooth gradient without harsh lines between colors.
Take a photo of your layout with your phone. Trust me on this one. You will thank yourself later when you’re joining and cannot remember which hexagon goes where.
Joining the Hexagons Step by Step
I recommend the flat slip stitch join for this project. It creates a visible white line between motifs that enhances the honeycomb look.
Step 1: Hold two hexagons with right sides facing outward (wrong sides together in the middle). Line up one edge, matching stitch for stitch.
Step 2: Join white yarn with a sl st through both layers, working through the back loops only of each hexagon.
Step 3: Sl st through each pair of aligned stitches across the edge. You will work 7 slip stitches per side (6 stitches plus 1 corner).
Step 4: When you reach a corner, stop. If the next hexagon shares this join, continue. If not, fasten off.
Work in rows or sections to keep track of your progress. Join the first row of hexagons together horizontally. Then attach the second row to the first, joining each hexagon to its neighbors both horizontally and vertically.
Tip for beginners: Join in small batches and weave in ends as you go. This prevents a mountain of finishing work at the end.
Adding the White Border
Once all hexagons are joined, you will add a clean border that unifies the entire piece.
Round 1: Join white yarn at any corner of the throw. Work sc evenly around the entire outer edge. At inner angles where hexagons create valleys, work sc2tog (single crochet two together) to keep the edge from rippling. At outer corners, work 3 sc in the corner stitch. Sl st to join.
Round 2: Ch 1, sc in each stitch around, maintaining the same shaping at corners and valleys. Sl st to join.
Round 3: Repeat Round 2 for a third row of sc if desired. Fasten off and weave in all ends.
The scalloped edge that results from the hexagon shapes is part of the charm. Do not worry about creating perfectly straight sides.
Optional Heart Appliqués
The throw features small crocheted hearts scattered across the surface, each matching the hexagon behind it. These are completely optional but add a lovely handmade touch.
Heart Pattern:
Using a 4.5mm hook and matching yarn color, create a magic ring.
Row 1: Ch 2, work 3 hdc in ring, ch 2, sl st in ring, ch 2, work 3 hdc in ring, ch 2, sl st in ring. Do not join. This creates the two bumps at the top of the heart.
Row 2: Ch 1, turn. Sc in first hdc, hdc in next hdc, dc in next hdc, ch 1, dc in top of ch-2 space, ch 1, work (dc, ch 2, dc) in the sl st between the bumps, ch 1, dc in top of next ch-2 space, ch 1, dc in next hdc, hdc in next hdc, sc in last hdc. Fasten off leaving a long tail.
Use the tail to sew each heart to the center of selected hexagons. Place them randomly across the throw, or follow the diagonal pattern shown with one heart per color section.
Finishing and Care Instructions
Blocking: Wet block your finished throw by soaking it in cool water for 15 minutes. Gently squeeze out excess water (do not wring). Lay flat on blocking mats and pin the edges to shape. Allow to dry completely.
Washing: Machine wash cold on gentle cycle. Tumble dry low or lay flat to dry. Acrylic yarns hold up beautifully to regular washing.
Tips for Success with This Crochet Tutorial
Count your stitches. At the end of each round, verify you have the correct stitch count. This catches mistakes early when they’re easy to fix.
Use stitch markers. Place a marker in the first stitch of each round to track where you started.
Block as you go. If your hexagons are curling, block them before joining. Flat motifs join much more easily.
Embrace imperfection. Handmade means variation. Small differences in tension or size will blend together in the finished throw.
Why Hexagon Blankets Make Perfect Gifts
This step by step crochet pattern creates a gift people genuinely treasure. The rainbow gradient works for baby showers, Pride celebrations, birthdays, or simply brightening someone’s home. Because you can customize colors, consider making it in someone’s favorite shades or their sports team colors.
The portable nature of hexagon projects also makes this ideal for crafting on the go. Toss a few hexagons in progress into your bag and work on them during lunch breaks, waiting rooms, or Netflix sessions.
I hope this Sunny Lemon Hexagon Kitchen Throw brings as much joy to your crafting time as it did to mine. The process of watching those colorful hexagons multiply and eventually come together into a cheerful rainbow blanket is genuinely satisfying. Thank you so much for choosing this pattern for your next project.
If you make this throw, I would absolutely love to see it. Tag me on Instagram or share a photo in my Facebook group. Your versions always inspire me and other makers in our community.
Save this pattern to your Pinterest boards so you can find it easily when you’re ready to start. And please drop a comment below if you have any questions or just want to share your progress. I read every single one and love hearing from you.