
Last summer, I was wandering through a farmers market when I spotted the most gorgeous basket of strawberries. The red against the green leaves, those tiny white seeds dotting the surface. I stood there thinking, "I need to crochet this." Not the strawberries themselves, but that feeling. That fresh, cheerful, summery vibe that makes you smile just looking at it.
That obsession turned into months of swatching, frogging, and starting over. I wanted each strawberry to pop with texture. I wanted the bag to actually hold things without stretching into a sad, droopy mess. And I wanted those crisp white grid lines that make granny square projects look so polished and intentional.
Well, I finally cracked it. This tote has become one of my absolute favorite makes, and every time I grab it for errands, someone stops me to ask where I got it. Now you can make your own.
About This Strawberry Granny Square Tote Crochet Pattern
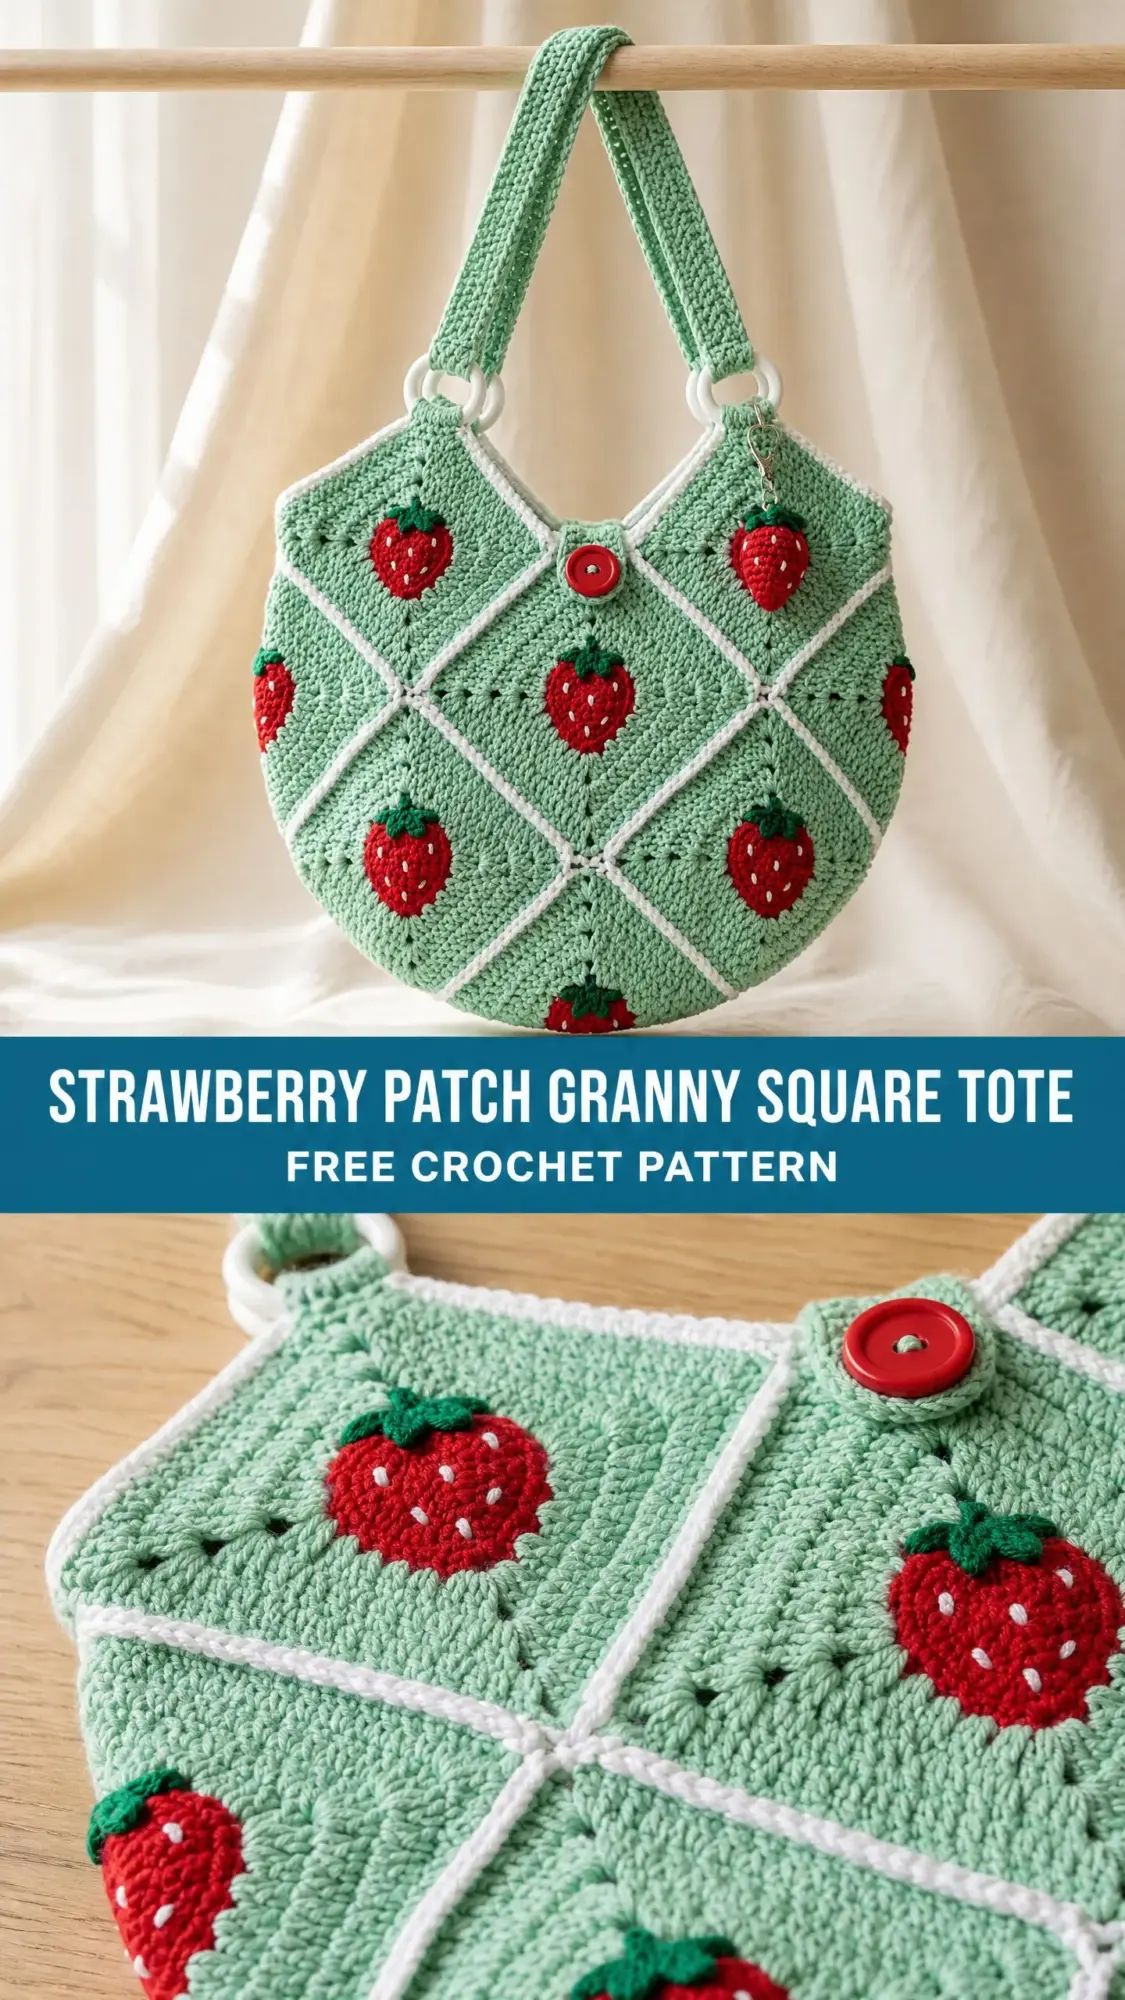
This cheerful tote bag combines classic granny square construction with adorable raised strawberry motifs worked right into the center of each square. The strawberries are created using bobble stitches that give them genuine dimension and texture you can feel. Tiny white surface stitches mimic the seeds, and little green leaf points crown each berry.
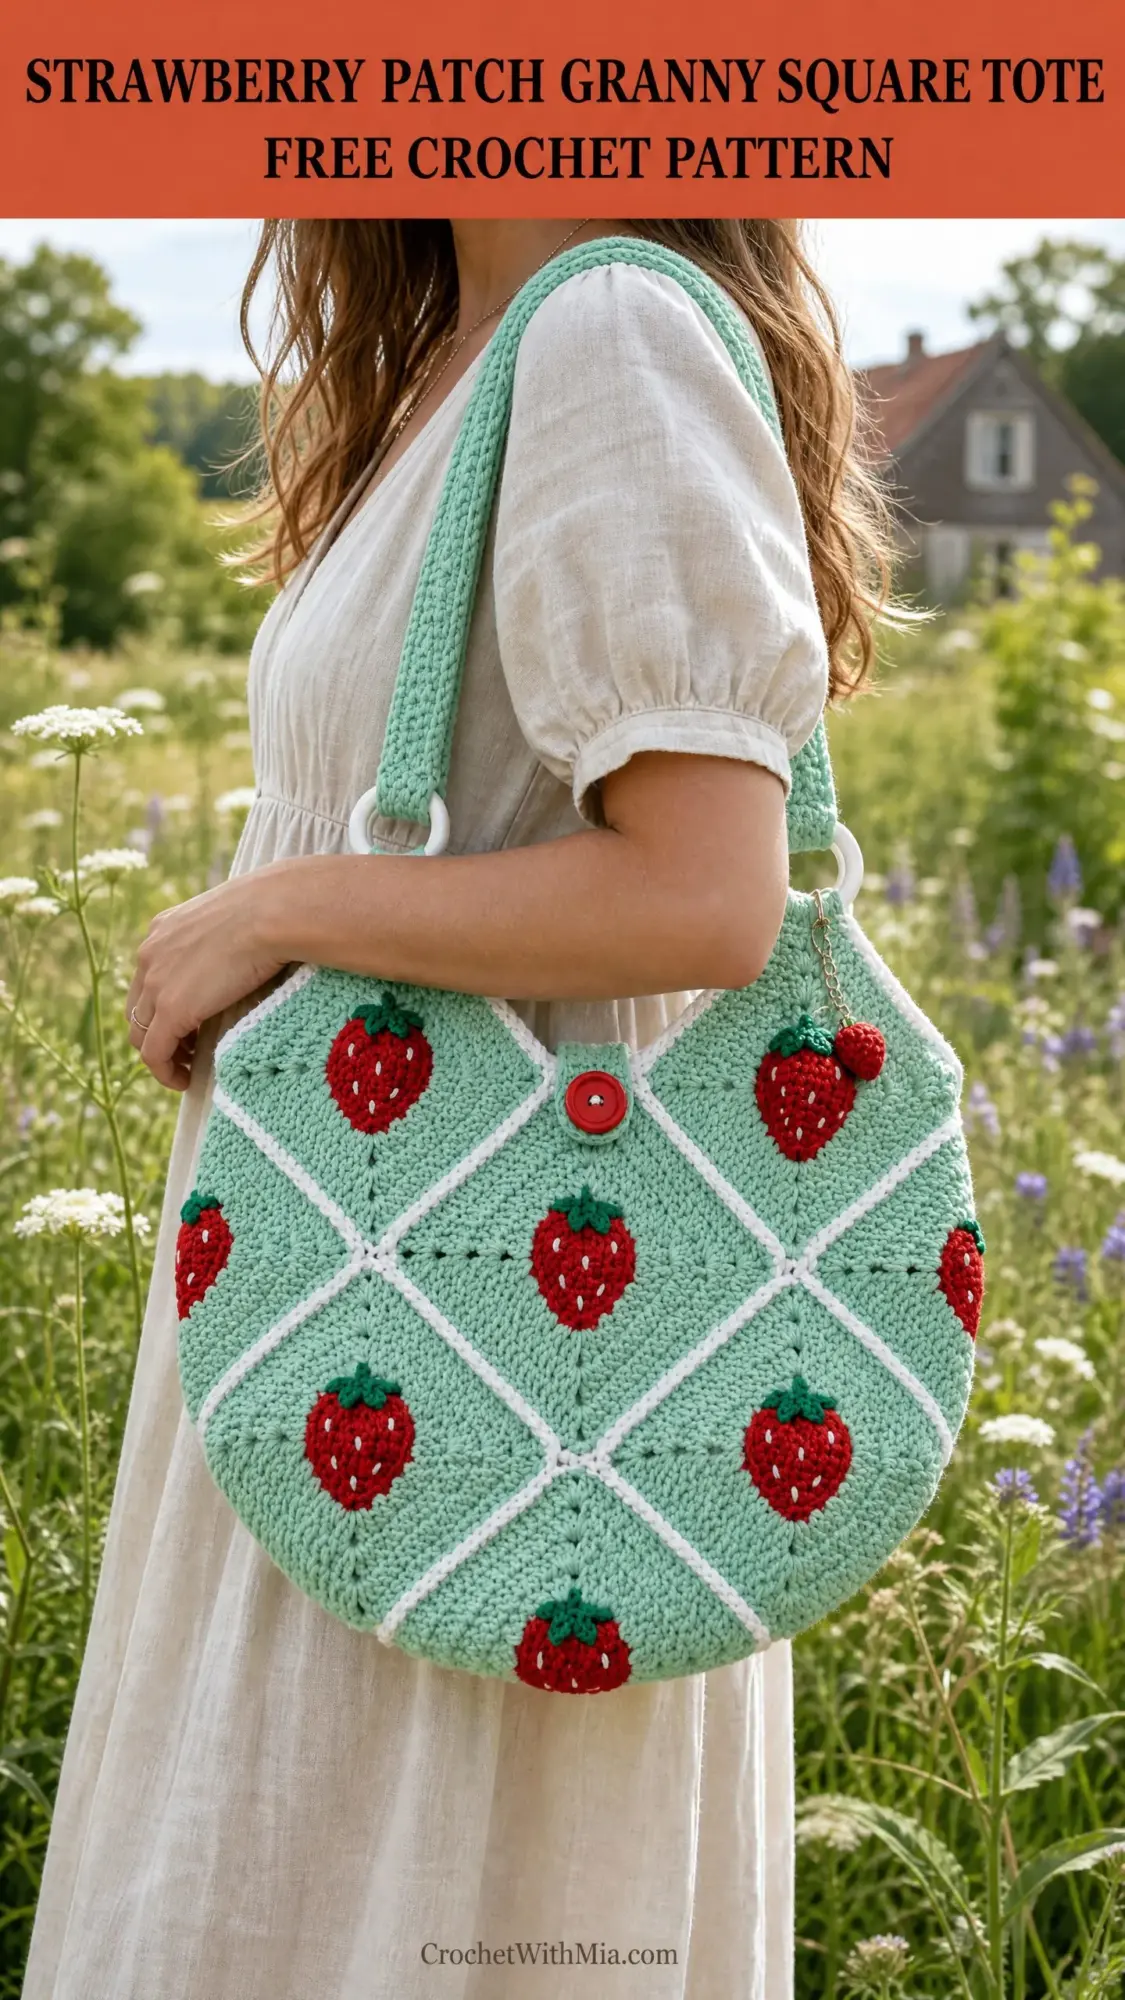
The bag uses 18 individual squares arranged into two panels, joined with a flat slip-stitch join that creates those beautiful white grid lines visible in the finished piece. A gently rounded silhouette, sturdy handle attached through D-rings, and a sweet button closure complete the design.
This is an intermediate level project. You should be comfortable with working granny squares, changing colors within a motif, and joining squares together. If you have completed a few colorwork projects and feel confident reading patterns, you can absolutely tackle this. I will walk you through every special technique step by step.
Expect this project to take approximately 18 to 24 hours total, including making all the motifs, joining, finishing, and assembly. Perfect for a week of evening crochet sessions or a dedicated weekend marathon.
Finished Measurements
Your completed tote will measure approximately 14 inches wide by 11 inches tall by 2.5 inches deep (35 cm wide by 28 cm tall by 6.5 cm deep), not including the handle.
Each individual granny square measures 3.5 inches by 3.5 inches (9 cm by 9 cm) after blocking.
Materials Needed
Yarn
You will need worsted weight cotton yarn in four colors:
Yarn Suggestions:
Lion Brand 24/7 Cotton in Mint, Red, White, and Grass works beautifully. This 100 percent mercerized cotton holds stitch definition well and is machine washable, making it ideal for a functional tote.
Paintbox Yarns Simply DK (used at a slightly tighter gauge) in Spearmint Green, Pillar Box Red, Paper White, and Grass Green offers excellent stitch clarity and a wide color range.
Drops Safran in mint, red, off-white, and green is a fine Egyptian cotton with excellent sheen that shows the bobble textures crisply.
Substitution Note: Any smooth worsted weight (category 4) or heavy DK cotton or cotton-blend yarn will work. Avoid fuzzy or textured yarns as they will obscure the strawberry motif detail. Always check your gauge before starting.
Hook
US size G-6 (4.0 mm) crochet hook
Notions
Gauge
1 completed strawberry granny square = 3.5 inches by 3.5 inches (9 cm by 9 cm) after blocking.
In basic double crochet granny stitch: 4 dc = 1 inch (2.5 cm), 4 rows = 2 inches (5 cm) using US G-6 (4.0 mm) hook and worsted weight cotton yarn.
Gauge is critical for this project. Your squares must measure correctly for the panels to assemble properly. Adjust hook size as needed.
Abbreviations
Special Stitches
Bobble Stitch (Used for Strawberry Body)
This creates a 5-dc bobble that pops out from the fabric to form the rounded strawberry shape.
Step 1: Yarn over, insert hook into indicated stitch or space.
Step 2: Yarn over and pull up a loop (3 loops on hook).
Step 3: Yarn over and draw through 2 loops only (2 loops remain on hook).
Step 4: Repeat Steps 1 through 3 four more times in the same stitch or space, until you have 6 loops on hook.
Step 5: Yarn over and draw through all 6 loops at once.
Step 6: Chain 1 to close and lock the bobble. This chain 1 does not count as a stitch.
Push all bobbles to the right side as you work so they show on the front of your fabric.
Flat Slip-Stitch Join (Used to Join Squares)
This joining method creates visible raised ridges on the right side that form the white grid lines.
Hold two squares with wrong sides facing each other. Insert hook through the back loop only of the corresponding corner or edge stitches of both squares simultaneously. Yarn over with joining yarn (Color C) and pull through both loops and through the loop on hook. Continue across the edge, working through both back loops of each pair of corresponding stitches.
Surface Slip Stitch (Used for Strawberry Dots)
With RS facing, insert hook through the fabric between stitches at desired dot position. Join Color C with a slip stitch. Work a second slip stitch into the same spot to create a small raised dot. Fasten off and weave in ends on WS. Repeat for each dot on every strawberry.
Pattern Notes Before You Begin
1. Each bag panel is made of 9 strawberry granny squares arranged in a 3 by 3 grid. You need 18 squares total.
2. The strawberry motif is crocheted directly into the center of each granny square using bobble stitches for the body and Color D for the leaves. The white surface dots are added afterward.
3. Make all squares before joining. Block all squares before assembly.
4. Chain 3 at the beginning of rounds counts as the first dc throughout unless otherwise noted.
5. Always join new colors with a standing stitch or slip-stitch join to avoid loose loops. Weave ends as you go to minimize finishing time.
6. All strawberries should point upward (leaf tops toward the top edge of the bag). Verify orientation before joining.
Crochet Pattern Instructions
Section 1: Strawberry Granny Square
Make 18 squares total.
The square is worked in rounds, starting with the strawberry motif at center, then expanding with Color A rounds.
Round 1 (Strawberry Base, Color B):
Make a magic ring.
Chain 3 (counts as first dc). Work 11 dc into the ring. Join with sl st to top of beg ch-3. Pull ring closed. (12 dc)
Round 2 (Strawberry Body, Color B):
Chain 1. Work 1 bobble into same stitch as join. Chain 1. Skip 1 dc. Work 1 bobble into next dc. Chain 1. Skip 1 dc. Continue in this manner around, placing bobbles in every other dc and ch-1 between each bobble. You will work 6 bobbles total. Join with sl st to top of first bobble. (6 bobbles, 6 ch-1 spaces)
The bobbles cluster together to form the rounded strawberry shape. Gently push all bobbles to the RS as you work.
Round 3 (Strawberry Shaping, Color B):
Sl st into ch-1 space. Chain 3 (counts as dc). Work 2 dc into same ch-1 space. Work 3 dc into each remaining ch-1 space around. Join with sl st to top of beg ch-3. (18 dc)
Round 4 (Leaves, Color D):
Join Color D in any dc of Round 3.
Chain 1. Work 1 sc into same stitch.
Next stitch: chain 4, sl st into second chain from hook, sc into next chain, hdc into next chain (this forms a leaf point). Sl st back into the same sc at the base.
Work 1 sc into next dc of Round 3.
Next stitch: chain 4, sl st into second chain from hook, sc into next chain, hdc into next chain. Sl st back into the same sc at the base.
Work 1 sc into next dc of Round 3.
Next stitch: chain 4, sl st into second chain from hook, sc into next chain, hdc into next chain. Sl st back into the same sc at base.
Continue working 1 sc, then a leaf point alternately across the next 3 stitches of Round 3 to mirror the first side.
Join with sl st to first sc. Fasten off Color D.
(Approximately 6 leaf points arranged across the top arc of the strawberry motif. Work leaves across the 6 stitches of the top half of Round 3 only, leaving the bottom 12 stitches as the strawberry body base.)
Checkpoint: After Round 4, the strawberry motif should measure approximately 1.5 inches (3.8 cm) across.
Round 5 (First Mint Border, Color A):
Join Color A in the st immediately after the last leaf point.
Chain 3 (counts as dc). Work 2 dc in same stitch. Chain 2 (corner space formed). Work 3 dc in same stitch.
Position the 4 corners as compass points (North, East, South, West) around the strawberry. At each corner position: Work [3 dc, ch 2, 3 dc] into the same stitch or the ch space closest to that corner.
Between corners: Work [3 dc] into the next available stitch or space.
For the North corner (above the leaves), work into a position just above the top leaf cluster. For the South corner (below the strawberry base), work into the lowest available stitch.
Join with sl st to top of beg ch-3.
Count after Round 5: (24 dc, 4 ch-2 corner spaces, 4 ch-1 side spaces)
Round 6 (Second Mint Border, Color A):
Join Color A in any corner ch-2 space.
Chain 3, work 2 dc into same corner space, ch 2, work 3 dc into same corner space (first corner complete).
Chain 1.
Work 3 dc into next ch-1 side space.
Chain 1.
Work [3 dc, ch 2, 3 dc] into next corner ch-2 space.
Repeat from "Chain 1. Work 3 dc" around all 4 sides.
Join with sl st to top of beg ch-3.
Count after Round 6: (36 dc, 4 ch-2 corner spaces, 8 ch-1 side spaces)
Round 7 (Third Mint Border, Color A):
Join Color A in any corner ch-2 space.
Chain 3, work 2 dc into same corner space, ch 2, work 3 dc into same corner space.
Chain 1.
Work 3 dc into next ch-1 side space. Chain 1.
Work 3 dc into next ch-1 side space. Chain 1.
Work [3 dc, ch 2, 3 dc] into next corner ch-2 space.
Repeat around all 4 sides.
Join with sl st to top of beg ch-3.
Count after Round 7: (48 dc, 4 ch-2 corner spaces, 12 ch-1 side spaces)
Fasten off Color A. Weave in all ends.
Add Strawberry Dots (Color C):
Using the surface slip stitch method, add 5 to 7 small white dots scattered across the red bobble area of the strawberry on the RS of each square. Arrange dots to mimic the seed pattern of a real strawberry (a few near top, more toward middle and bottom of the strawberry body).
Completed square should measure 3.5 by 3.5 inches (9 by 9 cm) after blocking.
Section 2: Blocking the Squares
Wet block all 18 squares by submerging in cool water, gently squeezing out excess moisture (do not wring), and pinning to a foam blocking mat at exact 3.5 by 3.5 inch (9 by 9 cm) measurements. Allow to dry completely before joining.
This step is essential. Blocking ensures all your squares are the same size and makes joining much easier.
Section 3: Joining the Squares into Panels
Arrange 9 squares in a 3 by 3 grid for the front panel and 9 squares in a 3 by 3 grid for the back panel. Make sure all strawberries point upward with leaf tops toward the top edge.
Using Color C and the Flat Slip-Stitch Join method:
Step 1: Join the 3 squares in the bottom row together first. Place first and second square with WS together. Using Color C, work flat slip-stitch join along one shared edge, working through back loops of corresponding corner and edge stitches on both squares simultaneously. At corner ch-2 spaces, work 2 sl sts into the shared space. Fasten off. Join second and third squares in the same manner. (3 squares joined into a bottom row strip.)
Step 2: Repeat for the middle row and the top row, creating 3 horizontal strips of 3 squares each.
Step 3: Join the three strips together by working horizontal flat slip-stitch joins along the long edges. Join bottom strip to middle strip, then middle strip to top strip.
Checkpoint: After joining, each panel should measure approximately 10.5 inches wide by 10.5 inches tall (26.5 cm by 26.5 cm). The white join lines form a visible grid across the panel.
Repeat entire join process for the back panel.
Section 4: Top Edge Shaping and Border of Each Panel
The top edge of each panel gets a border to stabilize it and create the smooth top opening.
Front Panel Top Edge:
With RS facing, join Color C in the top-left corner ch-2 space of the top-left square.
Row 1: Chain 1. Work 1 sc into each dc and each ch-1 space across the top edge of the top 3 squares. At each internal join between squares along the top, work 1 sc into the join itself to close any gap. Work 1 sc into the final corner stitch. Turn. (38 sc)
Button Loop Row (Front Panel only):
Row 2 (WS): Chain 1, work 1 sc in each sc to center stitch (stitch 19 of 38). At center: chain 8, skip 1 sc, sl st into next sc to form button loop. Continue working 1 sc in each rem sc to end. Turn. (38 sc plus 1 button loop of ch-8)
Row 3: Chain 1, work 1 sc in each sc across, working 8 sc into the ch-8 button loop space. (38 sc)
Fasten off Color C.
Back Panel Top Edge:
Work same as Front Panel Top Edge Rows 1 and 3 only (no button loop). (38 sc each row)
Fasten off Color C.
Section 5: Side and Bottom Seam
Place front and back panels with WS together, aligning all edges.
Using Color C and flat slip-stitch join, join along one side edge (working from top-right corner to bottom-right corner), then continue along the entire bottom edge, then up the remaining side edge (bottom-left corner to top-left corner). Do not seam the top edge. Leave top open.
At the corners where sides meet the bottom, work 3 sl sts into the corner to maintain a tidy turn.
Section 6: Gusset (Side Depth)
To create the 2.5-inch (6.5 cm) gusset depth:
After completing the side and bottom seam, flatten the bag at each bottom corner so the side seam aligns with the bottom seam, creating a triangular corner point. Measure 1.25 inches (3 cm) up from the very tip of each corner point and sew a straight seam across the triangle (perpendicular to the corner point) using Color C and yarn needle with whipstitch. This box-corner technique creates the flat-bottomed gusset. Repeat for both bottom corners.
Fold the sewn-off corner triangles up toward the bag interior and tack in place with a few stitches so they stay flat.
Section 7: Outer Border
With RS of assembled bag facing, join Color C at the top-left corner of the top opening.
Work a single round of sc evenly around the entire top opening of the bag, including across the already-worked top border rows of each panel. Work 1 sc into each stitch and 1 sc into the seam join at center front and center back. Join with sl st to first sc. Fasten off. (Approximately 78 sc around the full top opening)
Section 8: Handle
The handle is a single long flat strap crocheted in Color A with a Color C edging.
Foundation Chain: Using Color A, chain 121.
Row 1: Sc into second chain from hook, sc into each ch across. Turn. (120 sc)
Row 2: Chain 1, sc into each sc across. Turn. (120 sc)
Row 3: Chain 1, sc into each sc across. Turn. (120 sc)
Row 4: Chain 1, sc into each sc across. Do not turn. (120 sc)
Edging: With Color C, work 1 round of sc around the entire strap perimeter: along the long top edge (120 sc), 3 sc into the corner, along the foundation chain edge (120 sc), 3 sc into the other corner. Join with sl st. Fasten off. (246 sc around perimeter)
The completed strap should measure approximately 24 inches (61 cm) long by 0.75 inch (2 cm) wide.
Attach Handle:
Thread one end of the handle through one D-ring. Fold the end back on itself by 1.5 inches (3.8 cm) and sew securely to the underside of the strap using a yarn needle and Color A. Repeat for the other end of the handle through the second D-ring.
Attach D-rings to Bag:
Position the two D-rings centered on the top edge of the bag front, spaced approximately 2 inches (5 cm) apart from center. Sew each D-ring securely to the top border of the bag through all layers, stitching around the straight bar of the D-ring multiple times with Color A.
Repeat D-ring attachment on the bag back panel at the same positioning.
The handle loop sits through both front and back D-rings simultaneously, creating the looped single handle appearance.
Section 9: Button Closure
Sew the red button to the top border of the back panel at center, positioned to align exactly with the button loop on the front panel.
Button placement: measure the center top of the back panel (stitch 19 of 38) and sew button securely here using a yarn needle threaded with Color C or matching thread.
Fasten the bag by looping the front panel button loop over the back panel button.
Section 10: Optional Strawberry Charm
If using a purchased strawberry charm, attach it to the ring of one D-ring using the jump ring or bail on the charm.
To crochet a mini strawberry charm:
Make a magic ring. Work 6 sc into ring. Pull ring closed. (6 sc)
Round 2: Work 2 sc into each sc around. (12 sc)
Round 3: Work [sc, 2 sc in next] around. (18 sc)
Rounds 4 and 5: Work 1 sc in each sc around. (18 sc)
Round 6: Work [sc, sc2tog] around. (12 sc)
Round 7: Work sc2tog around. (6 sc)
Stuff lightly with yarn scraps. Fasten off, leaving a tail. Thread tail through remaining 6 sts and cinch closed. Add a green ch-6 loop at top to form a stem and leaf. Attach to D-ring through stem loop.
Finishing Your Tote
Weave in all remaining ends securely using a yarn needle, working ends along the WS of join seams where possible.
Wet block the assembled bag by dampening with a spray bottle and shaping by hand to the stated dimensions. Allow to dry completely flat or stuffed with plastic bags to hold the shape.
Trim any loose yarn ends flush with the fabric. Do not leave tails longer than 0.25 inch (0.6 cm).
Size Customization Tips
To make a larger bag: Add more squares to the grid. A 4 by 4 arrangement of 16 squares per panel will yield a bag approximately 14 inches wide by 14 inches tall.
To make a smaller bag: Use a 2 by 3 arrangement (2 squares wide, 3 squares tall) per panel for a smaller crossbody or purse size, approximately 7 inches wide by 10.5 inches tall.
To add a lining: Cut fabric lining to match bag dimensions plus 0.5-inch seam allowance on all sides. Sew fabric into a bag shape, fold top seam allowance to WS, insert into crochet bag with WS together, and whipstitch lining to the inside of the top border.
Care Instructions
Hand wash in cool water with mild detergent. Gently squeeze out excess water without wringing or twisting. Reshape and lay flat to dry away from direct sunlight and heat sources. Do not tumble dry. If using 100 percent mercerized cotton yarn, machine wash on a delicate cool cycle in a mesh laundry bag as an alternative. Do not bleach. Store flat or stuffed with tissue to maintain shape.
You Did It!
Thank you so much for making this strawberry tote with me! I hope the process was as enjoyable for you as designing it was for me. There is something deeply satisfying about watching those little bobble strawberries take shape, square by square, until suddenly you have this gorgeous, functional bag that is entirely handmade.
If you make this tote, I would absolutely love to see it! Tag me on Instagram or share a photo in our Facebook group. Seeing your creations truly makes my day.
Before you go, save this pattern to your Pinterest boards so you can find it easily when you are ready to start. And if you have any questions or want to share how yours turned out, drop a comment below. I read every single one and love hearing from you!