
Last summer, my niece was obsessed with a wildlife documentary series. She watched it on repeat, memorizing facts about elephants and giraffes, roaring like a lion at breakfast, and insisting her stuffed monkey join us at every meal. When her birthday rolled around, I wanted to make her something that captured all that wild enthusiasm in one tiny, wearable piece.
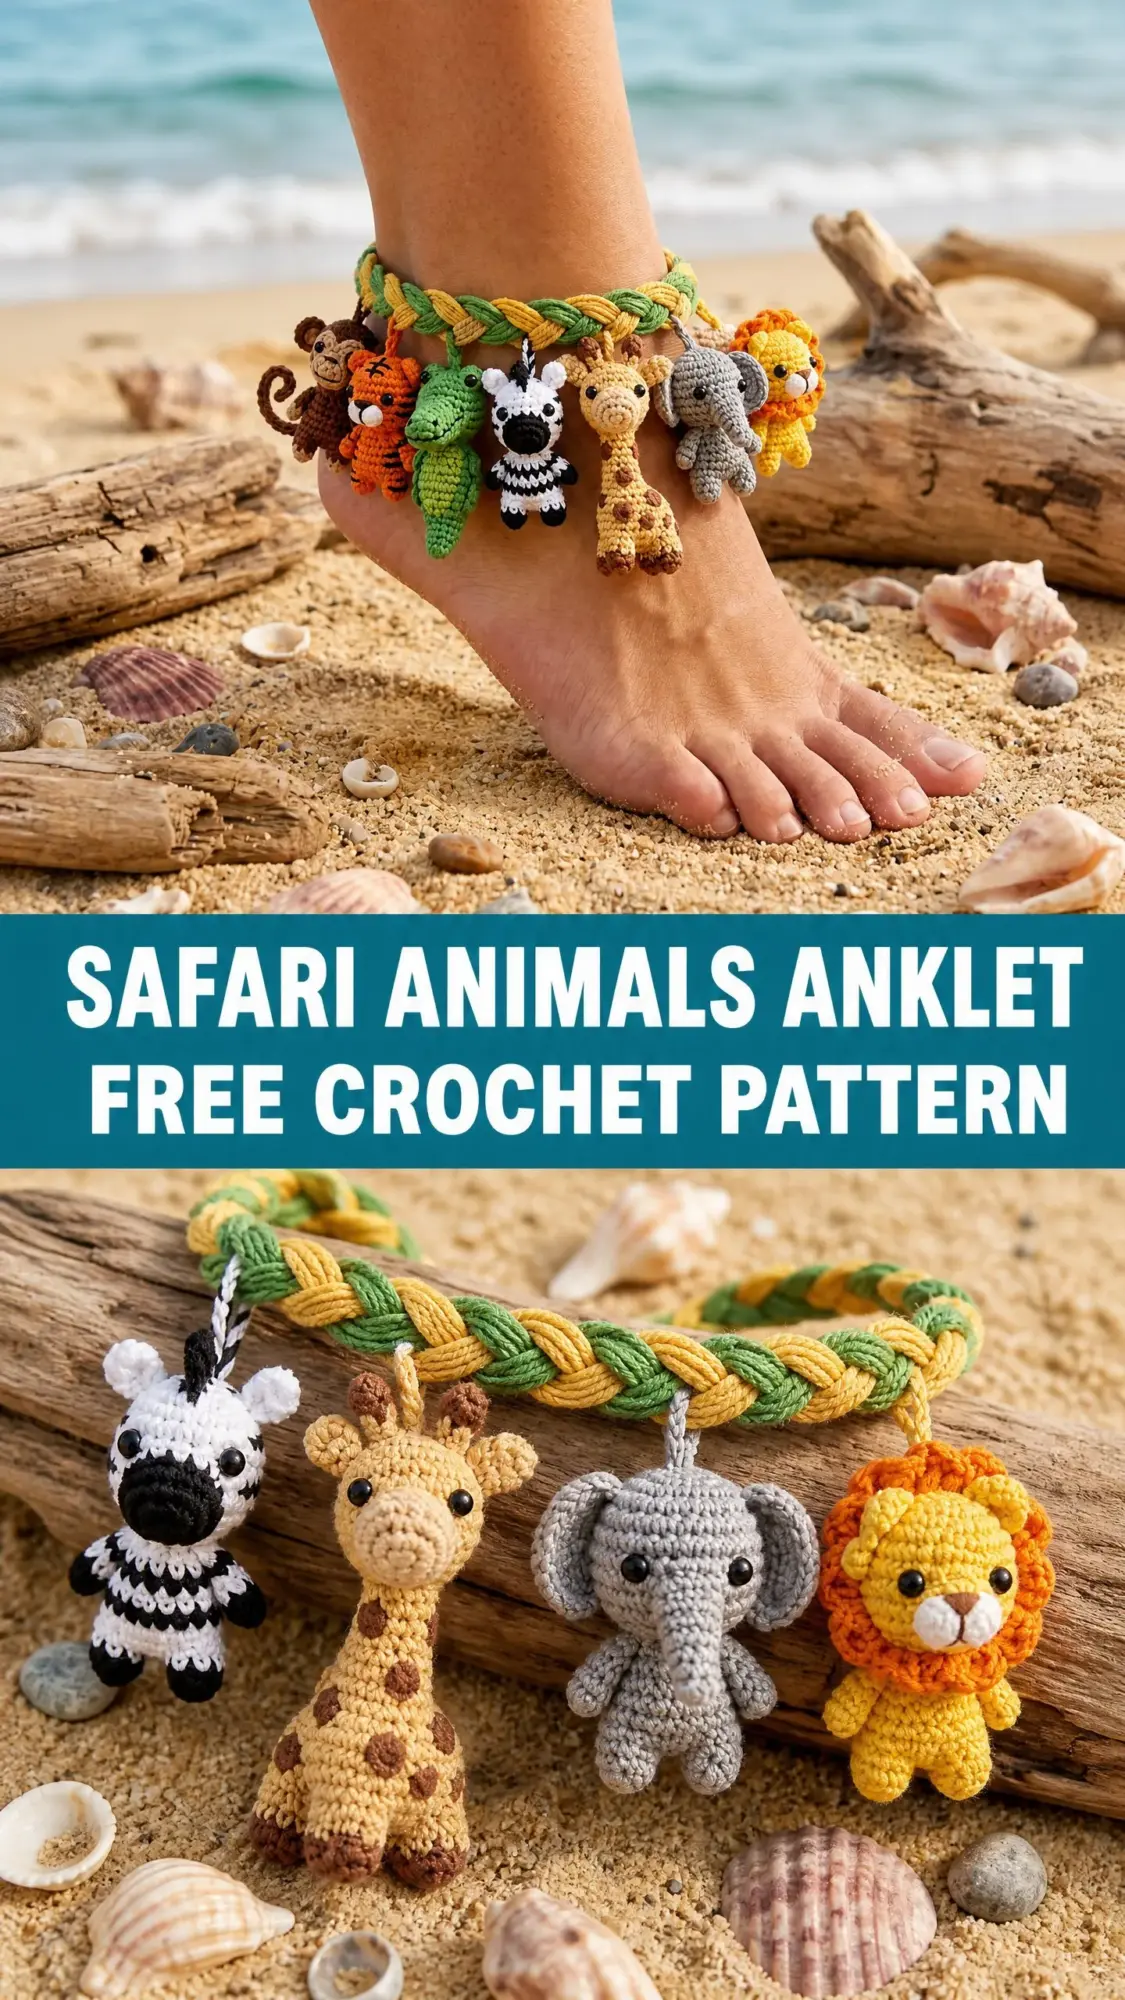
That’s when I started sketching out this safari animals anklet. Seven miniature amigurumi charms dangling from a braided band. A monkey, a tiger, a crocodile, a zebra, a giraffe, an elephant, and a lion, all small enough to hang around an ankle but detailed enough to make her squeal with delight. She wore it every single day that summer.
Now I’m sharing the complete pattern with you. Fair warning: this is not a quick weekend project. But if you love tiny detailed work and want to create something truly unique, keep reading. I’ll walk you through every single step.
About This Safari Anklet Crochet Pattern
This project combines two techniques. First, you’ll create a simple braided band using twisted cord strands in golden yellow and forest green. Then you’ll crochet seven individual miniature amigurumi animal charms, stuff them with fiberfill, add embroidered details, and attach them to the band.
Each charm measures approximately 1 to 1.5 inches tall and 0.75 to 1 inch wide. The finished band measures 8 to 10 inches in braided length and sits comfortably at the ankle bone. An adjustable slip-knot tie system using the yarn tails lets you customize the fit.
Skill level: Intermediate to Advanced. You’ll need comfort with magic rings, tight tension at small gauge, invisible decreases, color changes, and embroidered details. If you’ve made standard amigurumi before, you can absolutely handle this. Just take your time.
Time estimate: 20 to 30 hours total. The band takes about 30 minutes. Each animal takes 1.5 to 3 hours depending on complexity. Allow extra time for finishing, embroidery, and assembly.
Materials You’ll Need
Yarn for Charms (fingering weight, size 1, or thin sport weight, size 2):
You’ll need approximately 5 to 15 yards of each color for the charms.
Yarn for Band (DK weight, size 3):
Hooks:
Other Supplies:
Yarn Suggestions: I love Scheepjes Catona for the charms. It’s fingering weight mercerized cotton with exceptional stitch definition at tiny gauge. For the band, Paintbox Yarns Simply DK in Mustard Yellow and Grass Green braids beautifully.
Gauge
Getting gauge right matters a lot at this scale. Even half a stitch difference per inch changes your animal proportions significantly.
Charm gauge using US B-1 / 2.25 mm hook and fingering weight cotton in continuous rounds of single crochet (sc):
Band gauge is not critical since the band is adjustable, but a braid of 6 DK-weight strands should measure approximately 0.5 inch / 1.3 cm wide.
Abbreviations and Stitch Definitions
Let me define every stitch you’ll use. Keep this list handy as you work.
Special Techniques
Magic Ring (MR): Make a loop by crossing the yarn tail over the working yarn. Insert hook through the loop from front to back. Yarn over the working yarn and pull through. Chain 1 to secure. This chain does not count as a stitch. Work the specified number of sc into the center of the ring. Pull the yarn tail firmly to close the ring hole completely before continuing.
Invisible Decrease: This produces a flatter, less visible decrease than standard sc2tog and is essential for clean amigurumi surfaces. Insert hook into front loop only of next stitch. Without completing that stitch, insert hook into front loop only of the next stitch. Yarn over, draw through both front loops. Two loops remain. Yarn over, draw through both loops. Done.
Color Changes: Complete the last yarn over of your final sc in the old color with the new color yarn. Leave a 6-inch tail for weaving in later.
Important Pattern Notes
Read these before you start. They’ll save you frustration.
1. All animal charms are worked in continuous spiral rounds unless stated otherwise. Do not join at the end of rounds.
2. Place a stitch marker in the first stitch of each round and move it up as you go. This is crucial for keeping track at this tiny scale.
3. Stuff as you go. Add fiberfill gradually before closing rounds. Don’t wait until the end because the opening becomes too small.
4. Stitch counts appear in parentheses at the end of each round, like (12 sc).
5. If making this for a child under 3 years old, embroider the eyes instead of using safety eyes.
6. Attach safety eyes before stuffing and before the opening gets too small.
7. Each piece is made separately and sewn together using yarn tails and a tapestry needle.
8. The charms attach to the band in this order from left to right: monkey, tiger, crocodile, zebra, giraffe, elephant, lion.
The Band Instructions
Let’s start with the easiest part.
Cut the following strands:
Divide into three groups:
Knot all three groups together at one end with an overhand knot, leaving a 2-inch / 5-cm tail above the knot. Pin or clip the knotted end to something stable.
Braid using standard 3-strand technique: right over center, left over center, repeat. Continue for approximately 8 to 9 inches / 20 to 23 cm, keeping even firm tension throughout. The mixed Group 2 in the center creates that gorgeous two-tone intertwined effect.
Tie another overhand knot at the end, leaving a 3-inch / 7.6-cm tail. Unravel the tails slightly and trim into a clean tassel fringe of about 1 inch / 2.5 cm. These tails form your adjustable tie-on closure.
Checkpoint: Your finished band should measure 8 to 9 inches braided length (not including tails) and approximately 0.5 inch wide.
Monkey Charm
Monkey Head
Using Color A (medium brown) and 2.25 mm hook:
Rnd 1: MR, work 6 sc into ring, pull tail to close. (6 sc)
Rnd 2: Inc in each st around. (12 sc)
Rnd 3: (Sc in next st, inc in next st) 6 times. (18 sc)
Rnd 4: (Sc in next 2 sts, inc in next st) 6 times. (24 sc)
Rnds 5-7: Sc in each st around. (24 sc)
Rnd 8: (Sc in next 2 sts, sc2tog) 6 times. (18 sc)
Insert safety eyes between Rnds 5 and 6, approximately 5 stitches apart.
Rnd 9: (Sc in next st, sc2tog) 6 times. (12 sc)
Begin stuffing firmly.
Rnd 10: Sc2tog 6 times. (6 sc)
FO, leaving a 6-inch tail. Thread tail through remaining 6 sts, pull tight to close, weave in end.
Monkey Face Patch
Using Color L (cream):
Rnd 1: MR, work 6 sc into ring. (6 sc)
Rnd 2: Inc in each st around. (12 sc)
Rnd 3: (Sc in next st, inc in next st) 6 times. (18 sc)
FO, leaving a 12-inch tail. Flatten into an oval and sew to the front lower portion of the head.
Monkey Ears (make 2)
Using Color A:
Rnd 1: MR, work 6 sc into ring. (6 sc)
Rnd 2: Inc in each st around. (12 sc)
FO, leaving a 12-inch tail. Do not stuff. Flatten and sew one to each side of head.
Monkey Body
Using Color A:
Rnd 1: MR, work 6 sc into ring. (6 sc)
Rnd 2: Inc in each st around. (12 sc)
Rnd 3: (Sc in next st, inc in next st) 6 times. (18 sc)
Rnds 4-5: Sc in each st around. (18 sc)
Rnd 6: (Sc in next st, sc2tog) 6 times. (12 sc)
Stuff firmly.
Rnd 7: Sc2tog 6 times. (6 sc)
FO and close.
Monkey Arms (make 2)
Using Color A:
Rnd 1: MR, work 4 sc into ring. (4 sc)
Rnd 2: Inc in each st around. (8 sc)
Rnds 3-6: Sc in each st around. (8 sc each round)
FO, leaving a 10-inch tail. Stuff lightly. Sew to sides of body.
Monkey Legs (make 2)
Using Color A:
Rnd 1: MR, work 4 sc into ring. (4 sc)
Rnd 2: Inc in each st around. (8 sc)
Rnds 3-5: Sc in each st around. (8 sc each round)
FO, leaving a 10-inch tail. Stuff lightly. Sew to lower body.
Monkey Tail
Using Color A, ch 12. Sc in 2nd ch from hook and in each ch across. (11 sc)
FO, leaving a 10-inch tail. Coil slightly and sew to back base of body.
Monkey Assembly
1. Sew face patch to lower front of head, centered between eyes and bottom
2. Embroider two small nostrils on face patch and a curved smile using black floss
3. Sew ears to sides of head at eye level
4. Sew head to top of body
5. Sew arms to upper sides of body
6. Sew legs to lower body
7. Sew tail to back base
8. Thread a 4-inch length of Color A through top of head, knot both ends together to form hanging loop
Checkpoint: Completed monkey should stand approximately 1.25 inches tall.
Tiger Charm
Tiger Head
Using Color B (orange) and 2.25 mm hook:
Rnd 1: MR, work 6 sc into ring. (6 sc)
Rnd 2: Inc in each st around. (12 sc)
Rnd 3: (Sc in next st, inc in next st) 6 times. (18 sc)
Rnd 4: (Sc in next 2 sts, inc in next st) 6 times. (24 sc)
Rnds 5-7: Sc in each st around. (24 sc each round)
Insert safety eyes between Rnds 5 and 6, approximately 5 stitches apart.
Rnd 8: (Sc in next 2 sts, sc2tog) 6 times. (18 sc)
Rnd 9: (Sc in next st, sc2tog) 6 times. (12 sc)
Stuff firmly.
Rnd 10: Sc2tog 6 times. (6 sc)
FO and close.
Tiger Muzzle
Using Color L (cream):
Rnd 1: MR, work 6 sc into ring. (6 sc)
Rnd 2: Inc in each st around. (12 sc)
FO, leaving 12-inch tail. Flatten into oval and sew to front lower face. Embroider nose with Color C at center top and a Y-shaped mouth below.
Tiger Ears (make 2)
Using Color B:
Rnd 1: MR, work 5 sc into ring. (5 sc)
Rnd 2: Inc in each st around. (10 sc)
FO, leaving 10-inch tail. Pinch flat into triangle shape and sew to top of head.
Tiger Body
Using Color B:
Rnd 1: MR, work 6 sc into ring. (6 sc)
Rnd 2: Inc in each st around. (12 sc)
Rnd 3: (Sc in next st, inc in next st) 6 times. (18 sc)
Rnds 4-6: Sc in each st around. (18 sc each round)
Rnd 7: (Sc in next st, sc2tog) 6 times. (12 sc)
Stuff firmly.
Rnd 8: Sc2tog 6 times. (6 sc)
FO and close.
Tiger Arms, Legs, and Tail
Work arms and legs exactly as Monkey Arms and Legs using Color B.
For tail: Using Color B, ch 10. Sc in 2nd ch from hook and each ch across. (9 sc) FO, leaving 10-inch tail. Embroider 2 black stripes. Sew to back of body.
Tiger Assembly and Stripes
After assembling all pieces, use Color C (black) to embroider 3 to 4 short diagonal stripe lines across the top and sides of the head. Add similar stripes to the body. Attach hanging loop as for monkey.
Crocodile Charm
The crocodile has a unique elongated shape. The body and head are worked as one piece.
Crocodile Body and Head
Using Color D (green):
Rnd 1: MR, work 6 sc into ring. (6 sc)
Rnd 2: Inc in each st around. (12 sc)
Rnd 3: (Sc in next st, inc in next st) 6 times. (18 sc)
Rnds 4-6: Sc in each st around. (18 sc each round)
Rnd 7: (Sc in next st, sc2tog) 6 times. (12 sc)
Rnds 8-10: Sc in each st around. (12 sc each round)
This narrower section forms the snout and neck.
Rnd 11: (Sc in next st, inc in next st) 6 times. (18 sc)
Rnds 12-13: Sc in each st around. (18 sc each round)
Insert safety eyes between Rnds 12 and 13, placed high on the rounded section, approximately 4 stitches apart.
Rnd 14: (Sc in next st, sc2tog) 6 times. (12 sc)
Stuff firmly from snout end upward.
Rnd 15: Sc2tog 6 times. (6 sc)
FO and close.
Crocodile Legs (make 4)
Using Color D:
Rnd 1: MR, work 4 sc into ring. (4 sc)
Rnd 2: Inc in each st around. (8 sc)
Rnds 3-4: Sc in each st around. (8 sc each round)
FO, leaving 10-inch tail. Stuff lightly. Sew 2 to front and 2 to rear.
Crocodile Teeth
Using Color E (white), ch 4. Sl st in 2nd ch from hook, sl st in next ch, sl st in last ch.
Make 2. Sew one to upper snout edge and one to lower at the mouth area.
Crocodile Back Ridges
Using Color D, ch 8. Sc in 2nd ch from hook, (ch 2, sl st in same ch, sl st in next ch) 3 times.
FO, leaving 10-inch tail. Sew along top center of back.
Checkpoint: Crocodile should measure approximately 1.5 inches from snout to tail.
Zebra Charm
Zebra Head
Using Color E (white):
Work exactly as Tiger Head using Color E instead of Color B.
After assembly, embroider black vertical stripes across top and sides of head using Color C. Place 3 to 4 stripes on each side going over the top.
Zebra Muzzle, Ears, Body, and Legs
Work muzzle and ears as for Tiger using Color E. Add a small black embroidered tip to each ear.
Work body exactly as Tiger Body using Color E. Embroider 4 to 5 black vertical stripes around body.
For legs, work as other animal legs but change to Color C at Rnd 3 for the lower hoof section (work Rnds 4-5 in black).
Zebra Mane
Cut 8 to 10 strands of Color C, each 1 inch long. Fold each in half. Use crochet hook to pull folded loop through stitches along top center of head from between ears to neck. Pull cut ends through loop to secure. Trim all strands to 0.25 inch.
Zebra Tail
Cut 5 strands of Color C, each 2 inches long. Bundle together and sew to rear base of body. Trim to 0.5 inch. Fray slightly.
Giraffe Charm
Giraffe Head
Using Color F (tan):
Work exactly as Tiger Head using Color F. After assembly, embroider or duplicate-stitch irregular brown patches (Color G) across head.
Giraffe Ossicones (make 2)
Using Color F:
Rnd 1: MR, work 4 sc into ring. (4 sc)
Rnds 2-3: Sc in each st around. (4 sc each round)
FO, leaving 8-inch tail. Do not stuff. Sew to each side of top of head.
Giraffe Ears (make 2)
Using Color F:
Rnd 1: MR, work 5 sc into ring. (5 sc)
Rnd 2: Inc in each st around. (10 sc)
FO, leaving 10-inch tail. Flatten into oval, pinch base, sew behind ossicones.
Giraffe Neck and Body (one piece)
Using Color F:
Rnd 1: MR, work 6 sc into ring. (6 sc)
Rnd 2: Inc in each st around. (12 sc)
Rnds 3-5: Sc in each st around. (12 sc each round)
This narrow section forms the neck.
Rnd 6: (Sc in next st, inc in next st) 6 times. (18 sc)
Rnds 7-10: Sc in each st around. (18 sc each round)
Rnd 11: (Sc in next st, sc2tog) 6 times. (12 sc)
Stuff firmly throughout as you go.
Rnd 12: Sc2tog 6 times. (6 sc)
FO and close. Embroider irregular brown patches all over.
Giraffe Legs (make 4)
Work as other legs using Color F but change to Color G at Rnd 6 for hoof.
Giraffe Tail and Mane
For tail: Using Color F, ch 8. Sc in 2nd ch from hook and each ch across. (7 sc) Attach 3 strands of Color G as fringe at tip.
For mane: Cut 6 to 8 strands of Color G, each 1.5 inches long. Attach along top seam of neck using fringe-knot method. Trim to 0.25 inch.
Elephant and Lion Charms
The remaining animals follow similar construction methods. Work the elephant in Color H (light gray) and the lion in Color I (golden yellow) with an orange-yellow mane in Color J.
For the elephant, add large rounded ears by working: MR, 6 sc, inc to 12 sc, inc to 18 sc. Flatten and sew to head sides. Create a trunk by working a narrow tube of 6 sc for 6 rounds, curving slightly when sewing.
For the lion, create the mane by cutting 15 to 20 strands of Color J, each 1.5 inches long, and attaching them in a circle around the face using the fringe-knot method. Trim to create a full, rounded mane effect.
Final Assembly
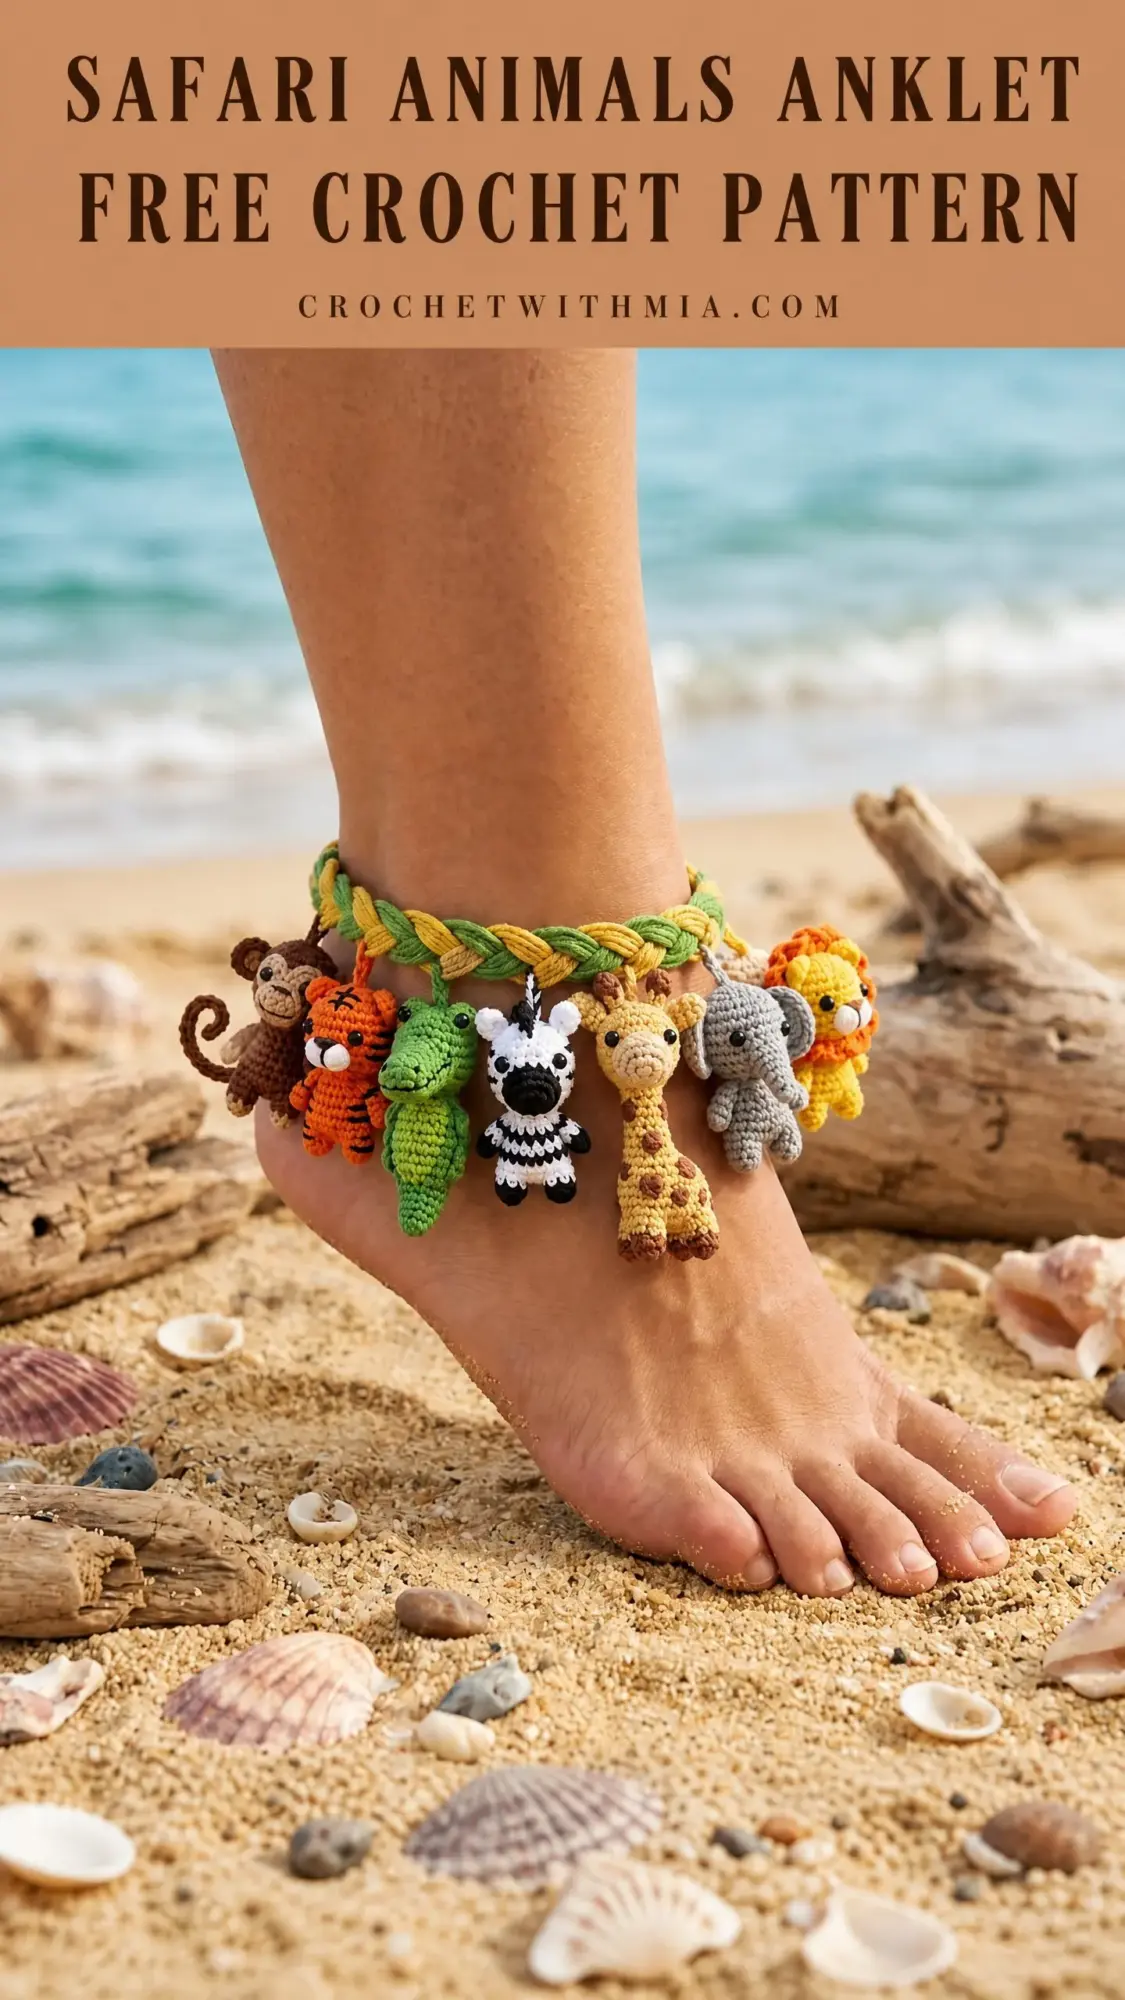
Once all seven charms are complete with their hanging loops attached, lay out your braided band flat. Space the charms evenly along the band, approximately 1 inch apart. The order from left to right should be: monkey, tiger, crocodile, zebra, giraffe, elephant, lion.
Thread each charm’s hanging loop through the braid and secure with a tight knot. Weave in any remaining ends. The charms should hang freely and face outward.
To wear, wrap the band around your ankle and tie the fringed ends in a bow or adjustable knot.
Tips for Success
Take breaks. This project has many small pieces. Working on one animal at a time over several days keeps you from getting frustrated.
Use good lighting. At this tiny gauge, every stitch matters. Natural daylight or a craft lamp helps enormously.
Keep pieces organized. I use small zip bags labeled with each animal’s name to hold pieces until assembly.
Don’t rush embroidery. The facial details and stripes bring these animals to life. Take your time.
I hope you love making this safari anklet as much as I did. It takes patience, but seeing all seven tiny animals dangling together is absolutely worth every stitch. If you want to find this pattern easily later, go ahead and save it to your Pinterest boards. And please, leave a comment below if you make one. I would love to see your little safari crew come to life!