
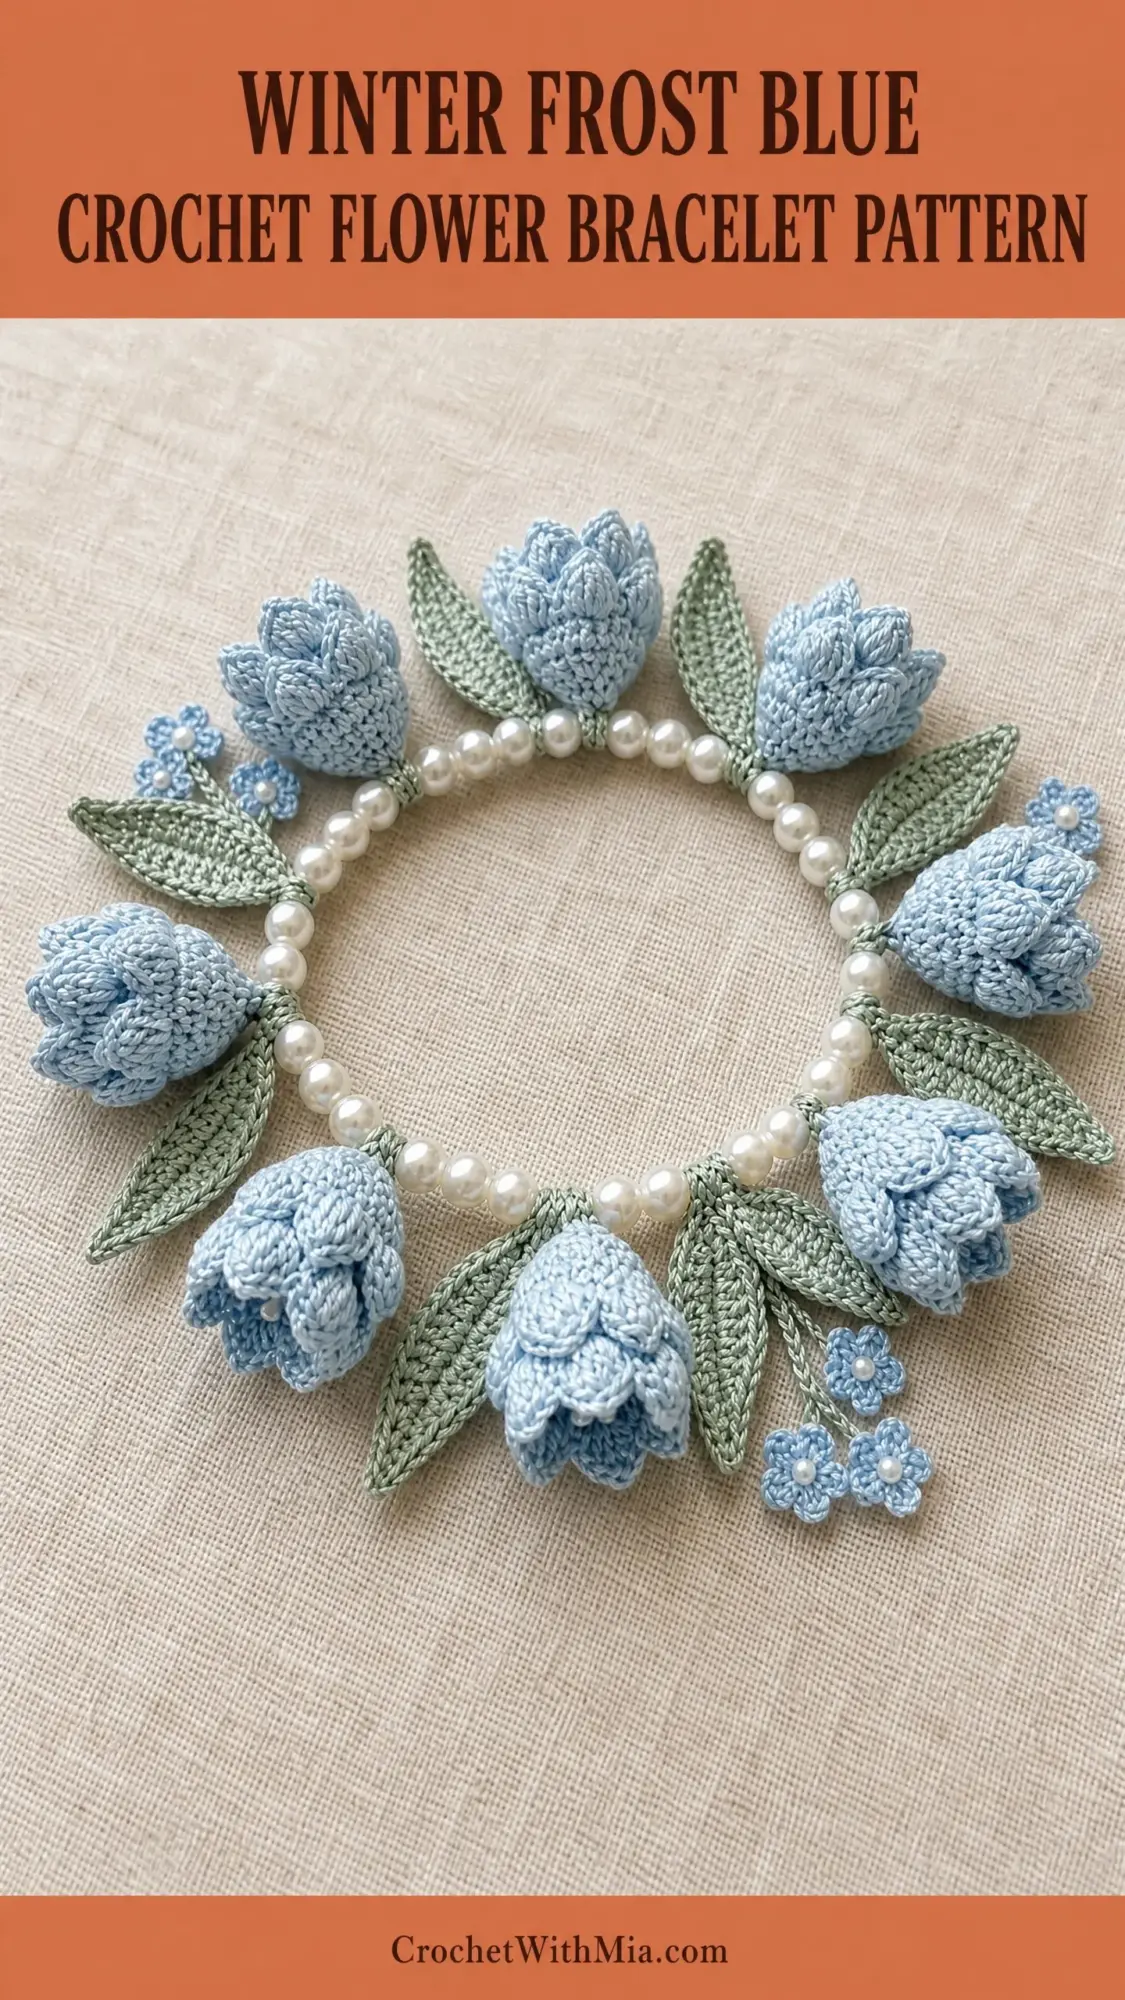
This is a wearable floral sculpture worked in fine crochet thread. Seven three-dimensional tulip buds, sage green leaves, and tiny forget-me-not flowers attach to a pearl bead band. The finished piece looks like a delicate wreath sitting on your wrist.
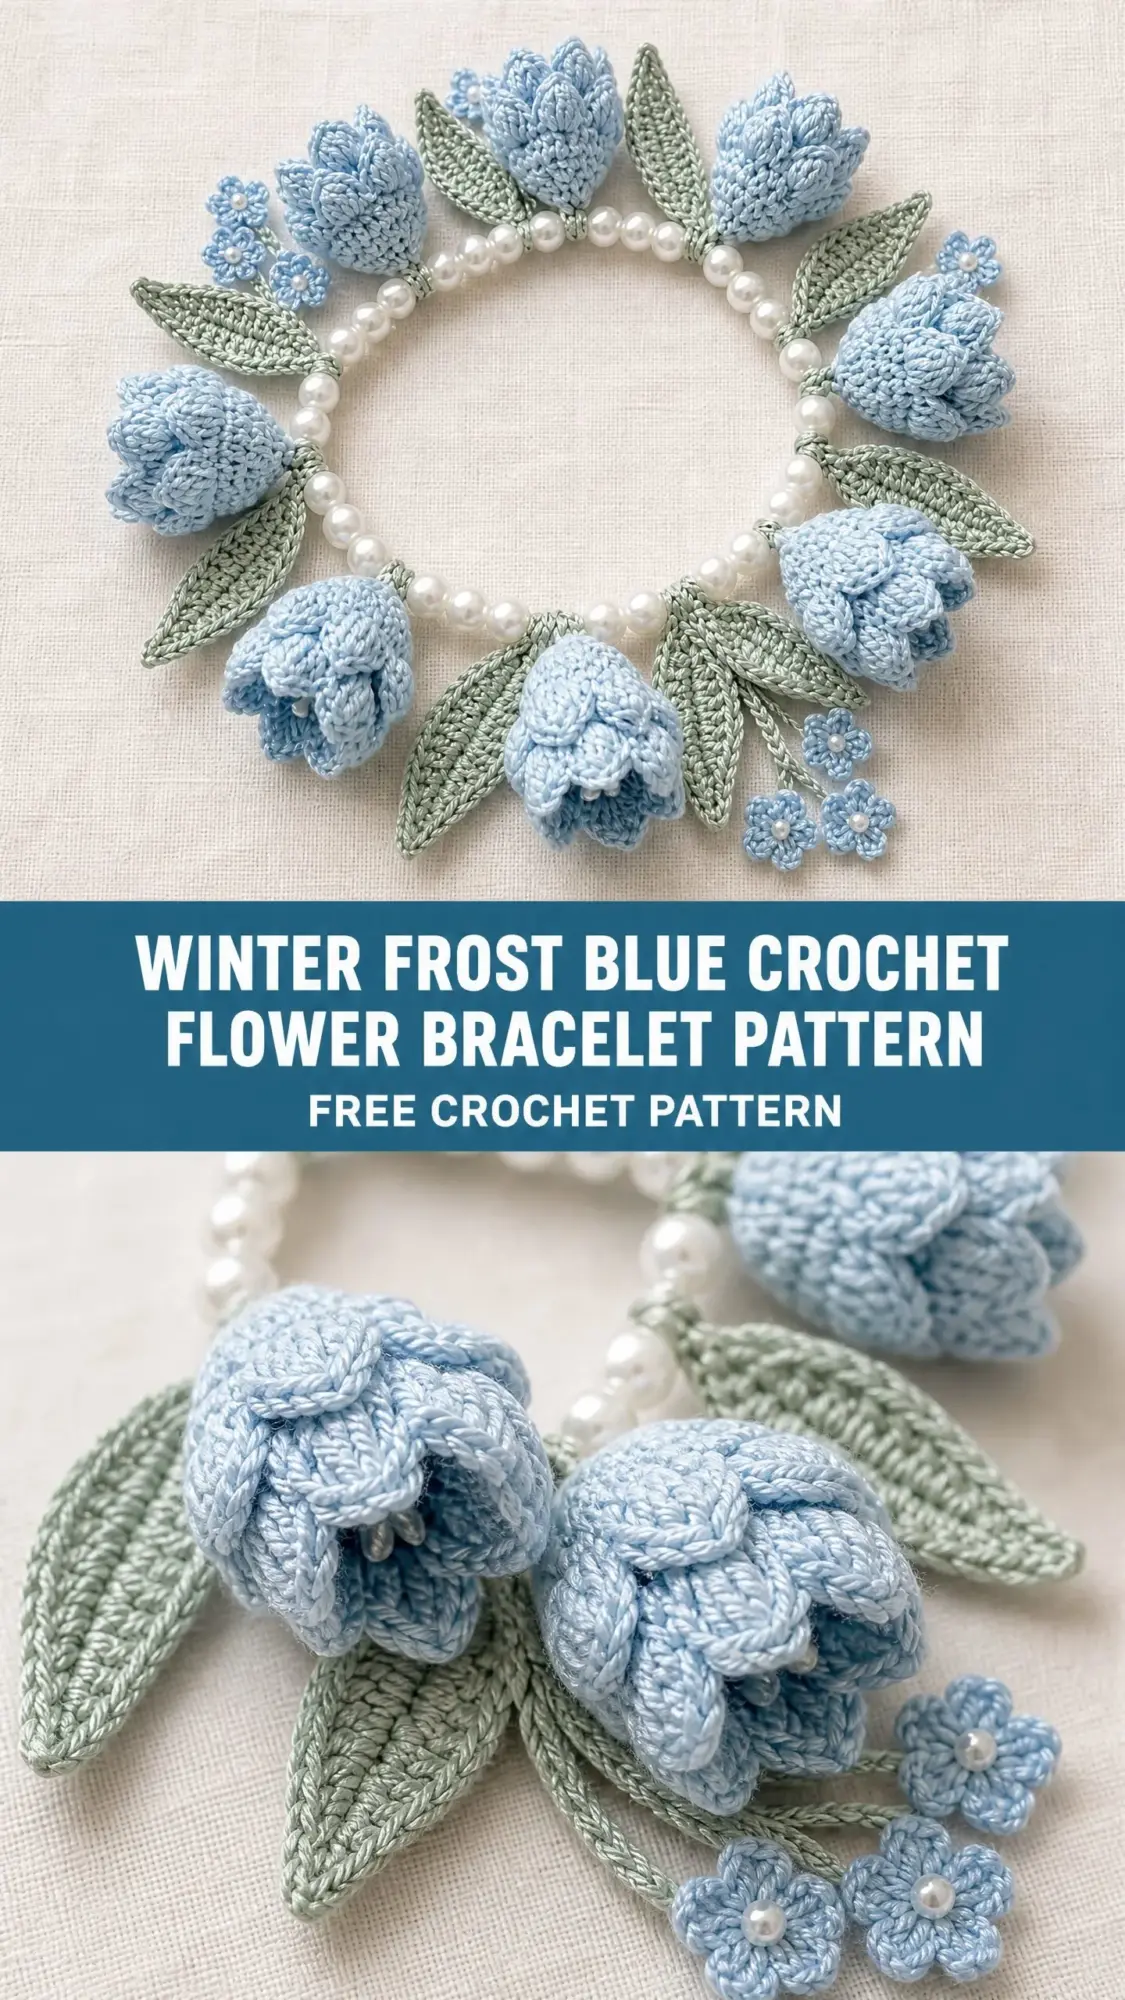
The bracelet requires size 10 crochet cotton thread and a steel hook. You will work each element separately, then assemble everything onto an elastic pearl strand. This is an advanced pattern with small, detailed components.
If you have experience working in continuous rounds, shaping with increases and decreases, and finishing small motifs, you are ready for this project. Plan for 12 to 18 hours of total work time. The result is absolutely worth the effort.
Why This Bracelet Pattern Works
I designed this bracelet to mimic the look of frost-kissed winter blooms. The pale ice blue tulips paired with soft sage leaves create that frozen garden aesthetic without any stiffness in the design. The pearl band adds elegance while providing stretch for comfortable wear.
Each tulip bud has three layers. An inner core provides structure and holds fiberfill stuffing. Inner petals wrap around this core. Outer petals add fullness and dimension. A separate calyx finishes the base of each bud with pointed green sepals.
The forget-me-not accent flowers fill gaps and add visual interest. They work up quickly in a single round and provide balance to the larger tulip elements.
Materials You Will Need
Gather these supplies before starting. Having everything ready makes the project flow smoothly.
Crochet Thread
You need size 10 crochet cotton thread in three colors:
Recommended Thread Brands
Coats and Clark Aunt Lydia’s Classic Crochet Thread Size 10 in Soft Blue (shade 805) works beautifully for Color A. DMC Cebelia Size 10 in color 3053 (sage) is excellent for Color B. Lizbeth Size 10 by Handy Hands offers consistent twist and smooth surface for this type of sculptural work.
Hook
Size 7 steel hook (1.65 mm). Keep a size 6 steel hook (1.8 mm) nearby if your tension runs tight.
Pearl Beads
Approximately 90 to 100 round pearl or pearl-finish beads, 6 mm diameter. The holes must be large enough for elastic cord to pass through twice.
Additional Supplies
Finished Measurements
Gauge
Using size 7 steel hook and size 10 crochet cotton thread:
10 single crochet stitches by 11 rows equals 1 inch / 2.5 cm
Check your gauge by making a small circle. Work a magic ring, chain 1, work 8 single crochet into the ring, slip stitch to join. Continue in single crochet for several rounds with increases. The circle should measure approximately 1.25 inches in diameter after 8 rounds.
Gauge matters here. Loose tension creates floppy tulip buds that won’t hold their shape. Tight tension makes stuffing difficult. Adjust your hook size as needed.
Abbreviations and Stitch Definitions
blo: Back loop only. Insert your hook under only the back loop of the stitch, leaving the front loop unworked.
ch: Chain. Yarn over and pull through the loop on your hook.
dc: Double crochet. Yarn over, insert hook into stitch, yarn over and pull up a loop (3 loops on hook), yarn over and pull through 2 loops (2 loops on hook), yarn over and pull through remaining 2 loops.
dec: Invisible single crochet decrease. Insert hook in front loop of next stitch, then front loop of following stitch, yarn over, pull through both loops, yarn over, pull through remaining 2 loops.
flo: Front loop only. Insert your hook under only the front loop of the stitch.
hdc: Half double crochet. Yarn over, insert hook into stitch, yarn over and pull up a loop (3 loops on hook), yarn over and pull through all 3 loops.
inc: Increase. Work 2 single crochet stitches into the same stitch.
MR: Magic ring. An adjustable loop that allows you to pull the center closed after working stitches into it.
sc: Single crochet. Insert hook into stitch, yarn over and pull up a loop (2 loops on hook), yarn over and pull through both loops.
sc2tog: Single crochet two together. Insert hook in next stitch, pull up loop, insert hook in next stitch, pull up loop, yarn over, pull through all 3 loops. This decreases by one stitch.
sc3tog: Single crochet three together. Same technique as sc2tog but worked over 3 stitches.
sl st: Slip stitch. Insert hook into stitch, yarn over, pull through both the stitch and the loop on your hook in one motion.
tr: Treble crochet. Yarn over twice, insert hook into stitch, yarn over and pull up a loop, (yarn over and pull through 2 loops) 3 times.
Special Stitches
Puff Stitch
This creates texture on the outer tulip petals.
1. Yarn over, insert hook into indicated stitch
2. Yarn over and pull up a loop to half double crochet height (3 loops on hook)
3. Yarn over, insert hook into same stitch
4. Yarn over and pull up a loop (5 loops on hook)
5. Yarn over, insert hook into same stitch one more time
6. Yarn over and pull up a loop (7 loops on hook)
7. Yarn over and pull through all 7 loops
8. Chain 1 to close (this chain does not count as a stitch)
Standing Single Crochet
Use this when joining new color mid-motif.
1. Make a slip knot on hook
2. Insert hook into indicated stitch
3. Yarn over and pull up a loop (2 loops on hook)
4. Yarn over and pull through both loops
Pattern Notes Before You Begin
All rounds are worked in a continuous spiral unless instructed to join with a slip stitch. Place a stitch marker in the first stitch of each round and move it up as you work.
Each tulip bud has three layers: inner core, inner petals, and outer petals. The calyx attaches separately around the base.
When stuffing tulip buds, use very small amounts of fiberfill. The bud should feel firm but not stretched. A bamboo skewer helps push fiberfill into narrow spaces.
Work with slightly tighter tension than normal. The goal is dense, opaque fabric with no gaps between stitches.
Leave a 6-inch tail when beginning each motif for weaving in. Leave a 12-inch tail when finishing motifs that will be sewn together.
Section 1: Tulip Bud Inner Core
Make 7 in Color A.
Round 1: MR, ch 1, work 6 sc into ring, pull tail to close ring. Do not join. Place marker. (6 sts)
Round 2: Inc in each st around. (12 sts)
Round 3: [Sc in next st, inc in next st] 6 times. (18 sts)
Round 4: [Sc in next 2 sts, inc in next st] 6 times. (24 sts)
Round 5: Sc in each st around. (24 sts)
Round 6: Sc in each st around. (24 sts)
Round 7: [Sc in next 2 sts, sc2tog] 6 times. (18 sts)
Round 8: [Sc in next st, sc2tog] 6 times. (12 sts)
At this point, lightly stuff the inner core with fiberfill. Insert wire stem now. Fold a 3-inch piece of wire in half, twist the two halves together at the base to form a single stem, and insert through the open base of the bud.
Round 9: [Sc2tog] 6 times. (6 sts)
Sl st in next st to close. Leave a 6-inch tail and fasten off. Thread tail onto tapestry needle and weave through the 6 remaining sts, pull gently to close the top. Secure and trim.
Checkpoint: Each inner core should measure approximately 0.75 inches tall and 0.75 inches in diameter at its widest point.
Section 2: Tulip Inner Petals
Make 7 sets in Color A. Each set has 3 inner petals.
With inner core held with the closed tip pointing up and wire stem pointing down, identify Round 4 (the round of 24 stitches). Divide into 3 groups of 8 stitches. Place markers at stitches 1, 9, and 17.
Petal 1
Join Color A with a standing sc into the first marked stitch of group 1.
Row 1 (RS): Sc in same st, sc in next 7 sts. Turn. (8 sts)
Row 2: Ch 1, dec, sc in next 4 sts, dec. Turn. (6 sts)
Row 3: Ch 1, dec, sc in next 2 sts, dec. Turn. (4 sts)
Row 4: Ch 1, [dec] 2 times. Turn. (2 sts)
Row 5: Ch 1, sc2tog. (1 st)
Do not fasten off. Sl st down the side edge of the petal back to the base ring (approximately 5 sl sts). Join with sl st to the first stitch of group 2.
Petals 2 and 3
Work exactly as Petal 1 into groups 2 and 3. After completing Petal 3, fasten off and weave in the 6-inch tail.
Checkpoint: The three inner petals should nestle snugly around the inner core, each tapering to a rounded point.
Section 3: Tulip Outer Petals
Make 7 sets in Color A. Each set has 3 outer petals.
Identify Round 6 of the inner core (directly below where inner petals attach). Divide 24 stitches into 3 groups of 8. Position markers to stagger with inner petals so outer petals fill the gaps.
Outer Petal 1
Join Color A with a standing sc into the first marked flo stitch of group 1.
Row 1 (RS): Working in flo only, [puff stitch in next st, ch 1] 4 times, sc in last 3 sts. Turn. (4 puffs, 3 sc, 4 ch-1 sps)
Row 2: Ch 1, sc in each st and each ch-1 sp across. Turn. (11 sts)
Row 3: Ch 1, dec, sc in next 7 sts, dec. Turn. (9 sts)
Row 4: Ch 1, dec, sc in next 5 sts, dec. Turn. (7 sts)
Row 5: Ch 1, dec, sc in next 3 sts, dec. Turn. (5 sts)
Row 6: Ch 1, dec, sc in next st, dec. Turn. (3 sts)
Row 7: Ch 1, sc3tog. (1 st)
Fasten off. Leave a 4-inch tail and weave in. Sl st down the edge back to the base ring before beginning the next petal.
Outer Petals 2 and 3
Work exactly as Outer Petal 1 into groups 2 and 3.
Checkpoint: Outer petals are broader than inner petals and should wrap around them, creating a layered tulip bud effect.
Section 4: Tulip Calyx
Make 7 in Color B.
Round 1: MR, ch 1, work 10 sc into ring. Do not join. (10 sts)
Round 2: Inc in each st around. (20 sts)
Round 3: Working in blo only, sc in each st around. (20 sts)
Round 4: [Sc in next st, inc in next st] 10 times. (30 sts)
Now work 5 sepal points directly into Round 4. Each sepal uses 6 consecutive stitches.
Sepal (Repeat 5 Times)
Row 1: Ch 1, sc in next 6 sts. Turn. (6 sts)
Row 2: Ch 1, dec, sc in next 2 sts, dec. Turn. (4 sts)
Row 3: Ch 1, dec, dec. Turn. (2 sts)
Row 4: Ch 1, sc2tog. (1 st)
Fasten off. Rejoin Color B with a sl st into the next unworked stitch of Round 4 and begin the next sepal.
After all 5 sepals are complete, weave in ends. Slip the calyx over the base of the assembled tulip bud. The blo ridge of Round 3 should sit at the base of the petal layers. Sew the calyx firmly to the base using the wire stem as an anchor point. Bend the wire loop flat against the outside.
Checkpoint: The assembled tulip bud with calyx should measure approximately 1.25 inches tall.
Section 5: Leaves
Make 14 in Color B.
Foundation chain: Ch 13.
Row 1: Starting in the 2nd ch from hook, sc in next st, hdc in next st, dc in next 3 sts, tr in next 3 sts, dc in next 2 sts, hdc in next st, sc in last st. Do not turn. Work 3 sc into the very last ch at the tip. Now work back along the other side of the foundation chain: sc in next st, hdc in next st, dc in next 2 sts, tr in next 3 sts, dc in next 3 sts, hdc in next st, sc in next st. Sl st into the first sc of Row 1 to close. (28 sts around perimeter plus 3 sts at tip)
Round 2 (Textured Surface): Ch 1. Working in blo, [sc in next 4 sts, hdc in next 2 sts, dc in next 3 sts, hdc in next 2 sts, sc in next 3 sts], sc in all 3 tip sts, [sc in next 3 sts, hdc in next 2 sts, dc in next 3 sts, hdc in next 2 sts, sc in next 4 sts]. Sl st to join. (31 sts)
Fasten off. Leave a 10-inch tail for sewing.
Wiring: Thread a 3-inch piece of floral wire along the center of the leaf from base to tip, weaving between the two layers. Bend tiny loops at each end using pliers to prevent poking through.
Checkpoint: Each leaf should measure approximately 1.5 inches long and 0.75 inches wide.
Section 6: Forget-Me-Not Accent Flowers
Make 6 in Color A with Color C centers.
Round 1: Using Color A, MR, ch 1, work 5 sc into ring, sl st to join to first sc. (5 sts)
Round 2: For each of the 5 sts work the following petal: ch 3, work 3 dc into the same base st, ch 3, sl st into the same base st, then sl st into the next st to advance. Repeat for all 5 petals. (5 petals)
Finish by sl st into the starting sc of Round 1.
Center Embellishment: Thread Color C onto a tapestry needle. Bring it up through the center and work 3 or 4 small straight stitches radiating from the center. Alternatively, sew a 3 mm seed bead into the center.
Fasten off Color A. Leave an 8-inch tail for sewing.
Checkpoint: Each forget-me-not should measure approximately 0.5 inches in diameter.
Section 7: Pearl Band Assembly
Step 1: Cut a 20-inch length of elastic cord. Fold it in half to find the center point.
Step 2: Thread all pearl beads onto the doubled elastic cord (pass both ends through each bead in the same direction). Thread beads until the strand measures 7 inches unstretched.
Step 3: Tie the two ends together using 3 to 4 surgeon’s knots. Pull firmly. Apply jeweler’s glue or clear nail polish to the knot. Allow to dry completely for at least 30 minutes.
Step 4: Trim excess elastic close to the knot, leaving approximately 0.125 inches.
Step 5: Slide the knot inside one pearl bead so it is hidden.
Checkpoint: The pearl band should stretch comfortably over your hand and spring back when worn.
Section 8: Final Assembly
Layout Planning
Lay your pearl band flat. Arrange 7 tulip buds around the outside at evenly spaced intervals, approximately 1 inch apart. Place one leaf pair behind each tulip, angling outward like a V shape. Position one cluster of 3 forget-me-nots at the bottom front and one cluster at the upper back.
Attaching Tulip Buds
1. Position the tulip facing outward and slightly upward
2. Using the flat wire loop at the calyx base, pass a double length of Color B thread through the loop, through the elastic cord between two pearl beads, and back through the loop
3. Wrap thread around the pearl cord 2 to 3 more times
4. Tie off with surgeon’s knots and dab with jeweler’s glue
5. Sew through the calyx base directly into the pearl cord at 2 to 3 additional points
Attaching Leaf Pairs
1. Hold two leaves with base ends touching, positioned behind a tulip at approximately 45-degree angles from each other
2. Sew each leaf base to the pearl cord between the same beads where the tulip anchors
3. Curl each leaf slightly away from center using the wire inside
Attaching Forget-Me-Nots
1. Arrange 3 forget-me-nots in a small cluster, overlapping edges slightly
2. Tack flowers to each other with 2 to 3 small stitches
3. Sew the cluster to the pearl cord, passing thread through 3 to 4 pearl beads
Final Adjustments
Hold the bracelet vertically and arrange each element so the bracelet appears full and even from all angles. Bend wired leaves and bud stems as needed. No element should point directly downward when worn.
Size Customization
For a 6-inch wrist: Use 78 to 82 pearl beads. Reduce to 6 tulip buds and 12 leaves. Make forget-me-not clusters with 2 flowers each.
For a 7.5-inch wrist: Use 100 to 110 pearl beads. Add an 8th tulip bud and 2 additional leaves, or increase spacing between elements.
For smaller flowers: Use size 20 thread with a size 10 or 12 steel hook. This produces tulips approximately 20 percent smaller.
For larger flowers: Use size 5 crochet thread with a size 5 or 6 steel hook. This produces buds approximately 25 percent larger.
Blocking and Finishing
Individual Motifs: Mix one part liquid starch with two parts water. Dip each piece, squeeze out excess, reshape by hand, and pin to a foam blocking board. Allow 2 to 4 hours to dry completely before assembly.
Leaves: Pin each leaf stretched to full length with the tip pointed and sides gently curved inward. The wire helps maintain shape after blocking.
Tulip Buds: Do not submerge stuffed buds. Lightly mist with a spray bottle, reshape by squeezing gently, and air dry.
Assembled Bracelet: Lightly mist the entire bracelet and reshape on a rounded form like a small jar or rolled towel. Allow to dry in position.
Care Instructions
Hand wash only in cool water with gentle soap. Do not wring or twist. Squeeze excess water gently and roll in a clean towel. Reshape and dry flat away from direct heat or sunlight. Do not machine wash, machine dry, or dry clean.
If the bracelet loses shape over time, re-mist lightly and reshape following the blocking instructions. Store flat in a small box or jewelry pouch to protect dimensional elements.
You Did It
This bracelet takes patience and precision, but the finished piece is truly stunning. The combination of soft blue tulips, delicate leaves, and lustrous pearls creates wearable art that draws compliments every time.
Thank you so much for choosing this pattern for your next project. I cannot wait to see your finished bracelets. Tag me on Instagram or share in my Facebook group so I can admire your beautiful work.
If you love this pattern, save it to your Pinterest boards so you can find it easily when you are ready to start. And please drop a comment below if you make one. I read every single comment and would love to hear how your bracelet turns out.