
Last summer, my niece announced she was expecting her first baby. A girl. Due in late spring. I immediately started mentally flipping through every baby pattern I had ever bookmarked, saved, or scribbled in notebooks over the years. Nothing felt right. Everything was either too fussy, too plain, or too complicated for the timeline I was working with.
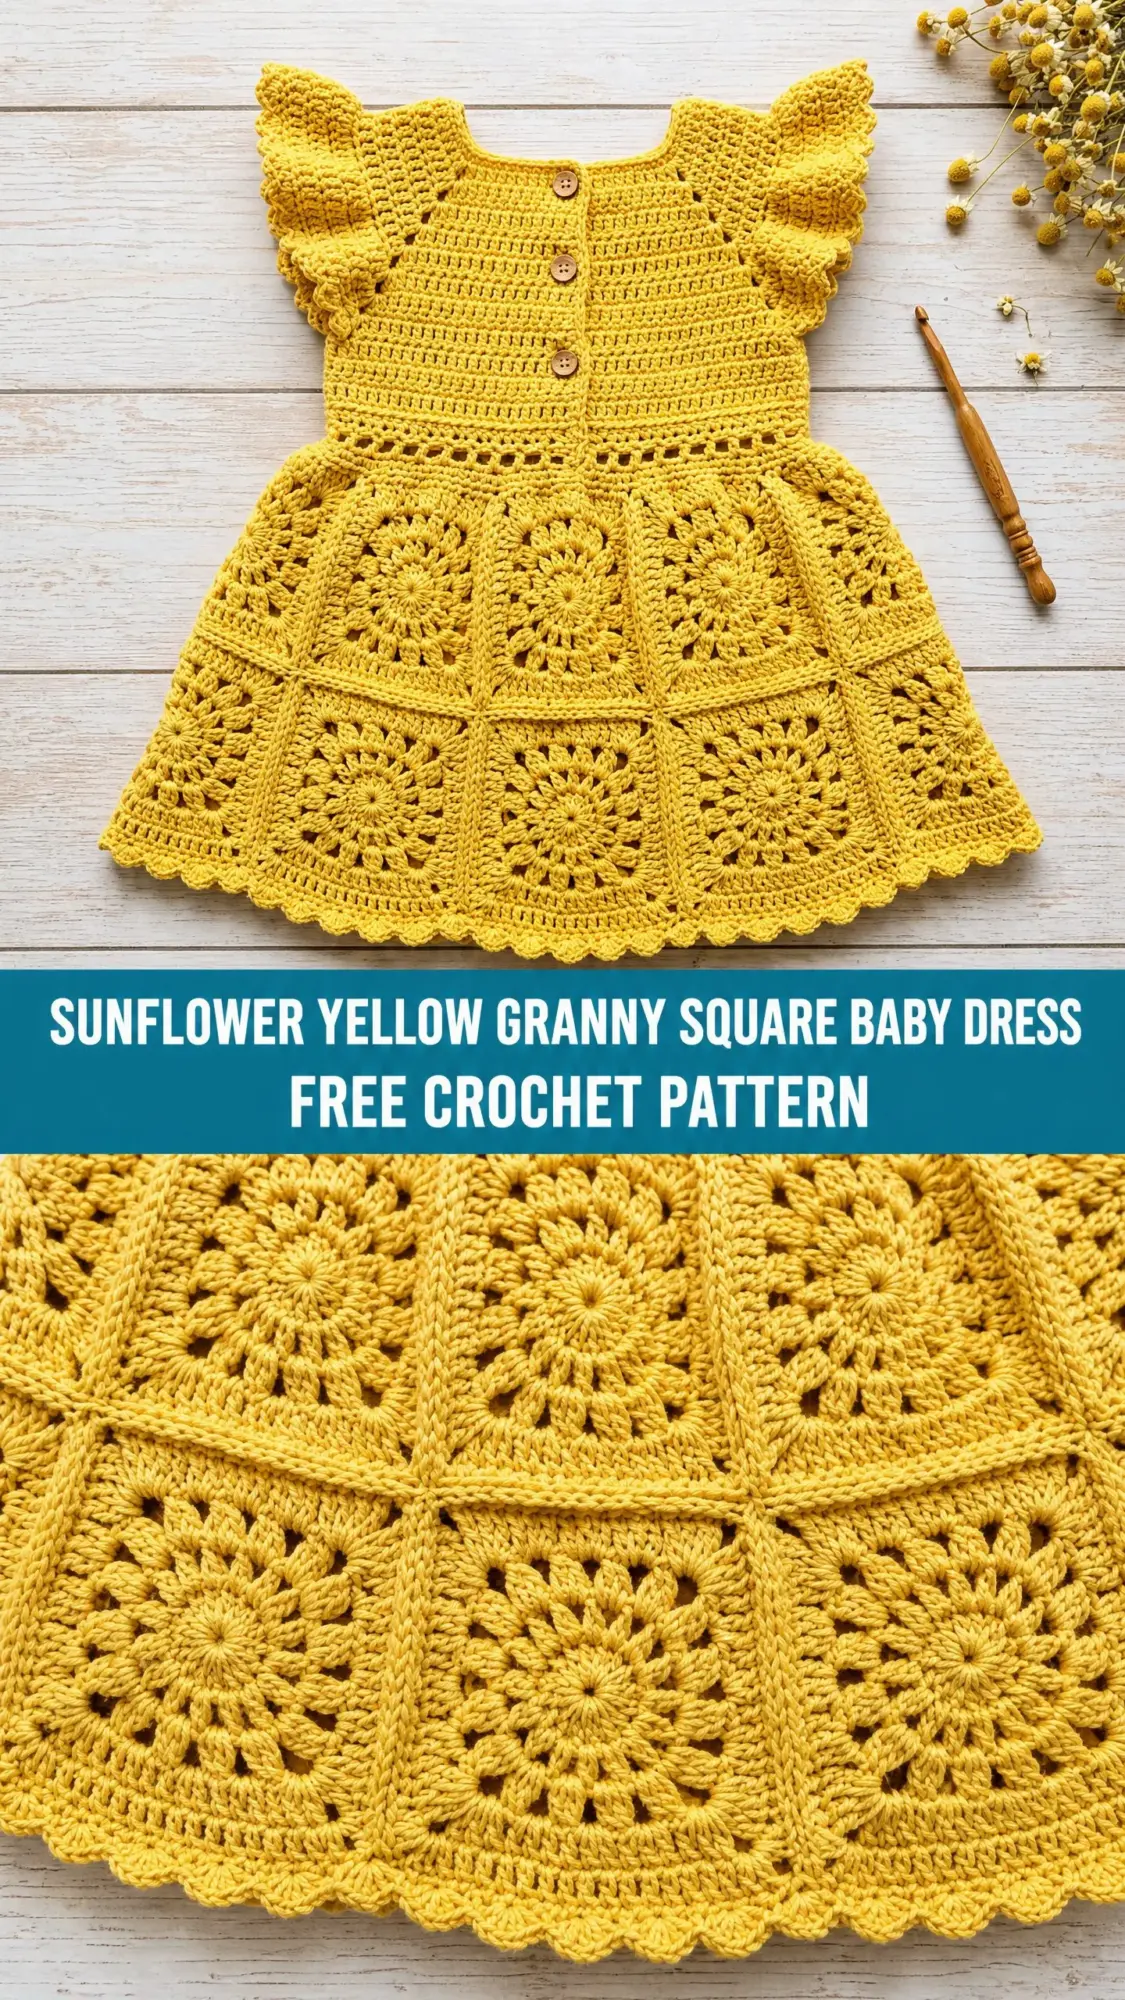
Then I remembered a sunny afternoon years ago when my grandmother taught me my very first granny square. She was wearing a yellow cardigan, and the yarn she handed me was the exact shade of buttercups growing wild in her backyard. That memory hit me out of nowhere, and suddenly I knew exactly what I wanted to make. A dress the color of sunshine, with granny squares just like the ones Grandma taught me, but sized down for tiny shoulders and a spring birthday.
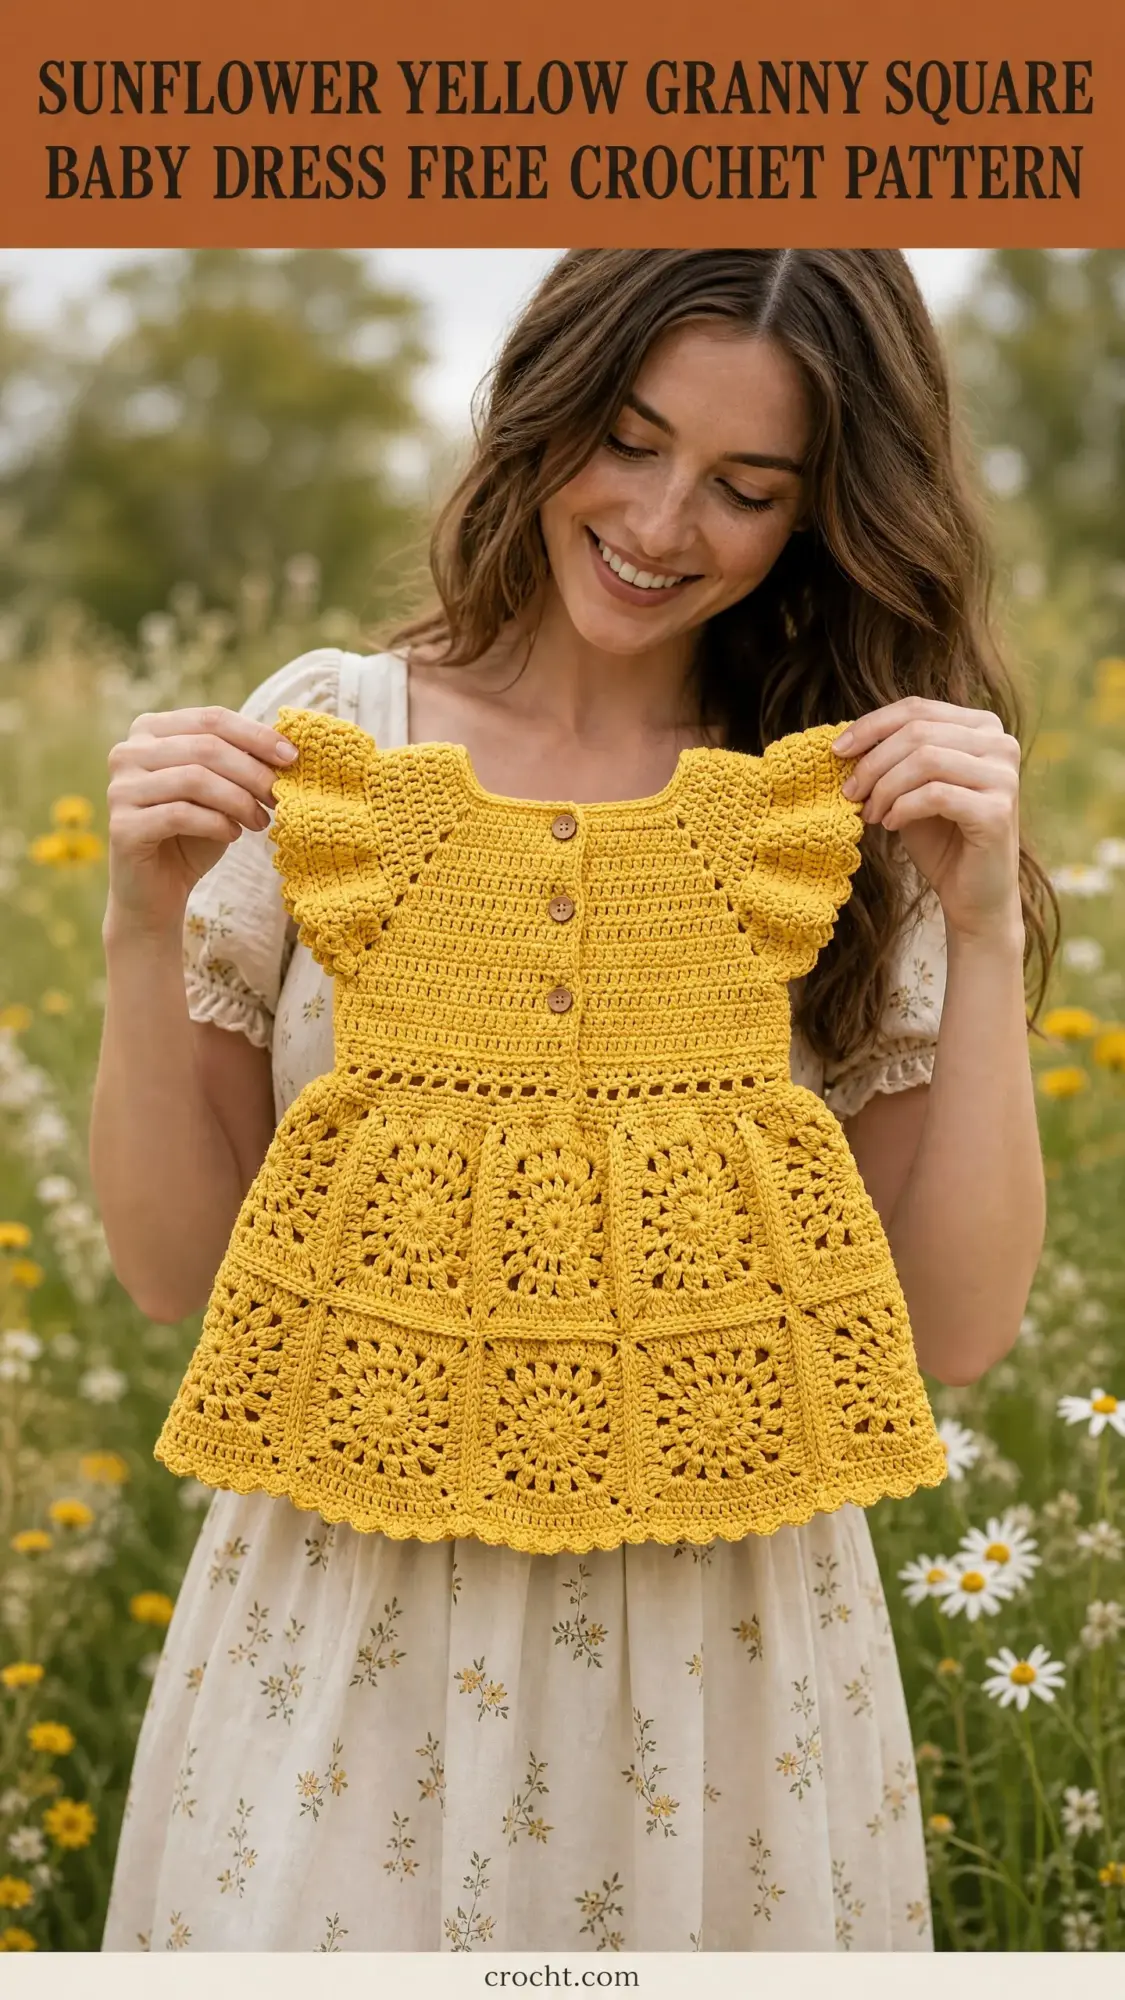
This pattern is that dress. It combines everything I love about traditional crochet with a modern, wearable design that actually looks like something you would find in a boutique. The bodice is smooth and fitted. The skirt has those gorgeous lacy granny squares arranged in two tiers for a sweet A-line shape. And those flutter sleeves? They make every baby look like a little garden fairy. I cannot wait to walk you through every single step.
Why This Crochet Pattern Works So Well
This baby dress hits a sweet spot that is surprisingly hard to find. It looks intricate and impressive, but the construction is actually quite logical once you break it down. You are not working in complicated stitch patterns or juggling multiple colors. The entire dress uses one yarn in one cheerful golden yellow, which means no color changes and no ends to weave in at every round.
The bodice is worked flat in rows using half double crochet (hdc), which creates a dense, smooth fabric perfect for the structured upper portion. The skirt uses traditional granny squares joined as you go, arranged in two tiers. The upper tier sits right below the waistline. The lower tier is slightly wider, adding one square on each side to create that gentle flare at the hem.
What I especially love is how the flutter sleeves come together. You work them directly onto the armhole edges in increasing rounds of double crochet clusters. They naturally curl and flare outward without any stiffening or shaping. The effect is effortlessly feminine.
Skill Level and Time Investment
I would call this an intermediate level crochet pattern. If you have made a few garments before and feel comfortable with basic shaping, reading row-by-row instructions, and working granny squares, you will do great here.
You should be familiar with:
If you are a confident beginner who has tackled a few accessories and wants to try your first garment, this could be a good stretch project. Just give yourself extra time and read through the entire pattern before starting.
Time estimate: 12 to 18 hours for an experienced intermediate crocheter. The granny squares take the bulk of the time, especially with blocking and joining.
Finished Measurements
This pattern is written for size 6 to 12 months. Here are the key measurements:
Size Customization Tips
To size up to 12 to 18 months: Add 2 foundation chains to each bodice panel (4 total across back and front) and add one additional granny square to each side of the lower skirt tier. This adds approximately 1 inch to the chest and approximately 3 inches to the hem circumference.
To size up to 18 to 24 months: Add 4 foundation chains to each panel (8 total) and add two additional squares per side of the lower tier. Check that the upper skirt tier square count still divides evenly.
To size down to 0 to 6 months: Remove 2 chains per panel and reduce the lower tier by one square per side.
Materials You Will Need
Yarn
DK weight (CYCA 3 / Light), 100 percent cotton or cotton-blend
Approximately 350 to 400 yards or 320 to 365 meters in golden yellow
Specific Yarn Suggestions:
1. Paintbox Yarns Simply DK (100% cotton, 137 yds per 50 g skein) in Buttercup Yellow. Approximately 3 skeins. This yarn has excellent stitch definition for granny squares and blocks beautifully.
2. Paintbox Yarns Cotton DK (100% cotton, 137 yds per 50 g skein) in Mustard Yellow. Approximately 3 skeins. A slightly firmer hand gives the skirt panels great structure.
3. Lion Brand 24/7 Cotton (100% cotton, 186 yds per 100 g skein) in Goldenrod. Approximately 2 skeins. Widely available and consistent in twist.
Substitution Note: Any smooth DK weight cotton or cotton-blend with a gauge matching 18 sc x 22 rows equals 4 inches will work. Avoid fuzzy or textured yarns as they obscure the granny square lace pattern. Mercerized cotton gives the crispest look. I do not recommend substituting with acrylic for a first garment because it will not block well and the drape will differ significantly.
Hook
US size G-6 / 4.00 mm
Additional Materials
Gauge
Getting gauge right is essential for a wearable garment, especially with cotton yarn which has minimal stretch.
Bodice gauge: 18 sc equals 4 inches or 10 cm; 20 rows equals 4 inches or 10 cm in single crochet worked flat with G-6 / 4.00 mm hook.
Granny square gauge: One completed 4-round granny square equals 3 inches by 3 inches or 7.5 cm by 7.5 cm after blocking.
Make a gauge swatch before you begin. Adjust your hook size up or down as needed.
Abbreviations (US Terms)
Special Stitches and Techniques
Granny Square (Worked in Rounds)
This is a standard 4-round granny square with a circular center motif.
Foundation Ring: Ch 6, join with sl st to form a ring.
Round 1 (RS): Ch 3 (counts as first dc), 2 dc into ring, ch 2, [3 dc into ring, ch 2] 3 times, join with sl st to top of beg ch-3. (4 groups of 3 dc, 4 ch-2 corner spaces)
Round 2: Sl st into next 2 sts and into ch-2 corner sp, ch 3 (counts as dc), 2 dc in same sp, ch 1, [3 dc in next ch-2 sp, ch 2, 3 dc in same sp, ch 1] 3 times, 3 dc in first ch-2 sp, ch 2, join with sl st to top of beg ch-3. (8 groups of 3 dc, 4 ch-2 corner sps, 4 ch-1 side sps)
Round 3: Sl st into next 2 sts and into ch-2 corner sp, ch 3 (counts as dc), 2 dc in same sp, ch 1, 3 dc in ch-1 side sp, ch 1, [3 dc in ch-2 corner sp, ch 2, 3 dc in same sp, ch 1, 3 dc in ch-1 side sp, ch 1] 3 times, 3 dc in first ch-2 corner sp, ch 2, join with sl st to top of beg ch-3. (12 groups of 3 dc, 4 ch-2 corner sps, 8 ch-1 side sps)
Round 4 (Finishing Round): Sl st into next 2 sts and into ch-2 corner sp, ch 3 (counts as dc), 2 dc in same sp, ch 1, [3 dc in next ch-1 sp, ch 1] twice, [3 dc in ch-2 corner sp, ch 2, 3 dc in same sp, ch 1, [3 dc in next ch-1 sp, ch 1] twice] 3 times, 3 dc in first ch-2 corner sp, ch 2, join with sl st to top of beg ch-3. (16 groups of 3 dc, 4 ch-2 corner sps, 12 ch-1 side sps)
Fasten off and weave in ends for standalone squares.
Join-As-You-Go (JAYG) Method
Work Round 4 of the new square until reaching a side or corner that touches a completed square. Instead of working ch 2 at a shared corner, work: ch 1, sl st into corresponding ch-2 corner sp of completed square, ch 1 (this replaces the ch 2). Instead of working ch 1 at a shared side sp, work: sl st into corresponding ch-1 side sp of completed square (no chain). Continue working Round 4 normally on all non-shared sides. This creates a flat, nearly invisible join.
Shell Stitch
5 dc worked into the same stitch or space, forming a fan shape.
Pattern Notes Before You Begin
1. The back of the dress has a center button band opening running from the neckline to the waistline junction. The back is worked in two separate panels that share the center opening. Three buttons are sewn onto the right back panel; buttonholes are made on the left back panel.
2. All bodice panels are worked flat in rows. Granny squares are worked in rounds with RS always facing. Do not turn granny squares.
3. The skirt has two tiers. The upper tier consists of 6 squares. The lower tier consists of 8 squares (one additional square on each outer back edge for the A-line flare).
4. Stitch counts in parentheses at the end of each row reflect working stitches only.
5. Block all granny squares before joining for the most uniform result. Pin to blocking mats at 3 inches by 3 inches.
Step by Step Crochet Pattern Instructions
Section 1: Back Right Panel
The back right panel forms the right half of the bodice back when worn. It is worked flat in rows of hdc from the shoulder down to the waistline.
Foundation: Ch 21.
Row 1 (RS): Hdc in 3rd ch from hook and in each ch across. Turn. (19 hdc)
Row 2: Ch 2 (does not count as st here or throughout bodice), hdc in each st across. Turn. (19 hdc)
Rows 3 to 8: Rep Row 2. Turn after each row. (19 hdc)
Place a stitch marker at each end of Row 1 to mark the shoulder line.
Armhole Shaping begins on Row 9:
Row 9 (RS): Ch 2, hdc in first 14 sts, leave last 5 sts unworked (these form the armhole edge). Turn. (14 hdc)
Row 10: Ch 2, hdc2tog over first 2 sts, hdc to end. Turn. (13 hdc)
Row 11: Ch 2, hdc across to last 2 sts, hdc2tog over last 2 sts. Turn. (12 hdc)
Row 12: Ch 2, hdc2tog, hdc to end. Turn. (11 hdc)
Rows 13 to 18: Ch 2, hdc across. Turn. (11 hdc)
Button Band Row: Do not turn after Row 18. Working along the straight center-back edge from bottom to top, evenly sc 18 sts up the edge, working 1 sc per row end approximately. Fasten off. (18 sc on button band edge)
Section 2: Back Left Panel
Foundation: Ch 21.
Row 1 (RS): Hdc in 3rd ch from hook and in each ch across. Turn. (19 hdc)
Rows 2 to 8: Ch 2, hdc in each st across. Turn. (19 hdc)
Row 9 (RS): Ch 2, skip first 5 sts (armhole edge), hdc in rem 14 sts. Turn. (14 hdc)
Row 10: Ch 2, hdc to last 2 sts, hdc2tog. Turn. (13 hdc)
Row 11: Ch 2, hdc2tog, hdc to end. Turn. (12 hdc)
Row 12: Ch 2, hdc to last 2 sts, hdc2tog. Turn. (11 hdc)
Rows 13 to 18: Ch 2, hdc across. Turn. (11 hdc)
Buttonhole Band Row: Do not turn after Row 18. Working along the straight center-back edge from bottom to top, sc 5 sts, ch 2, sk 2, sc 4, ch 2, sk 2, sc 4, ch 2, sk 2, sc 1. (18 sts plus 3 buttonhole ch-2 sps on band edge)
Fasten off. The three ch-2 spaces form the buttonholes.
Section 3: Front Bodice Panel
Foundation: Ch 43.
Row 1 (RS): Hdc in 3rd ch from hook and in each ch across. Turn. (41 hdc)
Rows 2 to 8: Ch 2, hdc across. Turn. (41 hdc)
Armhole Shaping:
Row 9 (RS): Sl st across first 5 sts, ch 2, hdc in next 31 sts, leave last 5 sts unworked. Turn. (31 hdc)
Row 10: Ch 2, hdc2tog, hdc to last 2 sts, hdc2tog. Turn. (29 hdc)
Row 11: Ch 2, hdc2tog, hdc to last 2 sts, hdc2tog. Turn. (27 hdc)
Row 12: Ch 2, hdc2tog, hdc to last 2 sts, hdc2tog. Turn. (25 hdc)
Rows 13 to 18: Ch 2, hdc across. Turn. (25 hdc)
Fasten off.
Section 4: Joining Shoulders
Hold the front panel with RS facing up. Hold the back right panel with RS facing up, aligning the shoulder edge (Row 1 of back right) with the right shoulder edge of the front panel (right 9 sts of front Row 1).
Using a yarn needle or slip stitch join, join the right shoulder across 9 sts.
Repeat to join left shoulder: align back left panel Row 1 with the left shoulder edge of the front panel across 9 sts.
The 7 remaining foundation chain sts of the front panel form the front neckline. The gap between the two back panels at the top forms the back neckline.
Section 5: Neckline Edging
Join yarn at top right corner of back right button band with sl st.
Round 1: Sc evenly around the entire neckline as follows: sc 11 across back right neckline edge, sc 3 across right shoulder seam, sc 23 across front neckline, sc 3 across left shoulder seam, sc 11 across back left neckline edge. Join with sl st to first sc. (51 sc)
Adjust sc count slightly as needed to keep the neckline flat and even.
Round 2: Ch 1, sc in each st around. Join with sl st. (51 sc)
Fasten off and weave in ends.
Section 6: Armhole Flutter Ruffle (Make 2)
Join yarn at the base of the armhole with RS facing, at the underarm point.
Round 1: Ch 1, work 36 sc evenly around the armhole opening. Join with sl st. (36 sc)
Round 2 (First Ruffle Layer): Ch 3 (counts as dc), dc in same st, ch 1, [2 dc in next st, ch 1] around. Join with sl st to top of beg ch-3. (36 groups of 2 dc, 36 ch-1 sps)
Round 3 (Second Ruffle Layer): Sl st into first ch-1 sp, ch 3 (counts as dc), 2 dc in same sp, ch 1, [3 dc in next ch-1 sp, ch 1] around. Join with sl st to top of beg ch-3. (36 groups of 3 dc)
Round 4 (Third Ruffle Flare): Sl st into next 2 sts and into ch-1 sp, ch 3, 3 dc in same sp, ch 1, [4 dc in next ch-1 sp, ch 1] around. Join with sl st to top of beg ch-3. (36 groups of 4 dc)
Fasten off and weave in ends. The ruffle will naturally curl and flare outward.
Section 7: Waistline Joining Row
Join yarn to the bottom right back edge of the bodice with RS facing.
Row 1: Ch 3 (counts as dc), work dc evenly across the entire bottom edge of the bodice. Work 1 dc per hdc stitch across each section: 11 sts across back right lower row, 25 sts across front lower row, 11 sts across back left lower row. Total: 47 dc. Do not join (the back has the center opening). Turn.
Row 2: Ch 2, hdc across all 47 sts. Turn. (47 hdc)
This creates a 2-row waistband joining strip.
Section 8: Granny Square Skirt
Upper Skirt Tier
The upper tier uses 6 squares: 1 for back right, 4 for the front, 1 for back left.
Square U1 (back right): Work Rounds 1 through 4 as standalone square. Fasten off. This is the anchor square.
Square U2: Work Rounds 1 through 3. On Round 4, when reaching the left side of the square, use JAYG to join all 4 side sps along the shared edge to the corresponding side sps of U1’s right edge. At the shared corner, join the corner sp of U2 to the corner sp of U1. Fasten off.
Squares U3, U4, U5: Repeat as U2, each joining to the previous square’s right edge. Fasten off each.
Square U6 (back left): Repeat as U2, joining to U5’s right edge. Do not join U6’s right edge to U1 (this remains the open back). Fasten off.
Attaching Upper Tier to Bodice: Hold the upper skirt strip with top edge aligned to the bottom of the waistband joining strip. Using yarn and a yarn needle, whip stitch the top edge of the upper tier squares to the bottom edge of the waistband row, distributing evenly.
Lower Skirt Tier
The lower tier consists of 8 squares: 6 squares align below the upper squares, plus 1 additional square at each outer back edge.
Square L1 (far right): Work Rounds 1 to 4 as standalone. Fasten off.
Squares L2 through L7: Work Rounds 1 to 3, then join Round 4 to the previous square’s free left edge using JAYG method. Fasten off each.
Square L8 (far left): Work as L2, joining to L7. Fasten off.
Attaching Lower Tier to Upper Tier: Align the top edge of each lower-tier square to the bottom edge of the upper-tier squares. The 6 central lower squares (L2 through L7) align directly below U1 through U6. Square L1 and L8 overhang one square-width at each back edge.
Whip stitch or sl st join the top edges of L1 through L8 to the bottom edges of U1 through U6.
Inter-Tier Band
Join yarn to the right back edge where the upper and lower tiers meet with RS facing.
Row 1: Ch 3 (counts as dc), work dc evenly across the join line between tiers. Approximately 24 dc across (3 per square x 8 squares). Turn. (24 dc)
Row 2: Ch 2, hdc across. Turn. (24 hdc)
Fasten off.
Section 9: Hem Scallop Edging
Join yarn at the bottom right back corner of the lower skirt tier with RS facing.
Foundation Row: Ch 1, sc evenly across the entire bottom edge of all 8 lower-tier squares, working approximately 12 sc per square bottom edge. Total: approximately 96 sc. (96 sc)
Shell Edging Round 1: Ch 1, [sc in next st, sk 2 sts, 5 dc in next st (shell made), sk 2 sts] across, ending with sc in last st. (16 shells, 16 sc)
Shell Edging Round 2: Sl st to top of first shell (3rd dc), ch 3 (counts as dc), 4 dc in same st, [sc in sc between shells, 5 dc in 3rd dc of next shell] across, ending sc in last sc, join with sl st to top of beg ch-3. Fasten off.
Finishing Your Baby Dress
Button Placement
Lay dress flat, RS up, back opening at top. Overlap the button band (back right) over the buttonhole band (back left) by approximately 0.5 inch. Mark button positions through the buttonholes. Sew 3 wooden buttons to the right back button band at marked positions.
Weaving In Ends
Weave in all yarn ends securely, passing through at least 3 to 4 stitches in multiple directions. Cotton yarn does not felt, so secure ends well.
Seaming
If any edges at the bodice sides are not fully closed, use mattress stitch to close any small gaps at the underarm join points. The armhole ruffle covers this area.
Blocking Instructions
Wet blocking is strongly recommended for cotton. Soak the finished dress in cool water for 15 to 20 minutes until fully saturated. Gently press out excess water in a towel (do not wring). Lay flat on blocking mats, pin to finished measurements, and allow to dry completely (12 to 24 hours).
Pay particular attention to the granny squares: pin each corner to exact measurements so the squares are perfectly square and the lace openings are fully opened. Pin the scallop hem open at each shell point.
Care Instructions
Machine wash cold on gentle cycle in a mesh laundry bag. Do not tumble dry. Lay flat to dry. Do not bleach. Cool iron on reverse side if needed, pressing through a damp cloth. Store folded, not hung, to preserve the granny square panels.
Tips for Success with This Crochet Tutorial
Block your granny squares before joining. I know it feels like an extra step, but trust me. When your squares are all exactly 3 inches by 3 inches, the join-as-you-go process becomes almost meditative. Unblocked squares can vary wildly in size, leading to a puckered or wavy skirt.
Count your stitches at the end of every row on the bodice. This is a garment, not a blanket. If you drop or add a stitch on the bodice, it will show in the fit.
Make one granny square first and measure it. If your square is too big, go down a hook size. Too small, go up. Do not skip this step.
Use stitch markers liberally. Mark the beginning of rounds, mark the shoulder seams, mark the armhole shaping rows. Future you will be grateful.
Thank you so much for choosing this pattern. I hope you love making this little sunshine dress as much as I loved designing it. There is something really special about creating a handmade garment for a baby, and I know whoever receives this will treasure it.
If you make this dress, I would absolutely love to see it. Tag me on Instagram or share a photo in my Facebook group. Seeing your finished projects is honestly the best part of my job.
Save this pattern to your Pinterest boards so you can find it when you are ready to start, and please leave a comment below if you have any questions or want to share your progress. Happy crocheting, friend!