
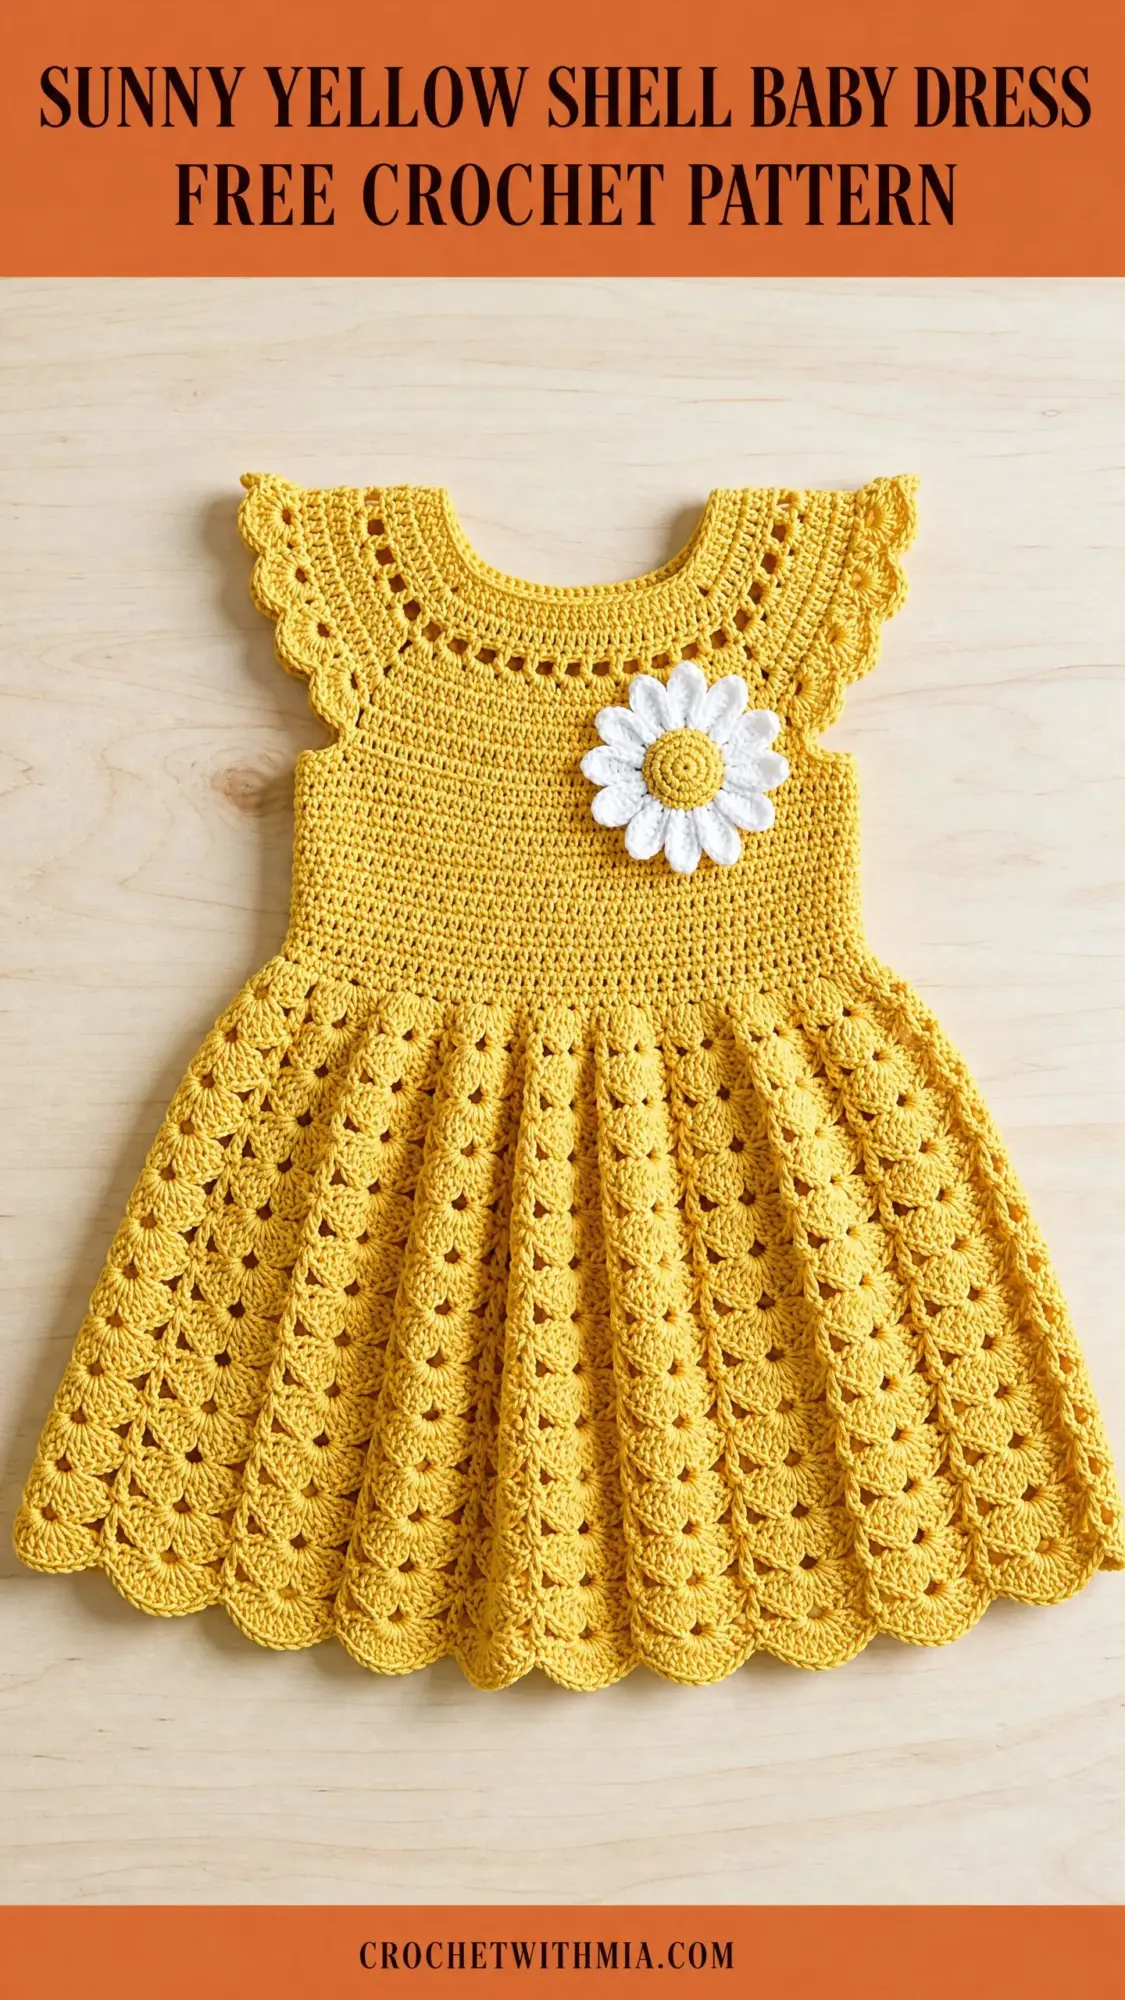
Go ahead and dig into that yarn stash. You know the one I mean. That gorgeous mustard yellow skein you’ve been saving for "something special" is about to become the most adorable baby dress you’ve ever made. This pattern combines a fitted single crochet bodice with a dreamy shell stitch skirt that fans out like sunshine, plus the sweetest little crocheted daisy applique at the chest. Fair warning: this is an intermediate project. You’ll work top-down construction, manage some increase math, and execute a repeating shell pattern. But if you’re comfortable with basic stitches and can count to six reliably, you’ve absolutely got this.
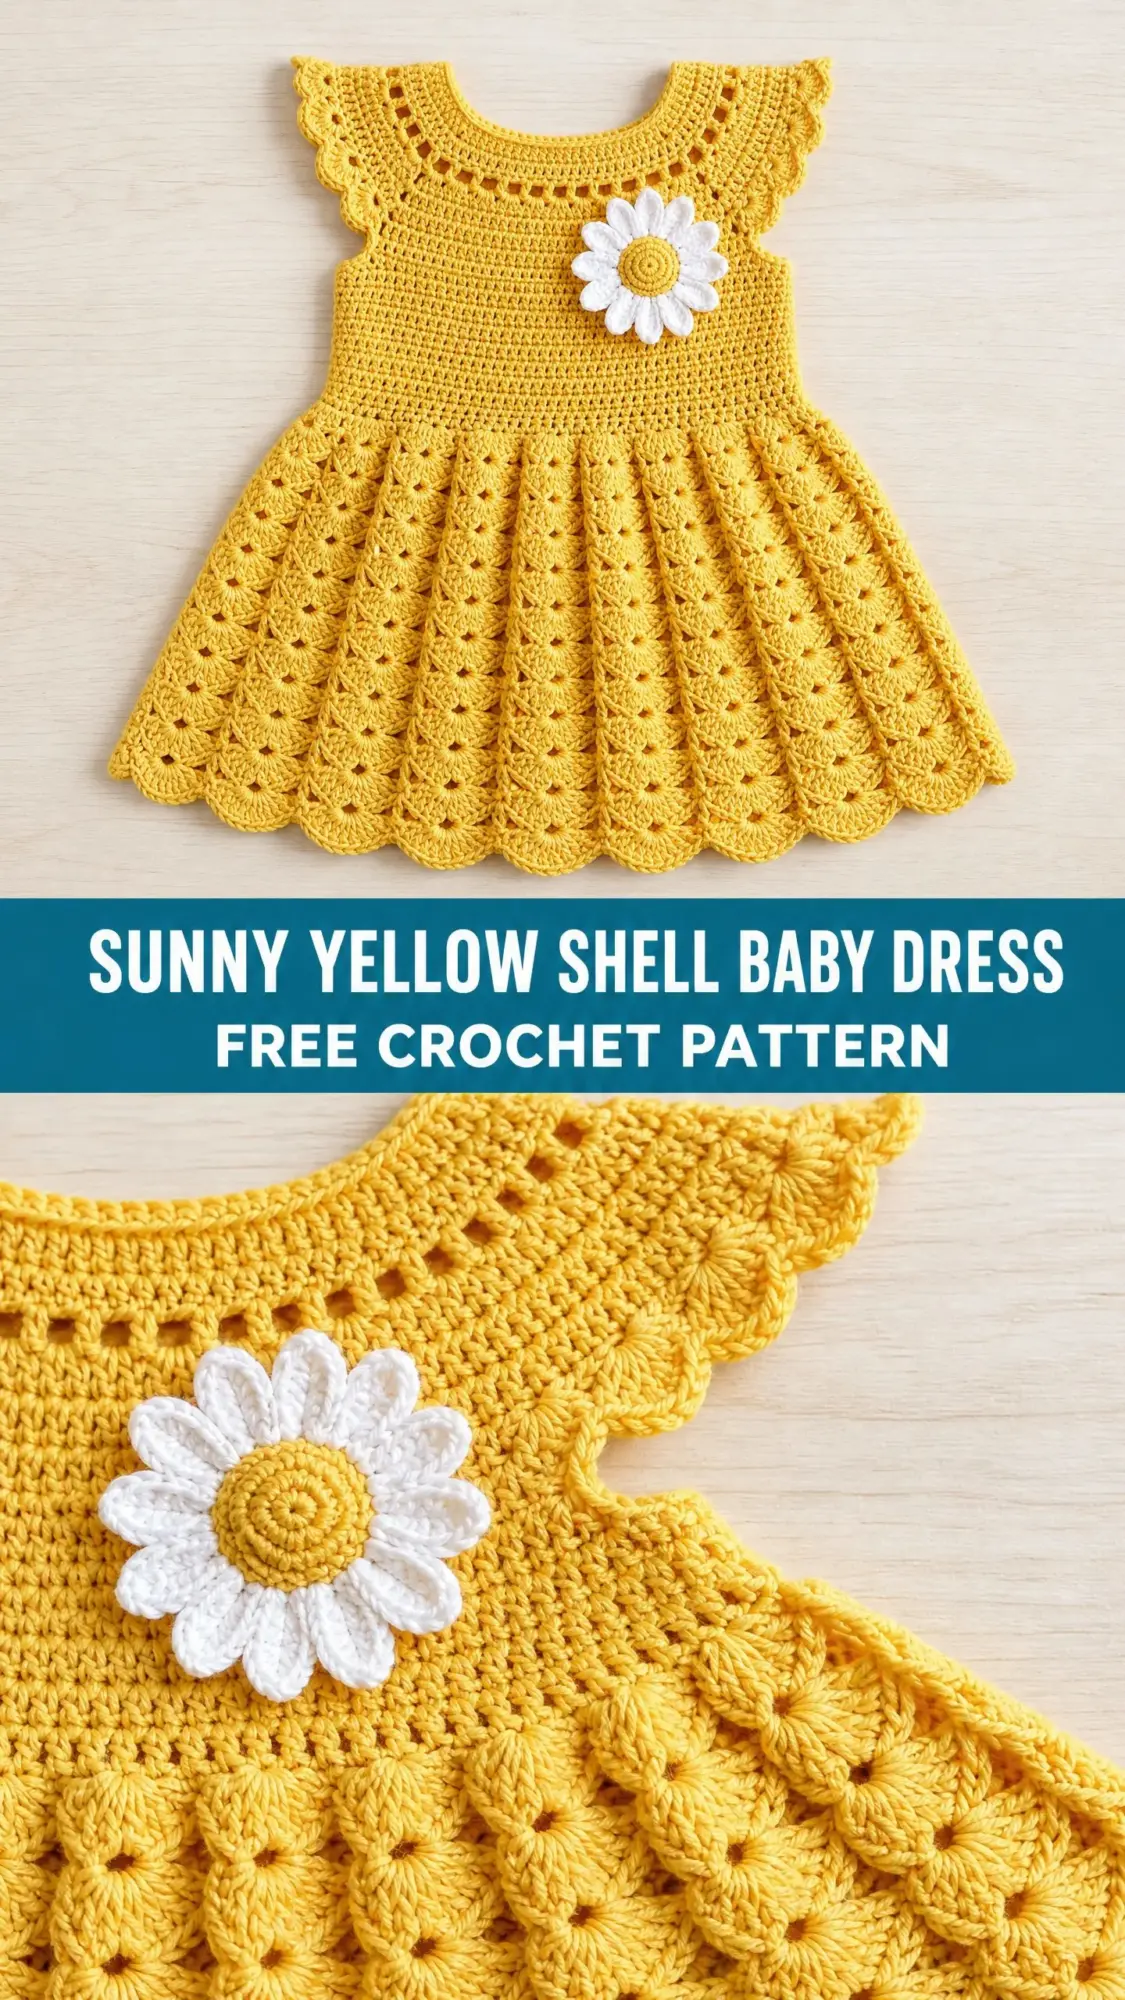
The construction is genuinely clever. You start at the neckline, work flat rows to create a keyhole back opening for easy dressing, then join in the round and shape the yoke. From there you divide for the armholes, crochet a smooth bodice, and transition into that stunning layered skirt. The flutter sleeves? They’re just scallop edging worked around the armhole openings. Simple but effective.
This dress fits babies 6 to 12 months and works up in approximately 10 to 14 hours. Perfect for portrait sessions, holidays, or just making a little one look absolutely precious on a Tuesday.
Why This Shell Baby Dress Pattern Works So Well
The genius of this design lives in its proportions. The smooth single crochet (sc) bodice creates a fitted look that contrasts beautifully with the full, textured skirt. As you work down the skirt, the shells gradually increase from 5 double crochets to 7, then to 9. This creates that lovely A-line silhouette without any complicated shaping math on your part.
The top-down construction means you can try the dress on your little model as you go. Running a bit long? Stop the skirt sooner. Need more room in the bodice? Add a round or two before the skirt transition. This flexibility makes the pattern forgiving even when your gauge isn’t perfect.
And that daisy? It’s worked separately and sewn on at the end. If you make a mistake on the flower, you haven’t ruined hours of dress work. Smart design choices like this make the whole project less stressful.
Materials You’ll Need
Yarn:
Hooks:
Notions:
Yarn Suggestions That Work Beautifully
Lion Brand Pound of Love in Butterscotch gives you excellent stitch definition and machine washability. Perfect for baby items that will see lots of laundry days.
Paintbox Yarns Simply Worsted in Mustard Yellow offers great value and consistent tension. The color range is excellent if you want to make this dress in other shades.
Cascade 220 Superwash in Sunflower brings luxurious softness and beautiful drape. It’s machine washable on gentle cycle, which matters enormously for baby clothes.
Avoid highly textured or chenille yarns. They’ll obscure the shell stitch detail that makes this skirt so special.
Gauge
Getting gauge right matters for fitted garments like this dress.
18 sc = 4 inches / 10 cm
10 rows sc = 4 inches / 10 cm
Work a 4 inch square swatch in single crochet, block it, then measure. If you’re getting more stitches per inch, go up a hook size. Fewer stitches? Go down a hook size. This step takes 20 minutes and saves hours of frustration.
Finished Measurements
Size: 6 to 12 months
Chest circumference: approximately 18 inches / 46 cm
Dress length (shoulder to hem): approximately 13 inches / 33 cm
Yoke depth: approximately 3 inches / 7.5 cm
Bodice length: approximately 3.5 inches / 9 cm
Skirt length: approximately 6.5 inches / 16.5 cm
Abbreviations
Before we dive in, let’s get familiar with the shorthand:
Special Stitches Explained
Shell Stitch
The shell is the star of this pattern’s skirt section. It’s simply 5 double crochets worked into the same stitch or space, creating a fan shape.
How to work it:
1. Identify your target stitch
2. Work 5 dc all into that single stitch
3. That cluster of 5 dc is one complete shell
Later in the pattern, shells grow to 7 dc, then 9 dc. Same concept, just more stitches fanning out.
Scallop Edging
Used at the hem, neckline, and sleeve edges. You’ll work shells separated by slip stitches to create a wavy, decorative border.
Pattern Instructions
Yoke
The yoke starts flat to create the back keyhole opening, then joins in the round.
Foundation Row (RS): With MC and larger hook, ch 61.
Row 1 (RS): Sc in 2nd ch from hook and in each ch across. Turn. (60 sc)
Row 2 (WS): Ch 1, sc in each st across. Turn. (60 sc)
Row 3 (RS): Ch 1, sc in each st across. Turn. (60 sc)
Row 4 Eyelet Row (WS): Ch 3 (counts as dc), sk next st, (dc in next st, ch 1, sk next st) across to last st, dc in last st. Turn. (31 dc, 29 ch-1 sp)
This creates those pretty little holes you see near the neckline in the photos.
Row 5 (RS): Ch 1, sc in first dc, (sc in ch-1 sp, sc in next dc) across. Turn. (60 sc)
Row 6 (WS): Ch 1, sc in each st across. Turn. (60 sc)
Row 7 Increase Row (RS): Ch 1, sc in first st, inc in next st, (sc in next 3 sts, inc in next st) rep across to last 2 sts, sc in last 2 sts. Turn. (74 sc)
Row 8 (WS): Ch 1, sc in each st across. Turn. (74 sc)
Row 9 Increase Row (RS): Ch 1, sc in first st, inc in next st, (sc in next 4 sts, inc in next st) rep across to last 2 sts, sc in last 2 sts. Turn. (88 sc)
Row 10 (WS): Ch 1, sc in each st across. Turn. (88 sc)
Row 11 Join Round: Ch 1, sc in each st across to end of row. Do not turn. Work 4 sc evenly down the left back edge of the keyhole opening, then sl st to join to the first sc of Row 11. Place marker for beginning of round. (88 sc in the main round)
From this point forward, you work in continuous rounds on 88 stitches.
Round 12: Ch 1, sc in each st around. Sl st to join. (88 sc)
Round 13 Increase Round: Ch 1, (sc in next 10 sts, inc in next st) 8 times. Sl st to join. (96 sc)
Round 14: Ch 1, sc in each st around. Sl st to join. (96 sc)
Round 15 Increase Round: Ch 1, (sc in next 11 sts, inc in next st) 8 times. Sl st to join. (104 sc)
Round 16: Ch 1, sc in each st around. Sl st to join. (104 sc)
Checkpoint: Your yoke should measure approximately 3 inches from the top edge and look like a shallow bowl shape. Count those 104 stitches before moving on.
Divide for Body and Armholes
Now you’ll separate the front from the back and create armhole openings.
Round 17 Divide Round: Ch 1. Sc in next 24 sts (back left panel). Ch 6, skip next 16 sts (left armhole). Sc in next 24 sts (front). Ch 6, skip next 16 sts (right armhole). Sc in next 24 sts (back right panel). Sl st to join. (72 sc plus 12 ch)
Round 18: Ch 1. Sc in each sc and each ch around. Sl st to join. (84 sc)
Round 19: Ch 1, sc in each st around. Sl st to join. (84 sc)
Bodice
The bodice is straightforward. Just single crochet rounds to create that smooth fitted section.
Rounds 20 through 30: Ch 1, sc in each st around. Sl st to join at end of each round. (84 sc per round)
Work 11 rounds total. Simple and meditative.
Checkpoint: The bodice should measure approximately 3.5 inches from the armhole divide. Total dress length from shoulder should be about 6.5 inches at this point.
Skirt Transition Increase Round
Here’s where the math matters. You need a stitch count that’s a multiple of 6 plus 1 for the shell pattern to work properly.
Round 31 Skirt Increase Round: Ch 1. Work (sc in next st, inc in next st) 37 times. Sc in last 10 sts. Sl st to join. (121 sc)
Quick math check: 84 plus 37 increases equals 121 stitches. 121 minus 1 equals 120, which divides evenly by 6 for 20 shell repeats. Perfect.
Skirt
Now for the fun part. The shell pattern creates those beautiful layered fans.
Round 32 Shell Setup Round: Ch 3 (counts as first dc), work 2 more dc in same st as join (half shell at beg), sk 2 sts, sc in next st, sk 2 sts, (shell of 5 dc in next st, sk 2 sts, sc in next st, sk 2 sts) 19 times, work 2 dc in same st as beginning ch-3 (completing the beg half shell), sl st to top of ch-3. (20 shells, 20 sc)
Don’t stress about counting individual stitches in shell rounds. Just count your shells and single crochets. You should have 20 of each.
Round 33: Sl st across first 2 dc of beg shell to reach center dc. Ch 1, sc in center dc of first shell. (Sk 2 dc, shell of 5 dc in next sc, sk 2 dc, sc in center dc of next shell) rep around. Sl st to first sc. (20 shells, 20 sc)
Round 34: Sl st across first 2 dc to center dc. Ch 1, sc in center dc of first shell. (Sk 2 dc, shell of 5 dc in next sc, sk 2 dc, sc in center dc of next shell) rep around. Sl st to first sc. (20 shells, 20 sc)
Round 35 Increase Round: Time to grow those shells. Sl st to center of first shell. Ch 1, sc in center dc. (Sk 2 dc, work 7 dc shell in next sc, sk 2 dc, sc in center dc of next shell) rep around. Sl st to first sc. (20 shells of 7 dc, 20 sc)
From now on, shells are 7 dc.
Rounds 36 through 38: Sl st across 3 dc to center dc of first shell. Ch 1, sc in center. (Sk 3 dc, 7 dc shell in next sc, sk 3 dc, sc in center of next shell) rep around. Sl st to first sc. (20 shells of 7 dc, 20 sc)
Round 39 Second Increase Round: Sl st to center of first shell. Ch 1, sc in center. (Sk 3 dc, work 9 dc shell in next sc, sk 3 dc, sc in center of next shell) rep around. Sl st to first sc. (20 shells of 9 dc, 20 sc)
Rounds 40 through 42: Sl st across 4 dc to center. Ch 1, sc in center. (Sk 4 dc, 9 dc shell in next sc, sk 4 dc, sc in center of next shell) rep around. Sl st to first sc. (20 shells of 9 dc, 20 sc)
Checkpoint: The skirt should measure approximately 5 inches from the skirt join. Those shells should be visibly layered and fanning outward beautifully.
Hem Scallop Edging
Round 43 Scallop Round: After completing Round 42, join yarn at any sc between shells. Work a scallop round as follows: (Sc in sc, ch 3, dc in same sc to form picot fan, sc in center dc of next shell, ch 3, dc in same center dc, sc in 9th dc of that shell, ch 3, dc in same last dc, sc in next sc between shells) rep 20 times around. Sl st to first sc. Fasten off. Weave in ends.
The goal is 20 evenly spaced scallop peaks matching your 20 shell columns. Adjust as needed to get that wavy edge.
Flutter Sleeve Edging
Join MC at the underarm chain of one armhole opening.
Round 1: Ch 1, sc evenly around the armhole opening, working approximately 28 to 30 sc total. Sl st to join. (28 sc)
Aim for a multiple of 7 stitches for the scallop math to work cleanly.
Round 2 Scallop: (Sk 2 sts, work 5 dc shell in next st, sk 2 sts, sl st in next st) rep around. Sl st to join. Fasten off. Weave in ends.
With 28 stitches, you’ll get exactly 4 lovely scallops. Repeat for the second armhole.
Back Neckline Edge and Button Loop
Join MC at the top right corner of the back opening.
Row 1: Ch 1, sc down the right back edge, sc across the back neck top, sc up the left back edge. Turn.
Row 2: Ch 1, sc across to last 3 sts of left edge. Ch 4 (button loop), sk 2 sts, sc in last st. Fasten off. Weave in ends.
Sew your button to the right back edge, aligned with the button loop.
Yoke Neckline Edge
Join MC at the back neckline.
Round 1: Ch 1, sc evenly around neckline edge, sl st to join. (approximately 60 sc)
Round 2 Scallop: (Sk 2 sts, 5 dc in next st, sk 2 sts, sl st in next st) rep around. Sl st. Fasten off. Weave in ends.
With 60 stitches, you’ll get 10 pretty neckline scallops.
Daisy Applique
Switch to CC white and the smaller hook (E-4 / 3.50 mm).
Magic ring with CC white.
Round 1: Ch 1, work 10 sc in ring. Pull ring tight. Sl st to first sc. (10 sc)
Round 2 Petal Round: (Ch 7, sl st in 2nd ch from hook, sc in next ch, hdc in next ch, dc in next 2 ch, hdc in last ch, sl st in next sc of Round 1) 10 times. (10 petals)
Fasten off white. Join MC yellow at center.
Round 3 Center: Working over the magic ring center, (sc, hdc, sc) in magic ring 3 times to create a small raised yellow center. Sl st to join. Fasten off. Weave in ends.
Pin the daisy to the upper left chest area of the dress front. Sew securely around the center and at 2 to 3 petal bases using your yarn needle.
Finishing and Blocking
Weave in all ends on the wrong side, running each tail through at least 1 inch of stitching.
Wet blocking is essential for this pattern. Submerge the finished dress in cool water. Gently squeeze out excess water without wringing. Roll in a clean towel to remove more moisture. Lay flat on a blocking mat, pin the hem scallops and neckline scallops open, and gently stretch the skirt to open up those shell stitches. Let dry completely, usually 12 to 24 hours.
Blocking transforms closed, bunchy shells into the beautiful open fan shapes you see in the photos. Don’t skip this step.
Size Customization Tips
For 12 to 18 months: Add one more increase round in the yoke before Round 17, giving you approximately 112 yoke stitches. Widen front and back panels to 28 sts each, armhole skips to 18 sts each. Add 2 additional bodice rounds.
For 0 to 3 months: Reduce foundation chain to 51 stitches, reduce yoke increases proportionally, target 72 stitches after division, reduce bodice to 8 rounds, and aim for approximately 16 shells in the skirt.
For a longer skirt: Add more rounds of 9 dc shells between Round 41 and the hem scallop. Every 2 additional shell rounds adds approximately 1 inch of length.
Care Instructions
Machine wash cold on gentle cycle if using acrylic or superwash wool. Lay flat to dry. Never tumble dry, as the shells may distort. Store folded rather than hung to prevent yoke stretching.
Thank you so much for choosing this pattern for your next baby project. I really hope you love making it as much as I loved designing it. The finished dress photographs beautifully and makes an unforgettable gift.
If you found this crochet tutorial helpful, please save it to your Pinterest boards so you can find it again when you’re ready to cast on. And I would absolutely love to see your finished dresses! Drop a comment below or tag me on Instagram when you make yours. Seeing your creations honestly makes my whole week.