
This is THE bag project I have been waiting to share with you. Seriously, I cannot contain my excitement about this one. A gorgeous structured tote covered in three-dimensional lavender sprigs? Yes please.
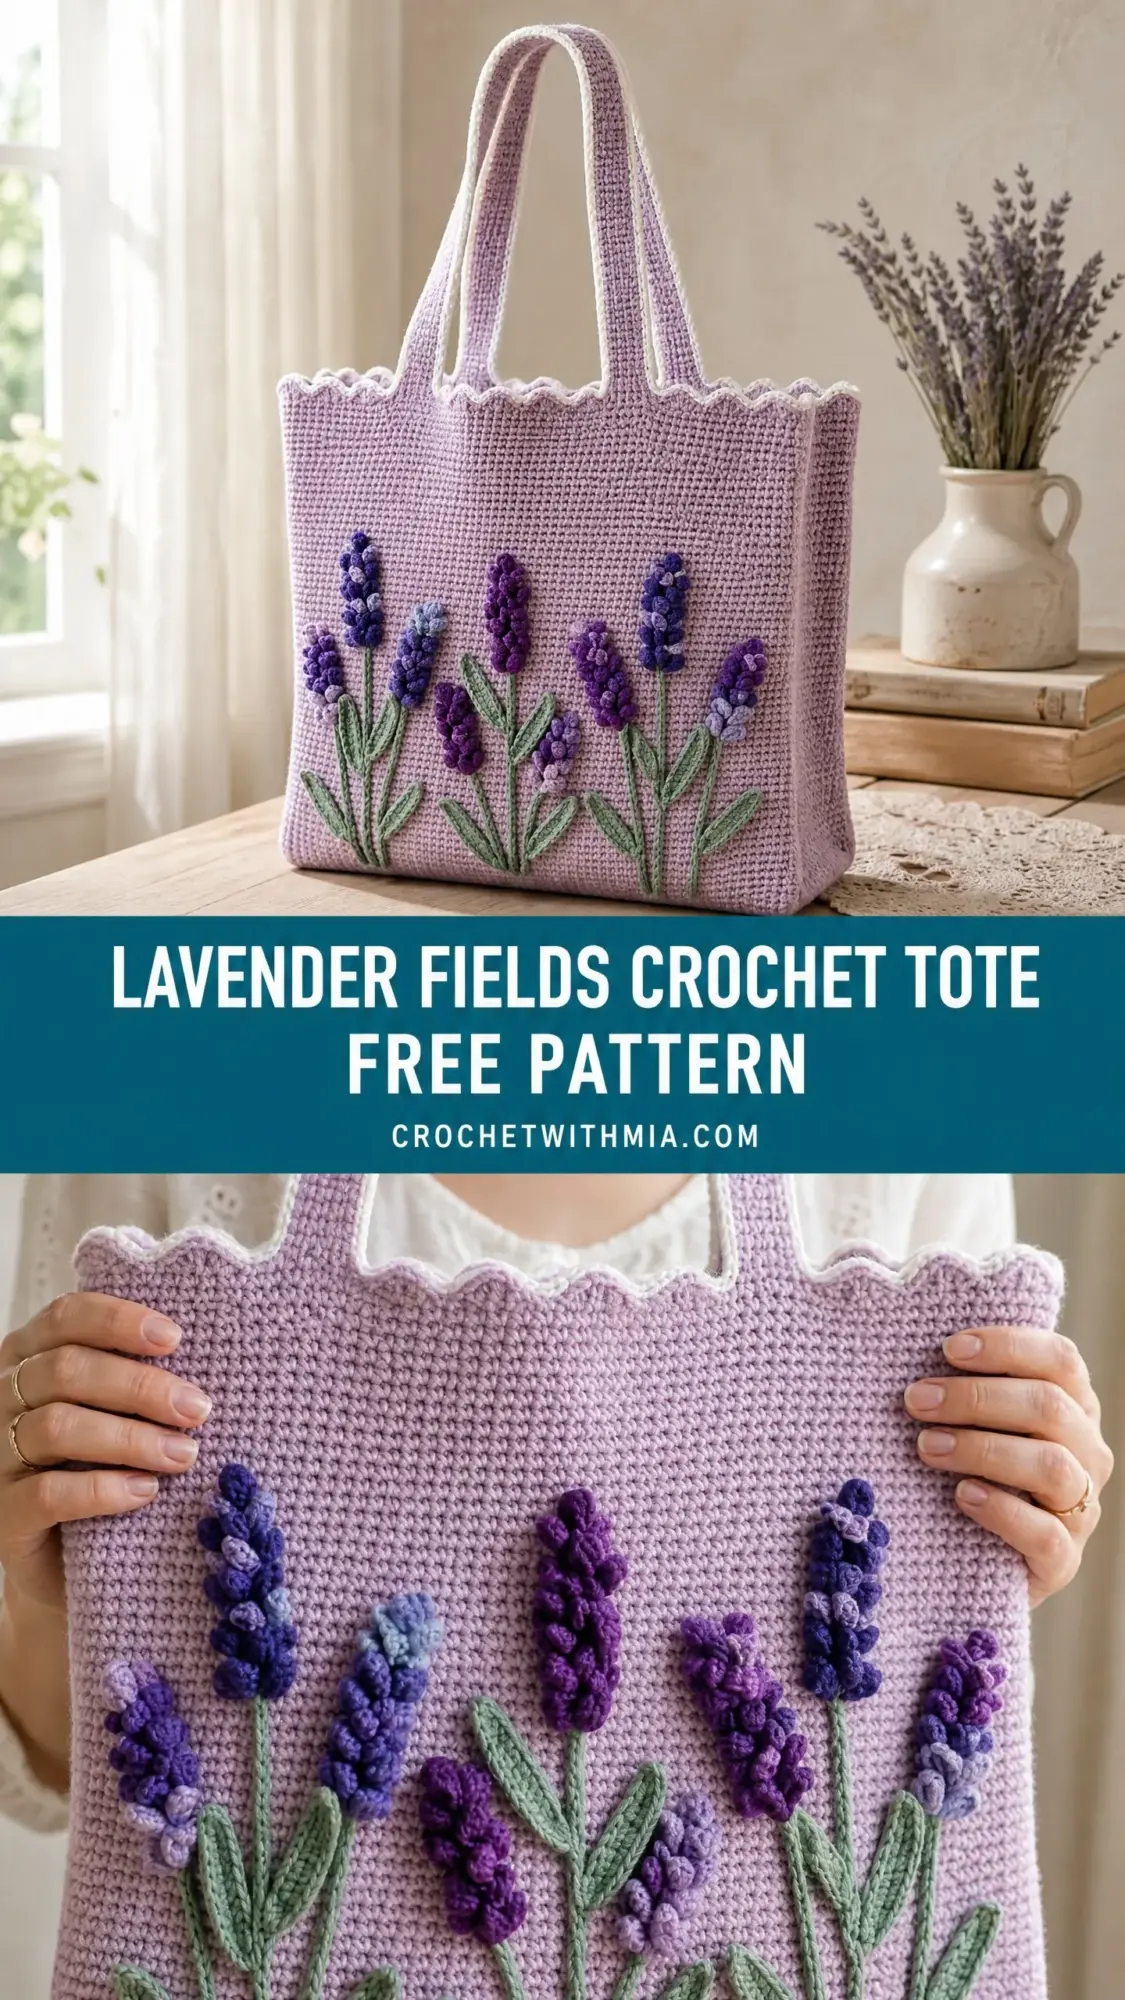
If you have been looking for a crochet project that looks absolutely stunning but uses stitches you already know, you have found it. The main body is just single crochet worked flat. That is it. The magic happens with the bobble stitch appliques that you make separately and sew on at the end. You could knock out the main panels in a weekend and spend a cozy evening making those sweet little lavender flowers.
This tote makes an INCREDIBLE gift. Mother’s Day, birthdays, teacher appreciation, or just because someone in your life deserves something beautiful. Give yourself about 12 to 18 hours total and you will have a bag that looks like it belongs in a boutique.
Why You Will Love This Crochet Tote Pattern
Let me tell you what makes this lavender tote bag pattern so satisfying to make. The construction is straightforward. You work two flat rectangular panels, seam them together, add straps, and finish with a pretty scallop edge around the top. No complicated shaping. No confusing increases or decreases. Just good old single crochet rows building up into a sturdy, beautiful fabric.
The lavender sprigs are where the creativity comes in. Each one is made separately using bobble stitches to create those plump little flower buds. You arrange them however you like across the front of the bag, pin them down, step back, adjust until you are happy, and then sew them on permanently. It feels like decorating a cake, but with yarn.
The finished bag measures approximately 13 inches wide by 14 inches tall, not including the straps. With the straps held up, you get about 36 inches total from strap tip to bag bottom. Perfect for carrying books, groceries, craft supplies, or whatever else life throws at you.
Materials You Will Need
Here is everything you need to gather before you start this crochet tote tutorial.
Yarn:
Tools:
A note on yarn choice: I strongly recommend cotton or a cotton blend for this project. Acrylic will stretch and sag over time, especially when you load up the bag. Cotton holds its structure beautifully. Lion Brand 24/7 Cotton, Paintbox Yarns Cotton DK worked doubled, or Cascade Ultra Pima are all excellent options.
Gauge
18 single crochet stitches and 20 rows equal 4 inches, worked with the G-6 hook and blocked.
To check your gauge, chain 24 and work single crochet rows for 25 rows. Block your swatch flat and measure the center 4 inches in both directions. If you are getting more stitches per inch, go up a hook size. Fewer stitches? Go down a hook size.
Because this is a bag and not a fitted garment, gauge is a bit forgiving. Anywhere from 12.5 to 13.5 inches wide for the finished panel is acceptable.
Abbreviations and Stitch Definitions
Before we dive into the step by step instructions, let me explain every stitch and abbreviation you will encounter.
Special Stitches
5-Stitch Bobble (bo5)
This stitch creates those adorable rounded bumps that form each lavender flower bud. Here is how to crochet a bobble step by step:
1. Yarn over, insert hook into the indicated stitch.
2. Yarn over and pull up a loop. You now have 3 loops on your hook.
3. Yarn over and draw through 2 loops. You now have 2 loops remaining. This is one unfinished double crochet.
4. Repeat steps 1 through 3 four more times into the same stitch. You will have 6 loops total on your hook.
5. Yarn over and draw through all 6 loops at once.
6. Chain 1 to lock the bobble in place. This chain does NOT count as a stitch.
The bobble naturally pops to the front of your work. Do not worry if it looks a little wonky at first. They even out beautifully once blocked.
Scallop Edging
This creates the decorative wave along the top of the bag.
1. Join yarn with a slip stitch.
2. Chain 1, work 1 sc in the same stitch.
3. Skip 2 stitches, work 5 dc in the next stitch. This forms one scallop shell.
4. Skip 2 stitches, work 1 sc in the next stitch.
5. Repeat steps 3 and 4 around the entire opening.
Pattern Instructions
Section 1: Main Body Panels (Make 2)
Both panels are identical. The lavender appliques only go on the front panel after everything is seamed together.
Foundation chain: Using Yarn A and G-6 hook, chain 61.
Row 1 (RS): Sc in 2nd ch from hook and in each ch across. Turn. (60 sc)
Row 2: Ch 1, sc in each st across. Turn. (60 sc)
Rows 3 through 70: Ch 1, sc in each st across. Turn. (60 sc each row)
After Row 70, your panel should measure approximately 13 inches wide and 14 inches tall. If it is a bit short, keep working rows until you hit 14 inches. Just make sure both panels have the same number of rows.
Fasten off the second panel. Leave the first panel with yarn still attached if you want to use it for seaming later.
Section 2: Straps (Make 2)
The straps are worked as narrow strips, then folded and joined to create a sturdy double-layered strap.
Foundation chain: Using Yarn A and G-6 hook, chain 101.
Row 1: Sc in 2nd ch from hook and in each ch across. Turn. (100 sc)
Rows 2 through 6: Ch 1, sc in each st across. Turn. (100 sc each row)
After Row 6, fold the strip in half lengthwise with wrong sides facing outward. Join the two long edges using a slip stitch seam. This creates a flat strap approximately 1 inch wide and 22 inches long.
Fasten off, leaving a 12-inch tail for sewing to the bag.
Make a second strap identically.
Section 3: Seaming the Panels
Place both panels with wrong sides together. The seam will be on the inside of the bag.
1. Using Yarn A and a tapestry needle (or slip stitch seam with your hook), join the panels along one short side from bottom corner to top edge.
2. Join the panels along the bottom edge from one corner to the other.
3. Join the remaining short side from bottom corner to top edge.
The top stays open. Your bag should now stand on its own with a flat bottom.
Section 4: Attaching Straps
Position each strap with the open short ends tucked 1.5 inches inside the top edge of the bag. Place the inner edges of each strap end approximately 3.5 inches from the side seams.
Sew each strap end securely using a square stitch pattern. Work around the perimeter of the strap end, then cross-stitch through the center for extra reinforcement. This bag will carry weight, so do not skimp on the stitching here.
Repeat for the second strap on the back panel.
Section 5: Scallop Edging
The scallop edging goes around the entire top opening as one continuous round.
Adjustment Round: Using Yarn A and G-6 hook, join with sl st to the top right corner of the bag with RS facing. Ch 1. Work 1 sc in each st around the top opening, decreasing 4 sts evenly spaced (work sc2tog at 4 distributed points) to reach 120 sts total. Join with sl st to first sc. (120 sc)
Scallop Round: Ch 1, sc in same st as join. Skip 2 sts, 5 dc in next st, skip 2 sts, sc in next st. Repeat from around. Join with sl st to first sc. Fasten off. (20 scallops)
Weave in all ends.
Section 6: Lavender Appliques (Make 5 Total)
Each lavender sprig has three parts: the bobble-covered stalk, main leaves, and optional small accent leaves.
Lavender Stalk (Make 4 Standard Height, 1 Taller for Center)
For standard-height sprigs (1, 2, 4, and 5):
Using Yarn B (or Yarn C depending on your color plan) and F-5 hook, chain 16.
Foundation row (spine): Sc in 2nd ch from hook and in each ch across. Turn. (15 sc)
Row 1 (bobble row, RS): Ch 1, (bo5 in next st, sc in next st) rep 7 times, bo5 in last st. (8 bobbles, 7 sc)
Turn your work 180 degrees to work along the other side of the foundation chain.
Row 2 (bobble row, second side): Ch 1, sc in first exposed chain loop, (bo5 in next loop, sc in next loop) rep 6 times, bo5 in last loop, sc in last loop. (7 bobbles, 8 sc)
Fasten off, leaving a 10-inch tail.
For the center sprig (sprig 3, taller):
Using Yarn B and F-5 hook, chain 20.
Foundation row (spine): Sc in 2nd ch from hook and in each ch across. Turn. (19 sc)
Row 1 (bobble row, RS): Ch 1, (bo5 in next st, sc in next st) rep 9 times, bo5 in last st. (10 bobbles, 9 sc)
Turn 180 degrees.
Row 2 (bobble row, second side): Ch 1, sc in first chain loop, (bo5 in next loop, sc in next loop) rep 8 times, bo5 in last loop, sc in last loop. (9 bobbles, 10 sc)
Fasten off, leaving a 10-inch tail.
Main Leaves (Make 10 Total)
Using Yarn E and F-5 hook, chain 8.
Row 1: Sc in 2nd ch from hook, sc in next 4 ch, hdc in next ch, 3 hdc in last ch (this is the tip of the leaf). Rotate work to continue along the opposite side of the foundation chain. Hdc in next ch, sc in next 4 ch, sl st in last ch. Fasten off, leaving an 8-inch tail. (14 sts total)
Each leaf is approximately 1.5 inches long.
Small Accent Leaves (Make 10 Total, Optional)
Using Yarn F and F-5 hook, chain 6.
Row 1: Sc in 2nd ch from hook, sc in next 2 ch, hdc in next ch, 3 hdc in last ch. Rotate work. Hdc in next ch, sc in next 2 ch, sl st in last ch. Fasten off, leaving an 8-inch tail. (10 sts total)
Each small leaf is approximately 1 inch long.
Assembling Each Sprig
1. Lay the stalk flat with the right side up.
2. Position one main leaf angling up and to the left from the midpoint of the stalk.
3. Position the second main leaf angling up and to the right.
4. Add the small accent leaves lower on each side.
5. Using the Yarn E tails, sew the leaf bases to the underside of the stalk.
Add a stem by threading Yarn E onto a tapestry needle and working a few straight stitches below the bottom of the stalk, extending about 1 inch downward.
Section 7: Applique Placement and Attachment
Arrange your five sprigs across the lower front panel of the tote. Here is the placement that matches the pictured project:
Pin all sprigs in place before sewing. Step back and look at the overall arrangement. Adjust until you are happy with it.
Using matching yarn threaded on a tapestry needle, sew each sprig to the bag front with small whipstitches around the perimeter of the stalk and along each leaf edge.
Finishing and Blocking
1. Weave in all remaining yarn ends on the inside of the bag. Weave each tail in at least two different directions for security.
2. Fill the bag with towels or a bag form to give it shape.
3. Mist the exterior thoroughly with cool water until the yarn is damp but not dripping.
4. Reshape the bag so the corners are square, the bottom is flat, and the sides are even.
5. Allow to dry completely, about 24 to 48 hours, away from direct sunlight.
6. If the scallop edging curls, use a warm iron with a damp pressing cloth to press it flat. Never iron directly on the crochet.
Care Instructions
Size Customization Tips
For a smaller tote (approximately 11 inches wide by 12 inches tall):
Reduce the foundation chain to 51 (50 working stitches). Work 60 rows instead of 70. Shorten straps to an 85-chain foundation.
For a larger market tote (approximately 15 inches wide by 16 inches tall):
Increase the foundation chain to 71 (70 working stitches). Work 80 rows. Lengthen straps to a 115-chain foundation. Consider adding a sixth lavender sprig to fill the wider front.
Final Thoughts on This Lavender Crochet Tote Pattern
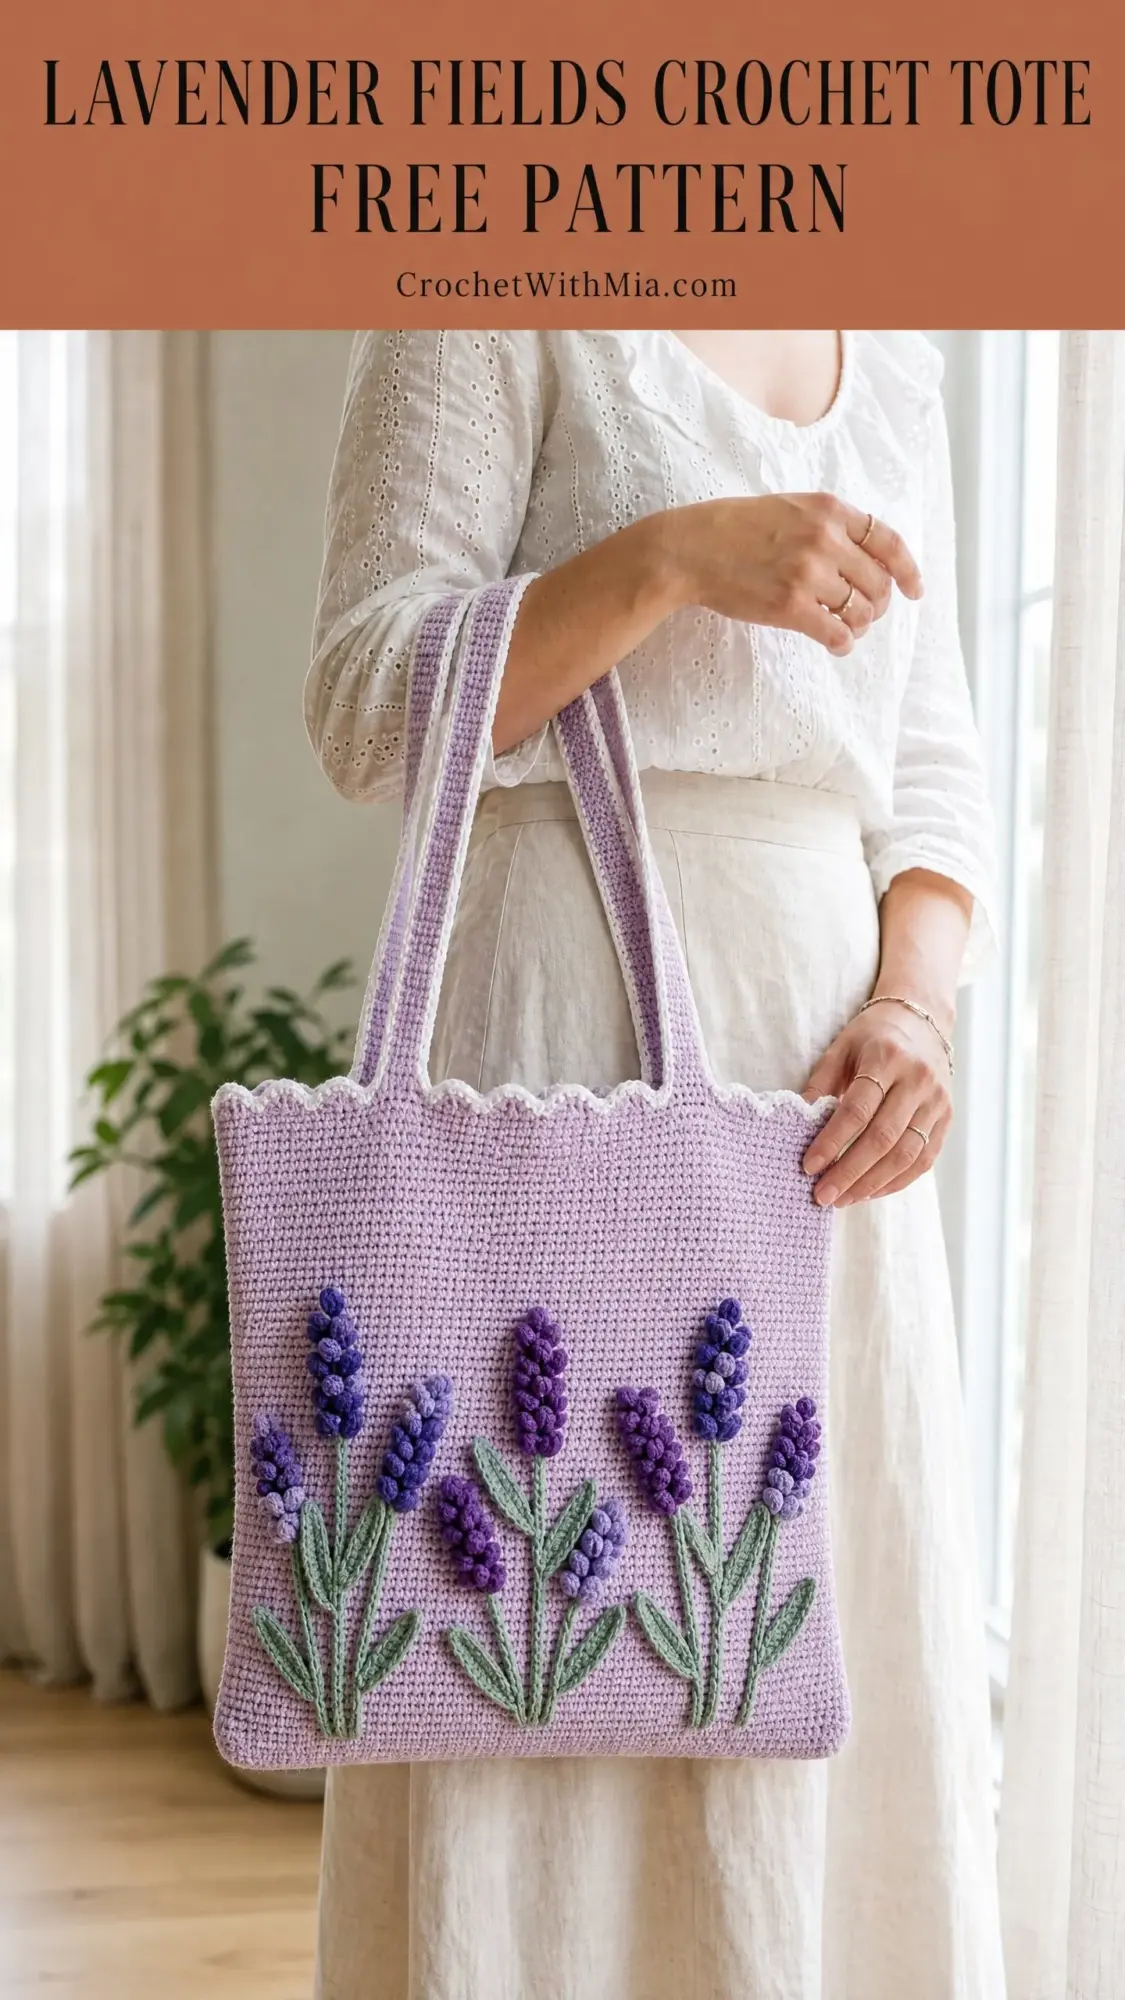
This lavender fields crochet tote is one of those projects that looks impressive enough to display but practical enough to use every single day. The combination of simple single crochet construction and those gorgeous bobble stitch lavender sprigs creates something truly special. Every time you carry it, you will get compliments. I promise.
Thank you so much for choosing this pattern. I genuinely appreciate you being here and trusting me to walk you through this project. If you make this bag, I would absolutely love to see it. Tag me on Instagram or share a photo in my Facebook group. Seeing your finished projects is honestly the best part of my job.
Go ahead and save this lavender tote bag pattern to your Pinterest boards so you can find it when you are ready to start. And please drop a comment below if you make one. I read every single comment and love hearing how your projects turn out. Happy crocheting!