
Go ahead and dig into that yarn stash. You know the one. Those beautiful skeins of worsted weight in terracotta and sage and dusty rose that you have been saving for the perfect project. This tote bag is exactly what they have been waiting for.
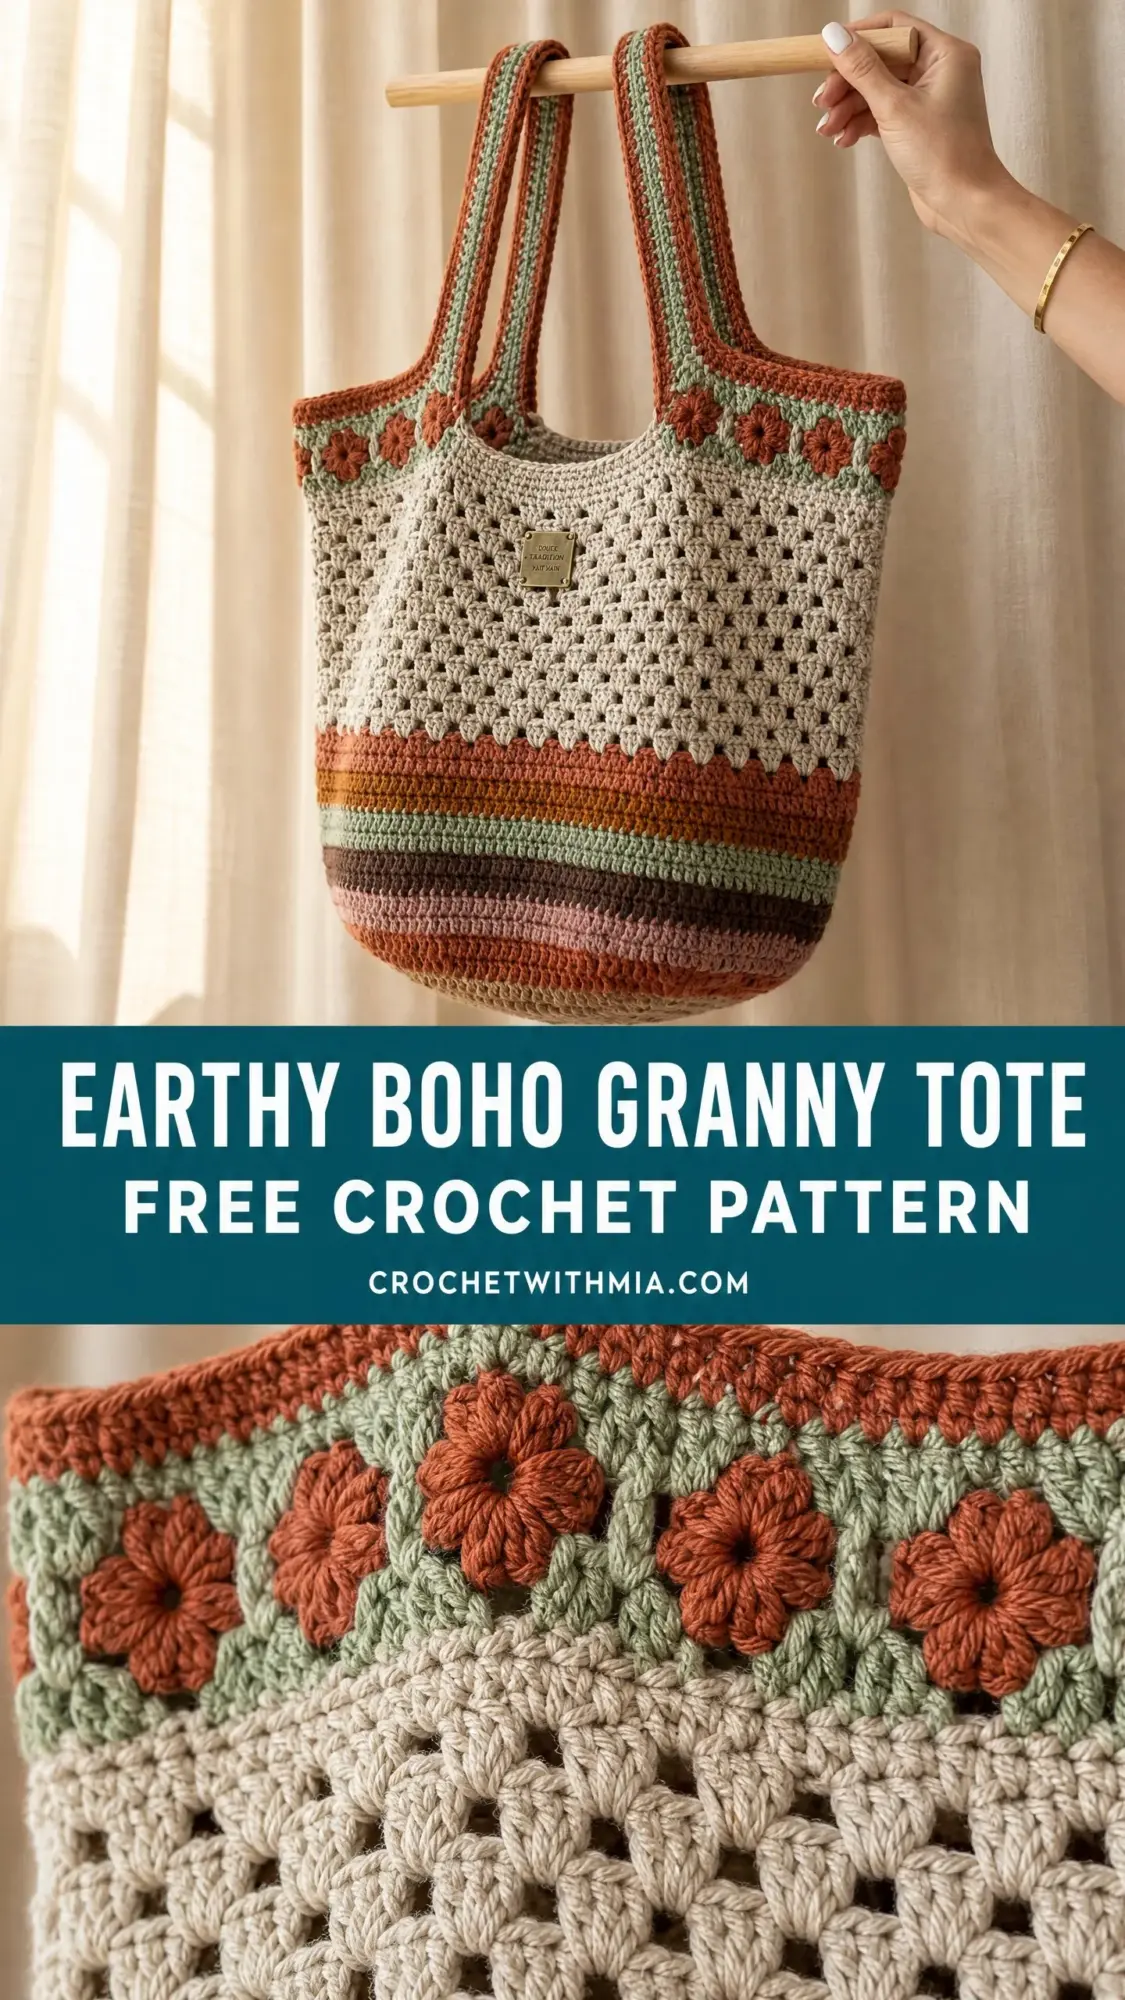
The construction on this bag is genuinely interesting. You start with a flat oval base, work up through colorful horizontal stripes, then transition into an open granny stitch body that gives the whole piece its boho character. A row of sweet little crocheted flowers trims the top. The contrast between the dense striped bottom and the airy granny stitch upper section creates visual interest and practical structure.
I will be honest with you about the skill level here. This is an intermediate project. You need to be comfortable working in the round, managing multiple colors, and following a granny stitch pattern. But if you have made a granny square blanket or worked stripes before, you absolutely have the skills for this. I will walk you through every step.
Why You Will Love This Earthy Boho Granny Tote
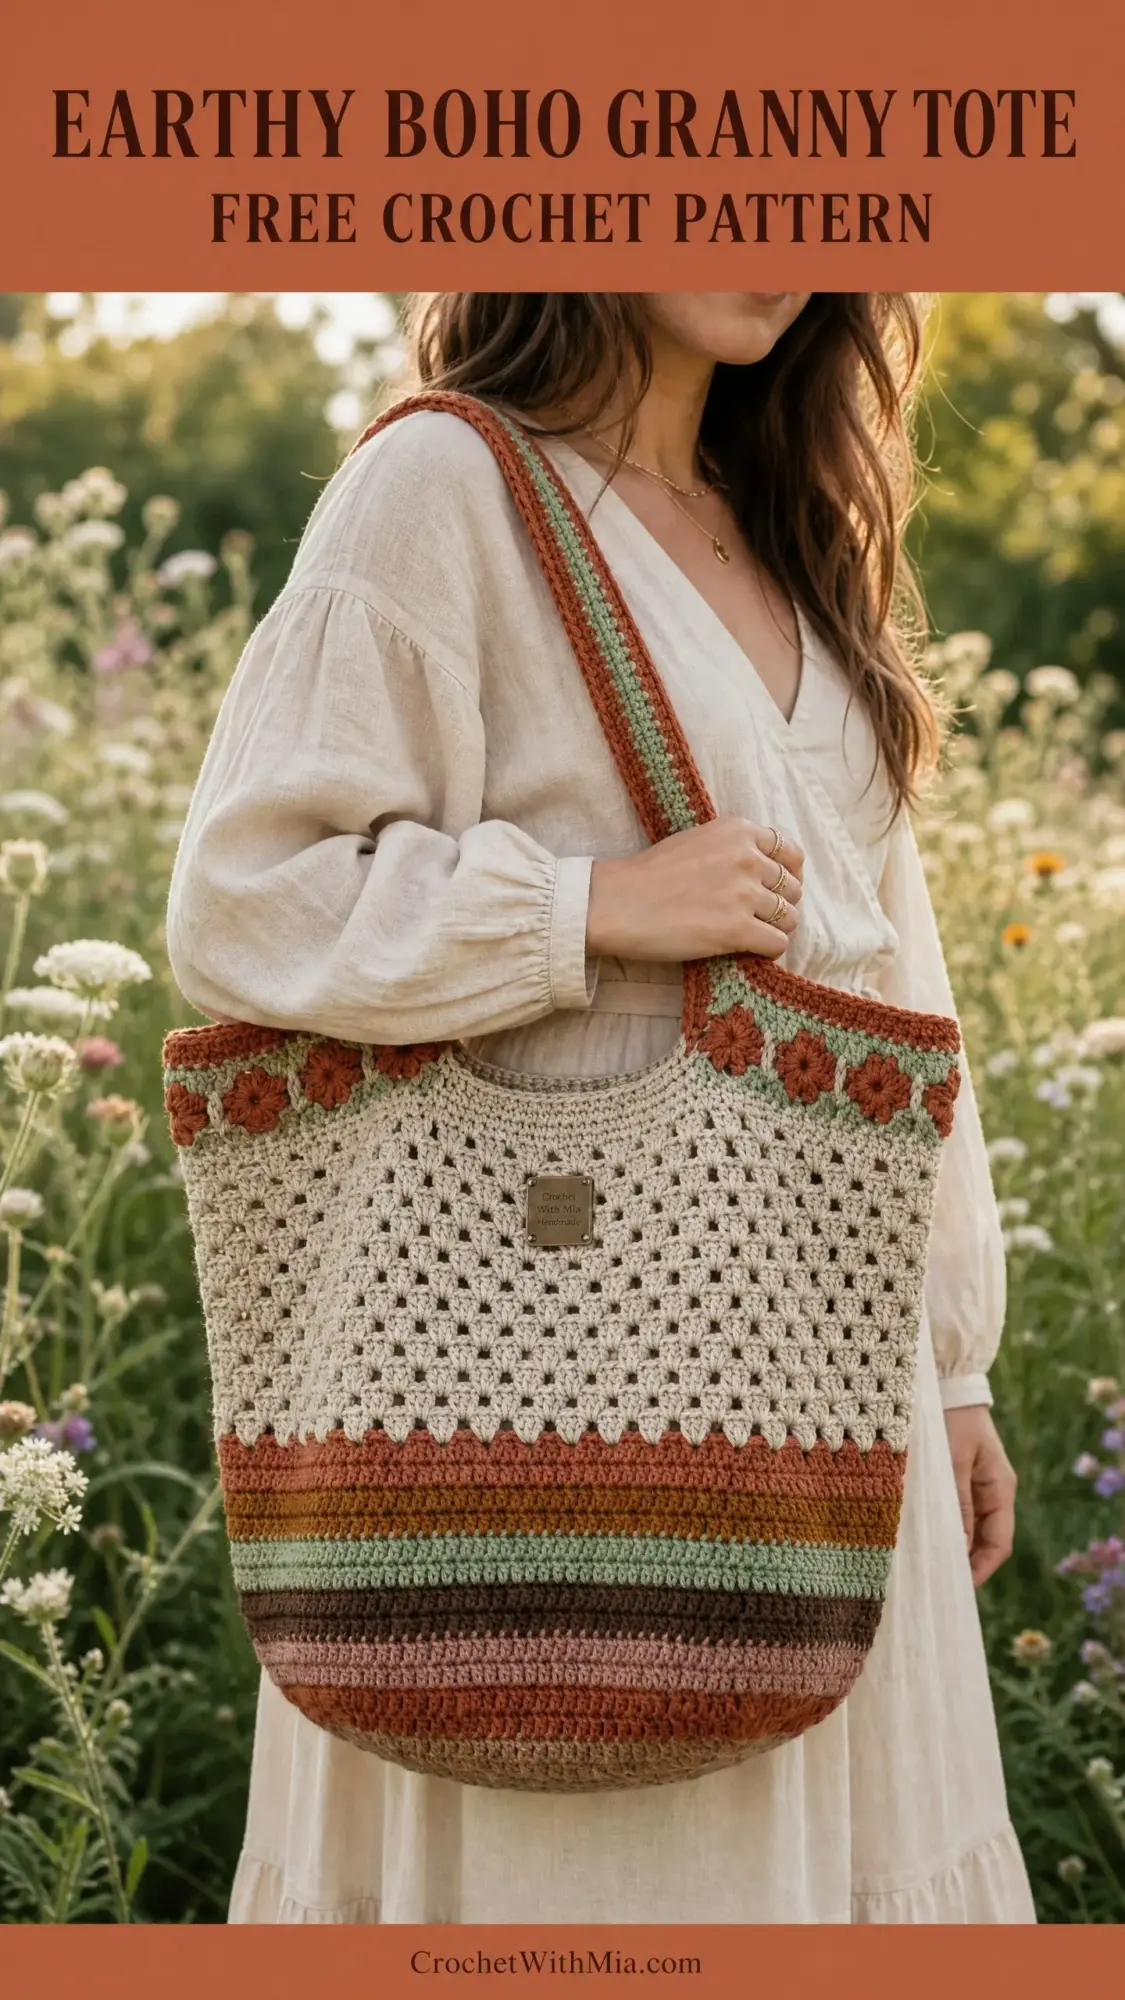
This bag has become one of my favorite everyday carries. The size is perfect for farmers market trips, library runs, or just tossing in your daily essentials. At approximately 15 inches wide by 13 inches tall, it holds plenty without being overwhelming.
The granny stitch section gives the bag that signature bohemian look while still being sturdy enough for actual use. And those little five-petal flowers along the top? They take this from nice handmade bag to something truly special.
The earthy color palette works with everything. Terracotta, sage green, burnt sienna, olive, dusty mauve, and chocolate all layer together beautifully against the oatmeal granny stitch body.
Materials You Will Need
Yarn (Worsted Weight):
Total yarn needed: approximately 860 yards across all colors.
Hook: US size J / 6.0 mm
Notions:
Yarn Suggestions
Lion Brand Yarn Pound of Love in Fisherman works beautifully for Color A. Pair it with Lion Brand Basic Stitch Anti-Pilling in coordinating earth tones for the remaining colors.
Paintbox Yarns Simply DK used doubled throughout is another excellent option. You might want to go up to a 6.5 mm hook when working doubled DK weight.
WeCrochet Swish Worsted in Bare, Amber Heather, Aloe, and Serrano creates a polished finish with lovely stitch definition.
Avoid very soft or drapey yarns. The bag needs structure to hold its shape when loaded. Cotton or cotton-blend yarns work especially well.
Gauge
In single crochet (sc) worked in rounds: 14 sc by 16 rows equals 4 inches on a US J / 6.0 mm hook.
In granny stitch pattern: one granny stitch repeat measures approximately 1.25 inches wide.
Please swatch before beginning. Gauge affects your finished size significantly.
Finished Size
Approximately 15 inches wide by 13 inches tall (excluding handles). Handles measure approximately 24 inches long.
In metric: approximately 38 cm wide by 33 cm tall, with handles 61 cm long.
Abbreviations and Stitch Definitions
ch: chain. Wrap yarn over hook and pull through the loop on your hook.
sl st: slip stitch. Insert hook into stitch, yarn over, pull through both the stitch and the loop on your hook in one motion.
sc: single crochet. Insert hook into stitch, yarn over and pull up a loop (2 loops on hook), yarn over and pull through both loops.
hdc: half double crochet. Yarn over, insert hook into stitch, yarn over and pull up a loop (3 loops on hook), yarn over and pull through all 3 loops.
dc: double crochet. Yarn over, insert hook into stitch, yarn over and pull up a loop (3 loops on hook), yarn over and pull through 2 loops (2 loops remain), yarn over and pull through remaining 2 loops.
st(s): stitch(es)
sp(s): space(s)
sk: skip
inc: increase (work 2 sc in one stitch)
rep: repeat
pm: place marker
blo: back loop only
rnd: round
ch-sp: chain space
cl: cluster (see Special Stitches below)
yo: yarn over
Special Stitches
Granny Cluster (cl)
This is the building block of the granny stitch section. Yarn over, insert hook into indicated stitch or space, yarn over and pull up a loop, yarn over and draw through two loops on hook. That completes one double crochet. Work two more double crochet stitches into the same location without joining them. You now have three double crochet stitches worked into one spot. This group of three is one cluster.
Five-Petal Flower
Make a magic ring or ch 4 and join with sl st to form a ring.
Round 1: ch 1, work 10 sc into the ring, join with sl st to first sc. (10 sc)
Round 2: (ch 3, skip 1 st, sl st into next st) 5 times. You have 5 ch-3 loops.
Round 3: Into each ch-3 loop work (sc, hdc, dc, hdc, sc). Each loop becomes one petal. Join with sl st. Fasten off.
These flowers are worked separately and attached to the bag border.
Pattern Instructions
Base (worked in rounds, Color A)
The base is a flat oval. Begin with a foundation chain.
Round 1: ch 22. Working into the back bumps of the chain: sc in 2nd ch from hook and in each of the next 19 ch, work 3 sc in the last ch. Rotate work to work along the other side of the foundation chain. Sc in each of the next 19 ch, work 2 sc in the first ch (the same ch where you began). Join with sl st to first sc. (44 sc)
Round 2: ch 1, 2 sc in first st, sc in next 19 sts, 2 sc in each of next 2 sts, sc in next 19 sts, 2 sc in last st. Join with sl st to first sc. (48 sc)
Round 3: ch 1, 2 sc in first st, sc in next 19 sts, (2 sc in next st, sc in next st) twice, sc in next 19 sts, 2 sc in next st, sc in next st. Join with sl st to first sc. (52 sc)
Round 4: ch 1, sc in first st, 2 sc in next st, sc in next 19 sts, (sc in next st, 2 sc in next st) twice, sc in next 19 sts, sc in next st, 2 sc in last st. Join with sl st to first sc. (56 sc)
Round 5: ch 1, sc in next 2 sts, 2 sc in next st, sc in next 19 sts, (sc in next 2 sts, 2 sc in next st) twice, sc in next 19 sts, sc in next 2 sts, 2 sc in last st. Join with sl st to first sc. (60 sc)
Round 6: ch 1, sc in next 2 sts, 2 sc in next st, sc in next 2 sts, sc in next 19 sts, (sc in next 2 sts, 2 sc in next st, sc in next 2 sts) twice, sc in next 19 sts, sc in next 2 sts, 2 sc in next st, sc in last st. Join with sl st to first sc. (64 sc)
Rounds 7 through 17: ch 1, work 4 increases evenly across the curved ends only (2 at each short end), maintaining the oval shape. Work one round at a time, adding 4 stitches per round.
Round 7: (68 sc)
Round 8: (72 sc)
Round 9: (76 sc)
Round 10: (80 sc)
Round 11: (84 sc)
Round 12: (88 sc)
Round 13: (92 sc)
Round 14: (96 sc)
Round 15: (100 sc)
Round 16: (104 sc)
Round 17: (108 sc)
After Round 17, your oval base is complete. It should measure approximately 10 inches long and 5 inches wide. Do not fasten off.
Quick check: Your flat oval should lie flat without cupping or ruffling. If it cups, you need more increases. If it ruffles, you have too many.
Lower Body: Stripe Section (worked in rounds)
Now you transition from working flat to working straight walls. The stitch count stays at 108 for all lower body rounds.
Round 18 (transition round, Color A, blo): ch 1, sc in blo of each st around. Join with sl st to first sc. (108 sc)
Working in the back loop only creates a crisp edge where the base meets the walls.
Rounds 19-21 (Color B): ch 1, sc in each st around. Join with sl st. (108 sc each round)
Rounds 22-23 (Color D): Join Color D. ch 1, sc in each st around. Join with sl st. (108 sc each round)
Rounds 24-25 (Color E): Join Color E. ch 1, sc in each st around. Join with sl st. (108 sc each round)
Rounds 26-27 (Color C): Join Color C. ch 1, sc in each st around. Join with sl st. (108 sc each round)
Rounds 28-30 (Color G): Join Color G. ch 1, hdc in each st around. Join with sl st. (108 hdc each round)
Rounds 31-32 (Color F): Join Color F. ch 1, sc in each st around. Join with sl st. (108 sc each round)
Rounds 33-34 (Color H): Join Color H. ch 1, sc in each st around. Join with sl st. (108 sc each round)
Rounds 35-37 (Color B): Join Color B. ch 1, sc in each st around. Join with sl st. (108 sc each round)
After Round 37, your stripe section should measure approximately 5 inches tall.
Upper Body: Granny Stitch Section (worked in rounds, Color A)
This is where the bag gets its signature look. You will divide the 108 stitches into 36 repeat units. Each unit is one cluster plus one ch-2 space.
Setup Round (Color A): Join Color A. ch 3 (does not count as a dc), work 2 dc in same st as joining (first cl made), ch 2, skip 2 sts, (work 3 dc cl in next st, ch 2, skip 2 sts) around. Join with sl st to top of first cl. (36 clusters, 36 ch-2 spaces)
Granny Round 1: sl st into first ch-2 sp. ch 3, work 2 dc in same ch-2 sp (beginning cl), ch 2, (cl in next ch-2 sp, ch 2) around. Join with sl st to top of beginning cl. (36 clusters, 36 ch-2 spaces)
Granny Rounds 2 through 10: Repeat Granny Round 1 nine more times. (36 clusters, 36 ch-2 spaces each round)
You will work a total of 11 granny rounds including the Setup Round.
After completing all granny rounds, this section should measure approximately 7 inches tall.
Top Border: Flower Row Setup (Colors C and B)
Border Round 1 (Color C): Join Color C. ch 1, work sc evenly around: work 1 sc into the top of each cl and 2 sc into each ch-2 sp around. (36 sc from cluster tops plus 72 sc from ch-2 spaces equals 108 sc total.) Join with sl st to first sc. (108 sc)
Border Round 2 (Color C): ch 1, sc in each st around. Join with sl st. (108 sc)
Border Round 3 (Color B): Join Color B. ch 1, sc in each st around. Join with sl st. (108 sc)
Border Round 4 (Color B): ch 1, sc in each st around. Join with sl st. (108 sc)
Fasten off.
Handles (make 2, Colors B and C)
Each handle measures approximately 24 inches long and 1.25 inches wide.
Handle Foundation (Color B): ch 80.
Row 1 (Color B): sc in 2nd ch from hook and in each ch across. Turn. (79 sc)
Row 2 (Color B): ch 1, sc in each st across. Turn. (79 sc)
Row 3 (Color C): Join Color C. ch 1, sc in each st across. Turn. (79 sc)
Row 4 (Color C): ch 1, sc in each st across. Turn. (79 sc)
Row 5 (Color B): Join Color B. ch 1, sc in each st across. Turn. (79 sc)
Row 6 (Color B): ch 1, sc in each st across. Do not turn. (79 sc)
Border row: ch 1, work sc evenly down the long side edge, across the beginning chain edge, up the other long side edge, and across the top. Join with sl st. Fasten off.
For a firmer handle, fold lengthwise and whipstitch the long edges together to create a tubular shape.
Make two handles total.
Flowers for Border (make 18, Color B with Color C center)
Work 18 five-petal flowers using the instructions in Special Stitches. Use Color C for the center ring and Color B for the petals. Fasten off, leaving a tail for sewing.
Assembly
Step 1: Position one handle with ends spaced approximately 3.5 inches apart on the front of the bag, centered horizontally. Each handle end should overlap the top border by approximately 2 inches on the inside. Sew securely using a tapestry needle, working a rectangle of stitches and crossing diagonally both ways for strength. Attach the second handle to the back in the same manner.
Step 2: Space 18 flowers evenly around the top border. With 108 stitches, placing one flower every 6 stitches gives you even spacing. Whipstitch each flower in place.
Step 3: Position the brass label at center front on the granny stitch section. Sew through the label holes using strong thread.
Finishing and Care
Weave in all ends securely. For blocking, fill the bag with a towel to shape it, mist lightly with water, and allow to dry completely. Do not hang wet as this will distort the shape.
Hand wash in cool water with gentle soap. Reshape while damp and lay flat to dry.
Customization Tips
Wider bag: Work additional increase rounds on the base, adding 4 stitches per round until desired width. Keep the stitch count divisible by 3 for the granny section.
Taller bag: Add stripe rounds or granny rounds. Each sc round adds about 0.25 inches. Each granny round adds about 0.6 inches.
Longer handles: Add stitches to the foundation chain in multiples of 2.
I hope you love making this Earthy Boho Granny Tote crochet pattern as much as I loved designing it. It is the kind of project that keeps you engaged without being stressful, and the finished bag is genuinely useful.
Thank you so much for being here and choosing this pattern for your next project. I would absolutely love to see your finished tote! Share your photos on Instagram or in our Facebook group so we can celebrate together.
If this pattern caught your eye, save it to your Pinterest boards so you can find it when you are ready to start. And please drop a comment below if you make one. I read every single comment and love hearing how your projects turn out!