
I don’t know about you, but I absolutely live for a project that looks way more impressive than it actually is. This bag? It’s one of those beautiful fakes. Stunning enough to make people think you spent weeks on it, structured enough to actually use every day.
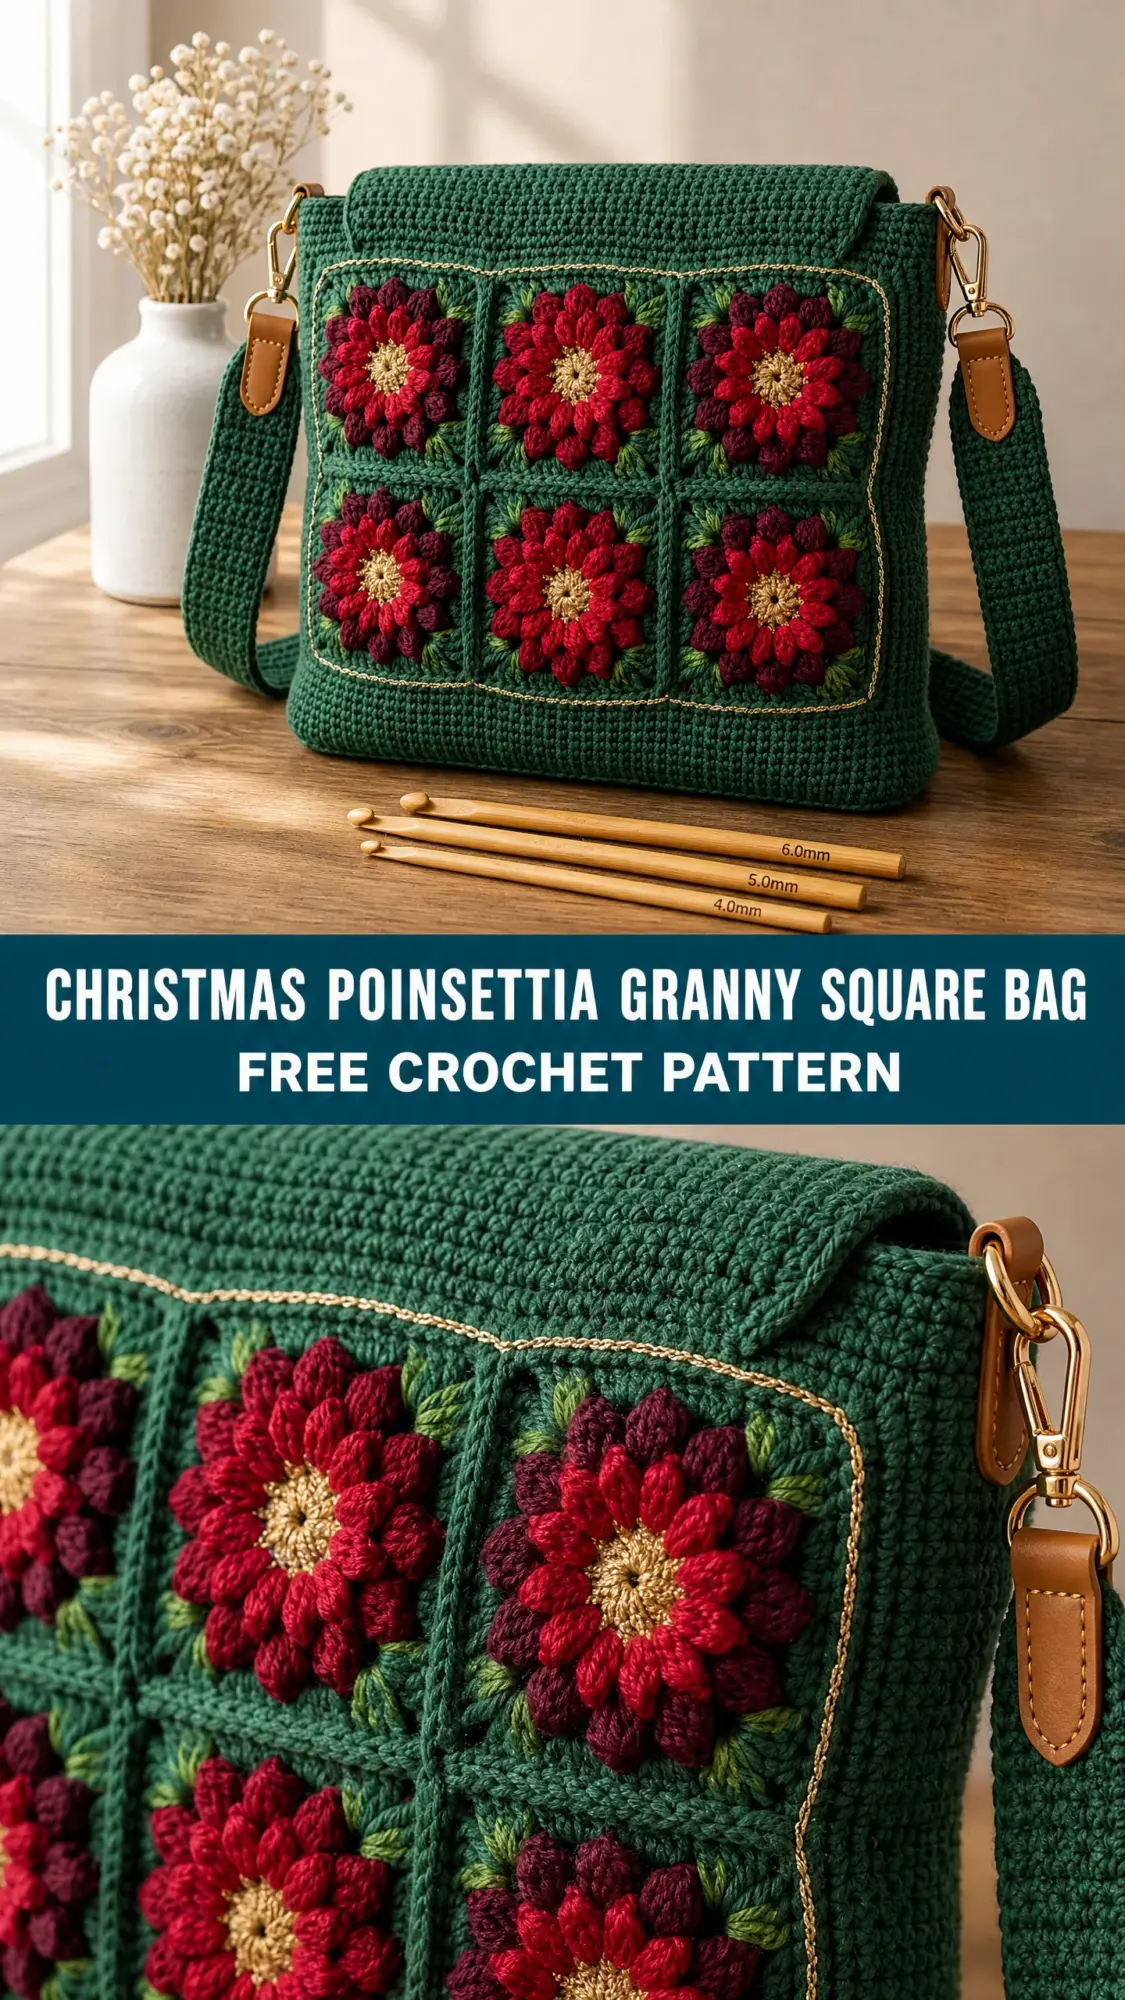
The Christmas Poinsettia Granny Square Bag combines everything I love about holiday crafting. You get the satisfaction of making those gorgeous raised flower motifs, the practicality of a sturdy crossbody bag, and the kind of wow factor that makes people stop you on the street. All without losing your mind over complicated construction.
If you’ve been wanting to level up from basic granny squares to something truly special, this is your sign. Let’s make something beautiful together.
About This Crochet Pattern
This structured crossbody bag features a flat bottom rectangular body crocheted in forest green, with a 3×2 grid of six raised poinsettia granny squares appliqued to the front flap panel. The bag closes with a fold over flap and attaches to gold hardware swivel clip straps with leather tab connectors.
The body is worked in tight single crochet (sc) for a dense, structured fabric. Meanwhile, the poinsettia squares combine traditional granny square construction with puff stitch petals in crimson and burgundy with gold centers. Think of it as the best of both worlds: classic technique meets holiday drama.
The squares are joined together, then sewn as a panel onto the front of the bag. A crochet strap is worked separately and threaded through D-rings on leather tabs. The overall aesthetic is holiday ready, structured, and artisan crafted.
Skill Level
This pattern is rated Intermediate to Advanced. You should be comfortable with granny square construction, working in the round, color changes, puff stitches, assembling multiple components, and attaching hardware.
If you’ve completed at least two or three bags or advanced motif projects, you’ll find this manageable. True beginners should build some square and basic bag experience first. But don’t let that scare you off. I’ll walk you through every step.
Time Estimate
Plan for approximately 18 to 26 hours total, depending on your speed and familiarity with granny motifs. The six poinsettia squares are the most time intensive element, averaging 45 to 60 minutes each. Allow additional time for blocking, joining, and assembly.
This isn’t a weekend project, but it’s absolutely worth the investment. Think of it as a labor of love that you’ll use for years.
Finished Size
Here are your finished measurements:
Bag body: approximately 11 inches wide by 12 inches tall by 2.5 inches deep (28 cm wide by 30.5 cm tall by 6.4 cm deep), not including strap
Flap: approximately 11 inches wide by 3.5 inches deep (28 cm by 9 cm), folded over
Each poinsettia granny square: approximately 3.5 inches by 3.5 inches (9 cm by 9 cm) before blocking
Assembled square panel: approximately 10.5 inches wide by 7 inches tall (26.7 cm by 17.8 cm)
Strap: approximately 48 inches (122 cm) adjustable
Materials Needed
Yarn
You’ll need worsted weight yarn in the following colors and amounts:
Yarn Suggestions
Option 1: Lion Brand Wool-Ease in Forest Green Heather, Cranberry, and Fisherman. Widely available, affordable, holds structure well, and easy care.
Option 2: Paintbox Yarns Simply DK held double OR Paintbox Yarns Simply Worsted in Racing Green, Pillar Red, and Dusty Rose for burgundy tones. Excellent stitch definition for the puff petals.
Option 3: Cascade 220 in Hunter Green, Christmas Red, and Burgundy. This 100 percent Peruvian wool blocks beautifully and gives the bag a firm, premium structure.
Substitution Note: Choose a smooth, plied worsted weight yarn with good stitch definition. Avoid fuzzy or hairy yarns, which will obscure the puff stitch petal detail. A yarn with some wool or acrylic content will hold the bag’s shape better than 100 percent cotton for the body, though cotton works well for the motifs.
Hooks
Notions
Gauge
Bag body (worked in sc, US J-10 / 6.0 mm hook): 16 sc x 18 rows = 4 inches by 4 inches (10 cm by 10 cm) in single crochet, blocked
Granny square (worked in the round, US I-9 / 5.5 mm hook): One completed 4-round poinsettia granny square = 3.5 inches by 3.5 inches (9 cm by 9 cm) after light blocking
Gauge is important for this project. Adjust hook size as needed. The bag body must be dense and structured. If your fabric feels loose or floppy, go down one hook size.
Abbreviations (US Terms)
Let me define all the abbreviations you’ll encounter in this crochet tutorial:
Special Stitches
Puff Stitch (ps)
This stitch creates the raised petal of the poinsettia. It looks complicated but I promise it’s just repetition.
Step 1: Yarn over, insert hook into indicated stitch or space.
Step 2: Yarn over again, pull up a loop to approximately 0.5 inch height. You now have 3 loops on hook.
Step 3: Yarn over, insert hook into the same stitch or space.
Step 4: Yarn over, pull up a loop to the same height. You now have 5 loops on hook.
Step 5: Yarn over, insert hook into the same stitch or space.
Step 6: Yarn over, pull up a loop to the same height. You now have 7 loops on hook.
Step 7: Yarn over, draw through all 7 loops on hook.
Step 8: Chain 1 to close and lock the puff stitch.
This creates one rounded, bobble-like petal segment. Work tightly enough that the petal stands forward from the fabric.
3-Double Crochet Cluster (3-dc cl)
Step 1: Yarn over, insert hook into indicated stitch or space.
Step 2: Yarn over, pull up a loop, yarn over, draw through 2 loops. One incomplete dc made.
Step 3: Repeat steps 1 and 2 two more times in the same stitch or space. You have 4 loops on hook.
Step 4: Yarn over, draw through all 4 loops on hook. One 3-dc cluster complete.
Granny Square Corner Shell
Work (3 dc, ch 2, 3 dc) all into the same corner ch-2 space. This is the standard granny corner used in the background rounds of the poinsettia squares.
Pattern Notes Before You Begin
1. The bag body is worked flat in rows of single crochet, then seamed.
2. The flap is worked as a continuation of the back panel, folding over to the front.
3. The six poinsettia granny squares are worked separately, joined in a 3 column by 2 row grid, and sewn onto the front face as a panel applique.
4. Work all turning chains as follows: sc rows use ch 1 to turn, which does NOT count as a stitch throughout.
5. Block your granny squares before joining them. This makes joining and sewing much easier.
6. Color sequence for poinsettia squares: Center is Color C (gold). First petal round is Color A (crimson). Second petal layer is Color B (burgundy). Background rounds are Color D (medium green) for round 3 and MC (forest green) for round 4.
Step by Step Instructions
Section 1: Poinsettia Granny Square (Make 6)
Use US I-9 / 5.5 mm hook. Work each square identically.
Round 1 (Gold center, Color C)
Make a magic ring.
Ch 1.
Work 8 sc into the magic ring.
Sl st to first sc to join.
Pull ring closed. (8 sc)
Round 2 (Crimson inner petals, Color A)
Join Color A with sl st into any sc of Round 1.
Work the following into each sc around: (ps, ch 1), then sl st into the next sc.
You will make 8 puff stitches total, one in each sc, with a sl st between each.
After the last sl st, sl st into the first ps of the round to close.
Do not turn. Work with RS always facing.
(8 puff stitches)
Round 2 Checkpoint: Your piece should look like a small sunburst or daisy with 8 raised crimson petals radiating from the gold center. The petals should stand toward you.
Round 3 (Burgundy outer petals, Color B)
Join Color B with sl st behind Round 2, inserting hook into the back bar of any sc from Round 1 (insert from behind Round 2 petals to access the back of Round 1).
Alternatively, work into the sl sts between petals from Round 2 to create a second, larger petal layer.
In each position (8 positions available): (ps, ch 1, sl st to next position) around.
Work 8 burgundy puff stitches total, positioned between or slightly behind the crimson petals to create a layered flower effect.
(8 ps, Color B)
Round 3 Checkpoint: You now have a two-layer poinsettia: gold center, crimson inner petals, burgundy outer petals. The flower should be approximately 2 inches in diameter.
Round 4 (Green granny square corners, Color D)
This round transforms the circular flower into a square.
Join Color D with sl st into any ch-1 space between any two outer petals.
You have 8 petal units in the circle. Designate 4 of them as corner positions (every other one) and 4 as side positions.
Corner positions (4 total): (3 dc, ch 2, 3 dc) into the ch-sp
Side positions (4 total): (3 dc) into the ch-sp
Between each corner shell and side cluster: ch 1 to create the granny square channel.
Work as follows, starting at a designated corner:
(3 dc, ch 2, 3 dc) into corner ch-sp [corner made], ch 1, (3 dc) into next ch-sp [side cluster], ch 1, rep from beginning 3 more times around.
Sl st to top of first dc to join.
(4 corner shells = 24 dc, 4 side clusters = 12 dc, 4 ch-2 corner spaces, 8 ch-1 spaces = 36 dc total)
Round 5 (Forest green outer border, MC)
Join MC with sl st to any corner ch-2 sp.
Ch 3 (counts as first dc).
(2 dc, ch 2, 3 dc) into same corner ch-2 sp [beg corner shell made].
Ch 1.
(3 dc) into next ch-1 sp [side cluster].
Ch 1.
(3 dc, ch 2, 3 dc) into next corner ch-2 sp [corner shell made].
Ch 1.
(3 dc) into next ch-1 sp.
Ch 1.
Rep from corner shell instruction around all 4 corners.
Sl st to top of beg ch-3 to join.
Fasten off, leave tail for seaming.
(4 corner shells = 24 dc, 8 side clusters = 24 dc, total dc = 48 dc, 4 ch-2 corner spaces, 8 ch-1 spaces)
Square Checkpoint: Each completed square measures approximately 3.5 inches by 3.5 inches. All 4 corners have ch-2 spaces. Each side has 2 clusters of 3 dc separated by a ch-1 sp.
Block all 6 squares lightly by pinning to measurements and misting with water or steam. Allow to dry completely before joining.
Section 2: Join Squares into Panel (3 Columns x 2 Rows)
Use MC and tapestry needle, or sl st join with US J-10 / 6.0 mm hook.
Lay squares out in a 3 wide by 2 tall grid, RS facing up, flowers all oriented the same direction.
Join Row 1 (top row): Join Square 1 to Square 2 along their shared side edge. Join Square 2 to Square 3.
Join Row 2 (bottom row): Join Square 4 to Square 5, Square 5 to Square 6.
Join Rows 1 and 2: Align Row 1 bottom edge to Row 2 top edge and join across the full width.
To join using flat slip stitch seam:
Hold two squares with WS together, RS facing out.
Insert hook through both corner ch-2 sps.
Join MC with sl st.
Sl st through both layers in each ch-sp and dc top across the edge, working (sl st, ch 1) at corner ch-2 alignments.
Fasten off and weave in ends.
Panel Checkpoint: Your joined panel measures approximately 10.5 inches wide by 7 inches tall. All seams lie flat.
Gold Trim Border on Panel
Using gold metallic thread or thin metallic yarn threaded on tapestry needle:
Work a running stitch or chain stitch embroidery line around the outer perimeter of the entire panel, approximately 2 rows inside the outermost dc stitches.
Alternatively: Join gold thread with sl st at any outer corner and sl st evenly around the entire outer edge of the panel, 1 sl st into each dc and (sl st, ch 1, sl st) at each outer corner. Fasten off. Weave in ends.
Set panel aside.
Section 3: Bag Body
Use MC and US J-10 / 6.0 mm hook throughout.
Ch 1 at beg of every row does NOT count as a stitch.
Front Panel
Ch 46.
Row 1 (WS): Sc into second ch from hook and each ch across. Turn. (45 sc)
Rows 2 through 54: Ch 1, turn. Sc across. Turn. (45 sc each row)
After Row 54, fasten off. Weave in ends.
Front Panel Checkpoint: Piece measures approximately 11.25 inches wide by 12 inches tall.
Back Panel with Flap
Ch 46.
Row 1 (WS): Sc into second ch from hook and each ch across. Turn. (45 sc)
Rows 2 through 54: Ch 1, turn. Sc across. Turn. (45 sc each row)
Rows 55 through 69 (Flap section): Ch 1, turn. Sc across. Turn. (45 sc each row)
These 15 additional rows create the fold over flap (approximately 3.5 inches).
After Row 69, do not fasten off. Work a sl st edging around the flap perimeter:
Rotate work. Sl st evenly down the right side of flap (approximately 15 sl sts). Sl st across the bottom edge of the flap (45 sl sts). Sl st up the left side of the flap (15 sl sts). Sl st across the top. Fasten off. Weave in ends.
Back Panel Checkpoint: Back panel is 45 sc wide and 69 rows tall total. Flap portion is the upper 15 rows.
Side Panels (Make 2)
Ch 12.
Row 1 (WS): Sc into second ch from hook and each ch across. Turn. (11 sc)
Rows 2 through 54: Ch 1, turn. Sc across. Turn. (11 sc each row)
Fasten off, leaving a long tail for seaming.
Base Panel
Ch 46.
Row 1 (WS): Sc into second ch from hook and each ch across. Turn. (45 sc)
Rows 2 through 11: Ch 1, turn. Sc across. Turn. (45 sc each row)
Fasten off, leaving a long tail for seaming.
Section 4: Bag Assembly
Step 1: Seam base to front.
With RS of front panel facing out and RS of base facing out, hold them with WS together along the bottom edge. Using MC and tapestry needle, whipstitch through outer loops of corresponding stitches across the 45 stitch width.
Step 2: Seam base to back.
Repeat Step 1 on the opposite long edge of the base panel, attaching the back panel bottom edge.
Step 3: Seam side panels.
Position one side panel between the front and back along the right side. Whipstitch the side panel to the front right edge. Then whipstitch the same side panel to the back right edge. Repeat for the second side panel on the left.
Step 4: Seam bottom corners.
Close the four bottom corner joints where the base meets the side panels by whipstitching the seam intersections closed.
Assembly Checkpoint: Your bag body is now a fully formed open top box shape, approximately 11.25 inches wide by 12 inches tall by 2.5 inches deep.
Step 5: Top edge finishing.
Using MC, join yarn at top edge of front panel corner.
Work 1 rnd of sc evenly around the top opening of the bag: 45 sc across the front top, 11 sc across each side top, and along the base of the flap where it meets the bag back top. Join with sl st. Fasten off.
Step 6: Attach leather strap tabs.
Position one leather tab on the right side of the bag, centered on the side panel top edge, with the D-ring extending upward. Sew the tab to the exterior using waxed thread, making at least 4 passes in an X pattern. Repeat on the left side.
Step 7: Sew poinsettia panel to front.
Center the assembled 6 square panel on the front face of the bag, leaving approximately 0.5 inch margin on the left and right edges, and approximately 1.5 inches from the bottom edge.
Using MC or Color D and tapestry needle, whipstitch around the entire perimeter of the panel.
Step 8: Flap edging (optional).
If desired, join gold metallic thread at the flap right edge and sl st evenly around the flap perimeter for a gold accent edge.
Section 5: Strap
Use MC and US J-10 / 6.0 mm hook.
Ch 9.
Row 1: Sc into second ch from hook and each ch across. Turn. (8 sc)
Rows 2 through 215 (approximately): Ch 1, turn. Sc across. Turn. (8 sc each row)
Work until strap measures 48 inches from foundation. Fasten off, leaving a long tail.
Strap Checkpoint: Strap is dense, flat, and approximately 48 inches long.
Work sl st edging along both long edges:
With RS facing, join MC at one corner and sl st evenly into each row end across the length. Fasten off. Repeat on opposite long edge.
Strap Attachment:
Thread one end of the strap through one swivel snap hook. Fold over 1 inch of strap end and whipstitch down tightly. Repeat at other end with the second swivel snap hook.
Clip swivel snaps to the D-rings on the leather tabs at each side of the bag.
Section 6: Closure Options
Option A (Magnetic snap, recommended):
Before lining, attach one half of a magnetic snap to the underside of the flap, centered horizontally, 1 inch from the flap bottom edge. Attach the corresponding half to the front panel, centered, approximately 1.5 inches down from the top edge.
Option B (Button and loop):
Crochet a chain loop of approximately 10 ch on the underside of the flap center. Sew a large decorative button to the front panel centered.
Option C (Zipper):
Before full assembly, sew a 9 inch zipper to the inside top opening.
Section 7: Lining (Optional but Recommended)
Cut two fabric rectangles: each 12 inches tall by 12 inches wide.
Cut two side lining rectangles: each 12 inches tall by 3.5 inches wide.
Cut one base lining rectangle: 12 inches wide by 3.5 inches wide.
Sew lining pieces together with RS together along all seams, leaving top edge open. Fold top edge under 1 inch and press.
Insert lining into bag with WS of lining facing WS of bag. Hand stitch lining to inside top edge of bag with whipstitch.
Finishing and Blocking
1. Weave in all remaining ends securely, doubling back through stitches.
2. Block the bag body by misting lightly with water. Gently reshape to dimensions and allow to dry flat or stuffed with a bag shaper.
3. Lightly re-steam the panel area if it has flattened during sewing.
4. Brush the exterior with a soft brush if any yarn fuzz has developed.
5. Trim all thread ends close to the work.
Size Customization Tips
To make the bag larger: Add stitches in multiples of your repeat. Adding 8 sc to the width of the front and back panels will widen the bag by 2 inches. To scale height, add rows in increments of 4. If you add a row of squares (making a 3×3 grid), you will need 9 squares.
To make the bag smaller: Reduce width and height symmetrically. A 3×1 grid of squares creates a smaller clutch style bag.
You Did It!
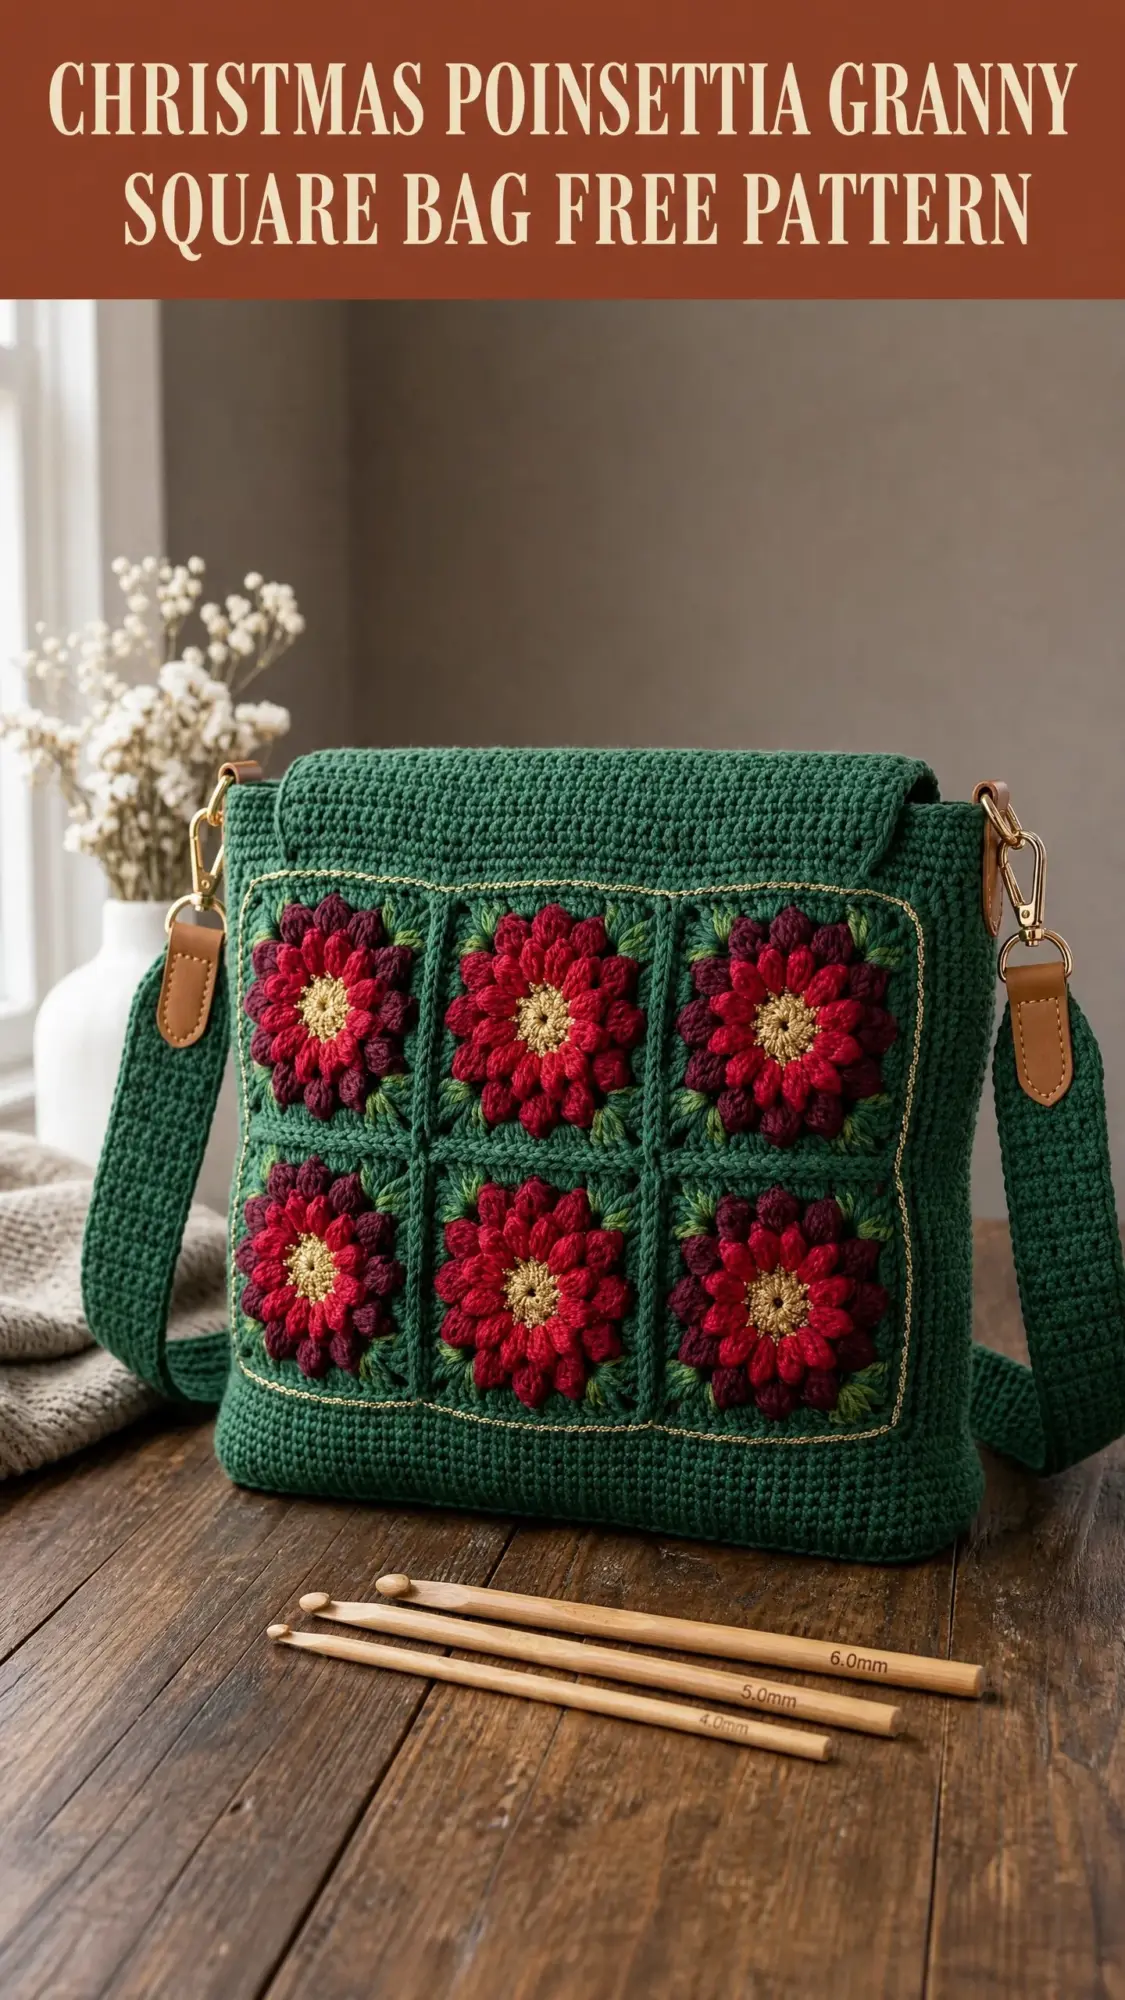
Thank you so much for choosing this Christmas Poinsettia Granny Square Bag pattern. I hope you love making it as much as I loved designing it. Those puff stitch poinsettias really do steal the show, and you should be incredibly proud of yourself for tackling such a beautiful project.
If you make this bag, I would absolutely love to see it! Tag me on Instagram or share a photo in my Facebook group. Seeing your finished projects is honestly the best part of my day.
If you want to come back to this crochet pattern later, go ahead and save it to your Pinterest boards so it’s easy to find. And please drop a comment below if you give it a try. I read every single one and I’m always here to help if you get stuck. Happy hooking!