
I designed this cardigan back in 2019, sitting at my grandmother’s kitchen table with a cup of tea and her old crochet notebooks spread around me. She had sketched a granny square motif decades ago that she never turned into anything. I promised her I would make something beautiful with it someday.
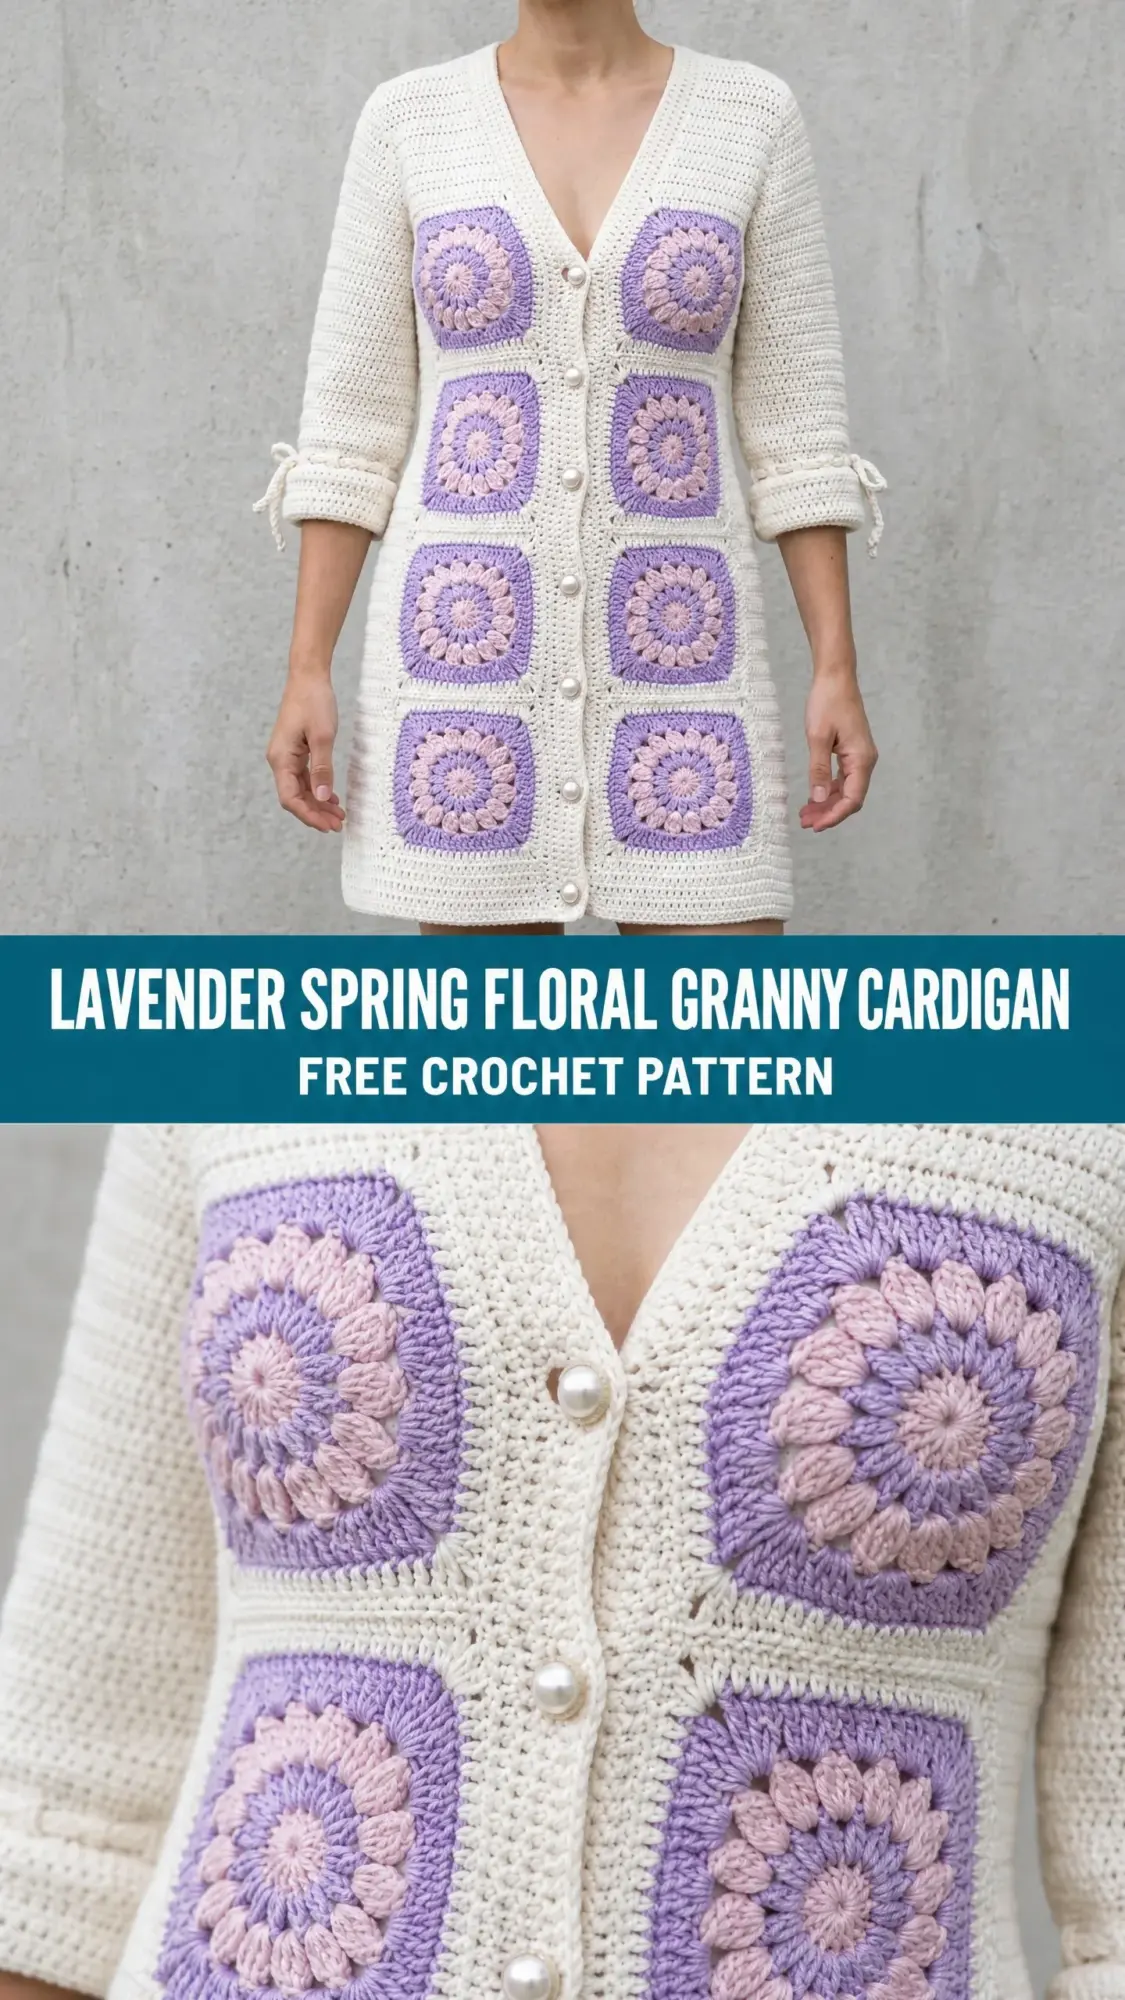
This is that promise, finally finished. The Lavender Spring Floral Granny Cardigan combines her original sunburst floral center with a modern cardigan dress silhouette that feels fresh and wearable today. Every time I look at those soft purple and pink squares against the creamy body, I think of her.
If you love projects with meaning behind them, this one will speak to your heart. It takes patience and some solid crochet skills, but the result is a statement piece you will reach for again and again.
About This Crochet Pattern
This cardigan dress is a true showstopper. The body features dense rows of single crochet (sc), which creates a structured, tailored fabric. Eight large granny squares with dimensional sunburst floral centers are crocheted separately and then attached to the front panels. Pearl shank buttons run down the center, and the sleeves have the sweetest little cuff ties.
The finished garment hits at the upper thigh, so you can wear it as a mini cardigan dress or style it as a longline cardigan over jeans. Either way, you will get compliments.
Skill Level
This is an intermediate to advanced intermediate project. You should feel comfortable with single crochet garment construction, working flat panels with shaping, constructing and joining granny squares, seaming panels together, setting in sleeves, and adding a button band.
If you have completed at least two garments before, you are ready for this. If granny squares or seaming feel intimidating, I would suggest practicing on a smaller project first.
Time Estimate
Plan for approximately 60 to 90 hours of work for an experienced crocheter. This is not a weekend project, but it is absolutely worth the time investment.
Finished Measurements
This pattern is written for size Small/Medium with the following finished dimensions:
Size customization tips are included at the end of the pattern.
Materials You Will Need
Yarn
You will need worsted weight yarn in three colors:
Total yarn needed: approximately 1,900 yards / 1,738 meters across all three colors.
Yarn Suggestions
Here are a few options that work beautifully:
Option 1: Lion Brand Pound of Love in Fisherman for Color A, with Paintbox Yarns Simply DK held double in Lilac and Ballet Pink for Colors B and C. Holding DK double approximates worsted weight, but always verify your gauge.
Option 2: Paintbox Yarns Simply Worsted in Champagne White, Wisteria Purple, and Dusty Rose. This is 100% acrylic with excellent stitch definition.
Option 3: Drops Safran cotton worsted in Off-White, Lavender, and Old Rose. The cotton gives a slightly drapey, summer-weight feel.
Whatever you choose, look for smooth, evenly plied yarn. Avoid textured or loosely spun yarn, which will muddy your floral motif.
Hooks
Notions
Gauge
Getting gauge right is mandatory for this garment. Even a half-stitch difference over 4 inches will significantly affect your finished size.
With J hook in single crochet:
Granny square gauge:
Swatch both flat (for the body) and in the round (for the squares) before starting.
Abbreviations and Stitch Definitions
Let me walk you through every stitch and abbreviation used in this pattern:
Special Stitches
Puff Stitch: This creates the dimensional center of your granny squares. Yarn over, insert hook, pull up a loop to double crochet height. Repeat this two more times in the same stitch (seven loops on hook). Yarn over and pull through all seven loops. Chain 1 to close.
Shell Stitch: Work 3 dc in the same stitch or space. This creates the petal clusters in your squares.
Sc2tog (single crochet decrease): Insert hook in next stitch, pull up a loop. Insert hook in following stitch, pull up a loop. Three loops on hook. Yarn over, pull through all three loops.
Extended Single Crochet (esc): Insert hook, pull up a loop, yarn over and pull through first loop only, then yarn over and pull through both remaining loops. Slightly taller than regular sc.
Pattern Notes Before You Begin
1. Body panels are worked flat in rows of single crochet.
2. Your chain 1 turning chain does NOT count as a stitch. Always work your first sc into the first stitch at the base of the chain.
3. Granny squares are worked in the round with the right side always facing you. Do not turn between rounds.
4. The eight squares go on the front panels only, arranged in two columns of four squares each.
5. Squares are sewn on as decorative appliqué after the body is complete. They are not structural.
6. For color changes in the granny squares, fasten off each color and join the next with a slip stitch. Do not carry yarn.
7. Sleeves are worked in the round from the top down after shoulder seaming.
Section 1: Granny Squares (Make 8)
Make 8 identical squares using all three colors.
Round 1 (Color C)
With Color C and J hook, make a magic ring.
Ch 3 (counts as first dc). Work 11 dc into the magic ring. Sl st to top of beginning ch-3 to join. Pull ring closed. (12 dc)
Round 2 (Color C)
Ch 1 (does not count as a stitch). Sc in the same st as join. Work 1 puff stitch in next st, ch 1. Continue around: sc in next st, puff stitch in next st, ch 1. End with sl st to first sc to join.
You will have 6 sc, 6 puff stitches, and 6 ch-1 spaces. (12 sts plus 6 ch-1 sps)
Round 3 (Color C)
Sl st into first ch-1 sp. Ch 3 (counts as dc). Work 2 more dc in same ch-1 sp (first shell made). Ch 2.
Continue around: work 3 dc shell in each ch-1 sp with ch 2 between each shell. Sl st to top of beginning ch-3 to join. (6 shells of 3 dc each, 6 ch-2 sps; 18 dc total)
Fasten off Color C.
Round 4 (Color B)
This round transforms your circle into a square shape.
Join Color B with sl st in any ch-2 sp between shells.
Ch 3 (counts as dc). Work 2 dc in same ch-2 sp, ch 2, work 3 dc in same ch-2 sp. First corner made.
Ch 1. Work 3 dc in next ch-2 sp (side shell, no corner). Ch 1.
Work (3 dc, ch 2, 3 dc) in next ch-2 sp. Second corner made.
Continue around, alternating corners and side shells until you have 4 corners and 4 side shells. Sl st to top of beginning ch-3 to join.
Stitch count: 4 corner clusters plus 4 side shells plus 8 ch-1 sps. Total dc: 32. Total ch-sps: 4 corner ch-2 plus 8 ch-1.
Fasten off Color B.
Round 5 (Color A)
Join Color A with sl st in any corner ch-2 sp.
Ch 3 (counts as dc). Work 2 dc in same corner ch-2 sp, ch 2, work 3 dc in same corner ch-2 sp. Corner made.
Ch 1. Work 3 dc in next ch-1 sp. Ch 1. Work 3 dc in next ch-1 sp. Ch 1. Work (3 dc, ch 2, 3 dc) in next corner ch-2 sp.
Continue around all four corners and sides. Sl st to top of beginning ch-3 to join.
Stitch count: 4 corners (24 dc) plus 8 side shells (24 dc) = 48 dc total, plus 4 corner ch-2 sps and 12 ch-1 sps.
Fasten off Color A. Weave in all ends.
Block each square to 5.5 inches / 14 cm. Set aside.
Checkpoint
After blocking, all 8 squares should measure exactly 5.5 inches from flat side to flat side. If your squares are smaller, try a larger hook. If larger, try a smaller hook and re-swatch.
Section 2: Back Panel
The back panel is worked flat in rows of sc using Color A and J hook.
Finished dimensions: 18 inches wide and 32 inches long.
Foundation
With Color A and J hook, ch 64.
Row 1 (WS): Sc in second ch from hook and in each ch across. Ch 1, turn. (63 sc)
Rows 2-128: Sc in each st across. Ch 1, turn at end of each row. (63 sc per row)
The back is worked straight with no waist shaping. After Row 128, fasten off leaving a long tail for shoulder seaming.
Checkpoint
Your back panel should measure 18 inches wide and 32 inches long. Place stitch markers at each end of Row 96 (24 inches from the hem). These mark the top of the side seam and bottom of the armhole.
Shoulder zones: On Row 128, the outer 9 sts on each side are shoulder attachment zones. The center 45 sts form the neck opening.
Section 3: Right Front Panel
Finished dimensions: 9 inches wide and 32 inches long (before button band).
Foundation and Body Rows
With Color A and J hook, ch 33.
Row 1 (WS): Sc in second ch from hook and in each ch across. Ch 1, turn. (32 sc)
Rows 2-64: Sc in each st across. Ch 1, turn. (32 sc per row)
V-Neck Shaping
Beginning at Row 65, you will decrease at the center front edge every other row.
Rows 65, 67, 69, 71, 73, 75, 77, 79, 81, 83, 85, 87, 89, 91, 93, 95: At the end of each of these rows (center front edge), sc2tog over the last 2 sts before turning.
After 16 decrease rows, at Row 96 you will have (16 sc).
Armhole Shaping
Row 97: Sl st across first 3 sts. Sc in each remaining st. Ch 1, turn. (13 sc)
Row 98: Sc across to last 2 sts. Sc2tog. Ch 1, turn. (12 sc)
Row 99: Sc2tog at beg. Sc across. Ch 1, turn. (11 sc)
Row 100: Sc across to last 2 sts. Sc2tog. Ch 1, turn. (10 sc)
Row 101: Sc2tog at beg. Sc across. Ch 1, turn. (9 sc)
Rows 102-128: Sc across all sts with no further shaping. (9 sc per row)
Fasten off, leaving a long tail.
Section 4: Left Front Panel
The left front is a mirror image of the right front.
Foundation
With Color A and J hook, ch 33.
Row 1 (WS): Sc in second ch from hook and in each ch across. Ch 1, turn. (32 sc)
Rows 2-64: Sc across. Ch 1, turn. (32 sc per row)
V-Neck Shaping (Mirrored)
Rows 65, 67, 69, 71, 73, 75, 77, 79, 81, 83, 85, 87, 89, 91, 93, 95: At the beginning of each of these rows, sc2tog over the first 2 sts.
After 16 decrease rows at Row 96: (16 sc)
Armhole Shaping (Mirrored)
Row 97: Sc across to last 3 sts. Leave last 3 sts unworked. Ch 1, turn. (13 sc)
Row 98: Sc2tog at beg of row. Sc across. Ch 1, turn. (12 sc)
Row 99: Sc across to last 2 sts. Sc2tog. Ch 1, turn. (11 sc)
Row 100: Sc2tog at beg. Sc across. Ch 1, turn. (10 sc)
Row 101: Sc across to last 2 sts. Sc2tog. Ch 1, turn. (9 sc)
Rows 102-128: Sc across. Ch 1, turn. (9 sc per row)
Fasten off, leaving a long tail.
Section 5: Shoulder and Side Seaming
Block all three body panels before seaming. Pin to measurements and allow to dry completely.
Shoulder seams: Using a yarn needle and Color A, mattress stitch the 9-st shoulder of the right front to the right 9 sts of the back shoulder. Repeat for the left side.
Side seams: Mattress stitch the front panel sides to the back panel from the hem (Row 1) up to Row 96 (armhole base). Leave the armhole open.
Checkpoint
Try the body on or measure over a dress form. Bust circumference should be approximately 36 inches when fronts are held together. Total length should be 32 inches. Armhole opening should be approximately 8 inches deep.
Section 6: Sleeves (Make 2)
Sleeves are worked from the top down. The cap is worked flat first, then joined into the round.
Sleeve Cap
With Color A and J hook, ch 33.
Row 1: Sc in second ch from hook and in each ch across. Ch 1, turn. (32 sc)
Row 2: Sc2tog at beg, sc across to last 2 sts, sc2tog. Ch 1, turn. (30 sc)
Row 3: Sc across. Ch 1, turn. (30 sc)
Row 4: Sc2tog at beg, sc across to last 2 sts, sc2tog. Ch 1, turn. (28 sc)
Row 5: Sc across. Ch 1, turn. (28 sc)
Row 6: Sc2tog at beg, sc across to last 2 sts, sc2tog. Ch 1, turn. (26 sc)
Row 7: Sc across. Ch 1, turn. (26 sc)
Row 8: Sc2tog at beg, sc across to last 2 sts, sc2tog. Ch 1, turn. (24 sc)
Rows 9-12: Sc across. Ch 1, turn. (24 sc per row)
Fold the cap so the two short ends meet. Join with sl st to form a ring. Sew the cap into the armhole opening using mattress stitch. Pin carefully, easing any fullness evenly.
Sleeve Body
Join Color A at the underarm point with sl st. Work sc in the round, using a stitch marker at the beginning of each round.
Round 1: Sc around entire lower edge of sleeve cap. (24 sc)
Rounds 2-8: Sc in each st around. (24 sc per round)
Round 9 (increase): 2 sc in first st, sc in each remaining st. (25 sc)
Round 10: Sc around. (25 sc)
Continue increasing 1 st at the beginning of every other round (Rounds 9, 11, 13, 15, 17, 19, 21, 23, 25, 27) until you have (34 sc).
Continue working even until the sleeve measures 15 inches from the underarm join.
Cuff Section
Round 1: Work 1 esc in each st around. (34 sts)
Rounds 2-5: Sc in each st around. (34 sc)
Round 6: Sl st in each st around to create a fold line. (34 sl sts)
Rounds 7-8: Sc around. (34 sc)
Fasten off and weave in ends.
Cuff Bow Tie
With Color A, ch 60. Fasten off. Thread this chain through the fabric at the fold line using your yarn needle. Tie in a small bow at the outside of the sleeve. Trim ends or tuck them back through.
Turn the cuff up by folding at the sl st round.
Section 7: Attaching Granny Squares
Position the 8 blocked granny squares on the front panels. Each front receives 4 squares in a single vertical column.
Placement Guide
Square 1: Top edge aligns with Row 120 (approximately 2.5 inches below shoulder seam). Center horizontally on the front panel.
Square 2: Directly below Square 1 with no gap.
Square 3: Directly below Square 2.
Square 4: Directly below Square 3. Bottom edge sits approximately 3 inches above the hem.
Repeat for the left front panel as a mirror image.
Pin each square in position. Using Color A and your yarn needle, whip stitch around all four sides. Catch only the back loop of the outermost round of the square and one thread of the body panel. Keep your stitches even and invisible on the right side.
Section 8: Button Band and Buttonholes
The button band runs the full length of the center front opening on both edges and continues around the back neck.
Use Color A and the smaller I hook for this section.
Left Front Band (No Buttonholes)
With RS facing, join Color A at the hem of the left front center edge with sl st.
Row 1: Ch 1, sc evenly up the entire left center front edge and across the back neck, ending at the right shoulder seam. Pick up approximately 3 sc for every 4 rows along vertical edges, and 1 sc per stitch across the back neck.
Continue adding rows to create a band approximately 1 inch wide, ending with a final row of sc.
Right Front Band (With Buttonholes)
Work the same as the left front band, but add buttonholes evenly spaced along the vertical edge. Space 10 buttonholes evenly, one at chest level and continuing down, aligned with the center of each granny square plus additional buttons above and below.
To create a buttonhole: ch 2, skip 2 sts, continue in sc. On the return row, work 2 sc into the ch-2 sp.
Fasten off and weave in all ends.
Finishing
Sew on all 10 pearl shank buttons opposite the buttonholes. Block the entire finished garment lightly, paying attention to the button band lying flat.
Tips for Success
Blocking is essential. Your granny squares need to be blocked to exact measurements before attaching. Your body panels need blocking before seaming. Trust the process.
Take your time with seaming. Good seaming makes the difference between a handmade-looking garment and a professional-looking one. Use mattress stitch and keep your tension even.
Try it on as you go. After seaming the body, try it on before adding sleeves. It is much easier to make adjustments at this stage.
The button band can make or break the look. Work slowly and count your stitches. A wavy or puckered button band will affect how the whole cardigan hangs.
Final Thoughts on This Crochet Tutorial
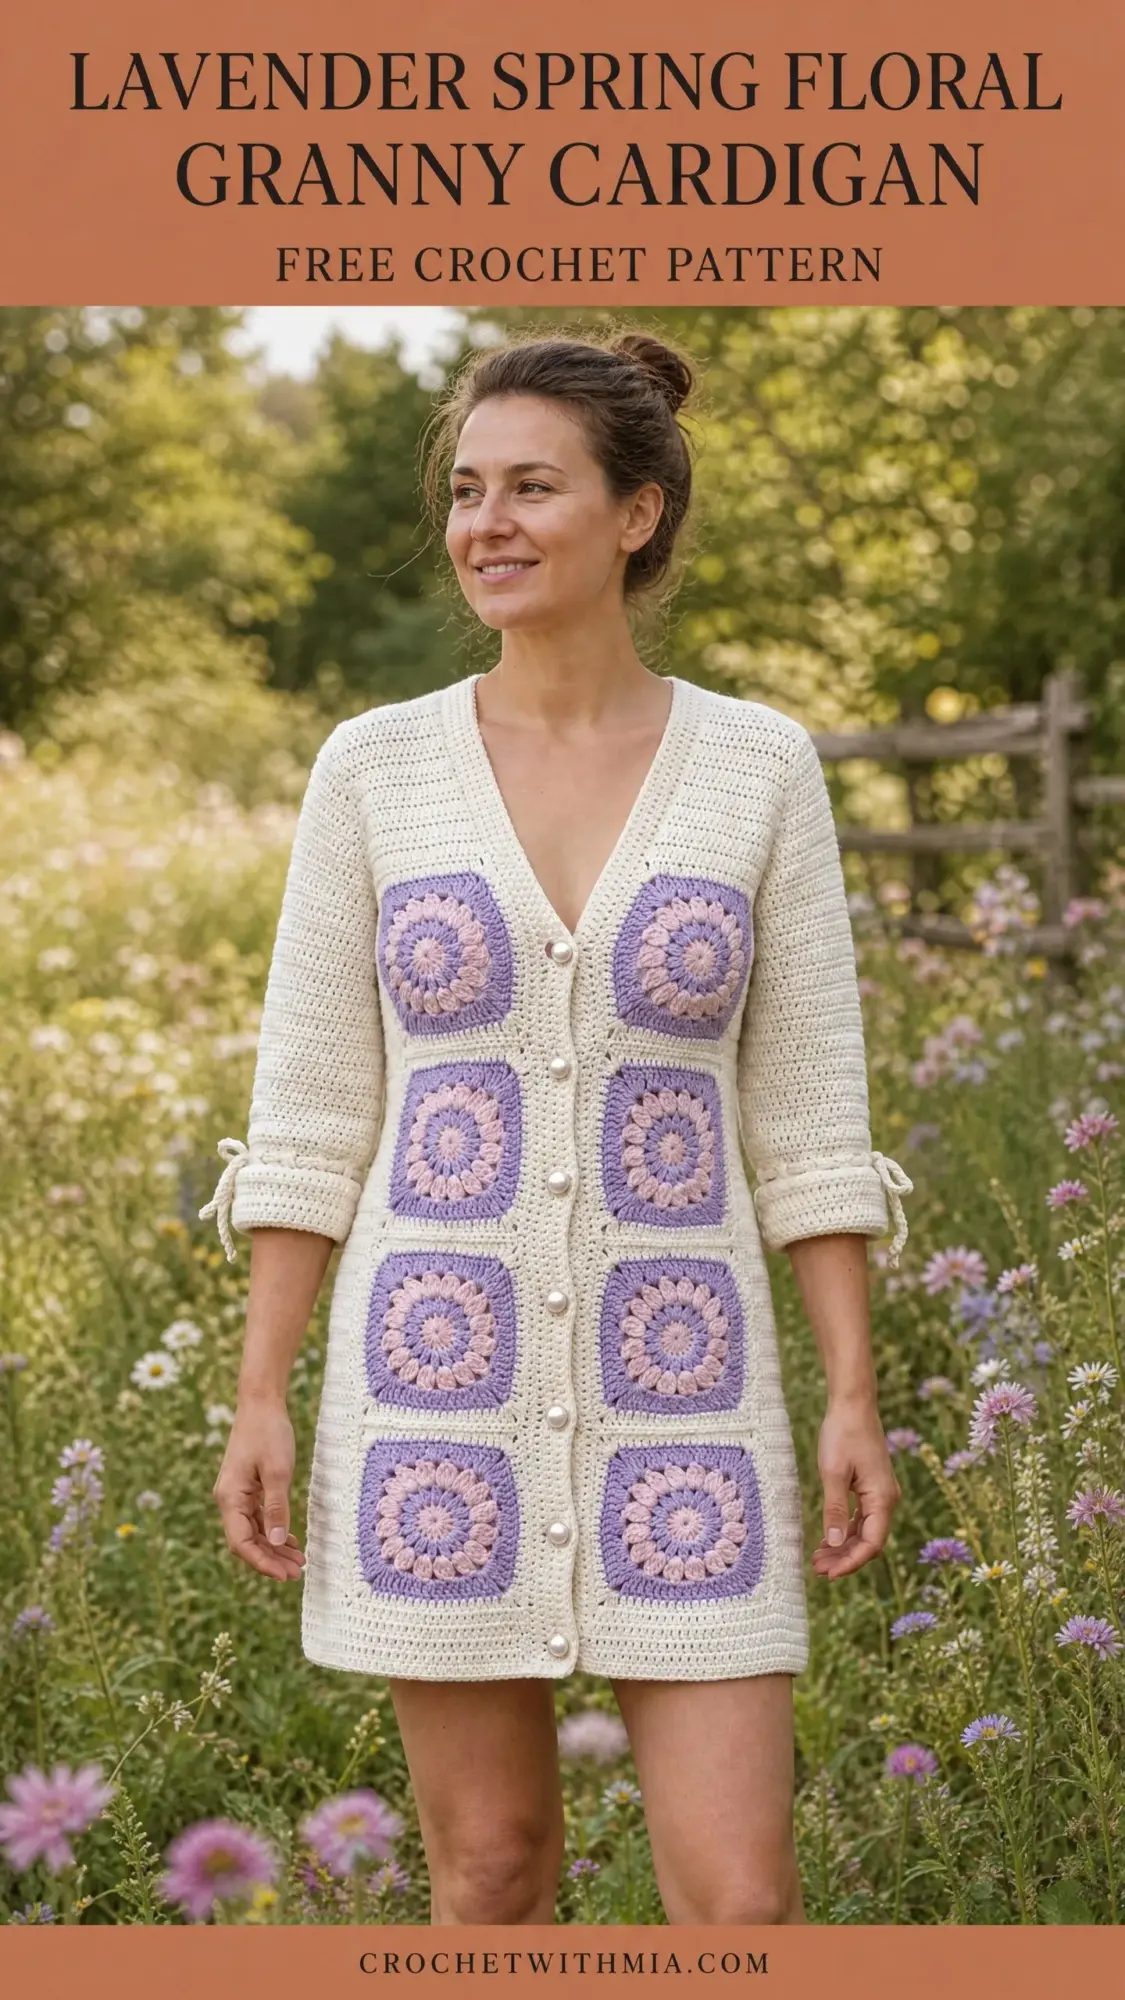
This Lavender Spring Floral Granny Cardigan is a labor of love. It asks for your time, your attention, and your patience. But what you get in return is a garment that tells a story, turns heads, and feels like a warm hug every time you wear it.
I hope you enjoy making this as much as I enjoyed designing it. Every stitch is an opportunity to slow down and create something meaningful with your hands.
Thank you so much for choosing to make this pattern. I truly appreciate you being here. If you finish your cardigan, I would absolutely love to see it. Tag me on Instagram or share a photo in my Facebook group. Seeing your creations is the highlight of my day.
If this pattern speaks to you, save it to your Pinterest boards so you can find it when you are ready to cast on. And please drop a comment below when you make it. I cannot wait to hear how yours turns out!