
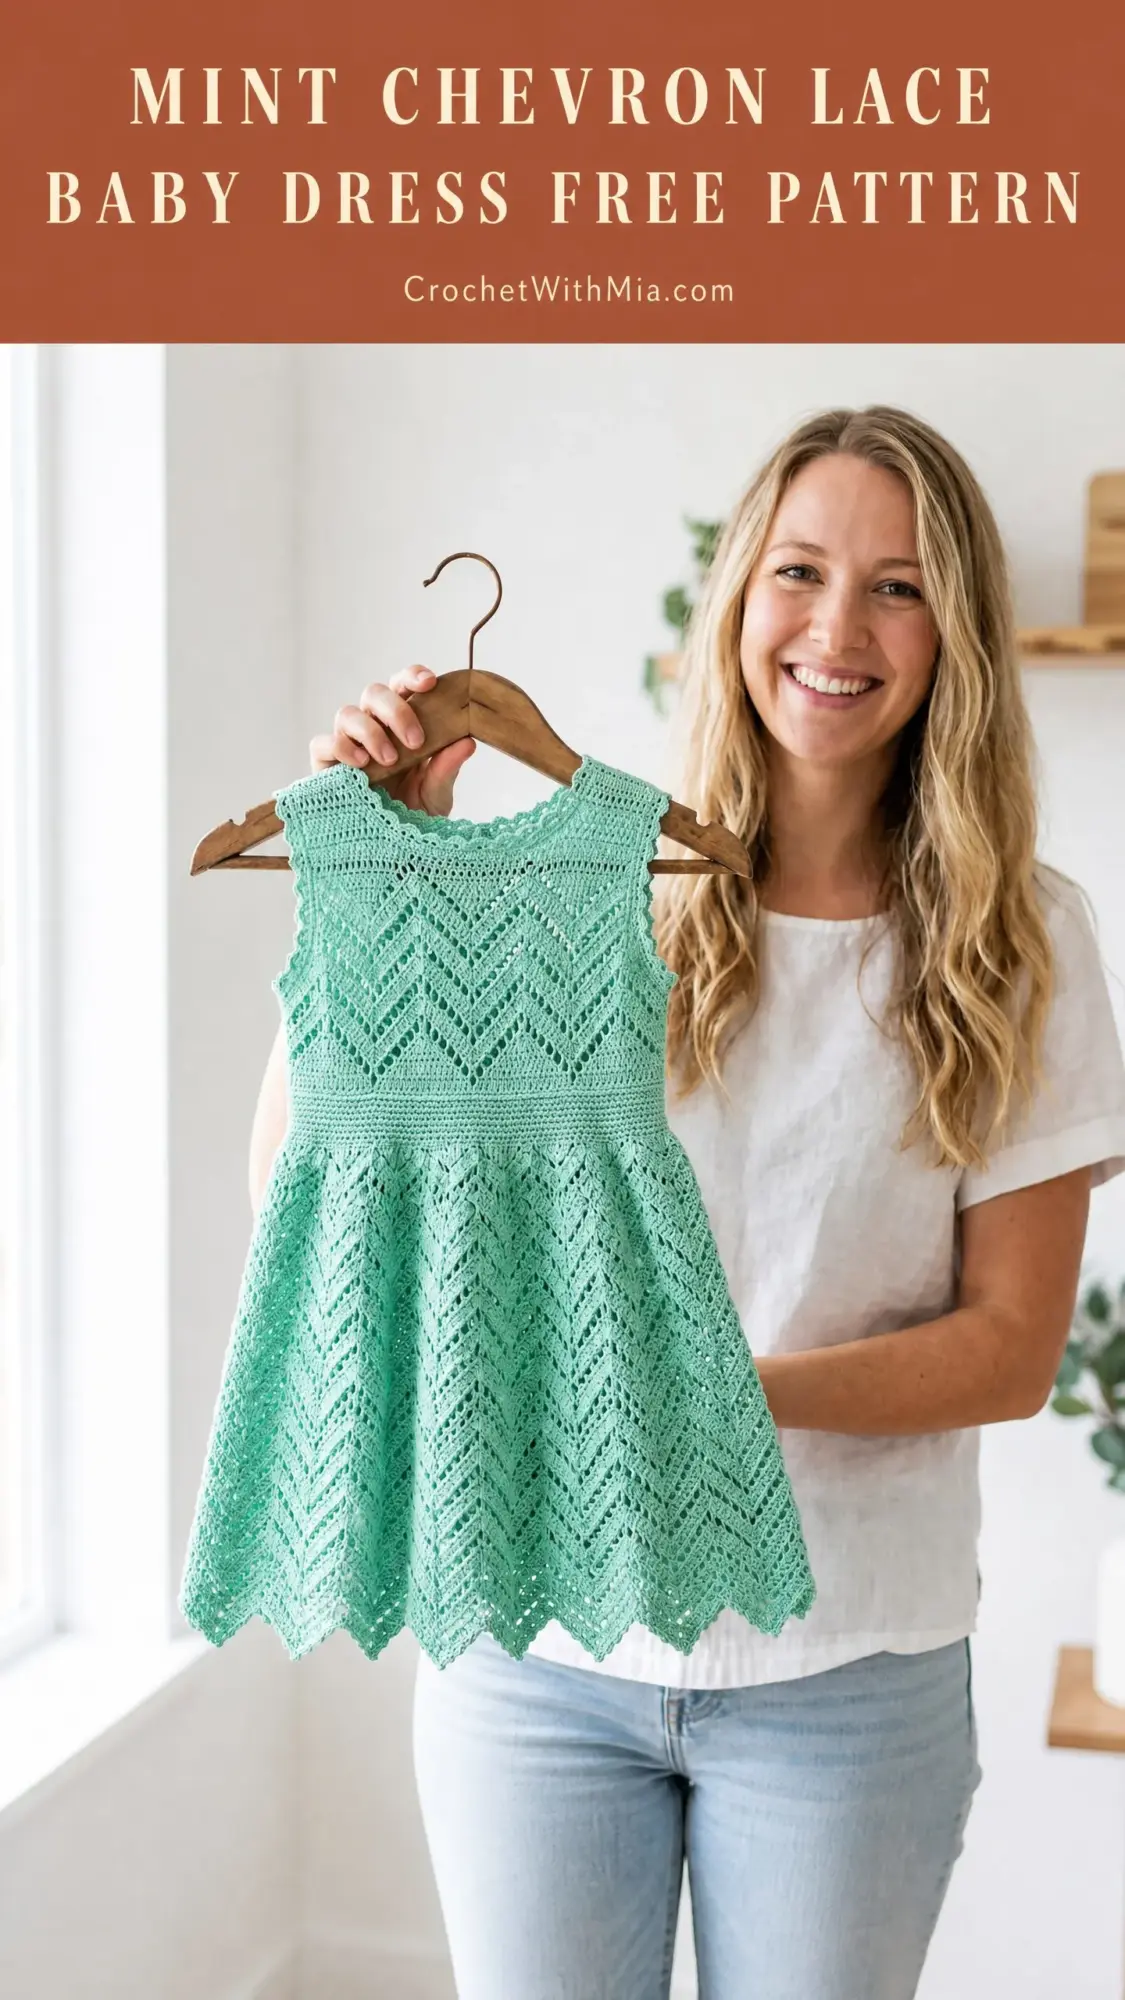
When I sat down to design this dress, I had a very specific vision in mind. I wanted something heirloom-quality that could be made in multiple sizes, feature that gorgeous chevron lace texture throughout, and still be approachable for intermediate crocheters who have a few projects under their belt. The zigzag pattern needed to flow seamlessly from bodice to skirt, creating those beautiful scalloped points at the hem that look like they belong in a vintage baby boutique.
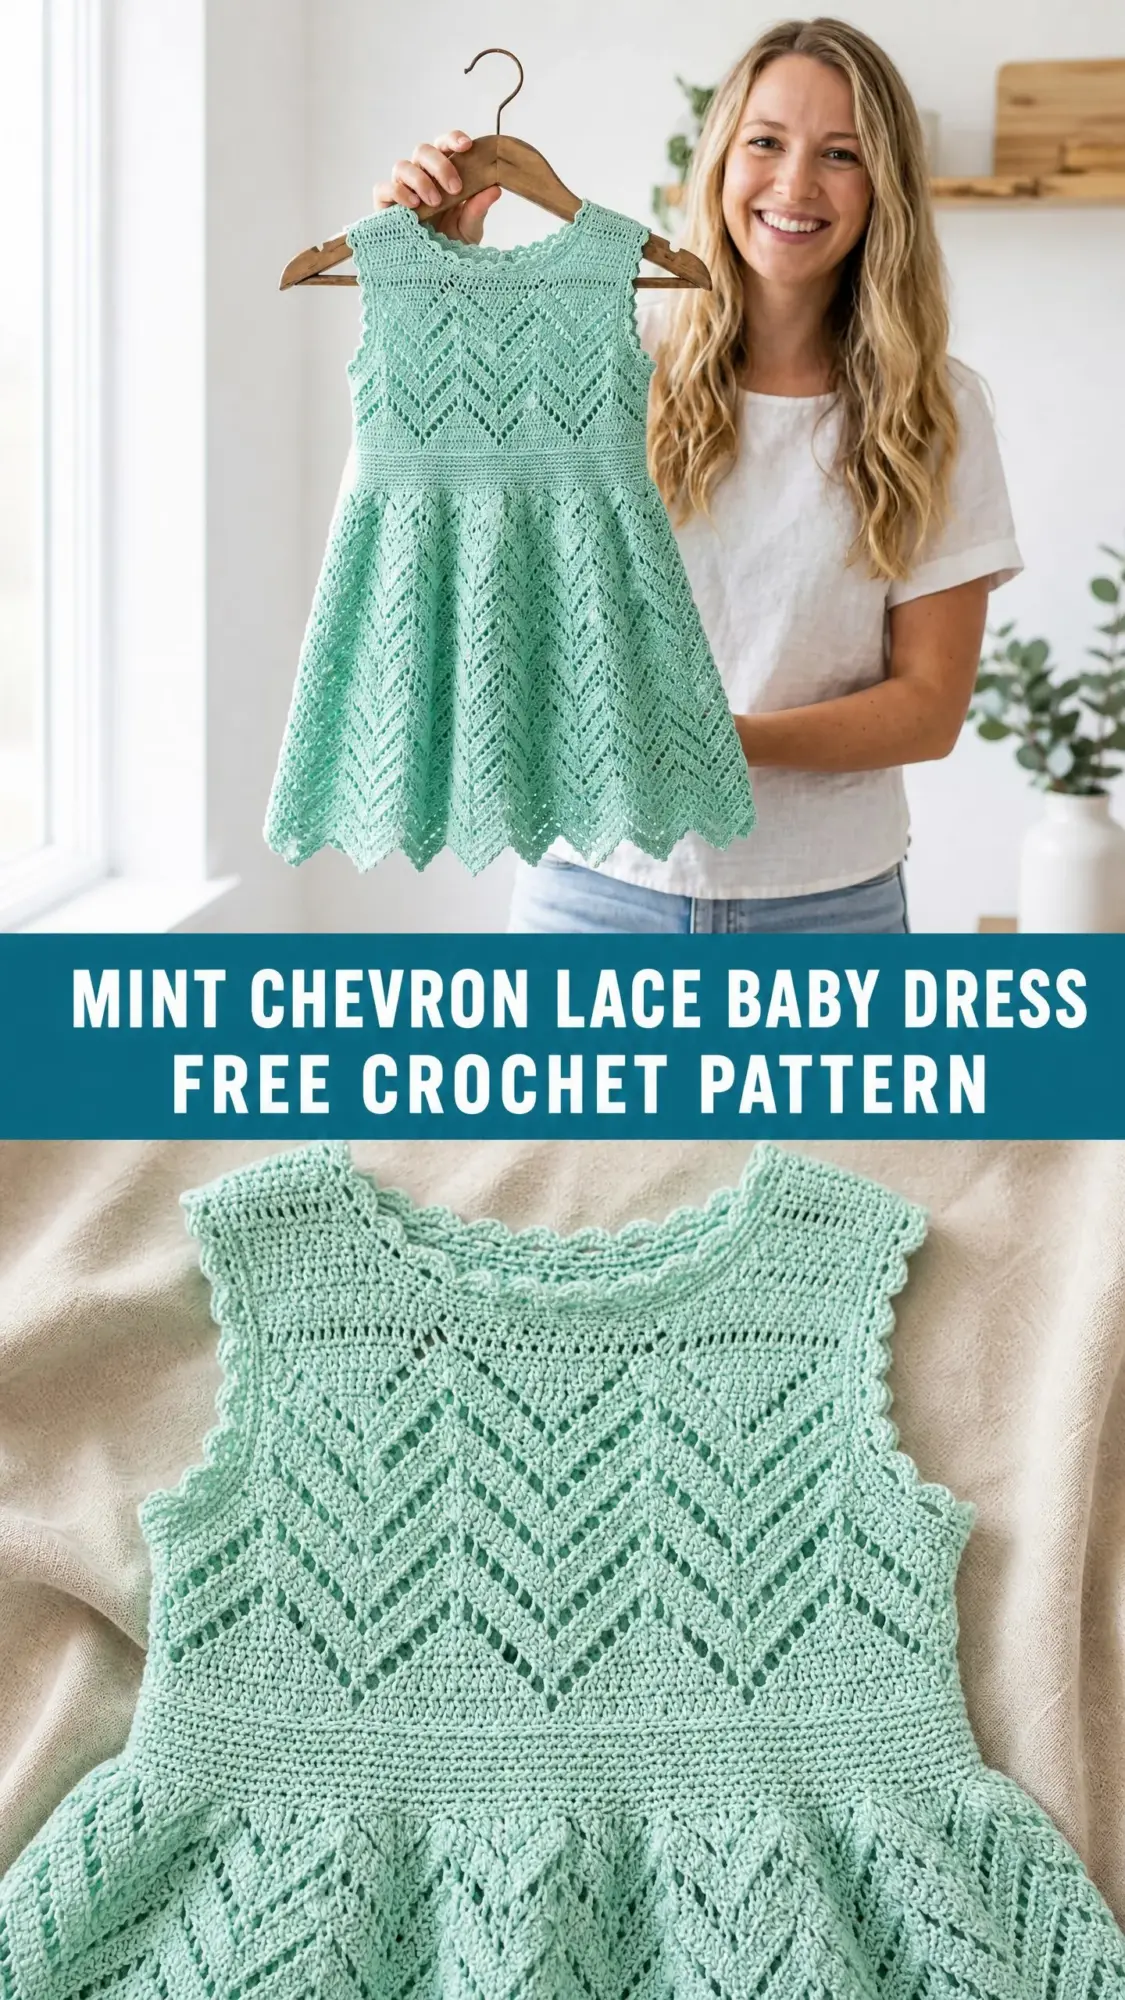
I spent a lot of time working out the math so the chevron repeats would line up perfectly at every size. The waistband needed to create that sweet gathered transition between the fitted bodice and the flowy A-line skirt. And those shell edging details at the neckline and armholes? They had to be just delicate enough to complement the lace without overwhelming it.
I am SO pleased with how this turned out! The mint green color gives it such a fresh, springtime feel, and the construction is completely seamless since you work the whole thing in the round from the top down. No seaming, no buttons, no zippers. Just slip it over baby’s head and go.
About This Crochet Pattern
This baby dress crochet pattern creates a stunning sleeveless dress featuring chevron lace throughout the bodice and skirt. The dress is worked from the top down, starting at the neckline with a flat yoke section that gets joined into the round at the underarms. From there, you work straight down through the bodice, a textured waistband, and into a full A-line skirt that finishes with naturally forming scallop points at the hem.
The chevron lace stitch creates that signature zigzag texture you see running vertically through the entire garment. Each chevron has a peak at the top (the upward point) and a valley at the bottom (the downward point), and these line up round after round to create continuous wavy lines.
Sizes included: 6 months, 12 months, 18 months, and 24 months
Finished measurements:
All sizes include approximately 1 inch of positive ease built in.
Skill Level
This is an intermediate crochet pattern. You should be comfortable with joining rounds, working lace repeats consistently, and reading stitch counts. If you have completed two or three projects involving shells or lace stitches, you can absolutely tackle this dress with patience and attention to detail.
The chevron lace stitch itself is not difficult once you get the rhythm down. The tricky part is maintaining your repeat alignment across every round. Take your time, use stitch markers generously, and count often.
Time estimate: Approximately 10 to 16 hours depending on your experience level and which size you are making.
Materials Needed
Yarn: DK weight yarn (CYCA weight 3) in mint or seafoam green
Yarn suggestions:
Choose any DK weight yarn with good stitch definition. Avoid fuzzy or halo yarns since they will obscure the lace details.
Hook: US size E-4 / 3.5 mm crochet hook, or size needed to obtain gauge
Notions:
Gauge
20 stitches and 22 rounds = 4 inches in single crochet worked in the round, after blocking
For the lace pattern: one full chevron repeat (12 stitches) = 2.4 inches wide, and 6 rounds of chevron lace = 2 inches tall, after blocking.
Gauge is mandatory for this garment. Even small deviations will significantly affect the chest circumference and overall length. Swatch in the round and block your swatch before measuring. I know swatching feels tedious, but trust me on this one.
Abbreviations
Let me walk you through all the abbreviations used in this pattern. I will define each one with its full name and a plain-English explanation.
Special Stitches
Chevron Lace Repeat
This is the core stitch pattern of the entire dress. It is worked over a multiple of 12 stitches, and each repeat creates one zigzag point. Here is exactly how it works:
Step 1: Work (sc, ch 2, sc) all into the same stitch. This creates the peak of the chevron, the upward point.
Step 2: Work dc into each of the next 2 stitches.
Step 3: Work hdc into the next stitch.
Step 4: Work sc into each of the next 2 stitches.
Step 5: Work sc2tog over the next 2 stitches. This creates the valley of the chevron, the downward point.
Step 6: Work sc into each of the next 2 stitches.
Step 7: Work hdc into the next stitch.
Step 8: Work dc into each of the next 2 stitches.
Now return to Step 1 for the next repeat.
Important note: When working this repeat in subsequent rounds, the (sc, ch 2, sc) peak is always worked into the ch-2 space of the previous round’s peak, and the sc2tog is always worked into the valley sc2tog position of the previous round. This is how the chevron lines stay aligned.
Shell Edging
This is used at the neckline and armhole edges.
Work (dc, ch 1, dc, ch 1, dc) all into the same stitch or space. This makes a 5-stitch shell. Skip 2 stitches. Slip stitch into the next stitch. Skip 2 stitches. Repeat around. Join with slip stitch to beginning.
Scallop Hem
This is worked at the hem in the final round. At each valley position, work a slip stitch. At each peak ch-sp, work (sc, hdc, dc, hdc, sc) to accentuate the scallop. This reinforces and defines the zigzag hem edge.
Pattern Instructions
Instructions are written for size 6 months. Changes for sizes 12 months, 18 months, and 24 months are given in parentheses throughout in that order.
Yoke (worked flat, then joined)
The yoke is worked back and forth in rows to create the shoulder shaping. You will join it into a round later at the underarms.
Foundation: Chain 61 (67, 73, 79).
Row 1 (RS): Sc into 2nd ch from hook and into each ch across. Turn. [60 (66, 72, 78) sc]
This foundation row is the back neckline edge.
Row 2 (WS): Ch 1, sc into first st, place marker in this st (left back shoulder corner). Sc into next 11 (12, 13, 14) sts [this is the left back panel]. Place marker (left sleeve start). Sc into next 6 (7, 8, 9) sts [left sleeve cap]. Place marker (left front shoulder corner). Sc into next 22 (24, 26, 28) sts [front panel]. Place marker (right front shoulder corner). Sc into next 6 (7, 8, 9) sts [right sleeve cap]. Place marker (right back shoulder corner). Sc into next 11 (12, 13, 14) sts [right back panel]. Sc into last st. Turn. [60 (66, 72, 78) sc]
Sections at end of Row 2:
Row 3 (RS, increase row): Ch 1, sc to 1 st before first marker, (sc, ch 1, sc) in next st (raglan increase), sm, (sc, ch 1, sc) in next st, sc across to 1 st before next marker, (sc, ch 1, sc) in next st, sm, (sc, ch 1, sc) in next st, sc across to 1 st before next marker, (sc, ch 1, sc) in next st, sm, (sc, ch 1, sc) in next st, sc across to 1 st before next marker, (sc, ch 1, sc) in next st, sm, (sc, ch 1, sc) in next st, sc to end. Turn.
Each increase row adds 8 stitches total (2 stitches at each of 4 raglan points). After Row 3: [68 (74, 80, 86) sts]
Row 4 (WS): Ch 1, sc across, working sc into each ch-1 sp. Turn. [68 (74, 80, 86) sts]
Rows 5 through 16 (18, 20, 22): Repeat Rows 3 and 4 alternately.
After Row 16 (18, 20, 22): [124 (138, 152, 166) sts]
Sections after final yoke row:
Checkpoint: After completing the yoke rows, lay your piece flat. The yoke from neckline to underarm should measure approximately 3.5 inches (4 inches, 4.5 inches, 5 inches). The fabric should be flat and the four raglan lines should be clearly visible as diagonal lines of chain spaces.
Joining Round and Underarm Separation
Now you will separate the sleeves and join the body into a round.
Joining Rnd: With RS facing, ch 1, sc across 18 (20, 22, 24) left back sts, ch 4 (underarm chain), skip all 18 (20, 22, 24) left sleeve sts, sc across 52 (58, 64, 70) front sts, ch 4 (underarm chain), skip all 18 (20, 22, 24) right sleeve sts, sc across 18 (20, 22, 24) right back sts, join with sl st to first sc to close the round. [92 (104, 116, 128) sts including 4 ch at each underarm]
Work 1 sc into each ch of the underarm chains as you pass them in the next round.
Rnd 1 after join: Ch 1, sc into each st around including the 4 underarm ch on each side. Join. [100 (112, 124, 136) sc]
Adjustment Round
The body stitch count must be a multiple of 12 for the chevron repeat.
For size 6 months: You have 100 sts. Decrease 4 sts evenly spaced: work sc2tog 4 times evenly around, sc in all other sts. [96 sc]
For size 12 months: You have 112 sts. Decrease 4 sts evenly spaced. [108 sc]
For size 18 months: You have 124 sts. Decrease 4 sts evenly spaced. [120 sc]
For size 24 months: You have 136 sts. Decrease 4 sts evenly spaced. [132 sc]
Multiples check: 96 / 12 = 8 repeats. 108 / 12 = 9 repeats. 120 / 12 = 10 repeats. 132 / 12 = 11 repeats. All correct.
Upper Bodice Chevron Lace
Work in Chevron Lace Repeat as defined in Special Stitches. Place a stitch marker in the first peak ch-2 space of the first round to track alignment.
Rnd 1 of Bodice Lace: Ch 1. Work Chevron Lace Repeat 8 (9, 10, 11) times around. Join with sl st to first sc. [96 (108, 120, 132) sts, with 8 (9, 10, 11) peak ch-2 spaces and 8 (9, 10, 11) valleys]
Rnds 2 through 10 (12, 12, 14) of Bodice Lace: Repeat Rnd 1, working each peak (sc, ch 2, sc) into the ch-2 sp of the previous round’s peak, and each valley sc2tog into the valley position.
Checkpoint: After all bodice lace rounds, the bodice section from the underarm to this point should measure approximately 3.5 inches (4 inches, 4.5 inches, 5 inches). The chevron lines should be clearly visible running up and down throughout the bodice.
Waistband
The waistband is worked in single crochet through the back loop only. This creates a raised texture band that cinches the silhouette between the bodice and skirt.
Rnd 1 of Waistband: Ch 1, sc in BLO of each st around. To transition cleanly from the lace, work into each sc and dc of the final bodice round (treat the ch-2 peak as 1 st by working sc into the ch-2 sp). Join. [96 (108, 120, 132) sc]
Rnds 2 and 3 of Waistband: Ch 1, sc in BLO of each st around. Join. [96 (108, 120, 132) sc]
Total waistband height: 3 rounds, approximately 0.5 inch.
Skirt Increase Round
To create the A-line flare, increase stitches evenly before beginning skirt lace.
Size 6 months: (sc in 3 sts, 2 sc in next st) 24 times. [120 sc]
Size 12 months: (sc in 2 sts, 2 sc in next st) 36 times. [144 sc]
Size 18 months: (sc in 4 sts, 2 sc in next st) 24 times. [144 sc]
Size 24 months: (sc in 10 sts, 2 sc in next st) 12 times. [144 sc]
Revised skirt stitch counts: 120 (144, 144, 144) sts
Skirt Chevron Lace
The skirt is worked in the same Chevron Lace Repeat as the bodice but with more repeats around and over more rounds for additional length and flare.
Rnd 1 of Skirt Lace: Ch 1. Work Chevron Lace Repeat 10 (12, 12, 12) times around. Join. [120 (144, 144, 144) sts]
Rnds 2 through 20 (22, 24, 28) of Skirt Lace: Repeat Rnd 1 of Skirt Lace, always working peaks into ch-2 spaces and valleys into valley positions of previous round. Join each round. [120 (144, 144, 144) sts]
Checkpoint: After all skirt lace rounds, the skirt section from the waistband to the bottom of the final lace round should measure approximately 7 inches (8 inches, 8.5 inches, 9.5 inches). Total dress length from shoulder should be approximately 13 inches (14.5 inches, 15.5 inches, 17 inches).
Hem Scallop Finishing Round
Work Scallop Hem round as defined in Special Stitches. At each valley position, sl st. At each peak ch-sp, work (sc, hdc, dc, hdc, sc). This final round enhances the natural zigzag hem and gives it a defined, finished edge. After this round, fasten off and weave in end.
Sleeve Cap Edging
The held sleeve stitches are finished with a single round of shell edging.
Rejoin yarn to any underarm ch stitch on the held sleeve stitches. With RS facing, ch 1, sc evenly around the armhole edge, picking up the 18 (20, 22, 24) held sleeve sts and approximately 6 (7, 8, 9) sts along the underarm chain. Join. [24 (27, 30, 33) sts approx]
Adjust to nearest multiple of 5 plus 1 if needed:
Shell Edging Rnd: (Dc, ch 1, dc, ch 1, dc) in first st (shell made), sk 2 sts, sl st in next st, sk 2 sts, rep around. Fasten off and weave in end. Repeat for second armhole.
Neckline Edging
Rejoin yarn to center back neckline with RS facing.
Neckline Pickup Rnd: Ch 1, sc evenly across the neckline foundation chain edge, picking up approximately 60 (66, 72, 78) sts. Join. Adjust count to nearest multiple of 5 if needed by working evenly spaced incs or decs.
Shell Edging Rnd: (Dc, ch 1, dc, ch 1, dc) in first st, sk 2 sts, sl st in next st, sk 2 sts, rep around. Fasten off and weave in end.
Size Customization Tips
To add length without changing width: Simply add more rounds of Chevron Lace to the skirt section before the Scallop Hem round. Each 2 rounds of lace adds approximately 0.67 inch of length.
To go up one size beyond 24 months: Increase the foundation chain by 6 stitches, add one more raglan increase row, and add one more chevron repeat in the skirt. Adjust yarn quantity by approximately 50 to 75 additional yards.
To change overall proportions: If you want a longer bodice relative to skirt, add 2 to 4 more rounds of bodice lace before the waistband. Reduce skirt lace rounds by the same number to maintain total length.
Finishing and Blocking
Weave in all ends securely using a yarn needle, running tails in opposite directions through the backs of stitches.
Wet blocking is strongly recommended. Soak the finished dress in cool water with a small amount of no-rinse wool wash for 15 to 20 minutes. Gently squeeze out excess water without wringing. Roll in a clean dry towel and press to remove more moisture. Lay flat on a blocking mat. Pin the hem points out to exaggerate the scallop chevron hem into its intended shape. Pin the neckline open and smooth the bodice flat. Allow to dry completely before removing pins.
This step transforms the dress and opens the lace dramatically. Do not skip it!
Do not iron directly. If needed, use a pressing cloth and steam iron held 1 to 2 inches above the surface.
Care Instructions
Hand wash in cool water or machine wash on gentle cycle in a mesh laundry bag. Lay flat to dry. Do not tumble dry. Do not bleach. Store folded flat to preserve the lace structure.
You Did It!
Thank you so much for choosing this pattern for your next baby project. I truly hope you love making this little dress as much as I loved designing it. There is something so satisfying about watching those chevron lines build round after round.
If you make this Mint Chevron Lace Baby Dress crochet pattern, I would absolutely love to see it! Tag me on Instagram or share a photo in my Facebook group. Seeing your finished projects is honestly the best part of my day.
Go ahead and save this pattern to your Pinterest boards so you can find it easily when you are ready to start. And if you have any questions or want to share how yours turned out, drop a comment below. I read every single one and I am always happy to help!