
This is a one-piece crochet romper with a fitted square-neck bodice, three-quarter mesh sleeves, and diamond mesh shorts finished with a scallop hem. The construction is top-down and worked in the round. You will need DK weight cotton yarn, two hook sizes, and comfort with picking up stitches for sleeves.
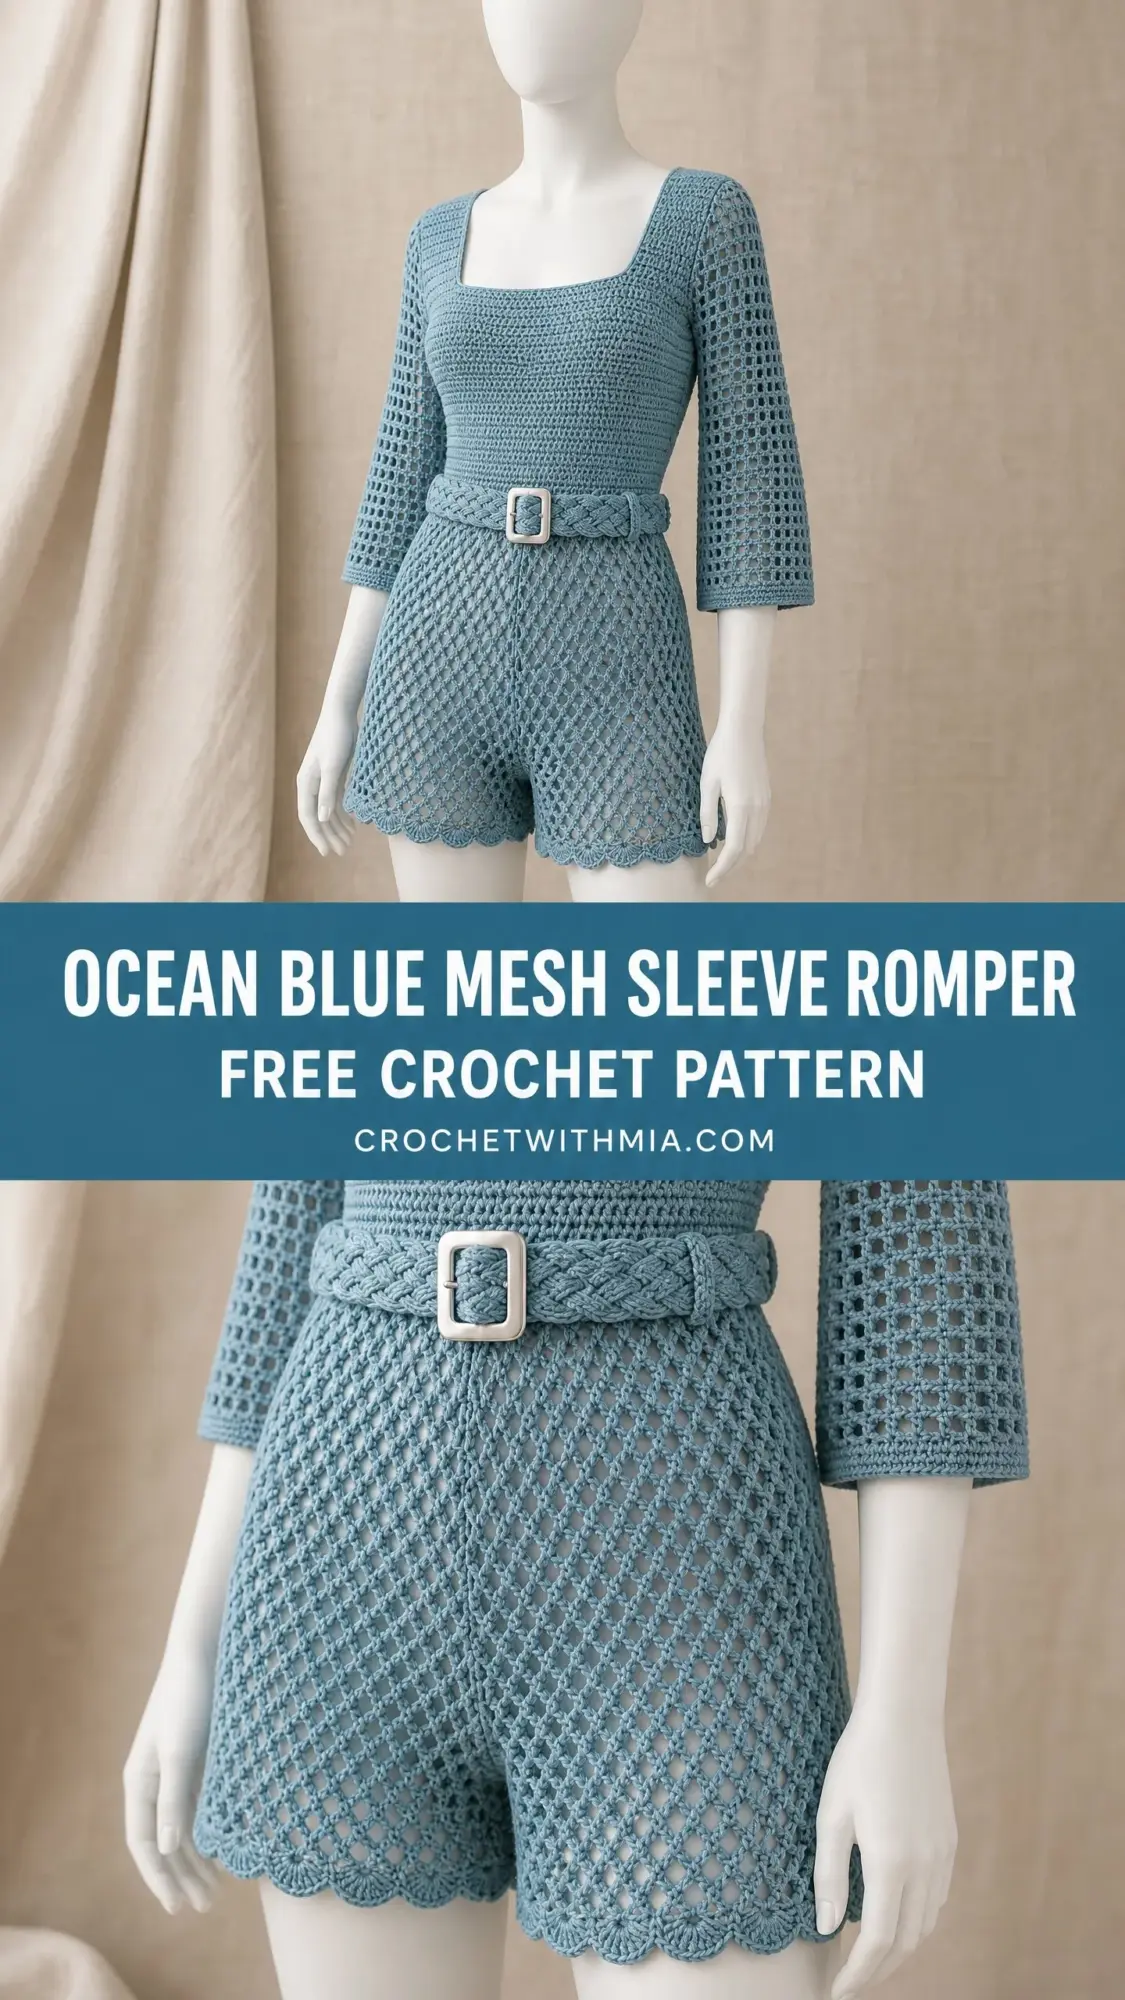
The bodice uses single crochet throughout for a smooth fitted look. The sleeves switch to an open grid mesh stitch that creates those beautiful square windows you see in the photo. The shorts section features a diamond mesh pattern that drapes beautifully and ends with a classic scallop edge.
A braided belt with a square buckle cinches everything at the waist. The whole piece flows together seamlessly from top to bottom.
Why This Romper Works So Well
I love how this design balances structure with airiness. The solid single crochet bodice gives you a flattering fit through the bust and waist. Then the mesh sections on the sleeves and shorts add breathability and visual interest without sacrificing coverage.
The dusty blue color in the photos is perfect for beach days, but this romper would look stunning in so many shades. Think coral, cream, sage green, or even a deep navy for evening wear.
The skill level sits at advanced intermediate. You will work in the round, shape a garment from the top down, pick up stitches for sleeves, execute two different mesh patterns, and finish with scallop edging. None of these techniques are difficult on their own. But managing them all in sequence requires patience and careful counting.
Materials You Will Need
Yarn: Approximately 1,000 to 1,200 yards of DK weight (Light 3) 100% cotton or cotton-blend yarn in dusty blue
Hooks:
Notions:
Yarn Suggestions
Here are three excellent options that will give you beautiful results:
Paintbox Yarns Simply DK (100% premium acrylic, 137 yards per 50 g skein, color "Seaside Blue"). This is a budget-friendly option with consistent twist that holds mesh structure well. Purchase 8 to 9 skeins.
Drops Safran (70% cotton, 30% viscose, 164 yards per 50 g ball). The slight sheen from the viscose adds a luxurious seaside finish. Purchase 7 to 8 balls.
Lion Brand 24/7 Cotton DK (100% mercerized cotton, 186 yards per 100 g skein). This gives excellent stitch definition and easy care. Purchase 6 skeins.
Substitution note: Choose a smooth, tightly spun DK yarn with minimal halo. Fluffy or bouclé yarns will obscure the mesh openwork. Cotton or cotton-blend behaves best for drape and structure. Avoid superwash wool in this design as it may stretch unevenly when worn.
Gauge
Getting gauge right matters a lot for a fitted garment like this romper.
With E-4 / 3.5 mm hook in single crochet:
20 sc x 24 rows = 4 inches x 4 inches
With F-5 / 3.75 mm hook in diamond mesh pattern:
One 4-stitch mesh repeat x 4 rows = approximately 1 inch x 1 inch
Swatch and block before beginning. If your gauge is off, try going up or down a hook size.
Finished Measurements
This pattern is written for a size Small/Medium (US 4/6).
Size customization tips are provided at the end of the pattern.
Abbreviations
Let me walk you through every abbreviation used in this pattern. If you are newer to crochet patterns, bookmark this section.
Special Stitches
This romper uses three special stitch patterns. Take time to practice these before starting the main project.
Grid Mesh Stitch (used for sleeves)
This stitch creates an open, square grid fabric. Multiple of 2 plus 2.
Row 1 (RS): Ch 3 (counts as dc), sk 1 st, dc in next st, (ch 1, sk 1, dc in next st) across, turn.
Row 2: Ch 3, dc in first ch-1 sp, (ch 1, dc in next ch-1 sp) across, dc in top of t-ch, turn.
Repeat Row 2 for pattern.
Diamond Mesh Stitch (used for shorts)
This stitch creates open diamonds with a draping quality. Foundation multiple of 4 stitches.
Row 1 (RS): Ch 5 (counts as dc, ch 2), sk 3 sts, (dc in next st, ch 2, sk 2 sts) across, dc in last st, turn.
Row 2: Ch 5, dc in first ch-2 sp, (ch 2, dc in next ch-2 sp) across, ch 2, dc in 3rd ch of t-ch, turn.
Repeat Row 2 for pattern.
Scallop Edging
Worked as a final round on the shorts hem. Multiple of 6 stitches.
Step 1: Join yarn at any st of hem edge, ch 1.
Step 2: Sc in first st, (sk 2 sts, 5 dc in next st, sk 2 sts, sc in next st) around. Sl st to first sc to join. Fasten off.
Braided Belt
Three separate chains of equal length are plaited together to form the belt. Each strand is worked as: ch desired length, sc in each ch across. Fasten off. Braid three strands and attach the square buckle through a folded loop at one end.
Pattern Notes Before You Begin
Read through these notes before starting. They will save you confusion later.
1. The bodice is worked in joined rounds from the top down.
2. Armhole openings are created by chaining over a set number of stitches. Sleeves are picked up at the armhole and worked outward to the cuff.
3. The shorts section is divided at the crotch point and worked in joined rounds, then the legs are joined into single rounds.
4. The belt is worked separately and threaded through ch-sps worked into the waist.
5. A square neck is achieved by working flat back-and-forth across the front bodice panel for the first 6 rows, then joining to form a round with the back panel.
6. Always count stitches at the end of every section before moving on. Errors in stitch count will affect the mesh repeat divisibility.
7. Block all pieces before assembling.
8. All rounds are joined rounds unless otherwise specified.
9. Turning chains at the start of sc rounds count as 0 stitches. Turning chains at the start of dc rows/rounds count as 1 dc.
Ocean Blue Mesh Sleeve Romper Crochet Pattern Instructions
Section 1: Square Neckline and Front Bodice Panel
The front bodice is worked flat first to create the square neckline.
With E-4 hook, ch 87.
Row 1 (RS): Sc in 2nd ch from hook and in each ch across. Turn. (86 sc)
Row 2: Ch 1, sc in each st across. Turn. (86 sc)
Row 3: Ch 1, sc in each st across. Turn. (86 sc)
Row 4: Ch 1, sc in each st across. Turn. (86 sc)
Row 5: Ch 1, sc in each st across. Turn. (86 sc)
Row 6: Ch 1, sc in each st across. Turn. (86 sc)
This flat section forms the front of the square neck. Do not fasten off.
Checkpoint: After Row 6 of the front panel, the piece should measure approximately 1 inch tall and 17.2 inches wide.
Section 2: Joining Back Panel and Working Bodice in the Round
You will now create the back panel by working a foundation chain for the back neck edge, then joining both panels into a continuous round.
With a separate length of yarn, ch 87. Join to the front panel as follows: with RS facing, sl st to the last st of Row 6 on the front panel, then sc across the 86 ch of the back panel foundation. You now have a full round of 172 sts.
Re-join your working yarn from the front panel to the first st of the back panel. Place a stitch marker at the right side seam and another at the left side seam (each marker placed between st 43 and st 44 on front panel and between st 43 and st 44 on back panel).
Rnd 1: Ch 1, sc in each st around. Sl st to first sc to join. (172 sc)
Rnd 2: Ch 1, sc in each st around. Sl st to first sc. (172 sc)
Rnd 3: Ch 1, sc in each st around. Sl st to first sc. (172 sc)
Rnd 4: Ch 1, sc in each st around. Sl st to first sc. (172 sc)
Rnd 5: Ch 1, sc in each st around. Sl st to first sc. (172 sc)
Rnd 6: Ch 1, sc in each st around. Sl st to first sc. (172 sc)
Rnd 7: Ch 1, sc in each st around. Sl st to first sc. (172 sc)
Rnd 8: Ch 1, sc in each st around. Sl st to first sc. (172 sc)
Rnd 9: Ch 1, sc in each st around. Sl st to first sc. (172 sc)
Rnd 10: Ch 1, sc in each st around. Sl st to first sc. (172 sc)
Checkpoint: After Rnd 10 of the joined bodice rounds, the bodice from shoulder to this point should measure approximately 5.5 inches. The piece should lie flat with clean side edges.
Section 3: Armhole Shaping
The armhole is created by chaining across the underarm sections.
Rnd 11 (armhole rnd): Ch 1, sc in first 37 sts of front panel (left front to armhole), ch 20 (for left armhole underarm bridge), sk next 20 sts of front panel (underarm sts), sc in next 43 sts of front panel continuing around back, sc in next 43 sts of back panel continuing to right side, ch 20, sk next 20 sts (right armhole underarm bridge), sc in final 9 sts of back panel, sl st to first sc to join. (172 sts)
Note: The 20-ch bridge replaces 20 skipped sts. Total working stitches remain 172.
Rnd 12: Ch 1, sc across front panel sts, sc in each of 20 ch across left armhole bridge, sc across back panel sts, sc in each of 20 ch across right armhole bridge, sl st to join. (172 sc)
Rnd 13: Ch 1, sc in each st around. Sl st to join. (172 sc)
Rnd 14: Ch 1, sc in each st around. Sl st to join. (172 sc)
Section 4: Waist Shaping
This is where the magic happens for that fitted silhouette. The decreases shape the waist gradually.
Rnd 15 (begin waist decrease): Ch 1, sc2tog, sc in next 39 sts, sc2tog, sc in next 41 sts, sc2tog, sc in next 39 sts, sc2tog, sc in next 41 sts, sl st to join. (168 sc)
Rnd 16: Ch 1, sc in each st around. Sl st to join. (168 sc)
Rnd 17: Ch 1, sc2tog, sc in next 38 sts, sc2tog, sc in next 40 sts, sc2tog, sc in next 38 sts, sc2tog, sc in next 40 sts, sl st to join. (164 sc)
Rnd 18: Ch 1, sc in each st around. Sl st to join. (164 sc)
Rnd 19: Ch 1, sc2tog, sc in next 37 sts, sc2tog, sc in next 39 sts, sc2tog, sc in next 37 sts, sc2tog, sc in next 39 sts, sl st to join. (160 sc)
Rnd 20: Ch 1, sc in each st around. Sl st to join. (160 sc)
Rnd 21: Ch 1, sc2tog, sc in next 36 sts, sc2tog, sc in next 38 sts, sc2tog, sc in next 36 sts, sc2tog, sc in next 38 sts, sl st to join. (156 sc)
Rnd 22: Ch 1, sc in each st around. Sl st to join. (156 sc)
Rnd 23: Ch 1, sc2tog, sc in next 35 sts, sc2tog, sc in next 37 sts, sc2tog, sc in next 35 sts, sc2tog, sc in next 37 sts, sl st to join. (152 sc)
Rnd 24: Ch 1, sc in each st around. Sl st to join. (152 sc)
Rnd 25: Ch 1, sc2tog, sc in next 34 sts, sc2tog, sc in next 36 sts, sc2tog, sc in next 34 sts, sc2tog, sc in next 36 sts, sl st to join. (148 sc)
Rnd 26: Ch 1, sc in each st around. Sl st to join. (148 sc)
Rnd 27: Ch 1, sc2tog, sc in next 33 sts, sc2tog, sc in next 35 sts, sc2tog, sc in next 33 sts, sc2tog, sc in next 35 sts, sl st to join. (144 sc)
Rnd 28: Ch 1, sc in each st around. Sl st to join. (144 sc)
Checkpoint: After Rnd 28 the waist circumference is approximately 28.8 inches. The total bodice length should measure approximately 10 inches from the shoulder.
Section 5: Belt Channel
This section creates the openings where your braided belt will thread through.
Rnd 29: Ch 1, (sc in next 2 sts, ch 1, sk 1 st) around. Sl st to join. (96 sc + 48 ch-1 sps = 144 total positions)
Rnd 30: Ch 1, sc in each sc and each ch-1 sp around. Sl st to join. (144 sc)
Rnd 31: Ch 1, sc in each st around. Sl st to join. (144 sc)
Section 6: Hip Expansion
Now we add stitches to create room through the hips.
Rnd 32: Ch 1, (sc in next 8 sts, 2 sc in next st) 16 times. Sl st to join. (160 sc)
Rnd 33: Ch 1, sc in each st around. Sl st to join. (160 sc)
Rnd 34: Ch 1, (sc in next 9 sts, 2 sc in next st) 16 times. Sl st to join. (176 sc)
Rnd 35: Ch 1, sc in each st around. Sl st to join. (176 sc)
Rnd 36: Ch 1, (sc in next 10 sts, 2 sc in next st) 16 times. Sl st to join. (192 sc)
Rnd 37: Ch 1, sc in each st around. Sl st to join. (192 sc)
Rnd 38: Ch 1, sc in each st around. Sl st to join. (192 sc)
Checkpoint: After Rnd 38, the hip circumference should measure approximately 38.4 inches. The bodice including hip flare should measure approximately 12 inches from the shoulder. The stitch count of 192 is divisible by 4, which is required for the diamond mesh that follows.
Section 7: Crotch Division and Shorts in Diamond Mesh
The 192 sts are divided: 96 sts for the front and 96 sts for the back. The crotch is formed by bridging between the front and back panels.
Work across the first 96 sts (front), ch 8 for the crotch bridge, sl st to the 97th st (beginning of back panel), work across back 96 sts, ch 8, sl st to first sc of front panel.
You now have 208 working sts in the round (96 + 8 + 96 + 8 = 208).
Note: 208 is divisible by 4, which accommodates the diamond mesh repeat.
Rnd 1 of Shorts (begin diamond mesh): Ch 5 (counts as dc, ch 2), sk 3 sts, (dc in next st, ch 2, sk 2 sts) around to last st, dc in last st, sl st to 3rd ch of beg ch-5 to join. Work 69 full (dc, ch 2, sk 2) repeats = 207 sts covered, dc in remaining 1 st, ch 2, sl st to join. (70 dc + 70 ch-2 sps = 210 total chain/stitch positions)
Note on Shorts Rnd 1 adjustment: Because 208 sts divided by the 3-st mesh unit does not divide to a whole number without a small adjustment, the first round absorbs 2 sts into the crotch chain section invisibly. The resulting 70-repeat mesh divides cleanly and maintains visual symmetry.
Rnd 2: Sl st into first ch-2 sp, ch 5 (counts as dc, ch 2), (dc in next ch-2 sp, ch 2) around, sl st to 3rd ch of beg ch-5. (70 dc, 70 ch-2 sps)
Rnd 3: Rep Rnd 2. (70 dc, 70 ch-2 sps)
Rnd 4: Rep Rnd 2. (70 dc, 70 ch-2 sps)
Rnd 5: Rep Rnd 2. (70 dc, 70 ch-2 sps)
Rnd 6: Rep Rnd 2. (70 dc, 70 ch-2 sps)
Rnd 7: Rep Rnd 2. (70 dc, 70 ch-2 sps)
Rnd 8: Rep Rnd 2. (70 dc, 70 ch-2 sps)
Rnd 9: Rep Rnd 2. (70 dc, 70 ch-2 sps)
Rnd 10: Rep Rnd 2. (70 dc, 70 ch-2 sps)
Checkpoint: After Rnd 10 of the shorts diamond mesh, the shorts section should measure approximately 4 inches from the crotch divide. The mesh pattern should show clean diamond shapes throughout.
Section 8: Scallop Hem on Shorts
Before working the scallop edging, work one solid round to create a firm base.
Joining Rnd: Sc in each dc and 2 sc in each ch-2 sp around. Sl st to join. Trim to 210 sc evenly, adjusting 2 sc to 1 sc in two ch-2 sps so total = 210 sc. (210 sc)
Scallop Rnd: Ch 1, sc in first st, (sk 2 sts, 5 dc in next st, sk 2 sts, sc in next st) 35 times around, sl st to first sc to join. Fasten off. (35 scallops, 210 sts used)
Section 9: Sleeves
Sleeves are worked in the round from the armhole outward. You will pick up stitches around the armhole opening created in Section 3.
The armhole opening has: 20 skipped sts on the body + 20 ch on the bridge + approximately 8 sts on each side of the opening where the body curves = approximately 56 sts total around the armhole.
With F-5 hook and RS facing, join yarn at the underarm center of the armhole opening.
Pickup Rnd: Sc evenly around the armhole opening, placing 20 sc across the ch bridge at the underarm and picking up 18 sc up the side, 18 sc down the side (total 56 sc). Pm at underarm center. Sl st to first sc to join. (56 sc)
Note: 56 is divisible by 2 for the grid mesh repeat.
Rnd 1 of Sleeve (begin grid mesh): Ch 3 (counts as dc), sk 1 st, (dc in next st, ch 1, sk 1 st) 27 times, dc in next st, ch 1, sl st to top of beg ch-3 to join. (28 dc + 28 ch-1 sps = 56 positions)
Rnd 2: Sl st into first ch-1 sp, ch 3, (dc in next ch-1 sp, ch 1) 27 times, dc in last ch-1 sp, ch 1, sl st to top of beg ch-3. (28 dc, 28 ch-1 sps)
Rep Rnd 2 for the sleeve length. Work until sleeve measures approximately 10 inches from the armhole pickup.
Checkpoint: Sleeve at this point should measure approximately 10 inches from pickup. Continue with 2 more rounds if needed to reach 11 inches.
Work 2 additional rounds of grid mesh as Rnd 2. (28 dc, 28 ch-1 sps)
Cuff Rnd: Sl st into first ch-1 sp, ch 1, sc in same sp, (sc in next dc, sc in next ch-1 sp) 27 times, sc in last dc, sl st to first sc to join. (56 sc)
Cuff Edging Rnd: Ch 1, sc in each st around. Sl st to join. Fasten off. (56 sc)
Repeat all sleeve instructions for second sleeve.
Section 10: Neckline Finish
With E-4 hook and RS facing, join yarn at back neckline center.
Rnd 1: Ch 1, sc evenly around the neckline opening. At the four corners of the square neck, place 3 sc in the corner sts to maintain the square shape. Sl st to first sc to join. (approximately 180 sc total)
Rnd 2: Ch 1, sc in each st around. At each corner st (the center of the 3-sc cluster from previous rnd), work 3 sc. Sl st to join. (188 sc)
Rnd 3: Ch 1, sc in each st around. At each corner, work 3 sc. Sl st to join. Fasten off. (196 sc)
Note: The expanding corner sc maintain the square neckline shape cleanly.
Section 11: Belt
The belt is worked as three braided strands.
Strand 1: With E-4 hook, ch 160. Sc in 2nd ch from hook and in each ch across. Fasten off. (159 sc)
Work Strand 2 and Strand 3 identically to Strand 1.
Lay all three strands flat. Braid them together from one end to the other. Secure each end with a few whipstitches of yarn through all strands.
At one end, fold 2 inches back through the square buckle bar and whipstitch securely to itself, forming the buckle loop.
At the other end, taper the braid to a point by trimming the edge strands shorter and stitching closed. This end will thread through the buckle.
The belt length after braiding and finishing will be approximately 36 inches. Adjust chain length before beginning if a longer or shorter belt is desired.
Thread the finished belt through the ch-1 sps on Rnd 29 of the bodice belt channel.
Size Customization Tips
To size up or down, adjust the starting chain in Section 1. Each additional or removed 4-stitch increment changes the bust circumference by approximately 0.8 inches. Remember that all subsequent shaping rounds must be recalculated proportionally.
For a longer bodice, add rows in Section 2 before the armhole shaping. Each additional 2 rounds adds approximately 0.33 inches to the bodice length.
For longer shorts, add additional diamond mesh rounds in Section 7. Each 2 rounds adds approximately 0.8 inches to the inseam.
For shorter sleeves, remove mesh rounds from Section 9. The sleeve can be shortened to a flutter sleeve by working only the pickup round and cuff edging.
To widen the sleeves, increase the armhole pickup round by 8 to 12 sts to pick up additional sts at the side seam points, ensuring the total remains divisible by 2 for the grid mesh.
Finishing and Blocking
Weave in all ends securely using a yarn needle. Work each tail through at least 1 inch of stitches in two directions before trimming.
Wet block the finished romper by soaking in cool water with a drop of wool wash for 15 minutes. Gently squeeze out excess water by rolling in a towel. Do not wring. Lay flat on blocking mats and pin to finished measurements. Pay particular attention to opening the mesh sections fully. Allow to dry completely before unpinning, which may take 24 to 48 hours.
Attach the square buckle to the belt as described in Section 11 before threading through the belt channel.
If the armhole openings feel loose after blocking, work a single round of sc around each armhole edge to stabilize.
Care Instructions
Hand wash in cool water with a gentle detergent or wool wash. Rinse thoroughly without wringing. Roll in a towel to remove excess moisture and lay flat to dry. Do not tumble dry, dry clean, or iron directly. Store folded, not hung, to prevent stretching of the mesh sections.
Time Estimate
Plan for 35 to 50 hours for an experienced crocheter. Allow extra time for the belt and finishing. This is a rewarding project that comes together beautifully, but it is not a weekend make. Break it into sections and enjoy the process.
You Did It!
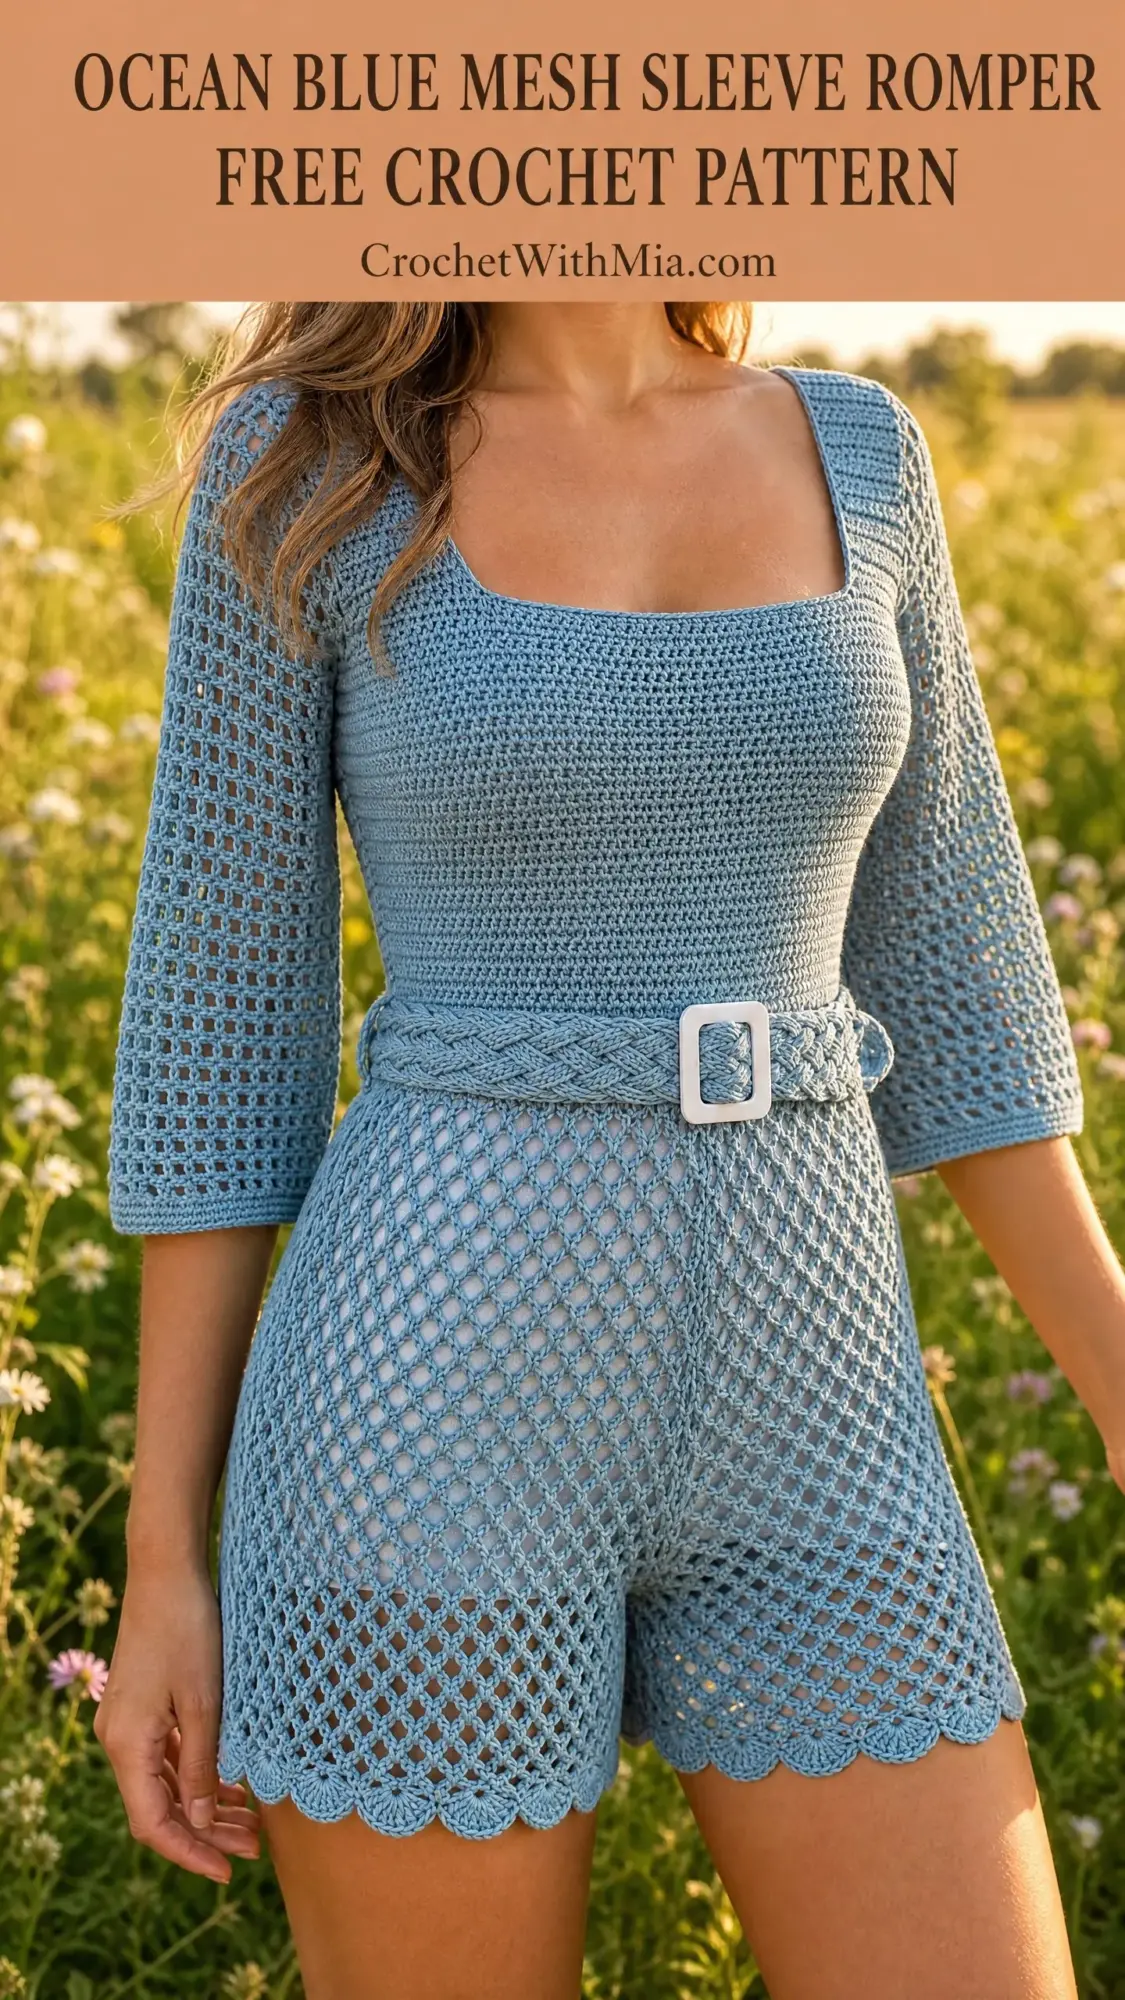
Thank you so much for choosing this pattern. I hope you love making this romper as much as I loved designing it. The mesh sleeves and diamond shorts really do look impressive, and that scallop hem is the perfect finishing touch.
If you make this romper, I would absolutely love to see it. Tag me on Instagram or share a photo in our Facebook group. Seeing your finished projects is honestly the best part of sharing patterns.
Save this Ocean Blue Mesh Sleeve Romper crochet pattern to your Pinterest boards so you can find it when you are ready to start. And please drop a comment below if you make one. I love hearing how your projects turn out!