
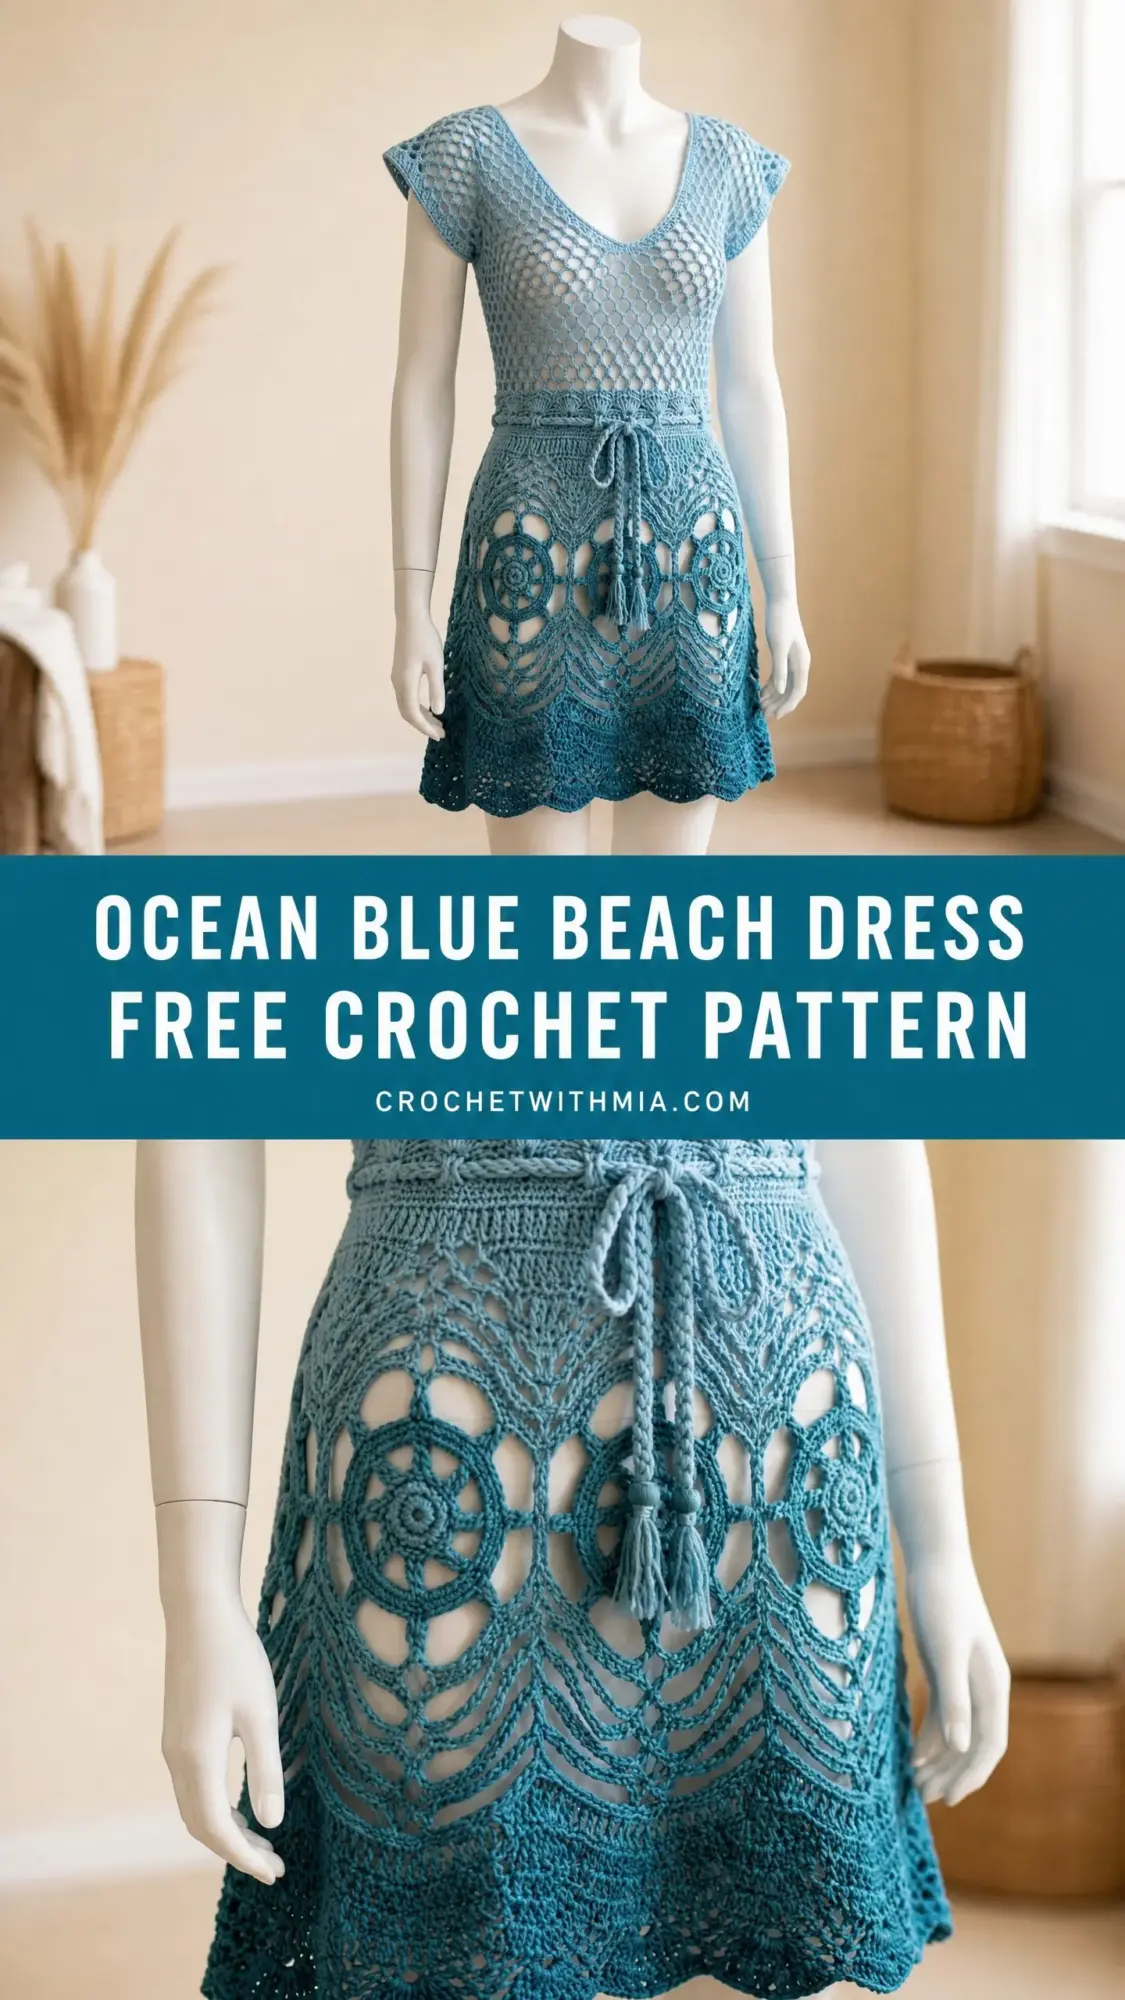
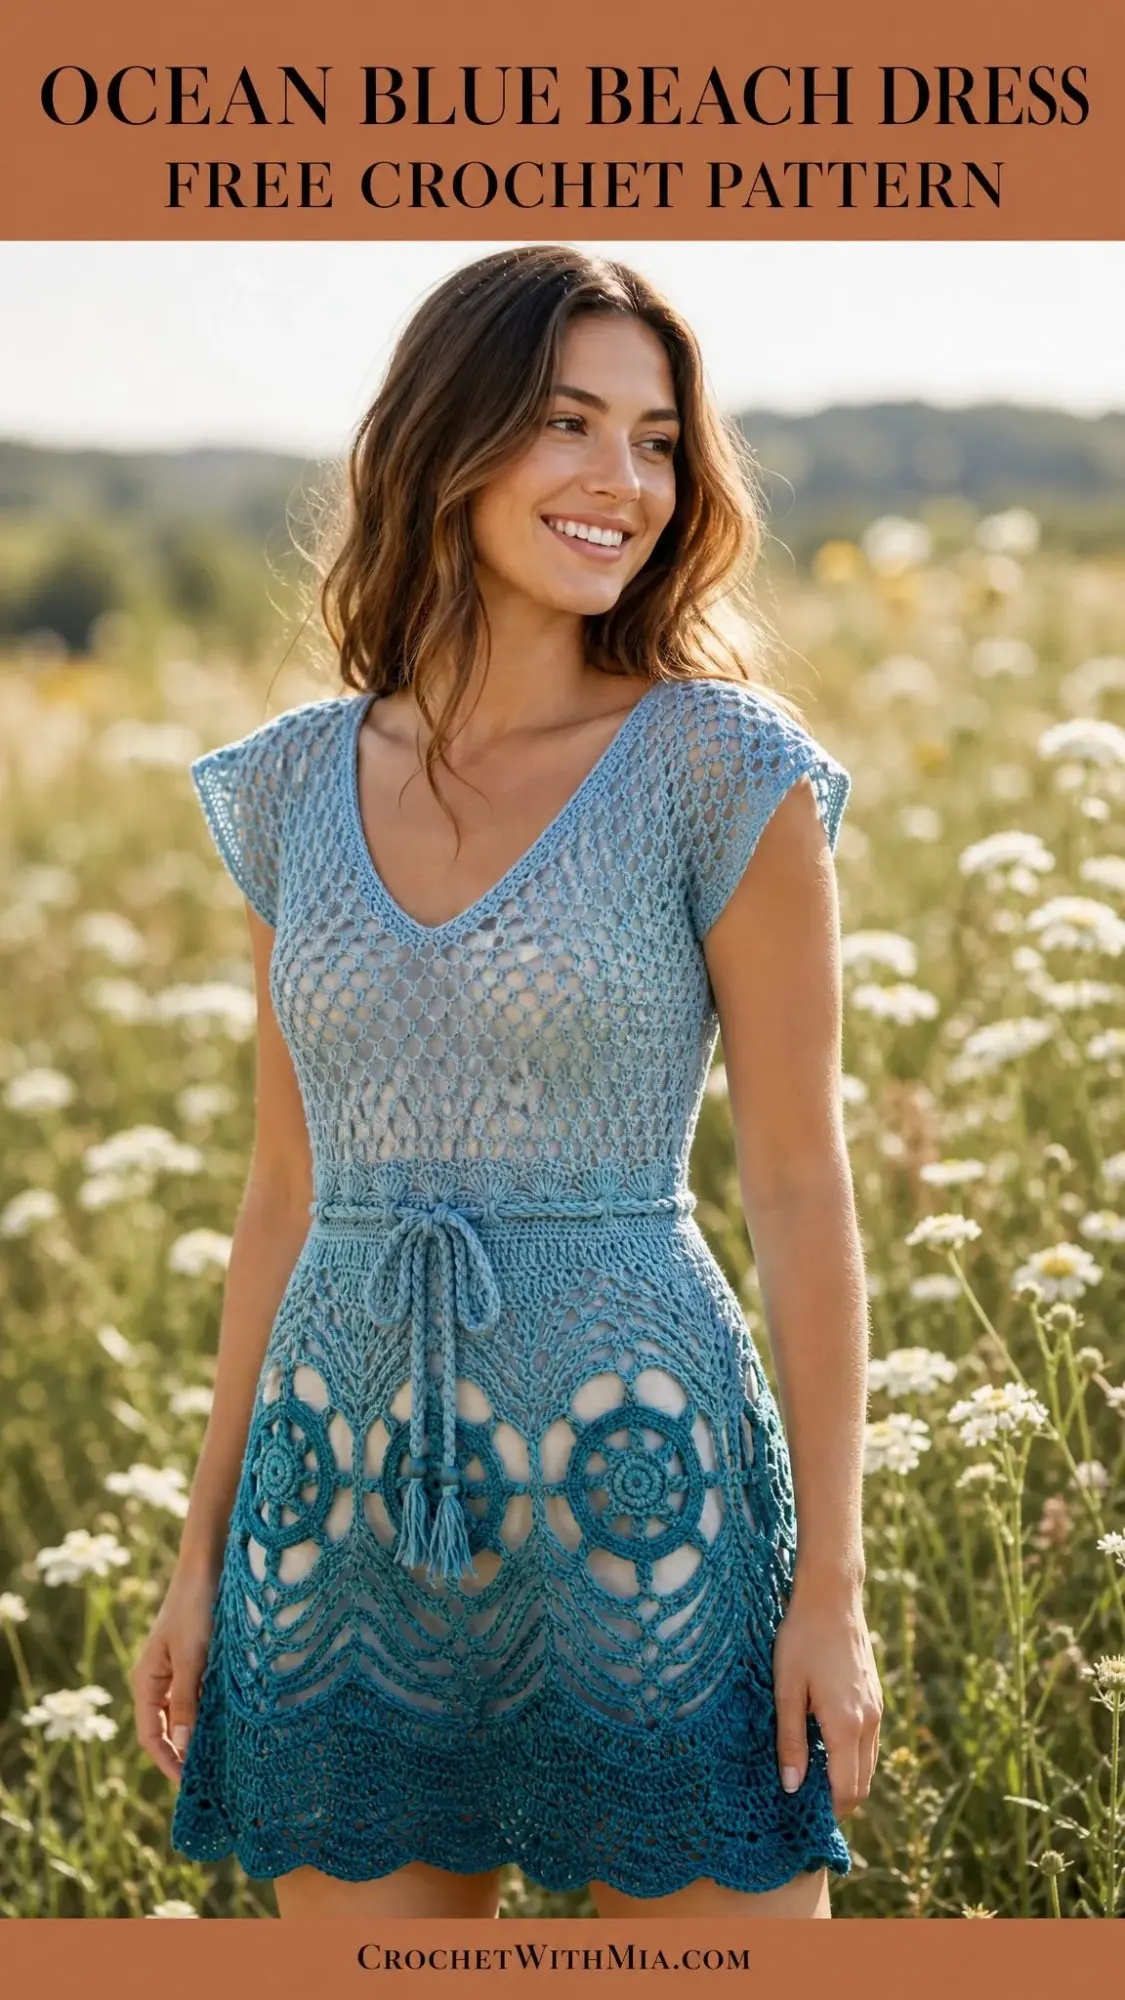
This is a stunning top-down beach dress with three distinct sections. You will work a mesh bodice, a fitted waistband with a drawstring, and a flared lace skirt featuring wheel motifs and pineapple arches. The gradient moves from pale sky blue through medium teal to deep ocean teal at the hem.
The construction sounds complex, but each section uses straightforward techniques. If you can work in the round, make basic decreases, and join motifs, you have all the skills you need. The mesh bodice is simply single crochet and chain stitches repeated. The wheel motifs are worked from the center out. Everything connects logically from top to bottom.
I will walk you through every step, define every stitch, and give you checkpoints along the way so you always know you are on track.
Why This Beach Dress Pattern Works
The dress has a flattering A-line silhouette that works beautifully over swimwear or with a slip underneath. The fitted mesh bodice provides structure at the top while the lace skirt flares gently at the hips. The drawstring waistband lets you adjust the fit to your body.
The color gradient is what really makes this piece special. Starting with pale sky blue at the shoulders, transitioning through medium teal in the upper skirt, and ending with deep ocean teal at the hem creates a beautiful ombre effect that looks far more complicated than it actually is.
Skill Level and Time Commitment
This is an advanced crochet pattern. You should be comfortable with working in the round, shaping a V-neckline with short rows, reading stitch counts through complex lace repeats, joining wheel motifs, and managing color changes.
If you have successfully completed at least two lace garments before, you will find this achievable with careful attention to stitch counts.
Time estimate: Approximately 25 to 35 hours for an experienced crocheter working at a steady pace.
Finished Measurements
This pattern is written for size Small/Medium. Size customization tips appear at the end.
Materials Needed
Yarn
You will need sport weight yarn (CYCA 2 / Fine) in three shades of blue:
Yarn Suggestions
Option 1: Paintbox Yarns Simply DK (100% acrylic, 137 yards per 50g ball) in Powder Blue, Slate Blue, and Teal. Acrylic holds shape well and works perfectly for beach coverup use.
Option 2: Lion Brand Yarn Comfy Cotton Blend (52% cotton, 48% micromodal, 255 yards per 100g skein) in Sky Blue, Dusty Blue, and Teal. This cotton blend gives a soft drape ideal for warm weather.
Option 3: Cascade Yarns 220 Superwash Sport (100% superwash merino wool, 136 yards per 50g ball) in Cloud, Pacific, and Mallard. This option gives the richest stitch definition and blocks beautifully.
Substitution Note: Any sport or light DK weight yarn achieving the stated gauge may be substituted. Avoid very stretchy yarns for the bodice. The mesh stitch loses structure with too much stretch. If substituting cotton, you may need to size up one hook for the bodice since cotton has less stretch than wool.
Hooks
Additional Materials
Gauge
Bodice gauge (Color A, E-4 hook): 18 stitches and 10 rows of mesh net stitch = 4 inches / 10 cm square after blocking.
Skirt motif gauge (Colors B and C, F-5 hook): One complete wheel motif = 4 inches / 10 cm diameter after blocking.
How to Make a Gauge Swatch
Chain 22. Row 1: single crochet in 2nd chain from hook, chain 2, skip 2 chains, single crochet in next chain. Repeat across. You should have 21 chains worked and 6 single crochets across. Continue in mesh pattern for 12 rows. Block and measure.
Important: Because the skirt is made of large joined motifs, even small gauge variations significantly change the finished hip circumference. Make at least one complete wheel motif swatch and measure after blocking before starting the skirt.
Abbreviations
Here are all the abbreviations used in this pattern. I have included plain-English definitions so you know exactly what each stitch means.
Special Stitches
Mesh Net Stitch
This creates the open hexagonal mesh seen on the bodice. Each unit is one single crochet plus a chain-2 space. The single crochet of each new row sits directly above the chain-2 space of the previous row. The chain-2 space sits over the previous single crochet.
Row version: Chain a multiple of 3 plus 1 for your foundation. Row 1 (RS): Single crochet in 2nd chain from hook, (chain 2, skip 2 chains, single crochet in next chain) across. Row 2 (WS): Chain 3, turn, single crochet in first chain-2 space, (chain 2, single crochet in next chain-2 space) across, ending single crochet in turning chain space.
Shell Stitch
Work 5 double crochets all into the same stitch or space. This creates a fan shape. When the pattern says "shell in next space," work all 5 double crochets into the designated space.
Picot
Chain 3, slip stitch in first chain of the chain-3. This creates a small decorative loop at the tip of a shell.
Wheel Motif
This is the large circular lace motif used in the skirt. It is worked in rounds from the center outward with an 8-spoke design.
Round 1: Magic ring, chain 3 (counts as first double crochet), 15 double crochets in ring, slip stitch to top of beginning chain-3 to join. (16 dc)
Round 2: Chain 1, single crochet in same stitch, chain 3, skip 1 double crochet, (single crochet in next double crochet, chain 3, skip 1 double crochet) around, slip stitch to first single crochet. (8 sc, 8 ch-3 sps)
Round 3: Slip stitch into first chain-3 space, chain 1, (single crochet, half double crochet, 3 double crochets, half double crochet, single crochet) in each chain-3 space around, slip stitch to first single crochet. (8 petals made, 56 sts total)
Round 4: Working behind the petals, slip stitch into the back of the single crochet at the base of a petal from Round 2, chain 4, (slip stitch into back of next Round 2 single crochet, chain 4) around, slip stitch to first slip stitch. (8 ch-4 sps)
Round 5: Slip stitch into first chain-4 space, chain 1, (single crochet, half double crochet, double crochet, chain 2, double crochet, half double crochet, single crochet) in each chain-4 space around, slip stitch to first single crochet. (8 arch-petals, 8 ch-2 tip sps)
Round 6: Slip stitch to first chain-2 space, chain 3, 4 double crochets in same space (first shell made), chain 3, (5 double crochets in next chain-2 space, chain 3) around, slip stitch to top of beginning chain-3. (8 shells, 8 ch-3 sps)
Round 7: Chain 1, single crochet in same stitch as slip stitch, single crochet in next 4 double crochets of shell, chain 5, skip chain-3 space, (single crochet in each of 5 double crochets of next shell, chain 5) around, slip stitch to first single crochet. (40 sc, 8 ch-5 sps)
Motif is complete. Fasten off or continue to join to adjacent motifs on the final round.
Joining Motifs
When working Round 7 of a motif that will connect to an adjacent motif already made, replace the center chain of each joining chain-5 arc with a slip stitch into the corresponding chain-5 arc of the adjacent motif. Work chain 2, slip stitch in chain-5 space of adjacent motif, chain 2 instead of chain 5 at each joining point. Each motif joins to its neighbors at two points.
Pineapple Arch
This simplified arch fills the diamond-shaped gaps between joined motifs.
Row 1: Attach yarn to corner chain-space, chain 4, (double crochet, chain 1) 5 times in same space, double crochet in same space. (6 dc, 5 ch-1 sps)
Row 2: Chain 3, double crochet in first chain-1 space, (chain 1, double crochet in next chain-1 space) across fan, chain 3, slip stitch to base. (5 dc with 4 ch-1 sps between)
Row 3: Chain 3, skip first chain-1 space, dc2tog over next two chain-1 spaces, chain 3, skip next chain-1 space, dc2tog. (2 dc2tog)
Row 4: Chain 4, slip stitch to adjacent motif chain-space to close arch. Fasten off or continue.
Pattern Notes Before You Begin
1. The dress is worked top-down. The bodice begins at the neckline edge, worked back and forth in rows for V-shaping, then joined into rounds once the V-point is reached.
2. Color changes: Color A is used for the entire bodice and waistband. Color B begins at the first round of the skirt and transitions to Color C at approximately the middle of the skirt.
3. Cap sleeves: The sleeve extensions are not separately constructed. They are created by the natural width of the shoulder and yoke rows. The first 6 rows of each shoulder section form the cap sleeve depth of approximately 2.5 inches / 6 cm.
4. The mesh bodice is intentionally open and semi-sheer. A slip or bandeau is recommended underneath if opaque coverage is desired.
5. Block aggressively. The lace motifs in the skirt will not open to their full beauty without wet blocking and pinning.
6. Join all rounds with slip stitch to the first stitch (not to the turning chain) unless otherwise noted.
Step by Step Instructions
Section 1: Bodice Neckline and Shoulder Setup
Using Color A and E-4 hook
The neckline begins at the center front V-point and is worked outward in both directions to create the V-shape.
Right Front Panel (V-point to right shoulder)
Chain 31.
Row 1 (WS): Single crochet in 2nd chain from hook, (chain 2, skip 2 chains, single crochet in next chain) across. (10 sc, 9 ch-2 sps)
Row 2 (RS): Chain 3, turn, single crochet in first chain-2 space, (chain 2, single crochet in next chain-2 space) across, ending with chain 2, single crochet in top of last single crochet. (10 sc, 10 ch-2 sps)
Row 3: Chain 1, turn, single crochet in first chain-2 space, (chain 2, single crochet in next chain-2 space) across, ending single crochet in top of chain-3. (10 sc, 9 ch-2 sps)
Rows 4 and 5: Repeat Rows 2 and 3. (Row 4: 10 sc, 10 ch-2 sps. Row 5: 10 sc, 9 ch-2 sps.)
Row 6 (Neckline increase row, RS): Chain 5, turn, single crochet in first chain-2 space (this adds one new mesh unit at neckline edge), (chain 2, single crochet in next chain-2 space) across, ending chain 2, single crochet in top of last single crochet. (11 sc, 11 ch-2 sps)
Row 7: Chain 1, turn, single crochet in first chain-2 space, (chain 2, single crochet in next chain-2 space) across, ending single crochet in 3rd chain of beginning chain-5. (11 sc, 10 ch-2 sps)
Fasten off. This is the right front shoulder panel.
Left Front Panel (V-point to left shoulder)
Rejoin Color A to the same V-point foundation chain with RS facing.
Row 1 (WS): Working into the other side of the foundation chain, single crochet in first chain, (chain 2, skip 2 chains, single crochet in next chain) across. (10 sc, 9 ch-2 sps)
Repeat Rows 2 through 7 as for right front panel, mirroring increases at the opposite neckline edge.
Row 6 mirror increase: Chain 3, turn, single crochet in first chain-2 space, (chain 2, single crochet in next chain-2 space) across, ending chain 2, single crochet in space, chain 2, single crochet in edge to add one unit. (11 sc, 11 ch-2 sps)
Fasten off. This is the left front shoulder panel.
Back Panel
The back is worked as one flat rectangle, then joined to both shoulder panels.
Chain 64.
Row 1 (WS): Single crochet in 2nd chain from hook, (chain 2, skip 2 chains, single crochet in next chain) across. (21 sc, 20 ch-2 sps)
Rows 2 through 7: Work in mesh net stitch pattern as established. No shaping on back. (Each RS row: 21 sc, 21 ch-2 sps. Each WS row: 21 sc, 20 ch-2 sps.)
Do not fasten off after Row 7 of back.
Checkpoint 1
After completing both front shoulder panels (7 rows each) and the back panel (7 rows), each panel should measure approximately 2.5 inches / 6 cm in height. Front panels should measure approximately 6 inches / 15 cm wide. Back panel should measure approximately 14 inches / 35 cm wide. The V-neck opening should be approximately 4 inches / 10 cm deep at center.
Section 2: Joining Into the Round and Lower Bodice
Using Color A and E-4 hook
Joining Round
Hold the back panel with RS facing. With yarn still attached to the back panel, work across the top edge of the back panel in mesh as established. At the right armhole edge, chain 6 to bridge the underarm gap, then join to the right front panel and work across it in mesh. At the neckline center, continue across the left front panel in mesh. At the left armhole edge, chain 6 to bridge the second underarm gap, slip stitch to join to the back panel beginning.
Total mesh units in joining round: 44 single crochets and 44 chain-2 spaces.
Bodice Rounds 1 Through 14
Round 1: Chain 1, single crochet in same stitch as join, (chain 2, skip chain-2 space, single crochet in next single crochet) around, slip stitch to first single crochet. (44 sc, 44 ch-2 sps)
Round 2: Chain 3, single crochet in first chain-2 space, (chain 2, single crochet in next chain-2 space) around, chain 2, slip stitch to first single crochet. (44 sc, 44 ch-2 sps)
Repeat Rounds 1 and 2 alternately for 12 more rounds (Rounds 3 through 14). No shaping.
Waist Shaping Round (Optional)
Round 15: Chain 1, single crochet in same stitch, (chain 2, single crochet in next chain-2 space) 4 times, skip one single crochet and its chain-2 space (decrease), (chain 2, single crochet in next chain-2 space) 9 times, skip one single crochet and its chain-2 space (decrease), (chain 2, single crochet in next chain-2 space) 9 times, skip one single crochet and its chain-2 space (decrease), (chain 2, single crochet in next chain-2 space) 9 times, skip one single crochet and its chain-2 space (decrease), chain 2, slip stitch to first single crochet. (40 sc, 40 ch-2 sps)
Rounds 16, 17, and 18: Chain 3, single crochet in first chain-2 space, (chain 2, single crochet in next chain-2 space) around, chain 2, slip stitch to first single crochet. (40 sc, 40 ch-2 sps each round)
Checkpoint 2
After Round 18, the bodice should measure approximately 13 inches / 33 cm from shoulder to current working row. The circumference around the waist should be approximately 28 to 29 inches / 71 to 74 cm unstretched.
Section 3: Waistband
Using Color A and E-4 hook
Round 1: Chain 1, (single crochet in next chain-2 space, single crochet in next single crochet) around, slip stitch to first single crochet. (80 sc)
Round 2: Chain 3 (counts as double crochet), double crochet in each single crochet around, slip stitch to top of beginning chain-3. (80 dc)
Round 3: Chain 3, double crochet in next double crochet, (chain 2, skip 2 double crochets, double crochet in next 2 double crochets) around, slip stitch to top of beginning chain-3. This creates the eyelet row for the drawstring. (20 ch-2 eyelets, 40 dc)
Round 4: Chain 3, double crochet in each double crochet and 2 double crochets in each chain-2 space around, slip stitch to top of beginning chain-3. (80 dc)
Round 5: Chain 1, single crochet in each double crochet around, slip stitch to first single crochet. (80 sc)
Fasten off Color A.
Drawstring
Using Color A, make a chain approximately 50 inches / 127 cm long. Slip stitch back along chain to form a doubled cord. Fasten off. Weave through the eyelet row of the waistband, starting and ending at center front.
Section 4: Skirt Wheel Motifs
Using Colors B and C with F-5 hook
First Ring of Motifs (Color B)
Make 10 wheel motifs and join them end to end in a ring.
Make Motif 1 completely through Round 7. Fasten off.
Make Motif 2 through Round 6. On Round 7, join to Motif 1 at two adjacent chain-5 arcs using the joining method described in Special Stitches. Fasten off.
Continue making and joining Motifs 3 through 10, each joining to the previous motif in the ring. Motif 10 joins to both Motif 9 (new join) and Motif 1 (closing the ring) on its Round 7.
Attaching Motif Ring to Waistband
Using Color B, attach yarn to the first single crochet of Round 5 of the waistband. Work a foundation round that connects the top of the motif ring to the waistband:
Work (chain 3, single crochet in top single crochet group of nearest motif chain-5 arc, chain 3, single crochet in next waistband single crochet) around, working 4 waistband single crochets per motif. Slip stitch to join.
Second Ring of Motifs (Transition Color B to Color C)
Make 10 additional wheel motifs positioned in the gaps between the first-ring motifs.
For each second-ring motif, work through Round 6. On Round 7, join to the two adjacent first-ring motifs at their lower chain-5 arcs. Each second-ring motif joins to 2 first-ring motifs and to 2 adjacent second-ring motifs.
Use Color B for Motifs 11 through 15 and Color C for Motifs 16 through 20 to create the color gradient.
Pineapple Arches
After all 20 motifs are joined, work the pineapple arch stitch into each diamond-shaped gap between four joined motifs. There are 10 gaps between the first and second rings. Work each arch using Color C.
Checkpoint 3
After completing all 20 motifs and the pineapple arches, the skirt body should measure approximately 10 inches / 25 cm from the waistband join. Hip circumference should be approximately 38 to 40 inches / 97 to 102 cm.
Section 5: Hem Border
Using Color C and F-5 hook
Round 1 (Foundation): Attach Color C to any bottom chain-5 arc of a second-ring motif. Chain 1, (5 single crochets in chain-5 arc of motif, 3 single crochets in arch base space) around, slip stitch to first single crochet. (80 sc total)
Round 2 (Shell setup): Chain 1, single crochet in first single crochet, skip 2 single crochets, 5 double crochets in next single crochet (shell made), skip 2 single crochets, single crochet in next single crochet. Repeat around. Work 13 complete shells. (13 sc, 13 shells)
Round 3 (Picot shells): Chain 1, single crochet in first single crochet, skip 2 double crochets of shell, (2 double crochets, picot, 2 double crochets) in center double crochet of shell, skip 2 double crochets, single crochet in next single crochet. Repeat around, slip stitch to first single crochet. (13 picot-shells, 13 sc)
Fasten off. Weave in all ends.
Size Customization Tips
Large/Extra-Large (Bust 38 to 40 inches)
Start the back panel with chain 76 (25 sc, 24 ch-2 sps across) and each front panel with chain 37 (12 sc, 11 ch-2 sps). After joining, you will have approximately 52 mesh units per round. The waistband will work into 104 single crochets. For the skirt, add 2 additional motifs per ring (12 per ring, 24 total) and 2 additional pineapple arches (12 total).
Extra-Small (Bust 30 to 32 inches)
Start the back panel with chain 52 (17 sc, 16 ch-2 sps) and each front panel with chain 25 (8 sc, 7 ch-2 sps). After joining, approximately 36 mesh units per round. Waistband works into 72 single crochets. For the skirt, use 8 motifs per ring (16 total) and 8 pineapple arches.
General rule: Every 3 stitches added to the bodice round adds approximately 0.66 inches to the bust. Every motif added to each skirt ring adds approximately 3.75 inches to the hip circumference.
Finishing and Blocking
1. Weave in all ends securely using a yarn needle. Weave at least 1 inch in two directions for each end.
2. Wet blocking is strongly recommended. Soak the finished dress in cool water for 15 to 20 minutes. Gently press out excess water without wringing. Lay flat on blocking mat.
3. Pin each wheel motif to its stated 4 inch diameter, pulling the petal arcs out to their full extent. Pin the chain-5 arcs open. Pin the pineapple arches into their pointed arch shape.
4. Block the bodice flat, stretching the mesh net lightly to open up the hexagons evenly.
5. Allow to dry completely, 12 to 24 hours depending on yarn fiber content.
6. For wool or wool-blend yarns, use a steam iron held 1 inch above the surface instead of wet blocking. Do not press down. For acrylic yarns, wet blocking only. Never steam acrylic.
7. Thread the drawstring through the waistband eyelets after blocking.
8. Attach tassels to drawstring ends: cut 12 strands of Color A approximately 6 inches long. Fold in half. Loop folded end through drawstring end. Pull cut ends through the folded loop and tighten. Wrap a separate short strand tightly around all strands approximately 0.75 inches from the top and tie securely. Trim tassel to desired length.
Care Instructions
For acrylic yarn versions: Machine wash cold on gentle cycle. Lay flat to dry. Do not tumble dry. Do not iron.
For cotton or cotton-blend versions: Machine wash cold on gentle cycle or hand wash. Lay flat to dry. May be ironed on low heat with a pressing cloth.
For wool or merino versions: Hand wash only in cool water with wool wash. Do not agitate. Press out water gently in a towel. Lay flat to dry away from direct sunlight or heat. Blocking after each wash is recommended.
Store flat or rolled, not folded at the motif seam lines, to prevent crease marks in the lace.
Final Thoughts on This Ocean Blue Beach Dress Crochet Pattern
This crochet tutorial walks you through creating a truly stunning piece that will turn heads at the beach or pool. The combination of the mesh bodice, decorative waistband, and intricate lace skirt creates a garment that looks like it came from a boutique.
Take your time with the wheel motifs. They are the heart of this design, and once you get the rhythm, they work up faster than you might expect. The pineapple arches fill those gaps beautifully and add an extra layer of detail.
Do not skip the blocking step. I cannot stress this enough. The lace will look bunched and the motifs will not open properly without proper wet blocking. It makes all the difference between a project that looks homemade and one that looks professional.
Thank you so much for choosing this pattern. I hope you love making your ocean blue beach dress as much as I loved designing it. If you make one, I would absolutely love to see it! Tag me on Instagram or share your photos on my Facebook page.
If you found this crochet pattern helpful, save it to your Pinterest boards so you can find it again later. And please drop a comment below if you make this dress. I love hearing how your projects turn out and seeing your color choices!