
This is THE dress project you have been waiting for. I am not exaggerating when I say this Sunset Orange Dahlia Ruffle Mini Dress is one of the most stunning garments you will ever crochet. Yes, it takes time. Yes, it requires focus. But the result? A fully structured, body-hugging mini dress with molded bustier cups, a ribbed waistband, delicate scallop lace hem, and a gorgeous oversized dahlia flower corsage perched on the shoulder. We are talking 40 to 55 hours of work that transforms into a wearable piece of art.
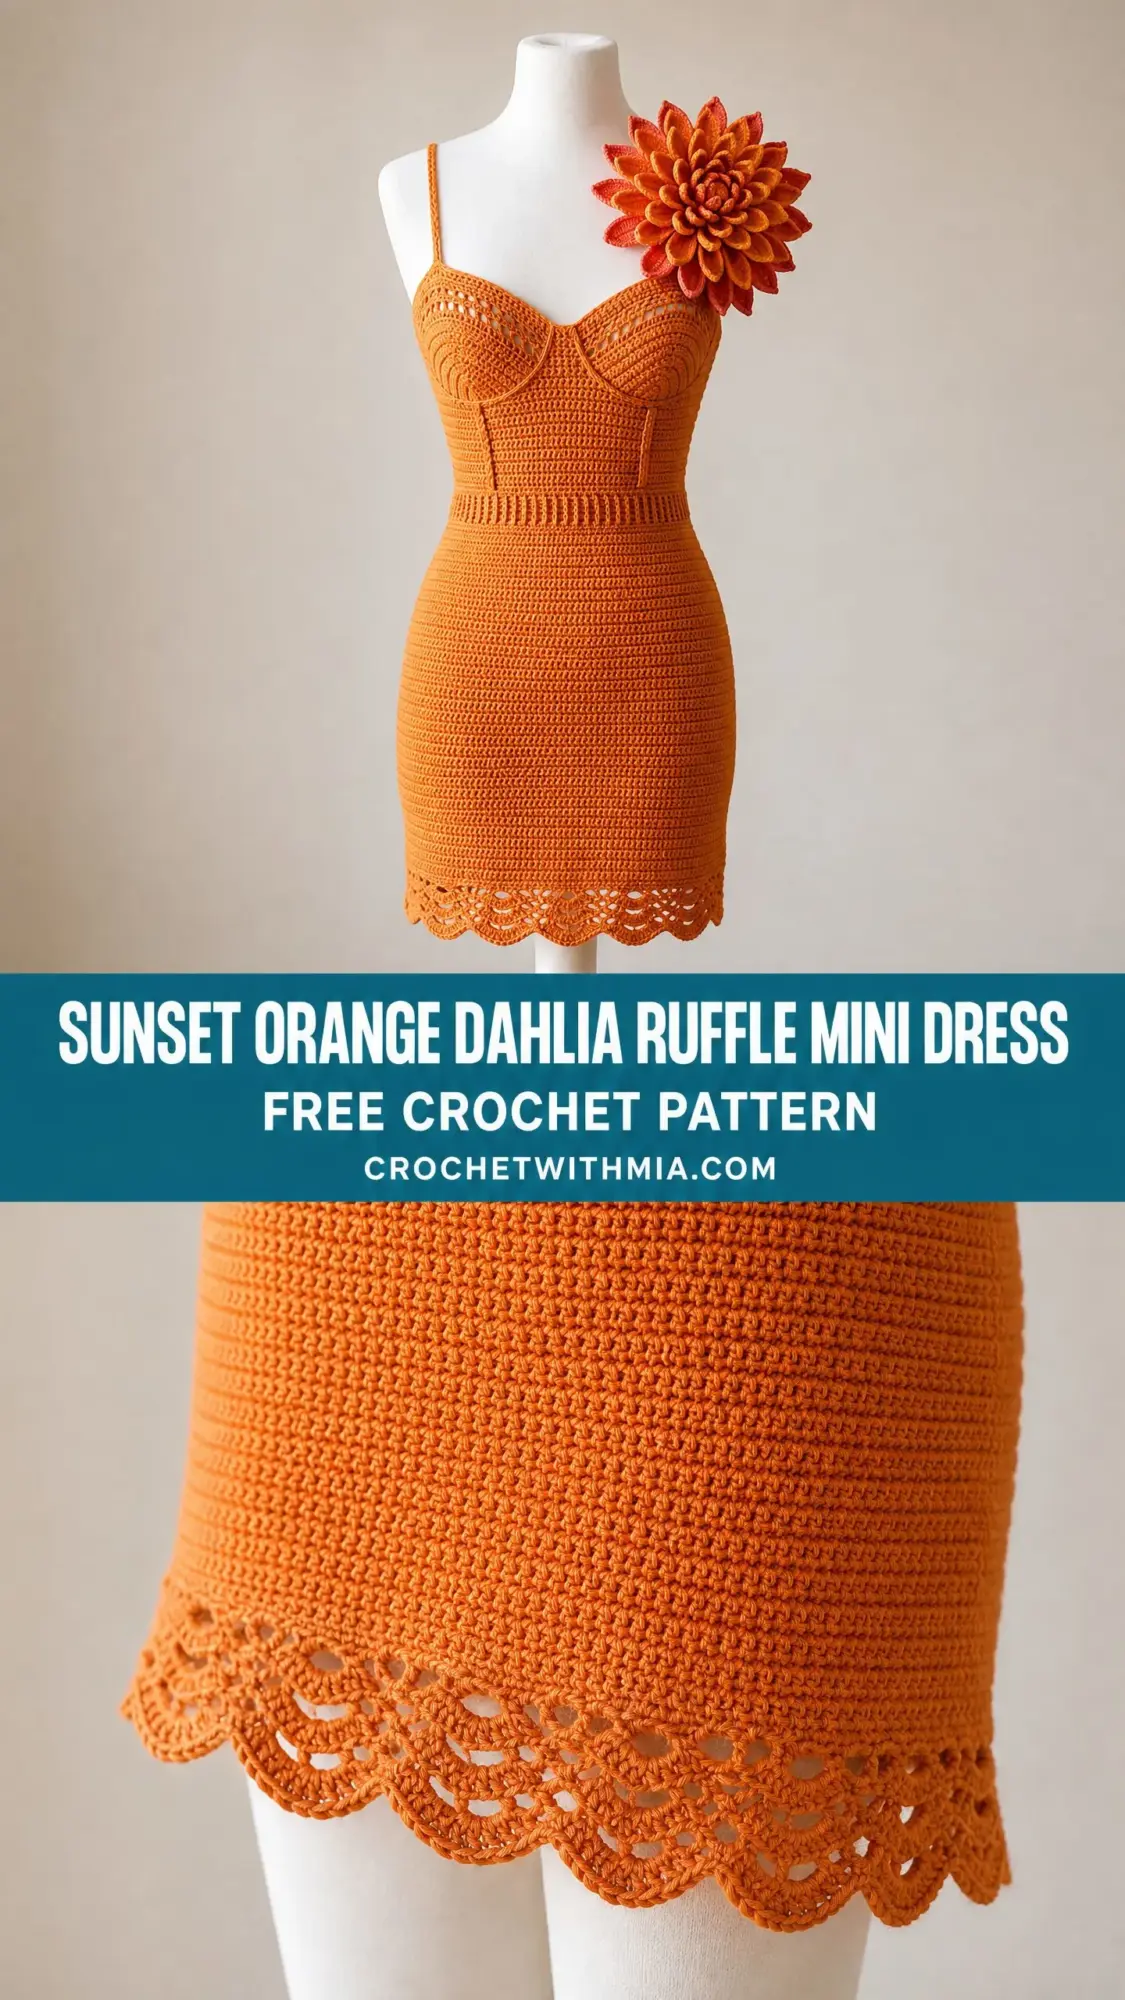
If you have been searching for a statement crochet garment that looks like it belongs on a runway, this is it. The construction is clever and methodical. You will build from the bottom up, starting with that pretty scallop edging, then working the fitted skirt in joined rounds, adding a stretchy ribbed waistband, shaping the bodice with actual molded cups, and finishing with spaghetti straps and that show-stopping dahlia bloom.
Fair warning: this is an advanced pattern. But if you have worked garments before and feel comfortable with shaping, seaming, and following detailed stitch counts, you are absolutely ready. Let me walk you through every single step.
Why This Crochet Mini Dress Pattern Stands Out
Most crocheted dresses rely on loose, flowy silhouettes to hide fit issues. This one does the opposite. The dense single crochet fabric creates structure. The waistband uses back loop only ribbing for stretch and definition. The cups are worked flat with short rows, then seamed onto the bodice for genuine shaping. Nothing about this dress is accidental.
The scallop hem adds romantic detail without overwhelming the clean lines. And that dahlia corsage? It transforms a gorgeous dress into an unforgettable one. The warm pumpkin orange color catches light beautifully, but this pattern works in any solid shade you love.
Skill Level and Time Investment
This is an advanced crochet pattern. You will need confident familiarity with working in joined rounds, seaming curved pieces, shaping with short rows, and following complex stitch counts across multiple construction zones. If you are newer to fitted garment construction, I recommend practicing each section independently before committing to the full project.
Plan for approximately 40 to 55 hours of work if you are an experienced maker working at a steady pace. This is not a weekend project. It is a labor of love that deserves your patience.
Finished Measurements
The pattern includes three sizes. Size Small appears first, with Medium in the first parentheses and Large in the second parentheses.
Bust: 32 (36, 40) inches / 81 (91, 102) cm
Waist: 26 (30, 34) inches / 66 (76, 86) cm
Hip: 34 (38, 42) inches / 86 (97, 107) cm
Total length (top of strap to hem): 30 (31, 32) inches / 76 (79, 81) cm
Skirt length (waist to hem): 14 (14.5, 15) inches / 36 (37, 38) cm
Bodice length (waist to top of cup): 6 (6.5, 7) inches / 15 (17, 18) cm
Materials Needed
Yarn: Worsted weight cotton or cotton blend yarn in warm orange. You will need approximately 1,400 (1,600, 1,800) yards / 1,280 (1,464, 1,646) meters. The pictured color is a pumpkin or burnt orange, similar to Pantone 16-1358.
Recommended Yarn Options:
Lion Brand 24/7 Cotton in Tangerine is a 100% mercerized cotton worsted weight with excellent stitch definition. Purchase 8 (9, 10) skeins of the 186 yard skeins.
Paintbox Yarns Cotton DK held double creates a similar gauge with softer drape. Purchase 11 (12, 14) skeins of the 137 yard skeins.
Drops Safran in color 24 orange is a cotton polyamide blend with subtle sheen. Purchase 9 (10, 11) skeins of the 164 yard skeins.
Substitution note: Avoid fuzzy or hairy yarns. The stitch texture relies on clean definition. Cotton or cotton blend fibers work best. Avoid 100% acrylic for the main body since it lacks the weight and drape needed.
Hooks: US size E-4 (3.5 mm) for main body. US size D-3 (3.25 mm) for scallop edging, waistband ribbing, and corsage.
Additional supplies: Tapestry needle for seaming, at least 8 stitch markers, small safety pins, scissors, blocking mat and rust-proof pins. Optional: 10 inches of boning or waistband stabilizer tape for extra structure.
Gauge
22 single crochet stitches x 26 rows = 4 inches / 10 cm in single crochet worked in joined rounds. Measure after blocking.
Gauge is mandatory for this garment. Even a half stitch discrepancy per inch will alter finished measurements by 1 to 2 inches across the full circumference. Please swatch and measure carefully before beginning.
Abbreviations and Stitch Definitions
beg = beginning
BLO = back loop only (insert hook under only the back loop of the stitch instead of both loops)
bo = bobble (see Special Stitches below)
ch = chain (yarn over, pull through loop on hook)
ch-sp = chain space
dc = double crochet (yarn over, insert hook, pull up loop, yarn over, pull through 2 loops, yarn over, pull through remaining 2 loops)
dec = decrease
hdc = half double crochet
inc = increase (work 2 single crochet stitches in the same stitch)
FLO = front loop only
pm = place marker
rem = remaining
rep = repeat
rnd = round
RS = right side
sc = single crochet (insert hook, pull up loop, yarn over, pull through both loops)
sc2tog = single crochet 2 together, a decrease (insert hook in next stitch, pull up loop, insert hook in following stitch, pull up loop, yarn over, pull through all 3 loops on hook)
sl st = slip stitch (insert hook, yarn over, pull through stitch and loop on hook in one motion)
sm = slip marker
sp = space
st = stitch
sts = stitches
WS = wrong side
yo = yarn over
Special Stitches
Scallop Shell (used for hem edging)
Skip 2 stitches, work 5 double crochet in the next stitch, skip 2 stitches, slip stitch in the next stitch. This completes one scallop shell unit and uses 6 stitches per repeat.
Bobble (bo) (used for bodice cup detailing)
Yarn over, insert hook in stitch, yarn over and pull up a loop, yarn over and pull through 2 loops. You now have one incomplete double crochet on your hook. Repeat this 4 more times in the same stitch so you have 5 incomplete double crochets total, which means 6 loops on your hook. Yarn over and pull through all 6 loops. Chain 1 to close the bobble.
Reverse Single Crochet (rev sc) (used for neckline edge)
With the right side facing, do not turn your work. Insert hook from left to right into the stitch to the right, yarn over, pull up a loop, yarn over, pull through both loops on hook. Continue working each stitch to the right across the row.
BLO Single Crochet Ribbing (used for waistband)
Work all single crochet stitches through the back loop only. This creates a stretchy, ridged texture similar to knit ribbing.
Dahlia Petal (used for corsage)
Chain 12, slip stitch in 2nd chain from hook and in each chain across for 11 slip stitches. This forms one petal strip. For layered petals, vary the chain length. Inner petals use chain 8, mid petals use chain 10, outer petals use chain 14. Join each petal strip into a loop by slip stitching through the base, then stack and sew layers together.
Pattern Notes Before You Begin
The dress is worked in sections and assembled. Please read through the entire pattern before beginning.
All rounds in the skirt are joined rounds worked with the right side always facing. Do not turn unless instructed.
Bodice cups are worked flat in short rows and seamed to the bodice foundation.
The waistband is worked as a separate ribbed rectangle, seamed into a band, then attached between the skirt and bodice.
Straps are worked as simple chains reinforced with slip stitch.
The dahlia corsage is worked separately and pinned or sewn onto one strap at the shoulder.
When the pattern says "work even," work single crochet in each stitch with no increases or decreases.
Stitch counts appear at the end of every row or round in parentheses.
Chain 3 at the start of a double crochet row counts as the first double crochet.
All seams are whip stitched with a tapestry needle unless otherwise noted.
Step by Step Crochet Pattern Instructions
Section 1: Scallop Hem Edging
The scallop edging forms the decorative bottom edge of the skirt. It is worked first as a flat strip and then joined.
Foundation chain: Ch 181 (211, 229).
Row 1: Sc in 2nd ch from hook and in each ch across. Turn. (180 sc, 210 sc, 228 sc)
Row 2 (Scallop Row, WS): Ch 1, turn to WS. Sl st in first sc, skip 2 sc, 5 dc in next sc, skip 2 sc, sl st in next sc across, working last sl st in final sc. Each repeat equals 6 stitches. (30 shells / 35 shells / 38 shells)
Row 3 (Skirt Foundation Row, RS): Turn to RS. Ch 1, work 1 sc in each dc and sl st across the top edge of the scallop row. Treat each sl st between shells as 1 sc and each group of 5 dc as 5 sc. (180 sc, 210 sc, 228 sc)
Seam the short ends of this strip together using a slip stitch seam to form a ring. The edging is now a joined band. (180 sc, 210 sc, 228 sc in the round)
Section 2: Skirt
All rounds are joined rounds. Begin each round with a slip stitch join to the first sc of the previous round, chain 1, and work sc in each stitch around. Do not count the chain 1 as a stitch.
Place a stitch marker in the first stitch of each round and move it up as work progresses.
Round 1: Join yarn to any sc of the skirt foundation row. Ch 1, sc in same st and in each st around. Sl st to first sc to join. (180, 210, 228)
Rounds 2 through 10: Work even. (180, 210, 228)
Decrease Section for Waist Shaping
Round 11 (Size Small): Sc in next 28 sc, sc2tog, sc in next 27 sc, sc2tog 5 times, sc in last 12 sc. Sl st to join. (174)
Round 11 (Size Medium): Sc in next 29 sc, sc2tog, sc in next 28 sc, sc2tog 5 times, sc in last 15 sc. Sl st to join. (204)
Round 11 (Size Large): Sc in next 37 sc, sc2tog, sc in next 36 sc, sc2tog 5 times, sc in last 10 sc. Sl st to join. (222)
Rounds 12 through 14: Work even. (174, 204, 222)
Round 15 (Size Small): Sc in next 26 sc, sc2tog 6 times. Sl st to join. (168)
Round 15 (Size Medium): Sc in next 32 sc, sc2tog 6 times. Sl st to join. (198)
Round 15 (Size Large): Sc in next 35 sc, sc2tog 6 times. Sl st to join. (216)
Rounds 16 through 18: Work even. (168, 198, 216)
Round 19 (Size Small): Sc in next 25 sc, sc2tog 6 times. Sl st to join. (162)
Round 19 (Size Medium): Sc in next 31 sc, sc2tog 6 times. Sl st to join. (192)
Round 19 (Size Large): Sc in next 34 sc, sc2tog 6 times. Sl st to join. (210)
Rounds 20 through 22: Work even. (162, 192, 210)
Round 23 (Size Small): Sc in next 24 sc, sc2tog 6 times. Sl st to join. (156)
Round 23 (Size Medium): Sc in next 30 sc, sc2tog 6 times. Sl st to join. (186)
Round 23 (Size Large): Sc in next 33 sc, sc2tog 6 times. Sl st to join. (204)
Rounds 24 through 26: Work even. (156, 186, 204)
Round 27 (Size Small): Sc in next 23 sc, sc2tog 6 times. Sl st to join. (150)
Round 27 (Size Medium): Sc in next 29 sc, sc2tog 6 times. Sl st to join. (180)
Round 27 (Size Large): Sc in next 32 sc, sc2tog 6 times. Sl st to join. (198)
Rounds 28 through 32: Work even. (150, 180, 198)
Round 33 (Size Small): Sc in next 22 sc, sc2tog 6 times. Sl st to join. (144)
Round 33 (Size Medium): Sc in next 28 sc, sc2tog 6 times. Sl st to join. (174)
Round 33 (Size Large): Sc in next 31 sc, sc2tog 6 times. Sl st to join. (192)
Rounds 34 and 35: Work even. (144, 174, 192)
Round 36 (Size Small only): Sc in next 22 sc, sc2tog 6 times. Sl st to join. (138)
Round 36 (Size Medium and Large): Work even. (174, 192)
Round 37 (Size Small): Work even. (138)
Round 37 (Size Medium): Sc in next 27 sc, sc2tog 6 times. Sl st to join. (168)
Round 37 (Size Large): Sc in next 30 sc, sc2tog 6 times. Sl st to join. (186)
Rounds 38 through 40: Work even. All sizes. (138, 168, 186)
Rounds 41 through 80: Work even with no more shaping, maintaining final stitch count throughout. (138, 168, 186)
Checkpoint: After completing the skirt, the piece should measure approximately 14 (14.5, 15) inches from the bottom of the scallop edging to the working edge. The circumference at the top working edge should measure approximately 25 (30.5, 34) inches when laid flat and doubled.
Section 3: Waistband
The waistband is worked as a separate flat ribbed panel and seamed into a ring, then attached to the top of the skirt.
With smaller hook (D-3 / 3.25 mm), ch 13.
Row 1: Sc in 2nd ch from hook and in each ch across. Turn. (12 sc)
Rows 2 through 138 (Size Small) / 2 through 168 (Size Medium) / 2 through 186 (Size Large): Ch 1, sc in BLO across each row. Turn. The number of rows equals the waist stitch count to ensure the waistband fits the skirt edge precisely.
After completing all rows, seam the short ends together to form a ring.
The waistband should measure approximately 25 (30.5, 34) inches in circumference and 1.75 inches in height.
Attach waistband: Align the long edge of the waistband with the top edge of the skirt (Round 80). With RS facing, whip stitch through both layers to join waistband to skirt around the entire circumference.
Checkpoint: After attaching the waistband, the total piece height should measure approximately 15.75 (16.25, 16.75) inches from the scallop hem.
Section 4: Bodice Foundation
The bodice is worked in joined rounds above the waistband.
Round 1 of Bodice: Join yarn to the top long edge of the waistband. Ch 1, sc in each row end around the top of the waistband. This should produce the same stitch count as the waist. (138, 168, 186)
Rounds 2 through 5: Work even. (138, 168, 186)
Bust Expansion (Rounds 6 through 10)
Round 6 (Size Small): Sc in next 22 sc, inc 6 times. Sl st to join. (144)
Round 6 (Size Medium): Sc in next 27 sc, inc 6 times. Sl st to join. (174)
Round 6 (Size Large): Sc in next 30 sc, inc 6 times. Sl st to join. (192)
Round 7: Work even. (144, 174, 192)
Round 8 (Size Small): Sc in next 23 sc, inc 6 times. Sl st to join. (150)
Round 8 (Size Medium): Sc in next 28 sc, inc 6 times. Sl st to join. (180)
Round 8 (Size Large): Sc in next 31 sc, inc 6 times. Sl st to join. (198)
Round 9: Work even. (150, 180, 198)
Round 10 (Size Small): Sc in next 24 sc, inc 6 times. Sl st to join. (156)
Round 10 (Size Medium): Sc in next 29 sc, inc 6 times. Sl st to join. (186)
Round 10 (Size Large): Sc in next 32 sc, inc 6 times. Sl st to join. (204)
Rounds 11 through 16: Work even. This is the main bodice body below the cup shaping. (156, 186, 204)
Checkpoint: After Round 16 of the bodice, the bodice section alone should measure approximately 4 (4.5, 5) inches above the waistband.
Section 5: Bodice Cups (Make 2)
Each cup is worked as a separate flat piece. Work begins at the bottom curve and short rows shape the cup upward into a pointed sweetheart top.
With E-4 hook, ch 37 (41, 45).
Row 1: Sc in 2nd ch from hook and in each ch across. Turn. (36, 40, 44)
Row 2: Ch 1, inc in first sc, sc across to last st, inc in last sc. Turn. (38, 42, 46)
Row 3: Ch 1, sc across. Turn. (38, 42, 46)
Row 4: Ch 1, inc in first sc, sc across to last st, inc in last sc. Turn. (40, 44, 48)
Row 5: Ch 1, sc across. Turn. (40, 44, 48)
Row 6: Ch 1, inc in first sc, sc across to last st, inc in last sc. Turn. (42, 46, 50)
Row 7: Ch 1, sc across. Turn. (42, 46, 50)
Row 8: Ch 1, inc in first sc, sc across to last st, inc in last sc. Turn. (44, 48, 52)
Row 9: Ch 1, sc across. Turn. (44, 48, 52)
Row 10: Ch 1, sc across to center 2 sts. Work sc2tog over center 2 sts. Sc to end. Turn. (43, 47, 51)
This begins the sweetheart V-notch. Now divide the cup into two halves.
Left Half of Cup
Row 11: Ch 1, sc across first 21 (23, 25) sts. Turn. Leave remaining sts unworked. (21, 23, 25)
Row 12: Ch 1, sc2tog, sc across. Turn. (20, 22, 24)
Row 13: Ch 1, sc across to last 2 sts, sc2tog. Turn. (19, 21, 23)
Row 14: Ch 1, sc2tog, sc across. Turn. (18, 20, 22)
Row 15: Ch 1, sc across. Turn. (18, 20, 22)
Row 16: Ch 1, sc2tog, sc across to last 2 sts, sc2tog. Turn. (16, 18, 20)
Row 17: Ch 1, sc across. Turn. (16, 18, 20)
Row 18: Ch 1, sc2tog, sc across to last 2 sts, sc2tog. Turn. (14, 16, 18)
Fasten off.
Right Half of Cup
Rejoin yarn at center with RS facing to the unworked 22 (24, 26) sts remaining after the Row 10 split.
Row 11: Ch 1, sc across 22 (24, 26) sts. Turn. (22, 24, 26)
Row 12: Ch 1, sc2tog, sc across. Turn. (21, 23, 25)
Row 13: Ch 1, sc across to last 2 sts, sc2tog. Turn. (20, 22, 24)
Row 14: Ch 1, sc2tog, sc across. Turn. (19, 21, 23)
Row 15: Ch 1, sc across to last 2 sts, sc2tog. Turn. (18, 20, 22)
Row 16: Ch 1, sc2tog, sc across to last 2 sts, sc2tog. Turn. (16, 18, 20)
Row 17: Ch 1, sc across. Turn. (16, 18, 20)
Row 18: Ch 1, sc2tog, sc across to last 2 sts, sc2tog. Turn. (14, 16, 18)
Fasten off.
Optional Bobble Detail Row
With RS facing, rejoin yarn at bottom of cup Row 1. Work 1 sc in each foundation chain st across. At the center of the row, place bobble as follows: sc in next 17 (19, 21) sts, work 1 bobble in next st, sc in next 17 (19, 21) sts. Fasten off.
Seaming Cups to Bodice
Position each cup onto the RS of the bodice Round 16 with the straight bottom edge of Row 1 of the cup aligned to the bodice stitches. Center each cup on the front half of the bodice, with the cup edges meeting at center front.
For Size Small, each cup covers approximately 36 sts at the bottom edge. Two cups cover 72 of the 156 total sts, centered on the front. The back 84 sts remain as the plain back panel.
For Size Medium, each cup covers 40 sts. Two cups cover 80 of 186 total sts, centered front.
For Size Large, each cup covers 44 sts. Two cups cover 88 of 204 total sts, centered front.
Pin cups in place and whip stitch along the bottom and side edges. The top curved sweetheart edge is left open and will be edged later.
Section 6: Upper Bodice and Cup Surround
Round 17 of Bodice: Join yarn at center back. Ch 1, sc in each st around the full bodice circumference, including along the top curved edge of the cups. At the top inner V of each cup, sc2tog to close the sweetheart notch. Work 1 sc2tog at the inner notch of each cup for 2 decreases total. Sl st to join. (154, 184, 202)
Round 18: Work even. (154, 184, 202)
Round 19 (Back Neck Shaping): Work sc across the back 77 (92, 101) sts. Turn. Do not work the front half.
Row 19A: Ch 1, sc2tog, sc across to last 2 sts, sc2tog. Turn. (75, 90, 99)
Row 19B: Ch 1, sc across. Turn. (75, 90, 99)
Row 19C: Ch 1, sc2tog, sc across to last 2 sts, sc2tog. Turn. (73, 88, 97)
Row 19D: Ch 1, sc across. Turn. (73, 88, 97)
Fasten off back panel.
Front Neckline Shaping: Rejoin yarn to left front edge of the bodice at the cup top. The front has 77 (92, 101) sts remaining.
Row F1: Ch 1, sc2tog, sc across to last 2 sts, sc2tog. Turn. (75, 90, 99)
Row F2: Ch 1, sc across. Turn. (75, 90, 99)
Row F3: Ch 1, sc2tog, sc across to last 2 sts, sc2tog. Turn. (73, 88, 97)
Row F4: Ch 1, sc across. Turn. (73, 88, 97)
Fasten off front panel.
Neckline Edging: With D-3 hook and RS facing, work 1 round of reverse single crochet along the entire top edge of the bodice, working continuously around. Work 1 rev sc per stitch and 1 rev sc per row end as needed to keep the edge flat. Sl st to join. Fasten off.
Section 7: Straps (Make 2)
With E-4 hook, ch 150 (160, 170).
Row 1: Sl st in 2nd ch from hook and in each ch across. (149, 159, 169 sl sts)
Fasten off, leaving a 12 inch tail for sewing.
Attach each strap: One end anchors to the top edge of the front bodice at the outer corner of each cup. The other end of each strap crosses over the shoulder and anchors to the back bodice at the corresponding back corner. Adjust strap length before final sewing to ensure comfort. Pin, try on a mannequin or fit model, then sew securely with tapestry needle.
Section 8: Dahlia Flower Corsage
The dahlia is worked in multiple layers of petals, stacked and sewn together. Vary the petal lengths for dimension.
Inner Petals (make 8): Ch 8, sl st in 2nd ch from hook and in each ch across. (7 sl sts)
Mid Petals (make 10): Ch 10, sl st in 2nd ch from hook and in each ch across. (9 sl sts)
Outer Petals (make 12): Ch 14, sl st in 2nd ch from hook and in each ch across. (13 sl sts)
Join each petal strip into a small loop by slip stitching the working end to the base. Arrange inner petals in a tight circle and sew together at the base. Layer mid petals around the inner petals, offsetting placement. Add outer petals around the mid layer, fanning outward. Sew all layers securely together at the center.
Pin the finished dahlia to one shoulder strap where it meets the bodice. Sew in place with matching yarn.
Finishing Your Sunset Orange Dahlia Ruffle Mini Dress
Weave in all remaining ends securely. Block the entire dress by soaking in cool water, gently pressing out excess water with a towel, and laying flat on a blocking mat. Pin the scallop hem to open the shells and smooth the bodice cups into shape. Allow to dry completely before wearing.
For extra waist definition, thread boning or waistband stabilizer tape through the waistband section before wearing.
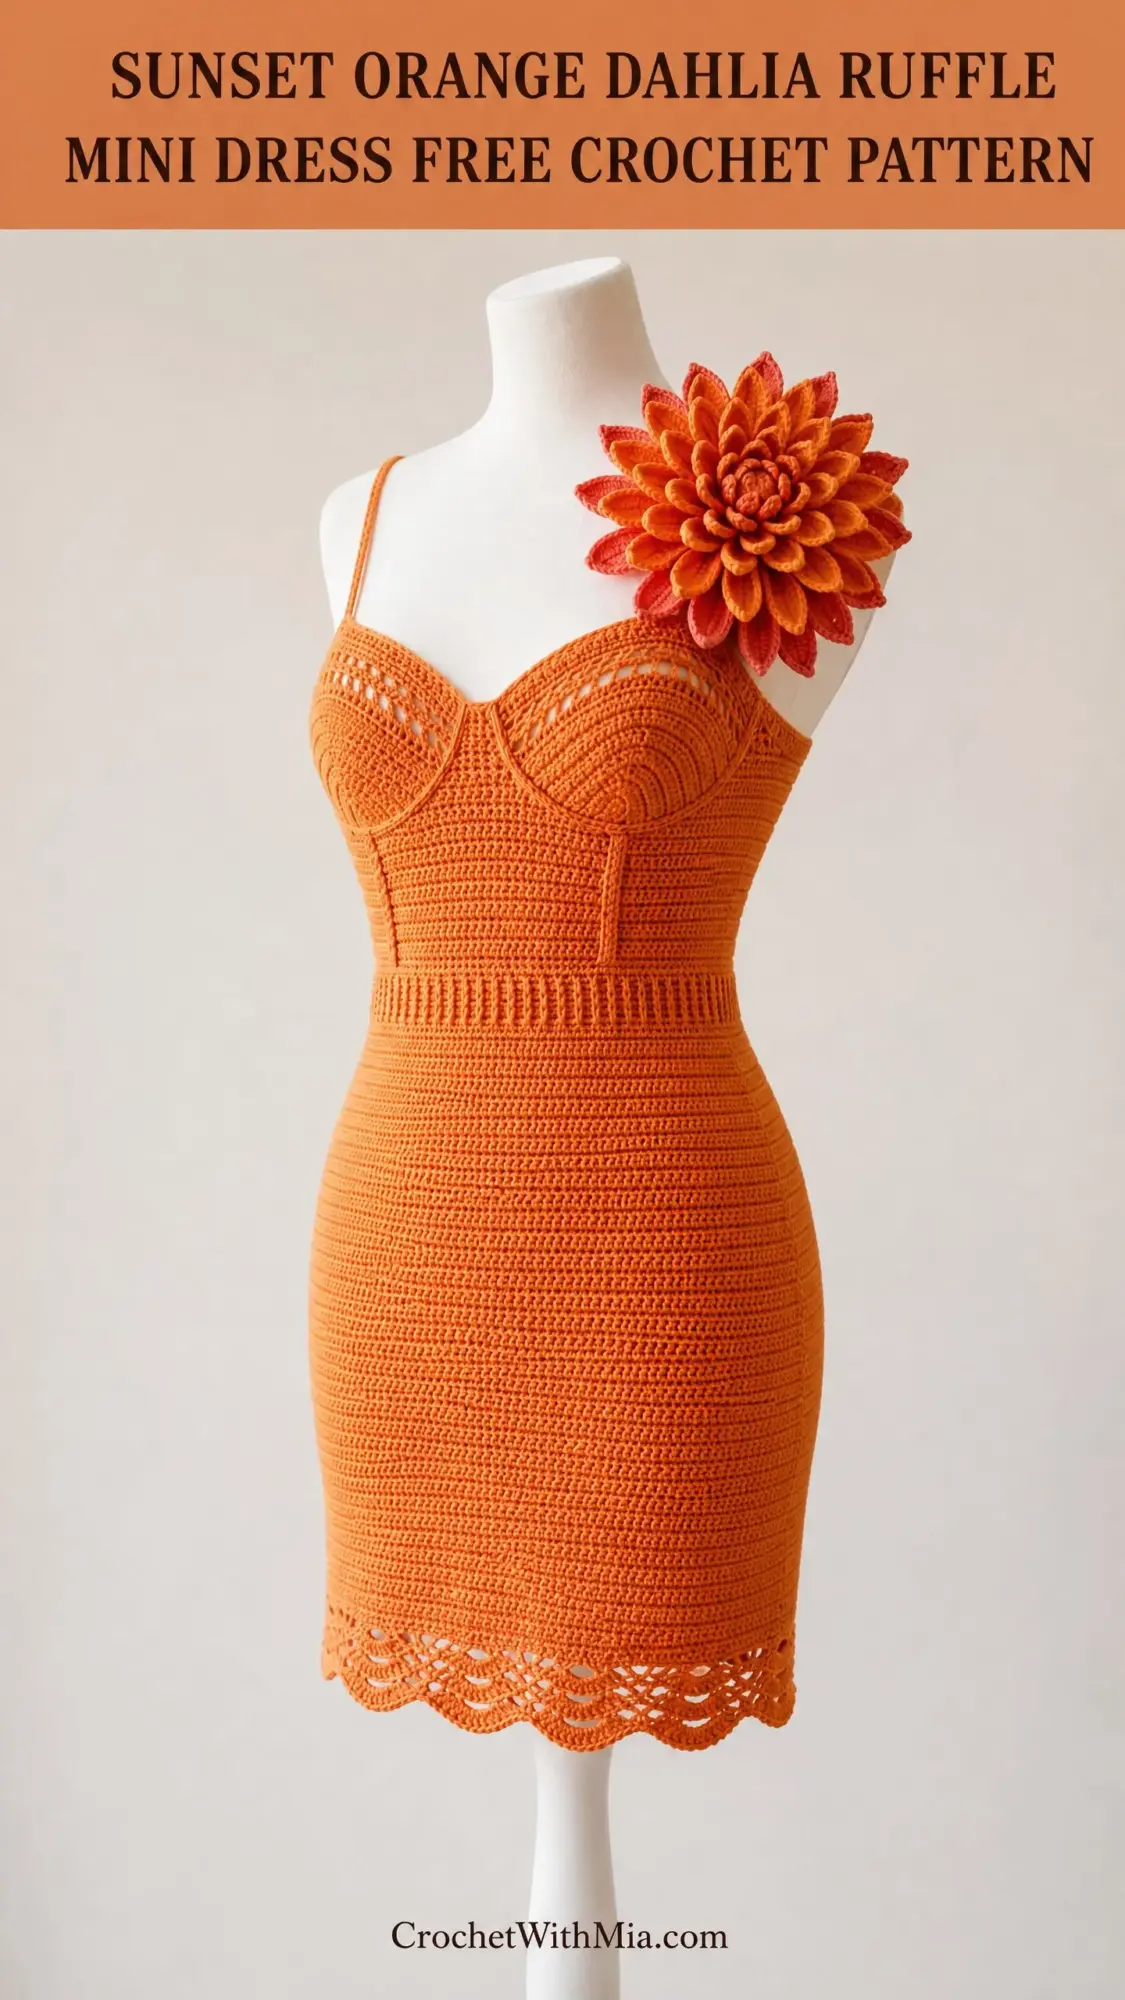
Tips for Success with This Crochet Tutorial
Swatch before you begin. I cannot stress this enough for fitted garments.
Use stitch markers liberally. Mark the beginning of every round and the placement of decrease stitches.
Try the dress on a dress form or fit model during construction. Adjust cup placement before final seaming.
Take your time with the cups. They are the trickiest part, but they create the stunning silhouette.
Block aggressively. Cotton yarn responds beautifully to wet blocking and the finished shape will be much cleaner.
Thank you so much for choosing this pattern for your next big crochet project. I truly hope you love making this dress as much as I loved designing it. The finished piece is absolutely worth every hour of work.
If you found this Sunset Orange Dahlia Ruffle Mini Dress crochet pattern helpful, please save it to your Pinterest boards so you can find it easily when you are ready to start. And if you make one, I would absolutely love to see it. Drop a comment below with your photos or tag me on social media. Happy crocheting!