
I don’t know about you, but I have a serious weakness for baby clothes that make me audibly gasp. You know the ones. The tiny outfits that are almost too cute to actually put on an actual baby because what if they spit up on it?
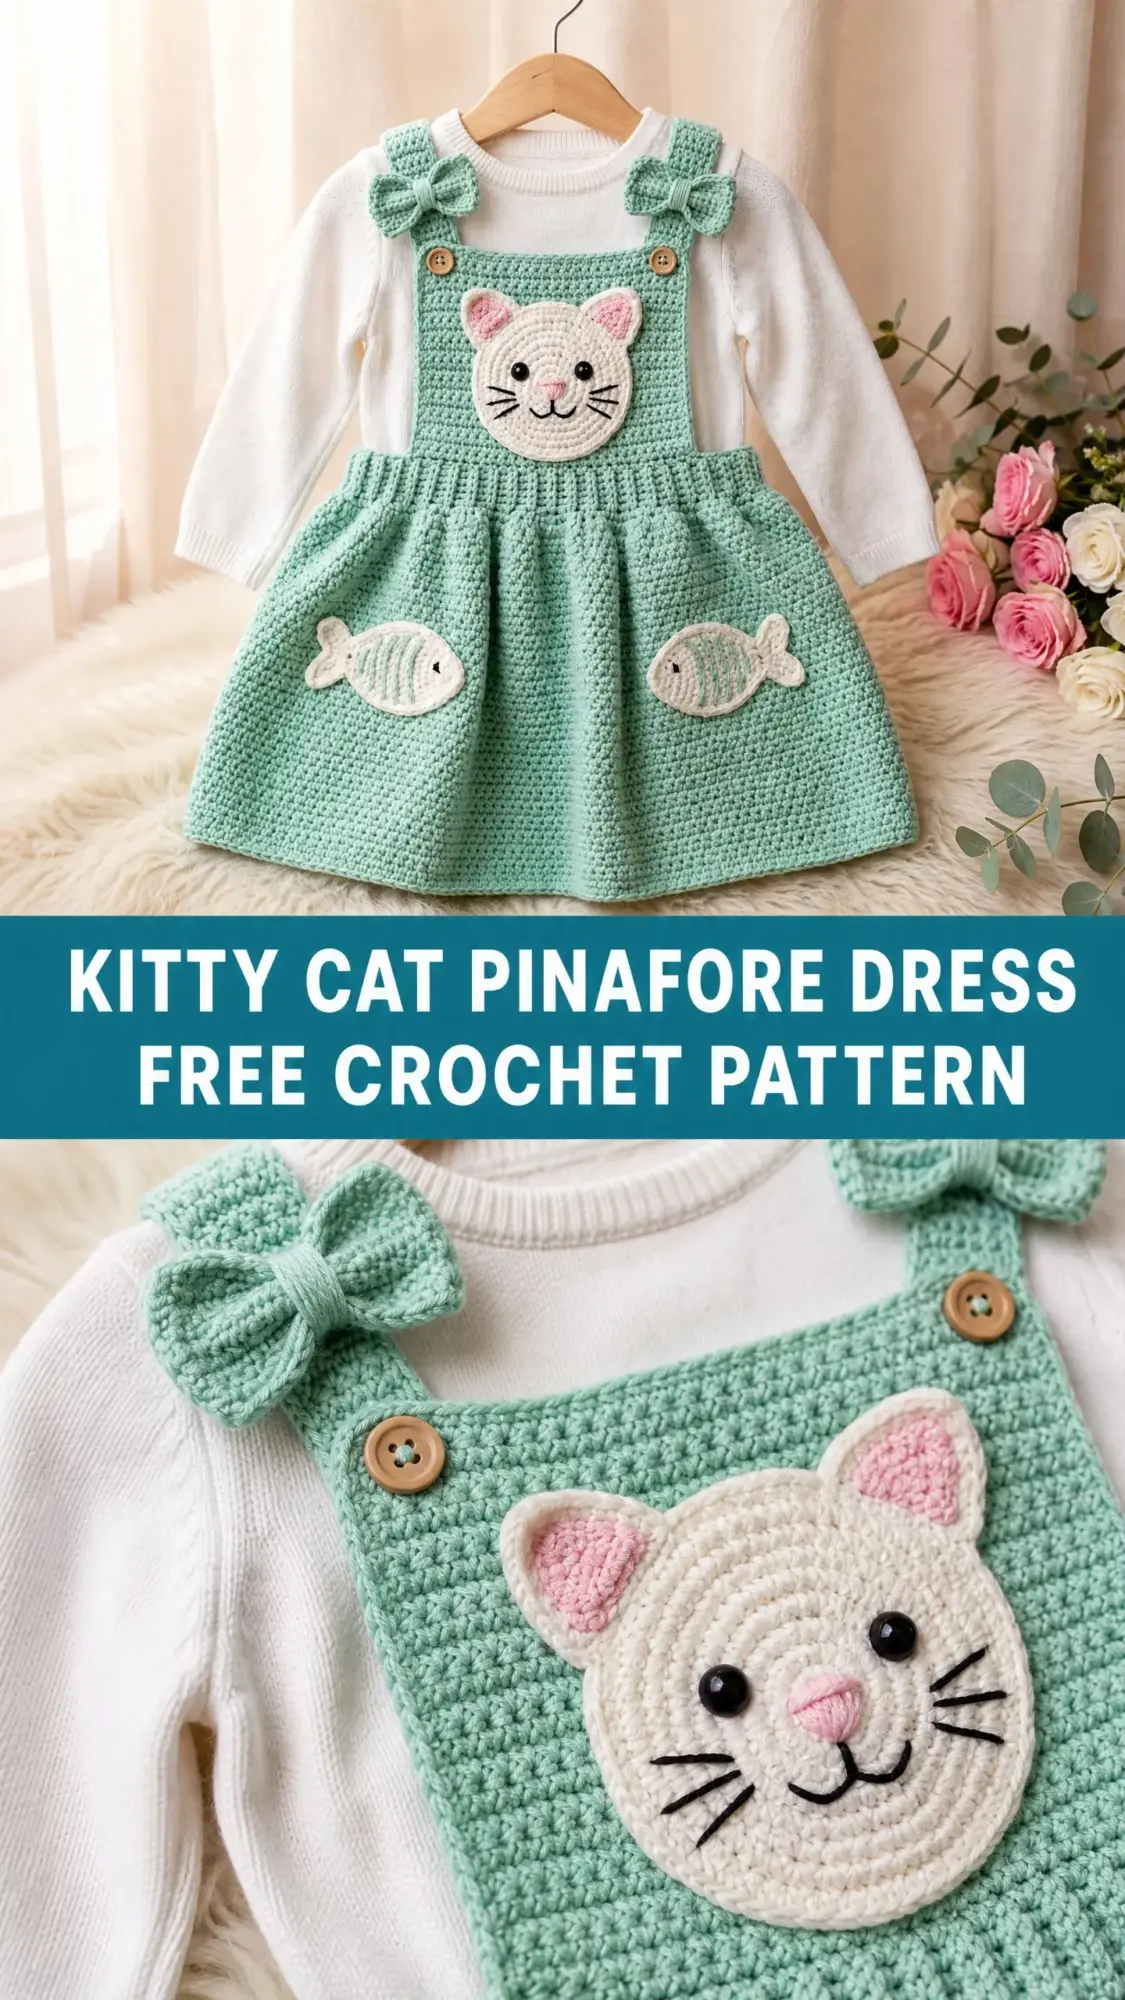
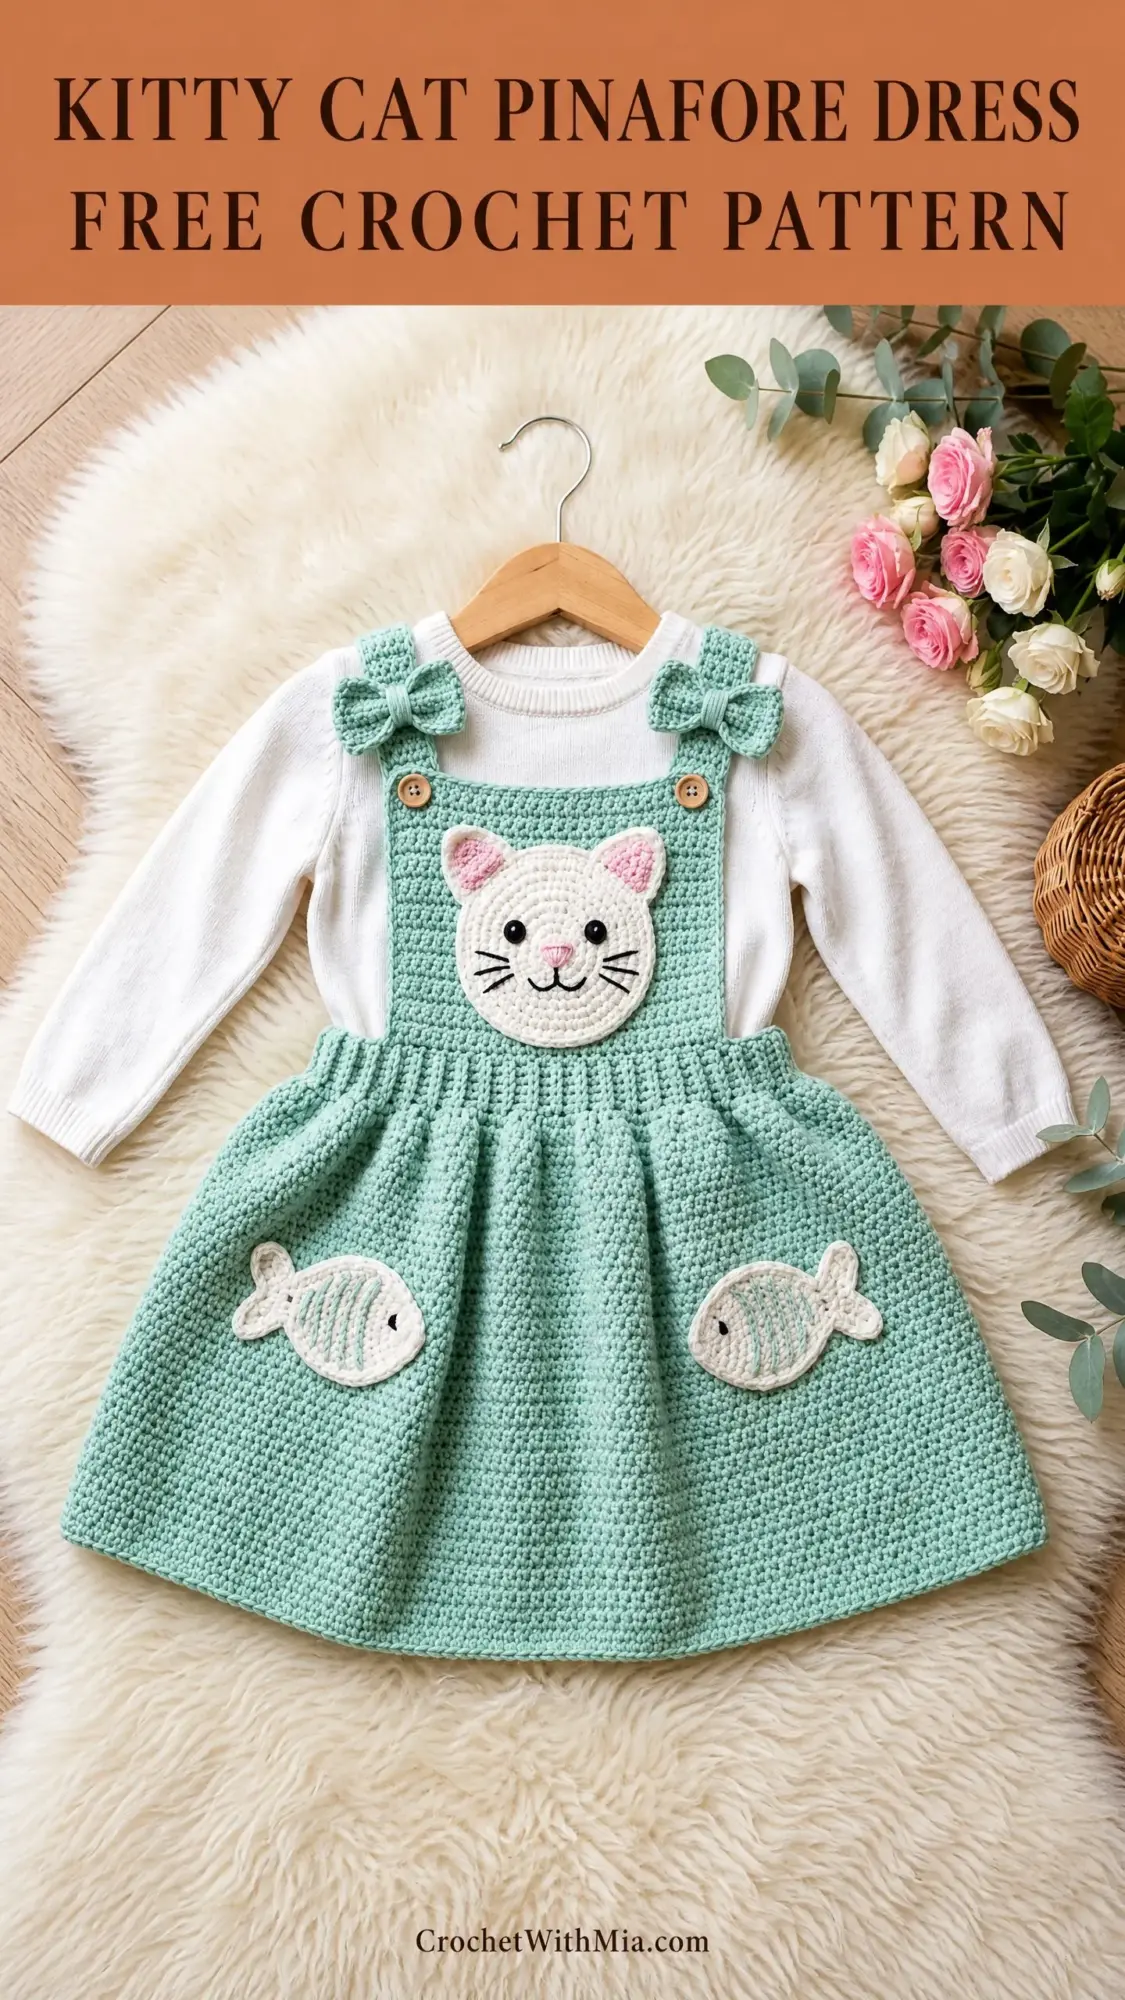
This kitty cat pinafore dress is exactly that kind of project. It combines a sweet mint green pinafore with an adorable crocheted cat face on the bib, complete with little fish appliques on the skirt that look like the kitty’s snacks. The whole thing layers over a simple white onesie or long sleeve top, and honestly, every time I look at it I want to squeeze something.
The best part? While it looks impressive, the construction is totally manageable. The main body uses a simple moss stitch texture, and all those cute details are worked separately and sewn on at the end. No complicated colorwork while you’re trying to count stitches. Just straightforward pieces that come together into something absolutely precious.
Why You’ll Love This Crochet Pattern
This pinafore dress hits that sweet spot between "looks like it took forever" and "I can actually finish this." The moss stitch creates beautiful texture without requiring you to learn anything fancy, and working the appliques separately means you can take your time perfecting that little cat face without the pressure of it being attached to anything yet.
The design includes practical details too. Button closures at the shoulder straps make dressing a wiggly baby much easier. The slightly flared skirt gives plenty of room for crawling and toddling. And because it’s a pinafore rather than a full dress, you can layer it over different tops for different looks.
Perfect for gift giving, this pattern creates a keepsake quality garment that any new parent would treasure. The finished size fits babies 12 to 18 months, with notes included for sizing up or down.
Skill Level
This crochet pattern is rated intermediate. You should be comfortable with working flat pieces, seaming, basic shaping with increases and decreases, working in the round for the appliques, and surface embroidery for the cat face details.
Don’t let that scare you off if you’re a confident beginner though. The main body uses just single crochet and chains in a repeating pattern. The trickiest parts are really just keeping track of your stitch counts and taking your time with the embroidered details at the end.
Finished Measurements
Size: 12 to 18 months
Materials Needed
Yarn
Hooks
Additional Materials
Yarn Suggestions
Any DK weight yarn that achieves gauge will work beautifully. Here are a few I recommend:
Lion Brand Pound of Love in Mint and Fisherman is machine washable, widely available, and holds stitch definition well. Ideal for baby garments.
Paintbox Yarns Simply DK in Spearmint Green and Champagne White offers excellent stitch clarity, consistent tension, and a budget-friendly price point.
Drops Baby Merino in a mint shade and natural is wonderfully soft against baby skin. The slight halo adds charm to the texture, though it requires gentle machine wash or hand wash.
Important: Avoid novelty or fuzzy yarns as they obscure the moss stitch texture and make applique attachment difficult.
Gauge
With F-5 / 3.75 mm hook and MC, in moss stitch pattern:
18 stitches and 20 rows = 4 inches / 10 cm (blocked)
With E-4 / 3.5 mm hook and CA, in single crochet:
20 stitches and 22 rows = 4 inches / 10 cm
Gauge is critical for a well-fitting garment. Please make and block a gauge swatch before beginning. I know it’s tempting to skip this step, but baby sizing is unforgiving and you’ll thank yourself later.
Abbreviations (US Terms)
Before we dive into the step by step instructions, let’s go over all the abbreviations you’ll encounter. I’ll define each one so you know exactly what to do.
Special Stitches
Moss Stitch (also called Linen Stitch or Granite Stitch)
This is the primary texture stitch used for the skirt and bib body. It creates a lovely woven look that’s sturdier than basic single crochet.
Row 1 (foundation): Ch an even number. Sc in second ch from hook, (ch 1, sk 1 ch, sc in next ch) across. Turn.
Row 2: Ch 1, sc in first sc, (ch 1, sk ch-1 sp, sc in next sc) across, ending sc in last sc. Turn.
In this pattern, every sc sits over a sc and every ch-1 sp sits over a ch-1 sp of the previous row. The stitch count given at the end of each row counts only the sc stitches (not the ch-1 spaces) unless otherwise noted.
Back Loop Only Single Crochet (BLO sc)
Insert hook under the back loop only (the loop farthest from you) of the indicated stitch, yo, pull through, yo, pull through both loops on hook. This creates the ribbed texture for the waistband.
Adjustable Ring (Magic Ring)
Make a loop with the yarn leaving a 6-inch tail. Insert hook through loop, yo and pull up a loop, ch 1 (or as specified) to begin. Work stitches into the loop, then pull tail to close the ring tightly.
Pattern Notes
Read through these before starting. They’ll save you confusion later.
The pinafore skirt is worked flat (back and forth in rows) beginning at the hem and working up to the waist. The hem is slightly wider and tapers toward the waist using evenly spaced decreases.
The waistband is worked in BLO sc rows attached to the top edge of the skirt, creating a subtle ribbed texture.
The bib is worked flat upward from the waistband, narrowing to create the bib shape, then divides for two straps.
All appliques (cat face, ears, fish) are made separately with the smaller hook and attached with yarn needle after all main pieces are blocked.
When the pattern says "turn," you will turn your work and make a chain for the next row unless otherwise specified.
Stitch counts at the end of rows for the moss stitch section count only the sc stitches. The full working stitch count including ch-1 spaces equals (sc count x 2) minus 1.
The skirt is worked as a flat rectangle with shaping. The finished skirt is seamed at the center back with a short seam at the lower portion, leaving the upper 3 inches / 7.5 cm open or closed with a button for ease of dressing.
RS is the smooth, public-facing side of the single crochet fabric.
Crochet Pattern Instructions
Skirt
The skirt is worked flat in moss stitch, beginning at the hem edge and shaping up toward the waist. The hem measures approximately 22 inches / 56 cm wide (flat, single layer).
Foundation Chain: With F-5 hook and MC, ch 101.
Row 1 (RS): Sc in 2nd ch from hook, (ch 1, sk 1, sc in next ch) across. Turn. (50 sc, 49 ch-1 sps = 99 working sts)
Row 2: Ch 1, sc in first sc, (ch 1, sk ch-1 sp, sc in next sc) across. Turn. (50 sc)
Rows 3 through 8: Rep Row 2. (50 sc each row)
Row 9 (decrease row): Ch 1, sc2tog over first sc and next ch-1 sp (treat the ch-1 sp as a stitch space: insert hook in first sc, pull up loop, insert hook in ch-1 sp, pull up loop, yo and draw through all 3 loops), (ch 1, sk 0, sc in next sc, ch 1, sk ch-1 sp, sc in next sc) across to last 4 sts, ch 1, sc2tog over next sc and final sc. Turn. (48 sc)
Note on decreasing in moss stitch: To decrease while maintaining the pattern, work sc2tog by inserting hook into one sc and then the next sc (skipping the ch-1 sp between them), completing the sc2tog normally. This eliminates one sc and one ch-1 sp, reducing stitch count by 1 sc per decrease worked. Work 2 decreases per decrease row, one at each end.
Row 10: Ch 1, sc in first sc, (ch 1, sk ch-1 sp, sc in next sc) across. Turn. (48 sc)
Rows 11 through 16: Rep Row 10. (48 sc)
Row 17 (decrease row): Dec at each end as established. Turn. (46 sc)
Rows 18 through 23: Rep Row 10. (46 sc)
Row 25 (decrease row): Dec at each end as established. Turn. (44 sc)
Rows 26 through 28: Rep Row 10. (44 sc)
Row 29 (decrease row): Dec at each end as established. Turn. (42 sc)
Rows 30 through 32: Rep Row 10. (42 sc)
Row 33 (decrease row): Dec at each end as established. Turn. (40 sc)
Rows 34 through 36: Rep Row 10. (40 sc)
Row 37 (decrease row): Dec at each end as established. Turn. (38 sc)
Row 38: Rep Row 10. (38 sc)
Row 39 (decrease row): Dec at each end as established. Turn. (36 sc)
Row 40: Rep Row 10. (36 sc)
Fasten off. This is the waist edge of the skirt.
CHECKPOINT: The skirt should measure approximately 8 inches / 20.5 cm tall from hem to waist edge and approximately 16 inches / 40.5 cm wide at the waist edge (flat). The hem should measure approximately 22 inches / 56 cm wide (flat). Block lightly before continuing.
Waistband
The waistband is worked in BLO sc rows across the waist edge of the skirt, creating a ribbed band approximately 1 inch / 2.5 cm tall.
Attach MC to top-right corner of skirt waist edge with RS facing.
Row 1 (RS): Ch 1, sc evenly across waist edge, working 1 sc per sc stitch and 1 sc per ch-1 sp across. You should have 71 sc across. Turn. (71 sc)
Note: Working into both the sc stitches and ch-1 spaces of the final moss stitch row gives you a denser base for the waistband.
Row 2: Ch 1, BLO sc in each sc across. Turn. (71 sc)
Row 3: Ch 1, BLO sc in each sc across. Turn. (71 sc)
Row 4: Ch 1, BLO sc in each sc across. Turn. (71 sc)
Row 5: Ch 1, BLO sc in each sc across. Turn. (71 sc)
Do not fasten off. Continue immediately to bib construction.
CHECKPOINT: The waistband should measure approximately 1 inch / 2.5 cm tall and the ribbed texture should be visible on the RS.
Bib / Bodice Front
The bib is worked upward from the center of the waistband top edge, in moss stitch, shaping into a rectangular bib panel approximately 8 inches / 20.5 cm wide and 4 inches / 10 cm tall, then dividing into two straps.
With RS facing, count to center of waistband. The bib begins 18 sts in from left edge and ends 18 sts in from right edge, worked over the center 35 sts.
Setup Row: With RS facing and working across waistband top, sl st across first 18 sts, ch 1, sc in same st (this is the 19th st), (ch 1, sk 1, sc in next) across until 18 sts remain unworked at right end. Turn. (18 sc for bib, 17 ch-1 sps)
Note: You have 18 sc in the bib panel, worked over 35 stitches of the waistband.
Row 1: Ch 1, sc in first sc, (ch 1, sk ch-1 sp, sc in next sc) across. Turn. (18 sc)
Rows 2 through 18: Rep Row 1. (18 sc each row)
CHECKPOINT: The bib panel should measure approximately 4 inches / 10 cm tall from the waistband top. The bib is 18 sc wide, approximately 8 inches / 20.5 cm at gauge.
After Row 18, divide for straps.
Strap Division
Left Strap
Row 1: Ch 1, sc in first sc, (ch 1, sk ch-1 sp, sc in next sc) 3 times, sc in next sc. Turn, working only over these first 4 sc (7 working sts including ch-1 sps). (4 sc)
Rows 2 through 34: Ch 1, sc in first sc, (ch 1, sk ch-1 sp, sc in next sc) 3 times. Turn. (4 sc)
Button Loop Row: Ch 1, sc in first sc, ch 1, sk ch-1 sp, sc in next sc, ch 3 (button loop), sk next sc, sc in last sc. Turn. (4 sc with button loop)
Final Row: Ch 1, sc in first sc, ch 1, sk ch-1 sp, sc in next sc, ch 1, sc in ch-3 sp, ch 1, sc in last sc. Turn. (4 sc)
Fasten off, leaving a 6-inch tail.
Right Strap
Skip 10 center sc of bib top (these remain as the center bib top), attach MC to 15th sc of bib top.
Row 1: Ch 1, sc in same st, (ch 1, sk ch-1 sp, sc in next sc) 3 times. Turn. (4 sc)
Rows 2 through 34: Ch 1, sc in first sc, (ch 1, sk ch-1 sp, sc in next sc) 3 times. Turn. (4 sc)
Button Loop Row: Work same as Left Strap Button Loop Row. (4 sc with button loop)
Final Row: Work same as Left Strap Final Row. (4 sc)
Fasten off, leaving a 6-inch tail.
CHECKPOINT: Each strap should measure approximately 7 inches / 18 cm long and approximately 1.75 inches / 4.5 cm wide.
Skirt Back Panel
The pinafore has a back panel that is worked identically to the skirt front but without the bib. Work a back skirt panel the same as the Skirt instructions above (Rows 1 through 40), then add the Waistband (Rows 1 through 5) on top. Fasten off after the waistband. This back waistband edge is seamed to the front waistband at the sides.
Back Straps
Attach MC at right edge of back waistband, 18 sts from the right edge. Work a 4-sc-wide moss stitch strap identical to the front straps for Rows 1 through 34. On the final row, work 1 sc in each sc (4 sc straight row for button placement). Sew 2 buttons to the RS of back strap ends, aligned to button loops on front straps.
Repeat for left back strap.
Assembly of Main Body
Seam skirt: With yarn needle and MC, seam the right side edge of front skirt to right side edge of back skirt using mattress stitch for approximately 6 inches / 15 cm up from the hem. Leave the upper 2 inches / 5 cm open at each side for arm ease. Seam the left side identically. Weave in ends.
The waistband front and back are already connected via the side seams of the skirt. The side seams hold the front and back together.
Seam center back (optional): If a fitted look is desired, seam the center-back waistband edges together for 1 inch / 2.5 cm and add a button and loop closure at the top of the back waistband for easy dressing.
Bow Appliques (make 2)
With E-4 hook and MC, ch 19.
Row 1: Sc in 2nd ch from hook and in each ch across. Turn. (18 sc)
Rows 2 through 8: Ch 1, sc in each sc across. Turn. (18 sc)
Fasten off, leaving a 12-inch tail.
Pinch the rectangle firmly at the center to form the bow shape. Wrap the tail yarn around the center 6 to 8 times tightly and knot securely on the WS. Sew one bow to the top-front of each strap (at the strap/bib join area) using yarn needle. The bow should sit horizontally with loops pointing left and right.
Cat Face Applique
Worked in the round with E-4 hook and CA.
Rnd 1: Make adjustable ring, ch 1, work 6 sc into ring, pull tail to close. Sl st to first sc. (6 sc)
Rnd 2: Ch 1, inc in each sc around. Sl st to first sc. (12 sc)
Rnd 3: Ch 1, (sc in next sc, inc in next sc) 6 times. Sl st to first sc. (18 sc)
Rnd 4: Ch 1, (sc in next 2 sc, inc in next sc) 6 times. Sl st to first sc. (24 sc)
Rnd 5: Ch 1, (sc in next 3 sc, inc in next sc) 6 times. Sl st to first sc. (30 sc)
Rnd 6: Ch 1, (sc in next 4 sc, inc in next sc) 6 times. Sl st to first sc. (36 sc)
Rnd 7: Ch 1, (sc in next 5 sc, inc in next sc) 6 times. Sl st to first sc. (42 sc)
Rnd 8: Ch 1, sc in each sc around. Sl st to first sc. (42 sc)
Fasten off, leaving a long tail for sewing. The circle should measure approximately 3.5 inches / 9 cm in diameter.
Cat Ears (make 2)
With E-4 hook and CA.
Ch 2.
Row 1: 3 sc in 2nd ch from hook. Turn. (3 sc)
Row 2: Ch 1, inc in first sc, sc in next sc, inc in last sc. Turn. (5 sc)
Row 3: Ch 1, inc in first sc, sc in next 3 sc, inc in last sc. Turn. (7 sc)
Row 4: Ch 1, inc in first sc, sc in next 5 sc, inc in last sc. Turn. (9 sc)
Row 5: Ch 1, sc in each sc across. Turn. (9 sc)
Row 6 (inner ear color change): Drop CA. With E-4 hook and CB, ch 1, sc2tog, sc in next 5 sc, sc2tog. Turn. (7 sc)
Row 7: Ch 1, sc2tog, sc in next 3 sc, sc2tog. Turn. (5 sc)
Row 8: Ch 1, sc2tog, sc in next sc, sc2tog. Turn. (3 sc)
Row 9: Ch 1, sc2tog, sc in next sc. (2 sc)
Fasten off, leaving a long tail. The ear is a small triangle approximately 1.25 inches / 3 cm tall and 1.75 inches / 4.5 cm wide at the base.
Fish Appliques (make 2)
With E-4 hook and CA.
Ch 12.
Row 1 (RS): Sc in 2nd ch from hook and in each ch across. Turn. (11 sc)
Row 2: Ch 1, inc in first sc, sc in next 9 sc, inc in last sc. Turn. (13 sc)
Row 3: Ch 1, inc in first sc, sc in next 11 sc, inc in last sc. Turn. (15 sc)
Row 4: Ch 1, sc in each sc across. Turn. (15 sc)
Row 5: Ch 1, sc2tog, sc in next 11 sc, sc2tog. Turn. (13 sc)
Row 6: Ch 1, sc2tog, sc in next 9 sc, sc2tog. Turn. (11 sc)
Row 7: Ch 1, sc in each sc across. Turn. (11 sc)
This forms the body of the fish. Do not fasten off.
Fish Tail
Ch 1, turn work 90 degrees. Work along the left short edge: 4 sc evenly down the edge. Turn. (4 sc)
Row 1: Ch 1, inc in first sc, sc in next 2 sc, inc in last sc. Turn. (6 sc)
Row 2: Ch 1, inc in first sc, sc in next 4 sc, inc in last sc. Turn. (8 sc)
Row 3: Ch 1, sc2tog, sc in next 4 sc, sc2tog. Turn. (6 sc)
Row 4: Ch 1, sc2tog, sc in next 2 sc, sc2tog. Turn. (4 sc)
Fasten off tail yarn, leaving long sewing tail.
Add stripe detail to fish: With CA and yarn needle or with a separate yarn color, use running stitch or slip stitch along the RS of the fish body to create 3 to 4 horizontal stripes. Alternatively, use surface slip stitch with a slightly darker CA yarn to add stripe texture.
Each fish should measure approximately 3 inches / 7.5 cm long and 1.5 inches / 4 cm tall at widest point.
Cat Face Details
Before sewing the cat face to the bib, add embroidered details:
Eyes: Using black yarn or embroidery thread, embroider two small circles or French knots approximately 0.75 inches / 2 cm apart and 0.5 inches / 1.5 cm above center of the circle. For children under 3, use embroidery rather than buttons due to choking hazard.
Nose: Using CB (pink), embroider a small inverted triangle shape at the center of the face, approximately 0.25 inches / 0.5 cm wide.
Mouth: Using black yarn, embroider a Y-shape below the nose: a short vertical line down from the nose tip, then two short diagonal lines curving outward and slightly upward to form a cat mouth.
Whiskers: Using black yarn, embroider 3 long straight lines radiating from each side of the nose area (6 whiskers total), each approximately 0.75 inches / 2 cm long.
Applique Placement and Attachment
Cat face: Position the cat face circle at the center of the bib panel, approximately 0.5 inches / 1.5 cm below the strap join. Pin in place. Sew around the entire perimeter of the circle using whipstitch or mattress stitch with CA yarn. Before closing completely, stuff lightly with a small amount of fiberfill for a subtle dimensional effect if desired, then close.
Cat ears: Position one ear at the upper-left of the cat face circle and one at the upper-right, slightly overlapping the circle edge. The ear base should overlap the circle by approximately 0.25 inches / 0.5 cm. Sew each ear base securely to the bib and to the cat face circle.
Fish appliques: Position one fish on the left pocket area of the skirt, approximately 2.5 inches / 6.5 cm up from the hem and 1.5 inches / 4 cm in from the left side seam. Position the second fish symmetrically on the right side. Both fish should face inward (tails toward the side seams). Sew each fish around its entire perimeter with CA yarn and whipstitch.
Bows: Sew one bow centered on the top of each front strap, at the point where the strap meets the bib shoulder area.
Buttons: Sew 2 buttons onto the RS of the back strap ends, positioned to align with the ch-3 button loops on the front straps. Button placement: 0.5 inches / 1.5 cm from the end of the strap.
Size Customization Tips
To size down to 6 to 12 months: Reduce the starting chain by 10 stitches (ch 91 instead of 101) and work fewer decrease rows in the skirt to maintain proportion. Reduce bib width by 2 sc and strap length by 4 rows.
To size up to 2T to 3T: Increase the starting chain by 10 stitches (ch 111) and add 2 additional decrease rows. Add 4 to 6 rows to the strap length. Increase the bib width by 2 sc.
General rule: At gauge, each 2 sc added to or removed from the starting chain changes the flat width by approximately 0.5 inches / 1.5 cm. Each 2 rows added to or removed from the skirt changes the length by approximately 0.4 inches / 1 cm.
If using a heavier worsted weight yarn, go up to a G-6 / 4 mm hook and expect to reduce stitch counts proportionally.
Finishing and Blocking
Weave in all yarn ends securely with a tapestry needle, working tails back and forth through stitches in different directions to prevent unraveling.
Wet block the main skirt and bib panels before attaching appliques. Submerge in cool water, gently squeeze out excess moisture, lay flat on a blocking board, pin to finished measurements, and allow to dry completely. This evens out the moss stitch texture and sets the shaping.
Appliques may be lightly steam-blocked with a pressing cloth before attachment.
After all appliques and buttons are sewn on, give the garment a final light steam press on the WS only, avoiding embroidered and stuffed areas.
Care Instructions
Time Estimate
Approximately 10 to 14 hours for an experienced intermediate crocheter, broken into:
This is a perfect project to work on over a week or two of evening crochet sessions. The appliques especially are great for working on while watching TV since they’re small and don’t require as much counting.
Final Thoughts on This Crochet Tutorial
This kitty cat pinafore dress crochet pattern is one of those projects that looks far more complicated than it actually is. Yes, there are multiple pieces. Yes, there’s embroidery. But each individual component is straightforward, and the magic happens when you bring it all together at the end.
Take your time with the cat face details. That’s where the personality comes through. And don’t stress if your first fish looks a little wonky. The second one always turns out better, and honestly, slightly imperfect handmade details just add to the charm.
Thank you so much for choosing this pattern for your next project. I genuinely hope you love making it as much as I loved designing it.
If you make this adorable pinafore, I would absolutely love to see it! Tag me on Instagram or share a photo in our Facebook group. And if you’re not quite ready to start yet, save this pattern to your Pinterest boards so you can find it when the time is right. Drop a comment below if you have any questions or just want to say hello. Happy crocheting!