
I don’t know about you, but I am always searching for that perfect everyday bag. You know the one. Big enough to hold everything, sturdy enough to last, and beautiful enough that people stop you on the street to ask where you got it.
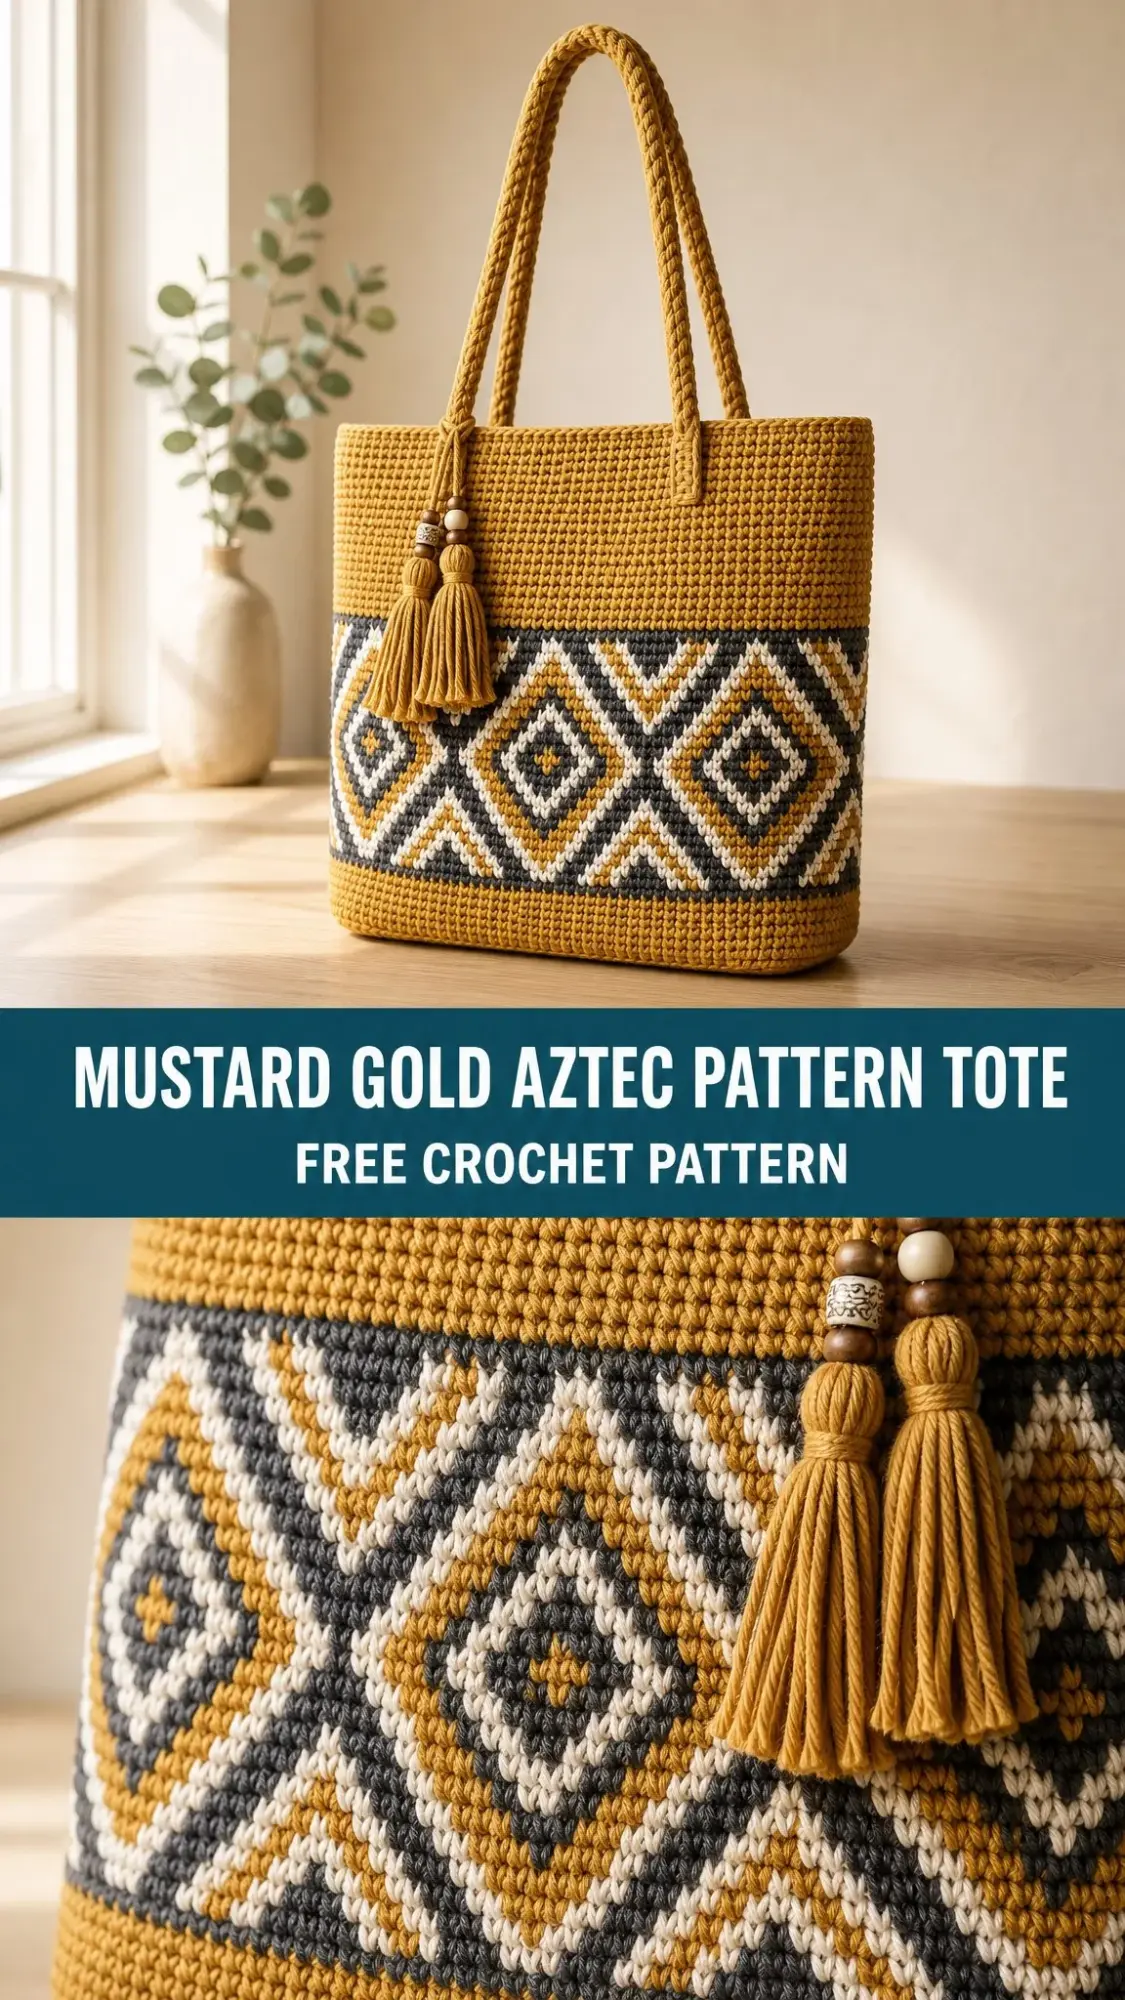
This mustard gold tote with its bold geometric colorwork band is exactly that bag. The rich golden yellow pairs beautifully with charcoal gray and off-white in a striking diamond and chevron motif that looks incredibly impressive but breaks down into simple, manageable steps.
The best part? You made it yourself. And once you learn the tapestry crochet technique used in the colorwork section, you will want to put geometric patterns on everything you make.
Why This Aztec Tote Stands Out
This structured tote bag features a solid mustard gold body worked entirely in single crochet (sc), which means you insert your hook into a stitch, yarn over, pull up a loop, yarn over again, and pull through both loops on your hook. Simple and satisfying.
The showstopper is the Fair Isle-style colorwork band across the lower third of the bag. This band uses tapestry crochet, a technique where you carry unused yarn colors inside your stitches as you work. The result is a thick, reversible fabric with no messy floats on the inside.
The geometric pattern repeats six times around the bag, creating a seamless design that looks the same from every angle. Both the front and back of the bag feature identical colorwork, so there is no wrong side to accidentally show.
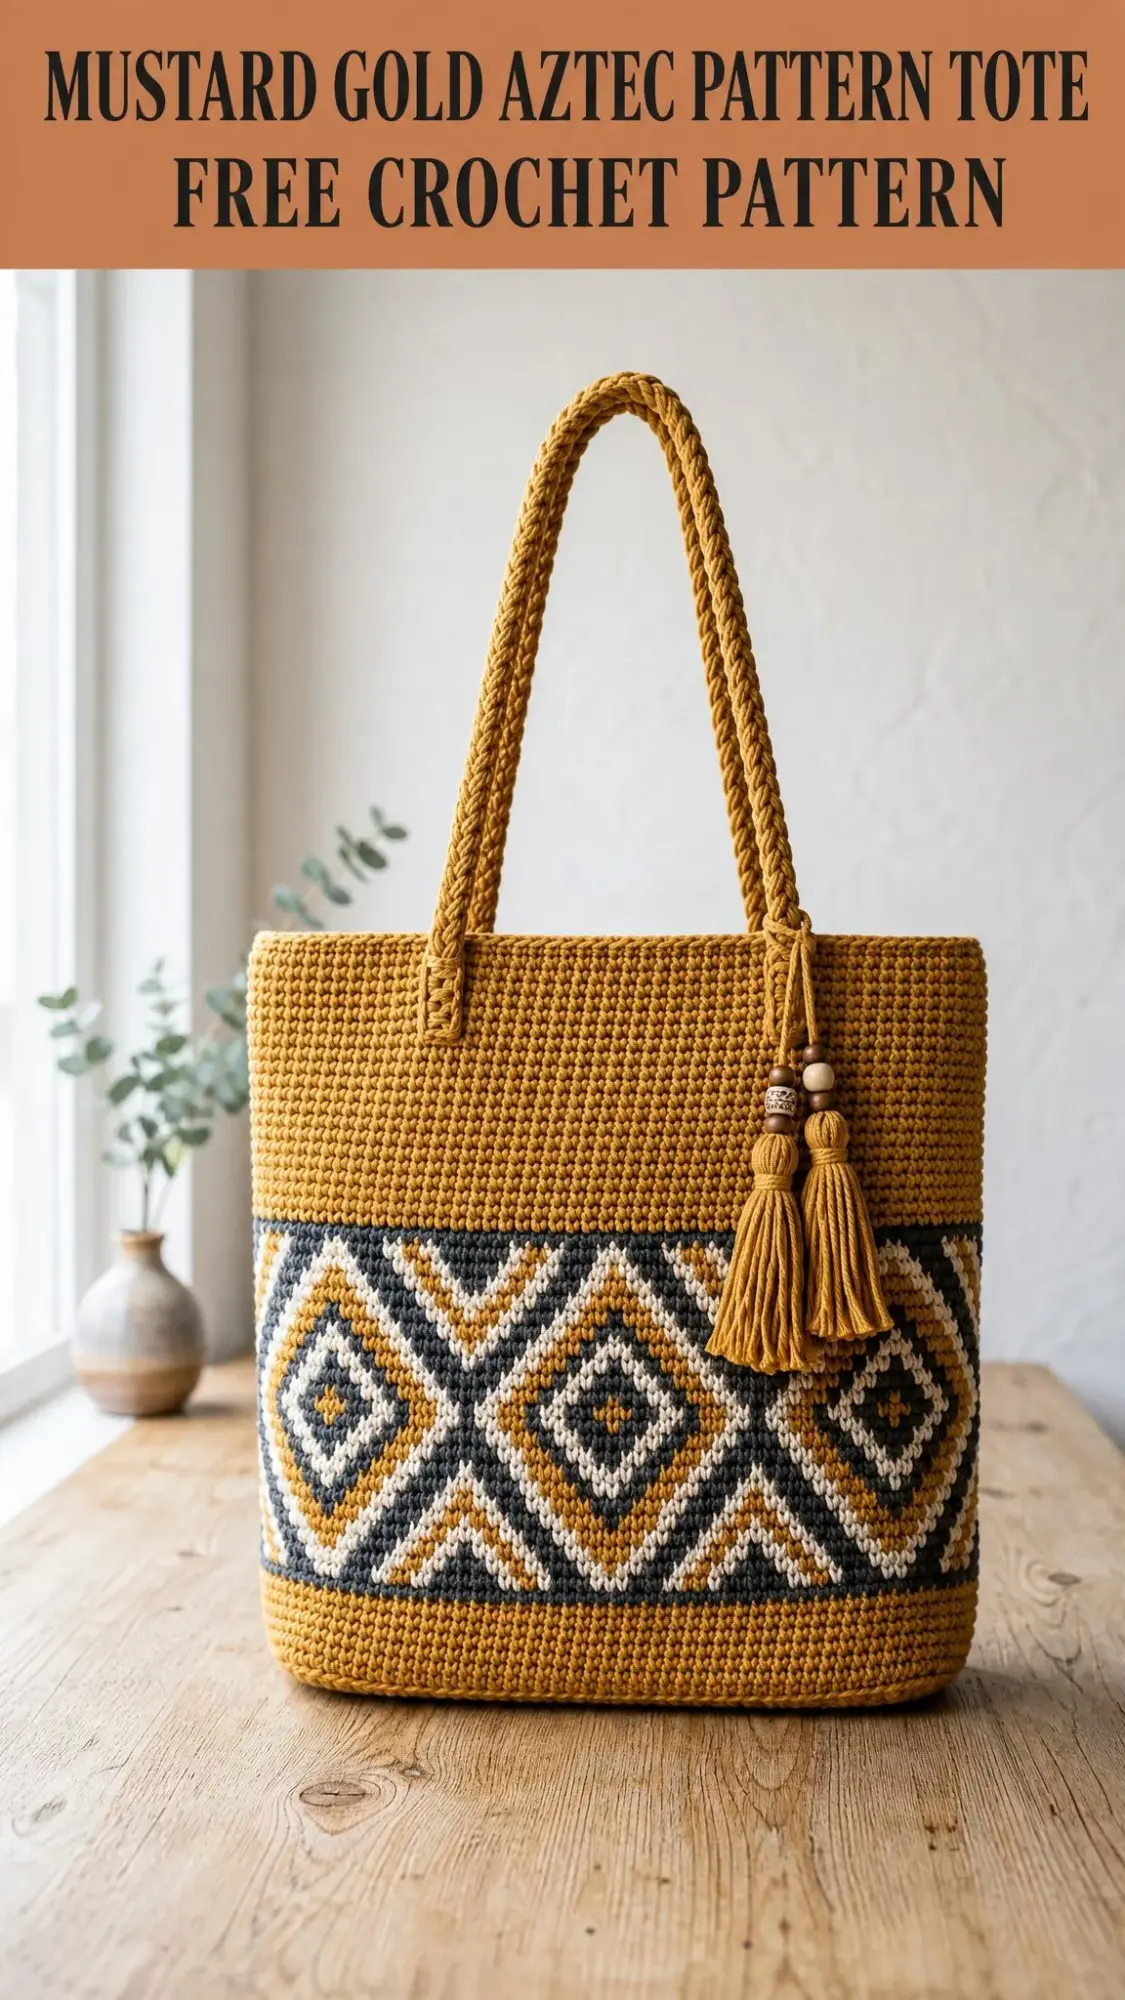
Finishing touches include braided rope handles made from the same yarn and decorative tassels with wooden beads. These details elevate the bag from handmade to heirloom quality.
Skill Level and Time Commitment
This pattern is rated intermediate to advanced. You should be comfortable with working in continuous rounds, making color changes, and reading a colorwork chart.
If you have never tried tapestry crochet before, do not let that stop you. The technique itself is straightforward once you understand the basics. You are simply carrying the unused yarn inside each stitch as you work, which I will explain in detail below.
Expect to spend approximately 18 to 25 hours on this project, depending on your experience with colorwork. The solid sections work up quickly. The colorwork band requires more focus but is absolutely achievable if you take it one round at a time.
Finished Measurements
Your completed tote will measure approximately:
These measurements reflect the blocked, assembled bag. The bag has a flat oval base that gives it structure and allows it to stand upright on its own.
Materials You Will Need
Yarn
You will need worsted weight cotton yarn in three colors:
Cotton or cotton-blend yarn is essential for this project. The fiber produces the structured, slightly stiff fabric that allows the bag to hold its shape. Avoid acrylic yarn, which will result in a bag that slouches and stretches over time.
Recommended Yarn Brands
Lion Brand 24/7 Cotton in Goldenrod, Charcoal, and Ecru works beautifully. This 100% mercerized cotton has excellent stitch definition for tapestry work and is machine washable.
We Are Knitters The Cotton in Mustard, Dark Gray, and Natural White is another excellent choice. Check your gauge carefully as this chunky-weight cotton may require adjusting your hook size.
Paintbox Yarns Simply DK held double throughout gives excellent color options and a very similar finished weight to worsted cotton.
Hook
US Size G-6 / 4.0 mm crochet hook or size needed to obtain gauge.
Notions
Gauge
18 single crochet by 20 rows = 4 inches / 10 cm, measured after blocking, using a US G-6 / 4.0 mm hook and worsted weight cotton.
Gauge matters for this project. If your stitches are too loose, the bag will stretch and sag when loaded with your belongings. If they are too tight, the fabric will be stiff and the bag smaller than intended.
Here is a tip: tapestry crochet rows often work slightly tighter than plain single crochet because you are carrying extra yarn inside each stitch. Make a gauge swatch in both plain single crochet and tapestry single crochet, then average the results. If your tapestry gauge is notably tighter, go up half a hook size for those sections only.
Abbreviations
Special Techniques
Tapestry Single Crochet
This technique creates the colorwork band. You carry unused yarn colors inside each stitch as you work, hiding the floats completely and producing a thick, reversible fabric.
Step 1: Insert your hook into the next stitch.
Step 2: Before drawing up a loop, lay the unused yarn color(s) across the top of the row so they rest on top of the previous round.
Step 3: Draw up a loop with the working color, catching the carried yarn(s) inside the stitch as you complete the sc.
Step 4: When changing colors, complete the stitch before the color change until two loops remain on hook. Drop the current color to the inside (not to the back), pick up the new color, and pull through both loops to complete the stitch.
Step 5: Carry unused colors consistently at every stitch. Never let floats hang free on the inside of the bag.
This sounds more complicated than it is. After a few stitches, the motion becomes automatic.
Braided Rope Handle
Cut 12 strands of Color A, each measuring 80 inches / 203 cm long. Divide into three groups of four strands each. Knot all 12 strands together at one end and attach to a stable surface (a doorknob works great).
Braid the three groups tightly until the entire length is braided. Knot the opposite end.
Your final braided handle measures approximately 22 inches / 56 cm after knotting and trimming, giving a comfortable shoulder drop.
Make two handles.
Tassel
Cut approximately 30 strands of Color A, each 10 inches / 25.5 cm long. Fold all strands in half.
Cut one 12 inch / 30.5 cm strand and loop it through the folded top of the bundle, tying it tightly to create the tassel neck.
Thread two or three wooden beads onto the tie strand above the tassel neck before attaching to the bag.
Wrap a second short strand tightly around the neck approximately 1 inch / 2.5 cm from the fold and tie securely.
Trim tassel ends evenly to approximately 3.5 inches / 9 cm below the neck wrap.
Make two identical tassels.
Pattern Notes Before You Begin
1. The bag body is worked in continuous rounds. Do not join rounds with a slip stitch unless instructed. Use a stitch marker in the first stitch of each round and move it up as you work.
2. The bag is worked from the bottom up. The flat oval base is constructed first, then the sides are worked upward in rounds.
3. During the colorwork band, always carry all unused colors inside every stitch. Never cut yarn between color sections within a round.
4. The colorwork repeat unit is 20 stitches wide. The full circumference of the bag is 120 stitches, giving exactly 6 repeats around the bag.
5. Read all colorwork rounds from right to left as you work around the bag.
6. When transitioning from the colorwork band back to solid Color A, cut Colors B and C and weave in ends.
7. The stitch count of 120 for the body rounds is divisible by 20 (the colorwork repeat) with exactly 6 repeats. Verify your count at the end of the base before beginning the sides.
Pattern Instructions
Section 1: Flat Oval Base
The base is worked back and forth to create a flat oval, then joined into a round. The finished base measures approximately 13 inches x 4.5 inches / 33 cm x 11.5 cm.
Foundation Chain: Using Color A and a US G-6 hook, ch 30. (30 ch)
Round 1 (base setup): Beginning in the 2nd ch from hook, sc in next 28 ch, 3 sc in the last ch (corner). Rotate to work along the opposite side of the foundation chain. Sc in next 27 ch, 2 sc in the starting ch. Join with sl st to first sc. Do not turn. (60 sts)
Round 2: Ch 1. Sc in next 28 sts. 3 sc in corner st. Sc in next 28 sts. 2 sc in last st. Sl st to join. (64 sts)
Round 3: Ch 1. Sc in next 29 sts. 3 sc in corner st. Sc in next 29 sts. 2 sc in last st. Sl st to join. (68 sts)
Round 4: Ch 1. Sc in next 30 sts. 3 sc in corner st. Sc in next 30 sts. 2 sc in last st. Sl st to join. (72 sts)
Round 5: Ch 1. Sc in next 31 sts. 3 sc in corner st. Sc in next 31 sts. 2 sc in last st. Sl st to join. (76 sts)
Round 6: Ch 1. Sc in next 32 sts. 3 sc in corner st. Sc in next 32 sts. 2 sc in last st. Sl st to join. (80 sts)
Round 7: Ch 1. Sc in next 33 sts. 3 sc in corner st. Sc in next 33 sts. 2 sc in last st. Sl st to join. (84 sts)
Round 8: Ch 1. Sc in next 34 sts. 3 sc in corner st. Sc in next 34 sts. 2 sc in last st. Sl st to join. (88 sts)
Round 9: Ch 1. Sc in next 35 sts. 3 sc in corner st. Sc in next 35 sts. 2 sc in last st. Sl st to join. (92 sts)
Round 10: Ch 1. Sc in next 36 sts. 3 sc in corner st. Sc in next 36 sts. 2 sc in last st. Sl st to join. (96 sts)
Round 11: Ch 1. Sc in next 37 sts. 3 sc in corner st. Sc in next 37 sts. 2 sc in last st. Sl st to join. (100 sts)
Round 12: Ch 1. Sc in next 38 sts. 3 sc in corner st. Sc in next 38 sts. 2 sc in last st. Sl st to join. (104 sts)
Round 13: Ch 1. Sc in next 39 sts. 3 sc in corner st. Sc in next 39 sts. 2 sc in last st. Sl st to join. (108 sts)
Round 14: Ch 1. Sc in next 40 sts. 3 sc in corner st. Sc in next 40 sts. 2 sc in last st. Sl st to join. (112 sts)
Round 15: Ch 1. Sc in next 41 sts. 3 sc in corner st. Sc in next 41 sts. 2 sc in last st. Sl st to join. (116 sts)
Round 16: Ch 1. Sc in next 42 sts. 3 sc in corner st. Sc in next 42 sts. 2 sc in last st. Sl st to join. (120 sts)
CHECKPOINT: After completing the base, count your stitches carefully. You must have exactly 120 stitches to proceed. This number is critical for the colorwork repeat. If your count differs, adjust by working an extra increase round or a decrease round as needed before beginning the sides.
Section 2: Lower Solid Body
Transition to working in continuous rounds without joining. Place a stitch marker in the first stitch of each round and move it up as you work.
Round 17: Sc in each st around. (120 sts)
Rounds 18 through 30: Sc in each st around. Work 13 more rounds of plain sc. (120 sts each round)
After completing Round 30, the lower solid body section measures approximately 2.8 inches / 7 cm tall from the top edge of the base.
CHECKPOINT: The lower body should measure approximately 2.8 inches / 7 cm from the base join line to your hook. The fabric should lie flat at the base and stand up at the sides with a firm texture.
Section 3: Colorwork Band
Begin tapestry crochet. Attach Color B and Color C, carrying all unused colors inside every stitch as described in the Special Techniques section.
The colorwork band consists of 18 rounds total. Each round uses a 20-stitch repeat worked 6 times around the bag.
Colorwork Chart
Position numbers 01 through 20 represent one repeat. Work each sequence 6 times per round to complete 120 stitches.
CB-1: B B B B B B B B B B B B B B B B B B B B (120 B)
CB-2: B C B C B C B C B C B C B C B C B C B C (60 B, 60 C)
CB-3: B B B B B B B B B B B B B B B B B B B B (120 B)
CB-4: B B B A A A A A A A A A A A A A A B B B (84 A, 36 B)
CB-5: B B A A A A A A A A A A A A A A A A B B (96 A, 24 B)
CB-6: B B A A C C A A A A A A A A C C A A B B (72 A, 24 B, 24 C)
CB-7: B A A C C A A A A A A A A A A C C A A B (84 A, 12 B, 24 C)
CB-8: B A C C A A A B A A A A B A A A C C A B (72 A, 24 B, 24 C)
CB-9: A A C A A A B B B A A B B B A A A C A A (72 A, 36 B, 12 C)
CB-10: A C A A A B B A B B B B A B B A A A C A (60 A, 48 B, 12 C)
CB-11: A C A A A B B A B B B B A B B A A A C A (60 A, 48 B, 12 C)
CB-12: A A C A A A B B B A A B B B A A A C A A (72 A, 36 B, 12 C)
CB-13: B A C C A A A B A A A A B A A A C C A B (72 A, 24 B, 24 C)
CB-14: B A A C C A A A A A A A A A A C C A A B (84 A, 12 B, 24 C)
CB-15: B B A A C C A A A A A A A A C C A A B B (72 A, 24 B, 24 C)
CB-16: B B A A A A A A A A A A A A A A A A B B (96 A, 24 B)
CB-17: B B B A A A A A A A A A A A A A A B B B (84 A, 36 B)
CB-18: B B B B B B B B B B B B B B B B B B B B (120 B)
When you finish Round CB-18, cut Colors B and C, leaving 6-inch tails for weaving in later.
Section 4: Upper Solid Body
Continue with Color A only, working in continuous rounds.
Work approximately 26 to 30 more rounds of plain single crochet (120 sts each round) until the bag body measures approximately 14 inches / 35.5 cm from the base to the top edge.
Fasten off and weave in ends.
Section 5: Assembly
Attach Handles: Position the first handle on one side of the bag, centered, with the two attachment points approximately 3 inches / 7.5 cm apart. Fold the knotted end of the handle down and sew securely through the top edge of the bag using Color A and your yarn needle. Repeat for the second handle on the opposite side.
Attach Tassels: Thread the tassel tie strand through the base of one handle where it meets the bag. Secure with a tight knot. Repeat for the second tassel on the opposite handle.
Optional Base Stabilizer: Insert your foam board, plastic canvas, or stiff interfacing into the bottom of the bag to help it maintain its rectangular shape.
Optional Lining: Cut your lining fabric to fit the interior of the bag with a 1-inch seam allowance. Fold the top edge under and hand-stitch the lining to the inside top edge of the bag using needle and thread.
Helpful Tips for Success
Take your time with the colorwork section. If you feel yourself getting frustrated, set the project down and come back to it later. The pattern will still be there, and fresh eyes make all the difference.
Use stitch markers liberally. Place one at the start of each round and consider placing additional markers at the beginning of each 20-stitch repeat during the colorwork section. This makes it much easier to catch mistakes before they become problems.
Block your finished bag by stuffing it with towels or tissue paper and allowing it to dry completely. This helps even out any tension variations in the colorwork and gives the bag its crisp, professional finish.
Wrapping Up Your Mustard Gold Aztec Pattern Tote
You did it. You now have a gorgeous, handmade tote bag that is as functional as it is beautiful. The tapestry crochet colorwork band gives this bag serious style, while the structured cotton construction means it will hold up to daily use for years to come.
Thank you so much for choosing this crochet pattern for your next project. I genuinely love seeing what you create.
If you found this crochet tutorial helpful, I would love for you to save it to your Pinterest boards so you can find it easily later. And please, leave a comment below if you make this bag. Seeing your finished projects absolutely makes my day.