
Okay, yarn lovers. This is your sign to dig into that stash and finally use those gorgeous skeins of cotton you have been saving for something special. This Lavender Cream Granny Square Tote combines puff-flower centers with classic granny construction, and the result is a soft, slouchy market bag that looks far more complicated than it actually is.
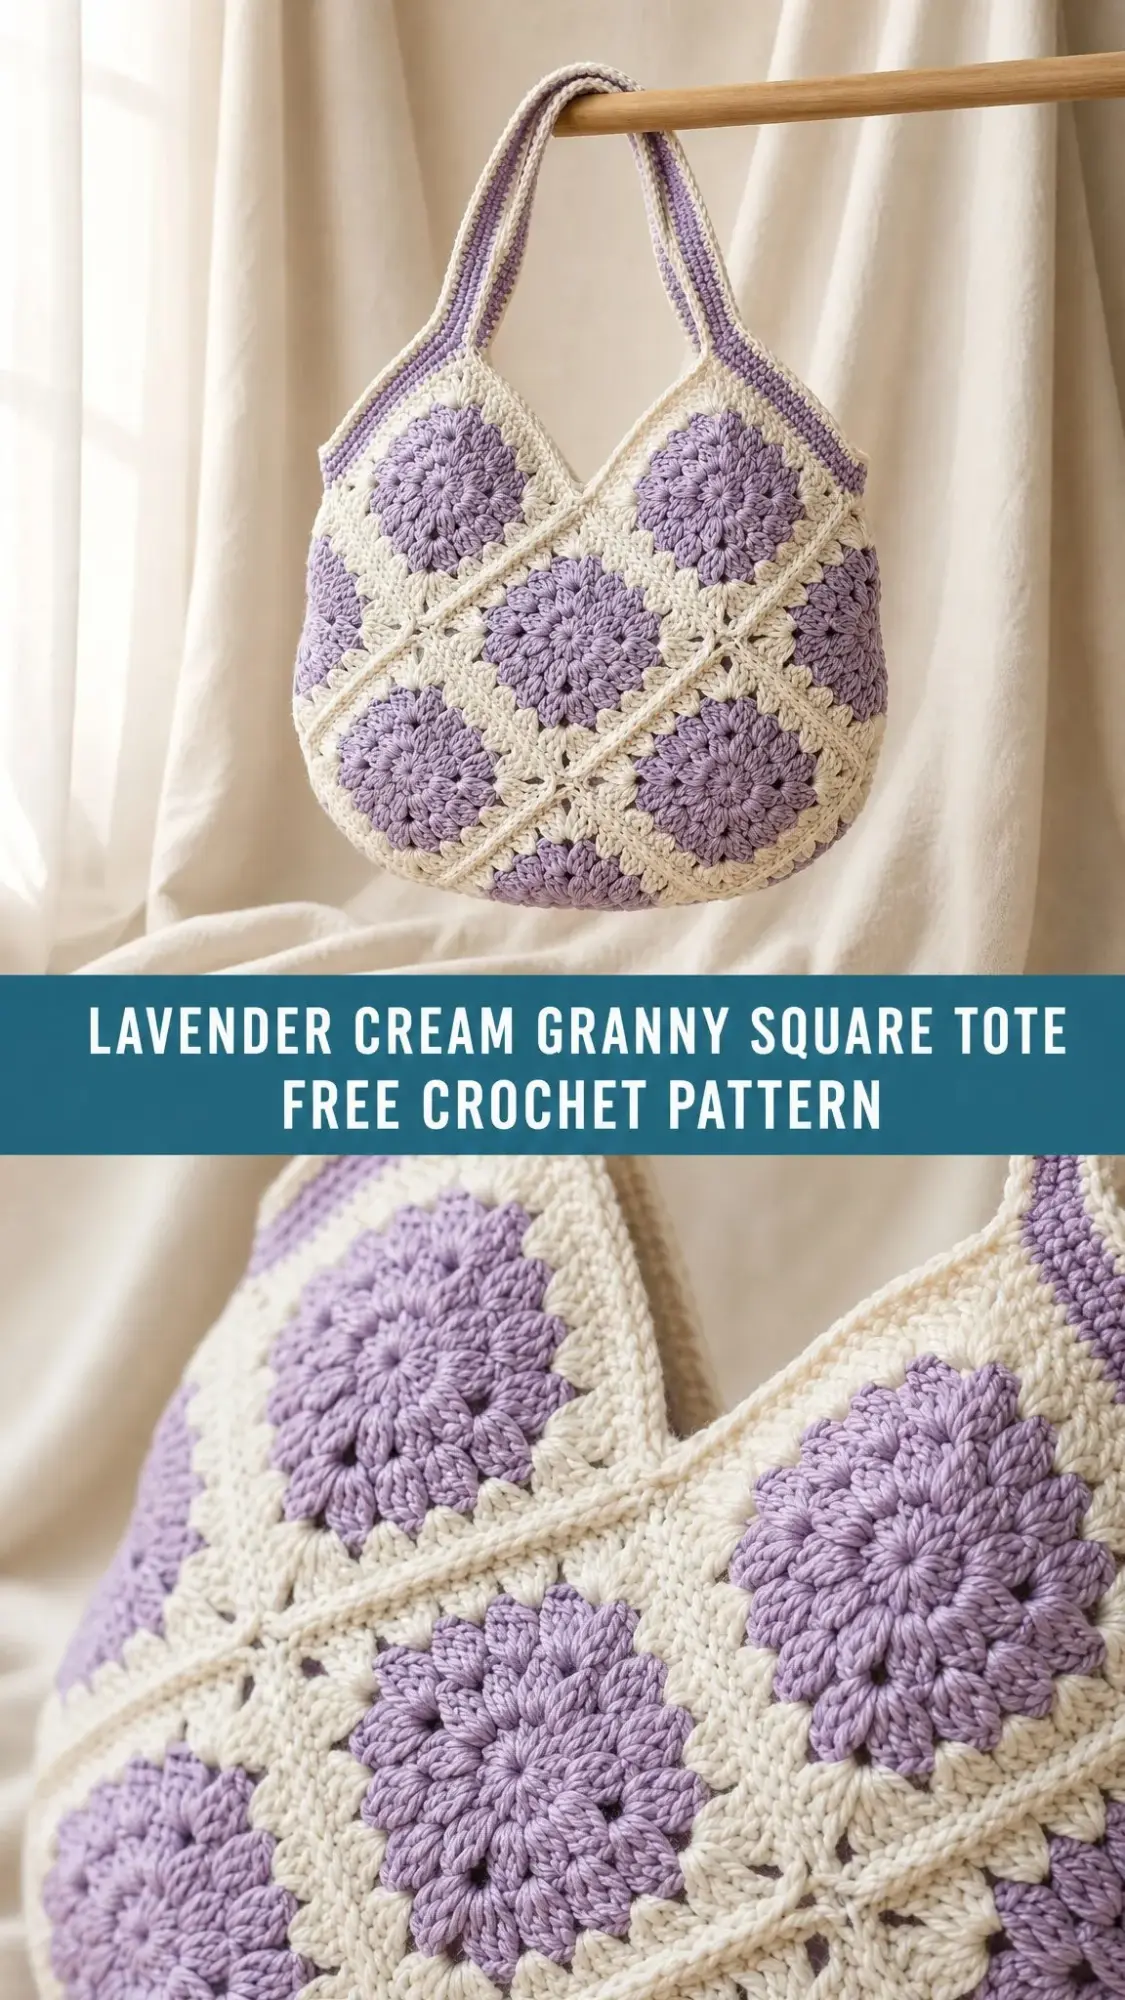
The squares are set on point, which creates that beautiful diagonal grid you see in the photos. You will make full squares and half-squares, then join them into a dumpling-shaped body with two sturdy handles. If you can work a double crochet (dc) and a puff stitch, you can absolutely make this bag.
Fair warning: the puff stitch takes a little practice to keep even, but I will walk you through it. This pattern is rated confident beginner, meaning you should be comfortable with basic stitches but do not need any advanced skills. Let’s get into it.
Why You Will Love This Tote
This bag has everything going for it. The lavender blooms pop against the cream background, giving it a fresh, springtime feel without being too delicate for everyday use. Cotton yarn means it is sturdy enough to carry groceries, books, or whatever else you need to haul around.
The construction is modular. You make individual squares, block them lightly, then seam them together. This makes it a perfect project for crocheting on the go. Work a square here, another square there, and before you know it, you have a whole tote ready to assemble.
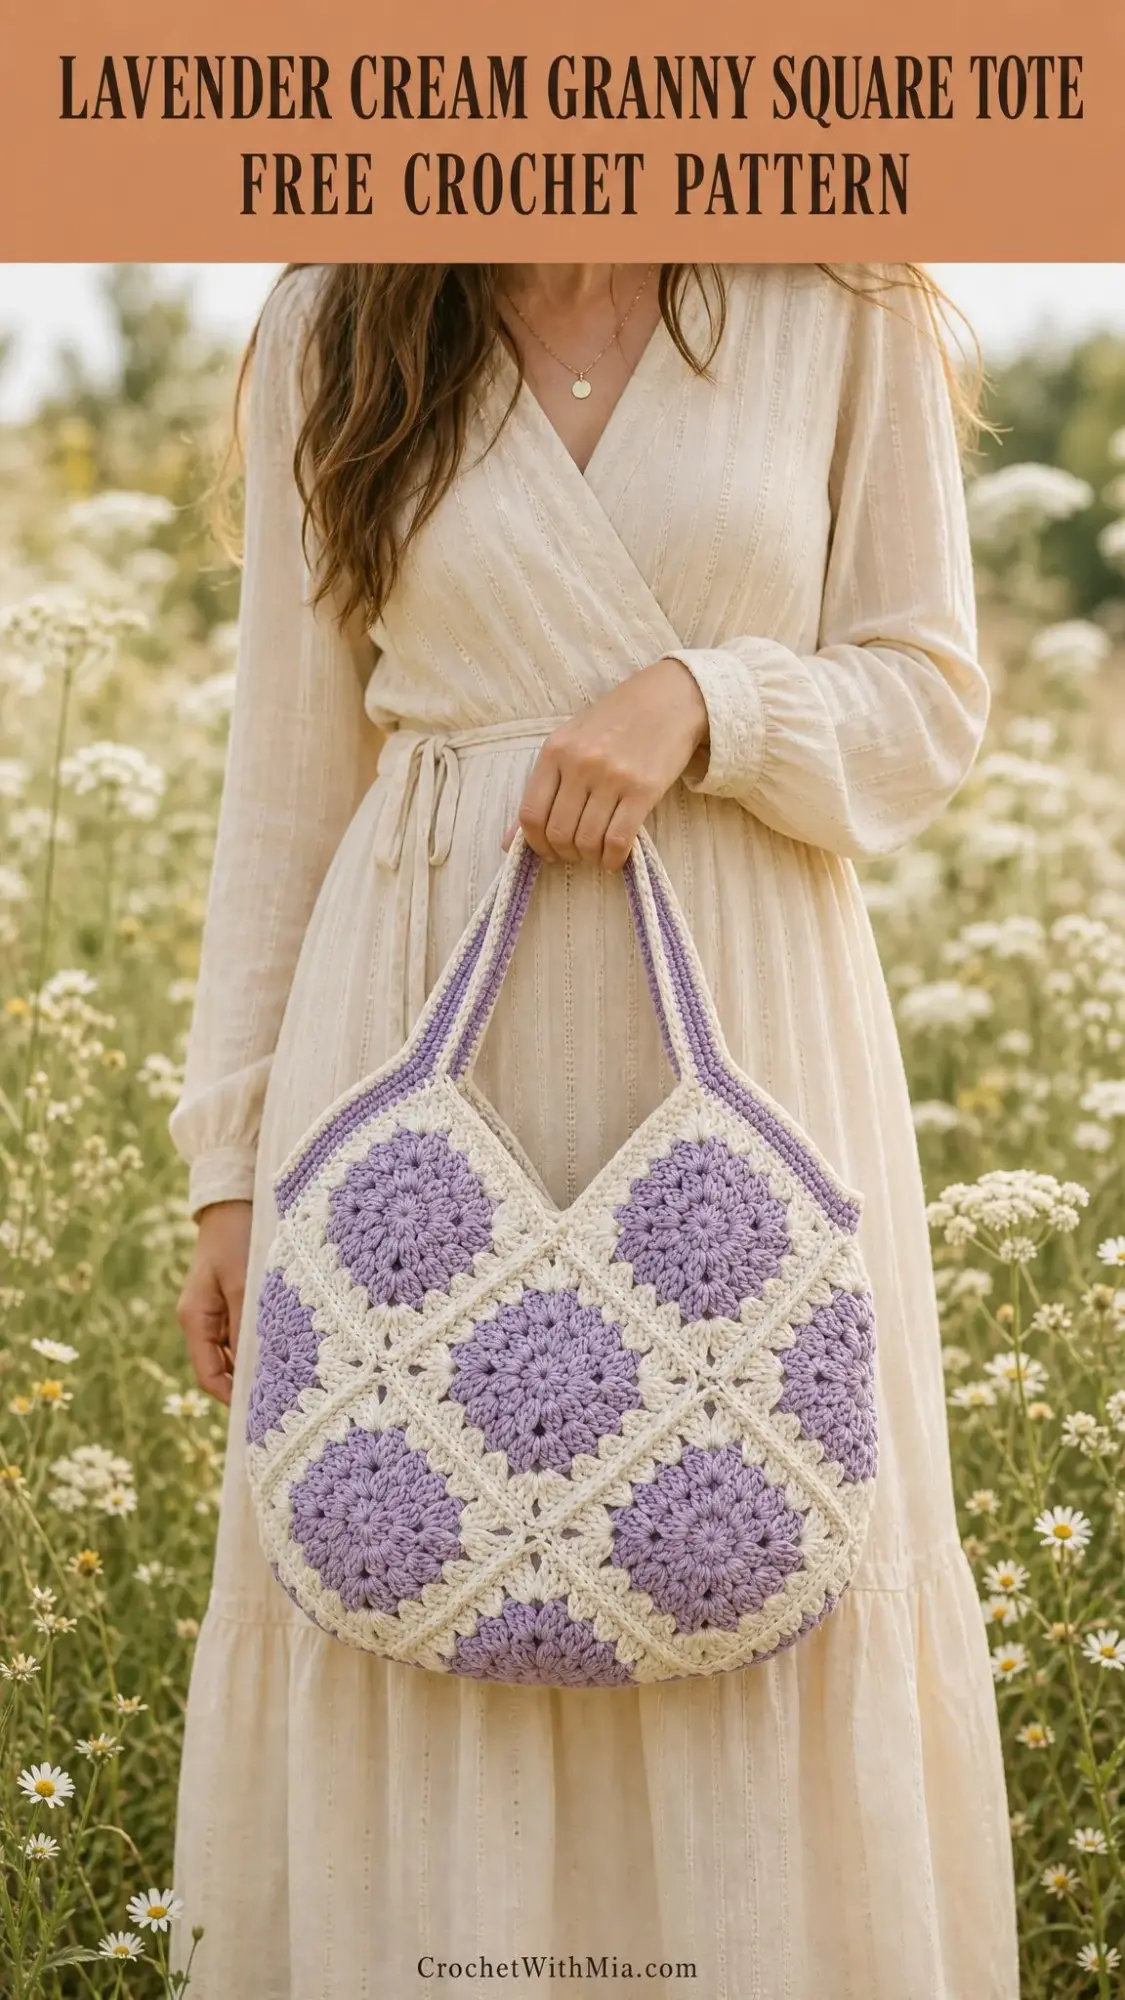
The finished bag measures approximately 13 inches wide by 13 inches tall, with a 9-inch handle drop. It is roomy without being overwhelming, and the soft cotton relaxes with use, giving it that perfectly slouchy look.
Materials and Tools
Before you start, gather everything you need. Here is the complete list pulled directly from the pattern:
Yarn:
A smooth, matte cotton gives the crispest stitch definition. The pattern suggests these yarn options:
Hook and Notions:
Gauge
One completed Lavender Bloom Square measures 4.5 inches (11.5 cm) along each edge after light blocking.
Gauge is not critical for fit since this is a bag, not a garment. However, keeping your squares consistent in size makes assembly much easier. If your square comes out larger, try dropping to a 4.5 mm hook. If it is smaller, move up to a 5.5 mm hook.
Abbreviations and Special Stitches
Let me break down every stitch you will use, with plain-English definitions so nothing catches you off guard.
Standard Abbreviations:
Note for UK crocheters: US sc equals UK dc, and US dc equals UK tr.
Special Stitches:
Puff Stitch (puff): This creates the rounded petals at each flower center. Here is how to work it:
1. Yarn over, insert hook in the stitch or space
2. Yarn over and pull up a loose loop to the height of a dc
3. Repeat steps 1 and 2 two more times in the same place (you now have 7 loops on your hook)
4. Yarn over and draw through all 7 loops
5. Chain 1 to close the puff
Tip: Keep your puff loops loose and even. Pull each one up to the same height so the petals sit plump and uniform.
3-dc Group: Three double crochets worked into the same stitch or space. This is the classic granny cluster.
Corner: Work (3 dc, ch 2, 3 dc) into the same space.
The Lavender Bloom Square
You will make 12 full squares total. The flower center is worked in lavender (Color B), then you switch to cream (Color A) to complete the square.
Round 1 (Color B):
With lavender, make a magic ring. Work [puff, ch 1] 8 times into the ring. Join with sl st to the top of the first puff. (8 puffs, 8 ch-1 spaces)
Round 2 (Color B):
Sl st into the first ch-1 space. Ch 3 (this counts as your first dc), work 2 dc in the same space, then 3 dc in each ch-1 space around. Join to the top of the beginning ch-3. Fasten off B. (24 dc in 8 groups)
Round 3 (Color A):
Join cream in any gap between two dc-groups. This first gap becomes a corner. Working around the 8 gaps and alternating corner, side, corner, side: in each of the 4 corner gaps work (3 dc, ch 2, 3 dc); in each of the 4 side gaps work 3 dc. Join to first dc. (36 dc, 4 corner spaces)
Round 4 (Color A):
Sl st to the nearest corner space. In each corner space work (3 dc, ch 2, 3 dc); along each side work 3 dc in each of the two gaps between groups. Join to first dc and fasten off, leaving a long tail for seaming. (48 dc, 12 dc per side)
Why 12 stitches per side? Every finished square has a matching 12-stitch edge, so squares line up perfectly when you join them. No easing or fudging required.
Block each square gently to 4.5 inches (11.5 cm) square. Crisp corners here make the whole tote look polished.
Half-Square Triangles
You will make 6 half-squares to fill the side notches and even out the top edge. These are worked in rows instead of rounds.
Row 1 (Color B):
With lavender, make a magic ring. Ch 3 (counts as dc), work 4 puffs with ch 1 between into the ring; end with 1 dc. Turn. (4 puffs, 2 dc at the ends)
Row 2 (Color B):
Ch 3, turn, 3 dc in each ch-1 space across, 1 dc in top of beginning ch. Fasten off B. (14 dc)
Row 3 (Color A):
Join cream at the right corner. Work (3 dc, ch 2, 3 dc) in the point, 3 dc in each gap across the long edge, ending with 1 dc in the last stitch. (20 dc)
The long straight edge of the triangle measures the same 12-stitch span as a full square’s side, so it slots neatly against the squares.
Layout
Each face of the tote (front and back) uses 6 full squares set on point in two offset rows of three, with 3 half-squares tucked into the open notches along the sides.
Lay everything out before you start joining. Admire that beautiful diagonal grid. This is also a good time to check that your squares are consistent in size and your colors are arranged the way you want them.
Joining the Body
Step 1: Build the Two Faces
With cream and a tapestry needle, whip-stitch the squares of each face together through the back loops. Match the 12 stitches of adjacent edges carefully. Tuck the half-squares into the side notches so each face becomes a smooth panel. Make 2 matching faces.
Step 2: Join Front to Back
Place the two faces with right sides together. Seam up one side, across the lower points, and up the other side, leaving the top open for the handles.
The on-point squares meet at their points along the base, which gives the tote its softly rounded dumpling bottom. No separate base round needed.
Step 3: Foundation Round
Round 1 (Color A):
With RS facing, join cream at one upper side seam. Work sc evenly around the entire top opening, spacing them so the edge lies flat (about 11 sc across each square edge). Aim for a multiple of 6; adjust to suit your assembly. Join. (approximately 132 sc)
Top Band
The top band adds structure and a pop of lavender around the opening.
Round 2 (Color A):
Ch 1, sc in each st around. Join. (132 sc)
Round 3 (Color B):
Join lavender. Ch 1, sc in each st around. Join. (132 sc)
Round 4 (Color B):
Ch 1, sc in each st around. Join and fasten off B. (132 sc)
Handles (Make 2)
Row 1 (Color A):
With cream, ch 61. Sc in 2nd ch from hook and in each ch across. Turn. (60 sc)
Rows 2 through 7 (Color A):
Ch 1, sc in each st across. Turn. Fasten off after Row 7. (60 sc each row)
Edging (Color B):
Join lavender at a corner; sc evenly all the way around the strap, working 3 sc in each end corner. Join and fasten off. (approximately 140 sc)
Attaching the Handles:
Pin each handle to the inside of the top band, spacing the ends about 5 inches (13 cm) apart and centering them on the front and back. Sew securely with cream, stitching through both the band and the strap several times for strength.
Size Customization
Because this tote is built from modular squares, resizing is simple. Just add or remove motifs and adjust the foundation count to match.
Bigger Beach Tote:
Use 8 squares per face (16 total) with 8 half-squares, set in two rows of four. Widen the top band foundation to a multiple of 6 near 176 sc, and lengthen the handles to ch 73 for a roomier drop.
Little Grab Bag:
Use 4 squares per face (8 total) with 4 half-squares. Reduce the band foundation to about 96 sc and shorten handles to ch 49 for a sweet mini version.
Handle Length Options:
Always check the drop against your own shoulder before sewing the handles down.
Finishing and Care
Finishing:
Care:
Make It Your Own
The lavender and cream combination is classic, but you can easily swap colors to match your style. Try sage green for an earthy vibe, terracotta for a warm bohemian look, or dusty blue for something softer. You could even work each flower in a different shade for a scrappy garden tote that uses up all those random skeins in your stash.
Tips for Success
Puff Stitch Troubleshooting:
If your puffs look uneven, you are probably pulling up loops of different heights. Try to make each pull-up consistently tall, about the height of a double crochet. It takes a few tries to get the rhythm, but once you do, it becomes automatic.
Joining Method:
The pattern calls for whip-stitching through back loops, which creates a subtle ridge on the wrong side and a nearly invisible seam on the right side. If you prefer a more decorative join, you can use a single crochet join or a flat slip stitch join instead.
Blocking Matters:
I know blocking feels like an extra step, but trust me on this one. Blocking your squares before assembly makes everything line up so much better. Even a light steam press makes a noticeable difference.
Final Thoughts on This Granny Square Tote Crochet Pattern
This Lavender Cream Granny Square Tote is one of those satisfying projects where you can see real progress with every square you finish. The puff-flower centers give it personality, the on-point layout adds visual interest, and the cotton construction means it is practical enough for everyday use.
Whether you make it for yourself or as a gift, this tote is sure to get compliments. The step-by-step instructions make it approachable even if you have never worked a puff stitch before, and the modular design means you can take it at your own pace.
Thank you so much for choosing this pattern. I hope you love making it as much as I enjoyed putting it together for you. If you decide to give it a try, I would absolutely love to see your finished tote. Tag me on Instagram or share a photo on Facebook so I can celebrate with you.
If this pattern caught your eye, go ahead and save it to your Pinterest boards so you can find it when you are ready to start. And if you make one, please drop a comment below. I love hearing how projects turn out and seeing the color combinations you choose. Happy crocheting!