
I pulled this pattern out of my design notebook last week and just had to smile. I originally created it for my neighbor’s first grandbaby, a little one named Oliver who arrived on the first day of spring. The tiny bunnies and scattered carrots felt perfect for a spring baby, and the powder blue reminded me of robin’s eggs and clear morning skies.
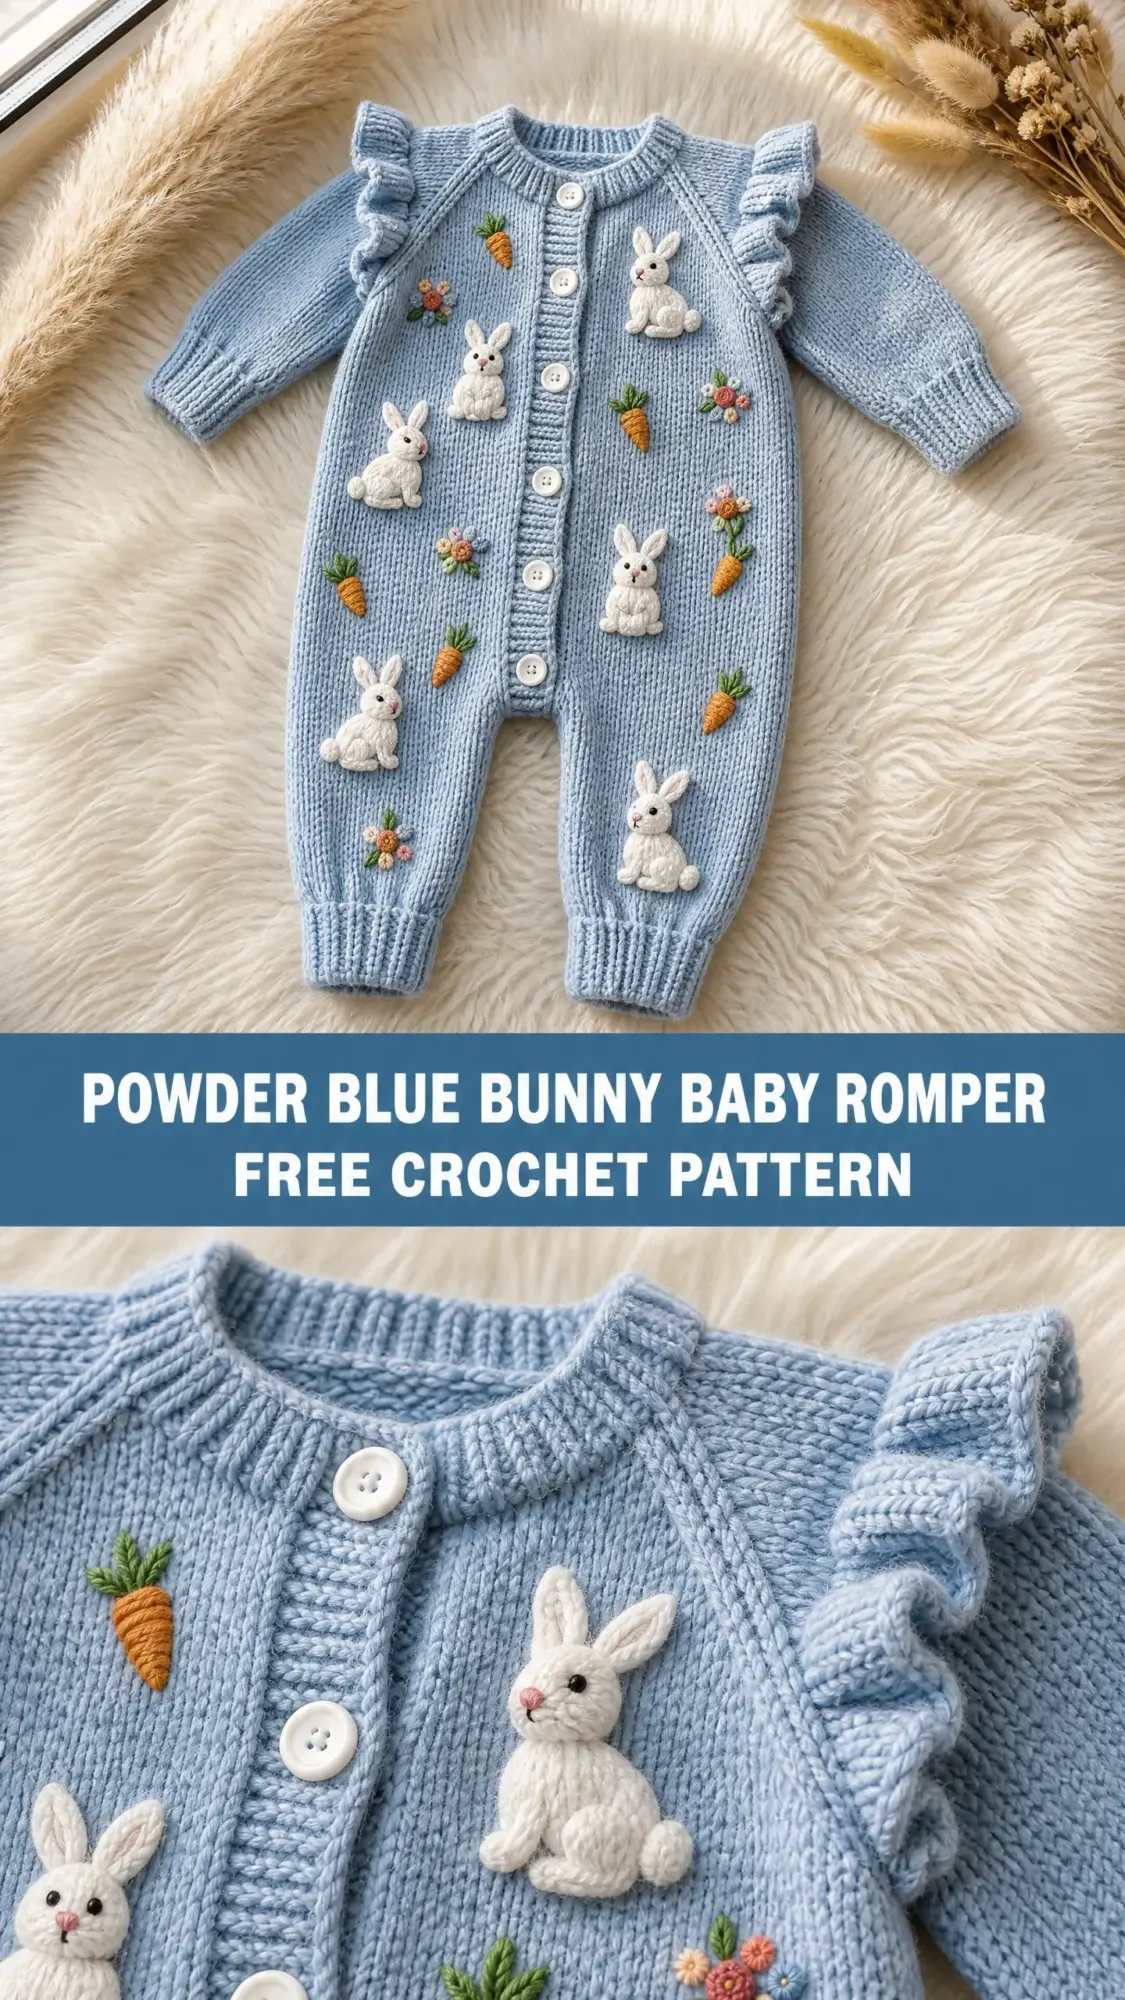
That was three years ago now, and I have made this romper at least a dozen times since. Each one goes to a different baby, a different family, a different celebration. I call it the Oliver Romper in my head, though Oliver himself has long outgrown it.
Today I am finally sharing the full written pattern so you can make your own. Whether you are welcoming a new little one into your family or creating a thoughtful handmade gift, this cozy romper with its sweet dimensional bunnies will become a treasured keepsake.
Why This Baby Romper Pattern Works So Well
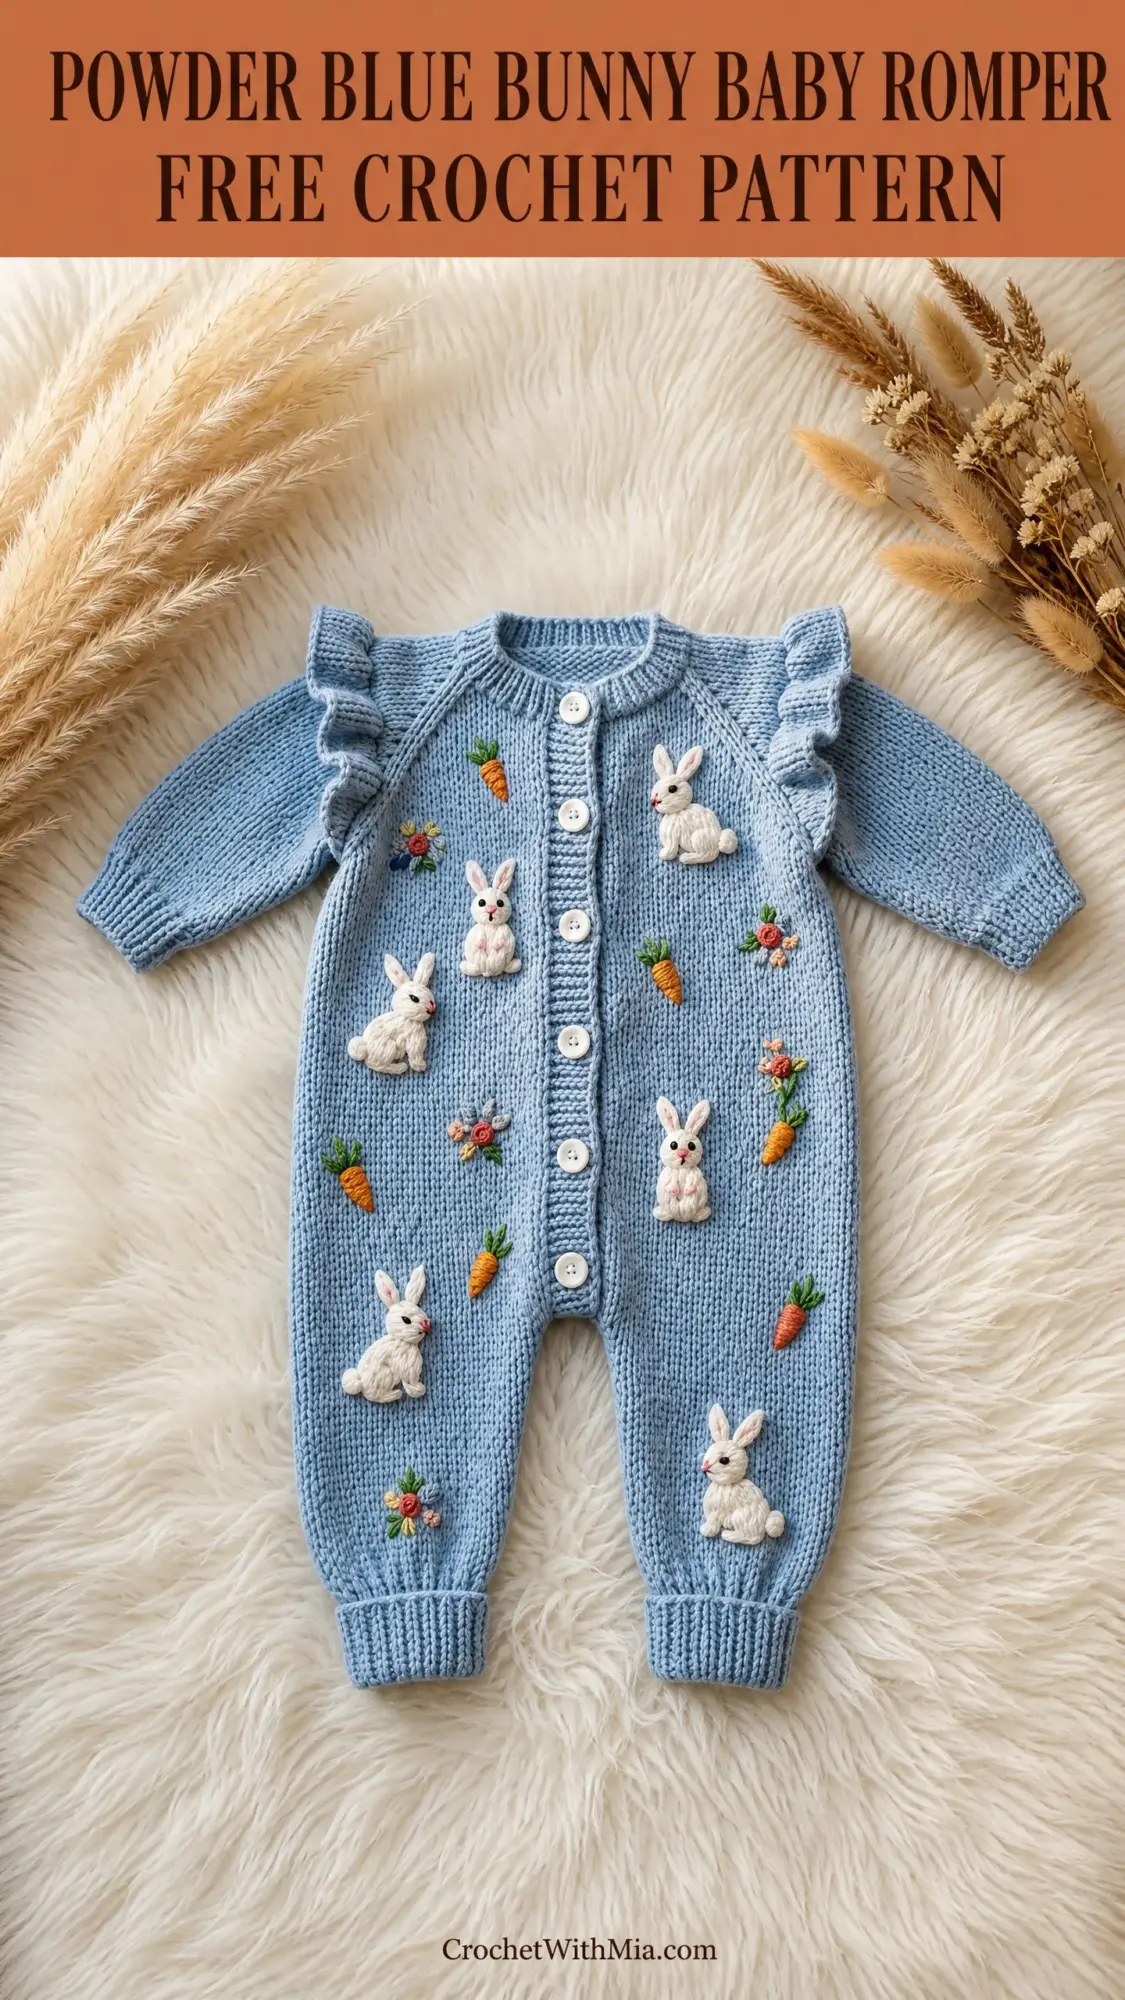
This crochet baby romper combines practicality with pure sweetness. The dense single crochet fabric creates a soft, sturdy texture that holds up to washing and wearing. The front button placket runs from neckline to crotch for easy diaper changes. Those ruffled shoulder details add a touch of charm without being fussy or difficult to construct.
The dimensional bunny appliques are my favorite part. They are small amigurumi-style pieces worked separately and sewn on after assembly. You can arrange them however you like across the front. Between the bunnies, simple embroidered carrots and tiny floral clusters fill the spaces with garden-inspired details.
This pattern is written for size 0 to 3 months, which fits most newborns through about twelve weeks. I have included sizing tips at the end if you need to adjust up or down.
Skill Level and Time Estimate
I would call this an intermediate level project. You should be comfortable working flat panels, seaming pieces together, picking up stitches along edges, and basic shaping like increases and decreases. The bunny appliques require small amigurumi-style construction, but they are simple shapes that come together quickly.
Expect to spend approximately 18 to 25 hours on this romper from start to finish. That includes all the assembly and embellishment work. You could easily spread this across a few weeks of evening crocheting.
Finished Measurements
Before you begin, here are the finished dimensions for size 0 to 3 months:
Materials You Will Need
Yarn
You will need worsted weight yarn (Weight 4) in the following amounts:
Yarn suggestions: Lion Brand Pound of Love in Pastel Blue works beautifully. This 100 percent acrylic machine washable yarn is ideal for baby garments and offers excellent stitch definition. Paintbox Yarns Simply DK held double or Cascade 220 Superwash in a pale blue colorway are also wonderful options.
Avoid fluffy or textured yarns that will obscure the stitch definition and make the appliques harder to attach.
Hooks and Tools
Gauge
Getting gauge right is critical for proper fit on a baby garment. Take time to make a swatch before starting.
With MC and H-8 / 5.0 mm hook:
Gauge swatch instructions: Chain 22. Work single crochet back and forth for 22 rows. Block lightly. Measure the center 16 stitches across 18 rows. Adjust hook size as needed.
With G-6 / 4.0 mm hook for ribbing:
Abbreviations and Stitch Definitions
Let me walk you through every abbreviation used in this pattern. Understanding these before you start will make the instructions much easier to follow.
Special Techniques
Ruffle Stitch
Work 3 dc into each stitch or space across the designated row or round. This creates a ruffled, gathered frill. When working a ruffle along a curved or angled edge, work 3 dc into each stitch evenly along the edge, adding an extra dc at corner points to prevent puckering.
Rib Stitch
Work sc in blo across every row. Do not skip the turning chain. Turn. This creates a flexible, stretchy ribbed fabric that resembles knit ribbing. For collar and cuffs, the rib is worked perpendicular to the main fabric edge and seamed on.
Surface Slip Stitch Embroidery
With yarn threaded on a tapestry needle, insert needle from back to front at the starting point, then reinsert at the next point following the desired line, pulling yarn through to create a visible stitch on the surface. Use this to create carrot body lines and stem details.
Pattern Notes Before You Begin
1. The romper is worked in flat panels. The front body and back body are each worked separately from the shoulder downward. After the body panels are complete and the button placket is added to the front, the panels are seamed at the sides. The legs are then worked downward from the leg openings.
2. Sleeves are worked flat from the cuff upward and seamed, then set into the armhole.
3. Ruffles are added along the shoulder yoke line after the body is assembled.
4. Ch 1 at the beginning of a row counts as a turning chain and does NOT count as a stitch throughout this pattern.
5. All stitch counts are given in parentheses at the end of each row or round.
6. Right side of fabric is the side showing the V of the single crochet stitches clearly.
Crochet Pattern Instructions
Back Panel
The back panel is worked flat from the shoulder edge downward to the crotch.
Foundation: With MC and H-8 hook, ch 33.
Row 1 (RS): Sc in 2nd ch from hook and in each ch across. Turn. (32 sc)
Row 2: Ch 1, sc in each st across. Turn. (32 sc)
Rows 3 through 10: Rep Row 2 eight times. Turn after each row. (32 sc)
Checkpoint: After Row 10, the back panel should measure approximately 2.25 inches (5.7 cm) in height and 8 inches (20.3 cm) wide.
Armhole Shaping
Row 11 (increase row): Ch 1, inc in first st, sc across to last st, inc in last st. Turn. (34 sc)
Row 12: Ch 1, sc across. Turn. (34 sc)
Row 13: Ch 1, inc in first st, sc across to last st, inc in last st. Turn. (36 sc)
Row 14: Ch 1, sc across. Turn. (36 sc)
Row 15: Ch 1, inc in first st, sc across to last st, inc in last st. Turn. (38 sc)
Row 16: Ch 1, sc across. Turn. (38 sc)
Row 17: Ch 1, inc in first st, sc across to last st, inc in last st. Turn. (40 sc)
Row 18: Ch 1, sc across. Turn. (40 sc)
Rows 19 through 36: Ch 1, sc across each row. Turn after each row. (40 sc)
Checkpoint: After Row 36, the back panel should measure approximately 8 inches (20.3 cm) tall and 10 inches (25.4 cm) wide.
Crotch Shaping
Row 37: Ch 1, sc2tog over first 2 sts, sc across to last 2 sts, sc2tog. Turn. (38 sc)
Row 38: Ch 1, sc across. Turn. (38 sc)
Row 39: Ch 1, sc2tog, sc across to last 2 sts, sc2tog. Turn. (36 sc)
Row 40: Ch 1, sc across. Turn. (36 sc)
Row 41: Ch 1, sc2tog, sc across to last 2 sts, sc2tog. Turn. (34 sc)
Row 42: Ch 1, sc across. Turn. (34 sc)
Row 43: Ch 1, sc2tog, sc across to last 2 sts, sc2tog. Turn. (32 sc)
Row 44: Ch 1, sc across. Turn. (32 sc)
Fasten off MC. Set back panel aside.
Front Panel Left Half (Button Side)
Foundation: With MC and H-8 hook, ch 17.
Row 1 (RS): Sc in 2nd ch from hook and in each ch across. Turn. (16 sc)
Row 2: Ch 1, sc across. Turn. (16 sc)
Rows 3 through 10: Rep Row 2. (16 sc)
Armhole Shaping Left Half
Row 11: Ch 1, inc in first st, sc across. Turn. (17 sc)
Row 12: Ch 1, sc across. Turn. (17 sc)
Row 13: Ch 1, inc in first st, sc across. Turn. (18 sc)
Row 14: Ch 1, sc across. Turn. (18 sc)
Row 15: Ch 1, inc in first st, sc across. Turn. (19 sc)
Row 16: Ch 1, sc across. Turn. (19 sc)
Row 17: Ch 1, inc in first st, sc across. Turn. (20 sc)
Row 18: Ch 1, sc across. Turn. (20 sc)
Rows 19 through 36: Ch 1, sc across. Turn after each row. (20 sc)
Crotch Shaping Left Half
Row 37: Ch 1, sc2tog, sc across. Turn. (19 sc)
Row 38: Ch 1, sc across. Turn. (19 sc)
Row 39: Ch 1, sc2tog, sc across. Turn. (18 sc)
Row 40: Ch 1, sc across. Turn. (18 sc)
Row 41: Ch 1, sc2tog, sc across. Turn. (17 sc)
Row 42: Ch 1, sc across. Turn. (17 sc)
Row 43: Ch 1, sc2tog, sc across. Turn. (16 sc)
Row 44: Ch 1, sc across. Turn. (16 sc)
Fasten off. Set aside.
Front Panel Right Half (Buttonhole Side)
Foundation: With MC and H-8 hook, ch 17.
Row 1 (RS): Sc in 2nd ch from hook and in each ch across. Turn. (16 sc)
Row 2: Ch 1, sc across. Turn. (16 sc)
Rows 3 through 10: Rep Row 2. (16 sc)
Armhole Shaping Right Half
Row 11: Ch 1, sc across to last st, inc in last st. Turn. (17 sc)
Row 12: Ch 1, sc across. Turn. (17 sc)
Row 13: Ch 1, sc across to last st, inc in last st. Turn. (18 sc)
Row 14: Ch 1, sc across. Turn. (18 sc)
Row 15: Ch 1, sc across to last st, inc in last st. Turn. (19 sc)
Row 16: Ch 1, sc across. Turn. (19 sc)
Row 17: Ch 1, sc across to last st, inc in last st. Turn. (20 sc)
Row 18: Ch 1, sc across. Turn. (20 sc)
Rows 19 through 36: Ch 1, sc across. Turn after each row. (20 sc)
Crotch Shaping Right Half
Row 37: Ch 1, sc across to last 2 sts, sc2tog. Turn. (19 sc)
Row 38: Ch 1, sc across. Turn. (19 sc)
Row 39: Ch 1, sc across to last 2 sts, sc2tog. Turn. (18 sc)
Row 40: Ch 1, sc across. Turn. (18 sc)
Row 41: Ch 1, sc across to last 2 sts, sc2tog. Turn. (17 sc)
Row 42: Ch 1, sc across. Turn. (17 sc)
Row 43: Ch 1, sc across to last 2 sts, sc2tog. Turn. (16 sc)
Row 44: Ch 1, sc across. Turn. (16 sc)
Fasten off. Set aside.
Button Placket
The placket is worked as a long narrow strip sewn to the center front opening edges.
With MC and G-6 hook, ch 7.
Row 1: Sc in 2nd ch from hook and in each ch across. Turn. (6 sc)
Work sc in blo across every row (rib stitch) for the length of the front opening, approximately 12 inches (30.5 cm).
Buttonhole Placket (for right front half)
Work identically, but on Row 5 of the placket and then every 1.5 inches (3.8 cm) thereafter, work a buttonhole as follows:
Sc in first 2 sts, ch 2, sk 2 sts, sc in last 2 sts. On the next row, sc in each st and work 2 sc into the ch-2 sp to close the hole. Continue rib pattern. Work 7 buttonholes total evenly spaced.
Sew the plain placket strip to the left front half center edge. Sew the buttonhole placket to the right front half center edge.
Neckline Ribbed Collar
With MC and G-6 hook, ch 8.
Row 1: Sc in 2nd ch from hook and in each ch across. Turn. (7 sc)
Work sc in blo across every row (rib stitch) until the collar strip measures 16 inches (40.5 cm).
Fasten off leaving a long tail. Seam the short ends of the collar together with mattress stitch to form a ring. Sew collar to neckline edge of assembled romper body, easing evenly around.
Sleeves (Make 2)
Sleeves are worked flat from the cuff upward.
Cuff
With MC and G-6 hook, ch 8.
Row 1: Sc in 2nd ch from hook and in each ch across. Turn. (7 sc)
Work in rib stitch (sc in blo every row) for 7 inches (17.8 cm). Fasten off. Seam short ends together with mattress stitch to form a ring. Set aside.
Sleeve Body
With MC and H-8 hook, ch 29.
Row 1 (RS): Sc in 2nd ch from hook and in each ch across. Turn. (28 sc)
Row 2: Ch 1, sc across. Turn. (28 sc)
Rows 3 through 6: Rep Row 2. (28 sc)
Sleeve Increase Section
Row 7: Ch 1, inc in first st, sc across to last st, inc in last st. Turn. (30 sc)
Rows 8 through 10: Ch 1, sc across. Turn. (30 sc)
Row 11: Ch 1, inc in first st, sc across to last st, inc in last st. Turn. (32 sc)
Rows 12 through 14: Ch 1, sc across. Turn. (32 sc)
Row 15: Ch 1, inc in first st, sc across to last st, inc in last st. Turn. (34 sc)
Rows 16 through 18: Ch 1, sc across. Turn. (34 sc)
Row 19: Ch 1, inc in first st, sc across to last st, inc in last st. Turn. (36 sc)
Rows 20 through 24: Ch 1, sc across. Turn. (36 sc)
Checkpoint: The sleeve body should now measure approximately 5.5 inches (14 cm) in length and 9 inches (22.9 cm) wide at the top.
Fasten off leaving a long tail for seaming.
Fold sleeve lengthwise with RS together. Seam the side edge from Row 1 to Row 24 using mattress stitch. Turn RS out. Attach the cuff ring to the lower edge of the sleeve, sewing evenly around with the rib running perpendicular to the sleeve edge.
Shoulder Ruffle
After the body panels are assembled and before the sleeves are set in, with RS facing and MC and H-8 hook, join yarn at the neckline corner of one shoulder edge.
Ruffle Row: Work 3 dc in each stitch or row-end evenly along the diagonal shoulder line from neckline to armhole edge. This will span approximately 10 to 12 stitches or row-end points. Fasten off.
Repeat on all 4 shoulder ruffle positions (2 front, 2 back).
Legs (Make 2)
After the body panels are assembled and the crotch seam is closed, pick up stitches around each leg opening.
With RS facing, MC and H-8 hook, join yarn at the inside leg seam point. Work sc evenly around the leg opening to yield 40 stitches total. Place marker at beginning of round, join with sl st to work in the round.
Rnd 1: Sc in each st around. (40 sc)
Rnds 2 through 4: Sc in each st around. (40 sc)
Leg Decrease Section
Rnd 5: Sc in first 18 sts, sc2tog, sc in next 18 sts, sc2tog. (38 sc)
Rnds 6 through 9: Sc around. (38 sc)
Rnd 10: Sc in first 17 sts, sc2tog, sc in next 17 sts, sc2tog. (36 sc)
Rnds 11 through 14: Sc around. (36 sc)
Rnd 15: Sc in first 16 sts, sc2tog, sc in next 16 sts, sc2tog. (34 sc)
Rnds 16 through 19: Sc around. (34 sc)
Rnd 20: Sc in first 15 sts, sc2tog, sc in next 15 sts, sc2tog. (32 sc)
Rnds 21 through 28: Sc around. (32 sc)
Checkpoint: After Rnd 28, the leg should measure approximately 6.5 inches (16.5 cm) from the crotch pickup round.
Ankle Cuff
With G-6 hook, ch 8.
Row 1: Sc in 2nd ch from hook and in each ch across. Turn. (7 sc)
Work in rib stitch for 6.25 inches (15.9 cm). Seam short ends together to form a ring. Sew cuff to lower edge of leg, easing evenly around with rib running perpendicular to leg edge.
Repeat for second leg.
Bunny Appliques (Make 6 to 8)
Each bunny is a small dimensional piece made with A1 (white) and G-6 hook.
Bunny Body
Magic ring, ch 1.
Rnd 1: 6 sc in magic ring. (6 sc)
Rnd 2: Inc in each st around. (12 sc)
Rnd 3: (Sc in next st, inc in next st) 6 times. (18 sc)
Rnds 4 through 6: Sc around. (18 sc)
Rnd 7: (Sc in next st, sc2tog) 6 times. (12 sc)
Stuff lightly with a tiny amount of fiberfill or scraps of white yarn.
Rnd 8: Sc2tog around. (6 sc)
Fasten off leaving a long tail. Close the opening by threading the tail through the remaining 6 sts and pulling tight. Weave in end.
Bunny Head
Magic ring, ch 1.
Rnd 1: 6 sc in magic ring. (6 sc)
Rnd 2: Inc in each st around. (12 sc)
Rnd 3: (Sc in next st, inc) 6 times. (18 sc)
Rnds 4 through 5: Sc around. (18 sc)
Rnd 6: (Sc in next st, sc2tog) 6 times. (12 sc)
Stuff lightly.
Rnd 7: Sc2tog around. (6 sc)
Fasten off, close, and weave in. Sew head to top of body.
Bunny Ears (Make 2 per bunny)
Ch 5.
Row 1: Sc in 2nd ch from hook, sc in next 2 chs, 3 sc in last ch (for rounded tip), then work back down the other side of the foundation chain: sc in next 3 sts. Sl st to close. (9 sc plus sl st)
Fasten off. With A5 (pink), embroider a tiny vertical stitch in the center of each ear for inner ear detail.
Sew ears to top of head.
With black embroidery floss or very thin dark yarn, embroider 2 tiny French knot eyes and a tiny nose dot on each bunny face.
Arrange and pin 6 to 8 finished bunnies across the front panel. Use this reference layout: 2 across the upper chest, 2 at mid body, and 2 to 3 scattered on the legs. Sew each bunny firmly to the romper using A1 yarn threaded on a tapestry needle.
Carrot Embroidery
Using A2 (orange) threaded on an embroidery needle, work small vertical satin stitch clusters approximately 0.5 inch (1.3 cm) tall directly on the fabric surface in the spaces between bunnies. Each carrot takes approximately 5 to 6 parallel vertical stitches close together, widest at top and tapering to a point.
With A3 (green), work 3 small straight stitches fanning upward from the top of each carrot cluster to create the leafy tops.
Small Floral Clusters
Using A4 (dusty rose or red) and an embroidery needle, work small groups of 5 tiny satin stitch petals arranged in a circle on the fabric between bunnies and carrots. Each petal is 2 to 3 stitches wide and approximately 0.3 inch (7 mm) long. Work a French knot center in A2 or A3. With A3, add 2 to 3 small lazy daisy leaves beside each flower cluster.
Assembly Instructions
Step 1: Lay front left half and front right half WS down. Join them at the placket center edge by sewing the placket bands over the raw edges, securing firmly.
Step 2: Place front panel and back panel WS together. Seam both side edges from underarm to crotch using mattress stitch. Leave the shoulder edges open and the armhole edges open.
Step 3: Join front and back at both shoulder edges using mattress stitch across the top row-end stitches of each shoulder section.
Step 4: Close the crotch seam by seaming the lower edges of the front and back panels at the crotch, leaving the two leg openings open.
Step 5: Set each sleeve into the armhole opening by pinning evenly around and seaming with mattress stitch. Ease any fullness evenly.
Step 6: Work shoulder ruffles as described above.
Step 7: Attach collar.
Step 8: Pick up leg stitches and work legs as described.
Step 9: Attach cuffs to sleeves and cuffs to leg ankles.
Step 10: Sew buttons to left placket band aligning with buttonholes on right band.
Step 11: Attach bunny appliques and work embroidery details.
Size Customization Tips
To size up to 3 to 6 months: Add 4 stitches to all starting chain counts. Add 4 more rows in the straight body section (Rows 19 through 40 instead of 19 through 36). Add 2 more increase rounds to the legs and 4 more leg rounds before the ankle cuff. The finished chest circumference will be approximately 18 inches (45.7 cm) and total length approximately 22 inches (55.9 cm).
To size down to newborn: Reduce starting chain by 4 stitches. Remove 2 body straight rows and 2 leg rounds.
When resizing, always recheck that the button placket length matches the new front opening length. Recalculate carrot and bunny placement proportionally.
Finishing and Blocking
Weave in all ends securely with a tapestry needle, taking care to bury ends within the dense single crochet fabric.
Wet blocking is recommended: Submerge the finished romper in cool water, press gently to saturate, remove and press excess water out with a towel without wringing. Lay flat on a blocking mat and pin to the finished measurements listed above. Allow to dry completely before removing pins.
For wool content yarns, use steam blocking instead of wet blocking to avoid felting.
Care Instructions
Machine wash cold on gentle cycle inside a mesh laundry bag. Do not wring. Reshape while damp and lay flat to dry. Do not tumble dry. Do not iron directly. If ironing is needed for the ribbon or collar, use a pressing cloth and low heat.
Final Thoughts on This Baby Romper Crochet Pattern
This little romper takes time and attention, but the result is something truly special. Every bunny you attach, every carrot you embroider, every button you sew on becomes part of a handmade gift that a family will treasure. I still get photos from Oliver’s grandmother showing him in his romper at family gatherings, even though he outgrew it years ago. She framed it.
Thank you so much for choosing to make this pattern. It means the world to me that you are spending your time and creativity on something I designed. If you make your own Oliver Romper, I would absolutely love to see it. Tag me on Instagram or share a photo on Facebook so I can celebrate with you.
If you loved this baby romper crochet pattern, go ahead and save it to your Pinterest boards so you can find it again when you need it. And please drop a comment below if you make one. I read every single comment and would love to hear how yours turns out.