
A Wearable Art Piece for Special Occasions
Looking for a statement dress that will turn heads at your next special event? This Moonlight Silver Fairy Dress crochet pattern creates a stunning floor-grazing midi dress with a dramatic ombre effect. The design moves from deep charcoal at the bodice through soft heather lavender in the skirt, finally fading to ethereal white at the pointed handkerchief hem.
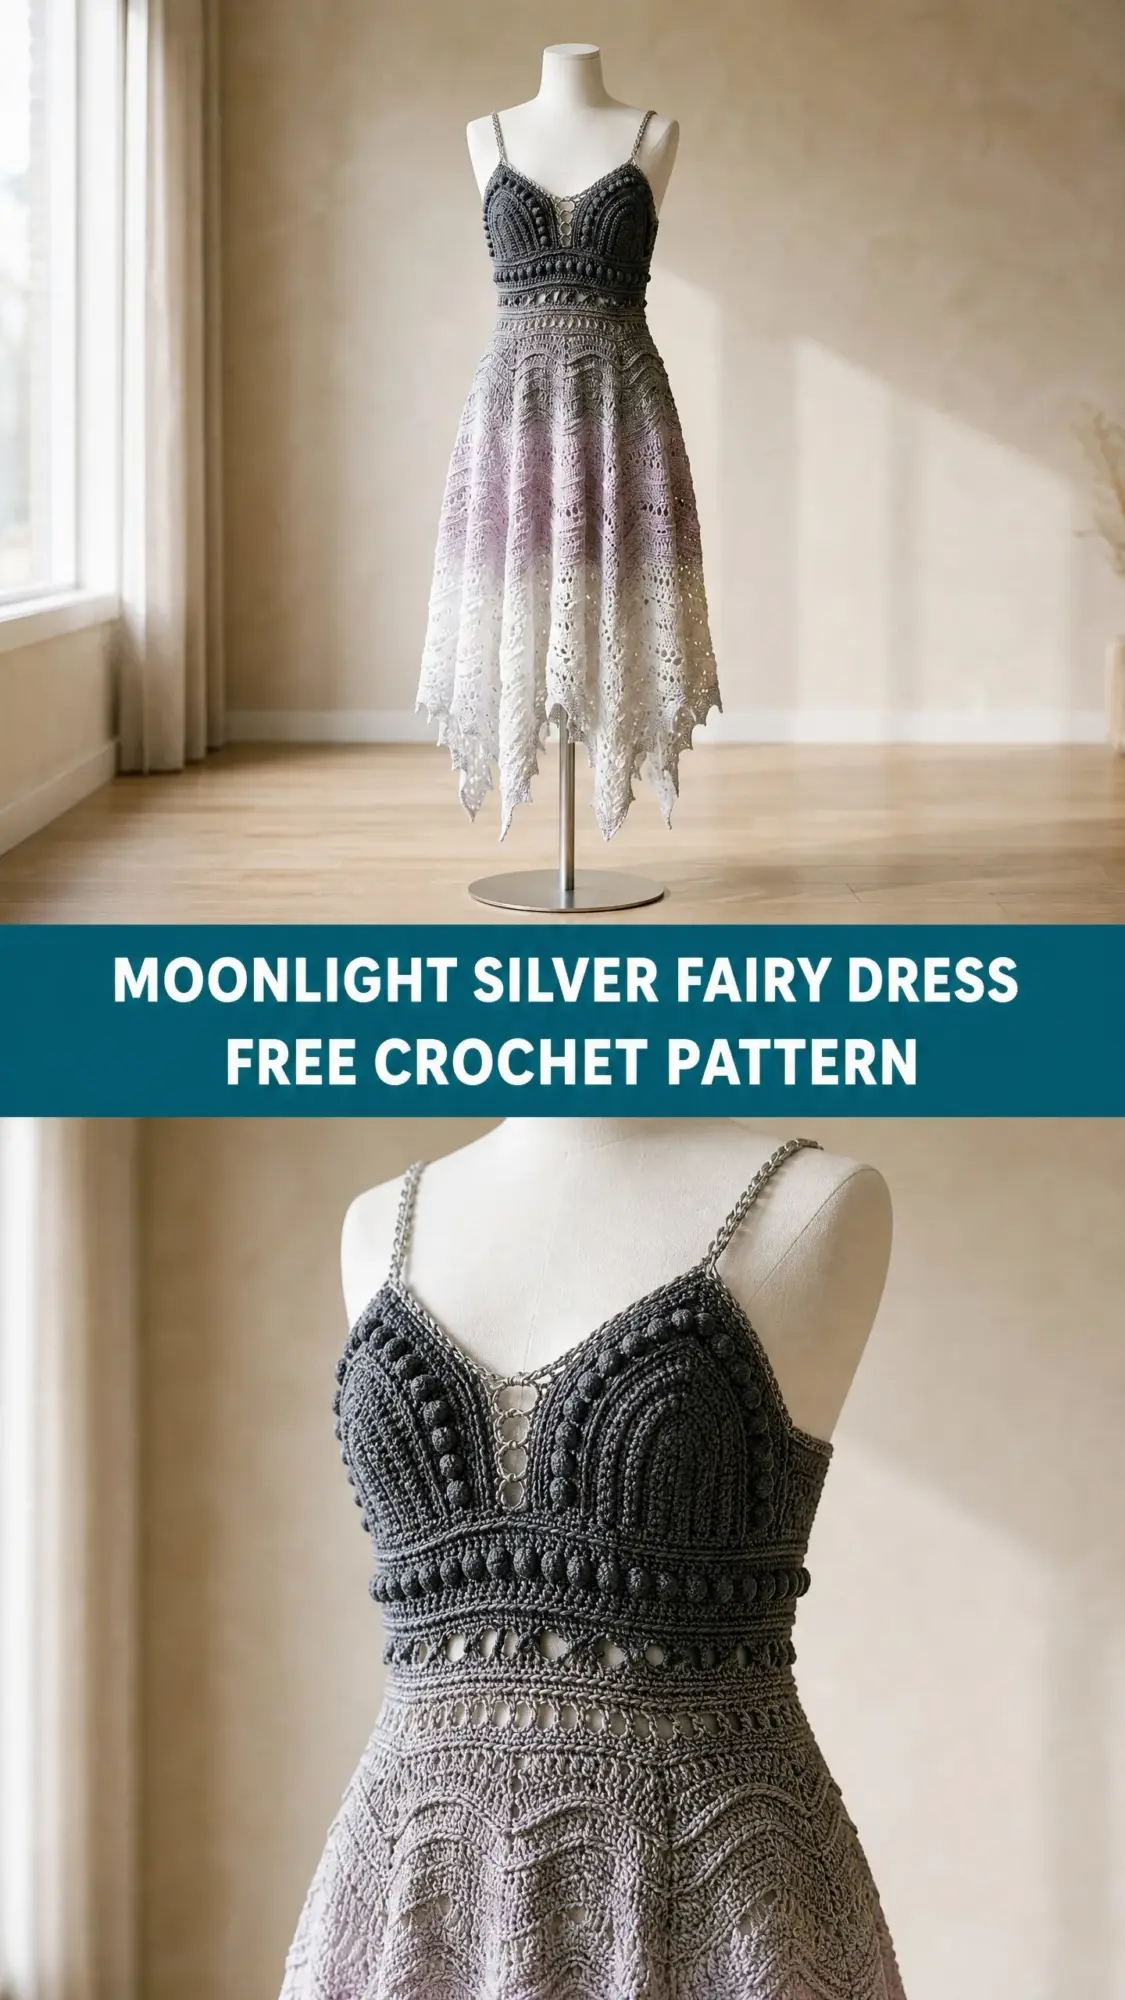
This is an advanced project that combines textured bodice work with delicate lace panels. You will use bobbles, raised post stitches, arch shells, and filet-style lace throughout the construction. The finished piece works beautifully for editorial shoots, fairy-themed events, formal occasions, or anywhere you want to feel absolutely extraordinary.
Plan for 80 to 120 hours of dedicated crafting time. The bodice alone takes roughly 20 to 25 hours due to the dense texture work. But the result? A one-of-a-kind garment you will treasure for years. This makes an unforgettable gift for a bride, a daughter, or yourself.
Skill Level
Advanced. This pattern requires confident knowledge of working bobbles, raised post stitches, filet crochet, lace motifs, seamless color changes, shaping across multiple construction zones, and blocking lace to finished dimensions. If you are newer to garment construction, I recommend completing at least three simpler garment projects before tackling this dress.
Finished Measurements
This pattern is written for size Medium with customization notes included at the end.
Materials
Yarn
You will need three colors of fingering weight yarn (CYCA 1) to achieve the ombre effect.
Yarn A (Charcoal): Approximately 650 yards / 595 m in deep charcoal or dark slate gray. This color covers the entire bodice, straps, and uppermost waistband section.
Yarn B (Heather Lavender): Approximately 900 yards / 823 m in soft heather lavender or dusty mauve. This creates the upper and mid skirt lace bands.
Yarn C (White): Approximately 1,100 yards / 1,006 m in white or off-white. A slightly lighter hand in this yarn helps the hem points drape correctly. This covers the lower lace bands and hem points.
Total yarn estimate: Approximately 2,650 yards / 2,424 m across all three colors.
Recommended Yarn Brands
Option 1: Malabrigo Sock (100 percent superwash Merino wool, 440 yards / 402 m per 100 g skein) in Plomo for Yarn A, Velvet Grapes for Yarn B, and Natural for Yarn C. This yarn has excellent stitch definition and blocks beautifully.
Option 2: Cascade Heritage Sock (75 percent superwash Merino, 25 percent nylon, 437 yards / 400 m per 100 g skein) in Charcoal, a light purple or thistle tone, and White. The nylon content adds durability for a wearable garment.
Option 3: Drops Fabel (75 percent wool, 25 percent nylon, 224 yards / 205 m per 50 g skein) in coordinating solids. This is a more economical option with good washability.
Substitution Note: Choose a fingering weight yarn with good stitch memory that blocks firmly. Avoid 100 percent acrylic for this project. The lace panels will not hold their shape without wet blocking. A wool or wool-blend yarn with at least 50 percent natural fiber is strongly recommended. All three colors should ideally come from the same yarn line to ensure consistent gauge across color transitions.
Hooks
Notions
Gauge
Gauge is mandatory for a fitted bodice. Swatch each section separately with the corresponding hook size. Block your swatches before measuring.
Bodice texture gauge (US B-1 / 2.25 mm hook):
22 stitches and 20 rows = 4 in / 10 cm in the arch-and-bobble texture pattern, blocked.
Waistband gauge (US C-2 / 2.75 mm hook):
24 stitches and 22 rows = 4 in / 10 cm in single crochet, blocked.
Skirt lace gauge (US D-3 / 3.25 mm hook):
One 12-stitch lace repeat = 2 in / 5 cm wide, and one 4-row lace band = 1.5 in / 4 cm tall, blocked.
A difference of even half a stitch per inch in the bodice section will result in a dress that is too tight or too loose by several inches across the bust. Take your time with gauge.
Abbreviations (US Terms)
Before we dive into the pattern, let me walk you through all the abbreviations. I am defining each one so you can reference this section anytime you get stuck.
Special Stitches
These special stitches create the beautiful texture and lace effects throughout the dress. Practice each one before starting if they are new to you.
Bobble (bo)
Yarn over, insert hook into indicated stitch, yarn over and pull up a loop, yarn over and draw through 2 loops only. You now have one incomplete double crochet. Repeat this sequence 4 more times into the same stitch. You should have 6 loops on your hook. Yarn over and draw through all 6 loops at once. Push the bobble to the right side of the work. One bobble completed.
Arch Shell
In the indicated chain space or stitch, work 2 double crochet, chain 2, 2 double crochet. This creates a small shell with a central chain-2 space.
V-Stitch (V-st)
Work double crochet, chain 2, double crochet all into the same stitch or chain space. This is the base unit of the skirt lace pattern.
Picot Join
Chain 3, slip stitch into the top of the last stitch made. This creates a decorative picot point used at the hem panel tips.
Extended Single Crochet (esc)
Insert hook into indicated stitch, yarn over and pull up a loop (2 loops on hook), yarn over and draw through 1 loop only (creating a chain within the stitch), yarn over and draw through remaining 2 loops. This produces a taller, slightly more flexible single crochet used in the waistband.
Front Post Double Crochet (FPdc)
Yarn over, insert hook from front to back to front around the post (vertical bar) of the indicated stitch in the row below, yarn over and pull up a loop, yarn over and draw through 2 loops twice. This creates raised vertical ridges on the right side.
Back Post Double Crochet (BPdc)
Yarn over, insert hook from back to front to back around the post of the indicated stitch in the row below, yarn over and pull up a loop, yarn over and draw through 2 loops twice. This creates recessed ridges on the right side, complementing the FPdc.
Scallop Edge
Slip stitch into first stitch, skip 2 stitches, 5 double crochet into next stitch, skip 2 stitches, slip stitch into next stitch. Repeat across. Used at the hem panel edges.
Chain Arch
Chain 5, slip stitch or single crochet into the indicated anchor stitch. This creates an open arch used in lace rows.
Pattern Notes
Read through these notes before beginning. They will save you confusion later.
1. The bodice is worked flat in two panels (Front and Back), each worked from the bottom edge up. After completion, the panels are seamed at the side seams using a slip stitch join on the wrong side.
2. The waistband is worked in the round after joining the bodice panels, picking up stitches along the bottom edge of the bodice. The waistband is the transition point for the skirt.
3. The skirt is worked in the round from the waistband down, with increases built into specific lace pattern rows to create the full circular silhouette.
4. The ombre color change is achieved by switching yarn colors at designated lace band boundaries. Carry the old color for a few stitches before cutting or work an overlapping join. Do not strand the unused color through the skirt lace as this will distort the open pattern.
5. The hem consists of 8 individual pointed triangular panels worked flat after completing the final skirt round. Each panel is worked back and forth with decreases at both edges to form the pointed handkerchief hem.
6. Straps are worked as long chains with slip stitch reinforcement, threaded through the top bodice edge and knotted or sewn at the back. Silver chain is threaded alongside the crocheted strap for the metallic accent.
7. The back closure uses snap closures hidden under a small crochet edging. The bodice back opens approximately 4 in / 10 cm from the top for ease of dressing.
8. Block all sections aggressively with warm water and rust-proof pins before final assembly. The lace skirt will grow significantly in blocking. Pre-block the skirt panels before attaching to the bodice to avoid distortion.
9. All rounds begin with a standing stitch or chain 2 (not counted as double crochet) unless stated otherwise. A slip stitch joins each round at the end.
10. Right side is always facing when working in the round for the skirt. The bodice flat sections are worked with right side and wrong side rows alternating.
Instructions
Section 1: Bodice Front Panel
Using Yarn A and US B-1 / 2.25 mm hook, chain 101.
Row 1 (RS): Single crochet into 2nd chain from hook and into each chain across. Turn. (100 sc)
Row 2 (WS): Chain 1, single crochet into first stitch, [FPsc around next stitch, single crochet into next stitch] across. Turn. (100 sts)
Row 3 (RS): Chain 2 (does not count as stitch here or throughout bodice unless stated), double crochet into first stitch, [FPdc around next stitch, double crochet into next stitch] repeat across. Turn. (100 sts)
Row 4 (WS): Chain 1, single crochet into each stitch across. Turn. (100 sc)
Row 5 (RS): Chain 2, [bobble in next stitch, double crochet in next 2 stitches] 33 times, bobble in next stitch. Turn. (100 sts total: 34 bobbles, 66 dc)
Row 6 (WS): Chain 1, single crochet into each stitch across, pressing bobbles to right side as you go. Turn. (100 sc)
Row 7 (RS): Chain 2, FPdc around each of next 2 stitches, [chain 2, skip 2 stitches, FPdc around next 2 stitches] 24 times, chain 2, skip 2 stitches, FPdc around last 2 stitches. Turn. (50 FPdc, 25 chain-2 spaces; 100 field stitches)
Row 8 (WS): Chain 1, single crochet into each FPdc and 2 single crochet into each chain-2 space across. Turn. (100 sc)
Row 9 (RS): Chain 2, double crochet into first stitch, FPdc around next stitch, [double crochet into next stitch, FPdc around next stitch] across to last 2 stitches, double crochet into last 2 stitches. Turn. (100 sts)
Row 10 (WS): Chain 1, single crochet across. Turn. (100 sc)
Row 11 (RS) Arch Row: Chain 4 (counts as dc + ch 1), skip first 2 stitches, [double crochet in next stitch, chain 1, skip 1 stitch] 49 times, double crochet in last stitch. Turn. (51 dc, 50 chain-1 spaces)
Row 12 (WS) Arch Fill: Chain 1, single crochet in first double crochet, [chain 3, single crochet in next double crochet] 50 times. Turn. (51 sc, 50 chain-3 arches)
Row 13 (RS) Arch Shell Row: Chain 1, [arch shell in next chain-3 space, chain 1] 50 times, single crochet in last single crochet. Turn. (50 arch shells)
Row 14 (WS): Chain 1, work sc2tog evenly across all arch shell and chain structure, reducing back to 100 single crochet. Place a stitch marker every 10 stitches to verify count as you work. Turn. (100 sc)
Designer tip: Row 14 is the gathering row after the decorative arch section. Work it intuitively with sc2tog placed approximately every other stitch pair across the arch shell tops and chain spaces until you restore 100 single crochet. This is standard practice in garment crochet after decorative expansion rows.
Row 15 (RS): Chain 2, [FPdc around next stitch, BPdc around next stitch] across. Turn. (100 sts)
Row 16 (WS): Chain 1, single crochet across. Turn. (100 sc)
Row 17 (RS): Repeat Row 5. (100 sts: 34 bobbles, 66 dc)
Row 18 (WS): Chain 1, single crochet across. Turn. (100 sc)
Row 19 (RS): Chain 2, double crochet across. Turn. (100 dc)
Row 20 (WS): Chain 1, single crochet across. Turn. (100 sc)
Rows 21 through 26: Repeat Rows 3 through 4 three times, maintaining alternating FPdc-texture and plain single crochet rows. (100 sts throughout)
Row 27 (RS) Bust Shaping Begin: Chain 2, double crochet in first 8 stitches, dc2tog, [double crochet in next 8 stitches, dc2tog] 9 times. Turn. (90 sts)
Row 28 (WS): Chain 1, single crochet across. Turn. (90 sc)
Row 29 (RS): Chain 2, [FPdc around next stitch, double crochet into next stitch] across. Turn. (90 sts)
Row 30 (WS): Chain 1, single crochet across. Turn. (90 sc)
Row 31 (RS) Underarm Shaping: Chain 1, single crochet in first stitch, sc2tog, single crochet to last 3 stitches, sc2tog, single crochet in last stitch. Turn. (88 sc)
Row 32 (WS): Chain 1, single crochet across. Turn. (88 sc)
Row 33 (RS): Repeat Row 31. Turn. (86 sc)
Row 34 (WS): Chain 1, single crochet across. Turn. (86 sc)
Row 35 (RS): Repeat Row 31. Turn. (84 sc)
Row 36 (WS): Chain 1, single crochet across. Turn. (84 sc)
Row 37 (RS): Chain 2, double crochet across. Turn. (84 dc)
Row 38 (WS): Chain 1, single crochet across. Turn. (84 sc)
Row 39 (RS): Chain 2, [FPdc around next stitch, BPdc around next stitch] across. Turn. (84 sts)
Row 40 (WS): Chain 1, single crochet across. Turn. (84 sc)
Row 41 (RS) Upper Bust Arch Row: Chain 4 (counts as dc + ch 1), skip first 2 stitches, [double crochet in next stitch, chain 1, skip 1 stitch] 41 times, double crochet in last stitch. Turn. (43 dc, 42 chain-1 spaces; total field: 84)
Row 42 (WS): Chain 1, single crochet in first double crochet, [chain 3, single crochet in next double crochet] 42 times. Turn. (43 sc, 42 chain-3 arches)
Row 43 (RS): Chain 1, [arch shell in next chain-3 space, chain 1] 42 times, single crochet in last single crochet. Turn. (42 arch shells)
Row 44 (WS): Chain 1, work single crochet across reducing back to 84 single crochet using the Row 14 method, placing sc2tog over shell pairs evenly. (84 sc)
Row 45 (RS) Final Bodice Texture: Chain 2, [bobble in next stitch, double crochet in next 2 stitches] 28 times. Turn. (84 sts: 28 bobbles, 56 dc)
Row 46 (WS): Chain 1, single crochet across. Turn. (84 sc)
Row 47 (RS): Chain 2, FPdc around each stitch across. Turn. (84 sts)
Row 48 (WS): Chain 1, single crochet across. (84 sc)
Fasten off Yarn A. This completes the bodice front panel.
Checkpoint: After completing the bodice front panel, the piece should measure approximately 9 in / 23 cm tall and 14 in / 35.5 cm wide at the top. If your piece is wider, go down a hook size. If narrower, go up a hook size and re-swatch.
Section 2: Bodice Back Panel
The back panel is identical to the front panel through Row 26.
Using Yarn A and US B-1 / 2.25 mm hook, chain 101.
Work Rows 1 through 26 exactly as for bodice front. (100 sc at Row 26)
Back Opening Instructions:
After Row 26, divide the panel at center. The left back half and right back half are each worked separately from Row 27 onward, with each half having 50 stitches at Row 26.
Right Back Half Row 27: Work over first 50 stitches. Double crochet in first 8, dc2tog, [double crochet in 8, dc2tog] 4 times, double crochet to end of right 50 stitches. (45 sts)
Left Back Half Row 27: Join new yarn to center stitch, work Row 27 over remaining 50 stitches identically. (45 sts each half)
Continue shaping with underarm decreases (Rows 31 through 35) worked on the outer edge only of each back half. The inner (center back) edge remains straight.
Row 31 Right Back Half: Single crochet in first stitch, sc2tog at beginning (outer edge), single crochet to end. Turn. (44 sts)
Row 31 Left Back Half: Single crochet to last 3 stitches, sc2tog, single crochet in last stitch (outer edge). Turn. (44 sts)
Repeat decreases for Rows 33 and 35, decreasing one at outer edge each decrease row.
After Row 36: each back half has 42 stitches.
Continue Rows 37 through 48 over 42 stitches per back half, working arch and texture rows proportionally. For the 42-stitch field on Row 41 back, work chain 4, skip 2, [double crochet, chain 1, skip 1] 20 times, double crochet in last stitch. (22 dc, 21 chain-1 spaces; field: 42)
Fasten off Yarn A on each back half at Row 48.
Section 3: Side Seams and Assembly
Place bodice front and back with right sides together. Using Yarn A and a tapestry needle or slip stitch join with hook, seam the side seams from Row 48 top edge down to Row 1 bottom edge on each side. Each seam is approximately 9 in / 23 cm long. Leave the bottom edge (Row 1) open for the waistband pickup.
The assembled bodice circumference at the bottom opening (Row 1) should measure 200 stitches around (100 front plus 100 back). At the top edge (Row 48), the total opening is 168 stitches (84 front plus 42 left back plus 42 right back). The back center opening spans approximately 3.5 in / 9 cm from the top.
Section 4: Waistband
Join Yarn A with US C-2 / 2.75 mm hook at any side seam at the bottom edge of the assembled bodice.
Round 1: Single crochet evenly around the bottom opening of the bodice, picking up 1 single crochet per stitch from each foundation chain. Total: 200 single crochet. Join with slip stitch to first single crochet. (200 sc)
Round 2: Chain 1, extended single crochet in each stitch around. Join. (200 esc)
Round 3: Chain 1, [FPsc around next stitch, BPsc around next stitch] around. Join. (200 sts)
Round 4: Chain 1, extended single crochet around. Join. (200 esc)
Round 5: Chain 1, single crochet around. Join. (200 sc)
Round 6: Chain 1, [single crochet in next 3 stitches, sc2tog] 40 times. Join. (160 sc)
Round 7: Chain 1, extended single crochet around. Join. (160 esc)
Round 8: Chain 1, [FPsc around next stitch, BPsc around next stitch] around. Join. (160 sts)
Rounds 9 through 10: Chain 1, single crochet around. Join each round. (160 sc)
Fasten off Yarn A. The waistband is now complete and measures approximately 1.5 in / 4 cm tall.
Checkpoint: The waistband lower edge should measure approximately 26 in / 66 cm in circumference. This is the waist measurement with ease. The waistband will stretch slightly to fit.
Section 5: Skirt Construction
The skirt is worked in the round from the waistband downward using US D-3 / 3.25 mm hook. The skirt uses a series of lace bands, each 4 rounds tall, stacked and increasing in stitch count as the skirt widens. Color changes occur between lace band groupings.
The skirt uses Yarn A for Lace Band Group 1, transitions to Yarn B at Lace Band Group 4, and transitions to Yarn C at Lace Band Group 8.
Base Round: Join Yarn A at waistband lower edge with US D-3 hook.
Round 1 (Skirt Foundation): Chain 1, 2 single crochet in each stitch around. Join. (320 sc)
Continue working the lace band patterns as established in the full pattern, following the color transition schedule and increase placement to achieve the dramatic circular silhouette. Each lace band group builds upon the previous, with the pattern opening up from denser texture near the waist to delicate filet-style lace approaching the hem.
Section 6: Hem Panels
The hem consists of 8 individual pointed triangular panels worked flat after completing the final skirt round. Divide your final round stitches into 8 equal sections of 40 stitches each (based on the increased stitch count at the skirt hem).
Work each panel back and forth with decreases at both edges on every right side row to form the pointed handkerchief hem. Continue until 1 stitch remains, then work a picot join to create the decorative point.
Section 7: Straps and Finishing
Straps: Using Yarn A and US B-1 hook, chain 150 for each strap. Slip stitch back along the chain to reinforce. Thread through the top bodice edge at the front corner, cross at the back, and secure. Thread silver decorative chain alongside the crocheted strap and attach with small jump rings or sewing thread.
Back Closure: Attach 4 to 6 snap closures along the center back opening, spaced approximately 1 inch apart. Work a small single crochet edging along each back edge to hide the snaps.
Blocking: Wet block the entire dress using warm water and rust-proof pins on blocking mats. Pin each hem point individually to achieve the dramatic fairy-tale silhouette. Allow to dry completely before wearing.
Final Tips for Success
Take your time with this project. The beauty of the Moonlight Silver Fairy Dress lies in the careful attention to each textured detail.
Block your swatches before measuring gauge. Block each section before assembly. Block the finished dress before wearing. Yes, that is three separate blocking sessions. Your patience will be rewarded with a garment that drapes and flows exactly as intended.
When changing colors for the ombre effect, work a few overlapping stitches to secure your yarn rather than carrying the unused color. The lace sections are too open for stranding, and visible carried yarn will spoil the ethereal effect.
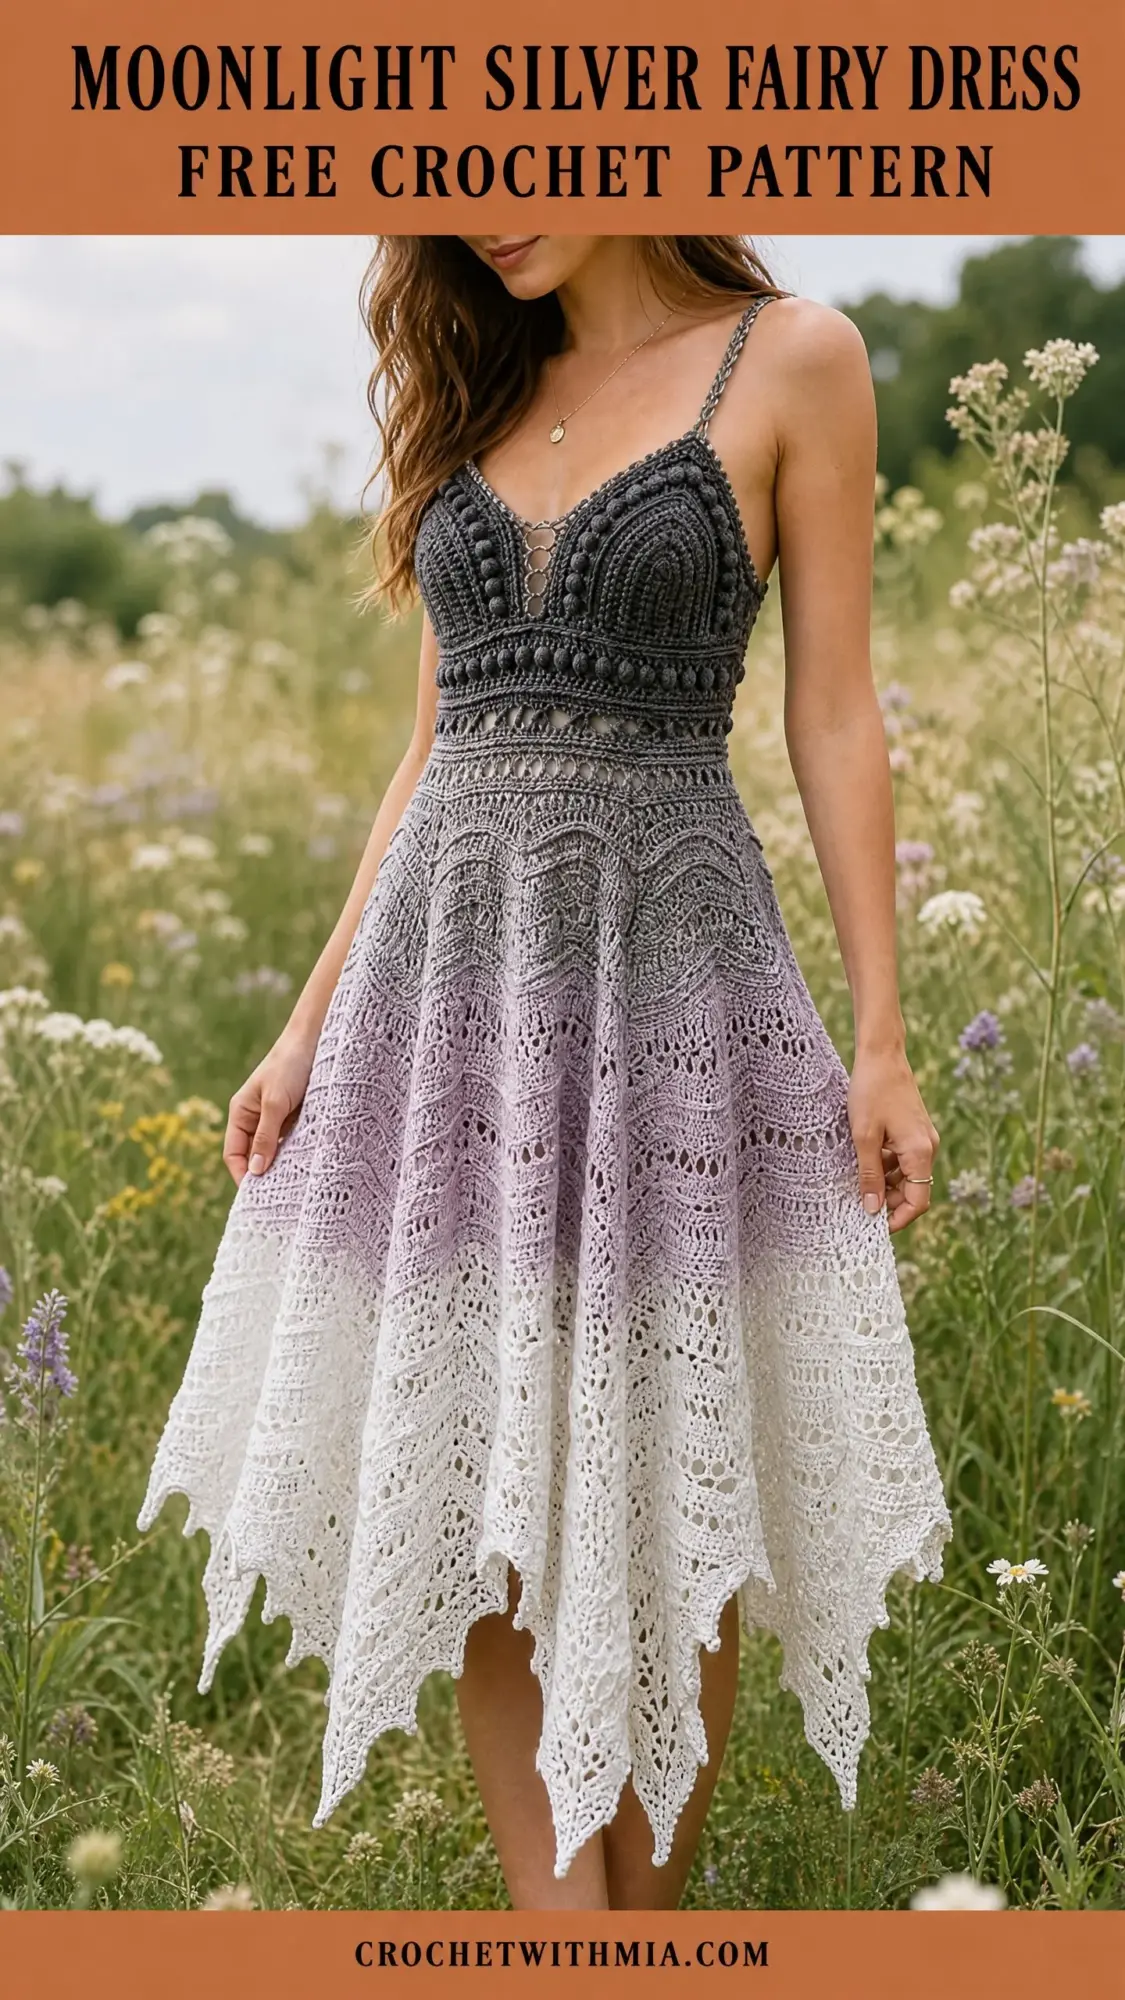
You Did It!
Thank you so much for choosing this pattern for your next special project. I truly hope you love making this dress as much as I loved designing it.
If you make your own Moonlight Silver Fairy Dress, I would absolutely love to see it! Tag me on Instagram or share a photo in our Facebook group. Seeing your finished projects is honestly the best part of sharing patterns.
Save this pattern to your Pinterest boards so you can find it whenever inspiration strikes. And please drop a comment below if you make this dress. I read every single one, and your feedback helps other crocheters decide if this project is right for them. Happy crocheting!