
Lace crochet intimidates a lot of people. I get it. All those chains and open spaces and delicate yarn can feel like a recipe for disaster. But here is the truth: if you can double crochet and count, you can absolutely make this stunning luna moth poncho.
Yes, this is an advanced pattern. Yes, it takes time. But the individual techniques are not mysterious or impossible. They are just regular stitches arranged in a beautiful way. The magic comes from patience and blocking, not from secret skills only experts possess.
This pattern breaks down every single step. I have written it so that intermediate crocheters ready for a challenge can follow along, and experienced lace makers can appreciate the construction details. Whether you have made one shawl or twenty, this luna moth poncho is within your reach if you are willing to take it row by row.
About This Luna Moth Lace Poncho Pattern
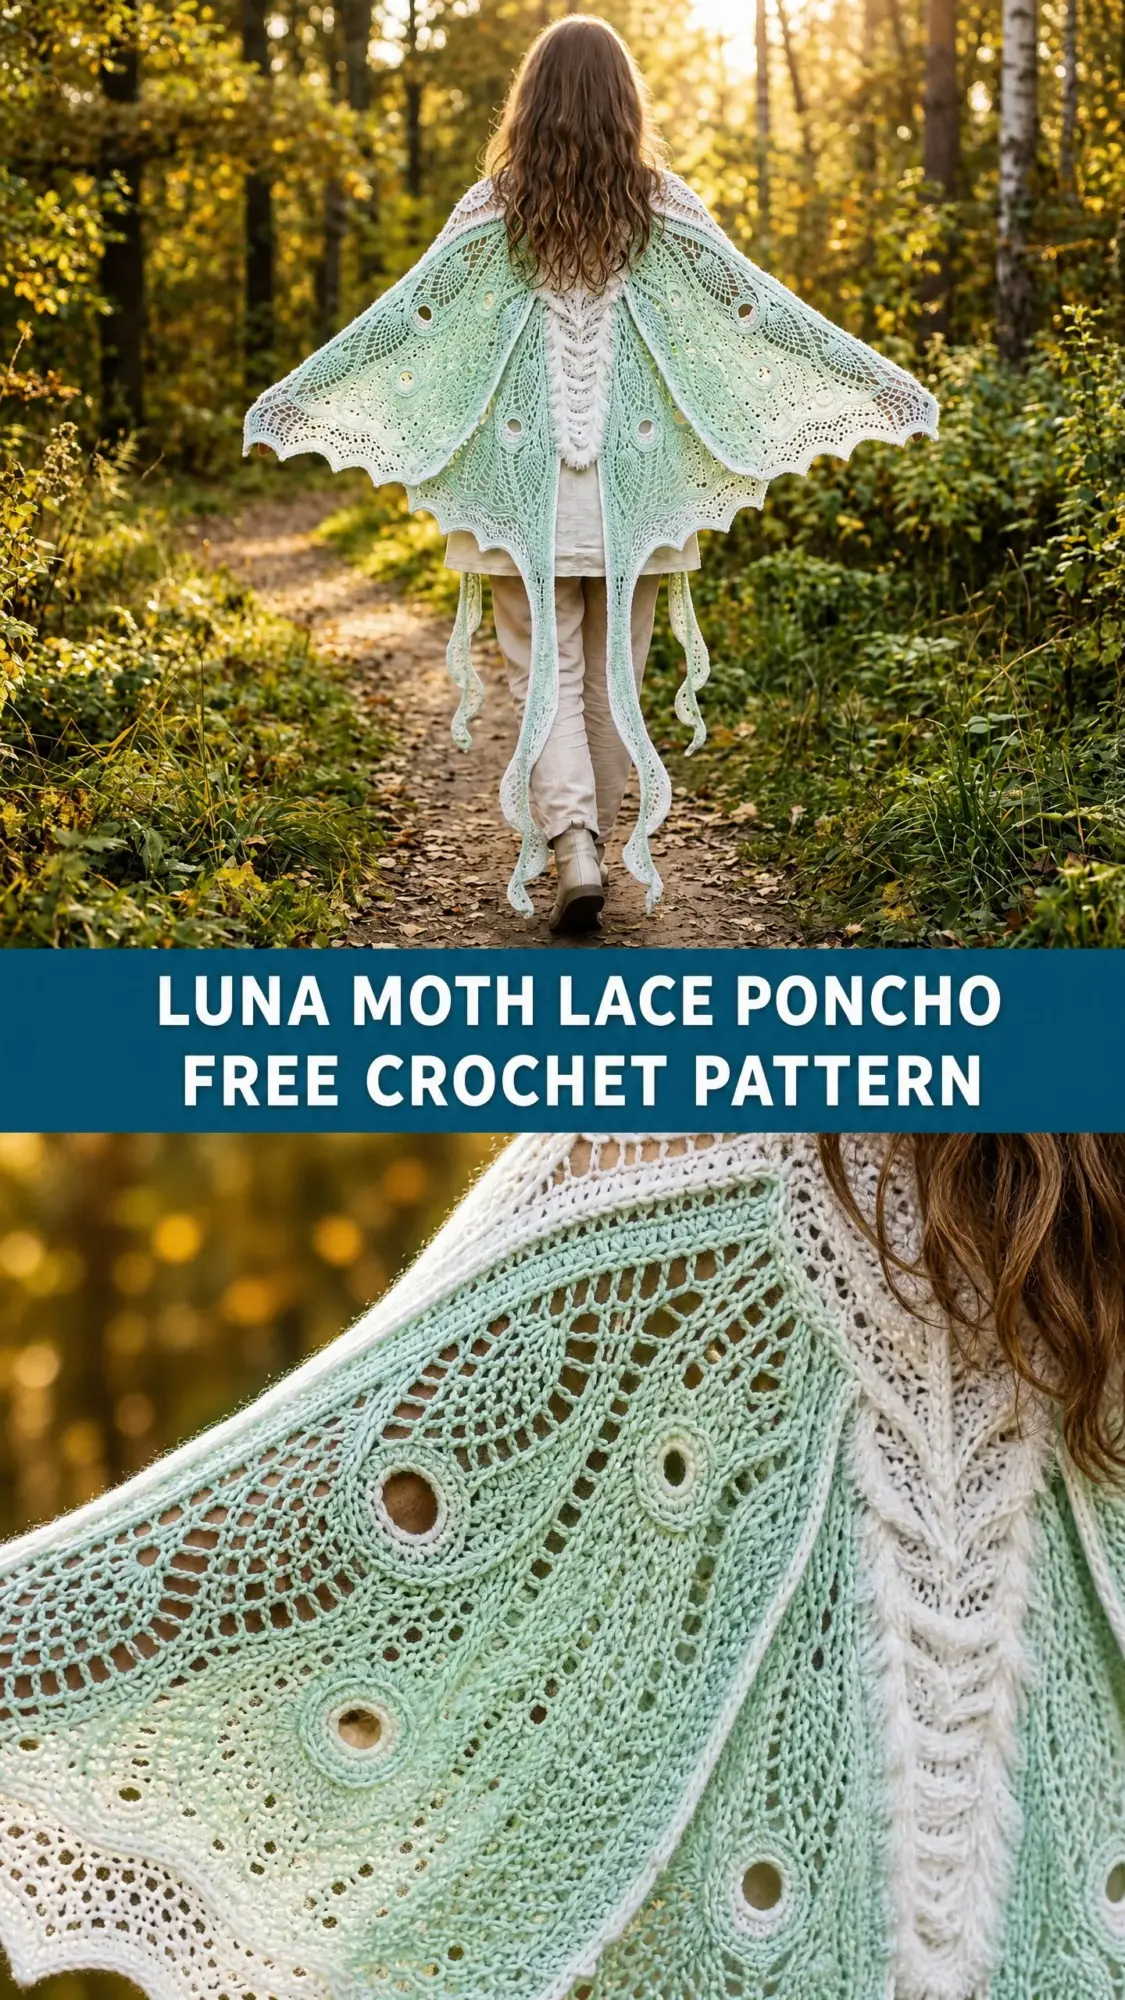
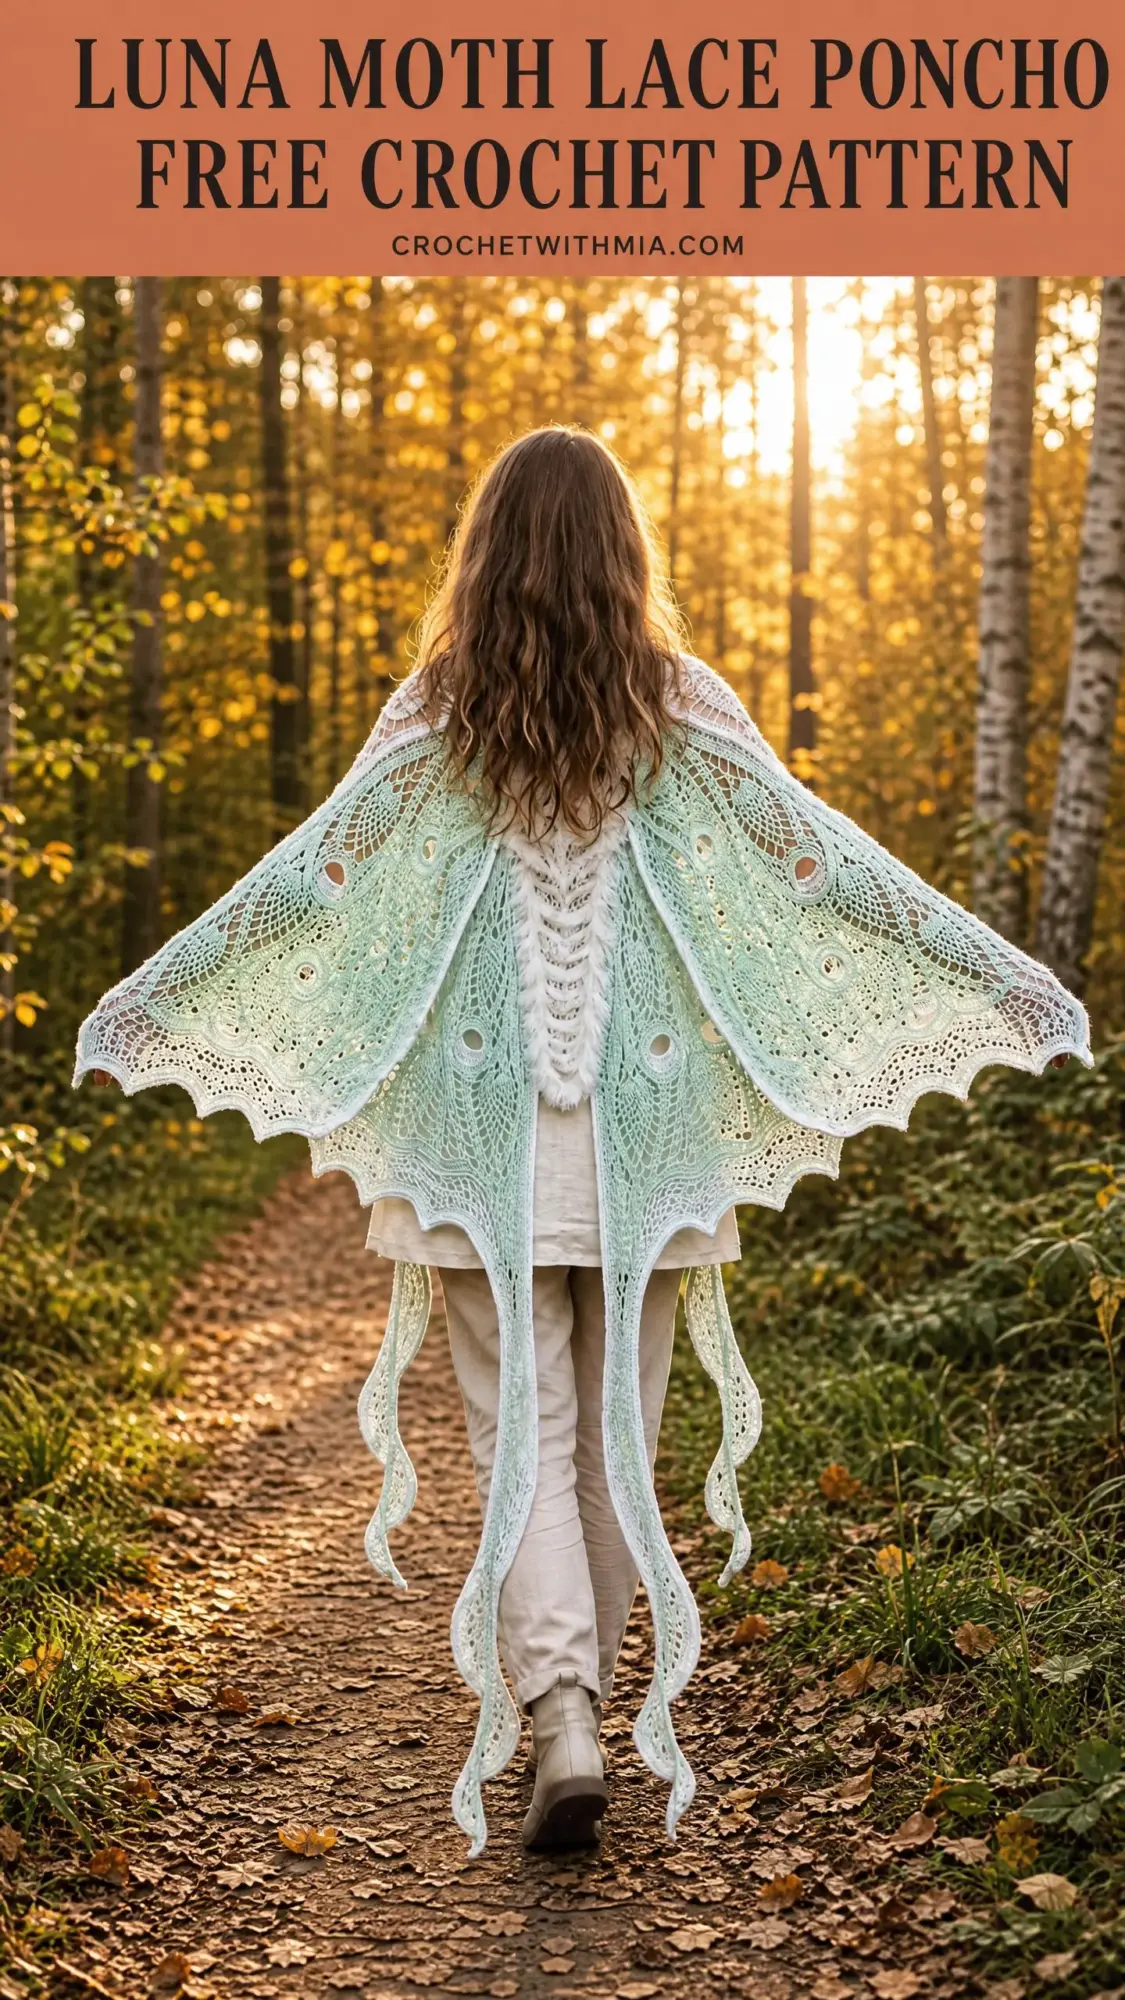
This wearable art piece transforms you into an ethereal luna moth. The design features two large symmetrical lace wing panels that drape over your shoulders and arms. A raised braid stitch runs down the center back to create the moth’s spine. Fluffy white trim at the collar and spine mimics the furry thorax of a real luna moth. Two long tail streamers hang from the lower corners, replicating those characteristic hindwing tails that make luna moths so recognizable.
The color palette transitions from soft white at the collar into pale mint green across the wings. You achieve this either through gradient yarn or by joining colors deliberately at specific rows. Small circular lace medallions sewn onto the finished wings create the signature eyespots that luna moths are known for.
When blocked and worn, this poncho spans approximately 54 inches from wingtip to wingtip. It hangs about 24 inches from collar to the lowest wing point, plus another 14 inches for the tail streamers. The neck opening fits comfortably over most adult heads with a circumference of about 22 inches unstretched.
Skill Level
This is an advanced pattern. You should feel comfortable with working lace in both the round and flat rows, managing gradient color joins, understanding shaping with simultaneous increases and decreases, applied surface crochet, and blocking lace aggressively.
I recommend completing at least two lace shawls before attempting this project. Expect to spend 60 to 80 hours on this poncho if you are experienced, and longer if you are newer to lace work.
Materials Needed
Yarn A (main wing color): Approximately 1,200 yards of fingering weight yarn in pale mint green. Look for yarn with slight halo or good stitch definition for lace.
Yarn B (edge and collar color): Approximately 400 yards of fingering weight yarn in soft white or ivory. This yarn works the first and last rows of each wing panel plus the collar yoke.
Yarn C (spine and collar trim): Approximately 60 yards of brushed mohair or fluffy boucle yarn in white. This creates the fuzzy spine and collar accent.
Hooks:
Notions: Tapestry needle, rust-proof blocking pins (at least 60), blocking mats, spray bottle or basin for wet blocking, stitch markers (at least 12), scissors
Yarn Suggestions
Malabrigo Lace in colorway Emerald City fading to Natural works beautifully for the gradient effect. This 100% merino lace yarn blocks gorgeously and has excellent drape. Use two skeins of mint and one of natural.
Alternatively, try Madelinetosh Tosh Lace in Forestry for Yarn A and Antler for Yarn B. The single-ply construction opens dramatically when blocked.
For the fluffy trim, Drops Lace (70% mohair, 30% silk) held with a single strand of Drops Fingering makes an excellent Yarn C substitution.
Substitution note: Use any fingering or lace weight yarn that meets gauge. Avoid highly textured or thick-and-thin yarns as they obscure the lace stitch pattern. Yarn with at least 50% natural fiber is strongly recommended for blocking. If using a gradient yarn instead of separate colorways, purchase a 1,600 yard gradient skein and wind off approximately 400 yards of the lightest section for the collar.
Gauge
With US B/1 (2.25 mm) hook and Yarn A, after blocking:
Gauge is critical for this project. The wing span is directly determined by stitch count times gauge. Swatch at least a 4-inch square in the lace fan stitch, block it, and measure before beginning. Adjust hook size as needed.
Abbreviations and Stitch Definitions
beg: beginning
ch: chain, the foundation stitch made by yarning over and pulling through a loop
ch-sp: chain space, the gap created by chains in previous rows
dc: double crochet, yarn over, insert hook, pull up loop, yarn over and pull through 2 loops twice
dc2tog: double crochet two together, a decrease that combines 2 stitches into 1
hdc: half double crochet
lp(s): loop(s)
MC: main color (Yarn A, mint green)
CC: contrast color (Yarn B, white)
FT: fluffy trim (Yarn C, white mohair or boucle)
MR: magic ring, an adjustable starting ring
picot: chain 3, slip stitch in first chain made, creates a small decorative loop
rep: repeat
RS: right side, the public-facing side of your work
sc: single crochet
sl st: slip stitch
sk: skip
sp: space
st(s): stitch(es)
t-ch: turning chain
tog: together
tr: treble crochet
WS: wrong side, the back of your work
yo: yarn over
[ ]: work all instructions inside brackets into the same stitch or space
( ): total stitch count at end of row or round
**\…\:** repeat instructions between asterisks as directed
Special Stitches for This Pattern
Shell (sh): Work 5 dc into the same stitch or chain space. This is the base fan unit of the wing lace pattern.
Large Shell (lg-sh): Work 7 dc into the same stitch or chain space. Used at outer wing increase points.
Picot: Chain 3, slip stitch into the first chain made. Creates a small decorative loop at the wing border edge.
V-stitch (V-st): Work dc, ch 2, dc all into the same stitch or chain space.
Open Shell: Work 3 dc, ch 1, 3 dc all into the same stitch or chain space.
Decrease Shell (dec-sh): Yarn over, insert hook into next stitch, yarn over, pull through, yarn over, pull through 2 loops. Skip the next 2 stitches. Yarn over, insert hook into next stitch, yarn over, pull through, yarn over, pull through 2 loops. Yarn over, pull through all 3 loops on hook. Chain 2. Work 2 dc into the same stitch where last leg of decrease was made. This creates a slanted decrease at the inner wing edge.
Chain Loop: Chain the number specified, slip stitch into the same stitch or the stitch specified to form a closed loop or arc. Used in the eyelet circle motifs.
Eyelet Circle Motif:
This creates a small circular lace medallion. Work 6 total: 3 for each wing panel. Set aside. They are sewn on after blocking.
Spine Braid Stitch: Worked on larger hook D/3 with Yarn B held together with Yarn C. Chain 6. Row 1: Dc in 4th ch from hook, dc in next 2 ch. Turn. (4 dc) Row 2: Ch 3 (counts as dc throughout), dc in next 3 sts. Turn. (4 dc) Repeat Row 2 for length specified. When applied to the garment center back with a surface sl st seam, the fluffy Yarn C creates a raised fuzzy spine appearance.
Pattern Notes Before You Begin
1. The poncho is worked in stages. First the collar yoke is worked in the round. Then the two wing panels are worked flat as separate pieces and joined to the yoke. Then the spine is applied. Then the border is worked.
2. Each wing panel is a large triangle with a curved outer scalloped edge and a straight inner edge that joins to the collar yoke.
3. The lace fan pattern consists of alternating shells and V-stitches. As the wing widens, extra V-stitches and shells are added at the outer edge on right-side rows.
4. Color transitions: Work Rows 1 through 5 of each wing panel in CC (white). Join MC (mint) at Row 6. Fade by working first 2 stitches of each row in CC and remaining stitches in MC for 2 transition rows, then drop CC and work all MC until Row 2 before border. Work last border setup row and all border rows in CC.
5. The eyelet circle motifs (luna moth eyespots) are made separately and sewn onto the wing panels at the positions indicated after blocking.
6. Do not turn work between collar rounds. The collar is worked in the round throughout.
7. Use stitch markers to mark the first stitch of each round in the collar and the wing edge increase points.
8. After blocking, the lace opens significantly. Do not measure or compare against finished dimensions before blocking.
9. The tail streamers are worked as narrow lace tubes (approximately 8 stitches in circumference) for 14 inches each, joined at the two lower inner wing corners.
10. Written pattern uses US crochet terminology throughout.
Collar Yoke Instructions
The collar is worked in the round from the top down, beginning at the neck edge.
With CC (Yarn B) and smaller hook (B/1), make a Magic Ring.
Round 1 (RS): Ch 3 (counts as first dc), work 11 dc into ring. Sl st to top of beg ch-3 to join. (12 dc)
Round 2: Ch 3, dc in same st, 2 dc in each st around. Sl st to top of beg ch-3. (24 dc)
Round 3: Ch 3, dc in same st, dc in next st, [2 dc in next st, dc in next st] around. Sl st to join. (36 dc)
Round 4: Ch 3, dc in same st, dc in next 2 sts, [2 dc in next st, dc in next 2 sts] around. Sl st to join. (48 dc)
Round 5: Ch 3, dc in same st, dc in next 3 sts, [2 dc in next st, dc in next 3 sts] around. Sl st to join. (60 dc)
Round 6: Ch 3, dc in same st, dc in next 4 sts, [2 dc in next st, dc in next 4 sts] around. Sl st to join. (72 dc)
Round 7: Ch 3, dc in same st, dc in next 5 sts, [2 dc in next st, dc in next 5 sts] around. Sl st to join. (84 dc)
Round 8: Ch 3, dc in same st, dc in next 6 sts, [2 dc in next st, dc in next 6 sts] around. Sl st to join. (96 dc)
Round 9: Ch 3, dc in same st, dc in next 7 sts, [2 dc in next st, dc in next 7 sts] around. Sl st to join. (108 dc)
Round 10: Ch 3, dc in same st, dc in next 8 sts, [2 dc in next st, dc in next 8 sts] around. Sl st to join. (120 dc)
Round 11: Ch 3, dc in same st, dc in next 9 sts, [2 dc in next st, dc in next 9 sts] around. Sl st to join. (132 dc)
Round 12: Ch 3, dc in same st, dc in next 10 sts, [2 dc in next st, dc in next 10 sts] around. Sl st to join. (144 dc)
This completes the collar yoke. The circle should measure approximately 7 inches in diameter before blocking and approximately 7.25 inches after blocking, giving a circumference of approximately 22.75 inches.
Fasten off. Weave in ends. Set collar aside.
CHECKPOINT: The finished collar yoke disk should measure approximately 7 inches across before blocking. You have 144 stitches around the outer edge. Mark the center front (st 1) and center back (st 73) with stitch markers. Each half has 72 stitches. Each half will become the attachment edge for one wing panel.
Collar Trim (Fluffy Accent)
With larger hook (D/3) and Yarn B held together with Yarn C (fluffy trim), join to any stitch in Round 1 (center hole area) of the collar.
Work 1 round of sc evenly around the inner neck edge of the collar, inserting hook into the front loops only of Round 1 stitches. Sl st to first sc to join. Fasten off. This creates a fluffy inner collar trim ring. (12 sc)
With same yarn combination, work 1 round of sc in the front loops of the outer edge of Round 12 of the collar. Sl st to join. Fasten off. This trims the collar outer edge before the wing panels attach. (144 sc)
Wing Panels (Make 2)
Each wing panel is worked flat. The top inner edge of the wing (the attachment edge) has 72 stitches, matching half of the collar yoke outer round.
Wing Foundation
With CC (Yarn B) and smaller hook, chain 74.
Row 1 (RS): Dc in 4th ch from hook and in each ch to end. Turn. (72 dc counting turning chain as dc)
Row 2 (WS): Ch 3, dc in next 2 dc. [Ch 2, sk 2 dc, dc in next 4 dc] 11 times. Ch 2, sk 2 dc, dc in next 3 dc. Turn. (48 dc + 12 ch-2 sps = 72 sts)
Row 3 (RS): Ch 3, [sh in next ch-2 sp, ch 2, V-st in center 2 dc of 4-dc group, ch 2] 11 times, sh in last ch-2 sp, dc in last 3 dc. Turn. (85 dc + 23 ch-2 sps)
Row 4 (WS): Ch 3, dc in first ch-2 sp, dc in each dc of shell, dc in ch-2 sp, dc in each dc of V-st across all repeats, end dc in last 3 dc. Turn. This collapses the lace back to solid dc for the setup. (72 dc)
Row 5 (RS): Ch 3, dc in next 2 dc. [Ch 2, sk 2 dc, dc in next 4 dc] 11 times. Ch 2, sk 2 dc, dc in next 3 dc. At the OUTER EDGE ONLY (the end of this row away from the attachment edge): work an additional [ch 2, 3 dc] into the turning chain space to begin the first wing width increase. Turn. (75 dc + 12 ch-2 sps)
Wing Phase 2: Increasing Section (Rows 6-30)
At Row 6, join MC (mint green). Drop CC but do not cut it. Carry CC loosely up the inner margin edge or cut and rejoin for border rows.
The wing increases at the outer (tip) edge only. The inner attachment edge remains straight. On every RS row, work a Large Shell (7 dc) at the outer edge turning point instead of a regular shell or V-st, and add 1 additional ch-2 and 1 additional V-st at the outer edge.
Row 6 (RS, MC): Ch 3. [V-st in next ch-2 sp, ch 2, sh in next ch-2 sp, ch 2] across to outer edge. At outer edge, work lg-sh (7 dc) in last ch-2 sp, ch 2, V-st in turning ch sp, dc in end st. Turn. (84 sts + 13 ch-2 sps)
Row 7 (WS, MC): Ch 3, dc in next ch-2 sp, dc in each dc and ch-sp across all shells and V-sts following the established pattern, dc in last 3 dc at inner edge. Turn. (84 dc)
Row 8 (RS, MC): Ch 3. Work lace fan repeat across. At outer edge, lg-sh in last ch-sp before edge, ch 2, V-st in turning ch. Turn. (93 sts + 14 ch-2 sps)
Row 9 (WS): As Row 7. (93 dc)
Row 10 (RS): Work lace repeat. Add lg-sh and V-st at outer edge as established. (102 sts + 15 ch-2 sps)
Row 11 (WS): As Row 7. (102 dc)
Row 12 (RS): Lace repeat + outer edge increase as established. (111 sts + 16 ch-2 sps)
Row 13 (WS): As Row 7. (111 dc)
Row 14 (RS): Lace repeat + outer edge increase. (120 sts + 17 ch-2 sps)
Row 15 (WS): As Row 7. (120 dc)
Row 16 (RS): Lace repeat + outer edge increase. (129 sts + 18 ch-2 sps)
Row 17 (WS): As Row 7. (129 dc)
Row 18 (RS): Lace repeat + outer edge increase. (138 sts + 19 ch-2 sps)
Row 19 (WS): As Row 7. (138 dc)
Row 20 (RS): Lace repeat + outer edge increase. (147 sts + 20 ch-2 sps)
Row 21 (WS): As Row 7. (147 dc)
Row 22 (RS): Lace repeat + outer edge increase. (156 sts + 21 ch-2 sps)
Row 23 (WS): As Row 7. (156 dc)
Row 24 (RS): Lace repeat + outer edge increase. (165 sts + 22 ch-2 sps)
Row 25 (WS): As Row 7. (165 dc)
Row 26 (RS): Lace repeat + outer edge increase. (174 sts + 23 ch-2 sps)
Row 27 (WS): As Row 7. (174 dc)
Row 28 (RS): Lace repeat + outer edge increase. (183 sts + 24 ch-2 sps)
Row 29 (WS): As Row 7. (183 dc)
Row 30 (RS): Lace repeat + outer edge increase. (192 sts + 25 ch-2 sps)
CHECKPOINT: After Row 30, your wing panel should measure approximately 12 inches tall from the top attachment edge and approximately 32 inches wide at its widest point.
Wing Phase 3: Maximum Width and Curve Rows (Rows 31-38)
Row 31 (WS): As Row 7. (192 dc)
Row 32 (RS): Ch 3. Work lace fan repeat across to within last 2 repeats. At the outer tip, work lg-sh (7 dc) in the outermost ch-sp, ch 2, [dc, ch 2, dc, ch 2, dc] (triple picot arm for wingtip). Turn. (192 dc + 2 ch-2 sps at tip)
Row 33 (WS): Ch 3, dc across all sts including picot arm dc. Turn. (195 dc)
Row 34 (RS): Lace repeat across. At lower outer wing edge only, add sh in last ch-sp + ch 3. Turn. (203 sts)
Row 35 (WS): Ch 3, dc across. Turn. (203 dc)
Row 36 (RS): Lace repeat. Add sh at lower outer edge + ch 2. Turn. (210 sts)
Row 37 (WS): Ch 3, dc across. Turn. (210 dc)
Row 38 (RS): Ch 3, lace repeat across all but last section. Work to outer lower corner. Work [lg-sh, ch 3, V-st] in corner sp to create the lower outer wing corner. Turn. (222 sts)
Wing Phase 4: Lower Wing Section and Inner Taper (Rows 39-55)
The wing now grows downward toward the lowest hem point. The inner edge begins a gradual decrease.
Row 39 (WS): Ch 3, dc across. Turn. (222 dc)
Row 40 (RS): Ch 3, lace repeat across to last 4 sts, dc2tog over next 2 sts, dc in last 2 sts. Turn. (220 sts)
Row 41 (WS): Ch 3, dc across. Turn. (220 dc)
Row 42 (RS): Ch 3, lace repeat to last 4 sts, dc2tog, dc in last 2 sts. Turn. (218 sts)
Row 43 (WS): Ch 3, dc across. Turn. (218 dc)
Row 44 (RS): Ch 3, lace repeat to last 4 sts, dc2tog, dc in last 2 sts. Turn. (216 sts)
Row 45 (WS): Ch 3, dc across. Turn. (216 dc)
Row 46 (RS): Ch 3, lace repeat to last 4 sts, dc2tog, dc in last 2 sts. Turn. (214 sts)
Row 47 (WS): Ch 3, dc across. Turn. (214 dc)
Row 48 (RS): Ch 3, lace repeat to last 4 sts, dc2tog, dc in last 2 sts. Turn. (212 sts)
Row 49 (WS): Ch 3, dc across. Turn. (212 dc)
Row 50 (RS): Ch 3, lace repeat to last 4 sts, dc2tog, dc in last 2 sts. Turn. (210 sts)
Row 51 (WS): Ch 3, dc across. Turn. (210 dc)
Row 52 (RS): Ch 3, lace repeat to last 4 sts, dc2tog, dc in last 2 sts. Turn. (208 sts)
Row 53 (WS): Ch 3, dc across. Turn. (208 dc)
Row 54 (RS): Ch 3, lace repeat to last 4 sts, dc2tog, dc in last 2 sts. Turn. (206 sts)
Row 55 (WS): Ch 3, dc across. Turn. (206 dc)
CHECKPOINT: After Row 55, the wing panel should measure approximately 22 inches tall from the top attachment edge.
Wing Phase 5: Lower Hem Approach (Rows 56-65)
The inner edge tapers more steeply now, with a decrease of 4 stitches per RS row.
Row 56 (RS): Ch 3, lace repeat to last 6 sts, dc2tog twice, dc in last 2 sts. Turn. (202 sts)
Row 57 (WS): Ch 3, dc across. Turn. (202 dc)
Row 58 (RS): Ch 3, lace repeat to last 6 sts, dc2tog twice, dc in last 2 sts. Turn. (198 sts)
Continue in this established pattern, decreasing 4 stitches at the inner edge on every RS row until your wing reaches approximately 24 inches from collar to lowest point.
Assembly and Finishing
Attaching Wing Panels to Collar
Align the 72-stitch top edge of each wing panel with half of the collar yoke outer edge (72 stitches per side). Using a tapestry needle and matching yarn, whip stitch the wing panels to the collar with wrong sides together. The center back seam falls between the two wing panels.
Working the Spine Braid
With larger hook (D/3) and Yarn B held together with Yarn C, work the Spine Braid Stitch for approximately 24 inches or the full length of the center back seam.
Using slip stitches, surface crochet the spine braid down the center back, attaching it to both wing panels along their inner edges. The fluffy Yarn C creates the raised fuzzy thorax effect.
Adding Eyelet Circle Motifs
Position 3 eyelet circle motifs on each wing panel to replicate luna moth eyespots. Sew in place using the long tails left during construction.
Working the Tail Streamers
At each inner lower wing corner, join yarn and work a narrow lace tube approximately 8 stitches in circumference. Continue for 14 inches. Fasten off and weave in ends.
Border
Join CC at any point along the outer wing edge. Work a scalloped picot border around all outer wing edges, creating the irregular trailing edge characteristic of moth wings.
Blocking Your Luna Moth Poncho
Blocking is essential for this project. The lace will not look right until it is blocked.
Soak the finished poncho in lukewarm water for 15 to 20 minutes. Gently squeeze out excess water without wringing. Lay flat on blocking mats. Pin out aggressively to finished dimensions, opening all the lace motifs and stretching the wing edges into their full span.
Allow to dry completely before unpinning. This may take 24 to 48 hours depending on humidity.
Tips for Success with This Crochet Pattern
Take your time with the color transitions. The fade from white to mint creates much of the visual impact.
Count your stitches frequently, especially during the increasing section. One missed increase throws off the entire wing shape.
Block your gauge swatch. Lace looks completely different before and after blocking.
Use plenty of stitch markers. Mark the first stitch of rounds, increase points, and color change locations.
This luna moth lace poncho is a statement piece. It takes commitment, but the result is absolutely worth every hour you put into it.
I hope you love making this luna moth poncho as much as I loved designing it. If you found this crochet tutorial helpful, save it to your Pinterest boards so you can find it when you are ready to start. And please leave a comment below if you make one. I would love to see your ethereal moth wings!