
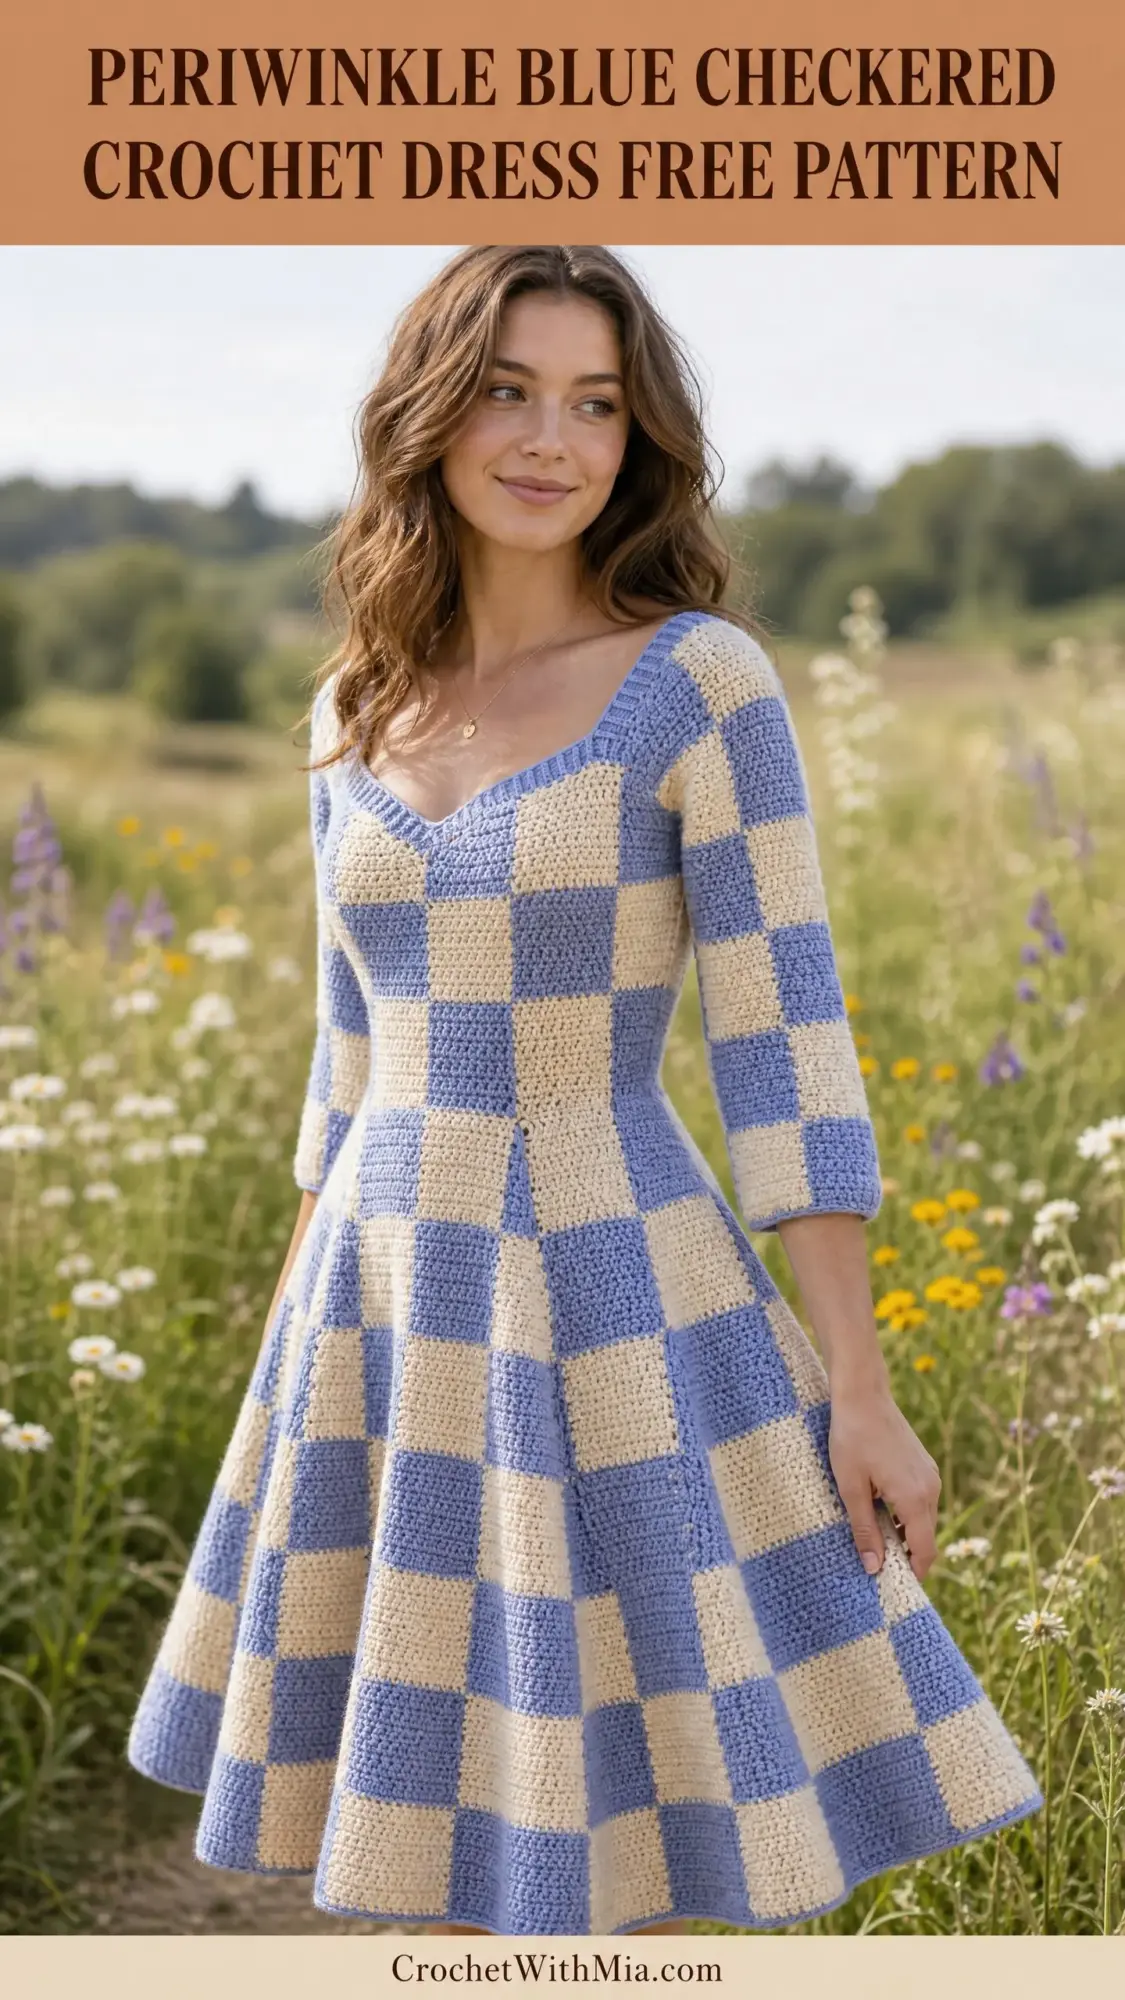
I’ve been looking for the perfect fit-and-flare dress pattern for ages, and this one absolutely stole my heart. The bold checkerboard design in soft periwinkle blue and cream gives major vintage vibes while still feeling completely modern.
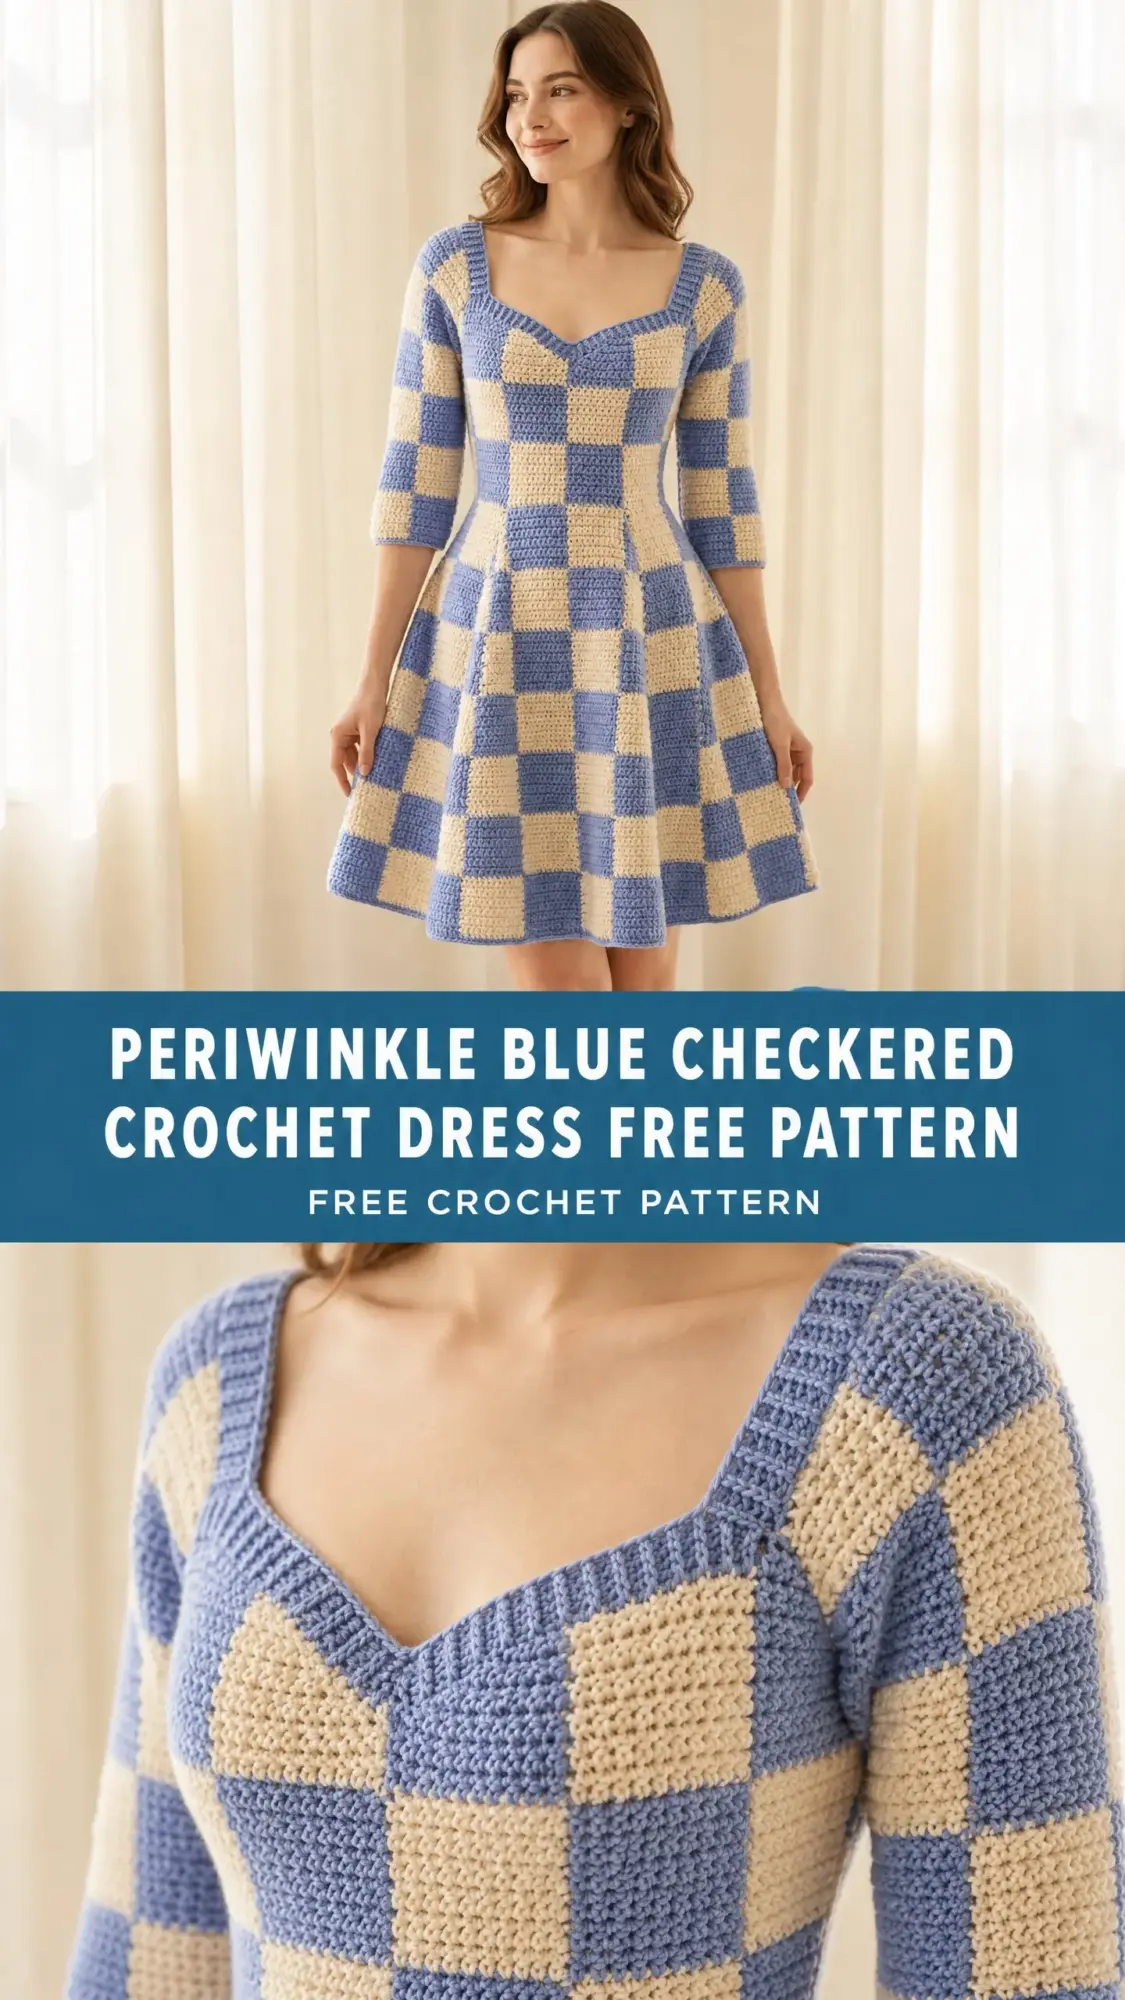
This is my favorite kind of project. It’s the type that looks incredibly impressive on a dress form but breaks down into manageable pieces once you understand the construction. You’re essentially making five flat pieces, joining them, and adding some gorgeous ribbed trim.
Fair warning though. This is not a quick weekend project. We’re talking 60 to 80 hours of focused crocheting. But every single hour is worth it when you slip into a handmade dress that fits like it was designed just for you.
About This Crochet Dress Pattern
This retro-inspired crochet dress features a sweetheart neckline, three-quarter sleeves, a nipped waist, and a flared skirt that moves beautifully when you walk. The entire garment is worked in single crochet (sc) using a tapestry crochet method where you carry the unused color along and work over it.
The checkerboard pattern creates 8-stitch by 8-row color blocks throughout. These blocks stay consistent across all pieces, which is what makes the pattern read so cleanly across the finished garment.
Construction happens in five main pieces: a front bodice, a back bodice, two sleeves, and a flared skirt. Everything is worked flat in rows, then seamed together. Ribbed trim finishes the neckline and sleeve cuffs for a polished look.
Skill Level
Intermediate to Advanced. This pattern requires comfort with colorwork using carried yarn, reading stitch counts across multiple pieces, shaping a sweetheart neckline, seaming garment pieces, and working ribbing.
The precision required for checkerboard alignment across seams makes this one challenging for newer crocheters. If you’ve never done colorwork before, I’d suggest practicing the tapestry crochet technique on a small swatch first.
Finished Sizes
Size S: Bust 34 in / 86 cm, Waist 26 in / 66 cm, Hip 38 in / 97 cm, Length (shoulder to hem) 36 in / 91.5 cm
Size M: Bust 37 in / 94 cm, Waist 29 in / 74 cm, Hip 41 in / 104 cm, Length 37 in / 94 cm
Size L: Bust 40 in / 101.5 cm, Waist 32 in / 81 cm, Hip 44 in / 112 cm, Length 38 in / 96.5 cm
All instructions are written for size S with size M and L adjustments in parentheses: S (M, L).
Materials Needed
Yarn: Worsted weight, Category 4, approximately 1,400 (1,600, 1,800) yards total
Hook: US Size J / 6.0 mm
Notions:
Yarn Suggestions
Lion Brand Yarn Pound of Love (100% acrylic, worsted weight, 1,020 yards per 16 oz skein) gives excellent stitch definition for the checkerboard. It’s machine washable, affordable, and available in suitable blue and cream shades.
Paintbox Yarns Simply DK held double (100% acrylic, DK weight) brings the weight to worsted when you hold two strands together. The matte finish closely mimics the texture in the finished dress.
Cascade 220 (100% Peruvian Highland Wool, worsted weight, 220 yards per 100 g skein) blocks beautifully for a polished finish. You’ll need 4 (4, 5) skeins of each color. Note that this yarn is not machine washable.
Substitution tip: Choose a yarn with good stitch definition and minimal halo or fuzz. Avoid fuzzy or highly textured yarns since they’ll obscure the color blocks. Always purchase one extra skein of each color to account for colorwork carry yarn consumption.
Gauge
18 sc x 20 rows = 4 in / 10 cm in single crochet checkerboard pattern using US J / 6.0 mm hook
Gauge swatch instructions: Chain 22. Work sc across in checkerboard pattern (alternating 8-stitch color blocks, changing colors every 8 rows) for 24 rows. Block swatch before measuring. Adjust hook size as needed.
Gauge is mandatory for this garment. Even a half-stitch difference per inch compounds significantly over 80-plus stitches and will produce a garment that does not fit as intended.
Abbreviations (US Terms)
Special Techniques
Checkerboard Colorwork Single Crochet
This dress uses a tapestry crochet method where the unused color is carried along the top of the stitches and worked over rather than cut and rejoined. Each color block is 8 stitches wide. Colors alternate every 8 stitches across each row and every 8 rows vertically to produce squares.
Step 1: Begin with working color. Work sc normally over the carried (non-working) yarn, encasing it in each stitch.
Step 2: At the 8th stitch, to switch colors, insert hook in next stitch, pull up a loop with the current color, drop current color to back, pick up new color, yarn over with new color, pull through both loops on hook.
Step 3: Continue working sc with new color, carrying old color inside stitches.
Step 4: At the end of 8 rows in the same color arrangement, begin the opposite checkerboard arrangement on row 9, so squares that were Color A are now Color B and vice versa.
Step 5: At row turns, always carry both yarns up the edge, twisting them around each other once to prevent long loose floats on the selvedge.
Single Crochet Ribbing
Ribbing is worked in rows of sc worked in the back loop only (BLO) for a stretchy, ribbed appearance.
Step 1: Chain the required number of stitches for the ribbing width.
Step 2: Row 1: Sc in 2nd ch from hook and in each ch across. Ch 1, turn.
Step 3: Row 2 and all following rows: Sc in BLO of each st across. Ch 1, turn.
Step 4: Continue for the length required, then seam short ends together and sew ribbing to opening.
Pattern Notes Before You Begin
1. The checkerboard blocks are 8 stitches wide and 8 rows tall throughout the entire garment. Do not alter block size when sizing up or down.
2. For size S, the bodice front and back are each 80 stitches wide (10 complete blocks). Size M is 88 stitches wide (11 blocks). Size L is 96 stitches wide (12 blocks).
3. The ch 1 turning chain does NOT count as a stitch in this pattern. Always insert hook in the first stitch at the beginning of every row.
4. When working color changes, the new color is always drawn through on the last pull-through of the previous stitch.
5. The skirt is worked flat from the waist down, then the short ends are seamed to form a tube.
6. Seaming is done using the mattress stitch with matching yarn for invisible joins on the RS.
7. Wet blocking the finished pieces before seaming allows checkerboard blocks to align precisely.
Step by Step Crochet Pattern Instructions
Bodice Front
Foundation: Using CA, chain 82 (90, 98).
Row 1 (RS): Sc in 2nd ch from hook and in each ch across. Change colors every 8 sts following checkerboard arrangement. Begin with CA for sts 1-8, CB for sts 9-16, CA for sts 17-24, CB for sts 25-32, CA for sts 33-40, CB for sts 41-48, CA for sts 49-56, CB for sts 57-64, CA for sts 65-72, CB for sts 73-80. Ch 1, turn. (80 sc) [M: 88 sc, L: 96 sc]
Rows 2-8: Continue in established checkerboard pattern, maintaining color blocks in same positions. Ch 1, turn at end of each row. (80 sc each row) [M: 88, L: 96]
Row 9 (block shift row): Begin new horizontal checkerboard tier. Shift all color blocks: sts 1-8 now worked in CB, sts 9-16 in CA, continuing in alternating pattern opposite to rows 1-8. Ch 1, turn. (80 sc) [M: 88, L: 96]
Rows 10-16: Continue new checkerboard arrangement. Ch 1, turn. (80 sc each row) [M: 88, L: 96]
Rows 17-24: Repeat rows 1-8 arrangement (back to original block positions). Ch 1, turn. (80 sc each row) [M: 88, L: 96]
Checkpoint: After Row 24, the bodice front should measure approximately 5 in / 12.5 cm tall and 17.75 in / 45 cm wide. You should see 3 complete horizontal checkerboard tiers.
Waist Shaping (Decrease Section)
Row 25: Sc2tog over sts 1-2, sc in each st to last 2 sts, sc2tog. Ch 1, turn. (78 sc) [M: 86, L: 94]
Row 26: Work even in pattern. (78 sc) [M: 86, L: 94]
Row 27: Sc2tog over sts 1-2, sc in each st to last 2 sts, sc2tog. Ch 1, turn. (76 sc) [M: 84, L: 92]
Row 28: Work even in pattern. (76 sc) [M: 84, L: 92]
Row 29: Sc2tog over sts 1-2, sc in each st to last 2 sts, sc2tog. Ch 1, turn. (74 sc) [M: 82, L: 90]
Row 30: Work even in pattern. (74 sc) [M: 82, L: 90]
Row 31: Sc2tog over sts 1-2, sc in each st to last 2 sts, sc2tog. Ch 1, turn. (72 sc) [M: 80, L: 88]
Row 32: Work even in pattern. (72 sc) [M: 80, L: 88]
Note on checkerboard during shaping: As side stitches are decreased, the outermost color block narrows. Continue carrying both yarns and work the remaining stitches of each block in the correct color even if blocks become less than 8 stitches at the edges.
Checkpoint: After Row 32, the bodice front waist section should measure approximately 8 in / 20 cm tall. Width at narrowest point should be approximately 16 in / 40.5 cm for size S.
Hip and Bust Increase Section
Row 33: 2 sc in first st, sc in each st to last st, 2 sc in last st. Ch 1, turn. (74 sc) [M: 82, L: 90]
Row 34: Work even. (74 sc) [M: 82, L: 90]
Row 35: 2 sc in first st, sc in each st to last st, 2 sc in last st. Ch 1, turn. (76 sc) [M: 84, L: 92]
Row 36: Work even. (76 sc) [M: 84, L: 92]
Row 37: 2 sc in first st, sc in each st to last st, 2 sc in last st. Ch 1, turn. (78 sc) [M: 86, L: 94]
Row 38: Work even. (78 sc) [M: 86, L: 94]
Row 39: 2 sc in first st, sc in each st to last st, 2 sc in last st. Ch 1, turn. (80 sc) [M: 88, L: 96]
Rows 40-48: Work even in checkerboard pattern. (80 sc each row) [M: 88, L: 96]
Checkpoint: After Row 48, the bodice front should measure approximately 10.5 in / 26.5 cm tall and 17.75 in / 45 cm wide at the bust.
Armhole Shaping
Row 49: Sl st across first 8 sts. Sc in each st across to last 8 sts, leave last 8 sts unworked. Ch 1, turn. (64 sc) [M: 72, L: 80]
Row 50: Sc2tog, sc in each st to last 2 sts, sc2tog. Ch 1, turn. (62 sc) [M: 70, L: 78]
Row 51: Sc2tog, sc in each st to last 2 sts, sc2tog. Ch 1, turn. (60 sc) [M: 68, L: 76]
Row 52: Sc2tog, sc in each st to last 2 sts, sc2tog. Ch 1, turn. (58 sc) [M: 66, L: 74]
Row 53: Sc2tog, sc in each st to last 2 sts, sc2tog. Ch 1, turn. (56 sc) [M: 64, L: 72]
Row 54: Work even. (56 sc) [M: 64, L: 72]
Rows 55-62: Work even in checkerboard pattern. (56 sc each row) [M: 64, L: 72]
Checkpoint: After Row 62, the armhole depth should measure approximately 3.5 in / 9 cm.
Sweetheart Neckline Shaping
The sweetheart is formed by splitting the work at center and working each side separately.
Identify center: 56 stitches total. Left side is sts 1-28, right side is sts 29-56.
Left Shoulder:
Row 63 (RS): Sc across 28 sts. Ch 1, turn. Leave remaining 28 sts unworked. (28 sc)
Row 64: Sc2tog at neck edge (last 2 sts of row), sc across. Ch 1, turn. (27 sc)
Row 65: Sc across to last 2 sts, sc2tog at neck edge. Ch 1, turn. (26 sc)
Row 66: Sc2tog at neck edge, sc across. Ch 1, turn. (25 sc)
Row 67: Sc across to last 2 sts, sc2tog. Ch 1, turn. (24 sc)
Row 68: Sc2tog at neck edge, sc across. Ch 1, turn. (23 sc)
Row 69: Sc across to last 2 sts, sc2tog. Ch 1, turn. (22 sc)
Row 70: Sc2tog at neck edge, sc across. Ch 1, turn. (21 sc)
Row 71: Work even. (21 sc)
Row 72: Sc2tog at neck edge, sc across. Ch 1, turn. (20 sc)
Rows 73-78: Work even for 6 rows. (20 sc each row)
Fasten off.
Right Shoulder:
Rejoin yarn at stitch 29 (center right) on RS.
Row 63 (RS): Sc across sts 29-56. Ch 1, turn. (28 sc)
Row 64: Sc across to last 2 sts, sc2tog at neck edge. Ch 1, turn. (27 sc)
Row 65: Sc2tog at neck edge, sc across. Ch 1, turn. (26 sc)
Row 66: Sc across to last 2 sts, sc2tog. Ch 1, turn. (25 sc)
Row 67: Sc2tog at neck edge, sc across. Ch 1, turn. (24 sc)
Row 68: Sc across to last 2 sts, sc2tog. Ch 1, turn. (23 sc)
Row 69: Sc2tog at neck edge, sc across. Ch 1, turn. (22 sc)
Row 70: Sc across to last 2 sts, sc2tog. Ch 1, turn. (21 sc)
Row 71: Work even. (21 sc)
Row 72: Sc across to last 2 sts, sc2tog at neck edge. Ch 1, turn. (20 sc)
Rows 73-78: Work even for 6 rows. (20 sc each row)
Fasten off.
Checkpoint: The completed bodice front should measure approximately 16 in / 40.5 cm tall from foundation chain to top of shoulder strap.
Bodice Back
The back bodice is identical to the front bodice through Row 62. The back has a square neckline instead of the sweetheart front.
Work Rows 1-62 exactly as for Bodice Front. (56 sc after armhole shaping) [M: 64, L: 72]
Back Neckline Shaping:
Row 63: Sc across 18 sts. Ch 1, turn. Leave remaining 38 sts unworked. (18 sc)
Rows 64-78: Work even for 15 rows. (18 sc each row)
Fasten off. This is the left back shoulder.
Rejoin yarn at stitch 39 on RS.
Row 63: Sc across sts 39-56. Ch 1, turn. (18 sc)
Rows 64-78: Work even for 15 rows. (18 sc each row)
Fasten off. This is the right back shoulder.
The 20 center back stitches (sts 19-38) are left unworked, creating the square back neckline opening of approximately 4.5 in / 11.5 cm.
Sleeves (Make 2)
The sleeves are three-quarter length, fitted at the upper arm and tapering slightly toward the wrist.
Foundation: Using CA, chain 42 (46, 50).
Row 1 (RS): Sc in 2nd ch from hook and in each ch across in checkerboard pattern. Ch 1, turn. (40 sc) [M: 44, L: 48]
Rows 2-8: Work even in established checkerboard. Ch 1, turn. (40 sc) [M: 44, L: 48]
Row 9: Shift checkerboard as for bodice. Work even. Ch 1, turn. (40 sc) [M: 44, L: 48]
Rows 10-24: Continue in checkerboard, completing 3 full tiers. (40 sc) [M: 44, L: 48]
Sleeve Increase for Upper Arm:
Row 25: 2 sc in first st, sc to last st, 2 sc in last st. Ch 1, turn. (42 sc) [M: 46, L: 50]
Row 26: Work even. (42 sc) [M: 46, L: 50]
Row 27: 2 sc in first st, sc to last st, 2 sc in last st. Ch 1, turn. (44 sc) [M: 48, L: 52]
Row 28: Work even. (44 sc) [M: 48, L: 52]
Row 29: 2 sc in first st, sc to last st, 2 sc in last st. Ch 1, turn. (46 sc) [M: 50, L: 54]
Row 30: Work even. (46 sc) [M: 50, L: 54]
Row 31: 2 sc in first st, sc to last st, 2 sc in last st. Ch 1, turn. (48 sc) [M: 52, L: 56]
Rows 32-40: Work even in checkerboard. (48 sc each row) [M: 52, L: 56]
Sleeve Cap Shaping:
Row 41: Sl st across first 8 sts, sc to last 8 sts, leave last 8 sts unworked. Ch 1, turn. (32 sc) [M: 36, L: 40]
Row 42: Sc2tog, sc to last 2 sts, sc2tog. Ch 1, turn. (30 sc) [M: 34, L: 38]
Row 43: Sc2tog, sc to last 2 sts, sc2tog. Ch 1, turn. (28 sc) [M: 32, L: 36]
Row 44: Sc2tog, sc to last 2 sts, sc2tog. Ch 1, turn. (26 sc) [M: 30, L: 34]
Row 45: Sc2tog, sc to last 2 sts, sc2tog. Ch 1, turn. (24 sc) [M: 28, L: 32]
Row 46: Sc2tog, sc to last 2 sts, sc2tog. Ch 1, turn. (22 sc) [M: 26, L: 30]
Row 47: Sc2tog, sc to last 2 sts, sc2tog. Ch 1, turn. (20 sc) [M: 24, L: 28]
Row 48: Sc2tog, sc to last 2 sts, sc2tog. Ch 1, turn. (18 sc) [M: 22, L: 26]
Row 49: Sc2tog, sc to last 2 sts, sc2tog. Ch 1, turn. (16 sc) [M: 20, L: 24]
Row 50: Sc2tog, sc to last 2 sts, sc2tog. Ch 1, turn. (14 sc) [M: 18, L: 22]
Fasten off.
Checkpoint: Each finished sleeve piece should measure approximately 9 in / 23 cm from cuff to underarm.
Skirt
The skirt is worked flat from waist to hem with increases to create the flared A-line shape.
Foundation: Using CA, chain 146 (162, 178).
Row 1 (RS): Sc in 2nd ch from hook and in each ch across in checkerboard pattern. Ch 1, turn. (145 sc) [M: 161, L: 177]
Rows 2-8: Work even in checkerboard. Ch 1, turn. (145 sc) [M: 161, L: 177]
Row 9 (block shift): Shift horizontal blocks. Work even. Ch 1, turn. (145 sc) [M: 161, L: 177]
Rows 10-16: Work even. (145 sc) [M: 161, L: 177]
Begin skirt flare increases (worked every 8 rows):
Row 17: Work 1 sc in first st, then work (sc in next 17 sts, inc in next st) 8 times, sc in rem sts to end. Ch 1, turn. (153 sc) [M: 169, L: 185]
Rows 18-24: Work even. (153 sc) [M: 169, L: 185]
Row 25: Work (sc in next 18 sts, inc) 8 times, sc in rem sts. Ch 1, turn. (161 sc) [M: 177, L: 193]
Rows 26-32: Work even. (161 sc) [M: 177, L: 193]
Row 33: Work (sc in next 19 sts, inc) 8 times, sc in rem sts. Ch 1, turn. (169 sc) [M: 185, L: 201]
Rows 34-40: Work even. (169 sc) [M: 185, L: 201]
Row 41: Work (sc in next 20 sts, inc) 8 times, sc in rem sts. Ch 1, turn. (177 sc) [M: 193, L: 209]
Rows 42-48: Work even. (177 sc) [M: 193, L: 209]
Row 49: Work (sc in next 21 sts, inc) 8 times, sc in rem sts. Ch 1, turn. (185 sc) [M: 201, L: 217]
Rows 50-56: Work even. (185 sc) [M: 201, L: 217]
Row 57: Work (sc in next 22 sts, inc) 8 times, sc in rem sts. Ch 1, turn. (193 sc) [M: 209, L: 225]
Rows 58-64: Work even. (193 sc) [M: 209, L: 225]
Row 65: Work (sc in next 23 sts, inc) 8 times, sc in rem sts. Ch 1, turn. (201 sc) [M: 217, L: 233]
Rows 66-72: Work even. (201 sc) [M: 217, L: 233]
Row 73: Work (sc in next 24 sts, inc) 8 times, sc in rem sts. Ch 1, turn. (209 sc) [M: 225, L: 241]
Rows 74-80: Work even. (209 sc) [M: 225, L: 241]
Row 81: Work (sc in next 25 sts, inc) 8 times, sc in rem sts. Ch 1, turn. (217 sc) [M: 233, L: 249]
Rows 82-88: Work even. (217 sc) [M: 233, L: 249]
Continue in this manner, increasing every 8 rows until skirt reaches desired length.
Assembly and Finishing
1. Block all pieces before seaming. This is essential for checkerboard alignment.
2. When joining the bodice front to back at side seams, ensure color blocks are offset by exactly 4 stitches (half a block) so that the pattern continues visually around the garment.
3. Seam shoulders using mattress stitch.
4. Seam bodice sides from underarm to waist.
5. Seam sleeve underarms, then set sleeves into armholes.
6. Seam skirt back seam, then attach skirt to bodice waist.
7. Work ribbing for neckline and sleeve cuffs using the BLO single crochet method, then attach.
8. Weave in all ends and give the finished dress a final blocking.
Tips for Success with This Checkered Crochet Dress Pattern
Take your time with color changes. The cleaner your color transitions, the crisper your checkerboard will look.
Check your stitch counts frequently. With so many rows and color changes, it’s easy to accidentally add or skip a stitch.
Use a dress form if possible. Being able to check fit as you go saves heartache later.
Block generously. This makes seaming so much easier and gives a professional finish.
Thank you so much for choosing this pattern for your next big project. I truly hope you love making this dress as much as I loved designing it. If you make one, I would absolutely love to see it! Tag me on Instagram or share in the Facebook group.
If this periwinkle blue checkered crochet dress is calling your name but you’re not quite ready to start, go ahead and save this pattern to your Pinterest boards so you can find it when you’re ready. And please drop a comment below if you make one. I’d love to hear how it turns out for you!