
THIS IS THE PROJECT. The one that makes everyone at the craft fair stop and ask, "Did you MAKE that?" I am not exaggerating when I say this woodland skirt is going to be your most impressive crochet achievement yet.
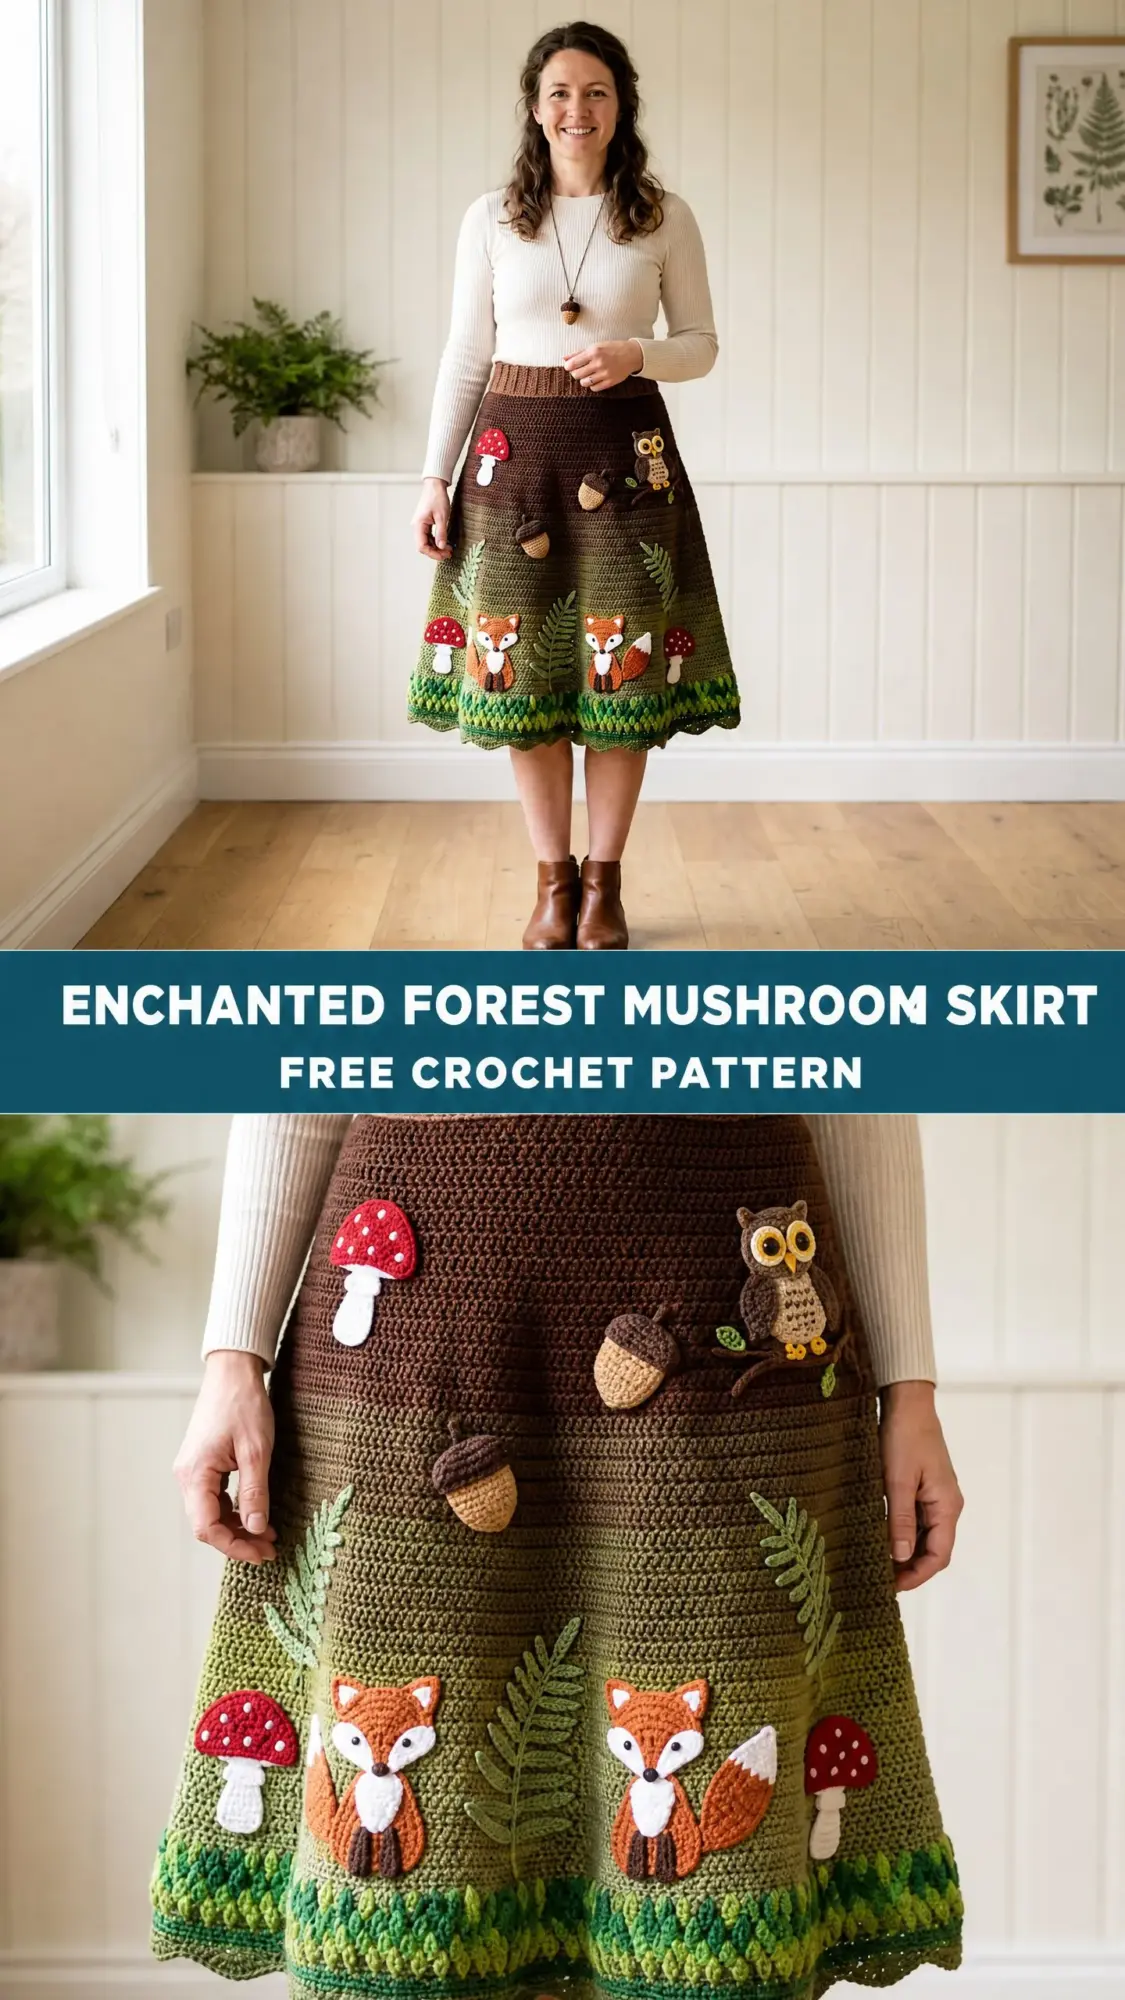
Yes, it takes time. We are talking 55 to 85 hours of dedicated stitching. But here is the thing: every single technique in this pattern is something you already know or can learn in five minutes. Single crochet. Increases. Working in the round. That is basically it for the main body.
The magic comes from the gradient color transitions, the A-line shaping, and those absolutely adorable applique motifs. Foxes! Mushrooms! An owl! Fern fronds! This skirt tells a story, and you get to be the artist who brings it to life.
About This Enchanted Forest Skirt Crochet Pattern
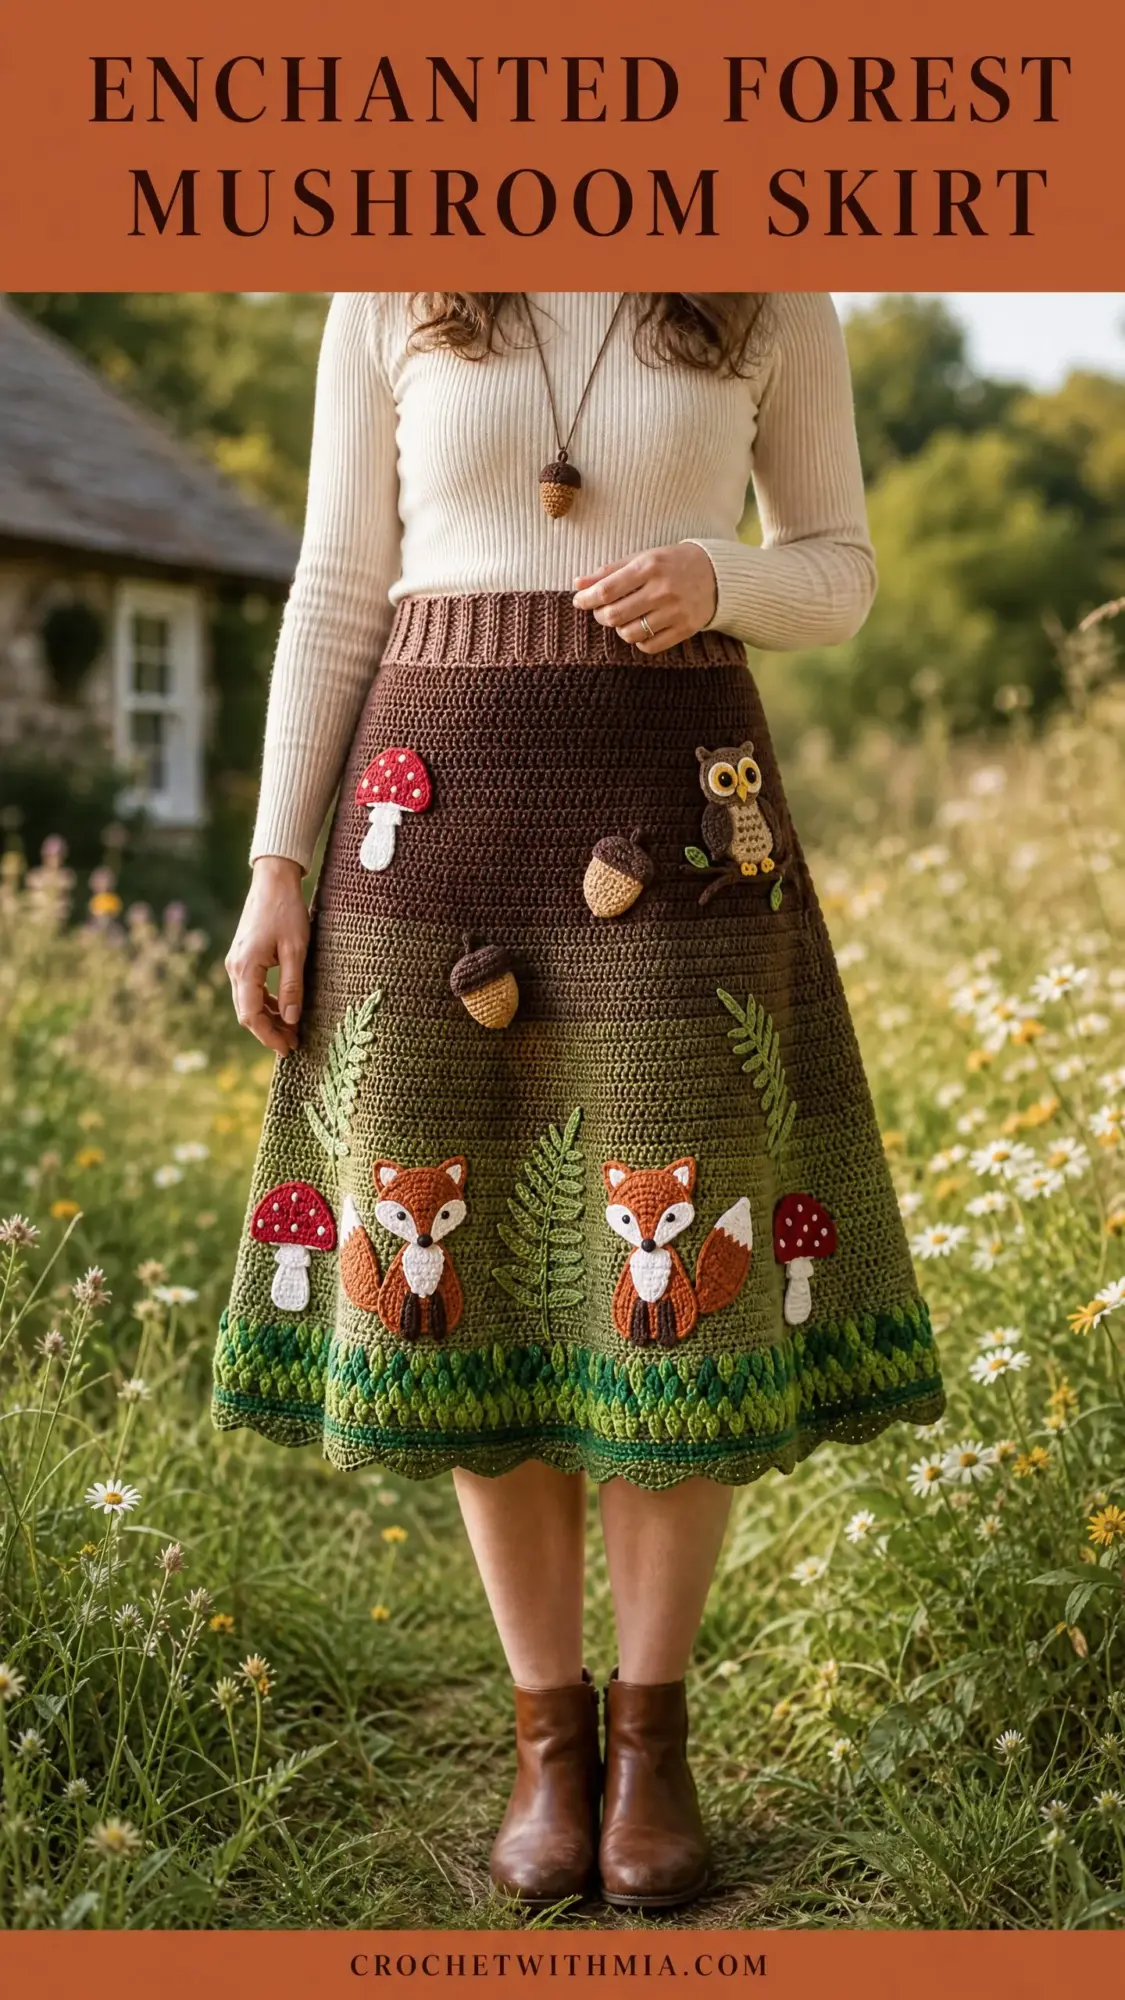
This wearable art piece celebrates the beauty of the woodland floor through clever construction and dimensional details. The A-line midi skirt features a seamless color gradient body worked in the round from waist to hem, a stretchy ribbed waistband with hidden elastic, and a collection of crocheted applique motifs that transform simple fabric into a forest scene.
The color palette flows naturally from warm tan at the waistband through rich chocolate brown, then transitions into olive green and bright grass green toward the hem. This gradient mimics the layered colors of a forest floor viewed from above. The scalloped shell border at the hem creates the illusion of grass and undergrowth, adding movement and texture.
Construction happens in five phases: the ribbed waistband worked flat and seamed, the main skirt body in continuous rounds with gradual shaping, the scalloped hem border, blocking and finishing, and finally creating and attaching all the woodland applique motifs.
Skill Level
This pattern works well for advanced beginners to intermediate crocheters. You should feel comfortable working in continuous rounds, changing yarn colors mid-round, working into the back loop only for texture effects, and executing basic increases.
The applique motifs require knowledge of working in the round, magic rings, and some simple embroidery finishing. The construction itself is straightforward. The complexity lies in the number of motifs and the patience required for smooth color blending.
If you have never worked a magic ring before, do not panic. It sounds fancy but takes about two minutes to learn. I will walk you through it in the special stitches section.
Finished Measurements
The pattern is written for size Medium with the following finished dimensions:
Size customization tips are included at the end of the pattern for those who need adjustments.
Materials Needed
Yarn
Main Colors (DK weight):
Applique Motif Yarns (small amounts, approximately 20 to 50 yards / 18 to 46 meters each):
Recommended Yarn Brands
Lion Brand Vanna’s Choice (DK to worsted weight, 100% acrylic, 170 yards / 156 meters per 3.5 oz / 100 g skein) offers excellent stitch definition for the applique motifs. You will need approximately 4 skeins of Brown, 3 skeins of Olive Green, 2 skeins of Grass Green, and 1 skein each of Tan, Dark Green, and all applique colors.
Paintbox Yarns Simply DK (100% acrylic, 137 yards / 125 meters per 1.76 oz / 50 g ball) provides a beautiful color range for the greens and browns with crisp stitch definition.
Drops Safran (cotton/polyester blend, DK weight, 175 yards / 160 meters per 1.76 oz / 50 g ball) gives a slightly heavier drape. The cotton content creates lovely stitch definition and nice weight at the hem.
Substitution Note: Any DK weight yarn matching the gauge specifications works fine. Avoid yarns that are too fuzzy or fluffy as this obscures applique details. A yarn with good stitch definition is essential. Acrylic or cotton blends are recommended for durability and easy care.
Hooks
Notions
Gauge
With US Size G-6 / 4.0 mm hook and DK weight yarn, working in single crochet (sc):
Gauge swatch instructions: Chain 24. Work single crochet across, turning at the end of each row, for 25 rows. Block your swatch before measuring. Your swatch should measure approximately 5.25 in / 13.5 cm wide and 5 in / 12.7 cm tall.
Adjust hook size as needed to match gauge. Gauge is critical for achieving correct finished dimensions, particularly the waist measurement and skirt length.
Abbreviations
Special Stitches and Techniques
Shell Stitch
Work 5 double crochets all into the same stitch or space. This creates a fan shape. When instructed to work a shell, all 5 dc go into the single indicated stitch or chain space.
Scallop Border Shell
Skip 2 stitches, work 1 single crochet in the next stitch, chain 2, work 5 double crochets in the same stitch as the single crochet just worked, chain 2, skip 2 stitches, slip stitch in the next stitch. This creates the scalloped hem edge visible in the finished skirt.
Invisible Join
Cut yarn leaving a 6 in / 15 cm tail. Thread tail onto tapestry needle. Insert needle under both loops of the first stitch of the round. Pull through. Insert needle back down through the center of the last stitch of the round. Pull through to close. This creates a seamless appearance where rounds join.
Magic Ring (MR)
Make a loop with the tail end of yarn behind the working yarn. Insert hook into the loop, pull up working yarn, chain 1 to secure, then work the required number of stitches into the ring. Pull the tail end to close the ring tightly.
Surface Slip Stitch
With RS facing and motif already attached, join yarn with slip stitch at base of fern. Insert hook through the fabric from front to back at the desired stem position. Pull up a loop. Continue inserting hook and pulling loops through both the loop on hook and the fabric, creating a chain of surface slip stitches along the stem line.
Bobble Stitch
Yarn over, insert hook in stitch, pull up loop, yarn over, pull through 2 loops. Repeat from start 3 more times in the same stitch (5 loops on hook). Yarn over and pull through all 5 loops. Push to right side of work.
Pattern Notes Before You Begin
The skirt is worked from the top down in continuous rounds after the waistband is complete. Place a stitch marker at the beginning of each round and move it up as you work. Do not join at the end of rounds unless specifically instructed.
Color changes for the gradient body: When instructed to change color, work the last stitch of the old color until 2 loops remain on hook, then draw the new color through those 2 loops to complete the stitch. Carry unused colors along the inside of the work for short spans (3 to 4 rounds) only. For longer color gaps, cut yarn and rejoin. Weave in all ends securely on the wrong side.
The waistband is worked flat and seamed. The elastic is inserted before the final seam is closed.
All applique motifs are blocked before attachment. Pin motifs to the blocked skirt body using the reference photograph as placement guide before sewing them down permanently.
The scallop hem requires a stitch count divisible by 6. The instructions build to this count deliberately.
Right side is the outside of the skirt throughout. Work with right side facing for all applique placement.
Crochet Pattern Instructions
Section 1: Waistband
The waistband is worked in rows to create a ribbed tube, then seamed. Use US Size F-5 / 3.75 mm hook and MC-A (Tan/Caramel).
Foundation Chain: Chain 16.
Row 1: Starting in the second chain from hook, work 1 sc in each chain across. Turn. (15 sc)
Row 2: Ch 1, working in BLO, work 1 sc in each stitch across. Turn. (15 sc)
Repeat Row 2 until the ribbed strip measures 30 in / 76 cm when very lightly stretched, or until it matches your desired waist circumference. This will be approximately 120 to 135 rows depending on your tension.
Do not fasten off. Seam the two short ends of the ribbed strip together using slip stitch or whip stitch to form a tube. Before closing completely, thread the pre-cut elastic through the ribbed tube. Overlap elastic ends by 1 in / 2.5 cm and sew together securely. Close the remaining seam.
Checkpoint: Your waistband tube should measure approximately 30 in / 76 cm in circumference and 3.3 in / 8.5 cm tall. It will relax to about 2.5 in / 6.5 cm in height when the elastic pulls it in slightly.
Section 2: Picking Up for Skirt Body
Switch to US Size G-6 / 4.0 mm hook. Join MC-B (Chocolate Brown) to one long edge of the waistband with a slip stitch.
Setup Round: Working along the long open edge of the waistband, place 135 sc evenly distributed around the entire edge. Join with sl st to first stitch. Place stitch marker. (135 sc)
Note: 135 is divisible by 9 for later increase distribution. Check that your stitches are evenly placed, roughly 1 stitch for every row of ribbing. Adjust placement if needed to reach exactly 135.
Section 3: Skirt Body Upper Zone (Chocolate Brown)
Work in continuous rounds. Move stitch marker up each round.
Rnd 1: Sc in each st around. (135 sc)
Rnd 2: Sc in each st around. (135 sc)
Rnd 3: (Sc in next 14 sts, inc in next st) rep 9 times. (144 sc)
Rnd 4: Sc in each st around. (144 sc)
Rnd 5: Sc in each st around. (144 sc)
Rnd 6: (Sc in next 15 sts, inc in next st) rep 9 times. (153 sc)
Rnd 7: Sc in each st around. (153 sc)
Rnd 8: Sc in each st around. (153 sc)
Rnd 9: (Sc in next 16 sts, inc in next st) rep 9 times. (162 sc)
Rnd 10: Sc in each st around. (162 sc)
Rnd 11: Sc in each st around. (162 sc)
Rnd 12: (Sc in next 17 sts, inc in next st) rep 9 times. (171 sc)
Rnd 13: Sc in each st around. (171 sc)
Rnd 14: Sc in each st around. (171 sc)
Rnd 15: (Sc in next 18 sts, inc in next st) rep 9 times. (180 sc)
Rnd 16: Sc in each st around. (180 sc)
Rnd 17: Sc in each st around. (180 sc)
Rnd 18: (Sc in next 19 sts, inc in next st) rep 9 times. (189 sc)
Rnd 19: Sc in each st around. (189 sc)
Rnd 20: Sc in each st around. (189 sc)
Checkpoint after Round 20: Your skirt body should measure approximately 4 in / 10 cm from the bottom edge of the waistband. You should have 189 stitches. The work should be visibly flaring outward in an A-line shape.
Section 4: Transition Zone (Brown to Olive Gradient)
Begin transitioning from MC-B (Chocolate Brown) to MC-C (Olive Green). Work this gradient by alternating 1 round of MC-B followed by 1 round of MC-C for 4 rounds, then switch to 2 rounds of MC-C for every 1 round of MC-B for 4 more rounds, then continue in MC-C only.
Rnd 21: With MC-B, sc in each st around. (189 sc)
Rnd 22: With MC-C, sc in each st around. (189 sc)
Rnd 23: With MC-B, (sc in next 20 sts, inc in next st) rep 9 times. (198 sc)
Rnd 24: With MC-C, sc in each st around. (198 sc)
Rnd 25: With MC-C, sc in each st around. (198 sc)
Rnd 26: With MC-B, sc in each st around. (198 sc)
Rnd 27: With MC-C, (sc in next 21 sts, inc in next st) rep 9 times. (207 sc)
Rnd 28: With MC-C, sc in each st around. (207 sc)
Rnd 29: With MC-C, sc in each st around. (207 sc)
Rnd 30: With MC-C, sc in each st around. (207 sc)
Rnd 31: With MC-C, (sc in next 22 sts, inc in next st) rep 9 times. (216 sc)
Rnd 32: With MC-C, sc in each st around. (216 sc)
Rnd 33: With MC-C, sc in each st around. (216 sc)
Rnd 34: With MC-C, (sc in next 23 sts, inc in next st) rep 9 times. (225 sc)
Rnd 35: With MC-C, sc in each st around. (225 sc)
Rnd 36: With MC-C, sc in each st around. (225 sc)
Checkpoint after Round 36: Your skirt should measure approximately 7.2 in / 18.3 cm from the bottom of the waistband. You should have 225 stitches and the lower portion should be in the olive-green transition zone.
Section 5: Lower Zone (Olive Green)
Continue with MC-C (Olive Green) throughout this section.
Rnd 37: (Sc in next 24 sts, inc in next st) rep 9 times. (234 sc)
Rnd 38: Sc in each st around. (234 sc)
Rnd 39: Sc in each st around. (234 sc)
Rnd 40: (Sc in next 25 sts, inc in next st) rep 9 times. (243 sc)
Rnd 41: Sc in each st around. (243 sc)
Rnd 42: Sc in each st around. (243 sc)
Rnd 43: (Sc in next 26 sts, inc in next st) rep 9 times. (252 sc)
Rnd 44: Sc in each st around. (252 sc)
Rnd 45: Sc in each st around. (252 sc)
Rnd 46: (Sc in next 27 sts, inc in next st) rep 9 times. (261 sc)
Rnd 47: Sc in each st around. (261 sc)
Rnd 48: Sc in each st around. (261 sc)
Rnd 49: (Sc in next 28 sts, inc in next st) rep 9 times. (270 sc)
Rnd 50: Sc in each st around. (270 sc)
Rnd 51: Sc in each st around. (270 sc)
Rnd 52: (Sc in next 29 sts, inc in next st) rep 9 times. (279 sc)
Rnd 53: Sc in each st around. (279 sc)
Rnd 54: Sc in each st around. (279 sc)
Rnd 55: (Sc in next 30 sts, inc in next st) rep 9 times. (288 sc)
Rnd 56: Sc in each st around. (288 sc)
Rnd 57: Sc in each st around. (288 sc)
Checkpoint after Round 57: Your skirt should measure approximately 11.4 in / 29 cm from the bottom of the waistband. Stitch count should be 288. The skirt has a pronounced A-line flare visible when laid flat.
Section 6: Lower Green Zone (Bright Green and Dark Green)
Begin transitioning to MC-D (Bright Grass Green).
Rnd 58: With MC-C, sc in each st around. (288 sc)
Rnd 59: With MC-D, sc in each st around. (288 sc)
Rnd 60: With MC-C, (sc in next 31 sts, inc in next st) rep 9 times. (297 sc)
Rnd 61: With MC-D, sc in each st around. (297 sc)
Rnd 62: With MC-D, sc in each st around. (297 sc)
Rnd 63: With MC-D, (sc in next 32 sts, inc in next st) rep 9 times. (306 sc)
Rnd 64: With MC-D, sc in each st around. (306 sc)
Rnd 65: With MC-D, sc in each st around. (306 sc)
Rnd 66: With MC-D, (sc in next 33 sts, inc in next st) rep 9 times. (315 sc)
Rnd 67: With MC-D, sc in each st around. (315 sc)
Rnd 68: With MC-D, sc in each st around. (315 sc)
Rnd 69: With MC-E (Dark Forest Green), sc in each st around. (315 sc)
Rnd 70: With MC-D, (sc in next 34 sts, inc in next st) rep 9 times. (324 sc)
Rnd 71: With MC-E, sc in each st around. (324 sc)
Rnd 72: With MC-D, sc in each st around. (324 sc)
Rnd 73: With MC-E, sc in each st around. (324 sc)
Rnd 74: With MC-D, (sc in next 35 sts, inc in next st) rep 9 times. (333 sc)
Rnd 75: With MC-E, sc in each st around. (333 sc)
Rnd 76: With MC-D, sc in each st around. (333 sc)
Rnd 77: With MC-E, sc in each st around. (333 sc)
Rnd 78: With MC-E, (sc in next 36 sts, inc in next st) rep 9 times. (342 sc)
Rnd 79: With MC-E, sc in each st around. (342 sc)
Rnd 80: With MC-E, sc in each st around. (342 sc)
Note: 342 divided by 6 equals 57. The stitch count is correct for the hem scallop pattern.
Checkpoint after Round 80: Your skirt body should measure approximately 16 in / 40.6 cm from waistband bottom. Total skirt length including waistband should be approximately 18.5 in / 47 cm.
Section 7: Scalloped Hem Border
The scalloped hem creates the layered grass effect. Work in joined rounds using MC-D and MC-E alternately. Each scallop repeat takes 6 stitches. You have 342 stitches, giving 57 scallop repeats.
Rnd 81 (Scallop Foundation): With MC-D, ch 1 (does not count as stitch). Working in the 342 stitches of Round 80: (sk 2 sts, work 5 dc into next st, sk 2 sts, sl st into next st) rep 57 times. Join with sl st to first sl st of round. (57 scallops)
Rnd 82 (Second Scallop Layer): With MC-E, join yarn at the center dc of any scallop (the 3rd of the 5 dc). Ch 3, work 4 more dc into the same stitch. Ch 2. Sc into the sl st joining point between the previous round’s scallops. Ch 2. (5 dc into center of next scallop, ch 2, sc into joining sl st, ch 2) rep around. Join with sl st to top of beginning ch 3. (57 shells)
Rnd 83 (Third Scallop Layer Offset): With MC-D, join at any sc from Round 82. Ch 1. Work 1 sc in the same stitch. Ch 2. Work 5 dc into the center of the nearest shell. Ch 2. (Sc into next sc, ch 2, 5 dc into center of next shell, ch 2) rep around. Join with sl st to first sc. (57 shells)
Rnd 84 (Deepest Hem Layer): With MC-E, join at the center dc of any shell. Ch 3, 4 more dc in same stitch. Ch 2, sc in sc below, ch 2. (5 dc in center of next shell, ch 2, sc in sc, ch 2) rep around. Join with sl st to top of beginning ch 3. Fasten off and weave in ends. (57 shells)
The four layers of offset scallops create depth and movement in the hem, mimicking layered grass.
Applique Motifs
Work all motifs separately with US Size G-6 / 4.0 mm hook and the listed applique colors. Block each motif before attaching.
Fox Motif (Make 2)
The fox is constructed in three pieces: body, tail, and face detail.
Fox Body:
Rnd 1: With Burnt Orange, MR, work 6 sc into ring, pull ring closed. (6 sc)
Rnd 2: Inc in each st around. (12 sc)
Rnd 3: (Sc in next st, inc in next st) rep 6 times. (18 sc)
Rnd 4: (Sc in next 2 sts, inc in next st) rep 6 times. (24 sc)
Rnd 5: (Sc in next 3 sts, inc in next st) rep 6 times. (30 sc)
Rnd 6: (Sc in next 4 sts, inc in next st) rep 6 times. (36 sc)
Rnd 7: Sc in each st around. (36 sc)
Rnd 8: Sc in each st around. (36 sc)
Rnd 9: (Sc in next 4 sts, sc2tog) rep 6 times. (30 sc)
Rnd 10: (Sc in next 3 sts, sc2tog) rep 6 times. (24 sc)
Lightly stuff with fiberfill if desired. Continue.
Rnd 11: (Sc in next 2 sts, sc2tog) rep 6 times. (18 sc)
Rnd 12: (Sc in next st, sc2tog) rep 6 times. (12 sc)
Fasten off, leaving a 10 in / 25 cm tail for sewing flat to skirt. Flatten before sewing. The body will be approximately 2.5 in / 6.5 cm in diameter when flat.
Fox Belly Panel (Make 2):
With Off-White yarn, ch 5.
Row 1: Sc in second ch from hook, sc in next 3 ch. Turn. (4 sc)
Row 2: Ch 1, inc in first st, sc in next 2 sts, inc in last st. Turn. (6 sc)
Row 3: Ch 1, sc in each st across. Turn. (6 sc)
Row 4: Ch 1, sc in each st across. Turn. (6 sc)
Row 5: Ch 1, sc2tog, sc in next 2 sts, sc2tog. Turn. (4 sc)
Row 6: Ch 1, sc in each st across. Fasten off. (4 sc)
Sew belly panel to the flat front of the fox body with the wider end toward the bottom.
Fox Ears:
With Burnt Orange, ch 3, work 3 sc into second ch from hook to form a small triangular point. Fasten off. Add a tiny Off-White inner ear by working 2 sc into the same base. Sew onto top of fox body at a slight outward angle.
Fox Tail:
With Burnt Orange, MR, work 6 sc. (6 sc)
Rnd 2: Inc in each st. (12 sc)
Rnd 3: (Sc in next st, inc) rep 6 times. (18 sc)
Rnds 4 to 6: Sc in each st around. (18 sc each)
Rnd 7: (Sc in next st, sc2tog) rep 6 times. (12 sc)
Rnd 8: Sc in each st around. (12 sc)
Fasten off, leaving tail for sewing. Sew to side/back of fox body. Use Off-White yarn to work a few surface stitches at the tail tip.
Embroider a small triangular Dark Brown nose and two small eyes on the cream face area.
Mushroom Motif (Make 4: 2 large and 2 small)
Mushroom Cap (Large):
With Bright Red, MR, work 6 sc. (6 sc)
Rnd 2: Inc in each st. (12 sc)
Rnd 3: (Sc in next st, inc) rep 6 times. (18 sc)
Rnd 4: (Sc in next 2 sts, inc) rep 6 times. (24 sc)
Rnd 5: (Sc in next 3 sts, inc) rep 6 times. (30 sc)
Rnd 6: Working in BLO, sc in each st around. (30 sc) This creates the curled mushroom cap edge.
Rnd 7: Sc in each st around. (30 sc)
Fasten off. Add white bobble stitches or small white circles for spots. Create stems with Off-White yarn worked in a small tube.
For small mushrooms, stop after Round 4 (24 sc) and work the BLO round there instead.
Blocking and Assembly
Block all pieces before final assembly. Wet block the skirt body by soaking in lukewarm water, gently squeezing out excess moisture, and pinning flat to blocking mats. Allow to dry completely.
Block applique motifs individually using the same method on a smaller scale.
Once everything is dry, pin all motifs to the skirt using the reference photograph as your placement guide. Position the foxes in the lower green zone, mushrooms scattered around them, ferns tucked between, and the owl and acorns in the brown upper zone.
When you are happy with the arrangement, sew each motif securely using matching yarn and a tapestry needle. Weave in all remaining ends on the wrong side.
Tips for Success with This Woodland Skirt Pattern
Take your time with color transitions. The gradient is what makes this skirt spectacular. Do not rush through the color change rounds.
Block aggressively. This pattern relies on clean lines and crisp stitches. Blocking transforms good work into great work.
Make extra motifs. Having a few spare foxes or mushrooms lets you play with placement before committing.
Try it on as you go. After completing the hip section, slip the work over your head periodically to check the fit.
Thank you so much for choosing this pattern for your next big project. I genuinely cannot wait to see your finished skirts come to life with