
When I sat down to design this little dress set, I had a few specific goals in mind. I wanted something sweet but not overly fussy. Something with enough detail to feel special, but made from stitches any intermediate crocheter could handle with confidence. I also wanted a complete outfit, not just a dress, but matching booties and a headband too.
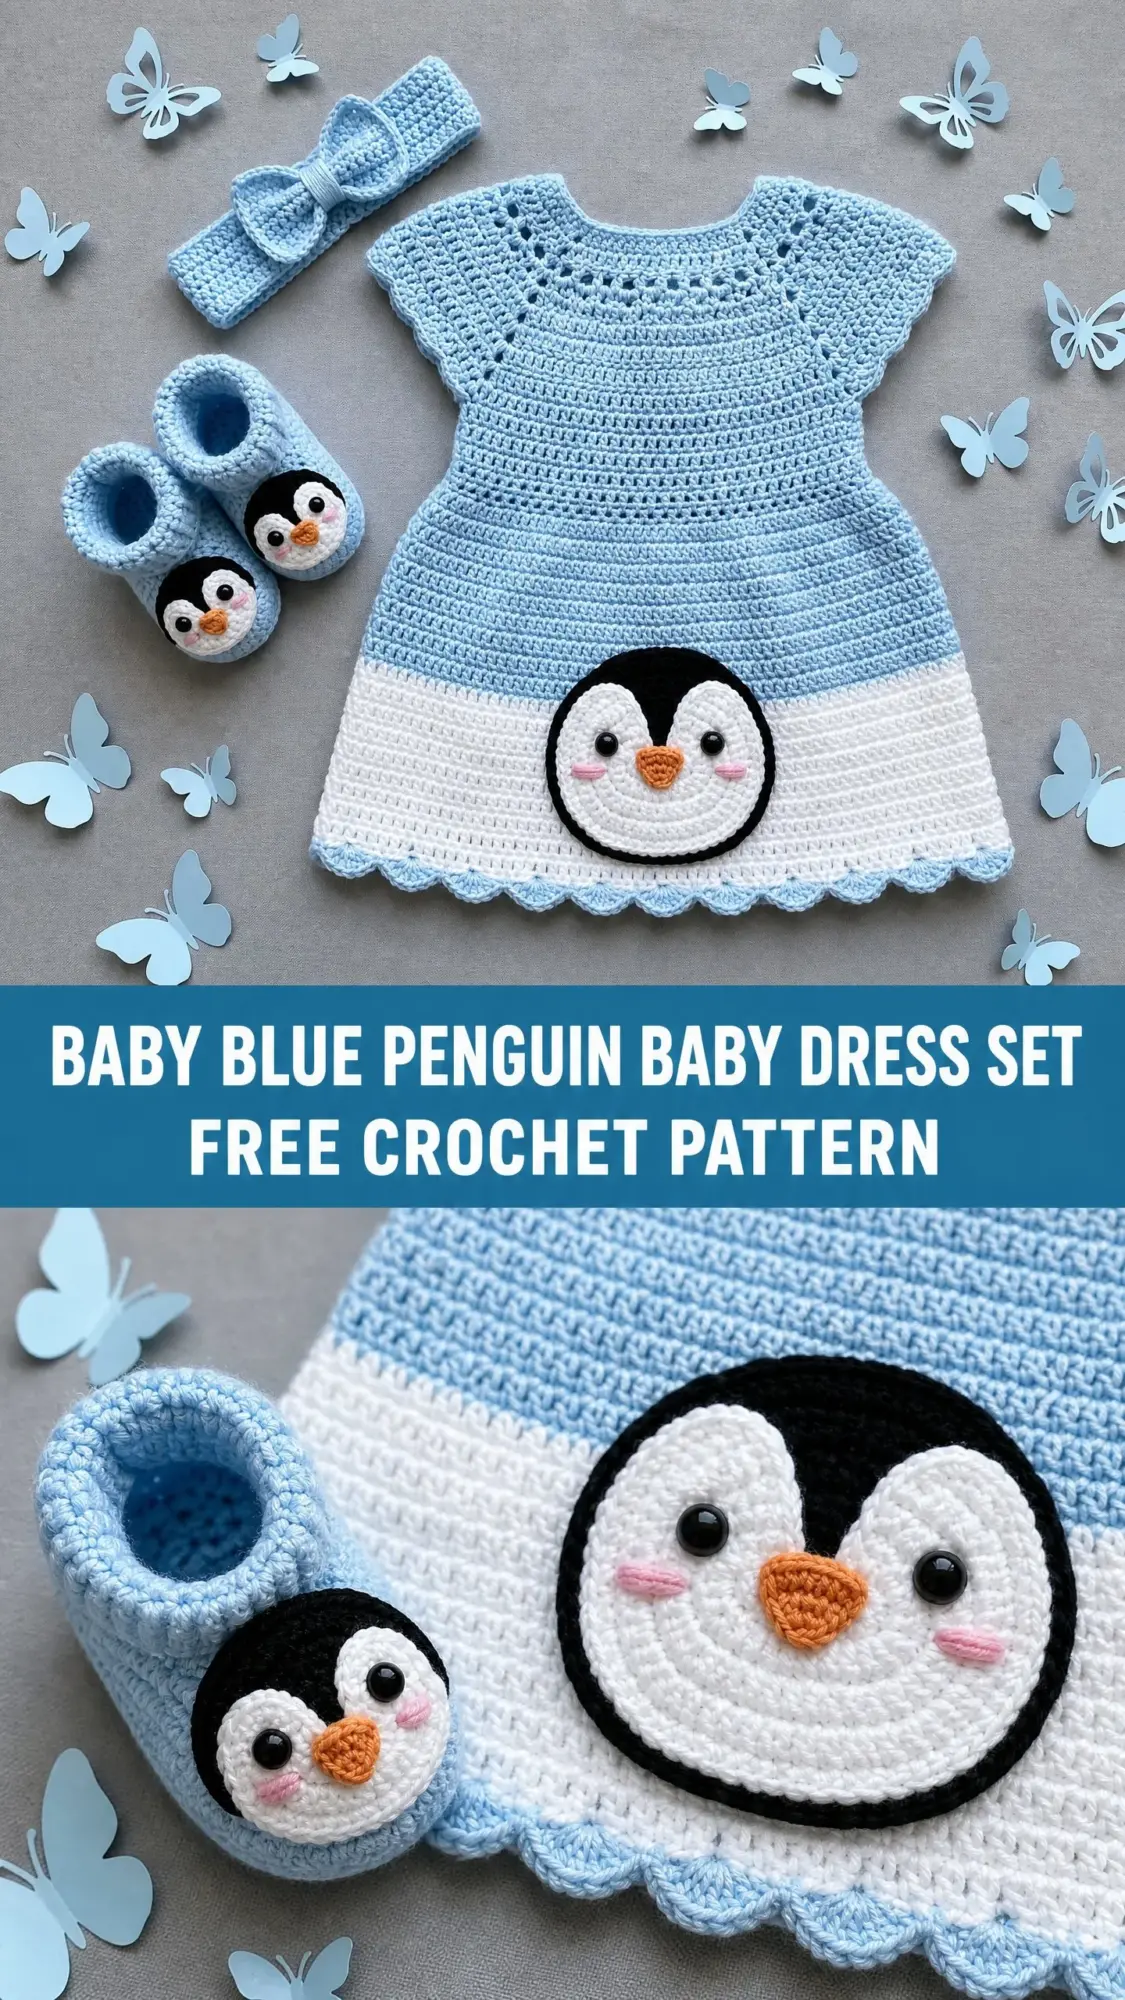
I spent hours playing with the penguin face placement, testing different yoke constructions, and making sure the scallop edging looked just right. The color blocking between the soft blue and crisp white took a few tries to get the proportions perfect.
I am SO pleased with how this baby blue penguin baby dress set turned out. It is exactly the kind of heirloom piece I would want to give at a baby shower or make for my own little one.
About This Crochet Pattern
This complete crochet tutorial walks you through making a top down baby dress with raglan shaping, a pair of adorable penguin booties, and a matching bow headband. The penguin applique on the dress front steals the show, but the entire set works together beautifully.
The dress is worked in the round from the neckline down, which means almost no seaming. You will love how the yoke naturally shapes itself through simple increases at four points. The skirt flares gently into an A line silhouette, and the color change from blue to white creates a clean canvas for that penguin face.
Skill level: Intermediate. You should be comfortable working in the round, following stitch counts, and changing colors. If you have made a basic baby garment before, you can absolutely tackle this project.
Time estimate: The complete set takes approximately 15 to 21 hours. The dress alone runs about 10 to 14 hours, the booties take 3 to 4 hours for the pair, the headband needs about 1 hour, and the penguin applique adds another 1 to 2 hours.
Finished Measurements
This pattern is written for a 3 to 6 month old baby.
Dress:
Booties:
Headband:
Size Customization Tips
Want to size up to 6 to 12 months? Add 6 additional foundation chains (3 per shoulder) for the neckline and work 2 additional increase rounds in the yoke. Then add 4 single crochet (sc) rounds between the color change and the hem, and work 2 additional skirt increase rounds.
For the booties, simply add 2 extra sc rounds after the sole shaping to extend the foot length.
The headband adjusts easily. Just add or subtract chains in multiples of 2 until you reach your desired length.
Materials You Will Need
Yarn:
Hook:
Notions:
Yarn Suggestions
Paintbox Yarns Simply DK (100% acrylic, 137 yards per 50 g ball) works beautifully. Try Powder Blue for Yarn A and Slate Grey White for Yarn B. You will need 2 balls of Yarn A and 1 ball of Yarn B.
Drops Safran (100% cotton, 175 yards per 50 g ball) gives excellent stitch definition and feels lovely against baby skin.
Lion Brand Baby Soft (60% acrylic, 40% nylon, 459 yards per 170 g skein) is budget friendly and ultra soft. One skein each of Baby Blue and White covers the entire set.
Choose any DK weight yarn that achieves the stated gauge. Look for soft, machine washable fibers suitable for baby skin.
Gauge
18 sc x 20 rows = 4 inches (10 cm) worked in single crochet, in the round, with US G-6 / 4.0 mm hook, after blocking.
To make a gauge swatch: Chain 22, work 22 rows of single crochet flat, then measure the center 4 x 4 inch area.
Gauge matters for fit. Adjust your hook size up or down as needed before beginning.
Abbreviations (US Terms)
Let me define every stitch you will encounter in this step by step crochet pattern:
Special Stitches
Scallop Stitch (used for hem and sleeve edges)
This creates a pretty wavy edge. The stitch count must be a multiple of 6 before you begin.
1. Skip 2 stitches
2. Work 5 dc into the next stitch
3. Skip 2 stitches
4. Work 1 sl st into the next stitch
5. Repeat from step 1 across or around
Shell Stitch (used for yoke eyelets)
This creates the decorative openwork row visible at the yoke.
1. Skip 1 stitch
2. Work (dc, ch 1, dc) into the next stitch
3. Skip 1 stitch
4. Work 1 sc into the next stitch
5. Repeat from step 1
Magic Ring
This starts circles with no hole in the center. Perfect for the applique and bootie sole.
1. Form a loop with the yarn tail crossing over the working yarn
2. Insert hook through the loop from front to back
3. Draw the working yarn through
4. Chain 1 to secure
5. Work the stated number of stitches into the ring
6. Pull the yarn tail firmly to close the center hole
Pattern Notes Before You Begin
The dress is worked entirely in the round from the top down, starting at the neckline. No seaming on the body.
The yoke uses raglan style increases. You will place four markers and increase at each marker every other round. This creates the armhole shaping naturally.
Join each round with a sl st to the first sc unless noted otherwise. The chain 1 at the beginning of each sc round does not count as a stitch.
Check your stitch count at each checkpoint. If you are off by more than 2 stitches, rip back and correct before continuing. I know that is frustrating, but it prevents bigger headaches later.
Instructions: The Dress
Neckline Setup
Using Yarn A and US G-6 hook, ch 64. Taking care not to twist the chain, join with a sl st to the first chain to form a ring.
Round 1: Ch 1, sc in each ch around. Join. (64 sc)
Round 2: Ch 1, sc in each st around. Join. (64 sc)
Yoke with Raglan Increases
Place stitch markers at positions 1, 17, 33, and 49 to mark the 4 raglan increase points. These markers divide the round into 4 sections: 2 front/back panels of 16 sts and 2 sleeve panels of 16 sts.
Round 3 (increase round): Ch 1, sc to 1 st before marker, inc, sc in marked st, inc; rep from 3 more times, sc to end. Join. (72 sc)
Round 4: Ch 1, sc in each st around. Join. (72 sc)
Round 5 (increase round): Rep Round 3 pattern. (80 sc)
Round 6: Ch 1, sc in each st around. Join. (80 sc)
Round 7 (increase round): Rep Round 3 pattern. (88 sc)
Round 8: Ch 1, sc in each st around. Join. (88 sc)
Round 9 (increase round): Rep Round 3 pattern. (96 sc)
Round 10: Ch 1, sc in each st around. Join. (96 sc)
Round 11 (increase round): Rep Round 3 pattern. (104 sc)
Round 12: Ch 1, sc in each st around. Join. (104 sc)
Round 13 (eyelet round, optional decorative row): Ch 3 (counts as dc), sk 1 st, (dc, ch 1, dc) in next st, sk 1 st, sc in next st, sk 1 st; rep from around, ending last rep with sl st to top of ch-3. (Approx 17 shell repeats, adjust if needed to close round evenly.) Join.
Round 14: Ch 1, sc in each st and ch-1 sp around. Join. (104 sc)
Round 15 (increase round): Rep Round 3 pattern. (112 sc)
Round 16: Ch 1, sc in each st around. Join. (112 sc)
Round 17 (increase round): Rep Round 3 pattern. (120 sc)
CHECKPOINT: After Round 17, count your stitches. You should have 120 sc total. The yoke should measure approximately 3.5 inches (9 cm) from the foundation chain.
Armhole Separation
The 120 sts are now divided as follows: Front body panel (30 sts), Back body panel (30 sts), Left sleeve (30 sts), Right sleeve (30 sts).
Round 18 (separation round): Ch 1, sc across 30 front sts, ch 4 (underarm bridge), skip 30 sleeve sts, sc across 30 back sts, ch 4, skip 30 sleeve sts. Join to first sc. (60 sc + 8 ch = 68 working sts in body)
Round 19: Ch 1, sc in each sc and each ch across the round. Join. (68 sc)
Cap Sleeve Finishing
Work each sleeve separately. Rejoin Yarn A to underarm bridge at one sleeve opening with sl st.
Sleeve Round 1: Ch 1, sc in each of the 30 held sleeve sts, sc in each of the 4 underarm ch. Join. (34 sc)
Sleeve Round 2: Ch 1, sc in each st around. Join. (34 sc)
Sleeve Edging: To ensure the multiple of 6 works out, adjust to 36 sts by working 2 inc evenly spaced in Round 2 before edging. (36 sts for edging = 6 scallop repeats)
Scallop round: Skip 2 sts, 5 dc in next st, skip 2 sts, sl st in next st; rep from around. Join and fasten off. (6 scallops)
Repeat for second sleeve.
Dress Body
Continue working on the 68 st body.
Rounds 20 to 22: Ch 1, sc in each st around. Join. (68 sc each round)
Round 23 (increase round): Ch 1, sc in next 16 sts, inc; rep from 3 more times. Join. (72 sc)
Rounds 24 to 26: Ch 1, sc in each st around. Join. (72 sc each round)
Round 27 (increase round): Ch 1, sc in next 17 sts, inc; rep from 3 more times. Join. (76 sc)
Rounds 28 to 30: Ch 1, sc in each st around. Join. (76 sc each round)
Round 31 (increase round): Ch 1, sc in next 18 sts, inc; rep from 3 more times. Join. (80 sc)
Rounds 32 to 34: Ch 1, sc in each st around. Join. (80 sc each round)
Round 35 (increase round): Ch 1, sc in next 19 sts, inc; rep from 3 more times. Join. (84 sc)
Rounds 36 to 38: Ch 1, sc in each st around. Join. (84 sc)
CHECKPOINT: After Round 38, the dress body should measure approximately 7 to 7.5 inches (18 to 19 cm) from the neckline. The skirt should flare gently from the underarm.
Color Change to Yarn B (White Lower Panel)
At the end of Round 38, complete the final sl st join with Yarn B. Fasten off Yarn A, leaving a 6 inch (15 cm) tail to weave in.
Round 39: With Yarn B, ch 1, sc in each st around. Join. (84 sc)
Round 40 (increase round): Ch 1, sc in next 20 sts, inc; rep from 3 more times. Join. (88 sc)
Rounds 41 to 43: Ch 1, sc in each st around. Join. (88 sc each round)
Round 44 (increase round): Ch 1, sc in next 21 sts, inc; rep from 3 more times. Join. (92 sc)
Rounds 45 to 46: Ch 1, sc in each st around. Join. (92 sc each round)
Hem Preparation
Round 47: At the end of Round 46, change back to Yarn A by completing the final sl st with Yarn A. Fasten off Yarn B.
With Yarn A, ch 1, sc in each st around. Join. (92 sc)
Adjust stitch count to nearest multiple of 6 for scallop edging: work 4 inc evenly spaced in this round. (96 sc = 16 scallop repeats)
Hem Scallop Edging
Round 48: Skip 2 sts, 5 dc in next st, skip 2 sts, sl st in next st; rep from around. Join. Fasten off. (16 scallops)
Weave in all yarn ends. Block lightly.
CHECKPOINT: Completed dress should measure approximately 11 inches (28 cm) from neckline to hem tip and approximately 17 inches (43 cm) in chest circumference.
Instructions: Penguin Applique
The applique is worked in rounds. You will make a black outer circle, a white inner face, tiny eyes, a beak, and cheeks.
Outer Circle (Black)
Using Yarn C (black) and US G-6 hook, make a magic ring.
Round 1: Ch 1, 6 sc into ring. Pull ring closed. Join. (6 sc)
Round 2: Ch 1, inc in each st around. Join. (12 sc)
Round 3: Ch 1, sc in next st, inc; rep from around. Join. (18 sc)
Round 4: Ch 1, sc in next 2 sts, inc; rep from around. Join. (24 sc)
Round 5: Ch 1, sc in next 3 sts, inc; rep from around. Join. (30 sc)
Round 6: Ch 1, sc in next 4 sts, inc; rep from around. Join. (36 sc)
Round 7: Ch 1, sc in next 5 sts, inc; rep from around. Join. (42 sc)
Round 8: Ch 1, sc in next 6 sts, inc; rep from around. Join. (48 sc)
Fasten off, leaving a long tail for sewing.
Inner White Face
Using Yarn B (white) and US G-6 hook, make a magic ring.
Round 1: Ch 1, 6 sc into ring. Pull ring closed. Join. (6 sc)
Round 2: Ch 1, inc in each st around. Join. (12 sc)
Round 3: Ch 1, sc in next st, inc; rep from around. Join. (18 sc)
Round 4: Ch 1, sc in next 2 sts, inc; rep from around. Join. (24 sc)
Round 5: Ch 1, sc in next 3 sts, inc; rep from around. Join. (30 sc)
Round 6: Ch 1, sc in next 4 sts, inc; rep from around. Join. (36 sc)
Fasten off, leaving a long tail for sewing.
Penguin Eyes
Using Yarn C (black) and a 2.5 mm or 3.0 mm hook, make a magic ring.
Round 1: Ch 1, 6 sc into ring. Pull ring closed. Join. Fasten off.
Make 2. Note: Safety eyes are not recommended for babies under 3 years.
Penguin Beak
Using Yarn D (orange) and US G-6 hook, ch 3.
Row 1: Sc in 2nd ch from hook, sc in next ch. Turn. (2 sc)
Row 2: Ch 1, inc in first st, sc in last st. Turn. (3 sc)
Row 3: Ch 1, sc in each st across. Fasten off. (3 sc)
Cheeks
Using pink yarn or pink embroidery floss, embroider a small oval blush circle on each side of the beak using a satin stitch. Alternatively, make a tiny 6 sc magic ring circle in pink yarn and sew flat to the face.
Applique Assembly
1. Center and pin the white face circle onto the black outer circle, leaving an even black border all around
2. Using Yarn B and a tapestry needle, whipstitch around the outer edge of the white circle, attaching it firmly
3. Sew the two eyes onto the white face, centered and symmetrical, approximately 0.5 inch (1.3 cm) apart and slightly above center
4. Sew the beak below and between the eyes
5. Add the cheek blushes on either side of the beak
6. Position the completed applique on the front center skirt panel, centered horizontally, with its center point approximately 1.5 inches (4 cm) above the color change line
7. Pin in place and whipstitch around the entire outer edge using Yarn C
Instructions: Booties
Work 2 identical booties.
Sole
Using Yarn A and US G-6 hook, ch 9.
Round 1: Starting in 2nd ch from hook, sc in next 7 chs, 3 sc in last ch (toe end). Rotating to work along opposite side of foundation chain: sc in next 6 chs, 2 sc in last ch (heel end). Join. (18 sc)
Round 2: Ch 1, inc in first st, sc in next 6 sts, inc in next 3 sts (toe), sc in next 6 sts, inc in next 2 sts (heel). Join. (24 sc)
Round 3: Ch 1, sc in next st, inc, sc in next 6 sts, (sc, inc) 3 times (toe), sc in next 6 sts, (sc, inc) 2 times (heel). Join. (30 sc)
Sides and Upper
Round 4: Ch 1, working in BLO, sc in each st around. Join. (30 sc)
This BLO round creates the sharp fold between sole and sides.
Rounds 5 to 6: Ch 1, sc in each st around. Join. (30 sc each round)
Toe Shaping
Round 7 (toe reduction): Ch 1, sc in first 8 sts, dec 4 times across center front (toe), sc in rem sts to end. Join. (26 sc)
Round 8: Ch 1, sc in first 7 sts, dec 3 times across center front, sc in rem sts. Join. (23 sc)
Round 9: Ch 1, sc in each st around. Join. (23 sc)
Cuff
Round 10: Ch 1, sc in each st around. Join. (23 sc)
Adjust count to 24 sc by working 1 inc in this round. (24 sc)
Round 11: Ch 1, sc in each st around. Join. (24 sc)
Round 12: Ch 1, sc in each st around. Join. (24 sc)
Cuff Edging
Round 13: Skip 2 sts, 5 dc in next st, skip 2 sts, sl st in next st; rep from around. Join. Fasten off. (4 scallops = 24 sts)
Bootie Penguin Face
Make one mini penguin applique per bootie using the same method as the dress applique but working only to Round 5 for the outer black circle (30 sc) and Round 4 for the inner white circle (24 sc). Add tiny eyes and beak as described above. Sew to the toe cap of each bootie, centered on the front upper.
Instructions: Headband
Using Yarn A and US G-6 hook, ch 62.
Row 1: Sc in 2nd ch from hook and in each ch across. Turn. (61 sc)
Rows 2 to 5: Ch 1, sc in each st across. Turn. (61 sc each row)
Fasten off, leaving a 12 inch (30 cm) tail for seaming.
Headband Bow
Using Yarn A, ch 22.
Row 1: Sc in 2nd ch from hook and in each ch across. Turn. (21 sc)
Rows 2 to 6: Ch 1, sc in each st across. Turn. (21 sc each row)
Fasten off, leaving a tail.
Pinch the bow rectangle at its center and wrap Yarn A tightly 8 to 10 times around the middle to cinch. Secure with a knot and weave in ends.
Headband Finishing
Fold the headband strip into a loop by seaming the short ends together with a mattress stitch or whipstitch using the long tail. Position the seam at the back. Center the bow on top of the headband at the front or slightly off center. Use the remaining yarn tail to whipstitch the bow securely to the headband.
Finishing and Blocking
Weave in all yarn ends securely using a tapestry needle. Pass each tail through at least 4 to 5 stitches in different directions to prevent unraveling.
Wet block the dress by submerging it in cool water, gently squeezing out excess water, reshaping on a blocking mat, and pinning the hem scallops open with blocking pins. Allow to dry completely before removing pins.
Block the applique flat before sewing it to the dress so it lies neatly without curling.
Block the booties by stuffing gently with a small cloth or plastic bag and pinning the cuff scallops open.
The headband does not require pinning but can be lightly steamed if using acrylic yarn. Do not steam or press acrylic with a hot iron directly.
Care Instructions
Machine wash cold on the gentle cycle inside a mesh laundry bag. Lay flat to dry, reshaping as needed. Do not tumble dry, iron directly, or dry clean. If using cotton yarn, press lightly with a damp cloth on the wrong side.
You Did It!
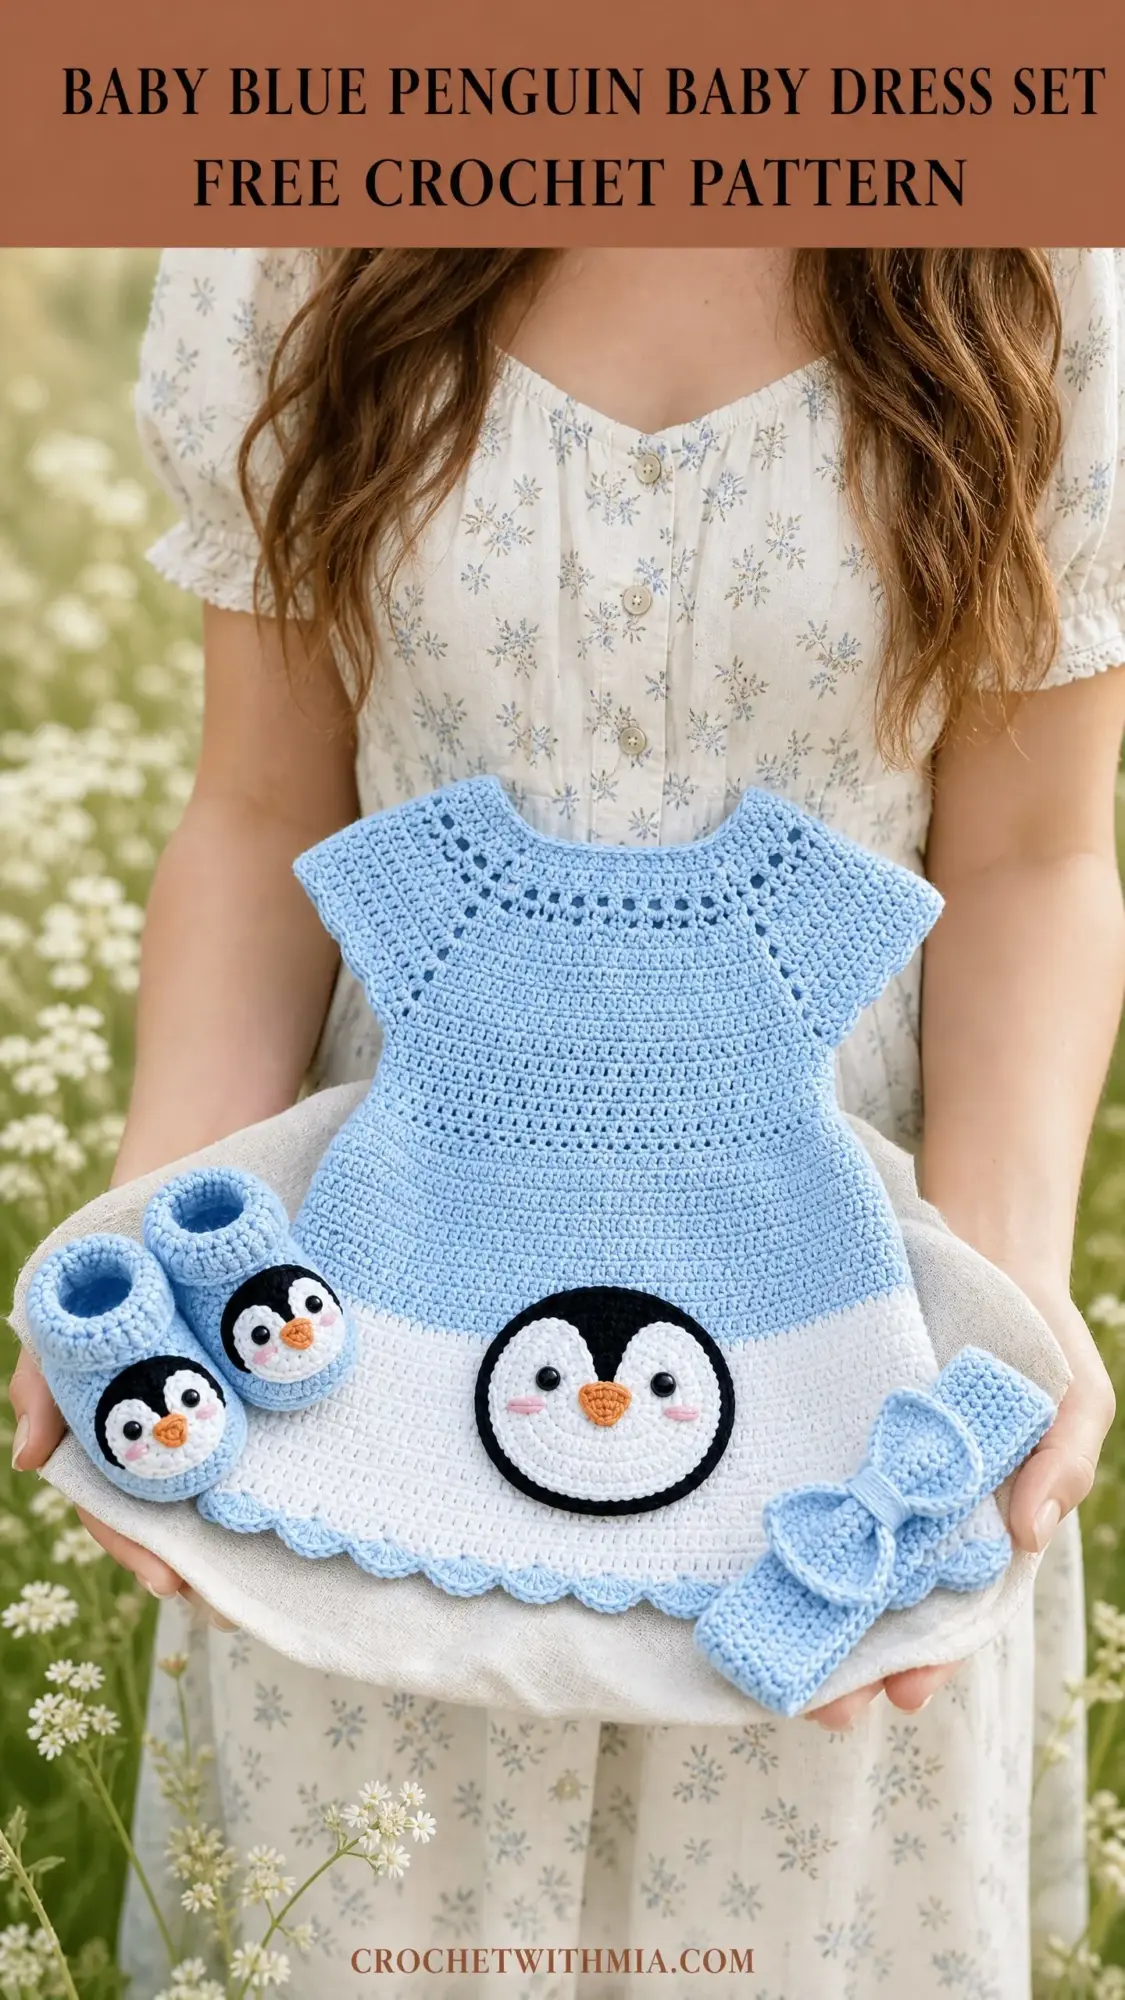
This baby blue penguin baby dress set crochet pattern creates something truly special. The coordinating pieces, the sweet penguin faces, and those scalloped edges all come together into a gift that will be treasured. Whether you are making this for a baby shower, a new arrival in your family, or just because you fell in love with those little penguin cheeks, I hope you enjoy every stitch.
Thank you so much for choosing this pattern. It means the world to me when makers trust my designs for their precious projects. If you make this set, I would absolutely love to see your finished piece. Tag me on Instagram or share it in my Facebook group. Seeing your color choices and watching these little dresses come to life is honestly one of my favorite things.
If this pattern made you smile, go ahead and save it to your Pinterest boards so you can find it later. And drop a comment below if you give it a try. I read every single one, and I love hearing how your projects turn out. Happy crocheting!